Exercise-003 Implementing LCD functions Part 2
In this article, let’s continue implementing the LCD functions.
- lcd_set_cursor() → you must first mention the column and then row for the library setCursor method.
- lcd_no_auto_scroll() → you have to access the noAutoScroll() method.
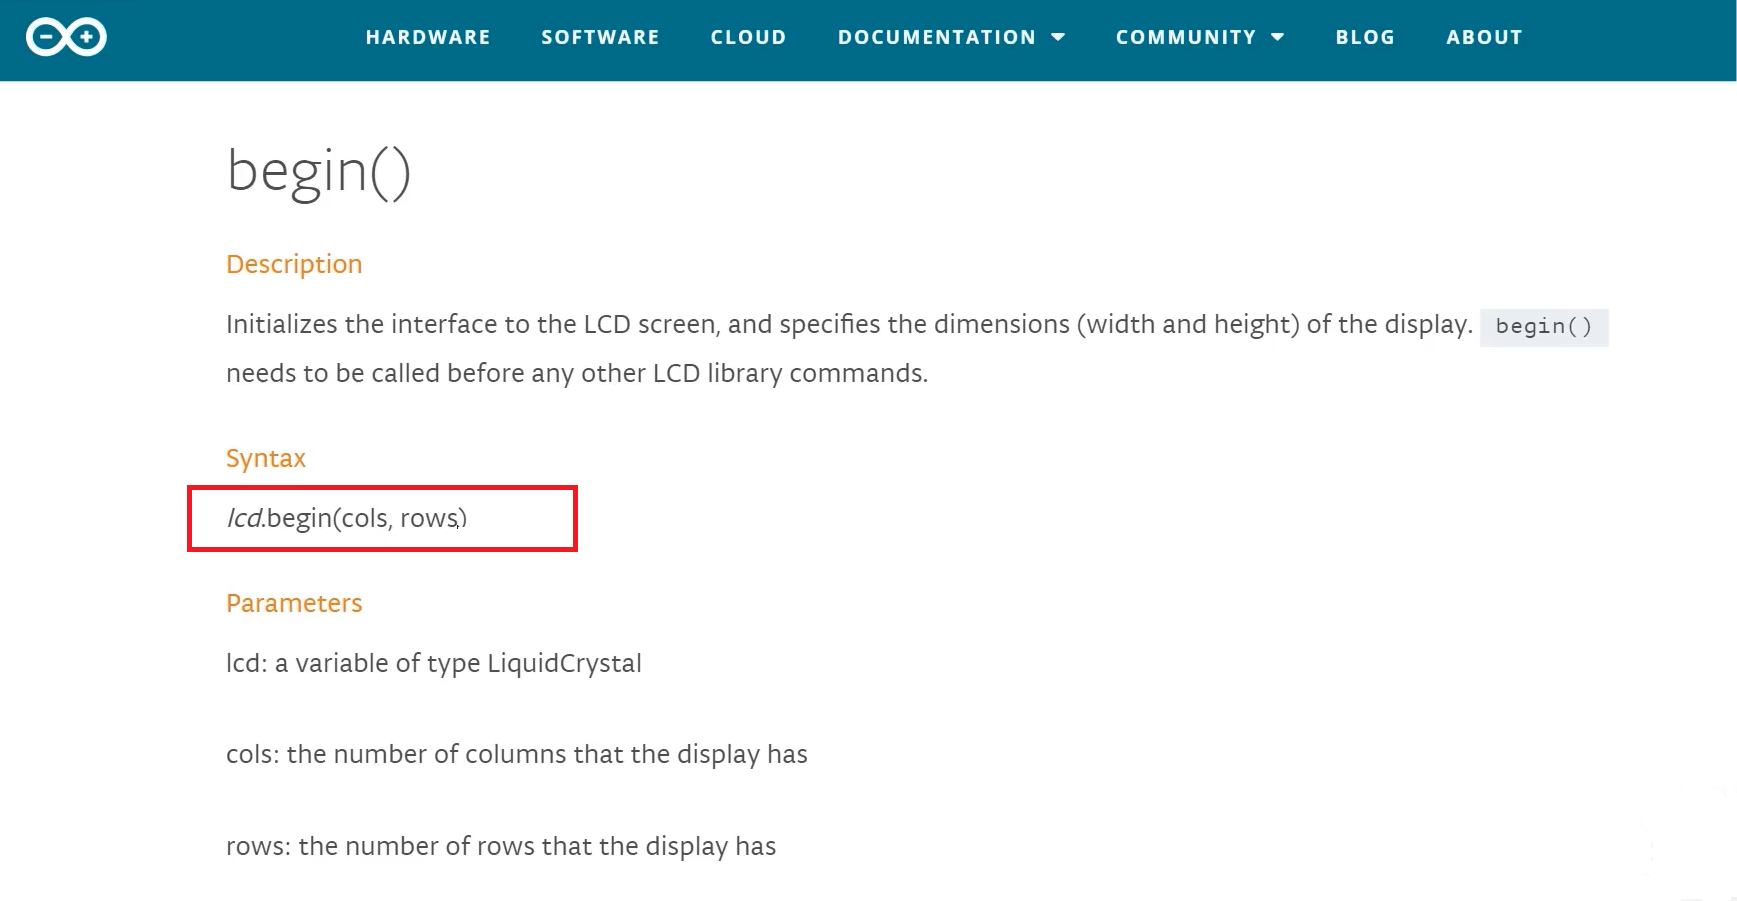
- lcd_begin() → And for the lcd_begin() as shown in Figure 1, this initializes the interface to the LCD screen and specifies the dimensions (width and height) of the display. begin() needs to be called before any other LCD library commands. Before using any of the methods, you should use this method first. And you have to pass two arguments, a number of columns and the number of rows your LCD has. I will use lcd_begin(uint8_t cols, uint8_t rows). You have to mention lcd.begin(cols, rows).
- lcd_move_cursor_R_to_L → And then move the cursor right to left. Whenever you print a character to the display, the cursor moves from right to left if you call lcd.rightToLeft() function. It’s a configuration function.
- lcd_move_cursor_L_to_R → You can make the cursor move from left to right instead, which is also by default, then you can call the lcd.LeftToRight() function.
- lcd_cursor_off → If you don’t want to see the cursor on display, call the lcd_cursor_off function, which calls the LCD object’s noCursor() method.
- lcd_cursor_blinkoff → If you don’t want to blink the cursor, then go for the noBlink() method.
- lcd_print_number → If you want to print any number, you can use lcd_print with the argument of type integer. The method is lcd.print(num).
- lcd_print_string → And print_string. It doesn’t matter whether you want to print a character, a string, or a number; only one method is print().
void lcd_scroll_right(void){
   lcd.scrollDisplayRight();
}

void lcd_set_cursor(int c, int r){
   lcd.setCursor(c,r);
}

void lcd_no_auto_scroll(void){
   lcd.noAutoscroll();
}

void lcd_begin(void){
   lcd.begin(cols,rows);
}

void lcd_move_cursor_R_to_L(void){
   lcd.rightToLeft();
}

void lcd_move_cursor_L_to_R(void){
   lcd.leftToRight();
}

void lcd_cursor_off(void){
   lcd.noCursor();
}

void lcd_cursor_blinkoff(void){
   lcd.noBlink();
}

void lcd_print_number(int num){
   lcd.print(num);
}

void lcd_print_string(String s){
   lcd.print(s);
}
Lcd.cpp code
#ifndef LCD_H
#define LCD_H
#include<Arduino.h>

void lcd_clear(void);
void lcd_print_char(char c);
void lcd_scroll_left(void);
void lcd_scroll_right(void);
void lcd_set_cursor(int c, int r);
void lcd_no_auto_scroll(void);
void lcd_begin(void);
void lcd_move_cursor_R_to_L(void);
void lcd_move_cursor_L_to_R(void);
void lcd_cursor_off(void);
void lcd_cursor_blinkoff(void);
void lcd_print_number(int num);
void lcd_print_string(String s);

#endif
Lcd.h code
The lcd.h code is shown above. In lcd_begin, you write uint8_t cols, uint8_t rows. You also have to add #include<Arduino.h>.
We have implemented lcd.cpp and lcd.h.
Now, go to our main.cpp and complete the ‘display_init’ function first.
#include "main.h"
#include "lcd.h"

static void protimer_event_dispatcher(protimer_t *const mobj,event_t const *const e);
static uint8_t process_button_pad_value(uint8_t btn_pad_value);
static void display_init(void);

/*Main application object */
static protimer_t protimer;

void setup() {
  // put your setup code here, to run once:
  Serial.begin(115200);
  display_init();
display_init() function
Let’s implement at the bottom ‘display_init’. Before calling any LCD methods, you first have to initialize the LCD.
static void display_init(void)
{
   lcd_begin(16,2);
   lcd_clear();
   lcd_move_cursor_L_to_R();
   lcd_set_cursor(0,0);
   lcd_no_auto_scroll();
   lcd_cursor_off();
}
display_init function
Many initialization commands need to be sent to the LCD before using other functionalities of the LCD like sending a command or sending a text to display.
All those things can be done using the library’s LCD begin() method. Let’s access all the wrapper functions. lcd_begin()you have to pass 16,2. That’s our LCD. And after this line, you can send whatever command you want.
After lcd_begin(), I clear the LCD, and the move cursor is set for the left to right. Why left to right? Because, look at Figure 2, that is our LCD (16×2 LCD), and there is a left side and right side as shown.
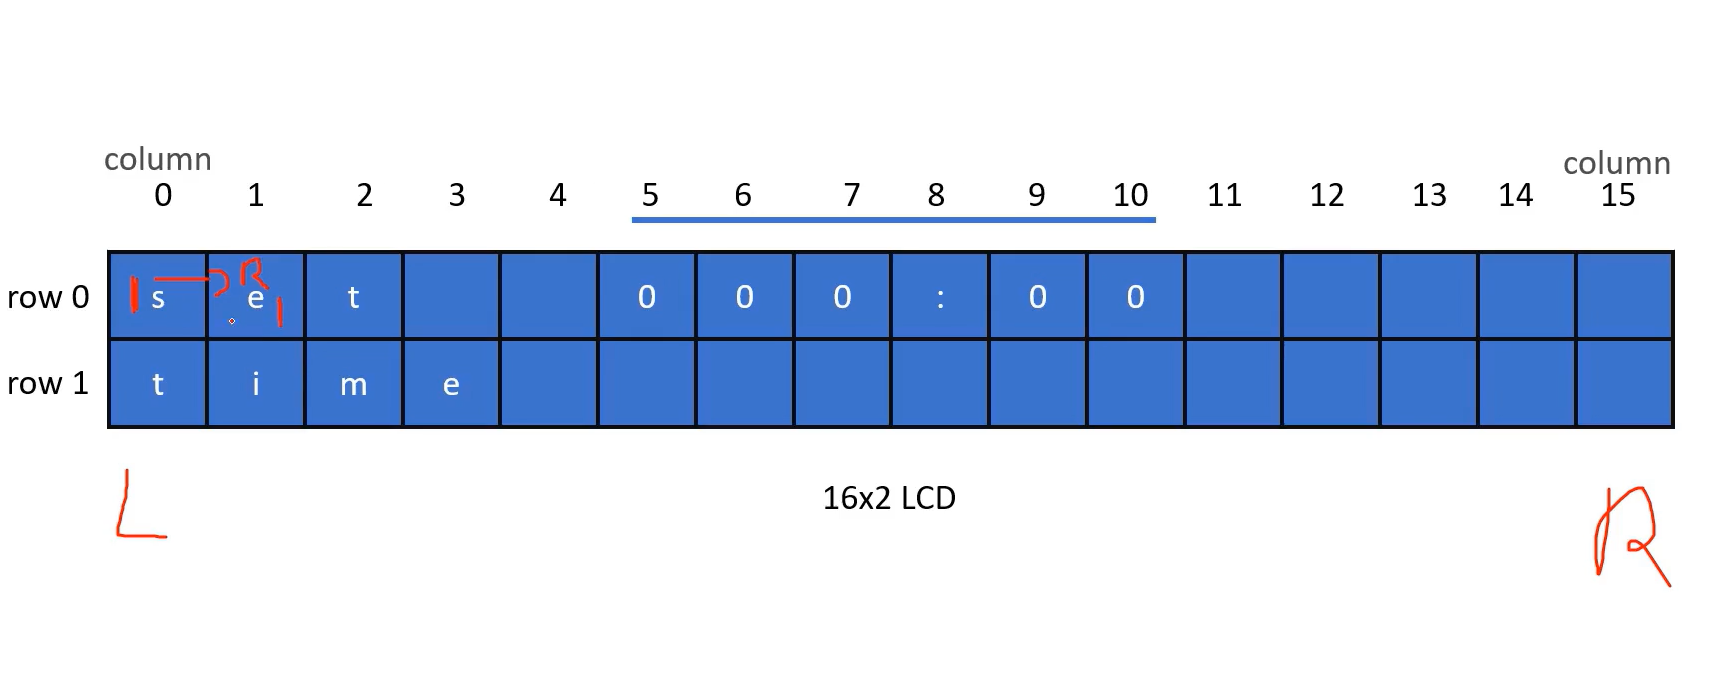
The cursor is in the first character; let’s say ‘s,’ the cursor moves to the right. It comes over the second character. That is the default nature of the LCD.
And lcd_set_cursor to the 0 0 location(as shown above code snippet). That configures the coordinates of the LCD, which internally uses a set cursor.
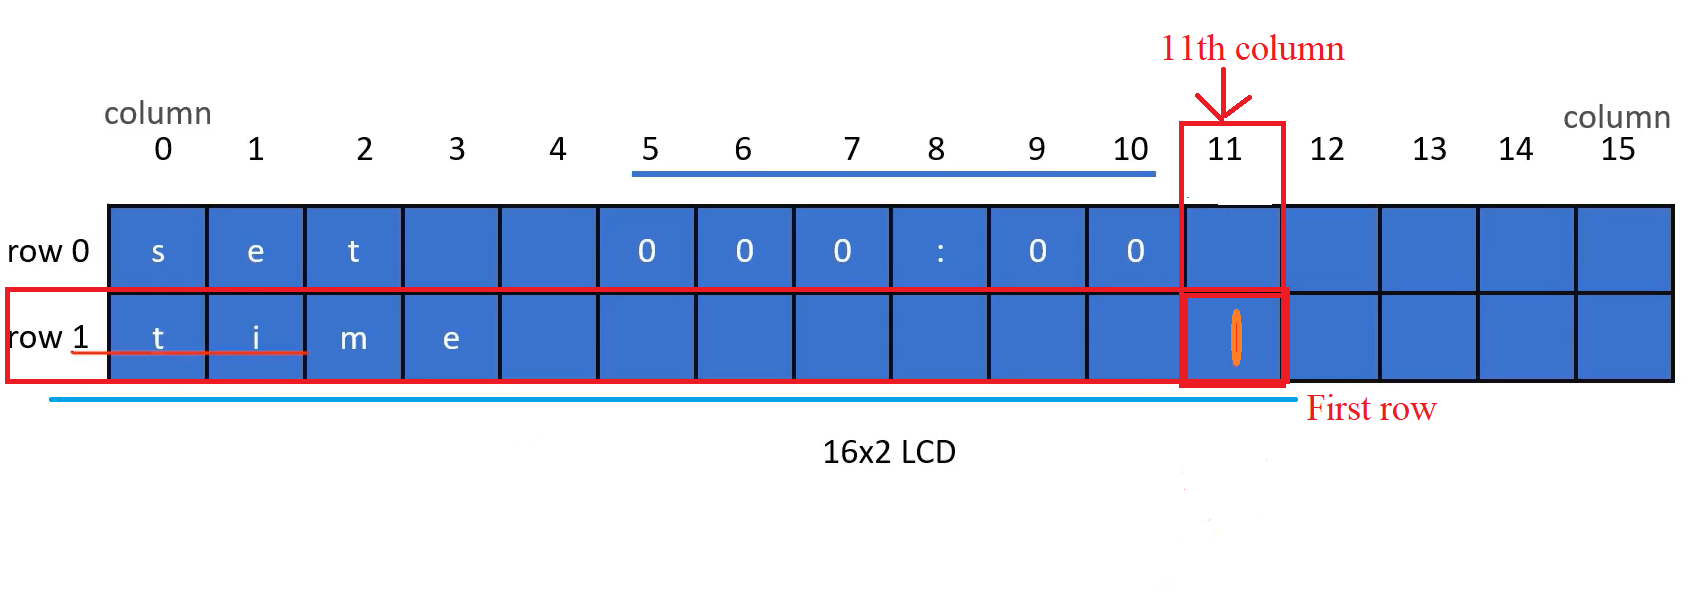
For example, if you want to set the cursor here(as shown in figure 3), the coordinates are 1st row and 11th column. The first argument is column number, and then it is row.
And lcd_no_auto_scroll() turns off the scrolling of the display. And lcd_cursor_off() turns off the visibility of the cursor. The cursor won’t appear on display. That is the display_init.
Our final task is to implement the helper functions like display_time, display_message, display_clear, and do_beep.
display_clear :
display_clear is very simple. You just call lcd_display_clear. The method is lcd.clear();
display_time:

The time has to be displayed in a minute and second fashion. There is no field for the hour information. mmm(minutes), ss(seconds), there is one colon (:) as shown in Figure 4. The time must appear in row 0, and it should start at column 5 and end at column 10.
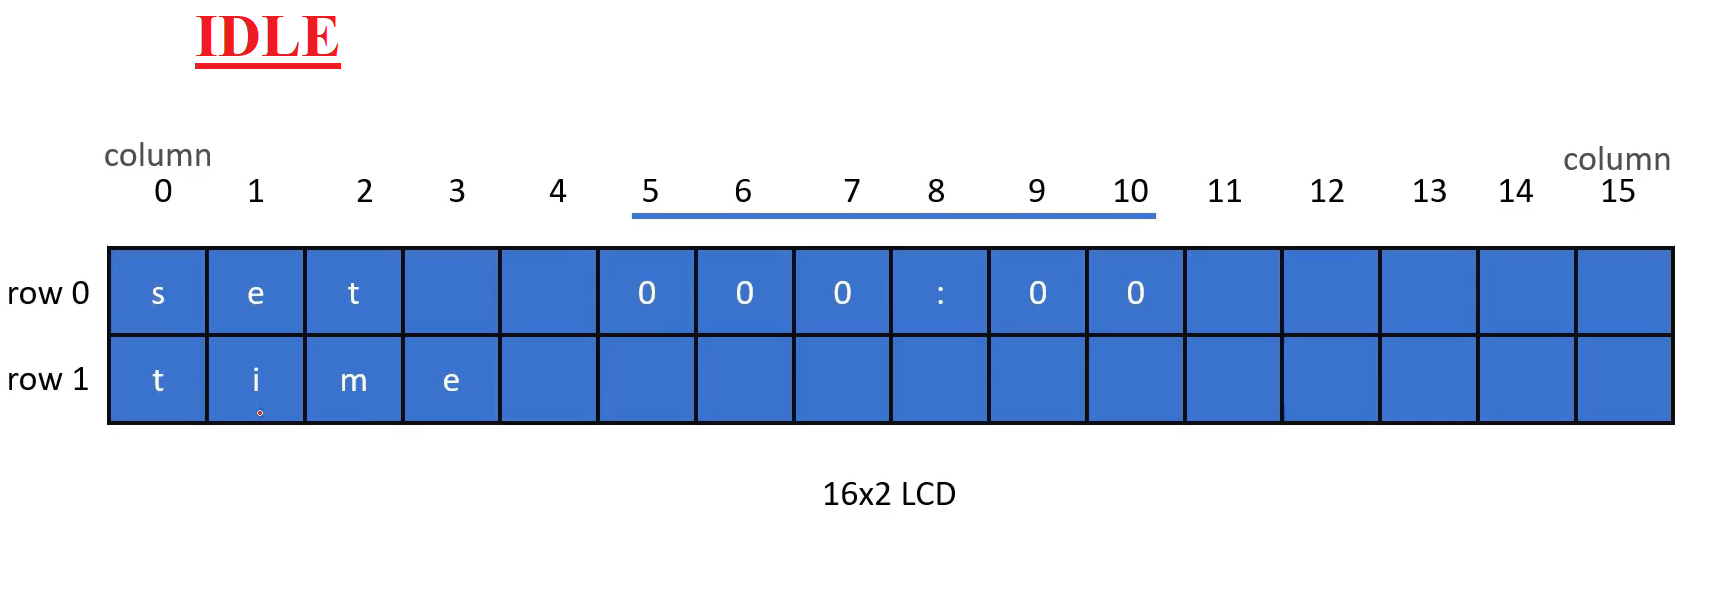
And when it is in the IDLE state, it should show a set time. That set time must appear at these coordinates on display, as shown in Figure 5.
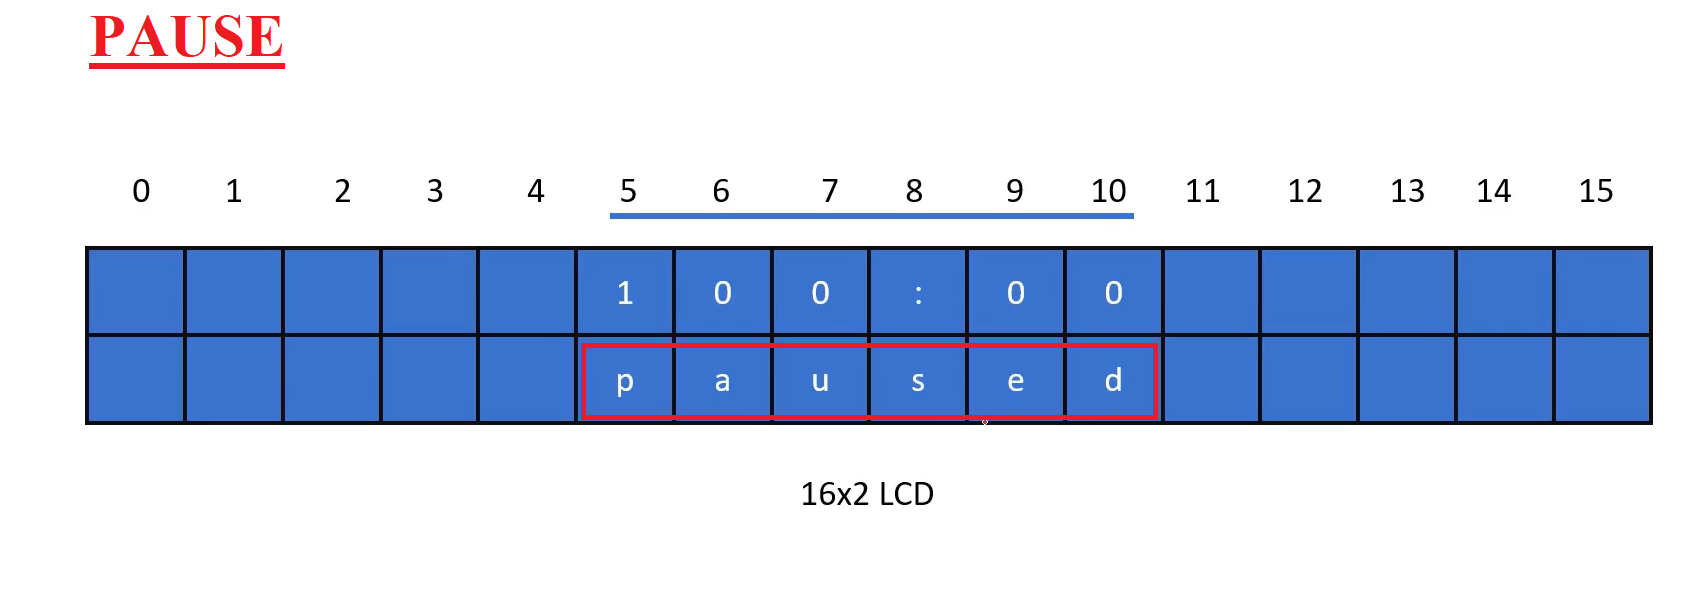
The timer is set for 100 minutes 0 seconds. Whenever it enters the paused state, a message should appear here “paused” at these coordinates, as shown in Figure 6.
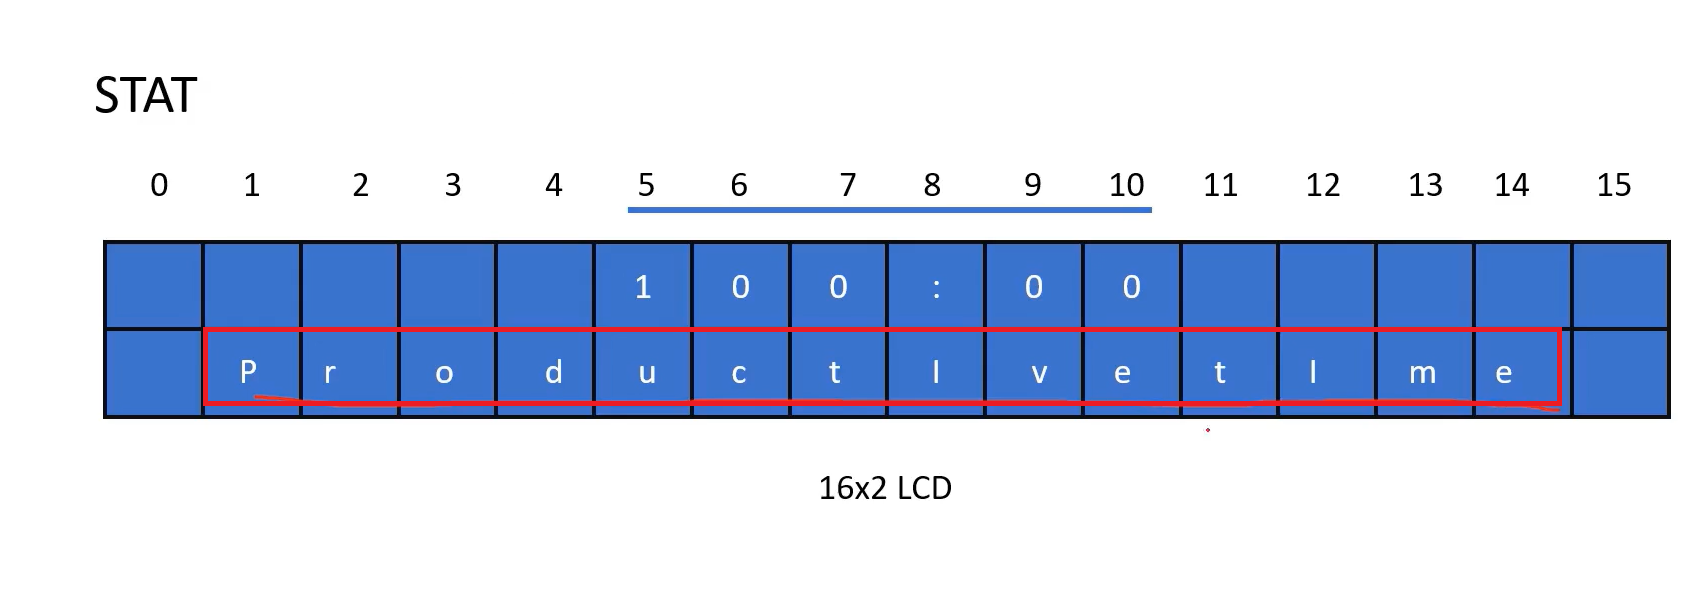
Whenever the application is in a STAT state, the message should appear at these coordinates of the LCD, as shown in Figure 7.
How to convert the current time variable to minutes and seconds?
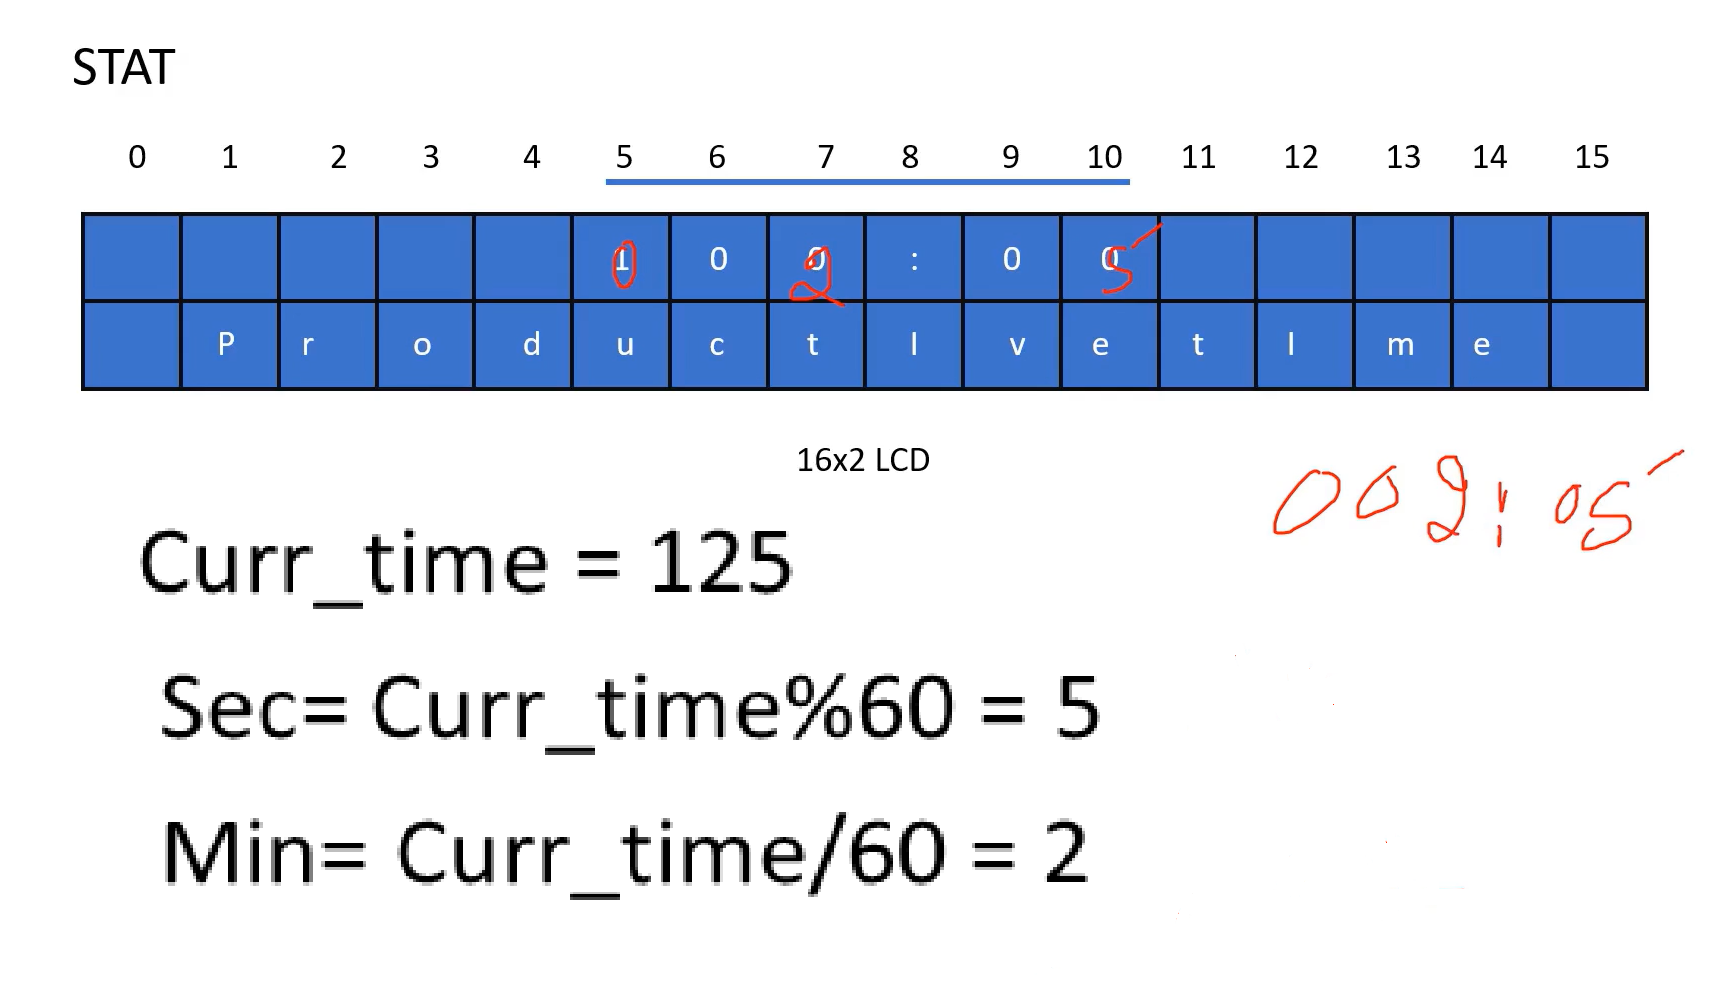
Let’s assume the current time is 125. Then, second = curr_time%60, which gives you 5. And minute = curr_time/60, the integer division gives you 2.
125 means → 2 minutes, 5 seconds. It should be displayed like 002:05. Like that, as shown in Figure 8. That’s how you convert current time to seconds and minutes while displaying in the display_time functions.
display_message:
For the display_message, there is one piece of information we have to provide. In the application, the messages are getting printed on different coordinates. Take column number and row number here. We will modify the display_message function like this, as shown in Figure 9.

For Example, Look at Figure 6, here “paused.” The column is 5; the row is 1. You can modify that(shown in Figure 6).

Wherever we have used display_message, like this, you can modify that(Figure 10).
do_beep():
And for the beep, you can use the tone function of the Arduino.
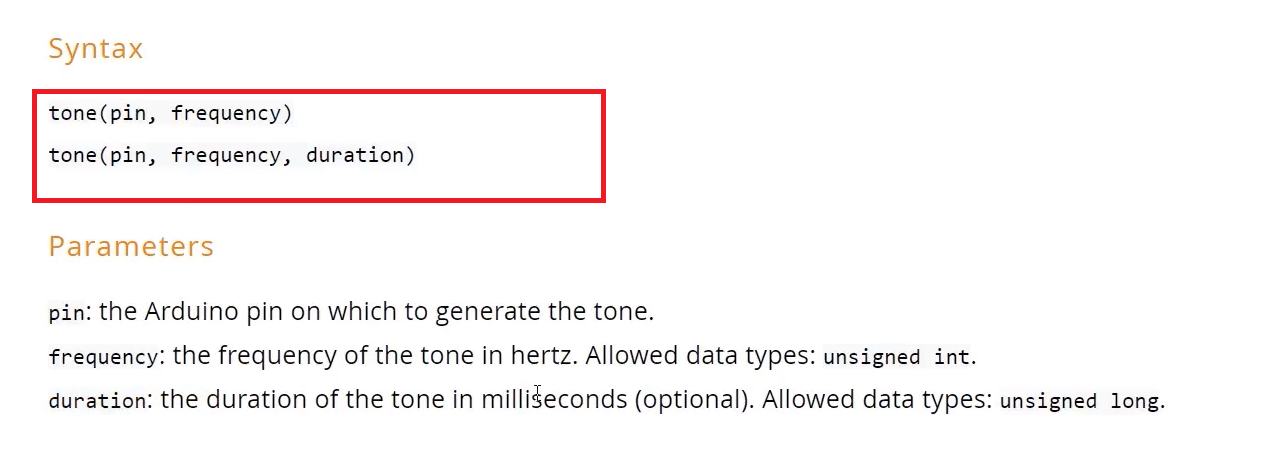
See Figure 11; You have to mention the pin connected to the buzzer; frequency is the frequency of the square wave fed to this pin, which drives the buzzer. And the duration of how long the beep should come out.
FastBit Embedded Brain Academy Courses
Click here: https://fastbitlab.com/course1

