Testing RGB mixer application on STM32F429 DISC board
In this article, let’s test the RGB_Mixer project on the STM32 Microcontroller Board.
Exercise: RGB Mixer
Test on Hardware
- Create a STM32 CubeIDE project
- Add all required peripherals using IDE’s device configuration tool, LVGL and LVGL display, and touchscreen drivers.
- Copy simulator tested code and test on the hardware.
Step 1: Setting up the IDE
Let’s get into the IDE. I have a project, LVGL_RGB_Mixer, and have already added the LVGL source. And hal_stm_lvgl is a driver for TFT and touchpad.
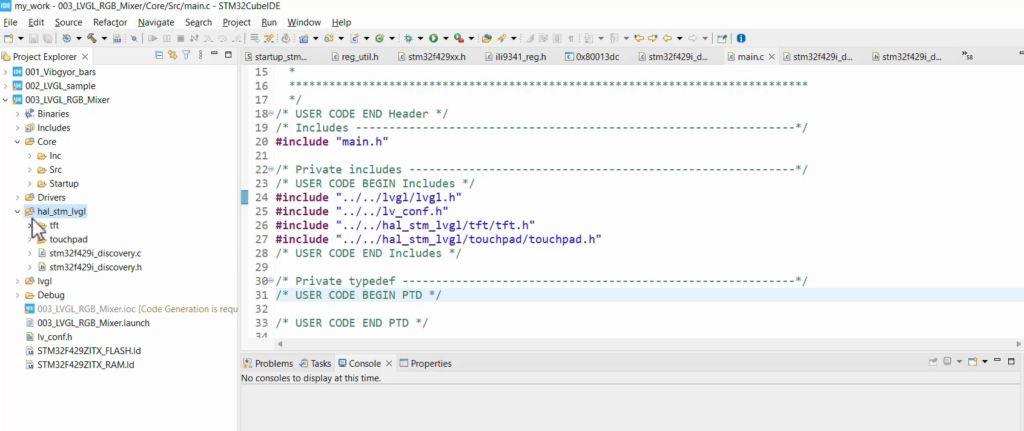
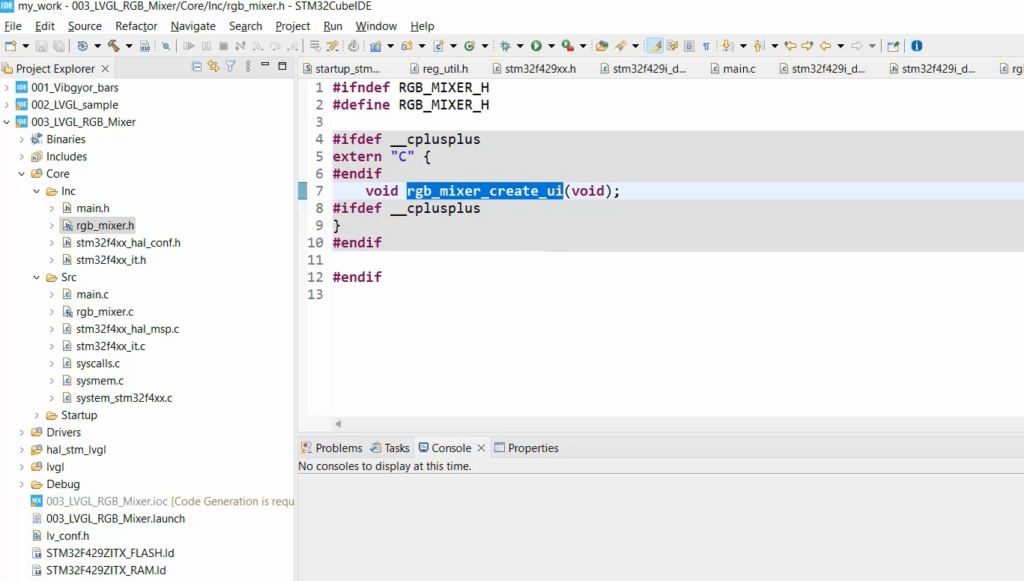
Step 2: Adding RGB Mixer Files
- In your project, you need to include “rgb_mixer.c” and “rgb_mixer.h” files. Begin by opening “rgb_mixer.c.”
- Navigate to the folder where these files are located, and drag and drop rgb_mixer.c into the ‘Src’ folder, selecting ‘Link to files.’
- Similarly, add rgb_mixer.h to the ‘Inc’ folder using the ‘Link to files’ option.
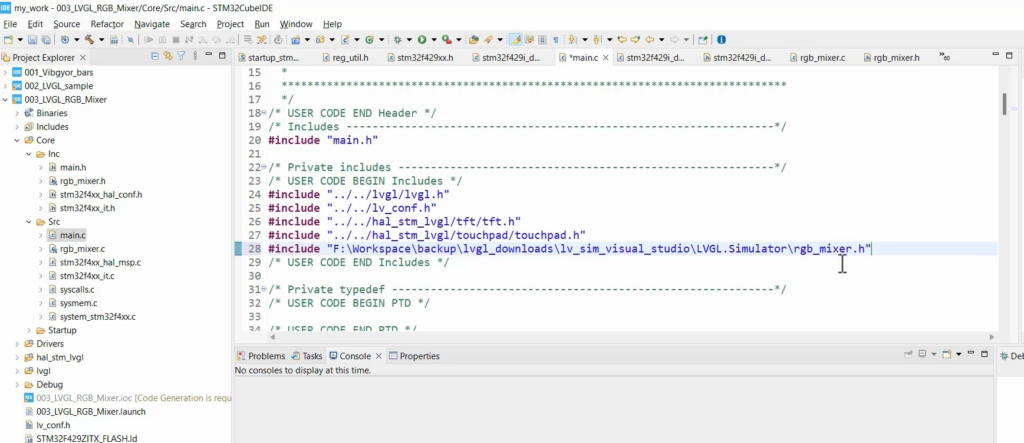
Step 3: Integrating RGB Mixer Functionality
The “rgb_mixer.h” file provides the “rgb_mixer_create_ui” function. To use it, go to your “main.c” file.
Actually, rgb_mixer.h gives the rgb_mixer_create_ui function. So, we have to call this function from main.c.
In “main.c,” call the “rgb_mixer_create_ui()” function. Don’t forget to include the header file. For this, you have to add the header file of that. I added the rgb_mixer.h full path.
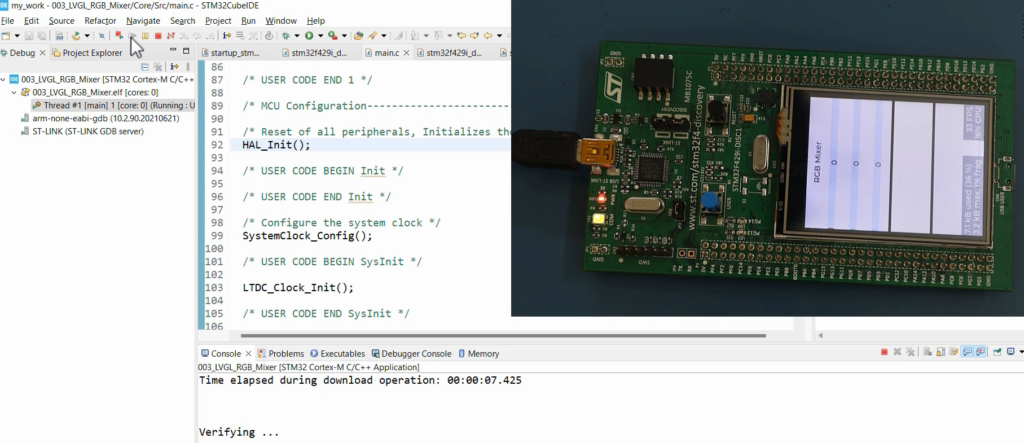
Step 4: Compiling and Debugging
- Compile your project. If successful, proceed to debug it.
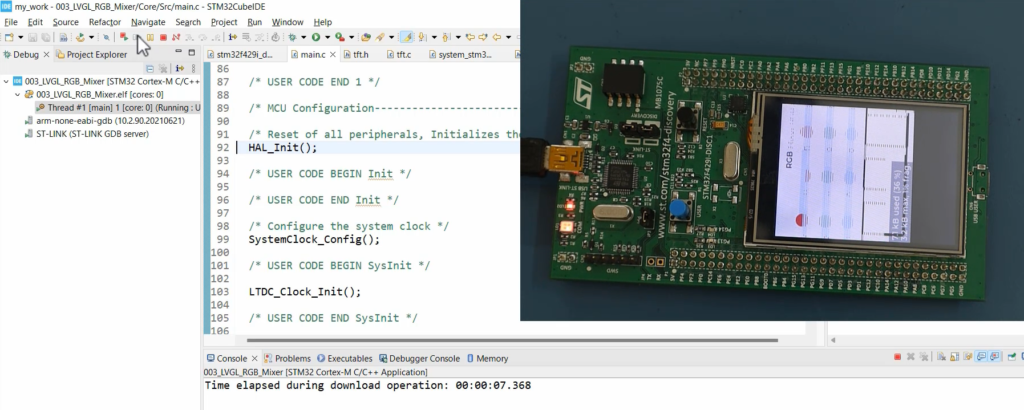
- Run your project.
Look at the output; actually, it is displayed in portrait mode.
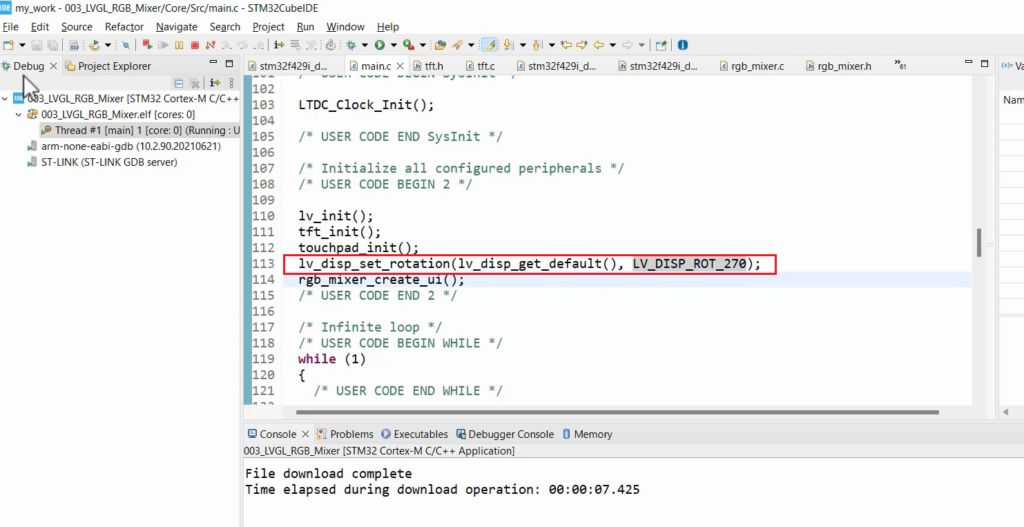
Step 5: Rotating the Display
Let’s use the LVGL API to rotate the user interface or rotate the screen.
For that, you can make use of this function lv_disp_set_rotation. For this, you have to give the display, I mean the display object, which you can get from lv_disp_get_default, which returns the default display object, and after that, you have to set the rotation degree. Here, I have used a display rotates 270 degrees.
Look at the output; there is some problem with the rotation.
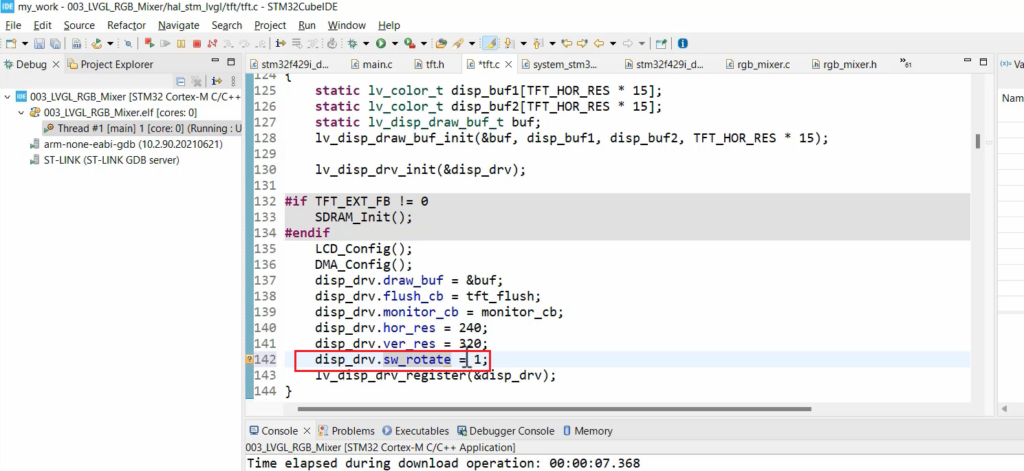
To fix this issue, you must enable software rotation, which you can do in the tft_init.
Go to the tft.c, and in the tft_init, add disp_drv.sw_rotate = 1;
disp_drv is a display driver object. It has a member element called software rotate. So, you have to turn it on. Because we are using a software rotate. I mean, the code rotates the display instead of sending commands to the display module. So, you have to make it 1.
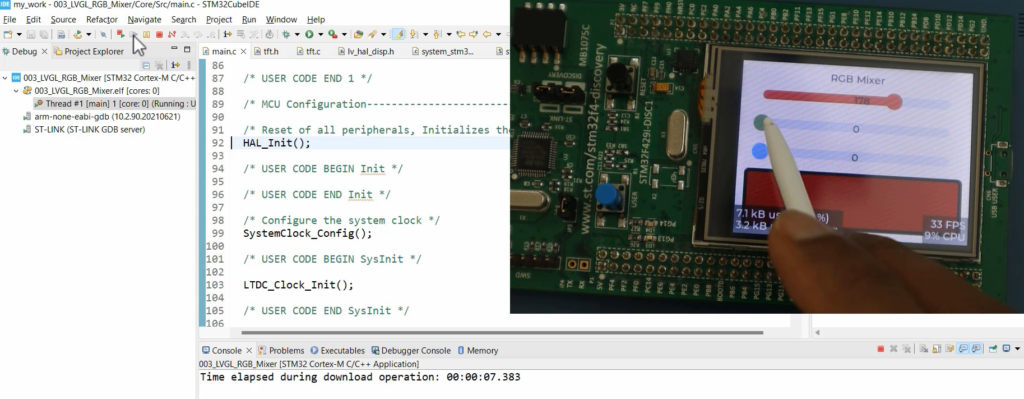
Now you can see the Output. We are getting the proper display here. And verify that touch functionality works as expected. Ensure that sliders and controls respond correctly.
In the following article, let’s see how to test the same code on the F7 board and the F407 board interfaced with the external LCD.
FastBit Embedded Brain Academy All courses
https://fastbitlab.com/course1