Exercise-008:Implementation part 1
This was the model file of our exercise 007ClockAlarm, as shown in Figure 1. Here, I used Settings state, and under which I used Clock_Setting and Alarm_Setting state.
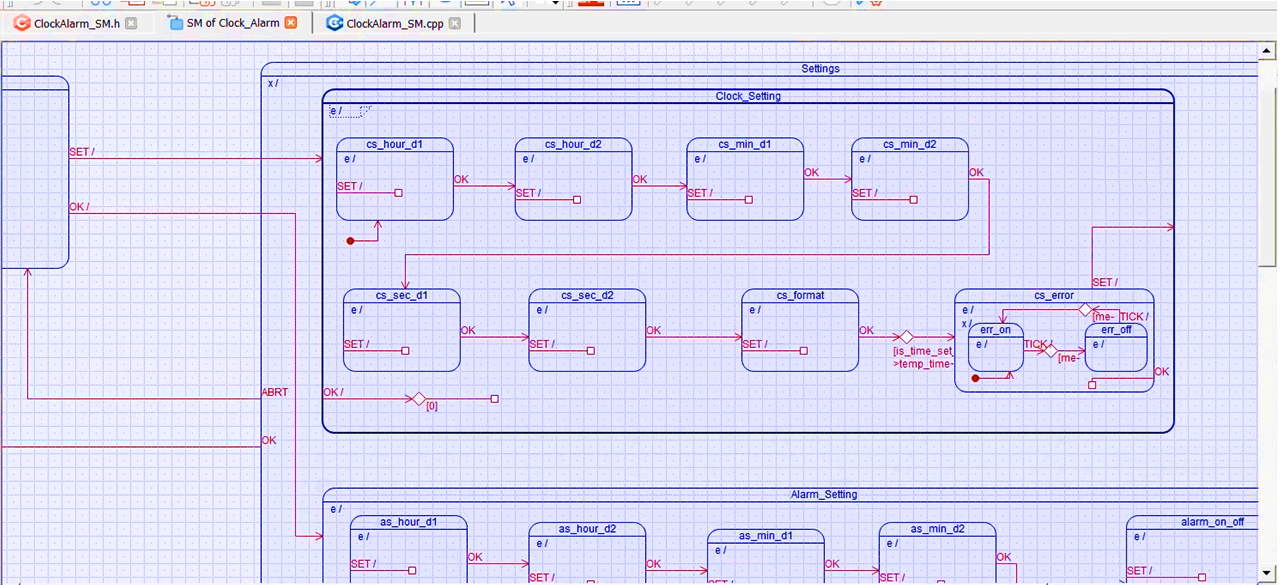
If you observe carefully, such complications are not required actually. You can use only one generic state called Settings, and you can use a variable to distinguish between whether it was a Clock_Setting or Alarm_Setting.
That’s why, in this exercise, that is in 008ClockAlarm_AO, I’m going to club these two Clock_Setting and Alarm_Setting states into one and use a variable to distinguish between whether the user wants to do a Clock_setting or an Alarm_Setting. That’s why the new model file what I provided consists of those changes. I will open that.
Let me go to the project 008ClockAlarm_AO and open that. And as you can see here, now it is simplified.

There is only one Outer state, Clock, which consists of Ticking and Settings state.
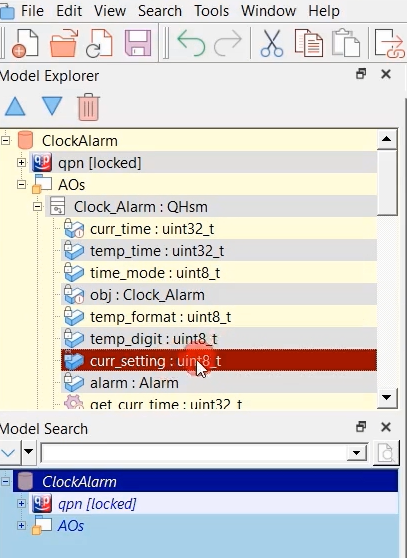
I used a variable. In the Clock_Alarm class, I created the variable ‘curr_setting.’ I have already given this file. When you open that model, you must also be able to see this new variable curr_setting, as shown in Figure 3.
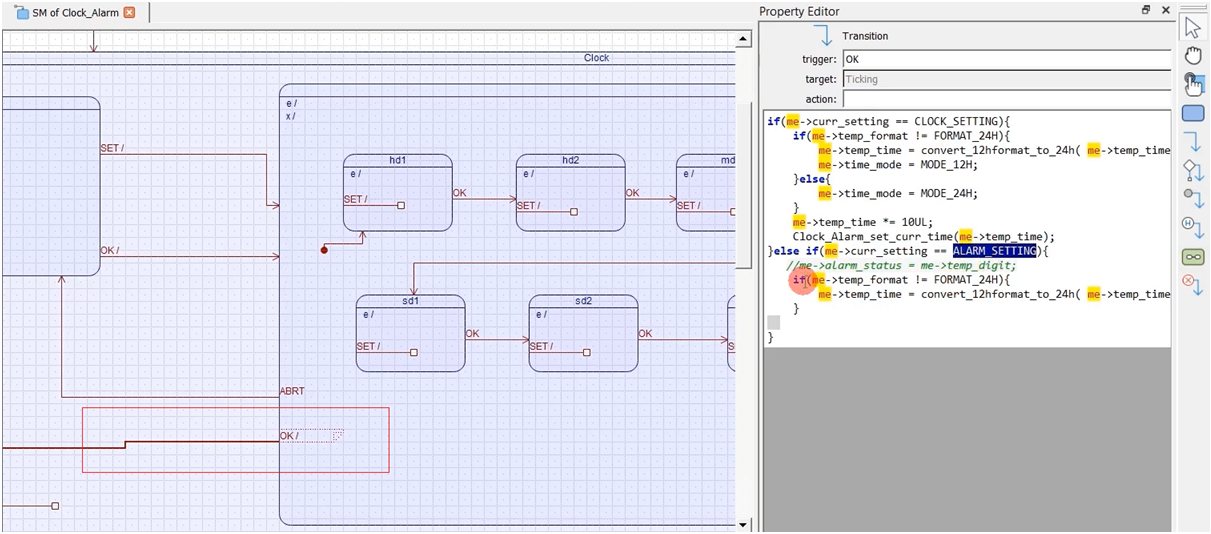
A ticking state is an initial state (See Figure 4). And when the user presses the SET button, I make curr_setting = CLOCK_SETTING. When the user presses OK here, I make curr_setting = ALARM_SETTING.

After that, when you are in Settings and when ‘OK’ is pressed, that means the setting is over, and you must update the alarm time or the current time. When the user presses ‘OK’ here, based on the value of the current setting, either update the current time or update the alarm time.
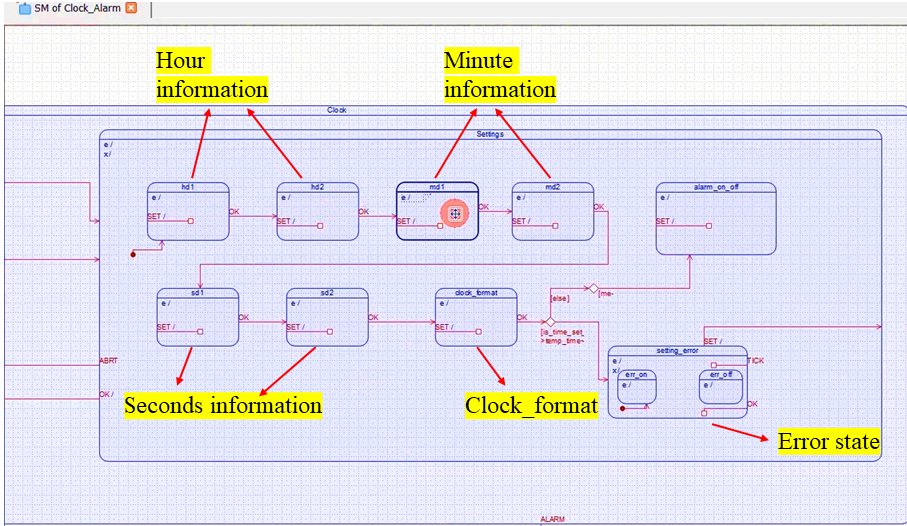
The Settings state (Figure 6) contains the hour, minute, seconds, clock_format information state. Even an Error state is common for both, Whether it is alarm setting or clock setting. The only change here is this one alarm_on_off.

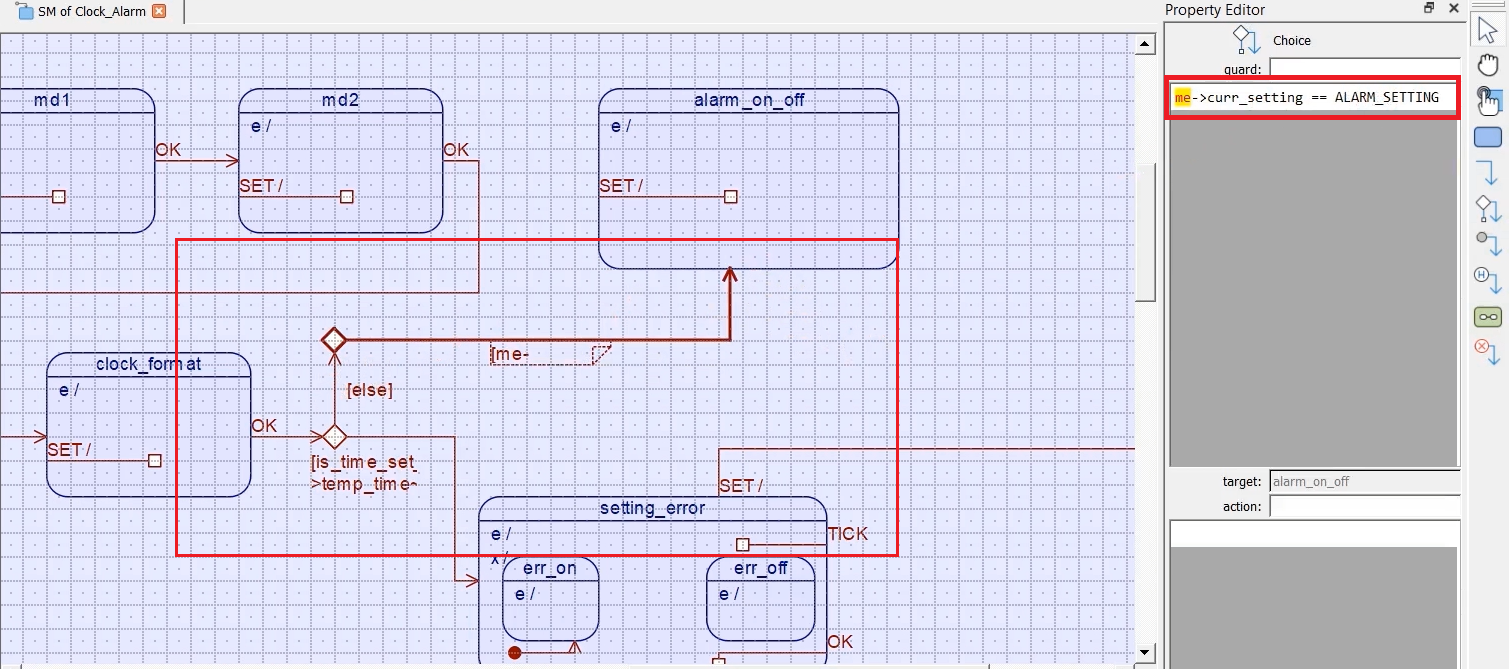
Here, whenever you select the clock_format, and then you press ‘OK’ here, then we check whether there is any error in the user settings. There is a choice node. If the is_time_set function returns true, then we go to the error state, and we display the error there.
But, if there is no error, then we have to take some other decision. That’s why let’s use the choice segment one more time, and let’s draw the else part here. In the guard, I’ll write else.
And if the current setting is alarm setting, then we have to go to this state ‘alarm_on_off’. That’s why I will use the choice segment one more time, and I draw like this(Figure 8). Let’s define the guard for this choice segment is me-> curr_setting == ALARM_SETTING. That’s an important change you have to notice there.
Suppose, if the current setting is not equal to ALARM_SETTING, then this guard fails. That also means that ‘OK’ has failed. That’s why the ‘OK’ will be handled by this superstate(Settings) here, and it exists.
And the package name, you can give whatever you want, but give some meaningful name. I’ll give AOs (active objects).

And now there is only one class, Clock_Alarm, which we created in the previous exercise. The same class, but I modified it. I removed the alarm-related attributes like alarm time and alarm status in this class. Why? Because now it will be a part of the alarm component.

In the following article, we will create two active objects and will also create this alarm component. We’ll see how to send events from the container object to the component object and the component object to the container object.
FastBit Embedded Brain Academy Courses
Click here: https://fastbitlab.com/course1

