STM32CubeIDE Installation
This guide provides a step-by-step walkthrough for installing STM32CubeIDE software, an essential tool for STM32 microcontroller development. Follow these instructions to seamlessly set up the software on your system.
Step 1: Download and Extract
- Download the STM32CubeIDE software archive from the official source.
- After downloading, extract the contents of the archive to a suitable location.

Step 2: Installation
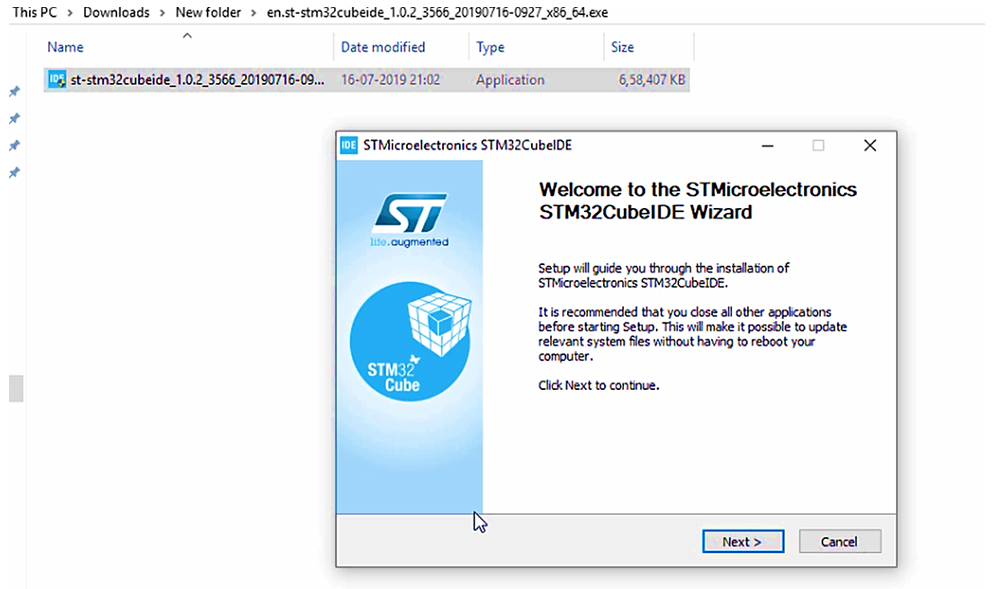
- Upon extraction, you’ll find the STM32CubeIDE software. This is the software you need to install.(Figure 2)

- Launch the software installation by running the executable.
- The STMicroelectronics STM32CubeIDE Wizard will appear. Welcome to the STMicroelectronics STM32CubeIDE Wizard, shown in Figure 3.
- Click “Next” to proceed.
Step 3: License Agreement
Read the License Agreement carefully.
If you agree with the terms, select “I Agree.”

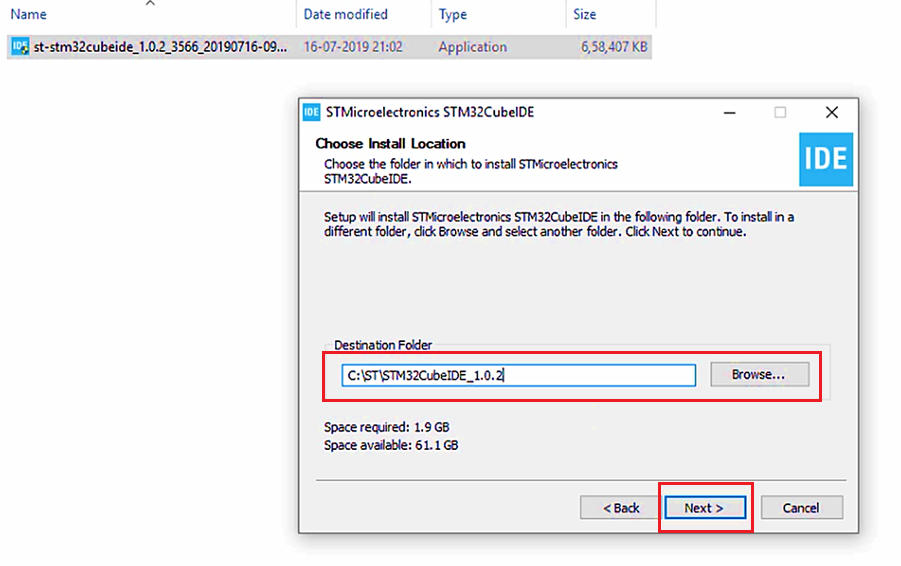
Step 4: Choose Install Location
Choose the destination location for the installation. By default, it might suggest the C drive.
- Click “Next” to continue.
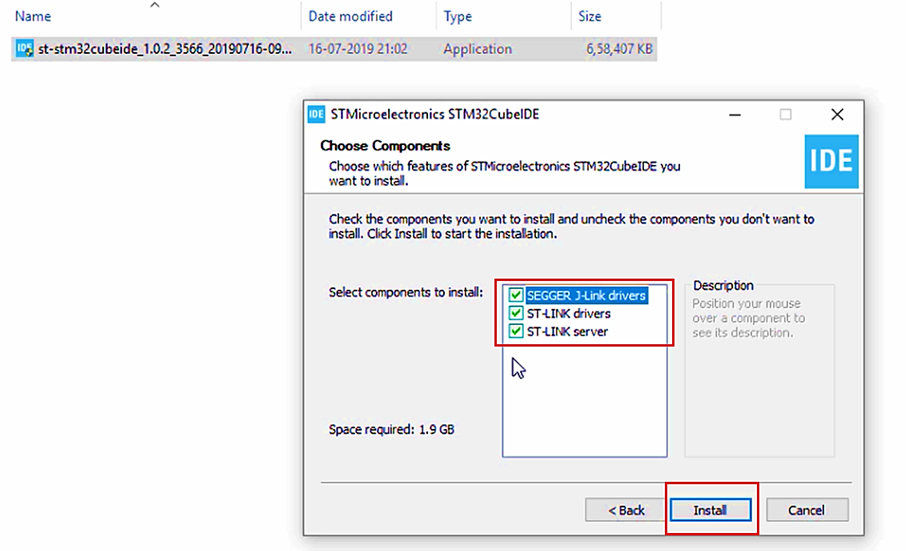
Step 5: Component Selection
- The installation will include necessary drivers and components shown in Figure 6. It’s recommended not to uncheck any options.
- Click “Install” to proceed.
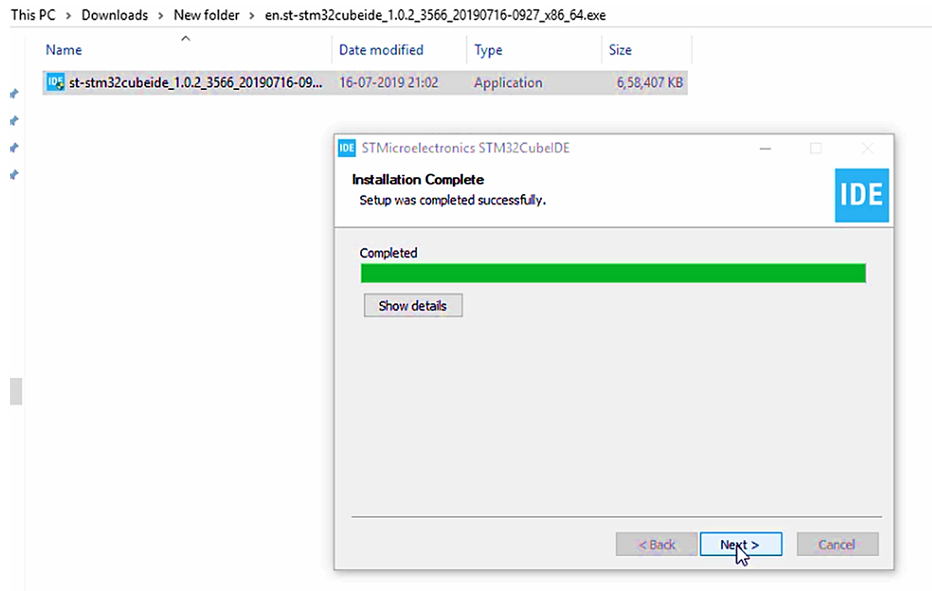
Step 6: Installation Progress
The installation process will commence, installing the selected components.
Once the installation completes, click “Next.”
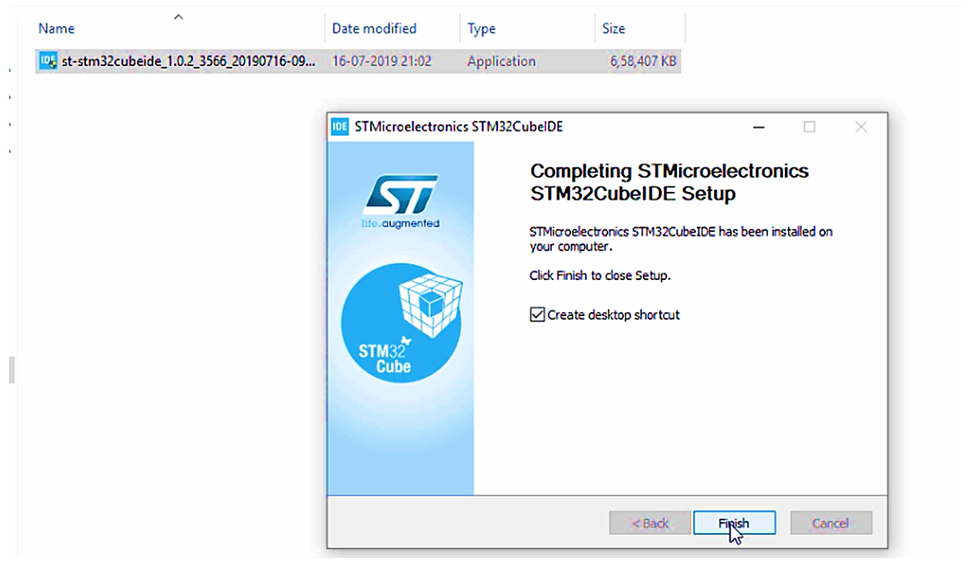
Step 7: Finish Installation
- Click “Finish” to complete the STM32CubeIDE installation(Figure 8).
Congratulations! You have successfully installed STM32CubeIDE on your system. This powerful tool will greatly assist you in developing applications for STM32 microcontrollers. Feel free to explore its features and start creating your projects.
FastBit Embedded Brain Academy Courses,
Click here: https://fastbitlab.com/course1

