LVGL and simulator download
LVGL is the graphics library for Embedded systems.
Running LVGL on Simulator and STM32 Microcontroller
- About LVGL
- Using Simulator
- Executing LVGL sample application on the simulator
- Adding LVGL source code to the STM32 project
- Adding LCD TFT and Touchscreen driver support
- Executing LVGL sample applications on target hardware
Source for all the discussion in this section
LVGL documentation 8.3
https://docs.lvgl.io/master/index.html
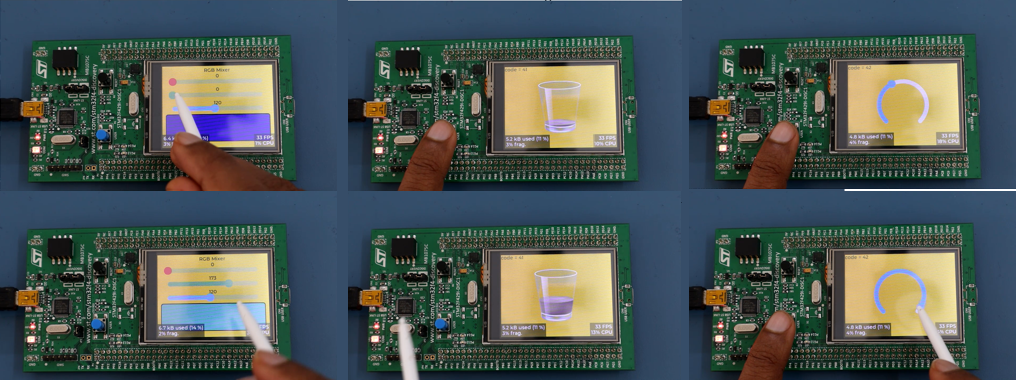
As you can see in this demo(Figure 1), all these are sample applications provided by the LVGL repository.
LVGL supports the creation of numerous widgets. You can create animations, set styles, create layouts, and modify various widget attributes. You can do many things using the simple APIs provided by the LVGL library. In this section, I will be discussing LVGL version 8.3.
For example, if you want to create a button and set an event callback for the button press, it’s a straightforward process. You need to refer to some sample applications related to buttons.
A small code snippet explains how to use the button and its event callback. You can experiment with it using your own code.
One of the reasons learning LVGL is simple is because it has beautiful documentation. Additionally, they provide many demo projects and sample applications to explore various graphic elements.
To learn more, refer to the LVGL documentation version 8.3.
Please note that newer versions may be available, so don’t hesitate to explore and experiment with the latest version. Make sure to refer to the documentation corresponding to the currently available version or the version you use.
Therefore, if you are using a newer version, you need to search for that specific API in your documentation and verify if it exists. It would help if you also checked its parameters because the LVGL community might occasionally remove specific APIs and introduce new ones. That’s why cross-checking the APIs is always important by referring to the LVGL documentation.
What is LVGL?
LVGL is a light and versatile graphics library. It is specially designed for creating Embedded GUI systems and it gives you a lot of APIs to use various graphic elements.
And you can create interesting visual effects by just calling some APIs provided by the graphics library.
LVGL has gained popularity in the embedded systems community due to its simplicity, small memory footprint, and powerful capabilities. It is often used in applications such as home automation systems, wearable devices, industrial control panels, medical devices, and more, where a responsive and visually appealing user interface is desired in resource-constrained environments.
Before utilizing this graphics library in our hardware, we will first experiment with the simulator. We will create a user interface using the simulator, and then transfer that code to our STM32 project for testing on our hardware.
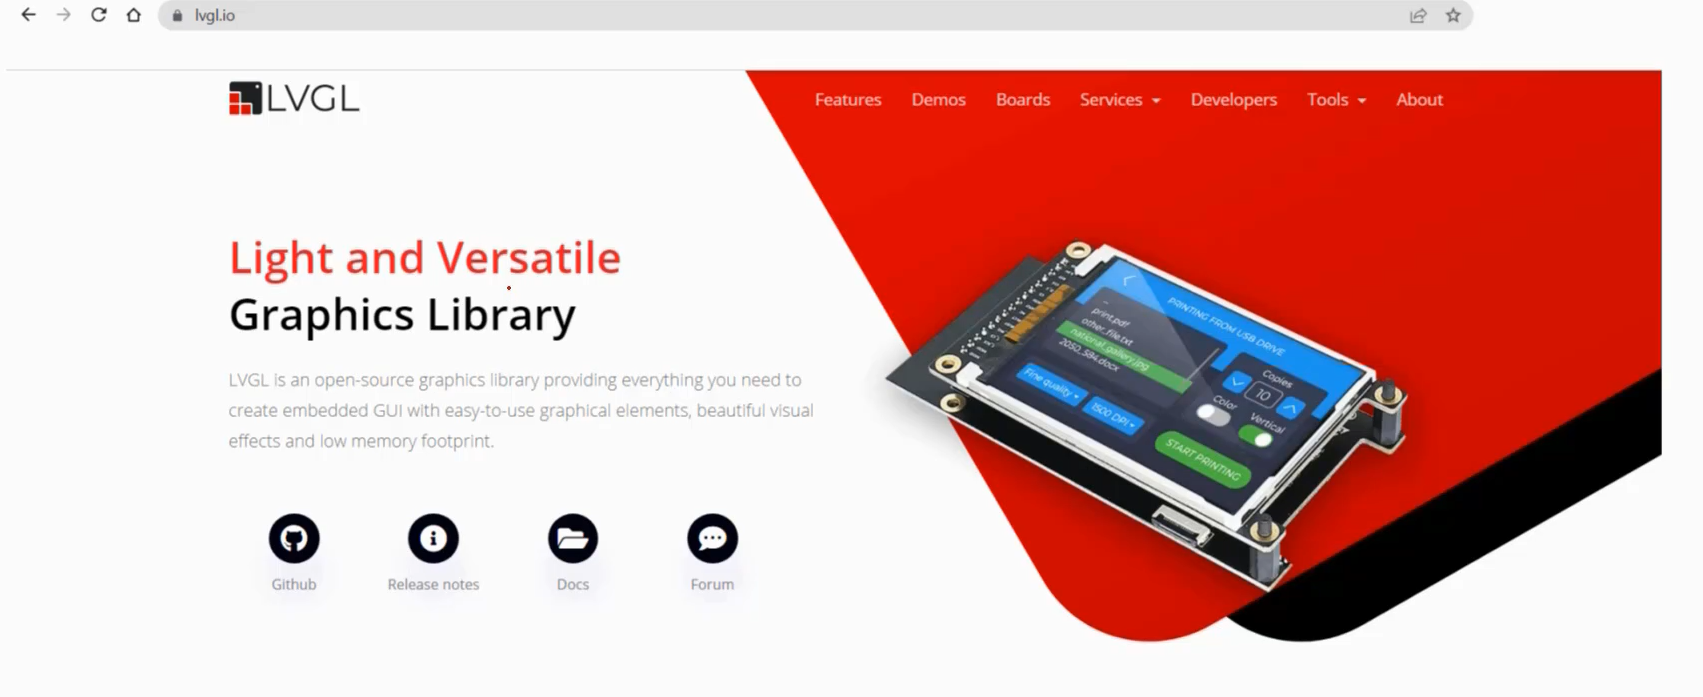
To begin, we require a simulator.
To acquire one, navigate to lvgl.io, click on “Get started,” and then select the “Simulator” option, as shown in Figure 4.
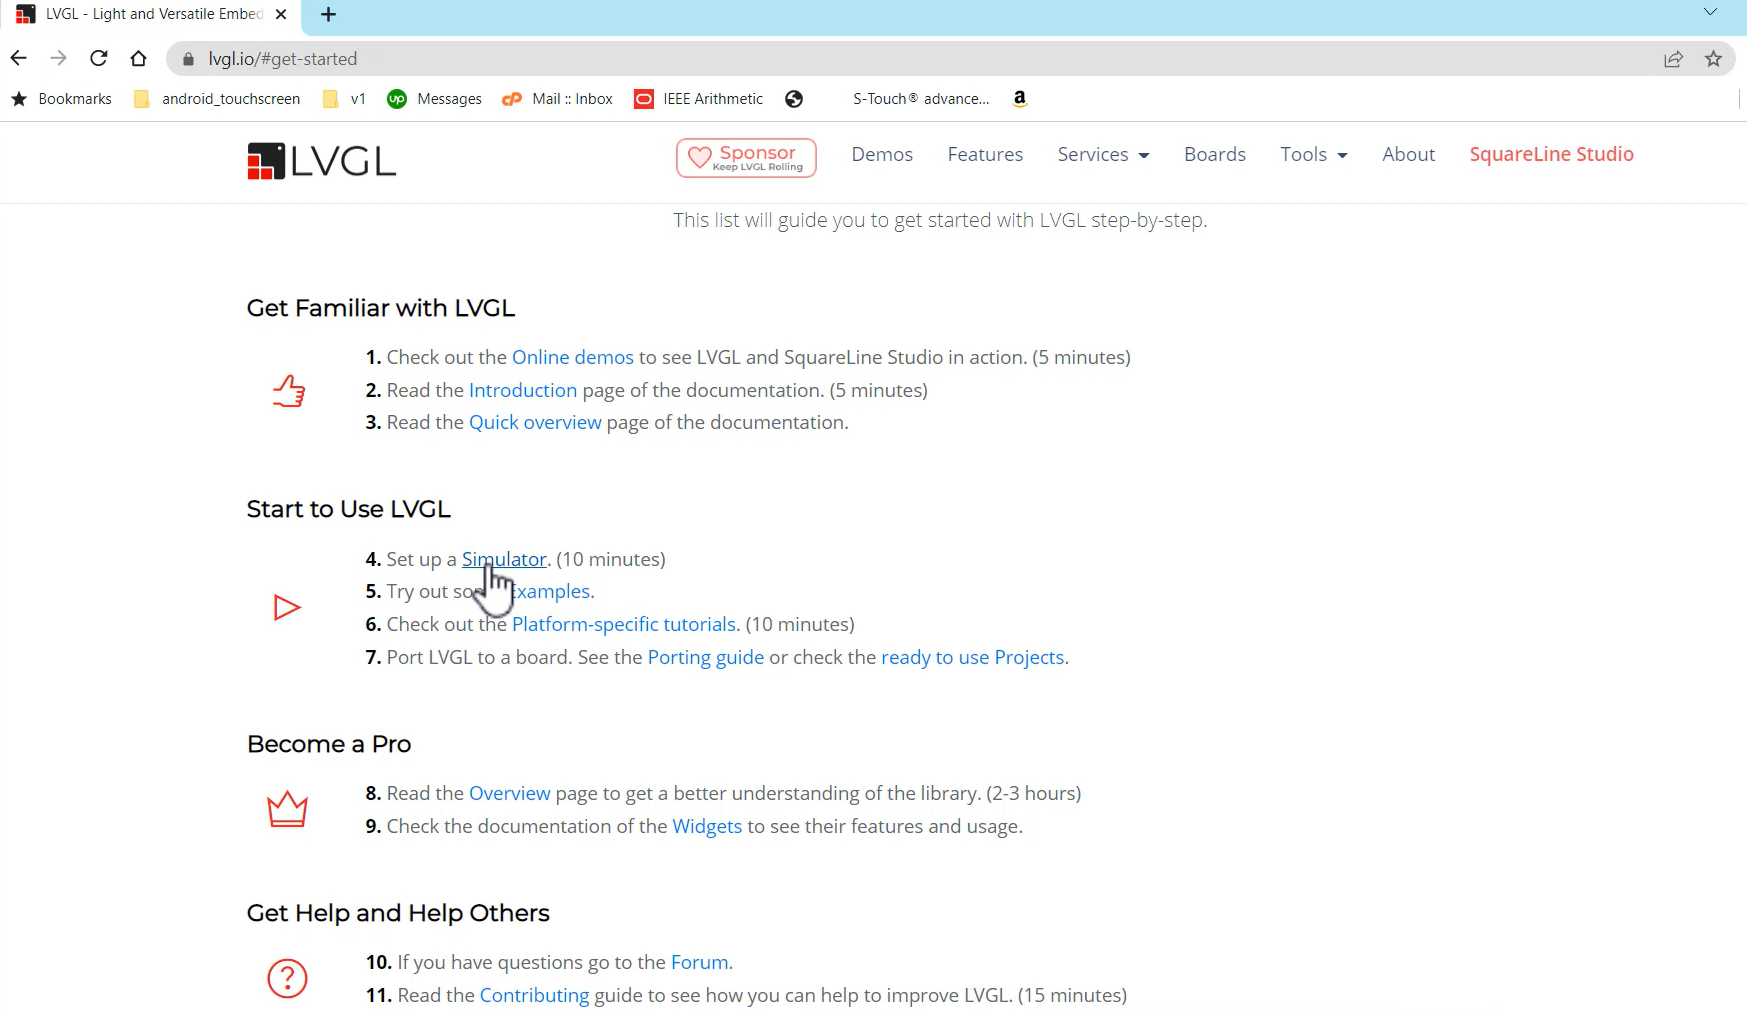
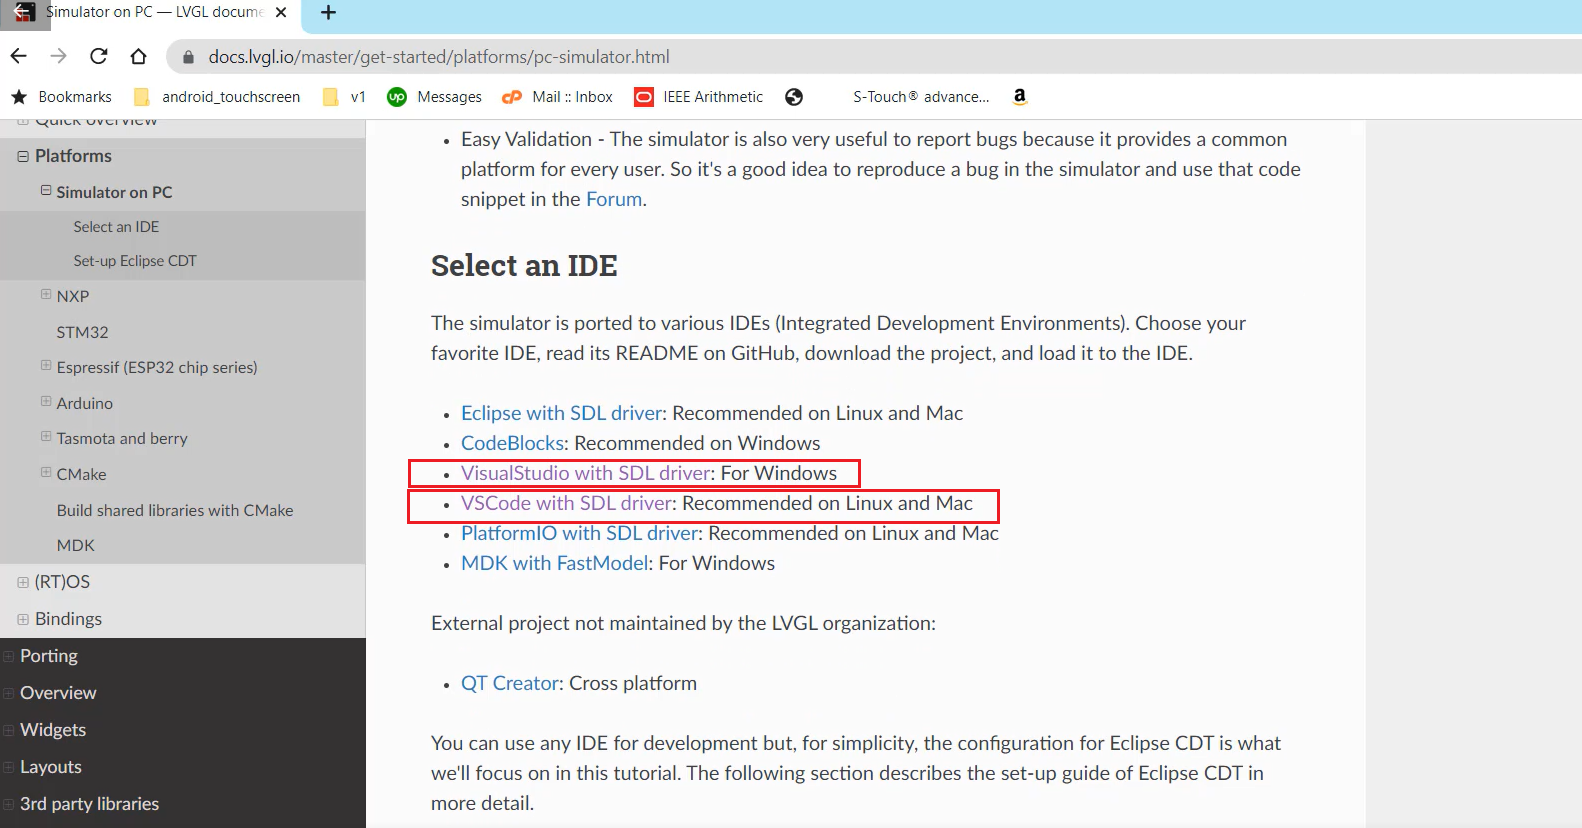
It will take you to the documentation, as shown in Figure 5.
VisualStudio with SDL driver: For Windows → you have to follow this link for Windows
VSCode with SDL driver: Recommended on Linux and Mac → you have to follow this link in case you are using Linux or Mac.
After selecting the IDE, it will take you to the GitHub repository(Figure 6).
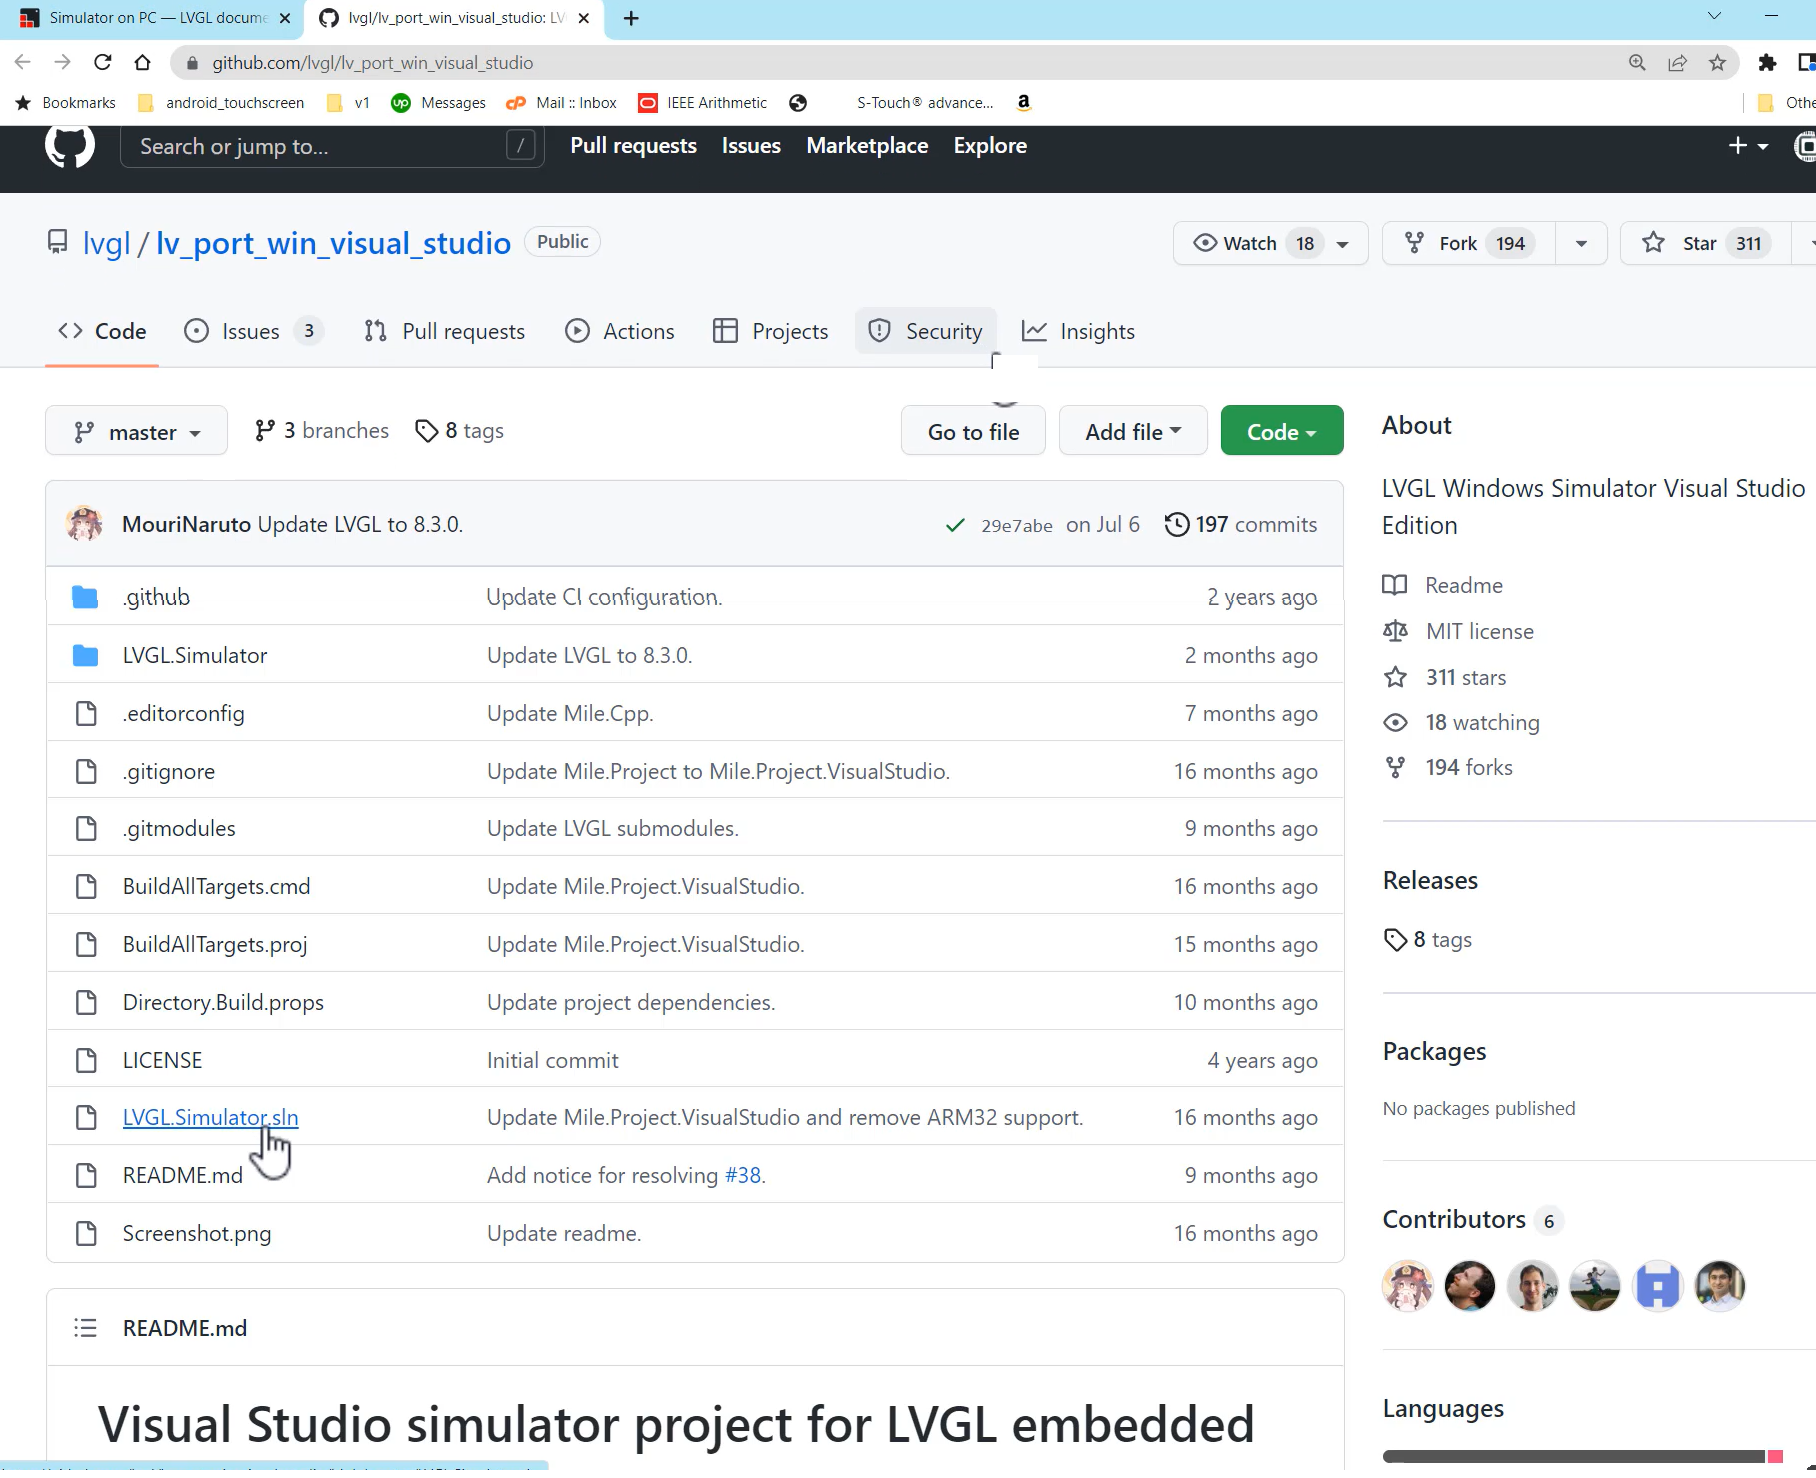
Here is a Windows simulator project. Please read the description in the Github repository to gain a better understanding of the project and its limitations.
How to download and run that simulator?
To download and run the simulator, follow these steps:
- This project is designed for Visual Studio. Therefore, you need to have Visual Studio installed on your computer.
- According to the documentation, it is required to have a newer version of Visual Studio. So, you must install Visual Studio 2019 or above.
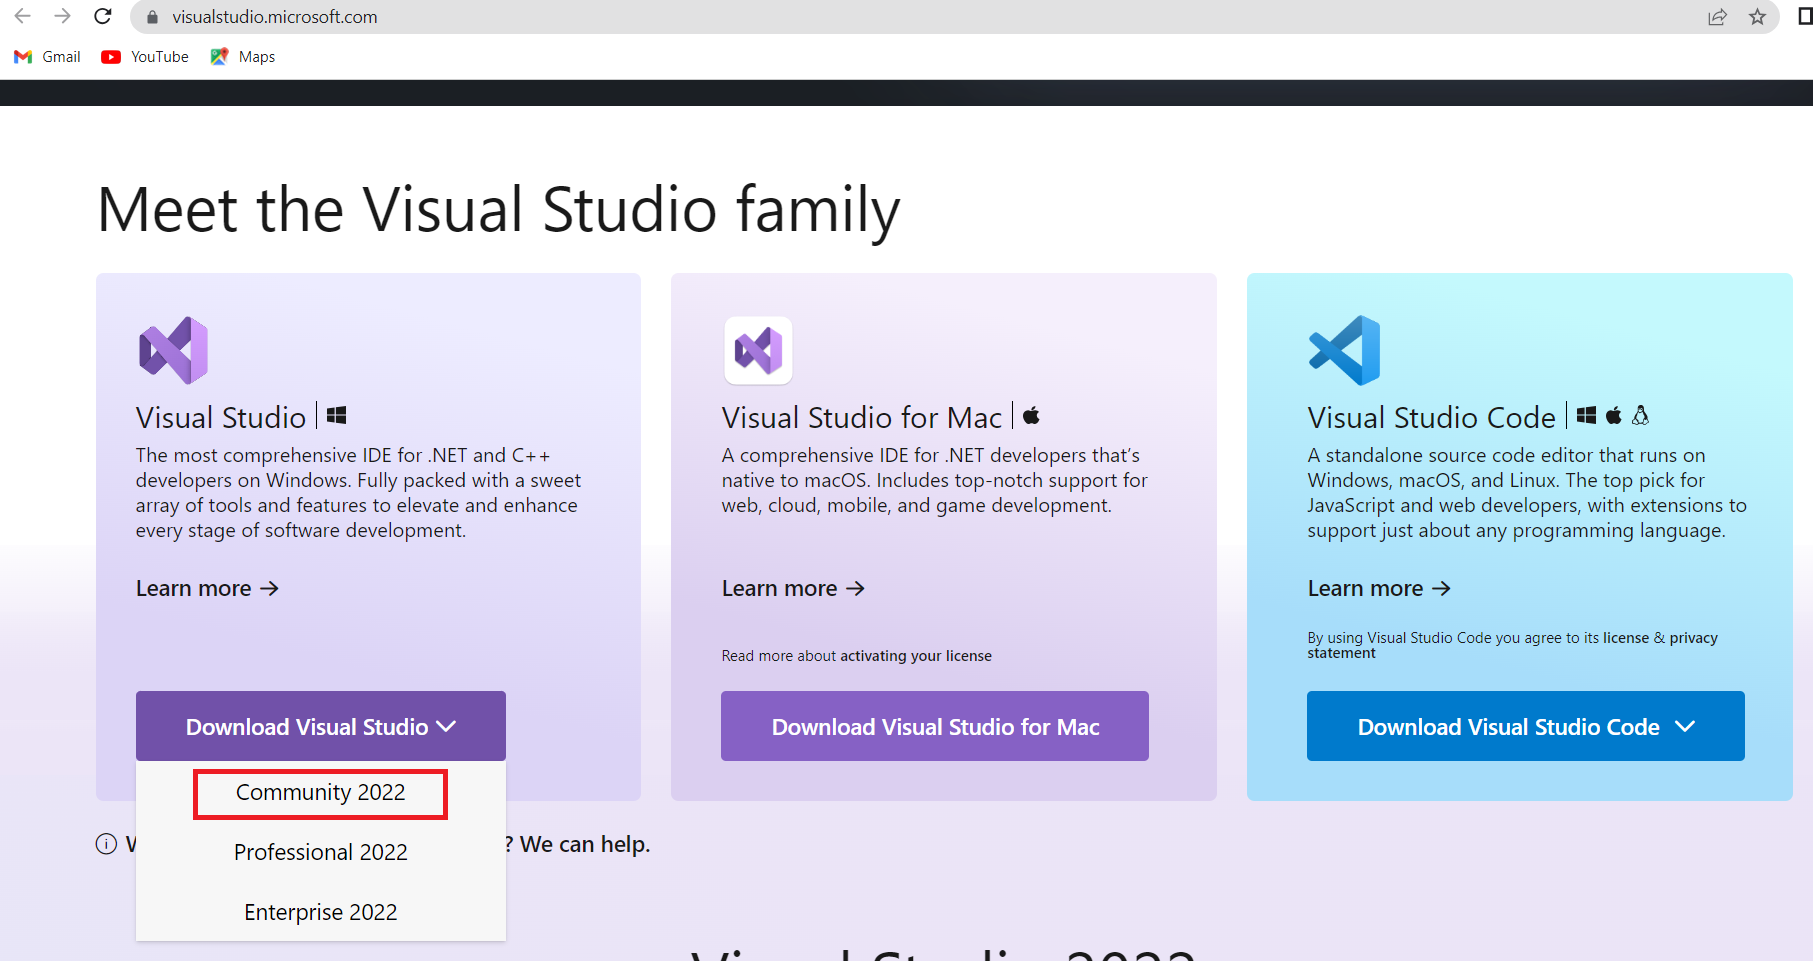
- Visit the Visual Studio website and download the appropriate version of Visual Studio. Please note that you should install Visual Studio, not Visual Studio Code.
- The recommended version is Visual Studio Community 2022, which is currently available. Refer to Figure 7 for guidance on selecting the version.
When you are installing Visual Studio, it will prompt you to the Modifying-Visual Studio Community 2022 window, as shown in Figure 8. Here you have to select “Desktop development with C++”.
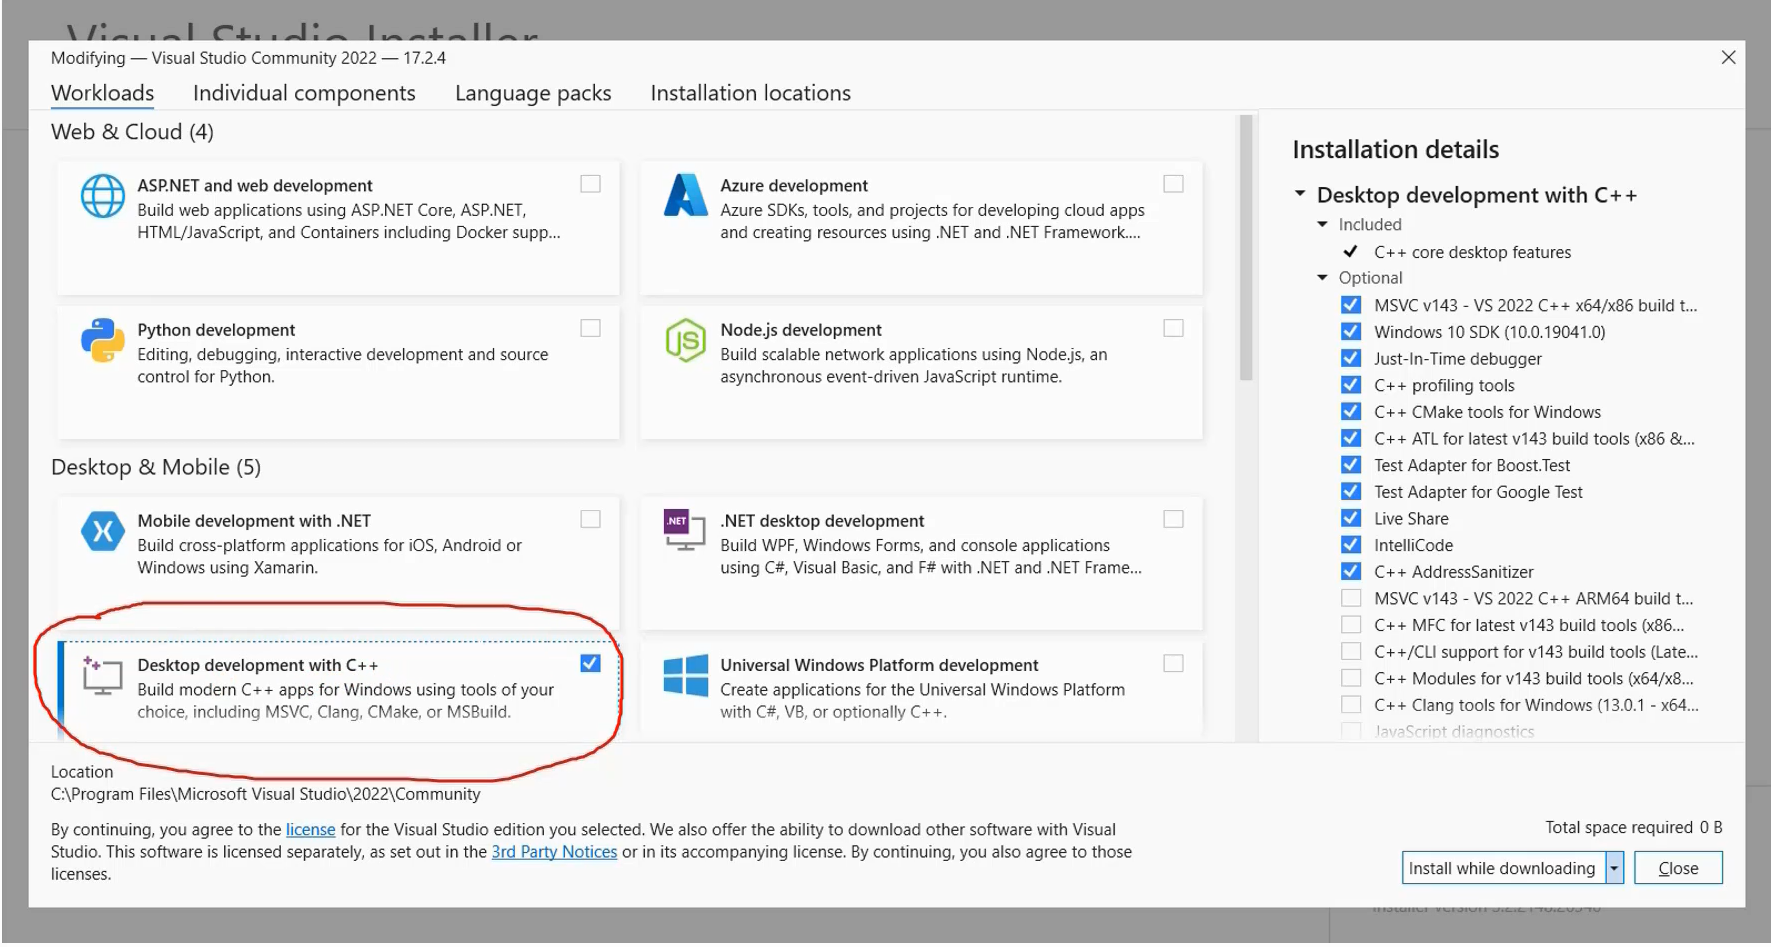
Desktop development with C++ is the only requirement for running the simulator. We don’t need any other technologies unless you are working with different technologies, in which case you may select them, but they will consume a lot of disk space.
Therefore, simply choose “Desktop development with C++” and proceed with the installation.
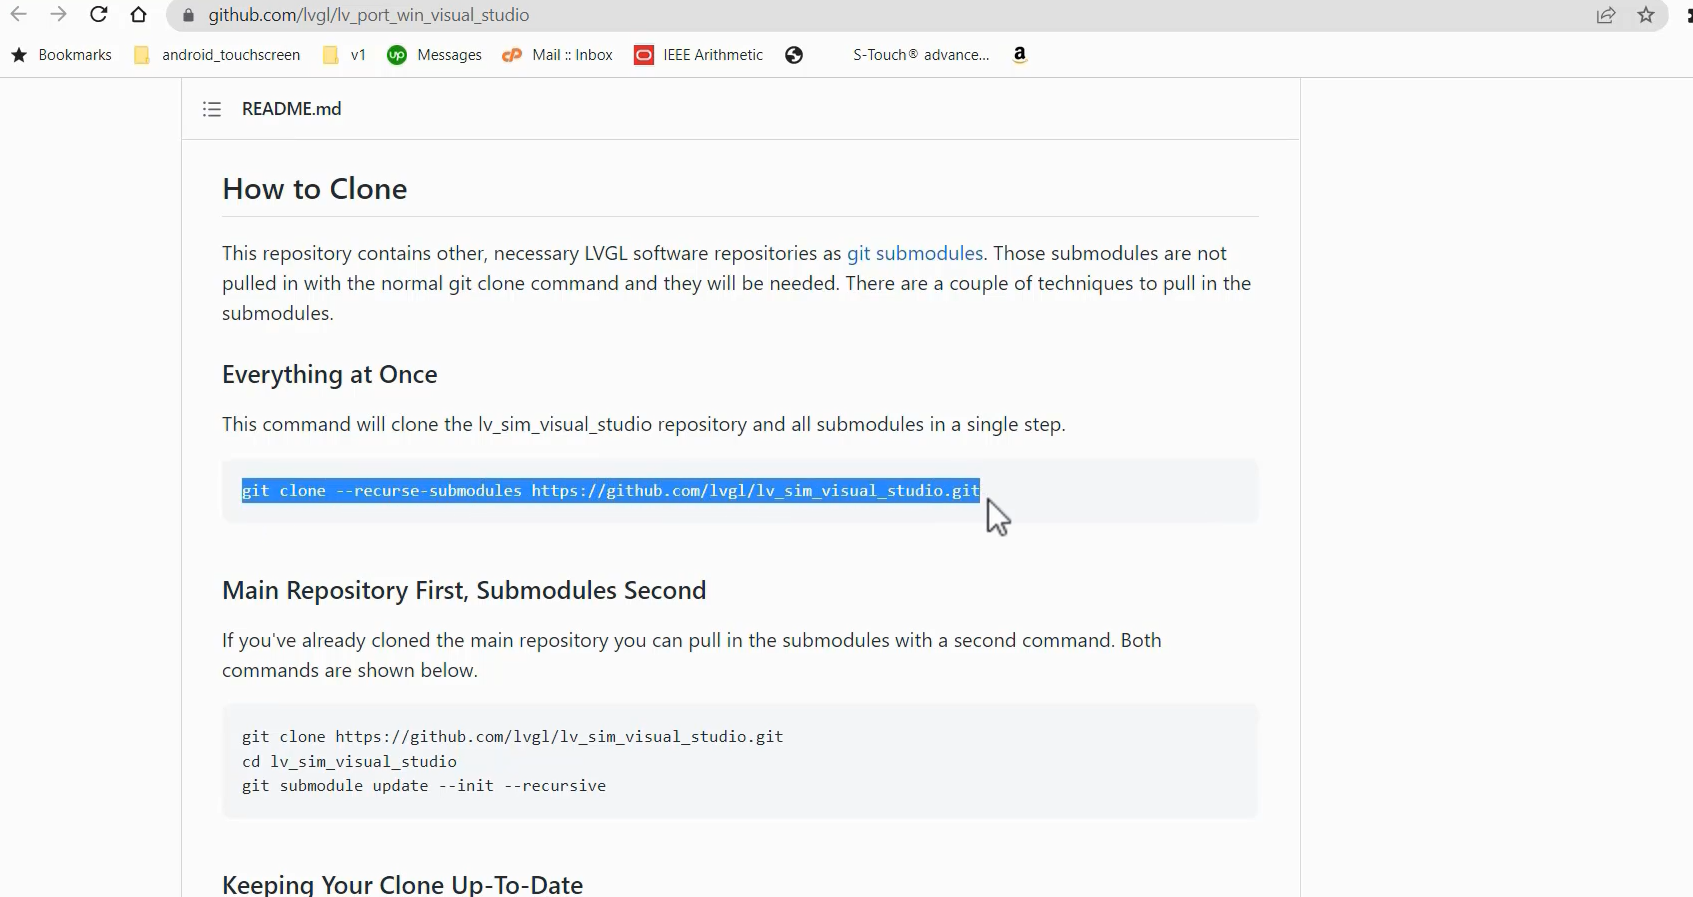
Now, let’s get back to the repository of the simulator, and then they have mentioned how to download this simulator to your machine.
Here is an instruction for that.
In the simulator’s repository, where they provide instructions on how to download it to your machine.
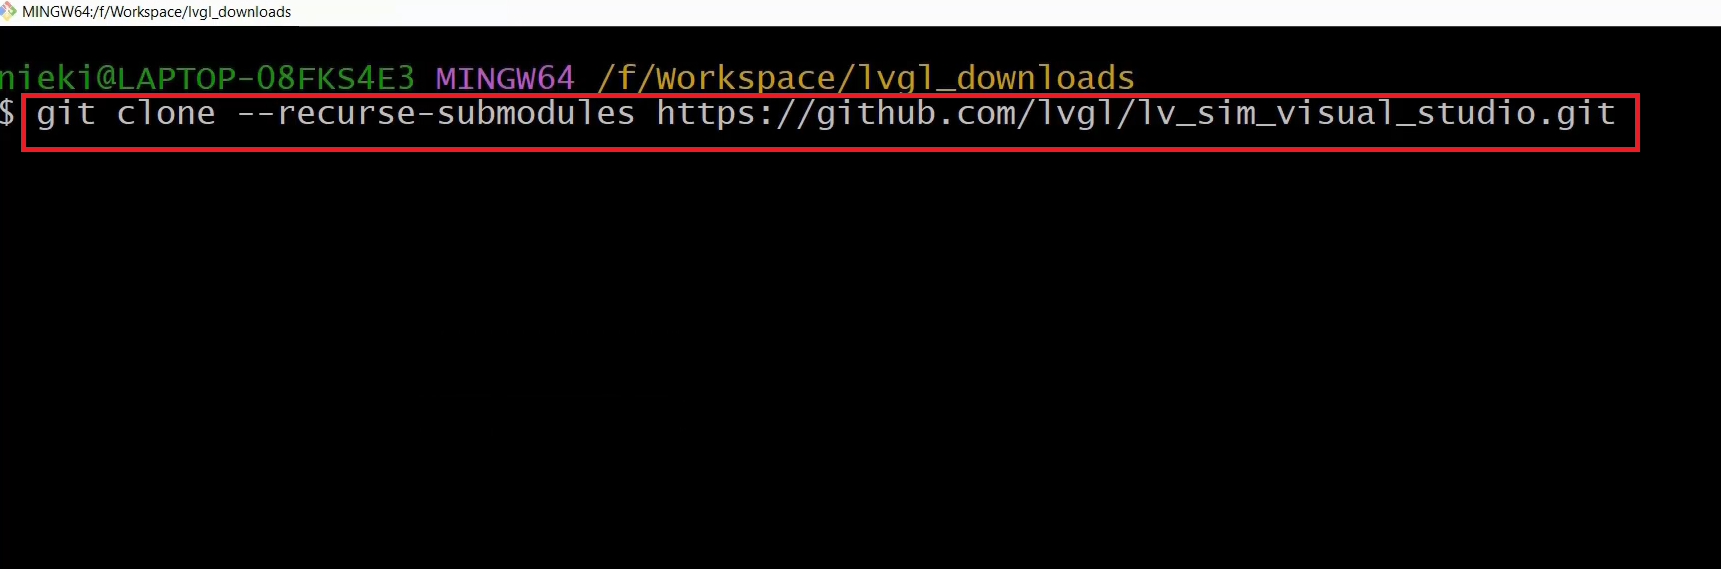
You just have to execute the command git_clone(shown in Figure 9).
To begin, you need to install Git.
To do this, simply search for “Git” on Google and visit the official Git website.
From there, download the appropriate version of Git for your operating system.
Click on “Download for Windows” , as shown in Figure 10.
Once the download is complete, proceed with the installation.
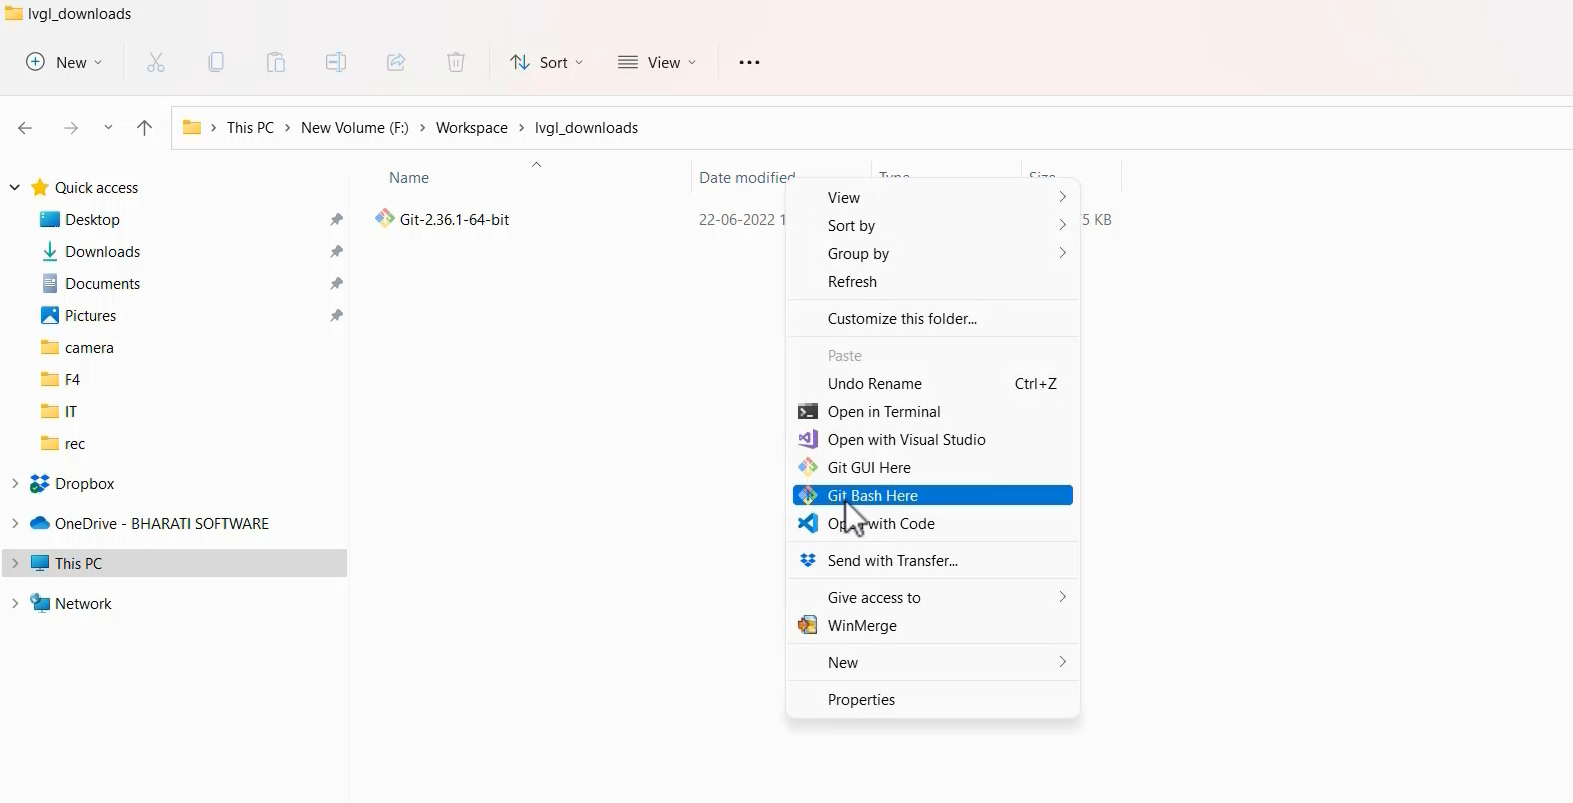
After that, let’s proceed to download the LVGL simulators. Go somewhere on your computer, right-click there, and select the “Git Bash Here” option, as shown in Figure 11.
Now, to download the simulators, go to the LVGL simulator project and execute the command shown in Figure 9. Copy the command and paste it here(Figure 12).
I have successfully downloaded the simulator.
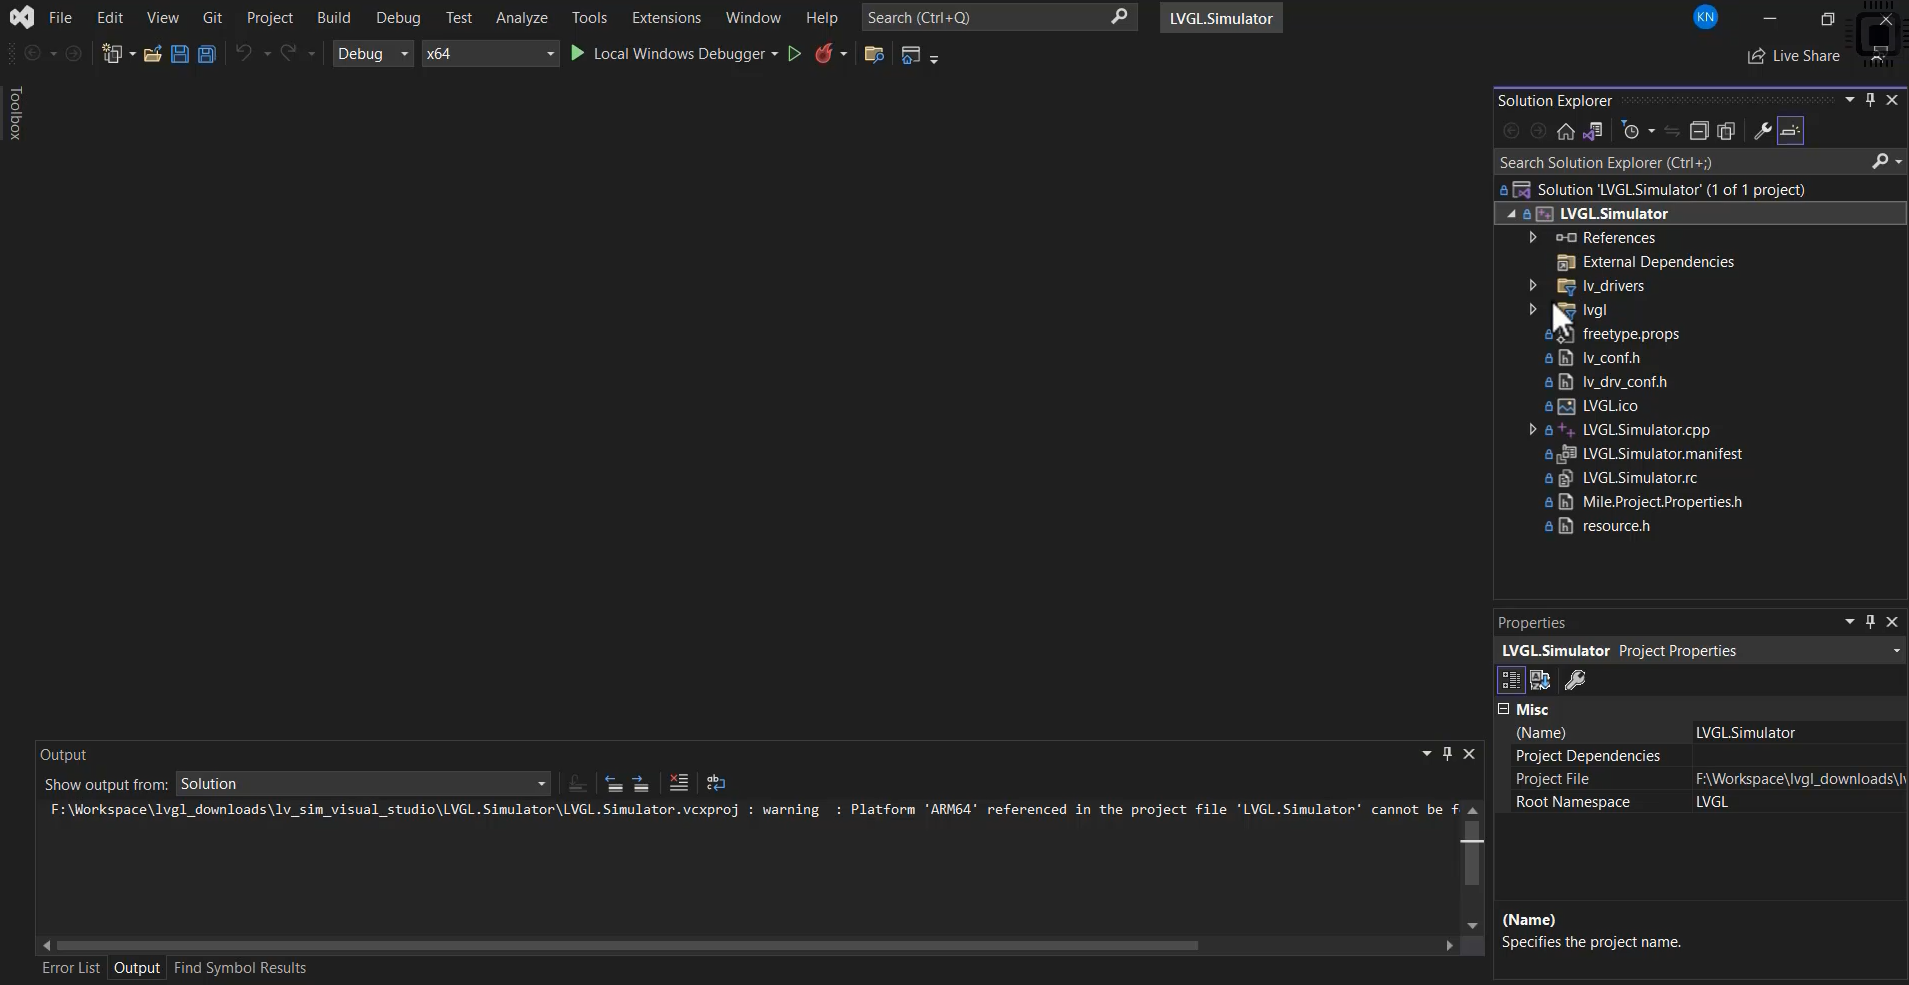
Next, navigate to the “lv_sim_visual_studio” folder. Inside, you will find the Visual Studio solution, depicted in Figure 13. Just double-click on that, and it launches Microsoft Visual Studio.

As you can see in Figure 14, the project is loaded into the IDE without any issues.
So, if you are using the 2019 version, then there could be some issues. That’s why it is better to install the newer version of Visual Studio.
Take a look at Figure 15. On the right-hand side, you can see the LVGL source code. It includes demos, with a couple of them available for you to run.
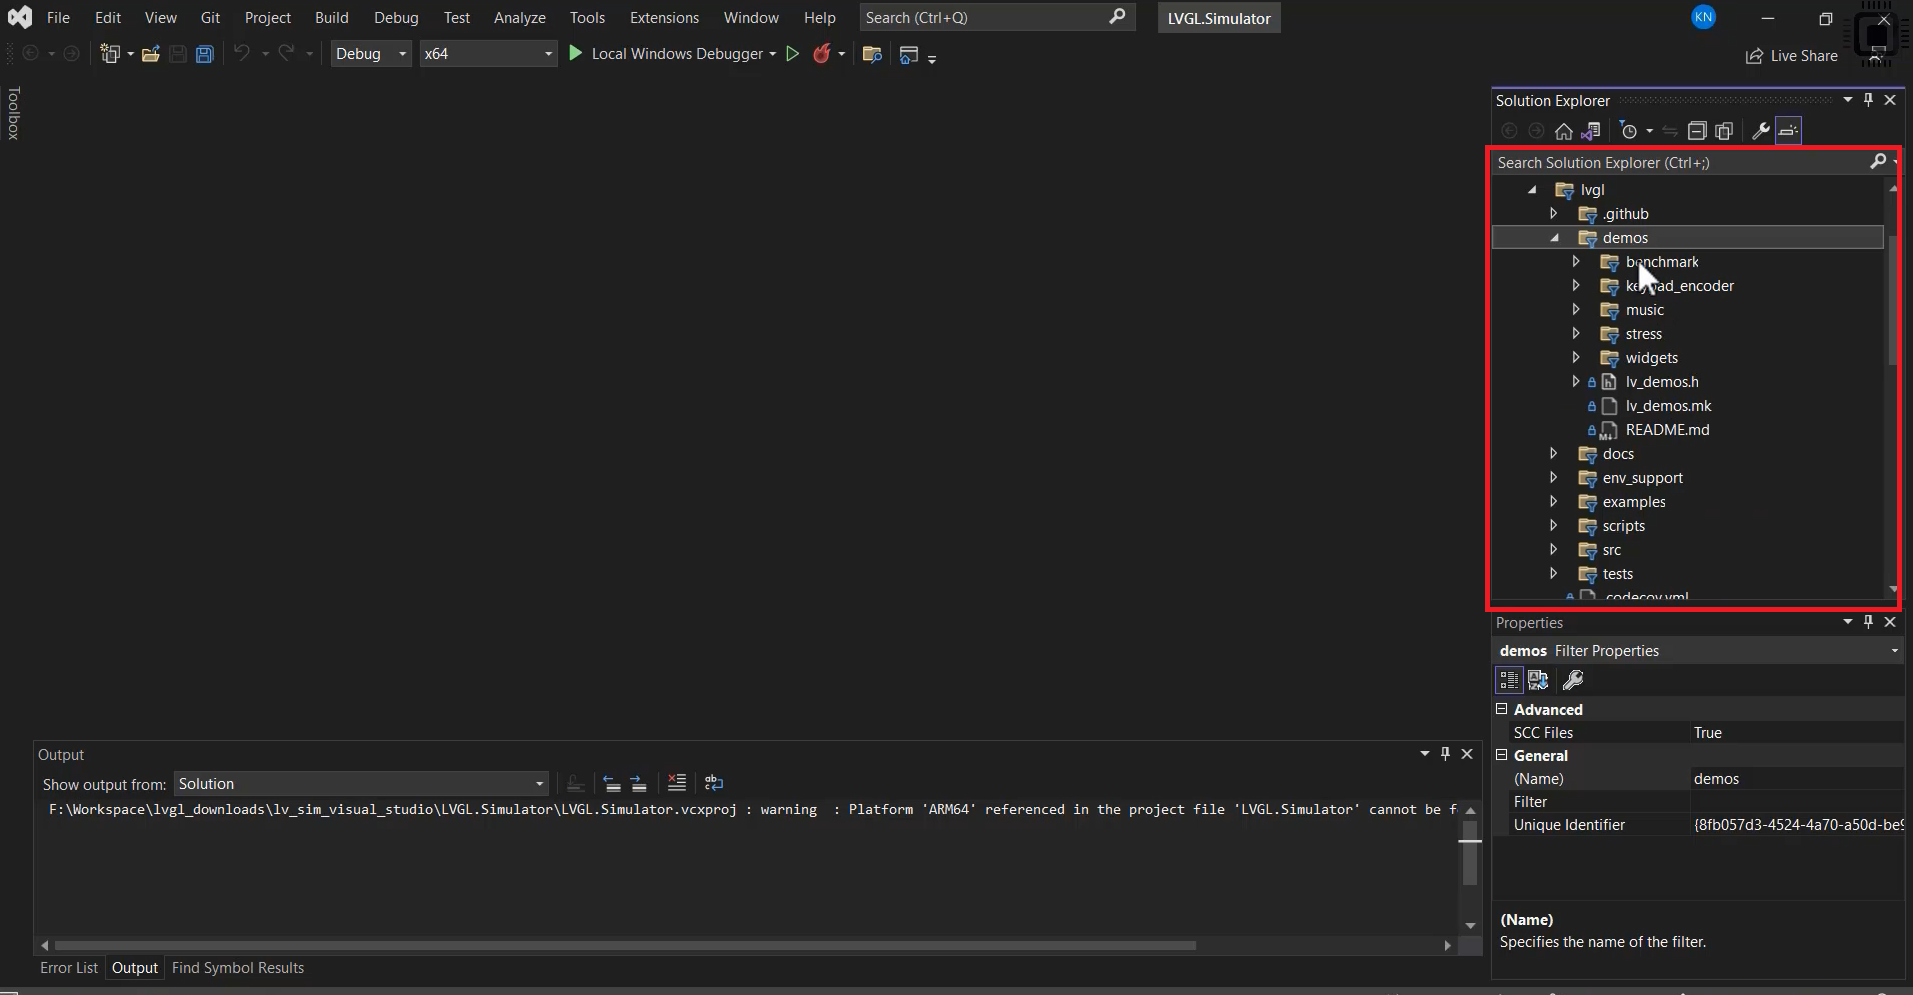
Additionally, within the examples folder, you’ll find numerous examples. For instance, if you want to learn how to use the button, simply navigate to the widget section and locate the button. They have provided multiple examples for your reference.
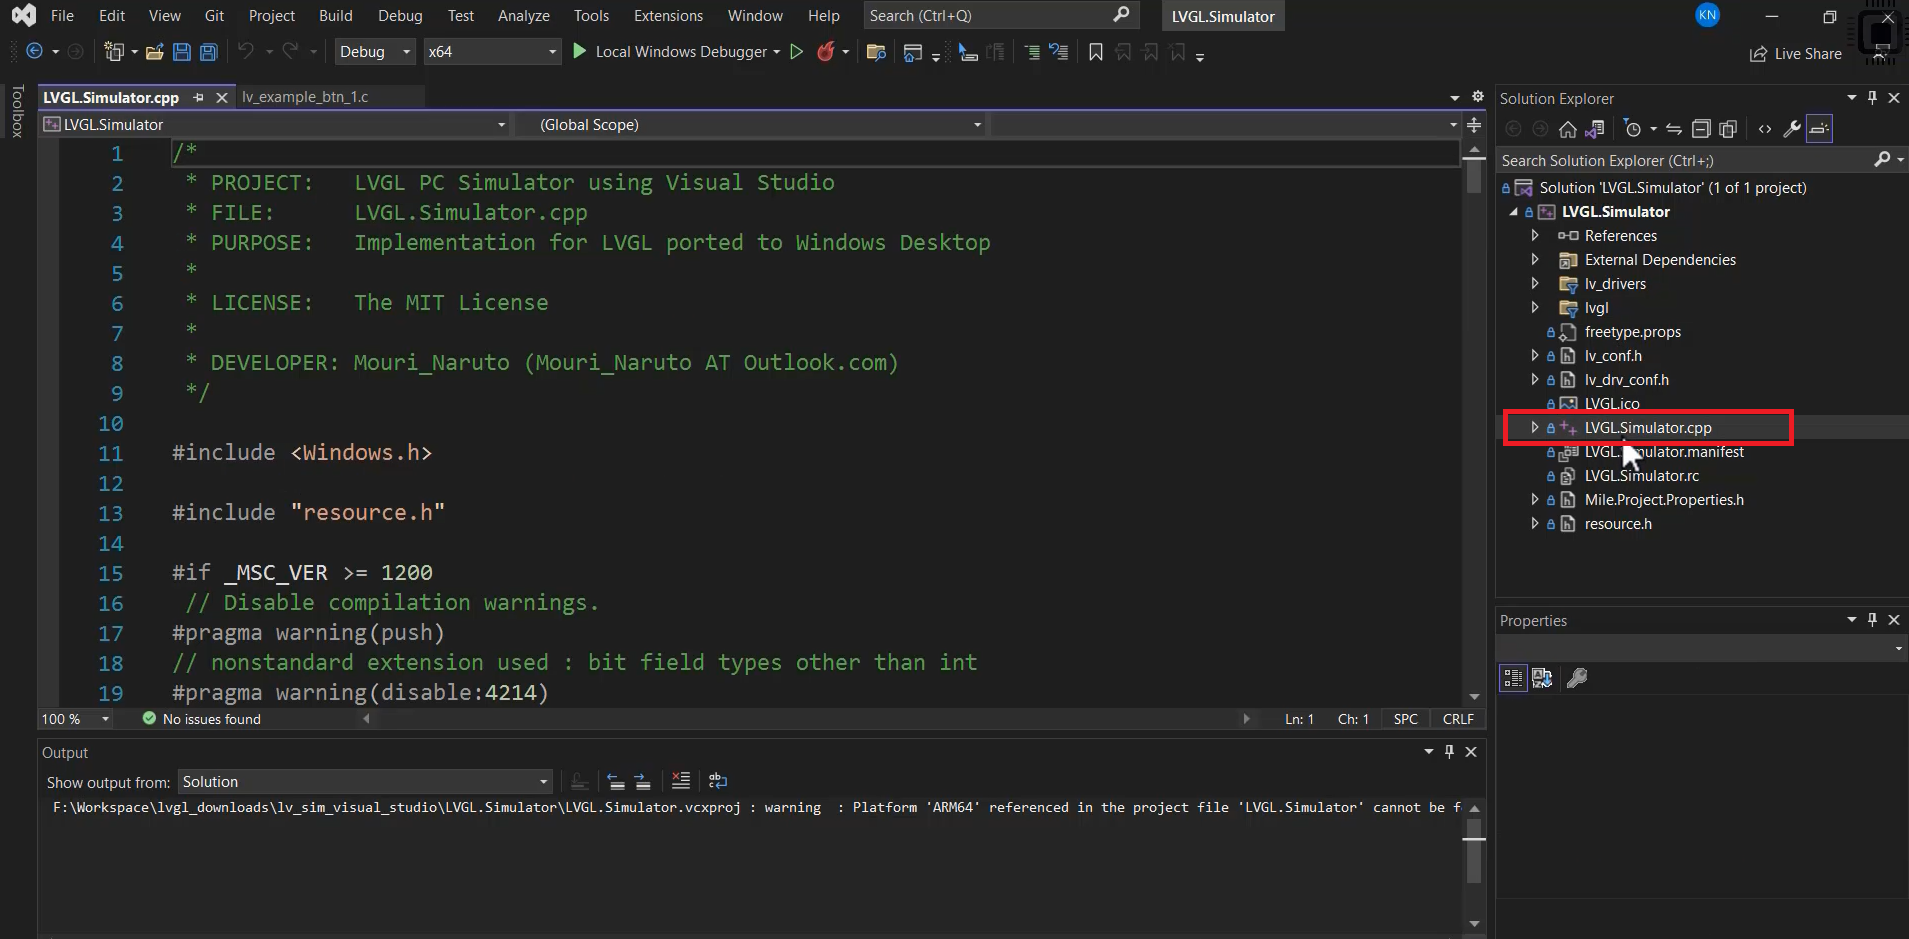
And if you are wondering what this project’s main file or function is. Where is the main function of this project?
That is in LVGL_Simulator.cpp. Here you find the main function.
In the main function, you can see that there is a demo located in the “demos” folder. If you navigate to the LVGL library and access the “demos” section, you will find that it calls the function from the file named “demo_widgets”. If you are interested in trying a different demo, you can refer to the corresponding folder.
There is one lv_conf.h, which is a user-configurable header file. By using this file, you can configure the LVGL library according to your project’s needs. It contains various macros, so you don’t need to explore everything whenever you want to modify something. We consult the documentation first to understand the meaning of each configuration item.
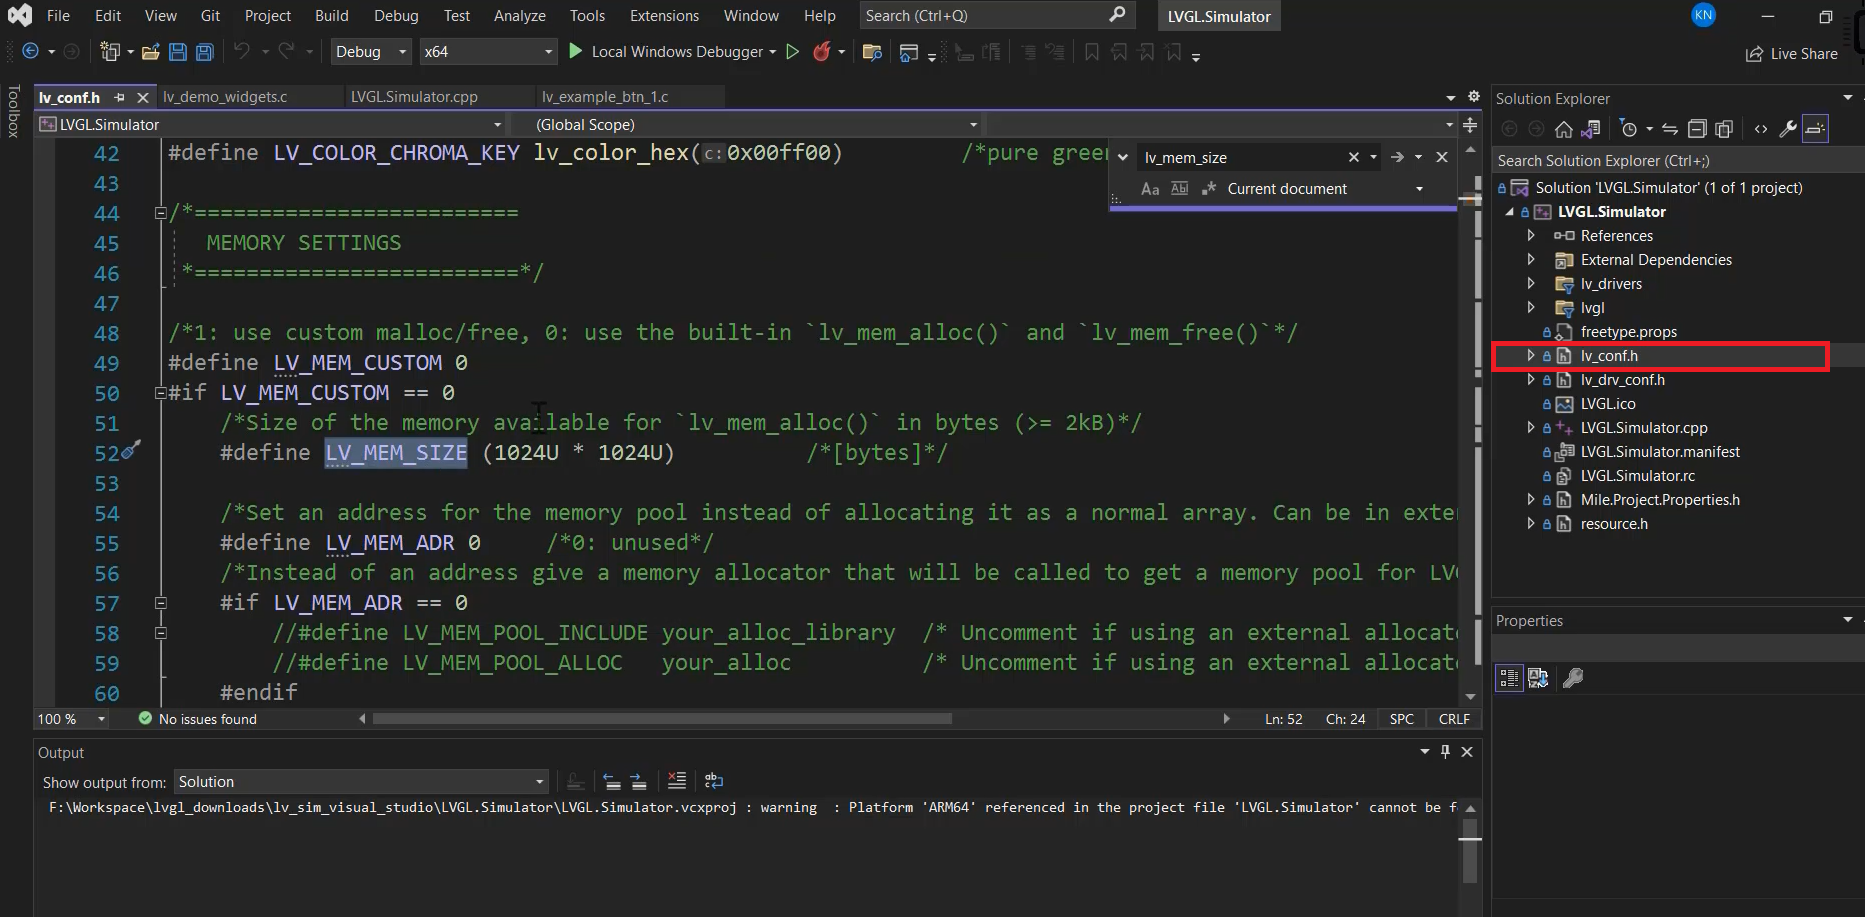
For instance, let’s consider one important macro called LV_MEM_SIZE. This macro represents the memory reserved for LVGL. Whenever you create new objects, widgets, animations, styles, etc., the LVGL library tries to allocate memory using the lv_mem_alloc() function. The value of LV_MEM_SIZE determines the size of the memory pool available for LVGL to utilize.
You need to configure this value based on the amount of RAM available in your microcontroller. For Windows, the RAM size doesn’t matter much because it typically has a large amount of memory. In this case, the LV_MEM_SIZE is set to 1024 kilobytes.
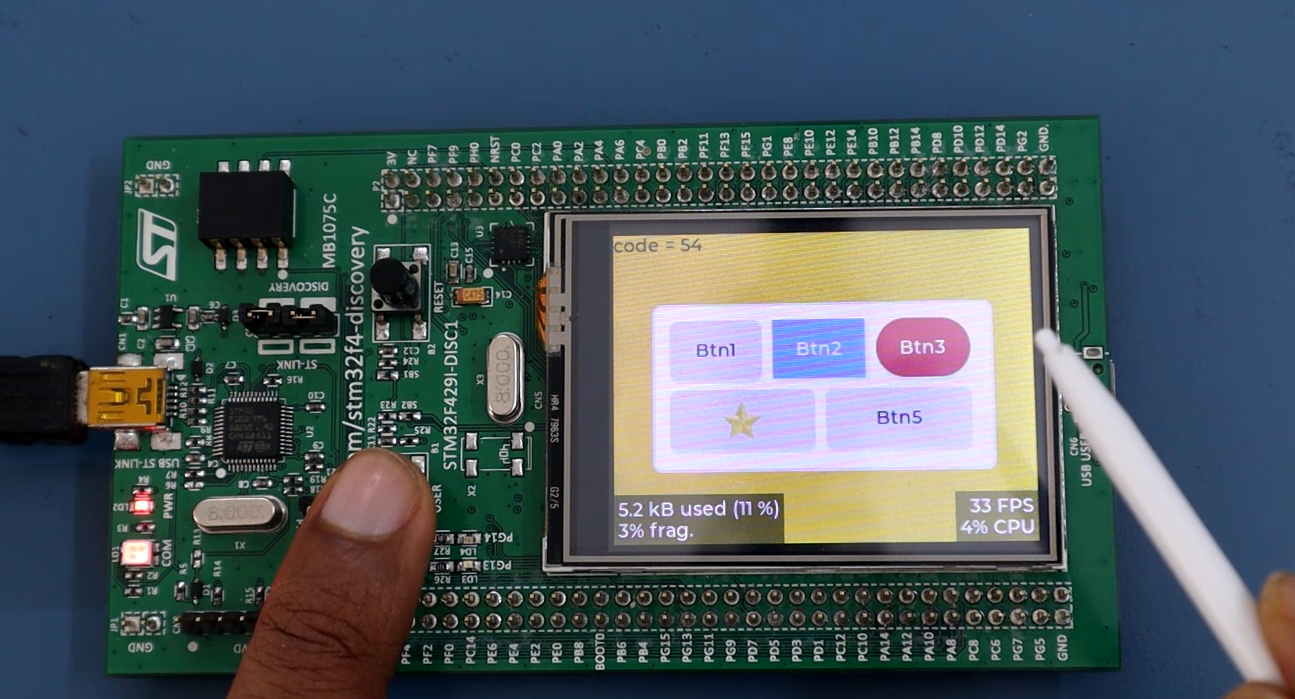
Let’s run the simulator and see the output.
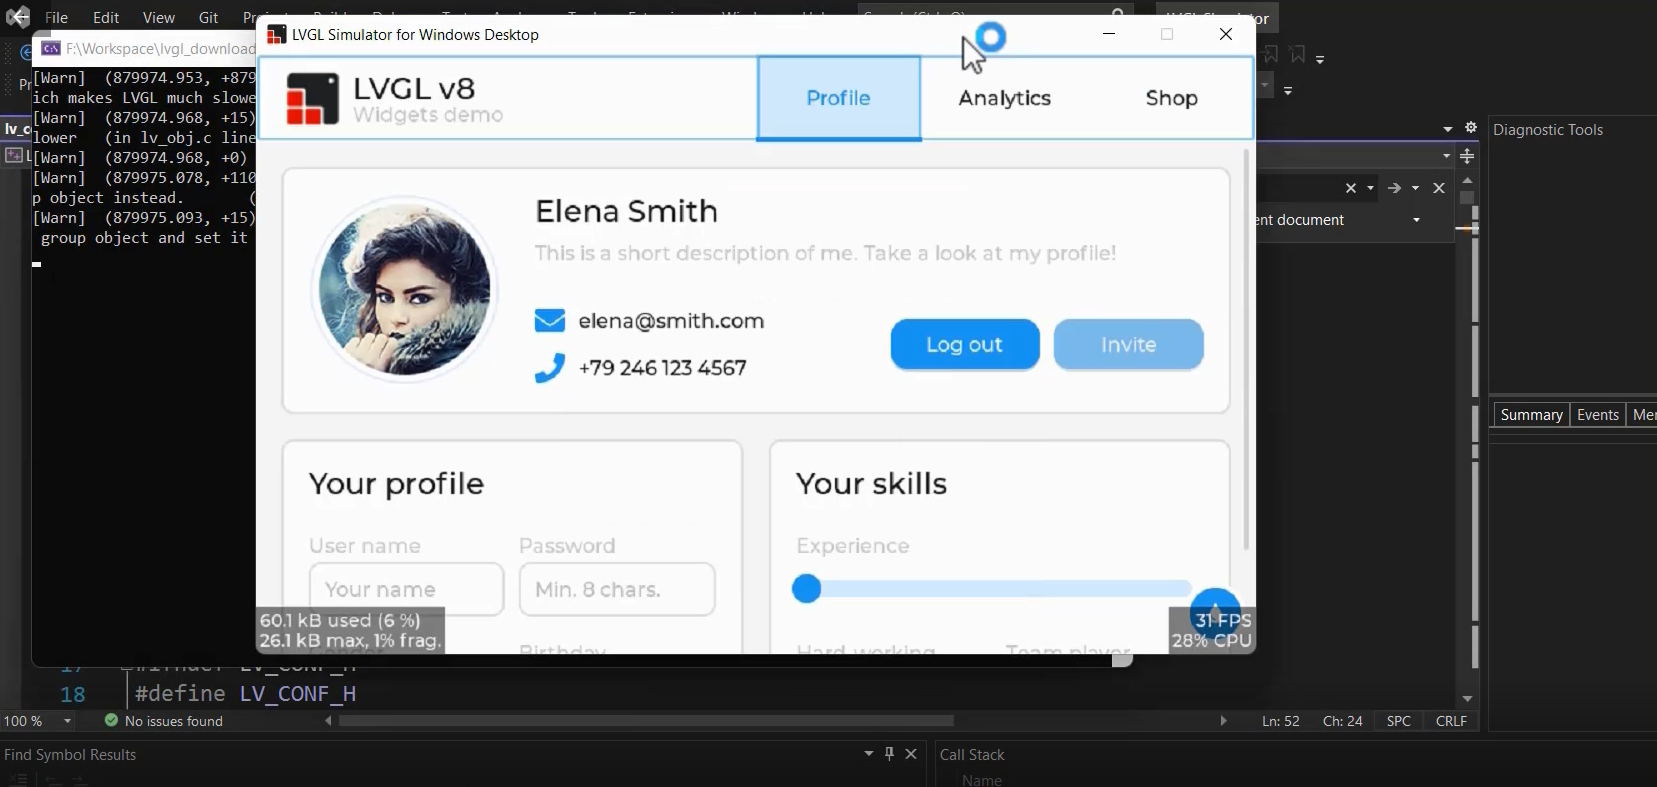
This is your screen or display screen, which responds to your mouse clicks. You can also flash the exact same code into your target board.
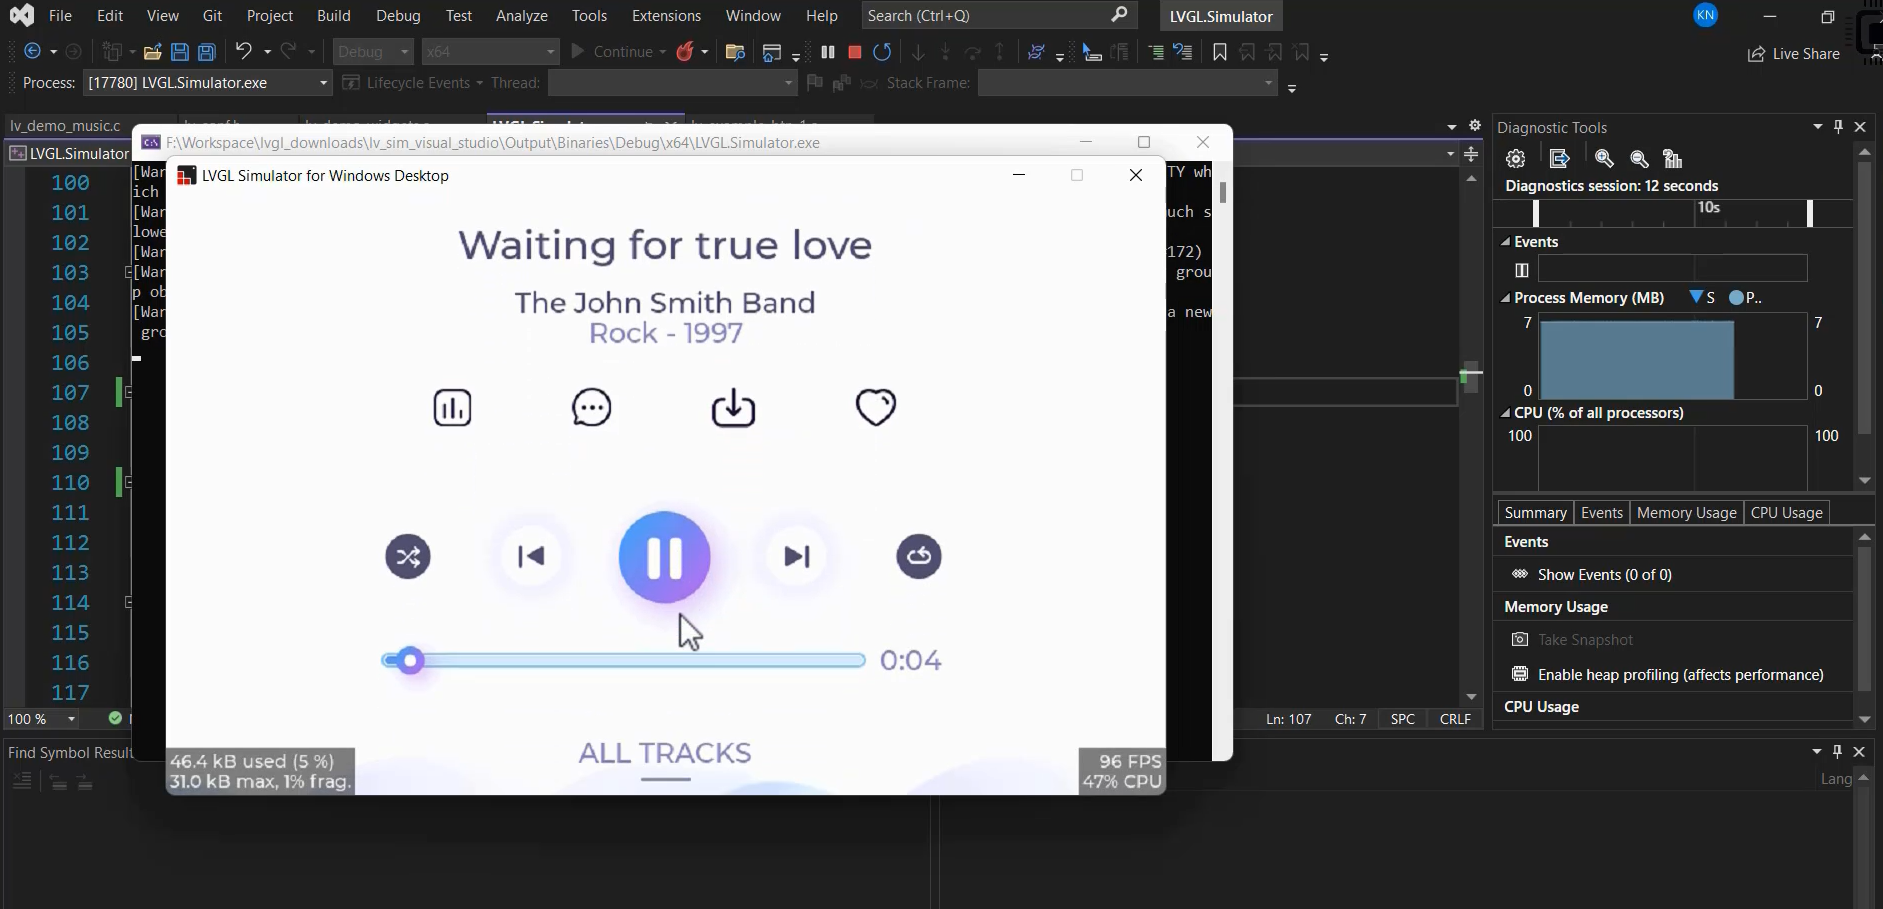
If you want to run another demo, you have that option. For instance, you can try the lv_demo_music, which is a music demo depicted in Figure 19.
Now we understand how to run the simulator. We’ll try with some sample applications.
FastBit Embedded Brain Academy Courses
https://fastbitlab.com/course1