Sizeof Operator
In this article, we learn about Sizeof operator.
Our newly created project, 002Sizeof, employs the powerful printf functionality to display the sizes of various data types.
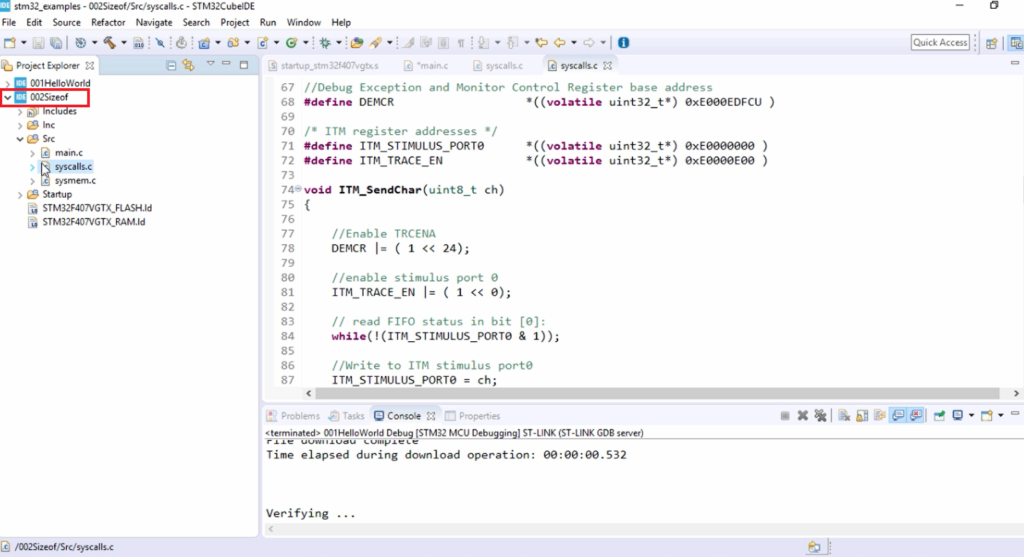
In main.c, first use the header file #include <stdio.h>.
After that, let me use printf to print the size of a char data type. The size of the char data type is %u because size is always unsigned, so that I can use %u\n and sizeof(char). So, this seems to be good.
After that, let me do it for the size of short, size of long, size of long long, size of int, and sizeof double, as shown below.
Some people may have doubts, so why didn’t I use %d?
That’s because ‘d’ is for signed integer. I know size cannot be negative. That’s why I used ‘u.’ That is for unsigned. So, even if you use d, that’s not an issue; that is also correct.
#include <stdio.h>
int main(void)
{
    printf("Size of char data type is %u\n",sizeof(char));
    printf("Size of short data type is %u\n",sizeof(short));
    printf("Size of int data type is %u\n",sizeof(int));
    printf("Size of long data type is %u\n",sizeof(long));
    printf("Size of long long data type is %u\n",sizeof(long long));
    printf("Size of double data type is %u\n",sizeof(double));
    for(;;);
}
sizeof main.c code
After that, now let’s create the debug configuration. Select the project, go to Debug As, and click on Debug Configurations.
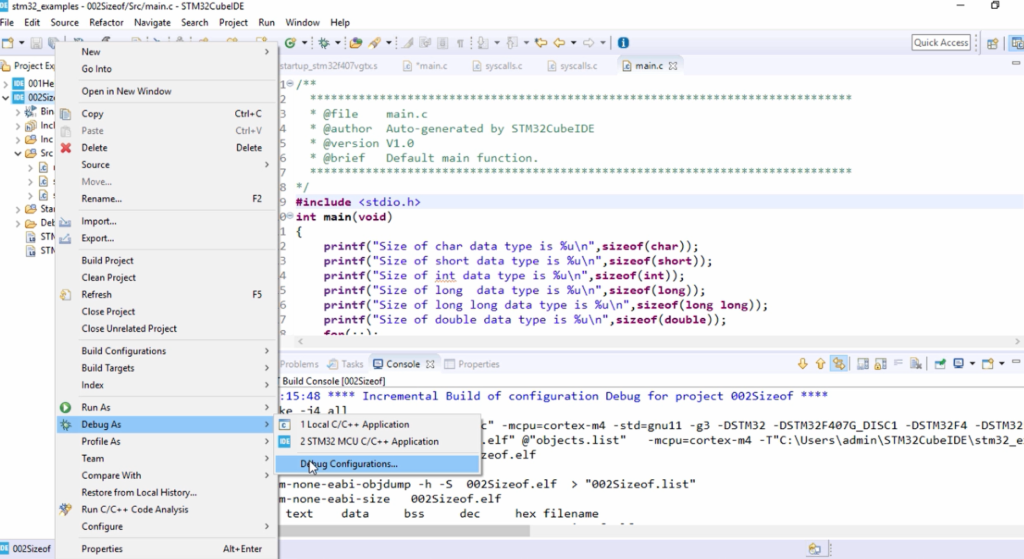
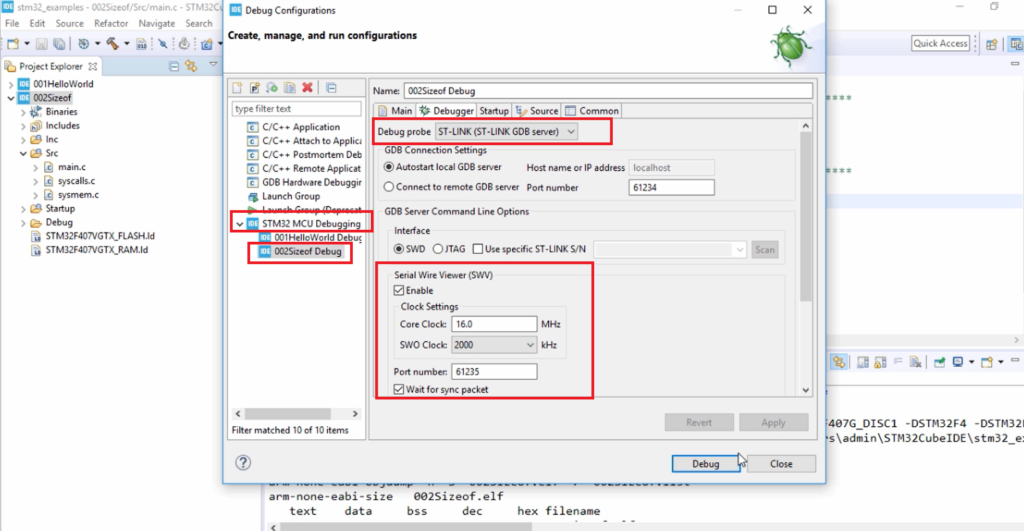
And there is already one configuration which is for our previous project. Select STM32 MCU Debugging and double click, and it creates another one here for our current project 002Sizeof Debug, as shown in Figure 3.
Here again, you have to go to the Debugger, select the debug probe is ST-LINK(ST-LINK GDB server), and the SWV is Enabled. Because we are using printf. So, click Apply and click Debug to start debugging.
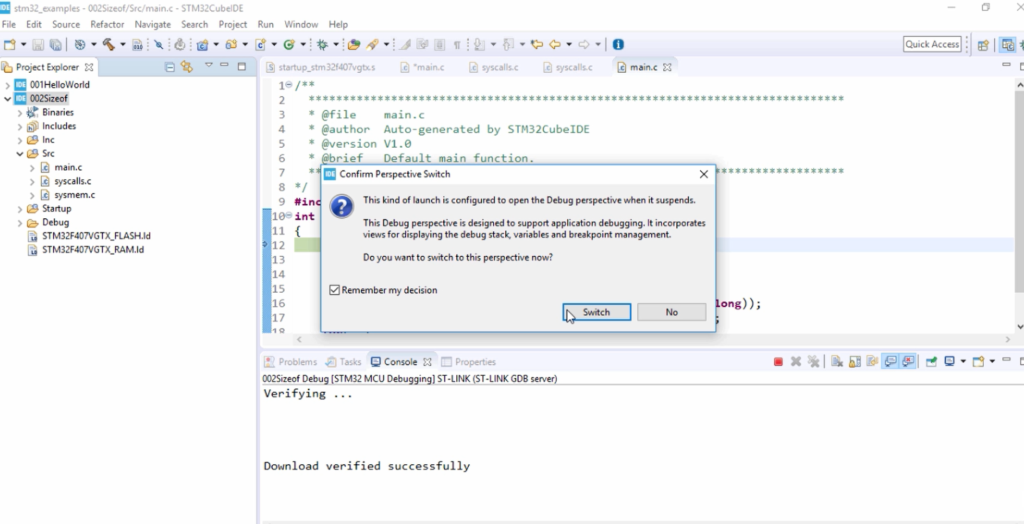
Now it went to the debug mode, and every time, it asks to Confirm Perspective Switch option. I would select this Remember my decision, and I will click Switch here.
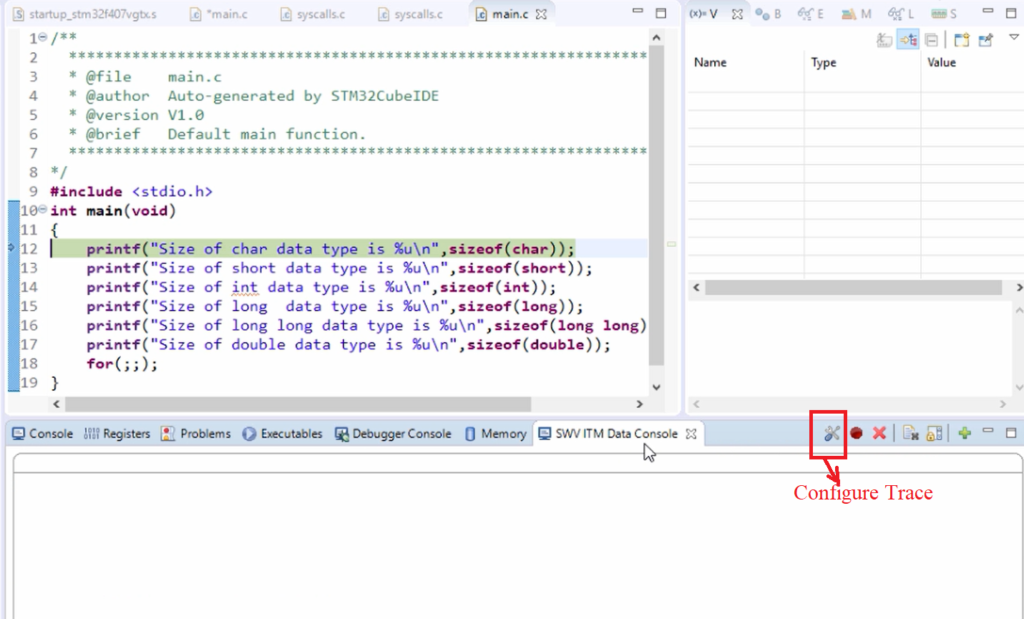
It will appear at the bottom of the SWV ITM Data Console. And then, click on Configure Trace here, as shown in Figure 5.
Select Port 0 here, this is also called channel 0 of ITM.
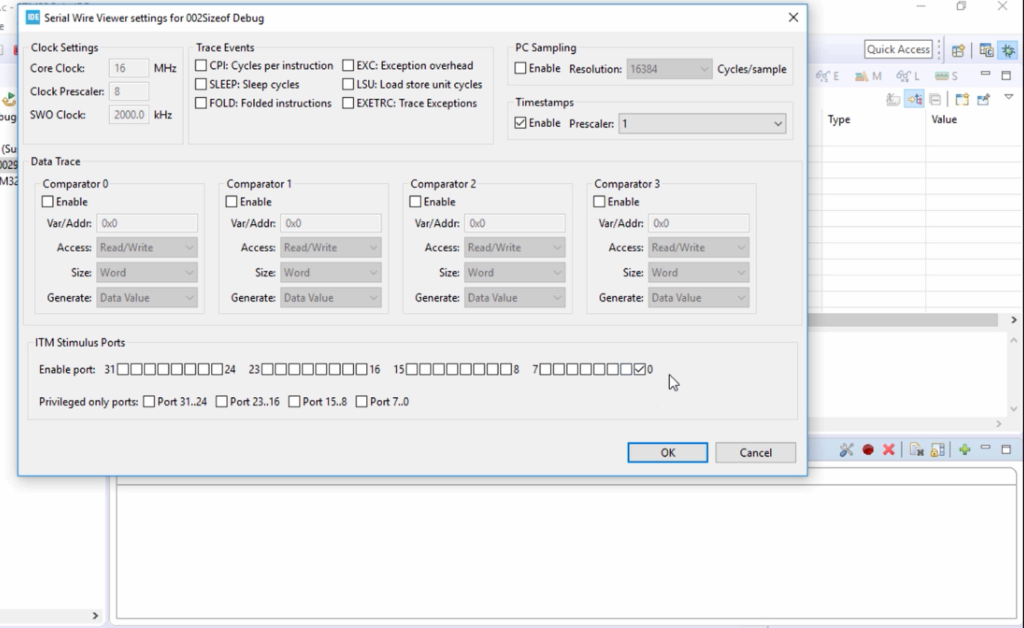
Actually, ITM has 32 channels, and our printf works over channel 0. That’s why we are monitoring channel 0.
Channel 1 can be used for other purposes if you use RTOS or something. So, if you want to get the diagnostic information of some other events, then you can use channel 1, channel 2, channel 3 like that. But by default, channel 0 will be used. That’s why we are monitoring channel 0 here. And then click OK here, as shown in Figure 6.
After that, click on Start Trace.
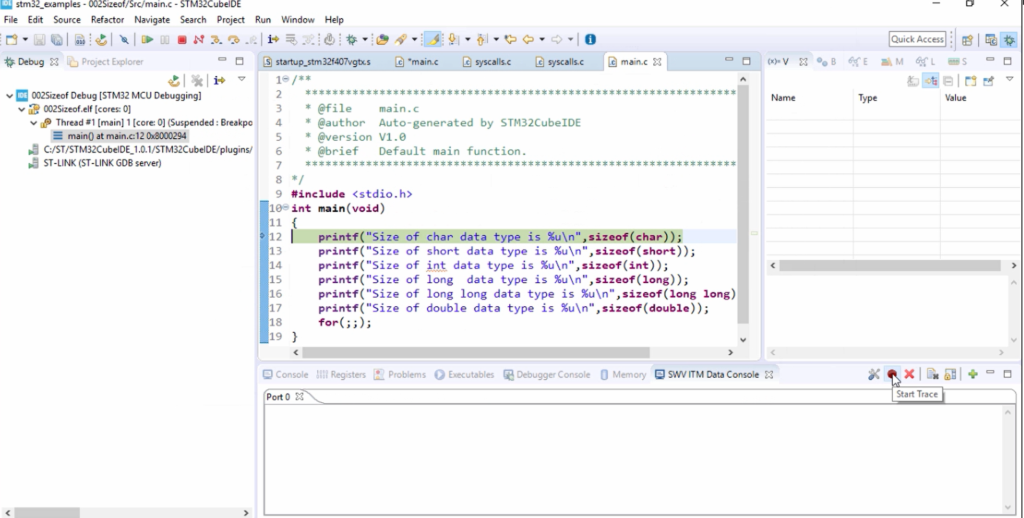
And after that, now let’s use the option that is Step Over, to execute the ‘C’ statements one by one.
Let’s first click this Step Over. The first line is executed, and in the console, it is printed. The size of the char data type is 1. That’s correct.
And next is short. So, the short is 2. For this cross compiler, the size of an int is 4 bytes, long is 4 bytes, long long is 8 bytes, and double is 8 bytes—the output is shown in Figure 8.
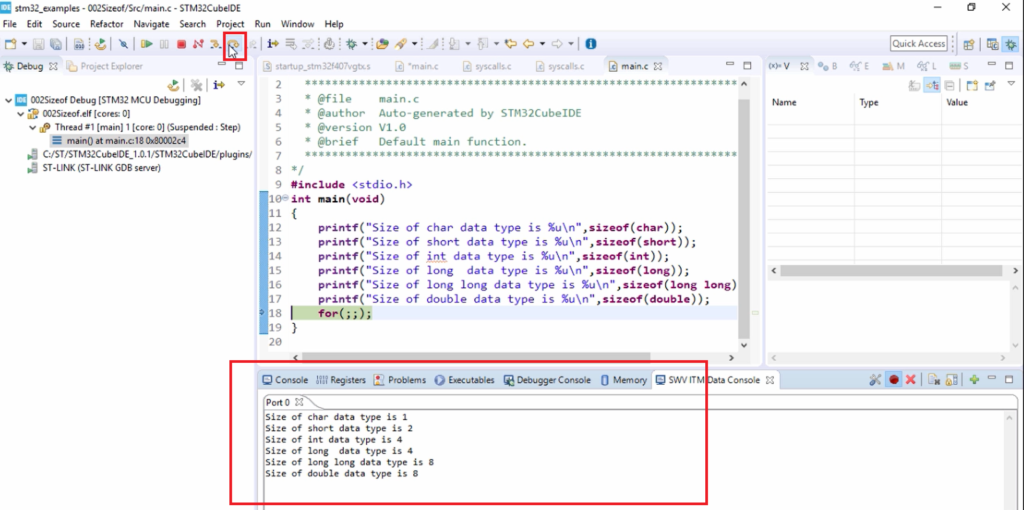
A simple exercise to find out different data sizes of different standard data types available in ‘C’ programming language, and this time we used the cross compiler.
In the following article, let’s explore more about this IDE to browse the memory window, and to understand where exactly the code is stored, and will also analyze some of the disassembly code of our project.
FastBit Embedded Brain Academy Courses
Click here: https://fastbitlab.com/course1

