I2C adding interrupt related macros and interrupt APIs
Let’s start implementing non-blocking data communication APIs to send and receive data with IT.
Steps:
1. Modify the handle structure of I2C, as shown in below code snippet.
/*
*Handle structure for I2Cx peripheral
*/
typedef struct
{
   I2C_RegDef_t *pI2Cx;
   I2C_Config_t I2C_Config;
       uint8_t *pTxBuffer; /* !< To store the app. Tx buffer address > */
       uint8_t *pRxBuffer; /* !< To store the app. Rx buffer address > */
       uint32_t TxLen; /* !< To store Tx len > */
       uint32_t RxLen; /* !< To store Tx len > */
       uint8_t TxRxState; /* !< To store Communication state > */
       uint8_t DevAddr; /* !< To store slave/device address > */
       uint32_t RxSize; /* !< To store Rx size > */
       uint8_t Sr; /* !< To store repeated start value > */
}I2C_Handle_t;
2. Define the application states.
/*
* I2C application states
*/
#define I2C_READY 0
#define I2C_BUSY_IN_RX 1
#define I2C_BUSY_IN_TX 2
Defining application states
3. Go to the I2C_driver.h file of the project and create the prototypes, as shown in Figure 3.
The parameters of the API will be the same, but the difference is the return type of the API should be uint8_t since these APIs return the application’s state. The application’s state may be ready, busy in transmission, or busy in reception, etc.
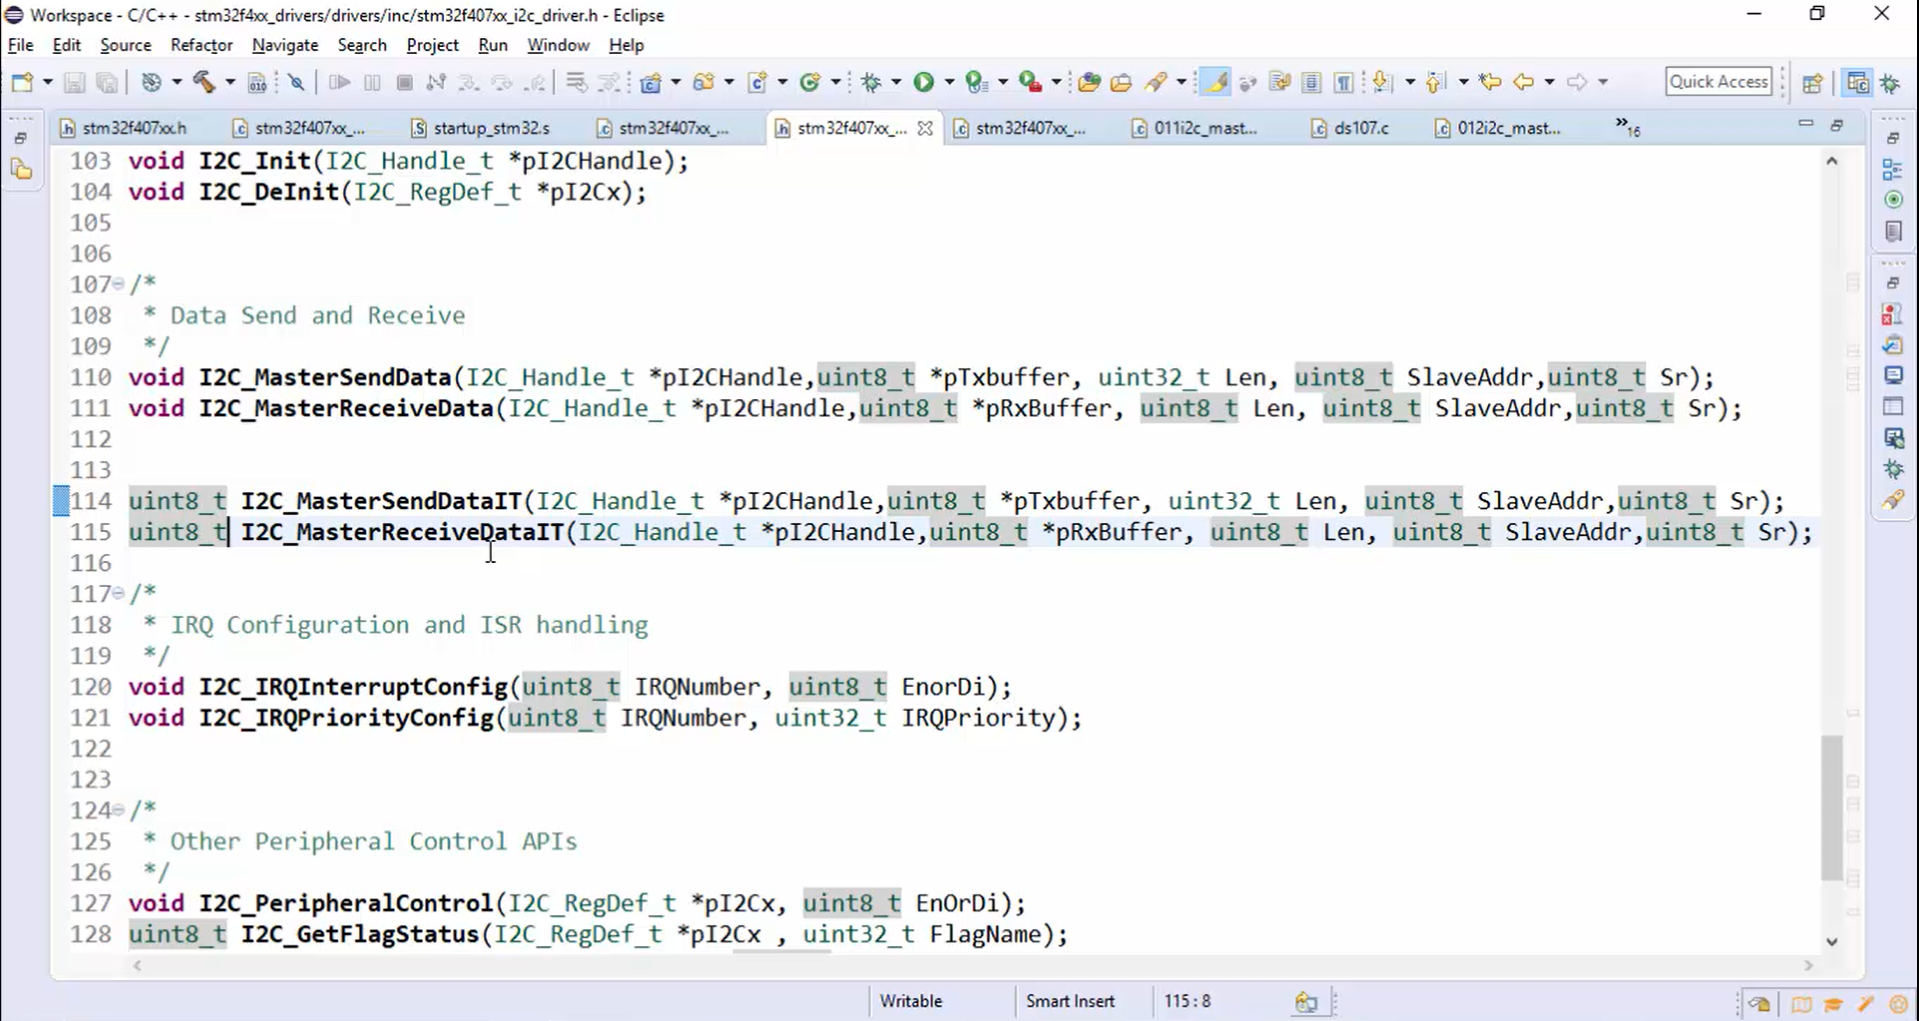
4. Implement the APIs in the driver source file, as shown in Figure 4.

It is necessary to complete a couple of other things before implementing the MasterSendDataIT and MasterReceiveDataIT APIs.
- Add the IRQ number macros in a device-specific header file, as shown in Figure 5.
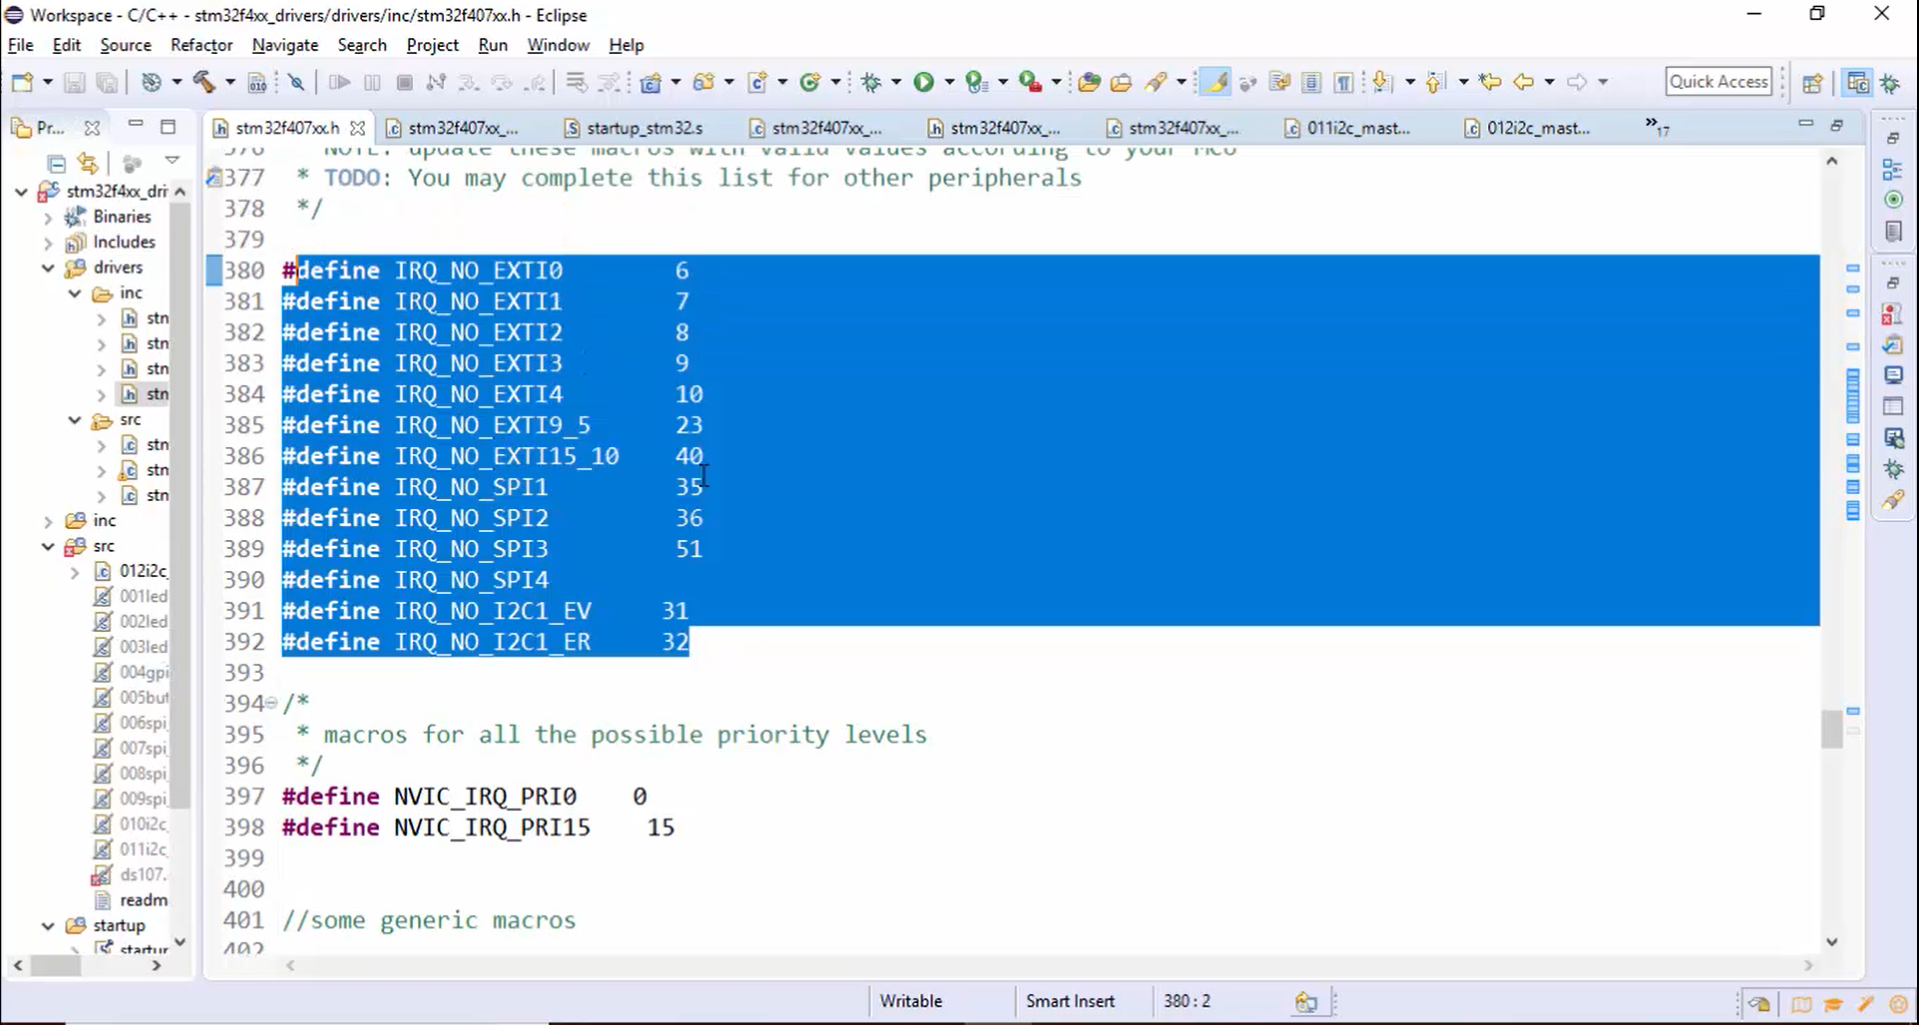
If you want to add more macros related to other I2C peripherals like I2C2 or I2C3, then add those macros after IRQ_NO_I2C1_EV and after IRQ_NO_I2C1_ER macros (Figure 5) along with the appropriate IRQ numbers.
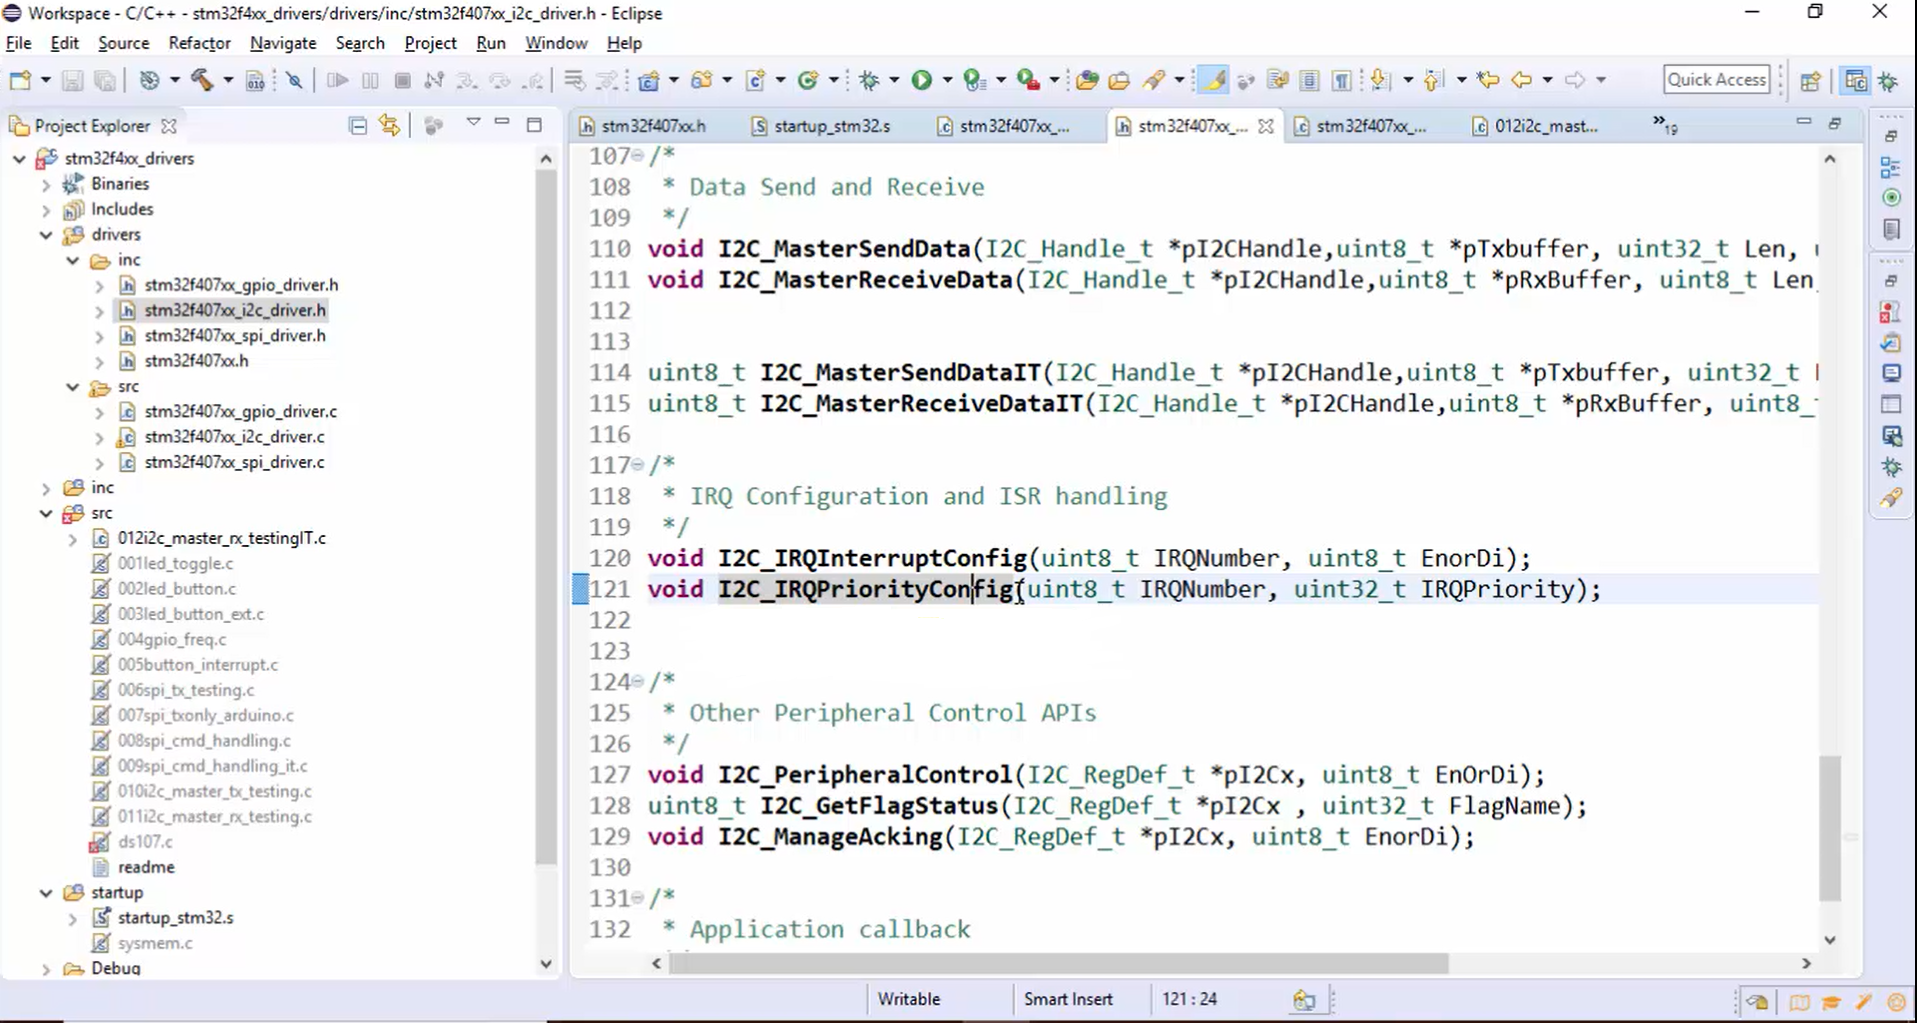
- Implement I2C IRQ interrupt config and I2C IRQ priority config (Figure 6) in I2C_driver.c file.
In the following article, let’s do the Assignment: I2C interrupt APIs implementation.
FastBit Embedded Brain Academy Courses
Click here: https://fastbitlab.com/course1

