RGB Sliders Creation, Alignment, and Customization
In this article, we’ll delve into the implementation of RGB sliders on a simulator interface. These sliders are a key component in creating an interactive RGB color mixer.
In our user interface (UI) design, we aim to build three sliders, each responsible for adjusting one of the RGB color components: Red (R), Green (G), and Blue (B). Let’s get started.

Creating the Red Slider
Our first task is to create the slider for the Red component (R). We can achieve this with the following code snippet:
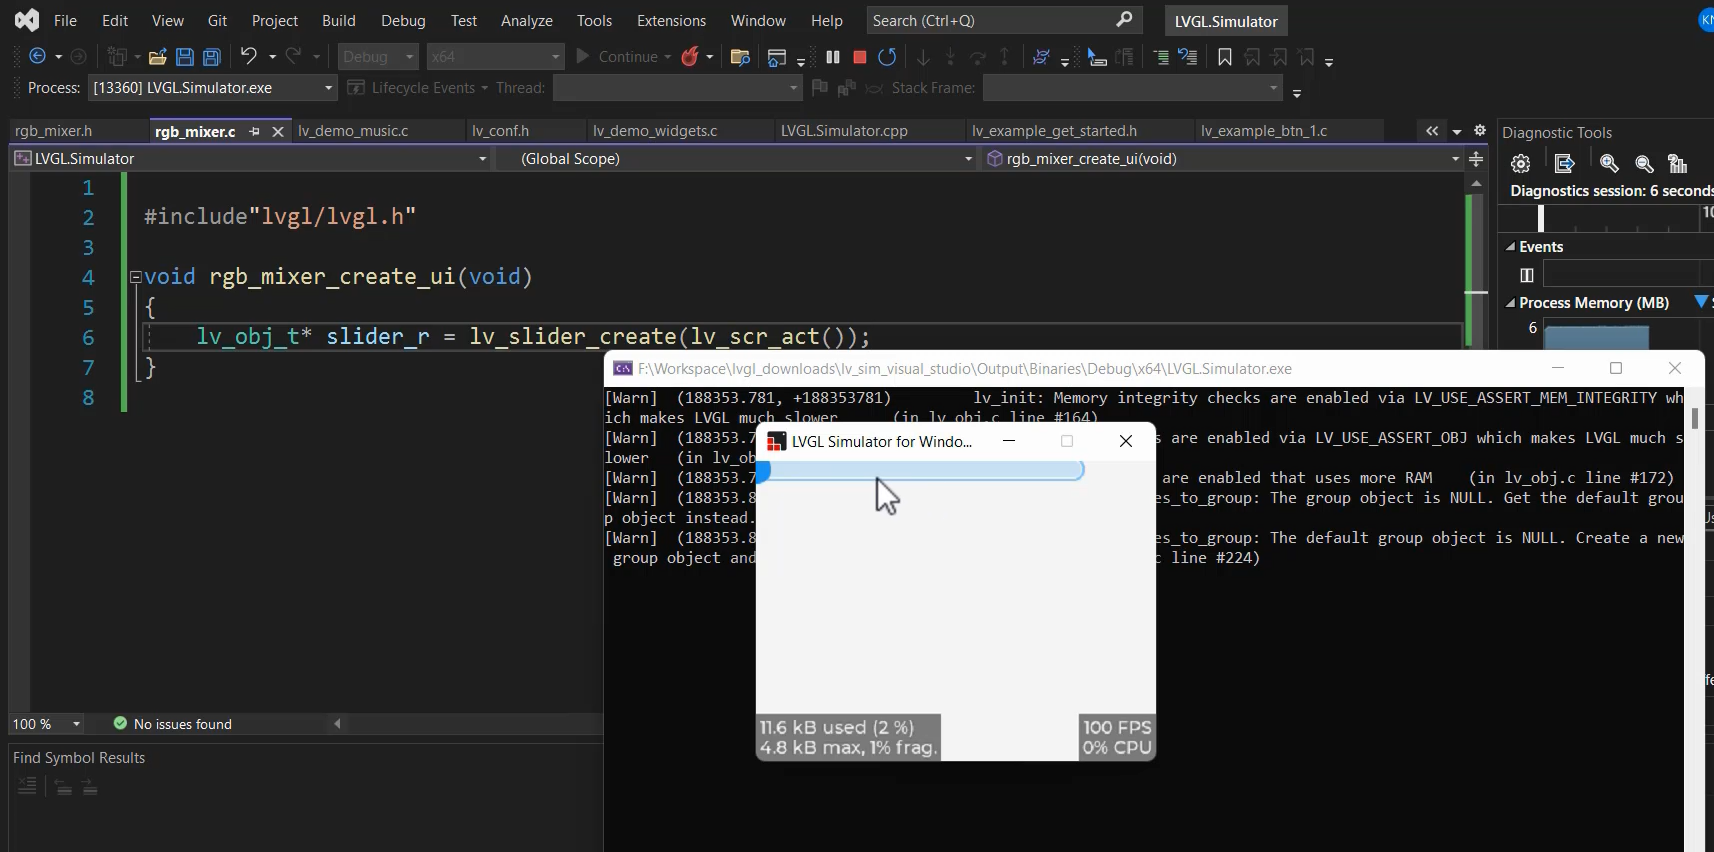
lv_obj_t* slider_r = lv_slider_create(lv_scr_act());
Here, slider_r is a variable that will store the slider object. By using lv_slider_create(), we create the slider itself. The lv_scr_act() function is used to mention the parent of the slider, which means the slider will be placed on the active screen.
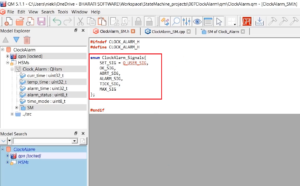
#include"lvgl/lvgl.h"
void rgb_mixer_create_ui(void)
{
    /*Create sliders*/
     lv_obj_t* slider_r = lv_slider_create(lv_scr_act());
}
Creating a Slider
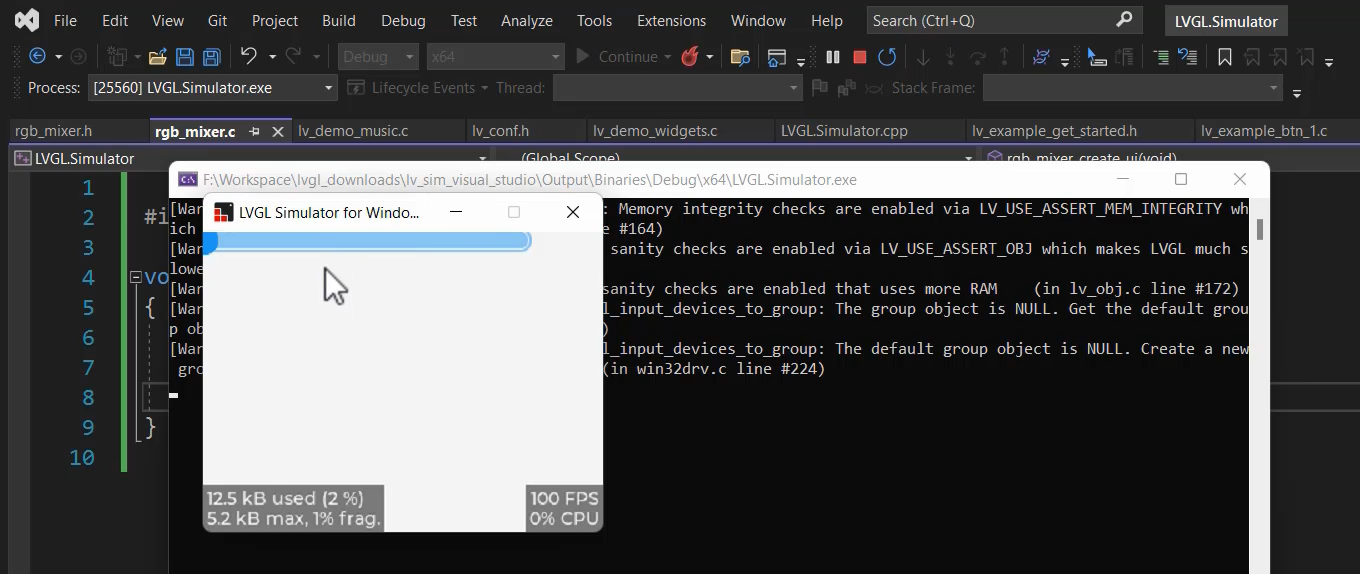
After running the code, you can see the result in Figure 2, where the slider is successfully created and displayed. A slider is a child of the parent, that is the screen. That’s why, when you display the screen, it also displays its child. Screen’s child is a slider.
With these steps, we’ve successfully created the first slider. Now, let’s proceed to create sliders for Green and Blue using a similar approach.
We create the variables slider_g and slider_b to represent the Green and Blue sliders. We use the lv_slider_create() function again, and as before, they will be created as children of the screen.
#include"lvgl/lvgl.h"
void rgb_mixer_create_ui(void)
{
     /*Create sliders*/
    lv_obj_t* slider_r = lv_slider_create(lv_scr_act());
    lv_obj_t* slider_g = lv_slider_create(lv_scr_act());
    lv_obj_t* slider_b = lv_slider_create(lv_scr_act());
}
Slider creation for R, G, B
Slider creation for R, G, B
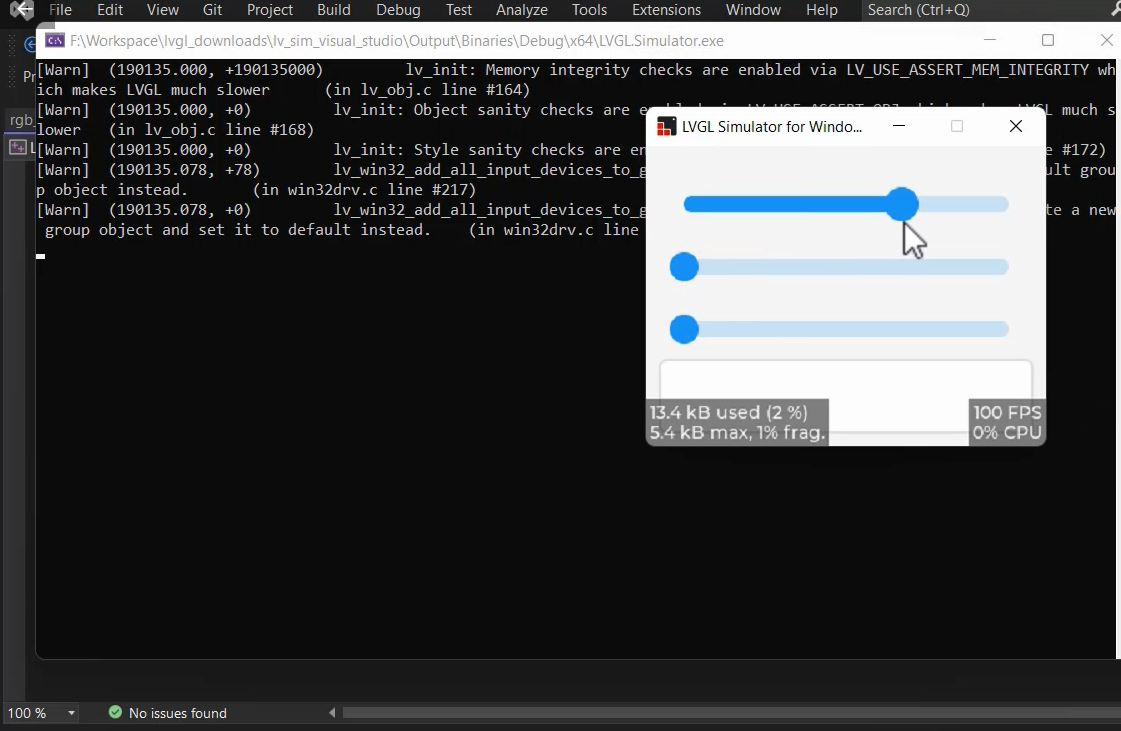
After running the code, you will notice that all three sliders are created, but by default, they are stacked on top of each other.
As a result, it’s not clear which slider corresponds to each RGB component. To address this, we need to position them separately.
To avoid confusion, let’s focus on one slider at a time, and then activate the others when needed. This way, we can differentiate between the RGB sliders easily.
In summary, this article guides us through the process of creating sliders for RGB values. After creating the sliders, we need to arrange them properly on the screen to avoid overlap. By following the steps provided, you will be able to create and manage the sliders effectively.
Aligning the Sliders
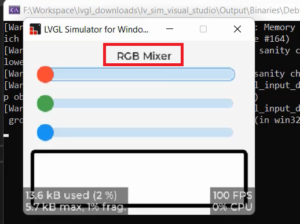
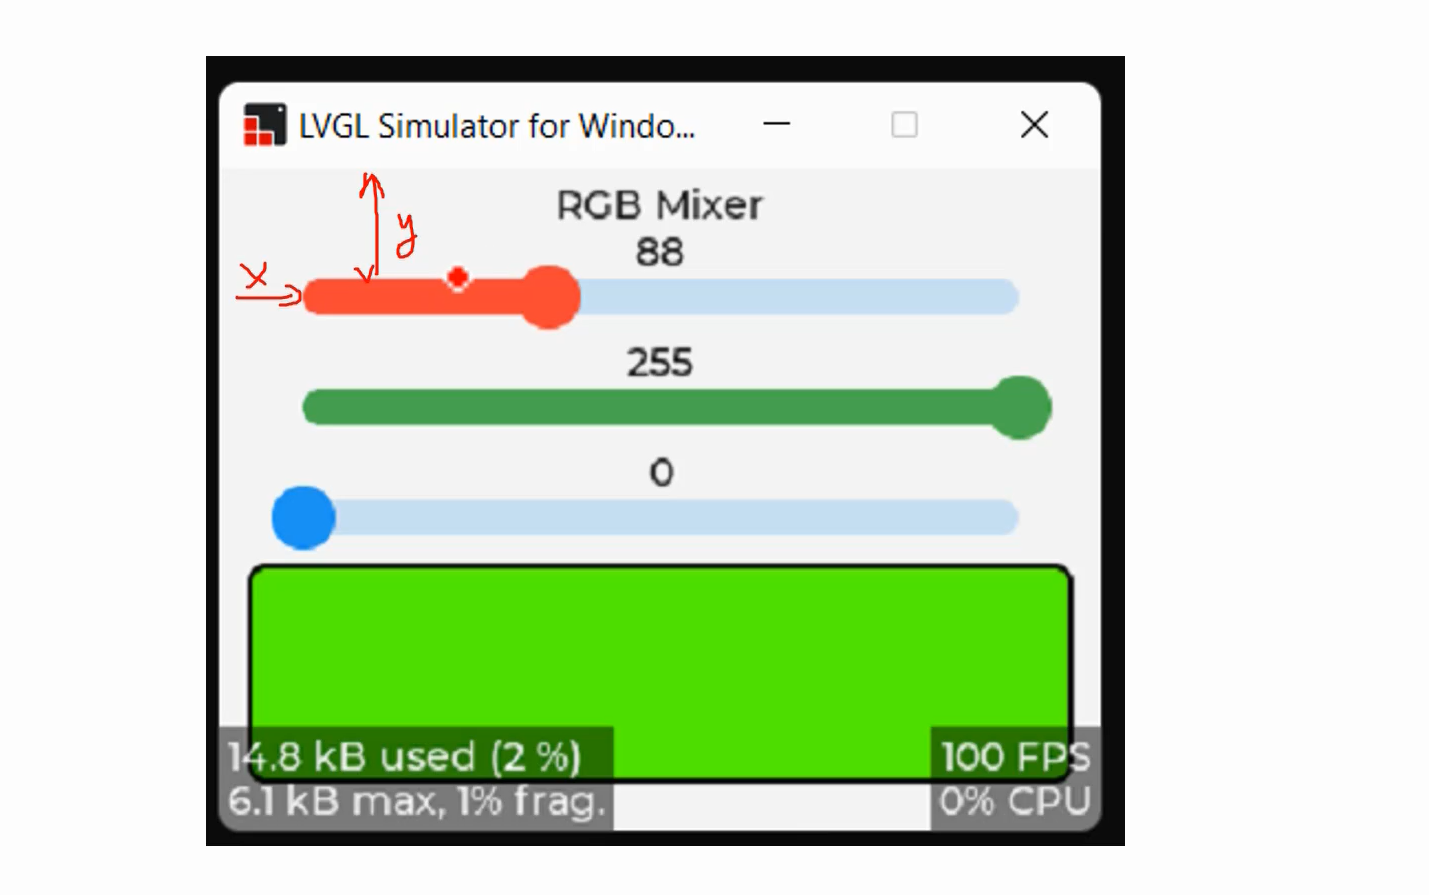
In Figure 4, you can observe some alignments in the RGB Mixer UI. To achieve such alignments, we need to explore object alignment techniques.
As you can observe, there are both y and x offsets. How can we achieve this? To achieve this, you have to explore object alignment.
You won’t find any function like lv_slider_align or anything of the sort. Because it’s a basic property, that’s why, you have to use lv_obj_align.
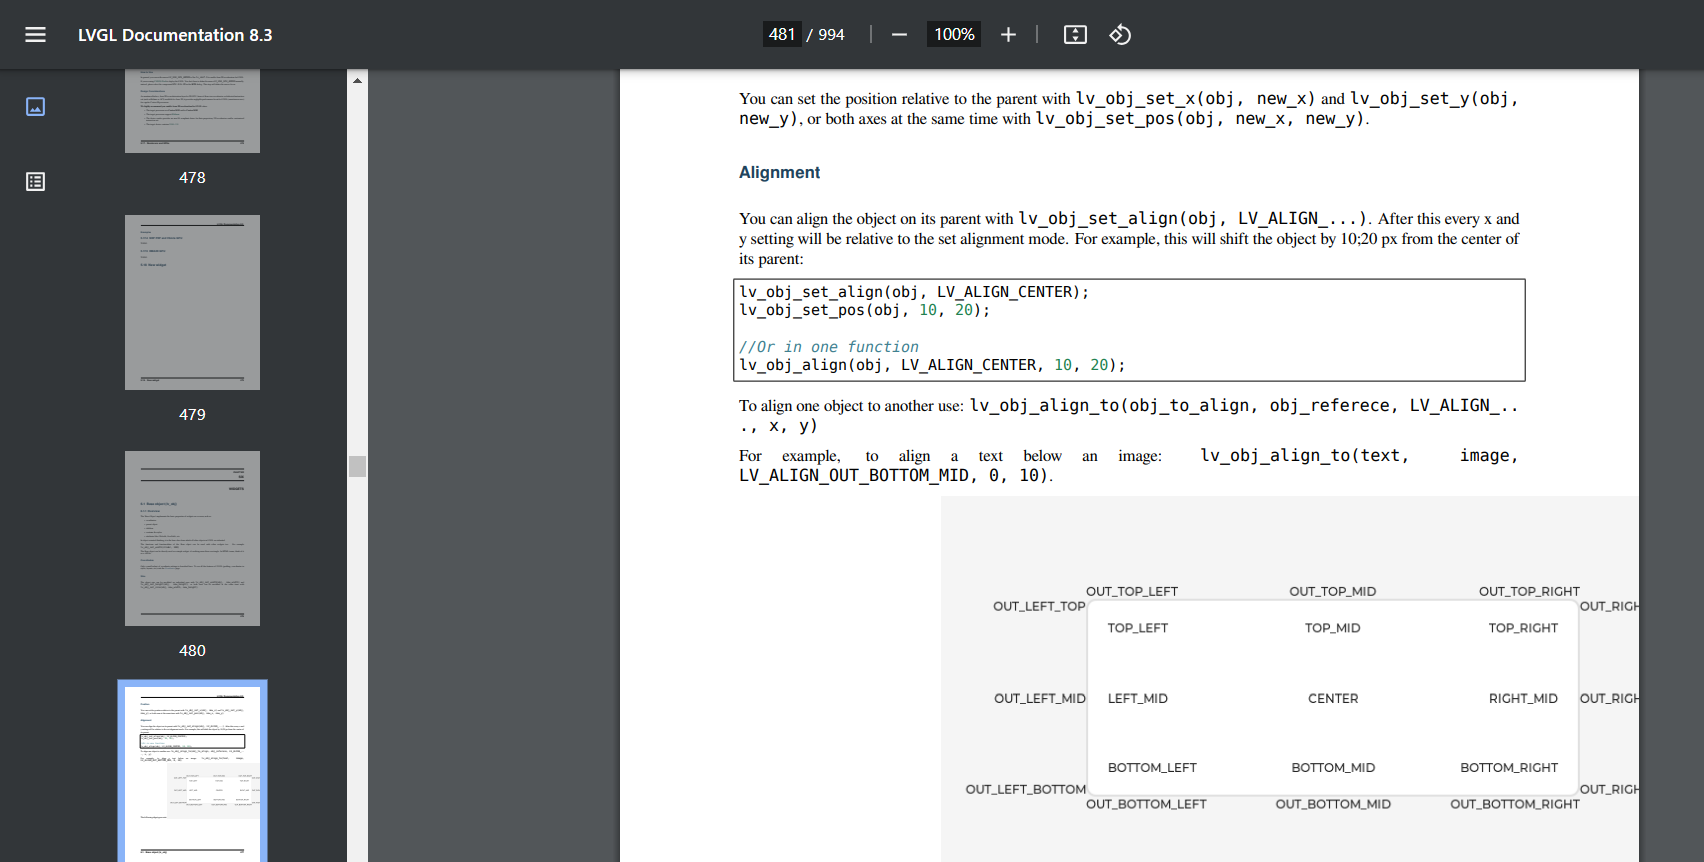
In the LVGL documentation (version 8.3), you’ll find a segment titled Alignment within the Base object section. This is where you can utilize the lv_obj_align function.
Now, let’s employ the lv_obj_align function. Specify the desired alignment type. In this case, I’ll use LV_ALIGN_TOP_MID.
void rgb_mixer_create_ui(void)
{

 /*Create sliders*/
     lv_obj_t* slider_r = lv_slider_create(lv_scr_act());
     lv_obj_t* slider_g = lv_slider_create(lv_scr_act());
     lv_obj_t* slider_b = lv_slider_create(lv_scr_act());


 /*Align sliders*/
     lv_obj_align(slider_r,LV_ALIGN_TOP_MID,0, 40);
     lv_obj_align_to(slider_g, slider_r, LV_ALIGN_TOP_MID,0,40);
     lv_obj_align_to(slider_b, slider_g, LV_ALIGN_TOP_MID, 0, 40);


/* Create a base object to use it as rectangle */
     lv_obj_t* rect = lv_obj_create(lv_scr_act());
     lv_obj_set_size(rect, 300, 80);
     lv_obj_align_to(rect, slider_b, LV_ALIGN_TOP_MID, 0, 30);
}
Slider Creation:
- Three sliders (slider_r, slider_g, and slider_b) are created using the lv_slider_create() function. These sliders will presumably control an RGB colour’s red, green, and blue components.
Slider Alignment:
- The sliders are aligned using the lv_obj_align() and lv_obj_align_to() functions. They are aligned vertically in the middle of the screen (LV_ALIGN_TOP_MID) with a slight gap between them.
- The slider_r is aligned directly at the middle top of the screen.
- The slider_g is aligned to be directly below slider_r, maintaining the vertical alignment and a slight gap.
- The slider_b is aligned to be directly below slider_g, maintaining the vertical alignment and a slight gap.
Rectangle Creation:
- A rectangle object (rect) is created using the lv_obj_create() function. This rectangle will likely display the mixed RGB color.
- Lv_obj_set_size → You can control the width and height using this function. And width and height you have to mention in pixels. The rectangle’s size is 300 pixels wide and 80 pixels tall using the lv_obj_set_size() function.
- The rectangle is aligned directly below slider_b, with a slight gap, using the lv_obj_align_to() function.
You can even explore more LVGL APIs to make it better. This code creates a simple user interface for an RGB color mixer. Users can manipulate three sliders to adjust a colour’s red, green, and blue components. The resulting mixed color is displayed as a rectangle below the sliders. This interface allows users to visually control and see the effects of changing the RGB values on the color output.
In the next article, we’ll explore how to apply colors to various parts of the slider, such as the ‘Main,’ ‘Indicator,’ and ‘Knob’ components, and we’ll also learn how to add labels for a more comprehensive UI. Stay tuned for more!
FastBit Embedded Brain Academy Courses
https://fastbitlab.com/course1