ST Link Firmware Upgrade
Look at the Figure 1, here you Download the ST-Link firmware upgrade software.

This is the software given to all the platforms such as Windows, Mac, and Ubuntu in order to do the firmware upgrade of the ST-Link.
- Software Versatility: Discover the software’s compatibility across various platforms, including Windows, Mac, and Ubuntu.
- Firmware Range: Observe that at the top of the web page the firmware upgrade covers ST-Link, ST-Link/V2, and ST-Link/V2-1. .
In the beginning, they say it is ST-Link/V2-1, and in some other places, they say it as ST-Link/V2-A. Here is a naming mismatch, but please note that the V2-A is nothing but V2-1.
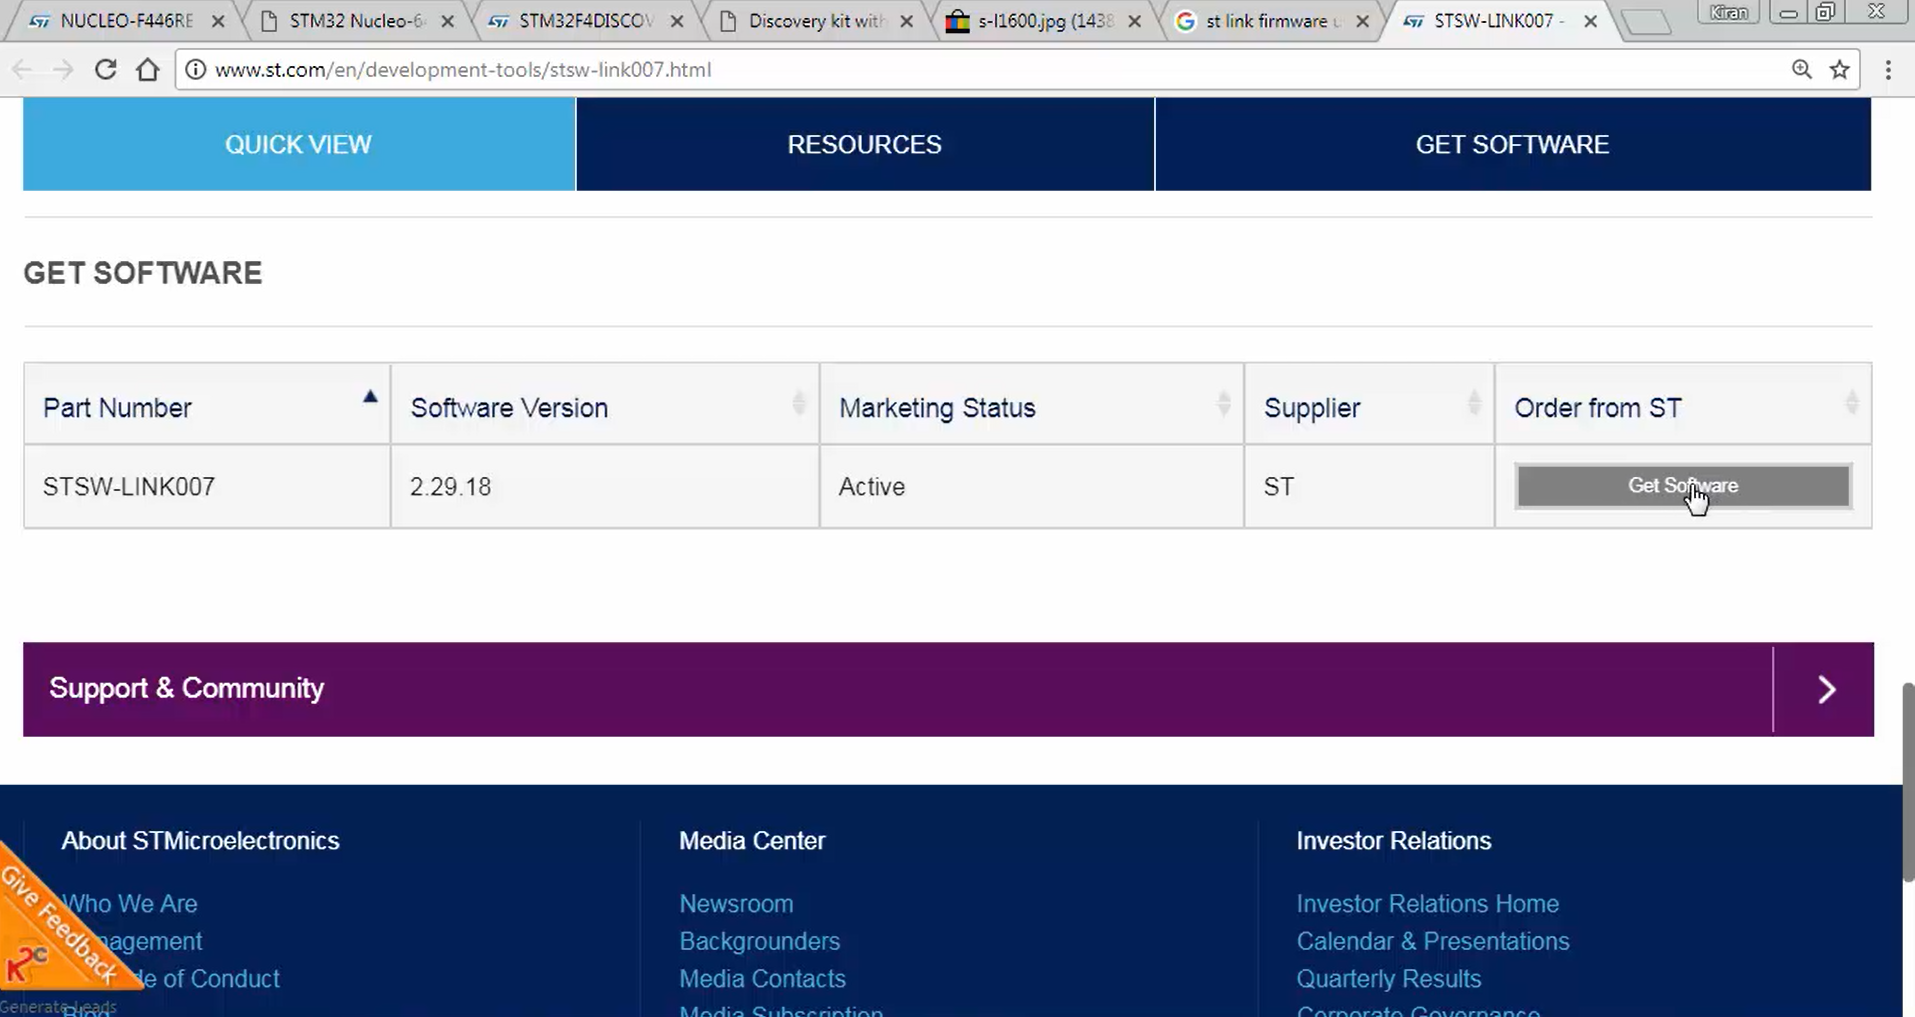
Access the end of the web page to initiate the software download (Figure 2). Click “Get Software” to proceed.
After that, accept the agreement shown in Figure 3.
Then you have to login to download the software. If you don’t have an account, then you have to create one (Figure 4).


Upon download, you’ll receive an archive file (Figure 5).,

For Windows users, execute the downloaded ST-Link upgrade software (Figure 6).
Linux and Mac users can run the executable Jar file (Figure 7) by simply double-clicking on it. Since it is a Jar file, it can run on Linux as well as on MACs.

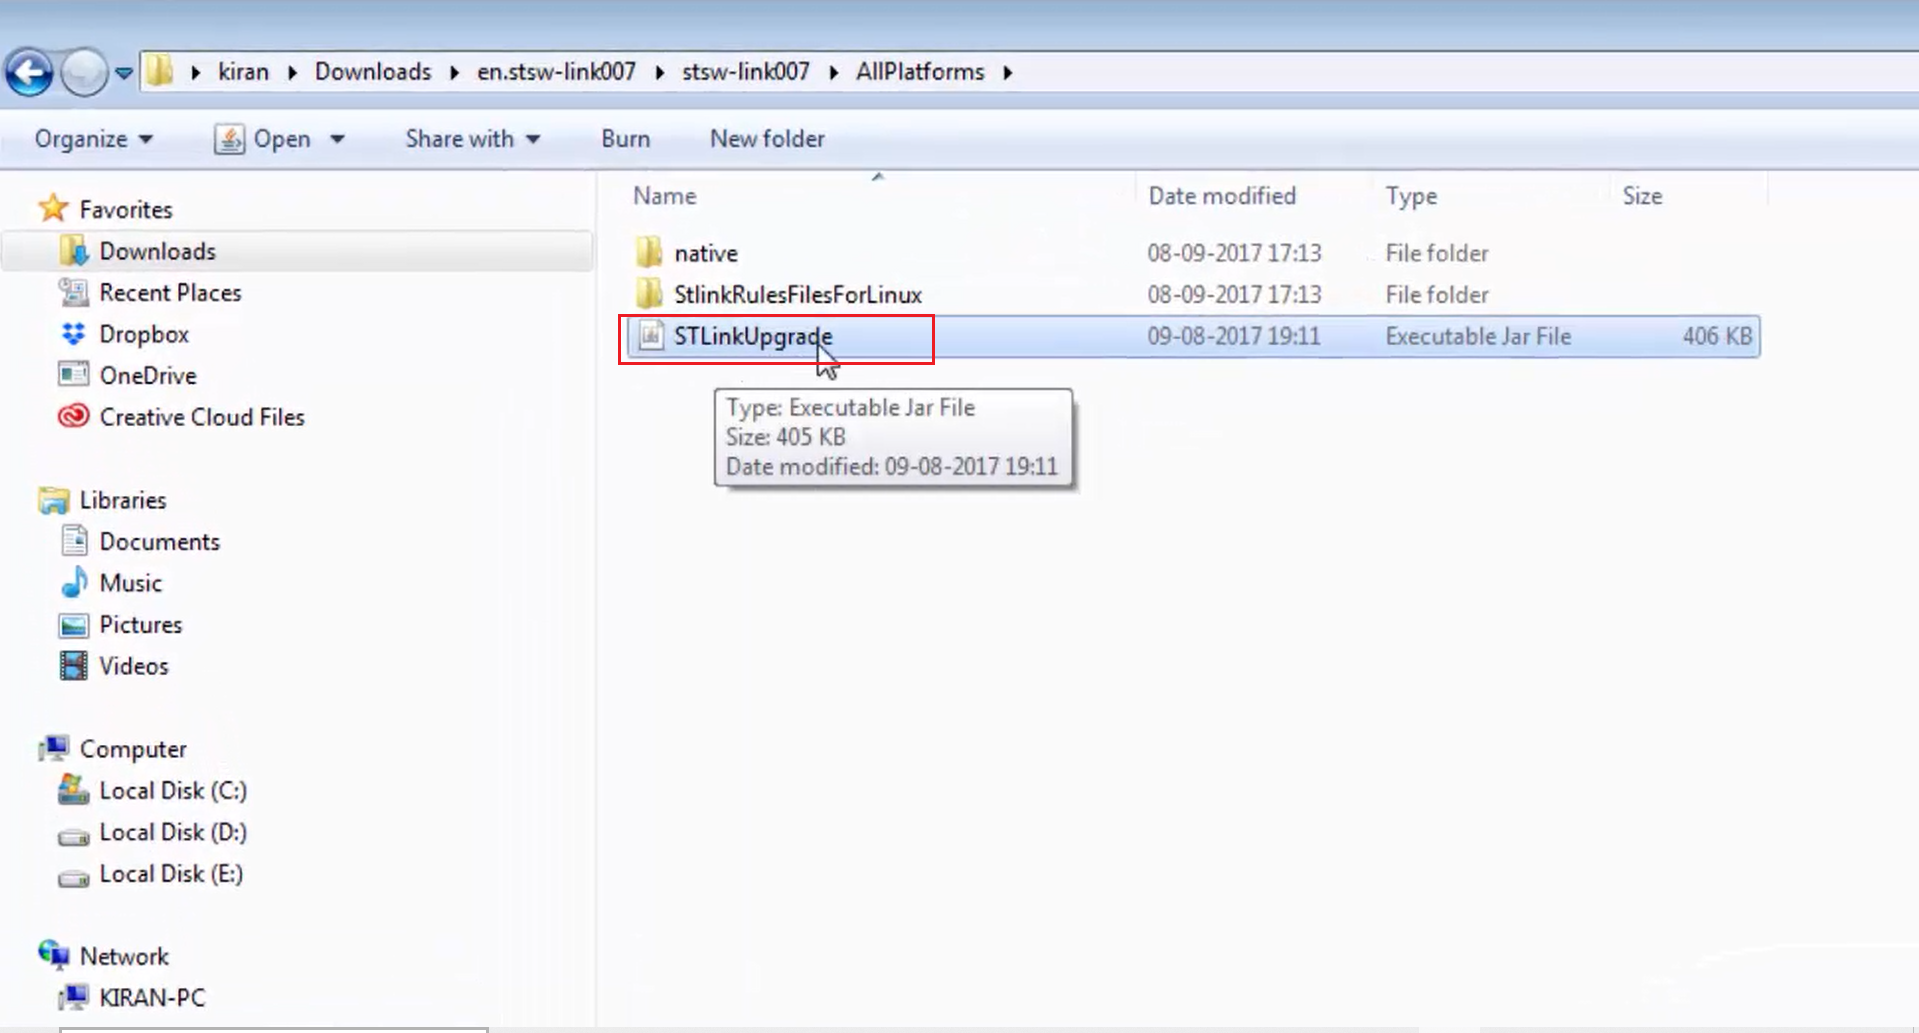
For example, consider that you are on Windows and have not connected your board to the PC. Now just run the Executable Jar file shown in Figure 7.
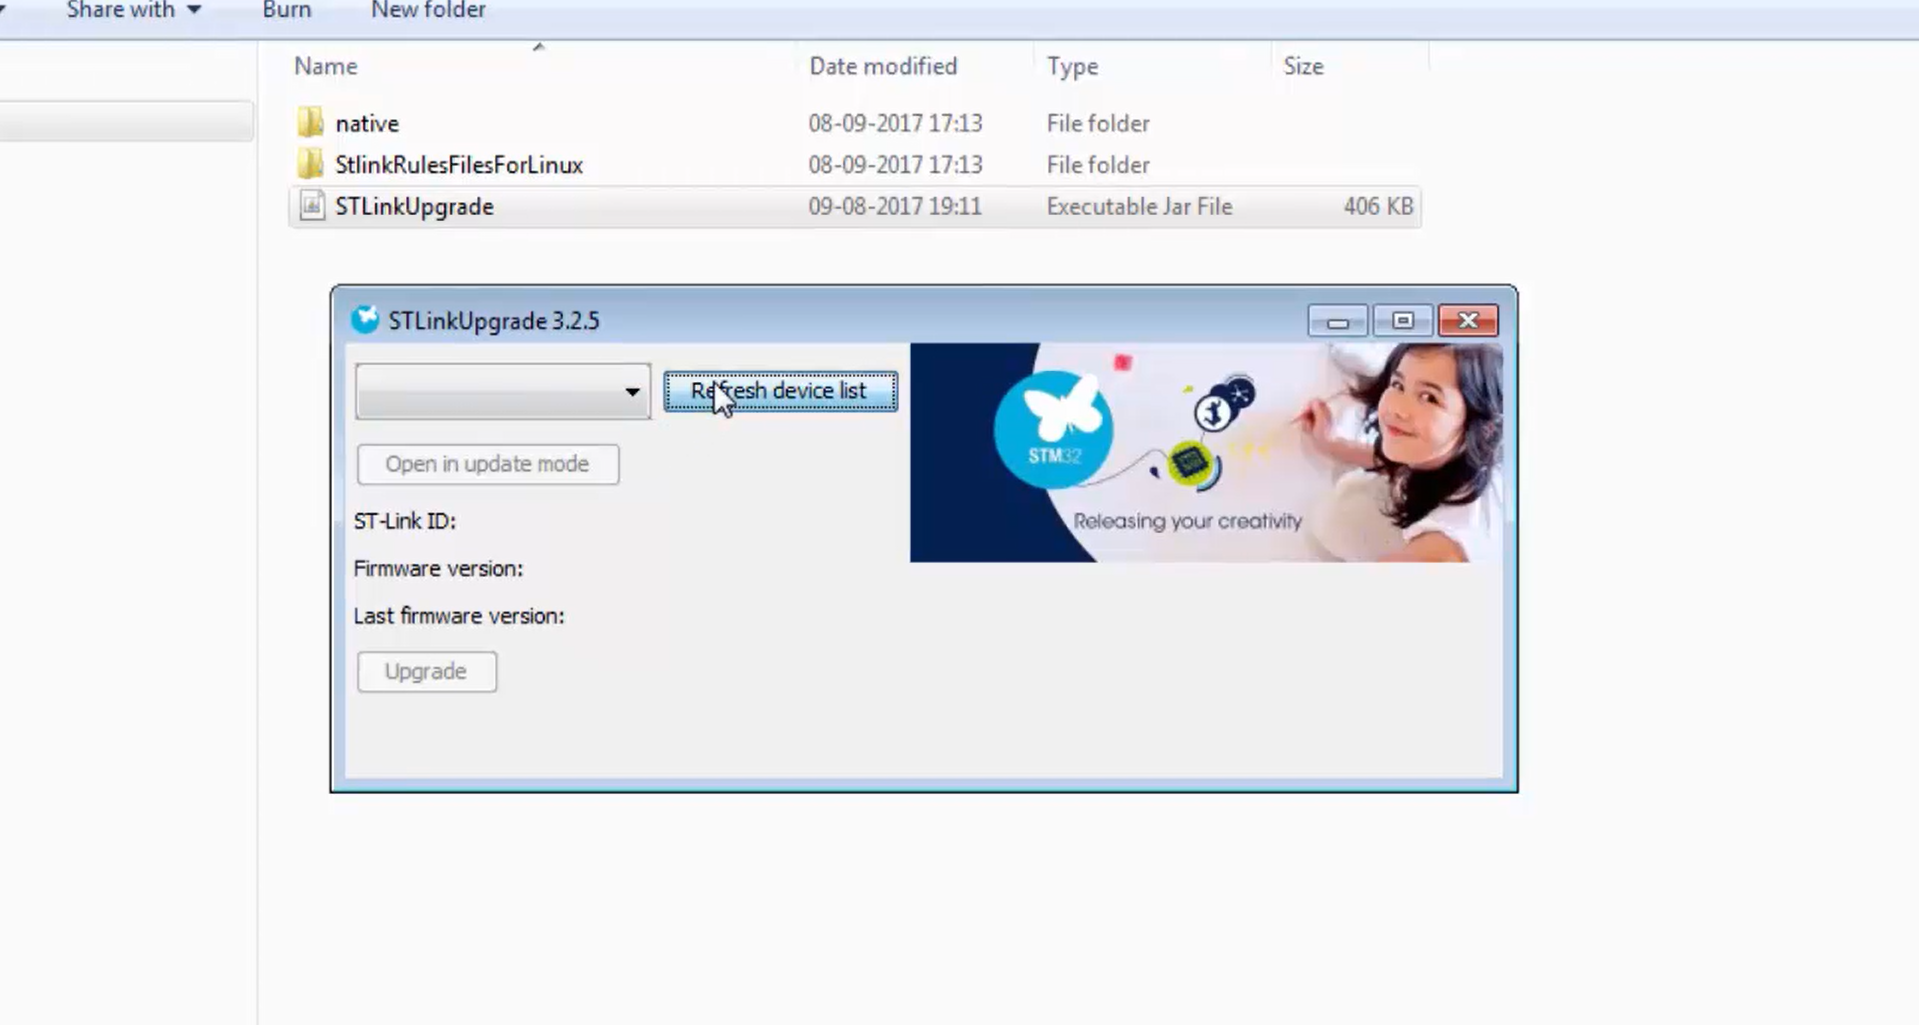
Now observe Figure 8; it is not showing anything.

Connect your board to the PC and click “Refresh Device List” option (Figure 9).
Now it has been detected that the board connected to the PC is actually the old board, which contains the ST-LINK/V2 version (Figure 10).
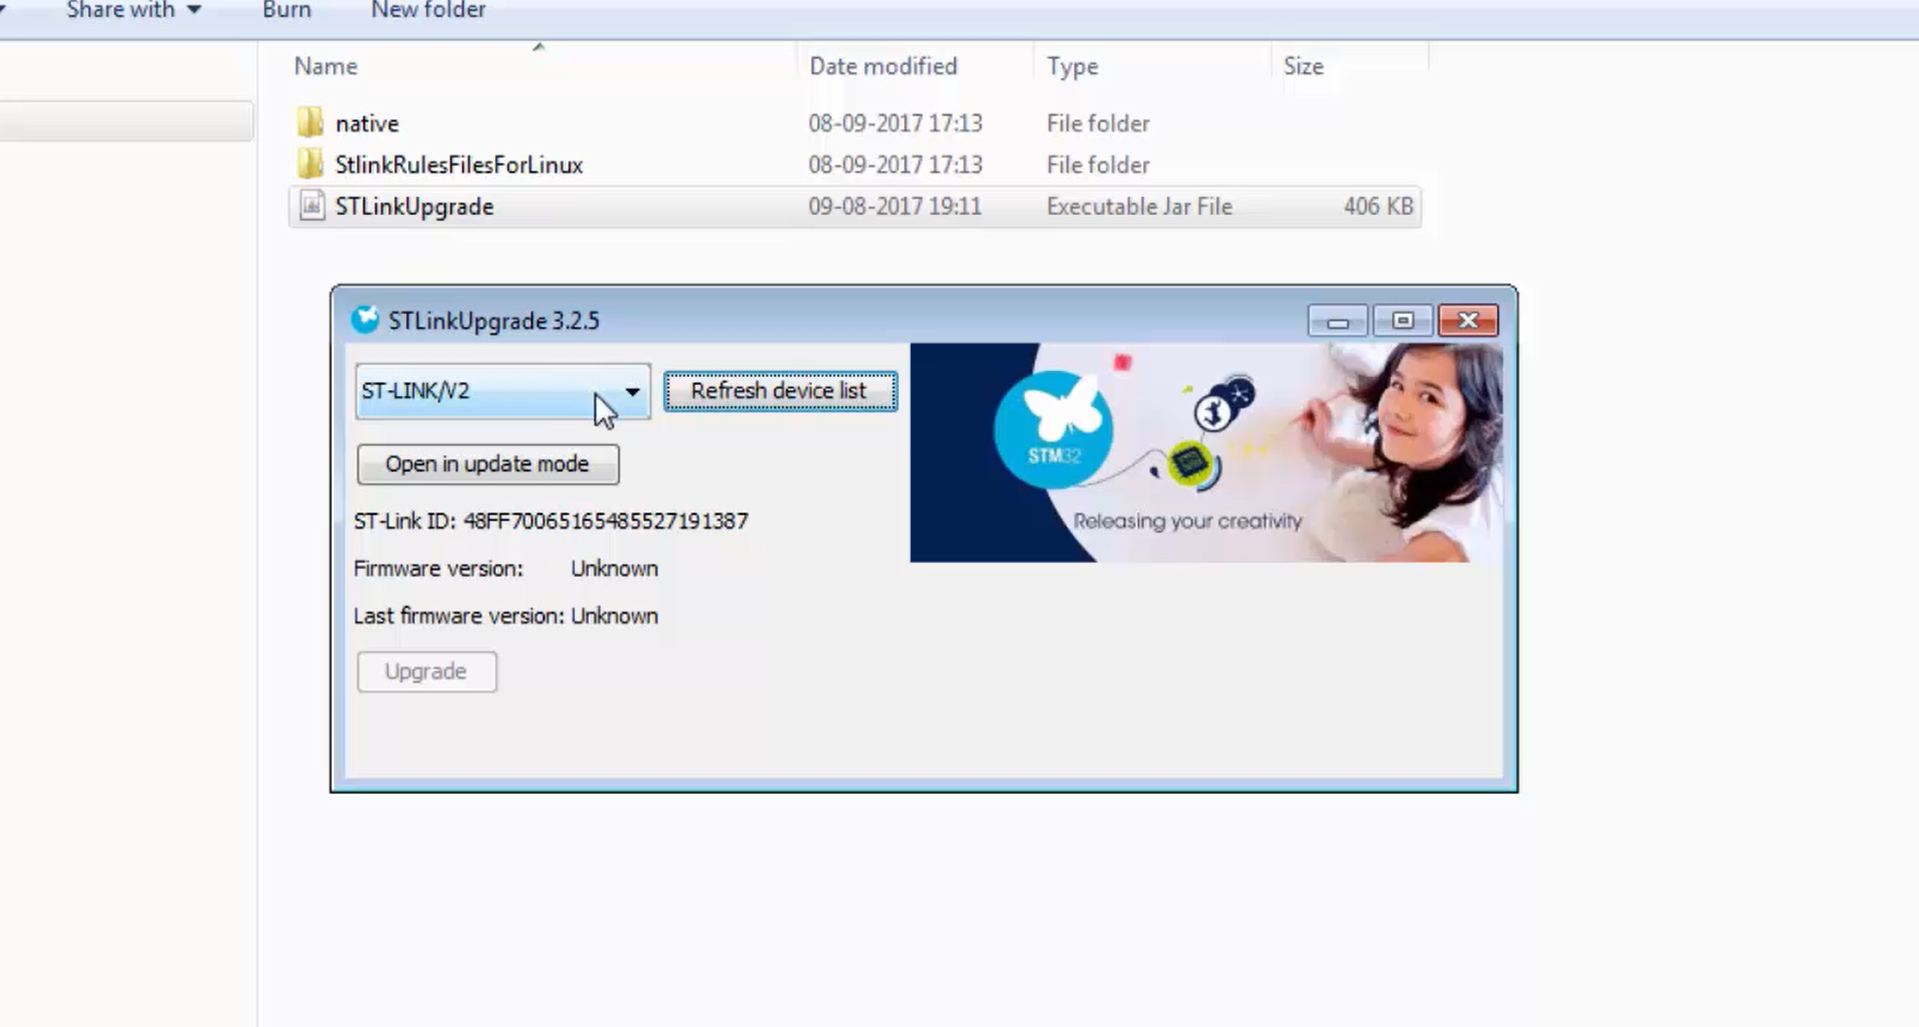
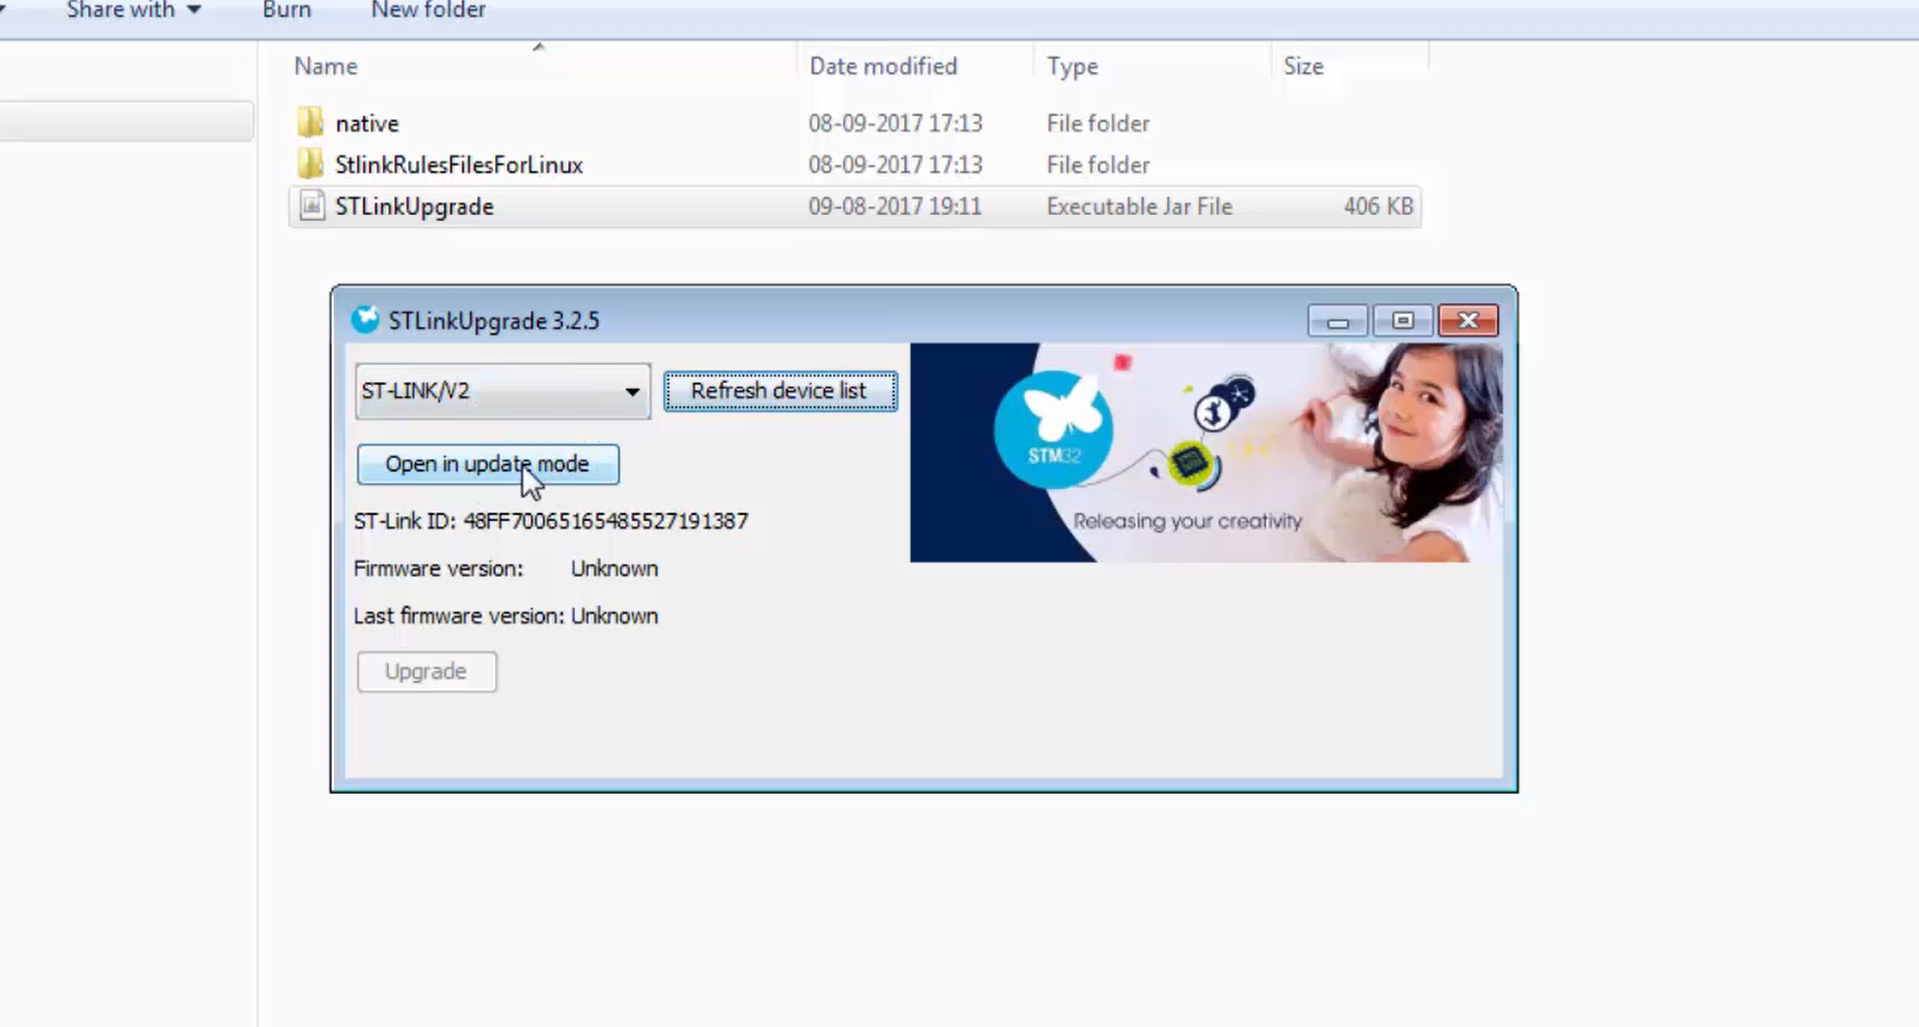
Then Click “Open in Update Mode” option (Figure 11) to proceed..
When you do this?
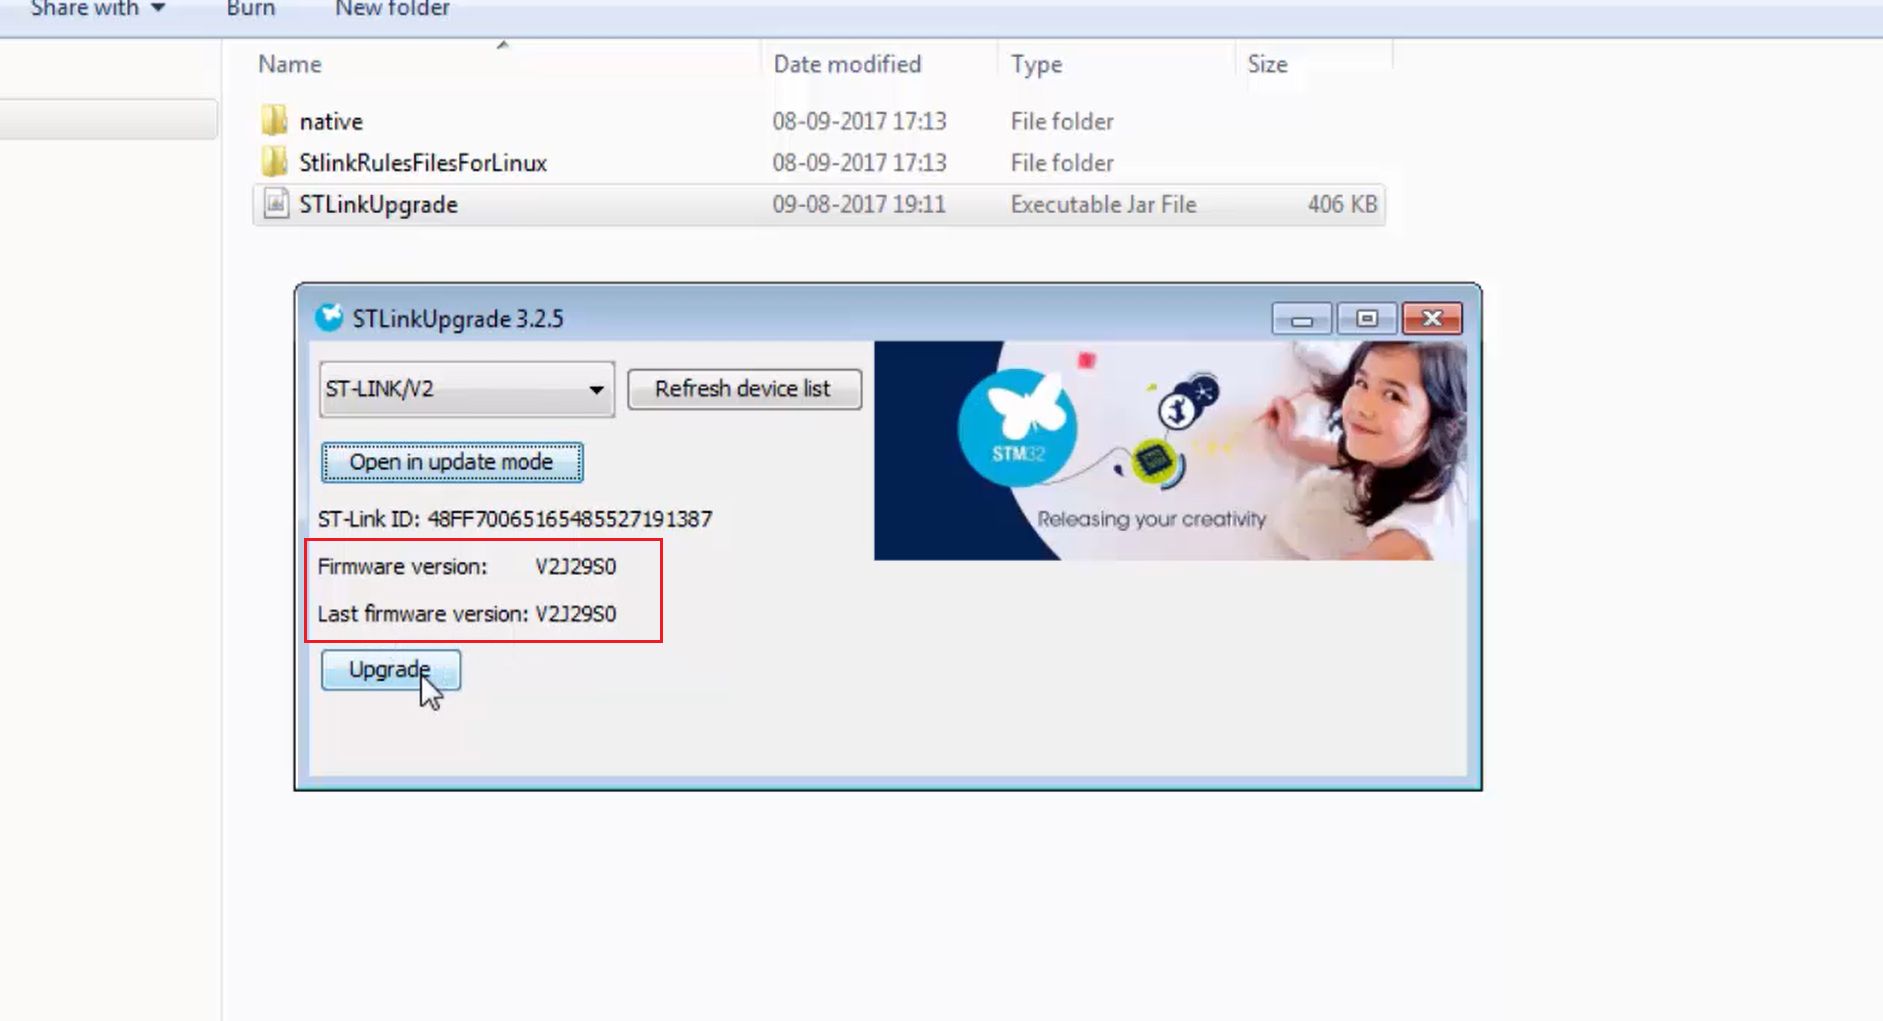
You can see that the firmware version running on the board is V2J2950, and the latest available version is also that one only since it has already been updated. You may see a mismatch here.
In case of a version mismatch, click “Upgrade” to update the firmware (Figure 12).
This will upgrade the firmware, which is running on the ST-Link microcontroller, and if you are using a newer board, then it may show you V2-1 instead of V2.
Now the upgrade is successful, now close the popup window and restart your microcontroller. This is the firmware upgrade procedure for discovery.
If you have a Nucleo board, then also the procedure is the same, and the software is also the same.
The Nucleo board is based on the ST-LINK/V2-1 debugger and programmer. Nucleo came after the discovery. That’s why it comes with V2-1.
Now for Nucleo, also let’s run the ST-Link once again. Connect your board to the PC and click on the refresh device list. From Figure 13, you can see that it is showing V2-1.

It is showing that the firmware version is unknown. So, just click on the open in update mode option and wait until it installs some drivers. Now it is saying that the current firmware version on the board is 28, available is 29. Just click on upgrade to the newer firmware version (Figure 14).
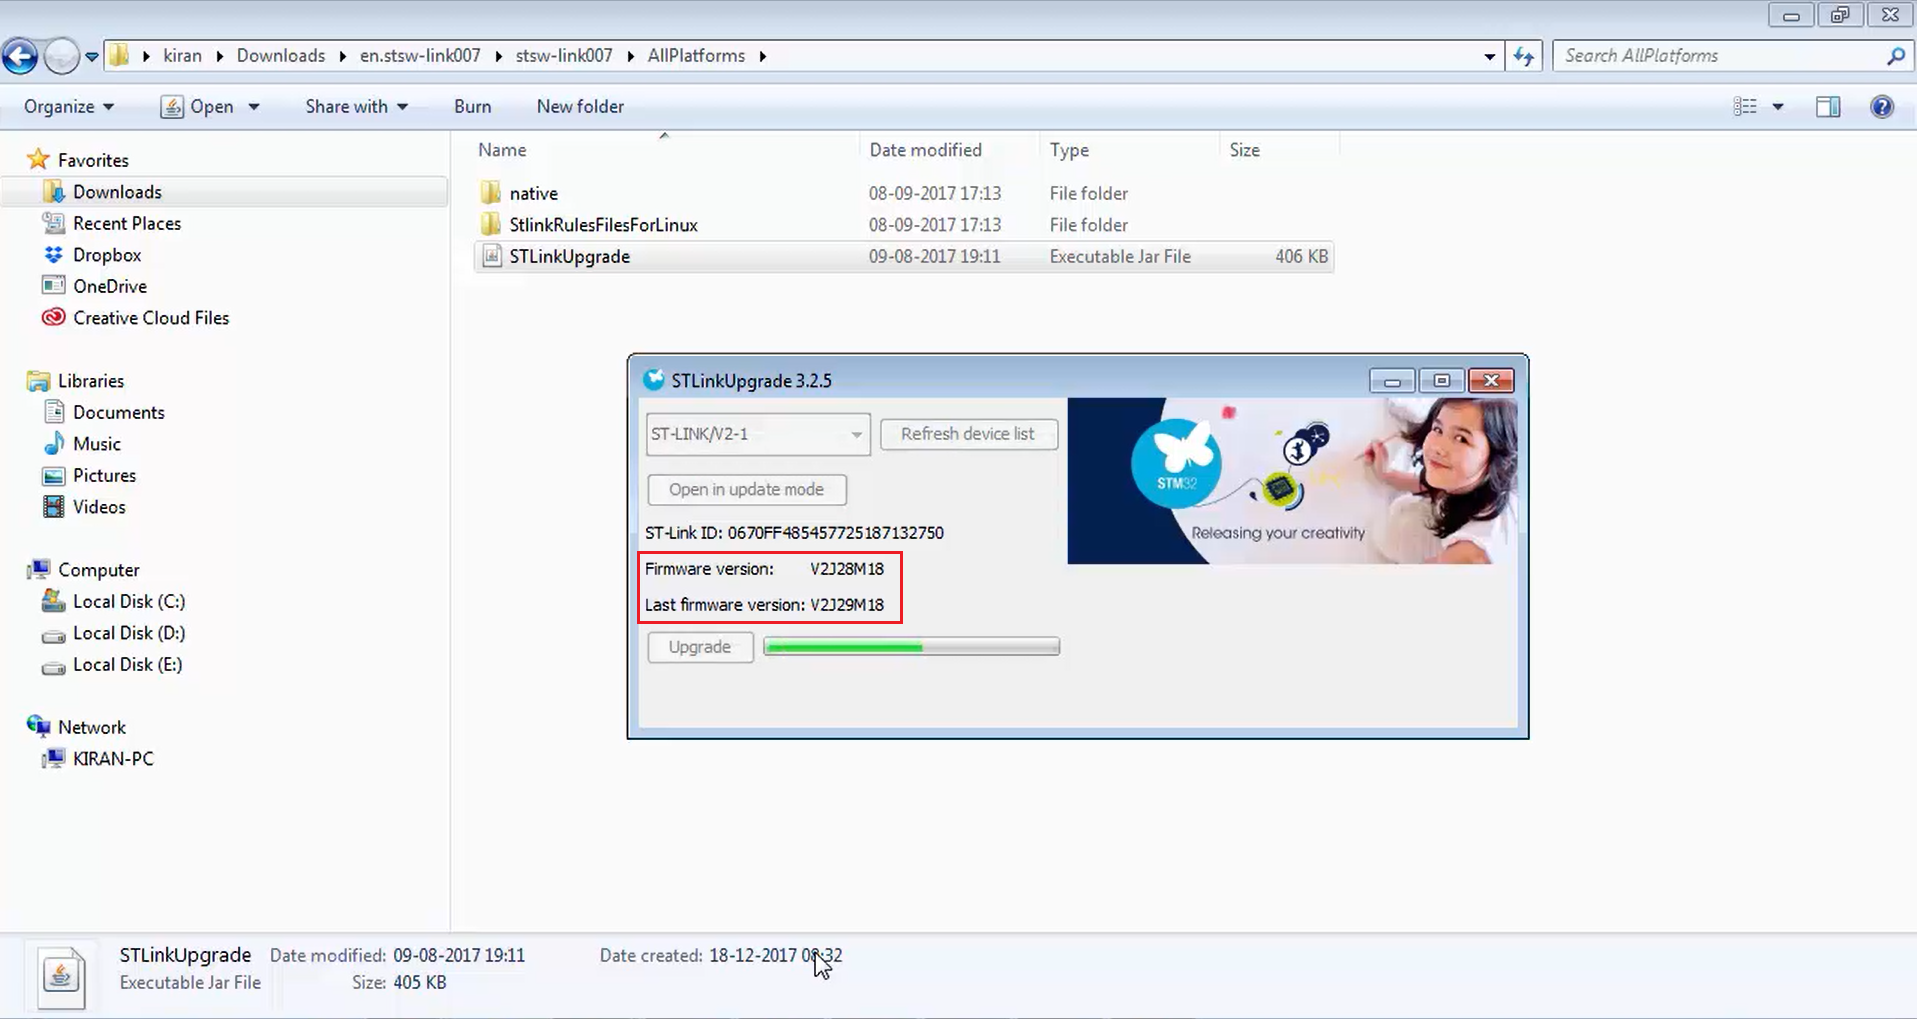
Upon successful upgrade, close the popup window and restart your microcontroller. .
These firmware upgrade steps have to be done in order to use your board successfully with this course.
Note: Similar firmware upgrade steps apply to Nucleo boards as well, ensuring consistency across platforms.
In the next article, let’s Download the Open STM32 System Workbench.
FastBit Embedded Brain Academy Courses
click here: https://fastbitlab.com/course1


