Understanding ARM Semi-hosting feature
Now, let’s print some data by the task handlers, and let’s use some printf statements in order to print some logs. For that, you have to use ARM semihosting.
ARM semihosting:
ARM semihosting is a feature of the ARM Cortex M platform. As the name itself indicates, this feature takes the help of host software (Figure 1).
We are using STM32 system workbench IDE with debugger and other features as host software. You have to take the help of the host software to exchange some debug-related information or message.
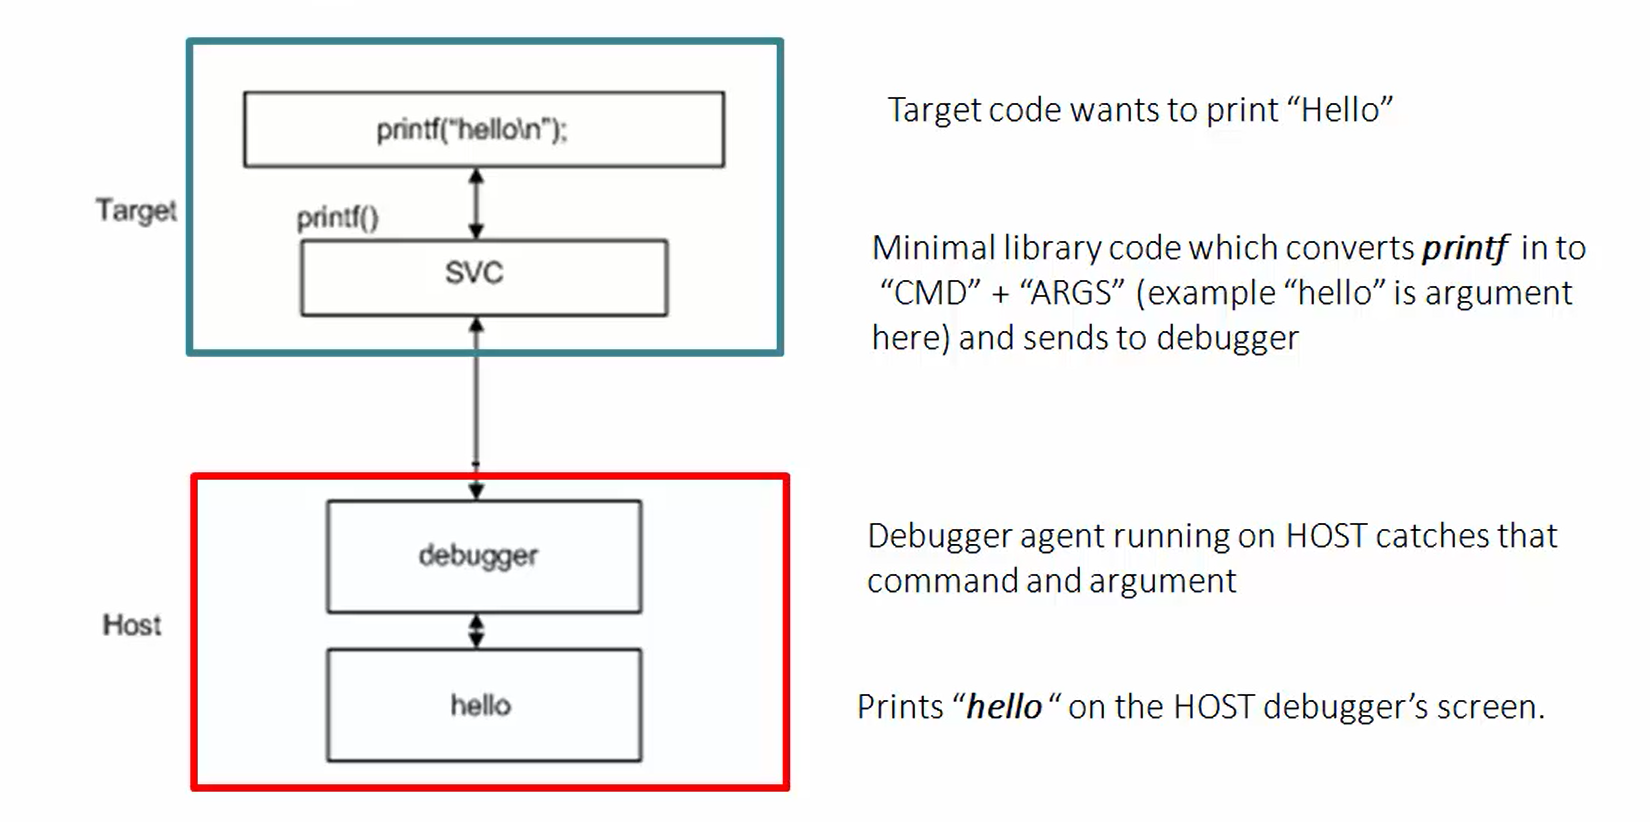
For example, if you use printf in your embedded software, which is running on the target hardware. Let’s say the target hardware is a Nucleo board. Then there is no need to implement printf library code in your embedded software, which runs on the target. That would consume lots of space. So, the technique here is you can use printf without using the native printf library on your embedded software. But take the help of the printf library present in the host or to be specifically present in the host debugging software, which is your eclipse. This technique is called ARM semihosting.
We actually use the technique of message transfers from embedded software running on your hardware to the IDE to implement some of the C library functions such as printf, scanf, etc. This is what we call as semihosting.
The semihosting is a mechanism that allows target boards to exchange messages from the embedded software to the host computer, which is running a debugger. Remember that this semihosting works only when you put the IDE in debugging mode.
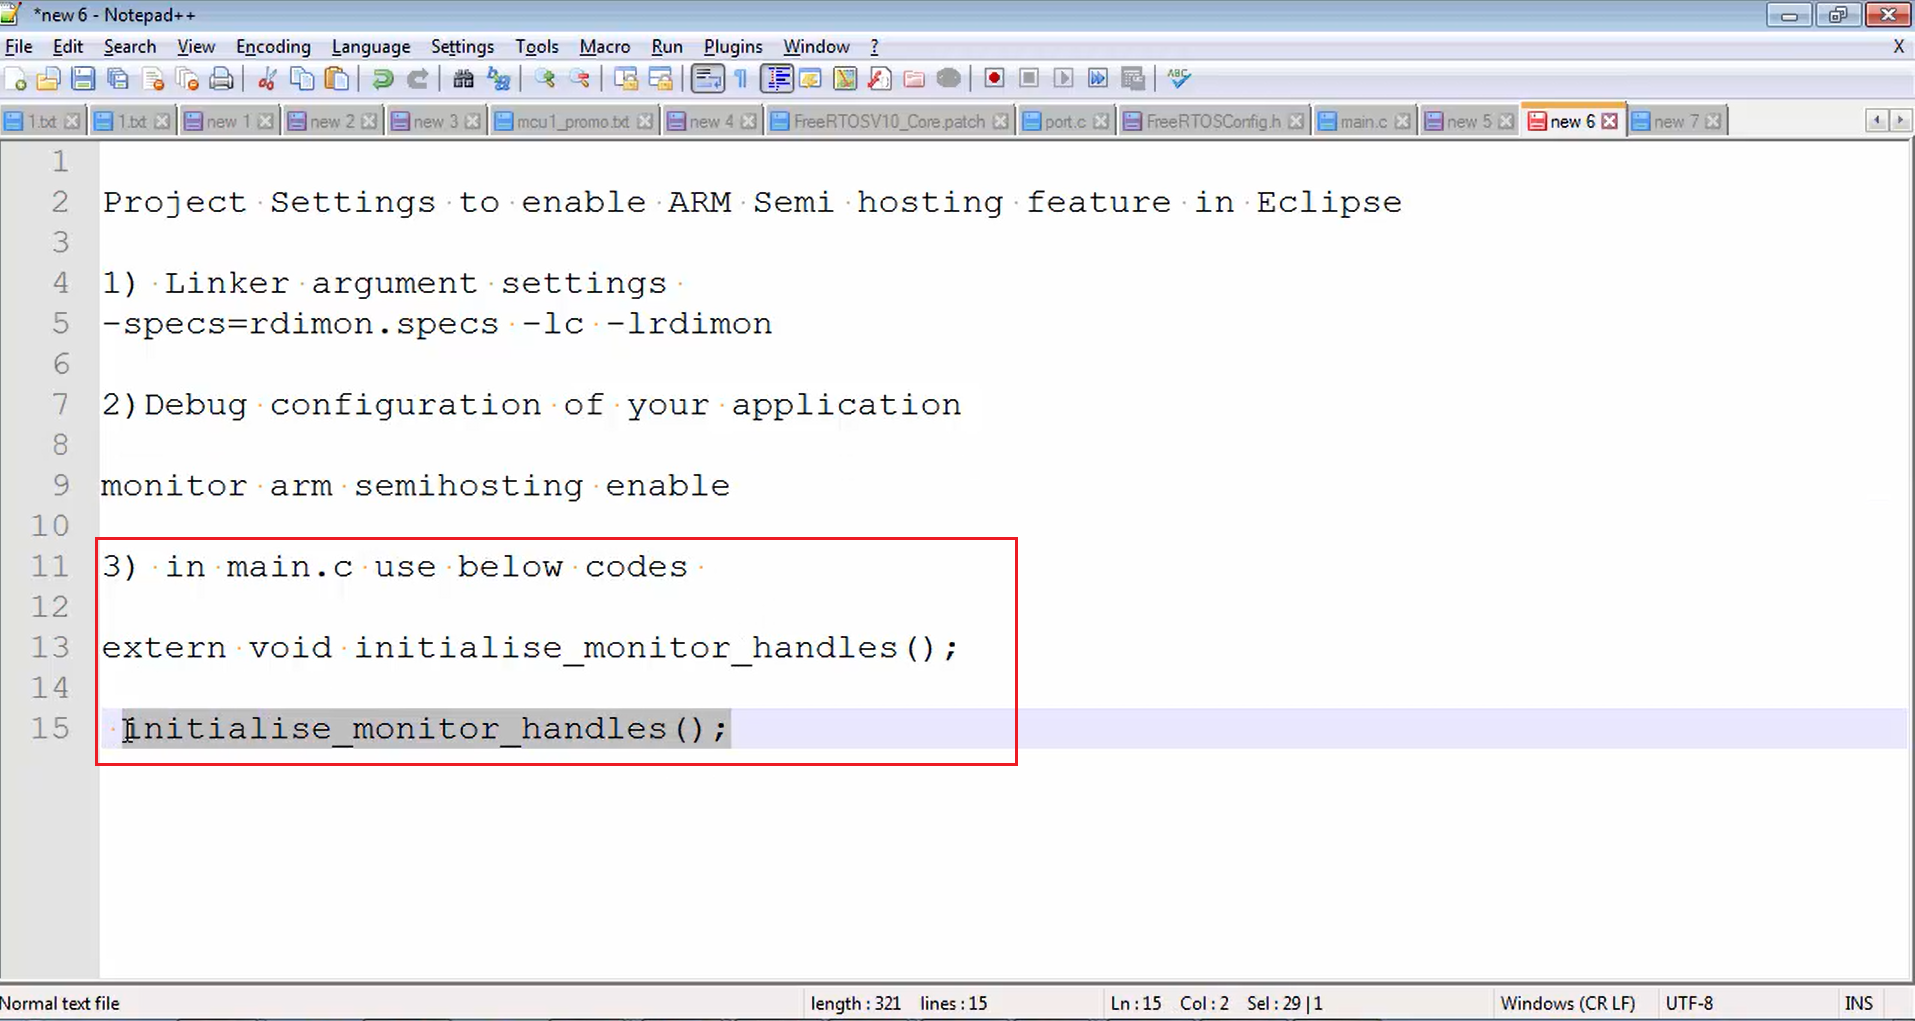
There is a small document, as shown in Figure 2. Please download that. There you will see the project settings you have to do in order to enable the ARM semihosting. There are three important steps:
- You have to send some arguments to the GCC linker.
- Do some debug configuration for your application. That means you have to send monitor arm semihosting enable command.
- After that, in the main.c you have to call the initialise_monitor_handles() function.
The combination of all the above things will configure the semihosting in the openSTM32 system workbench.
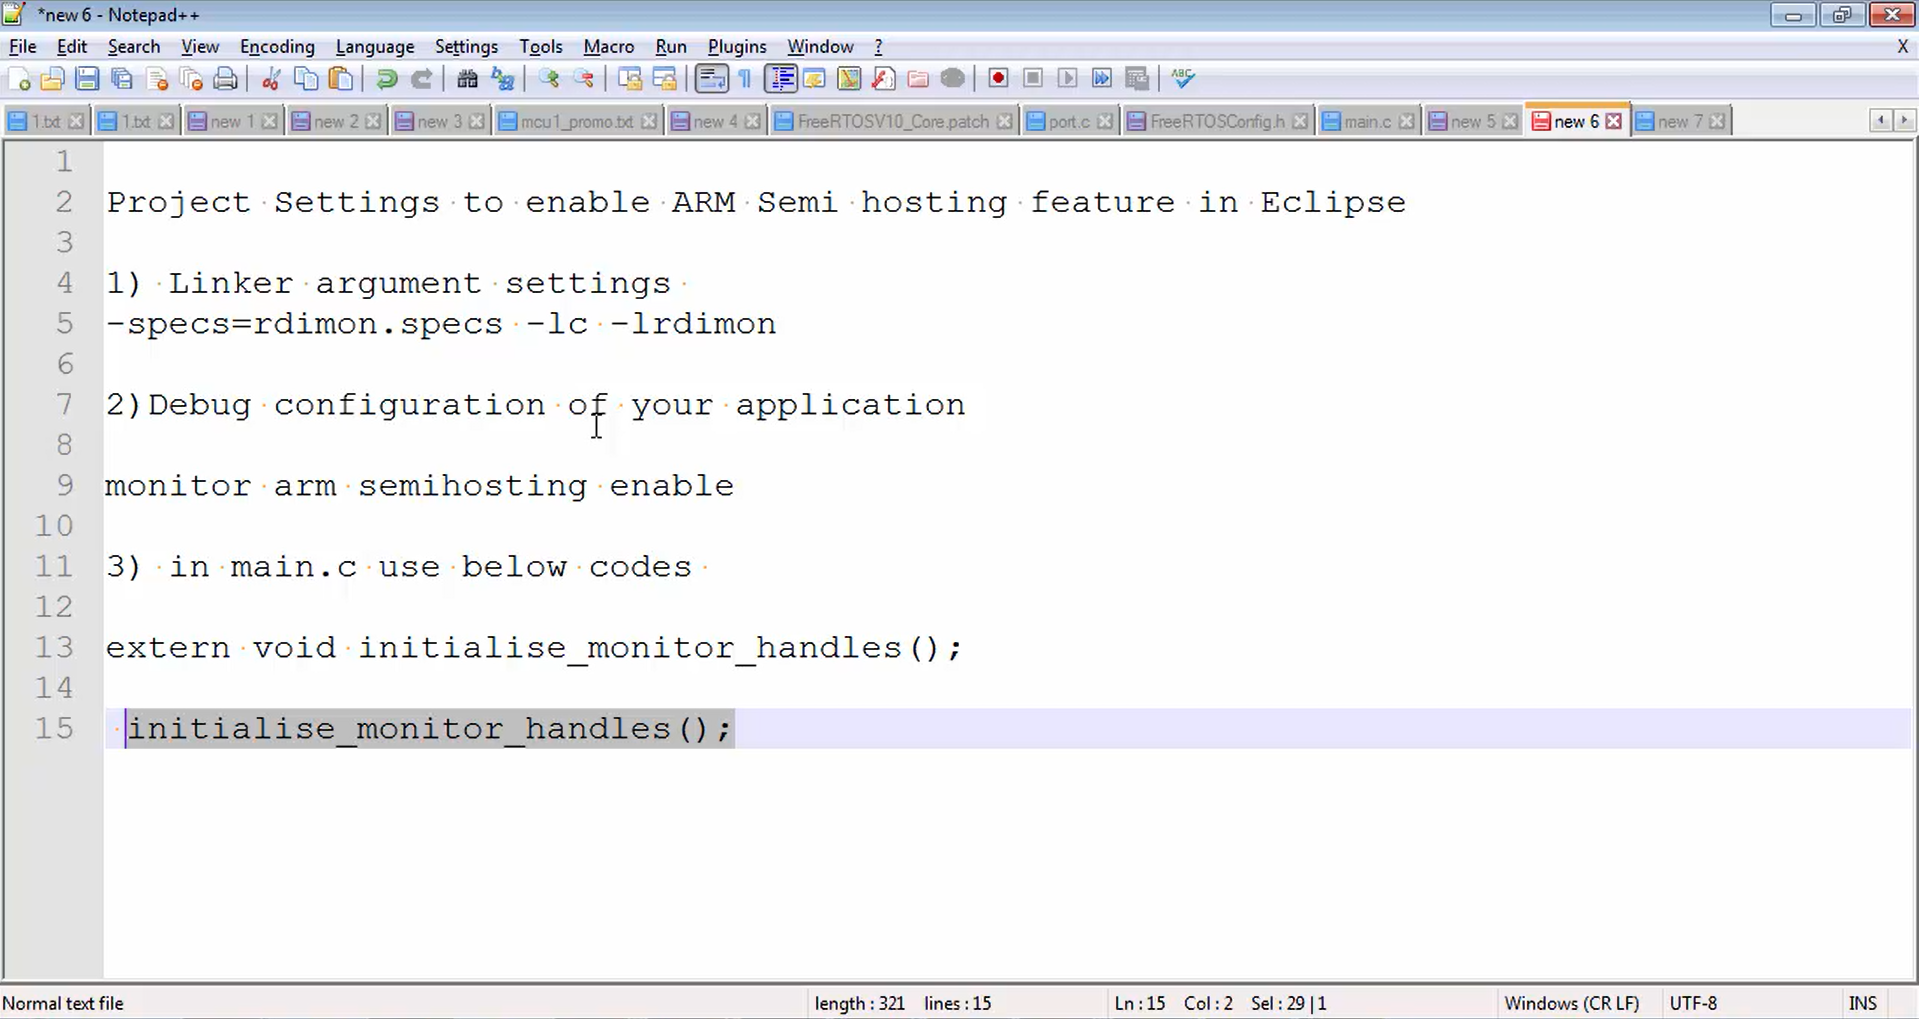
Now let’s do all these settings one by one.
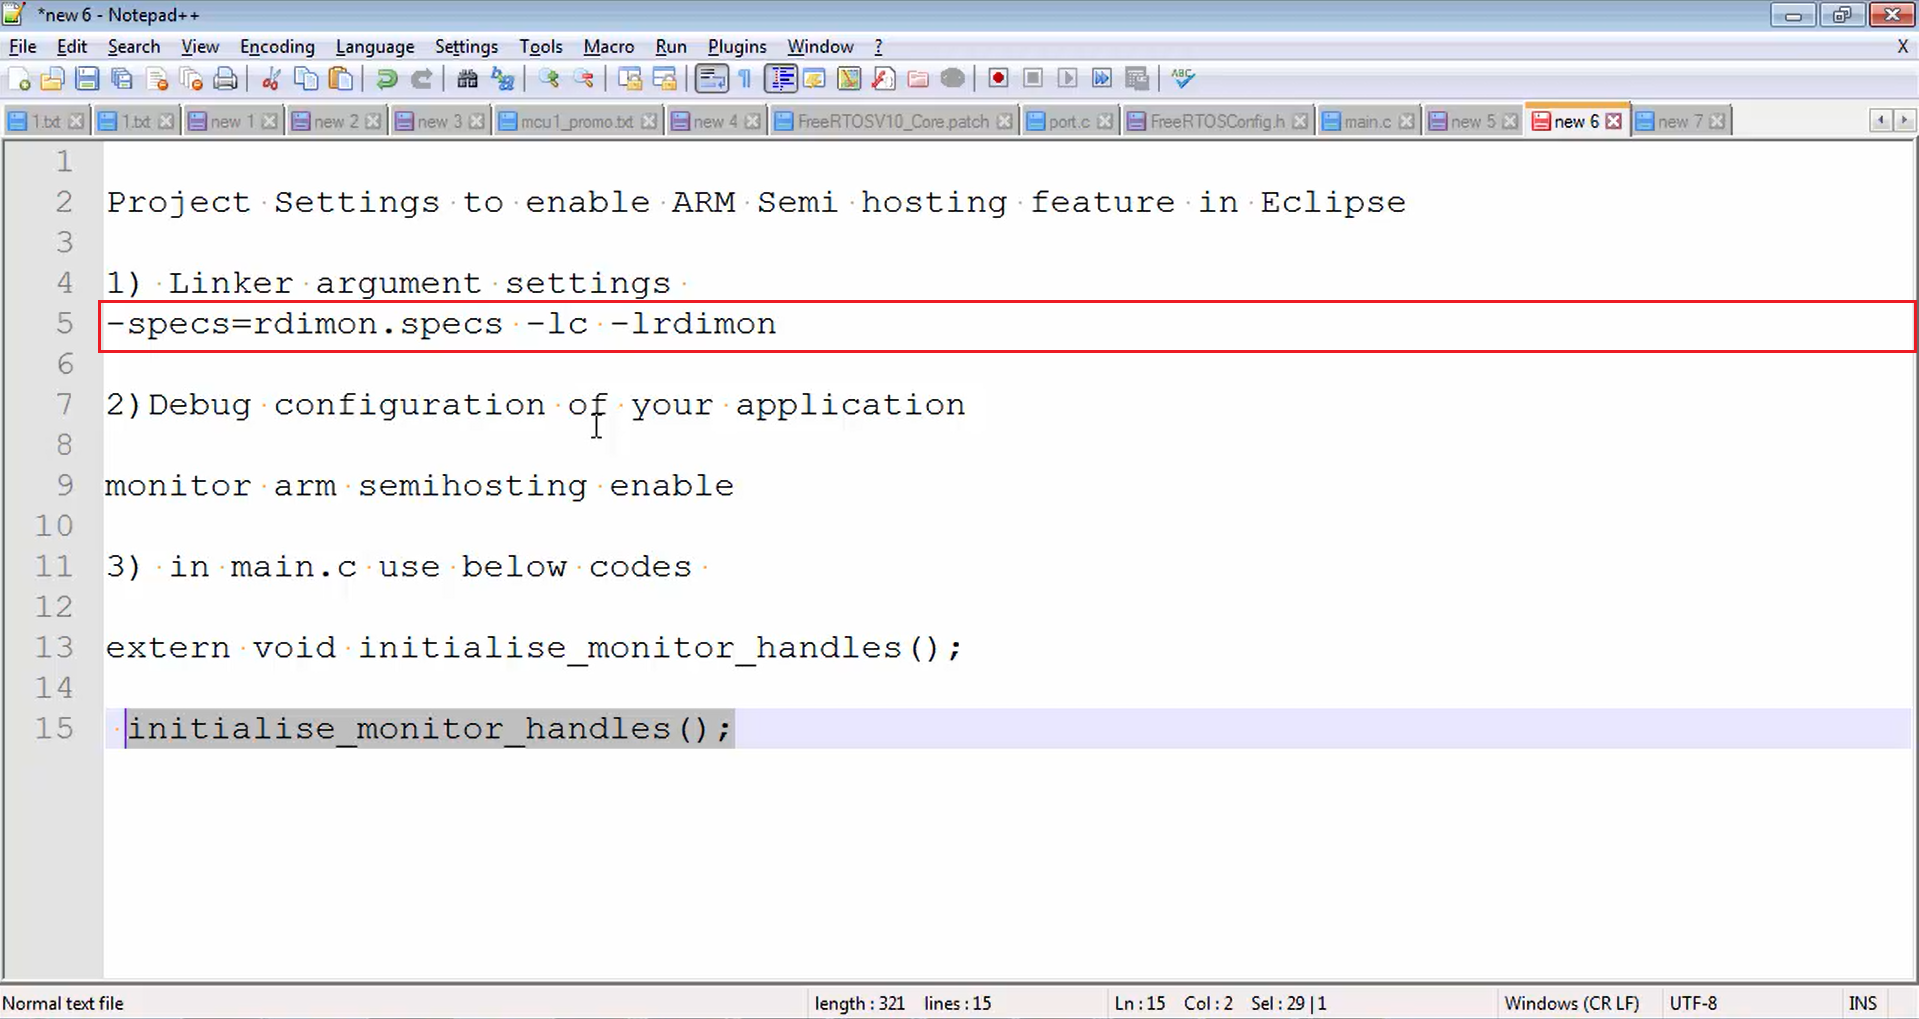
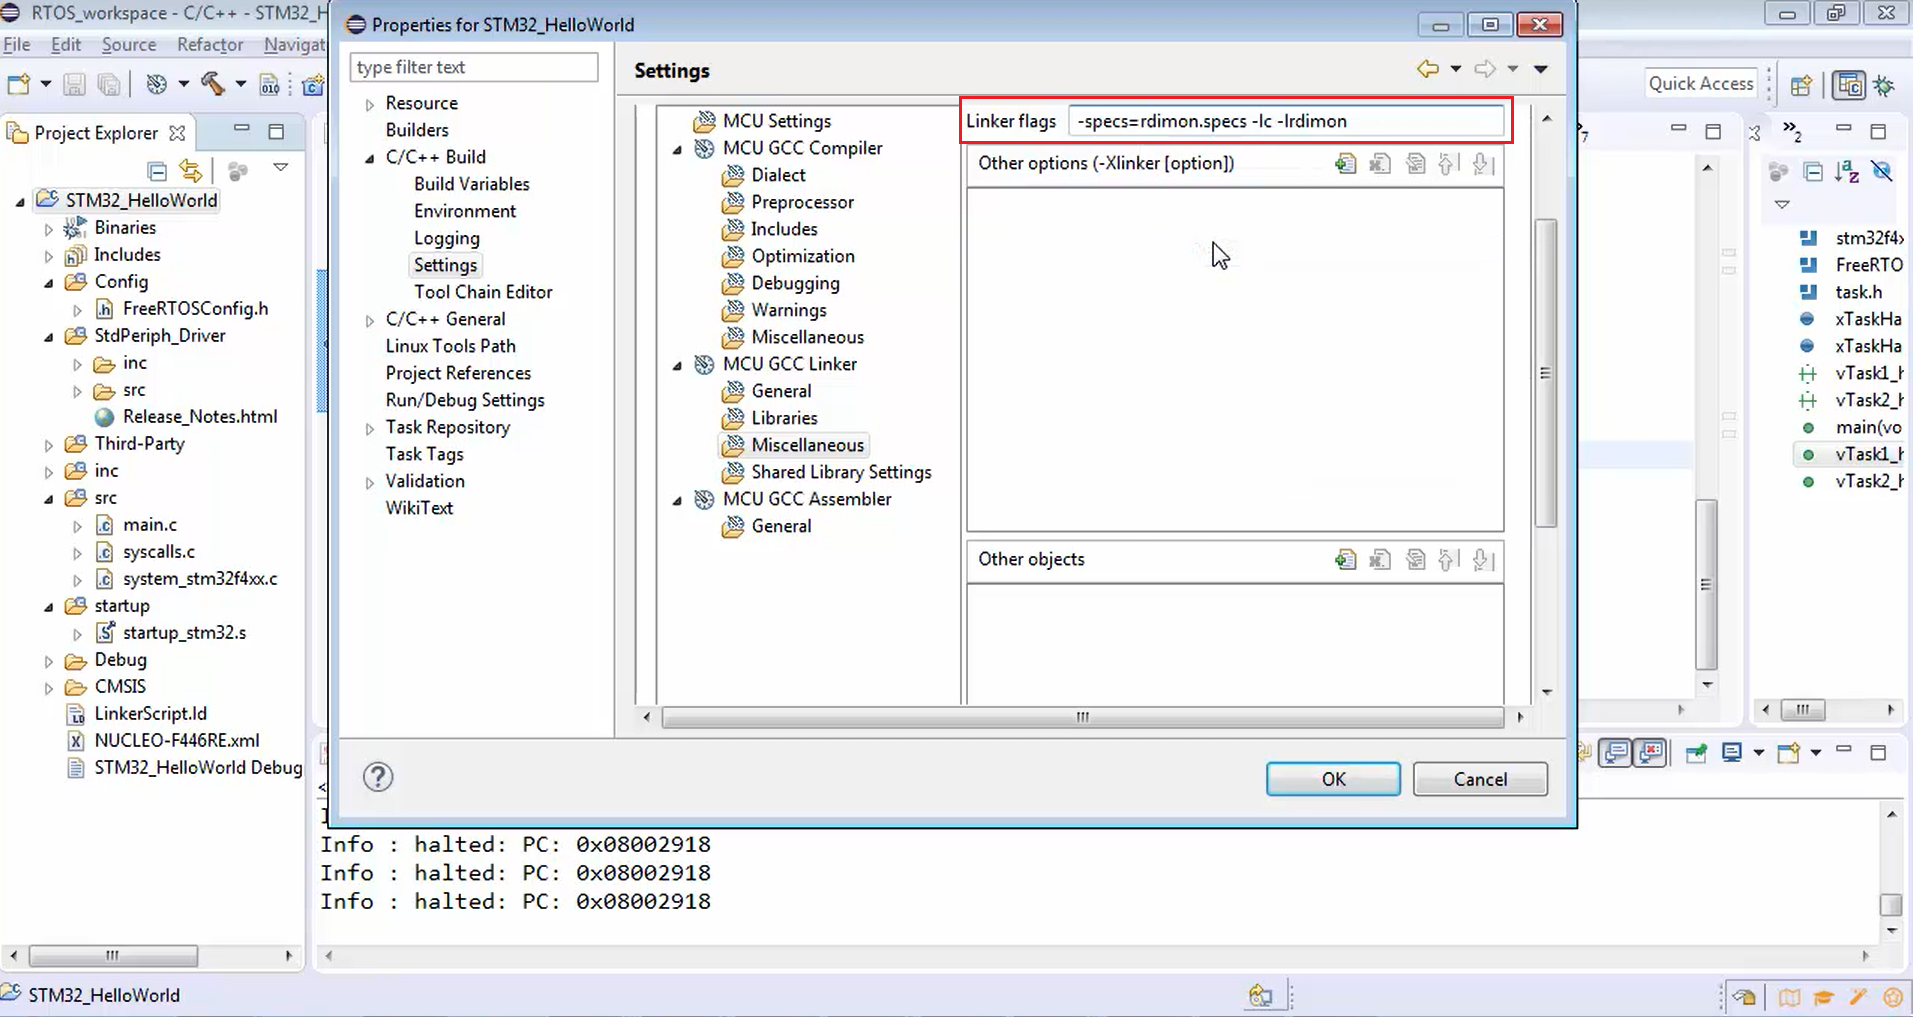
1. First, let’s set the linker arguments to enable the semihosting feature. For that, just copy the line shown in Figure 3 and go to the eclipse.
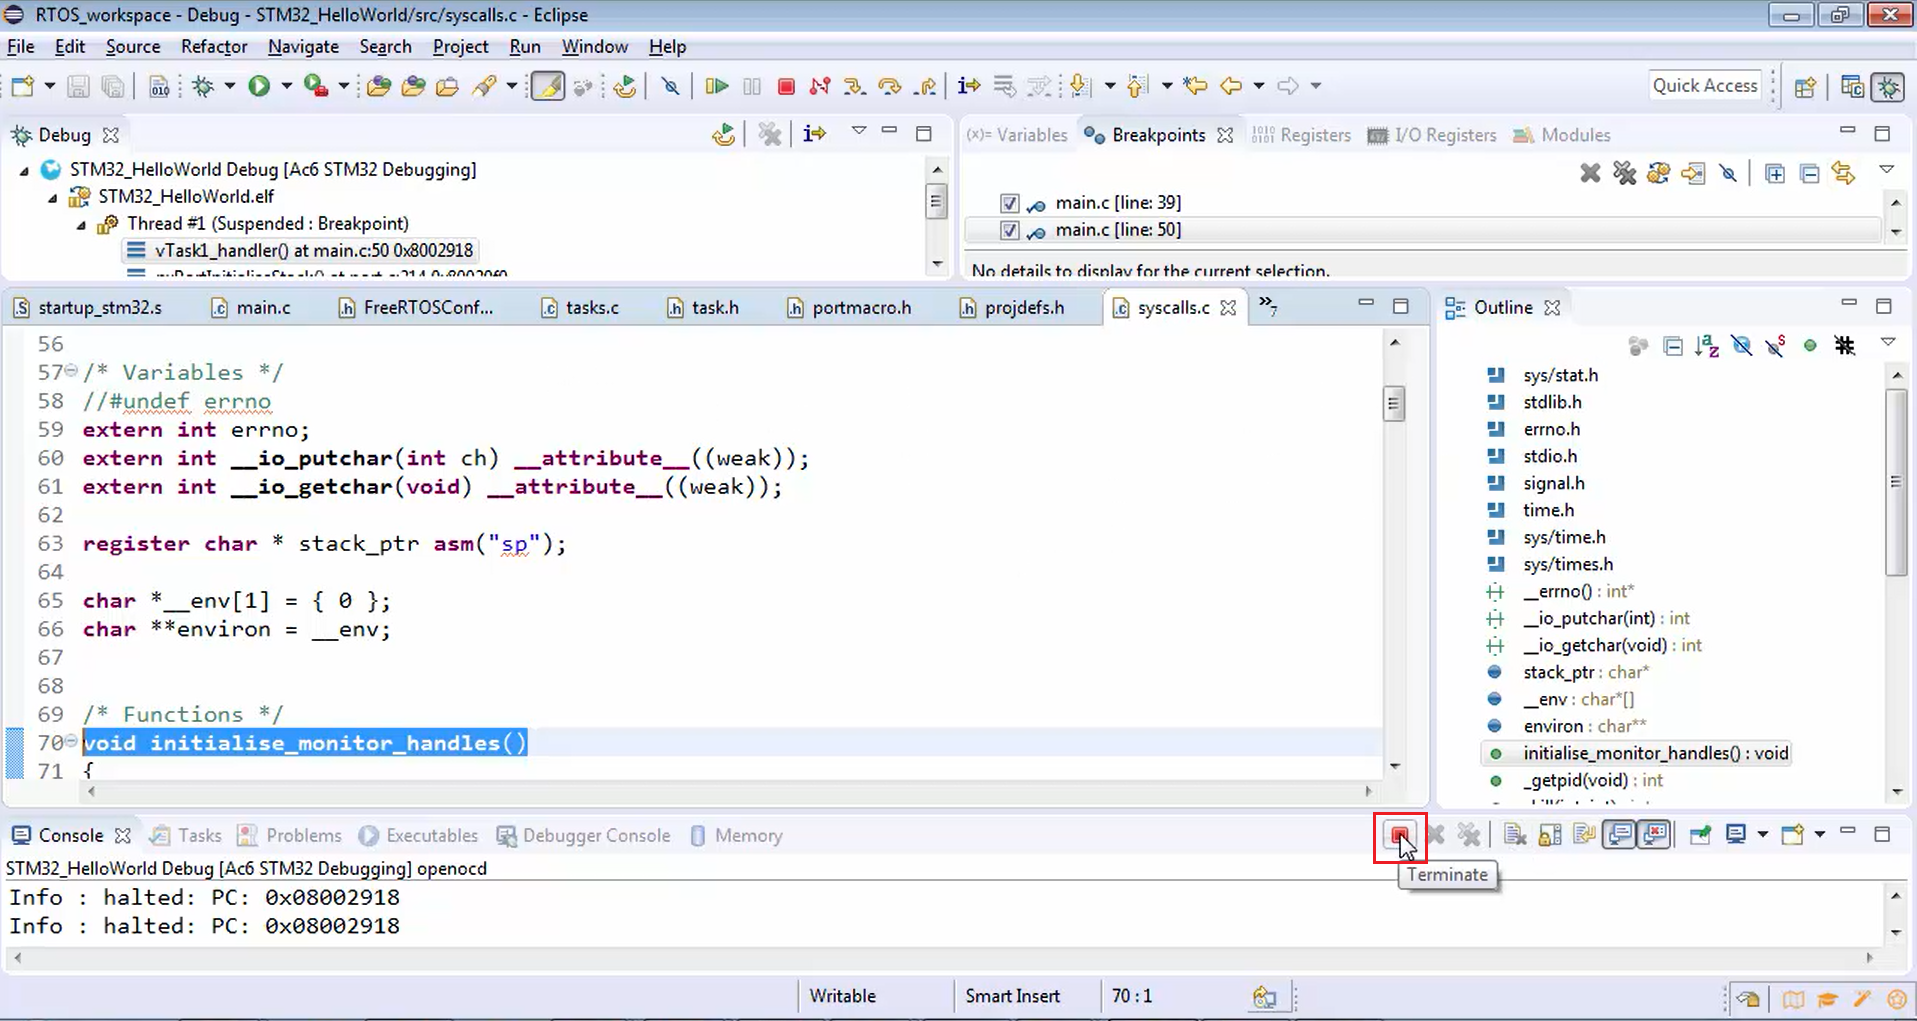
Now let’s terminate the debugging session by clicking on the option shown in Figure 4.
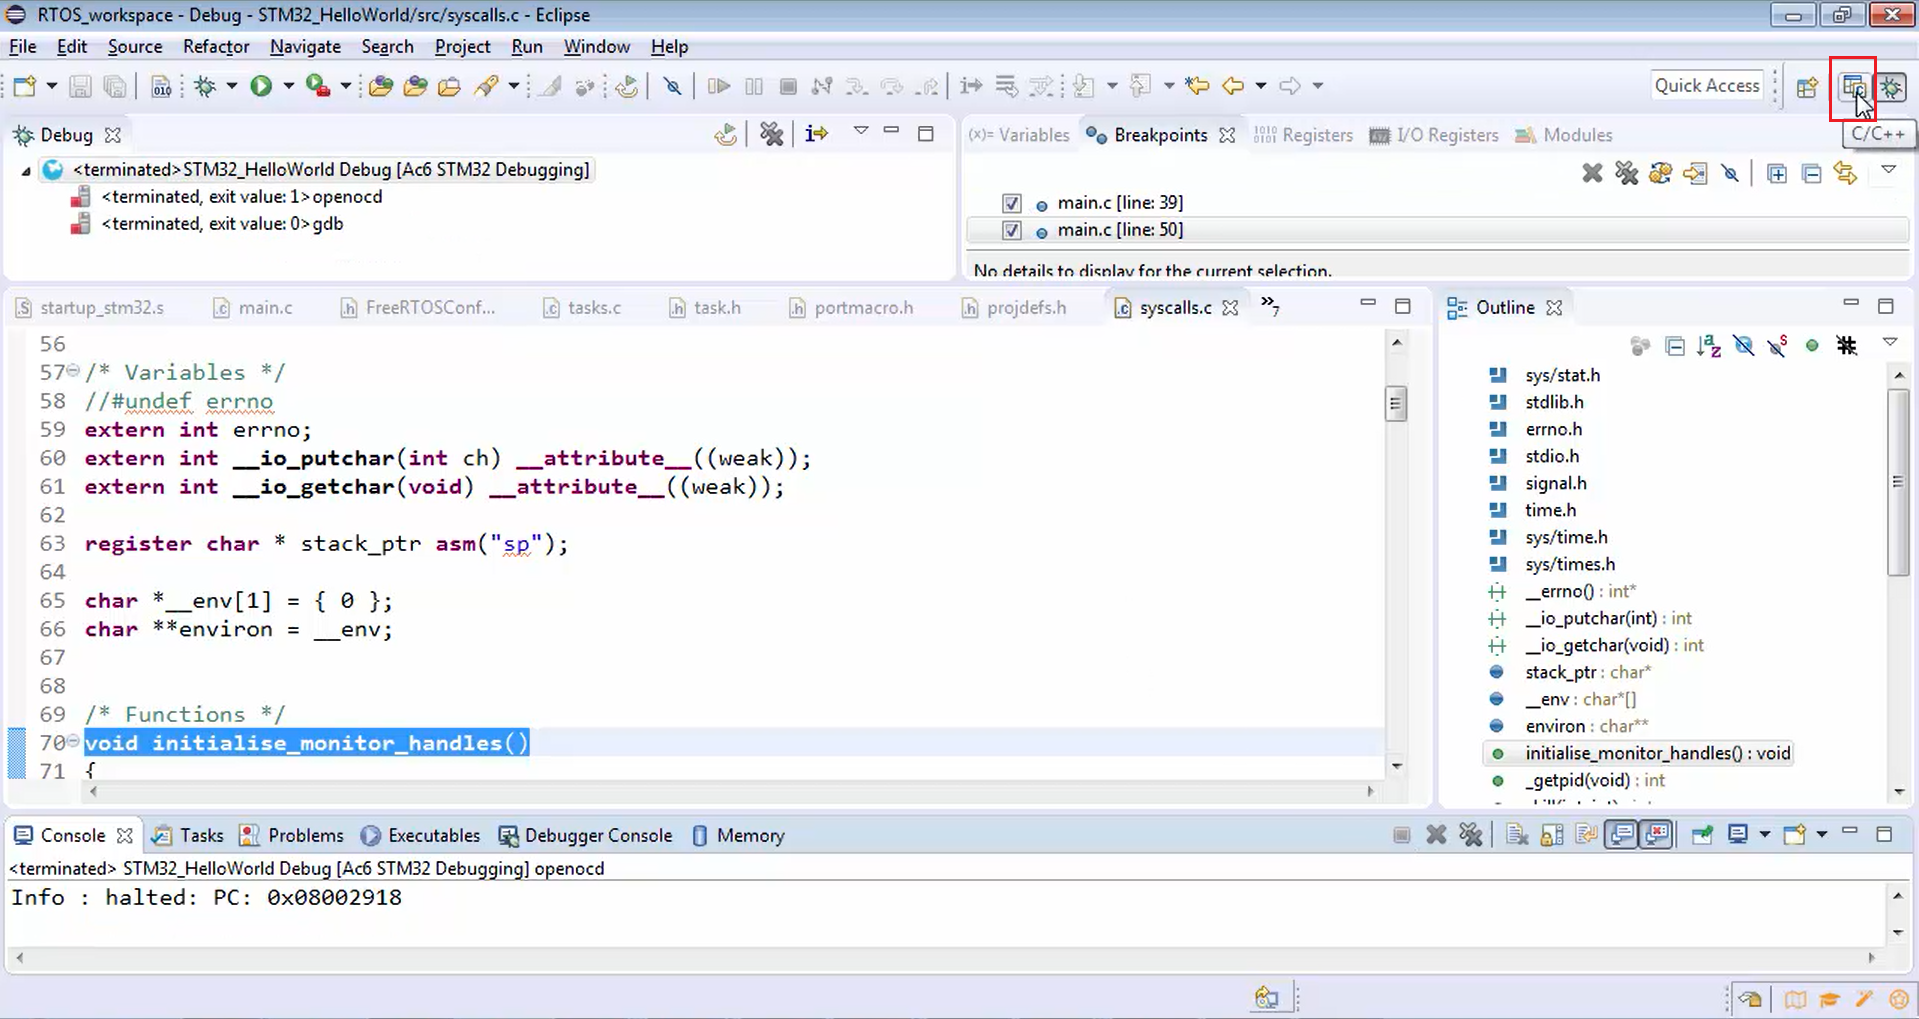
Then go to the C/C++ perspective (Figure 5).
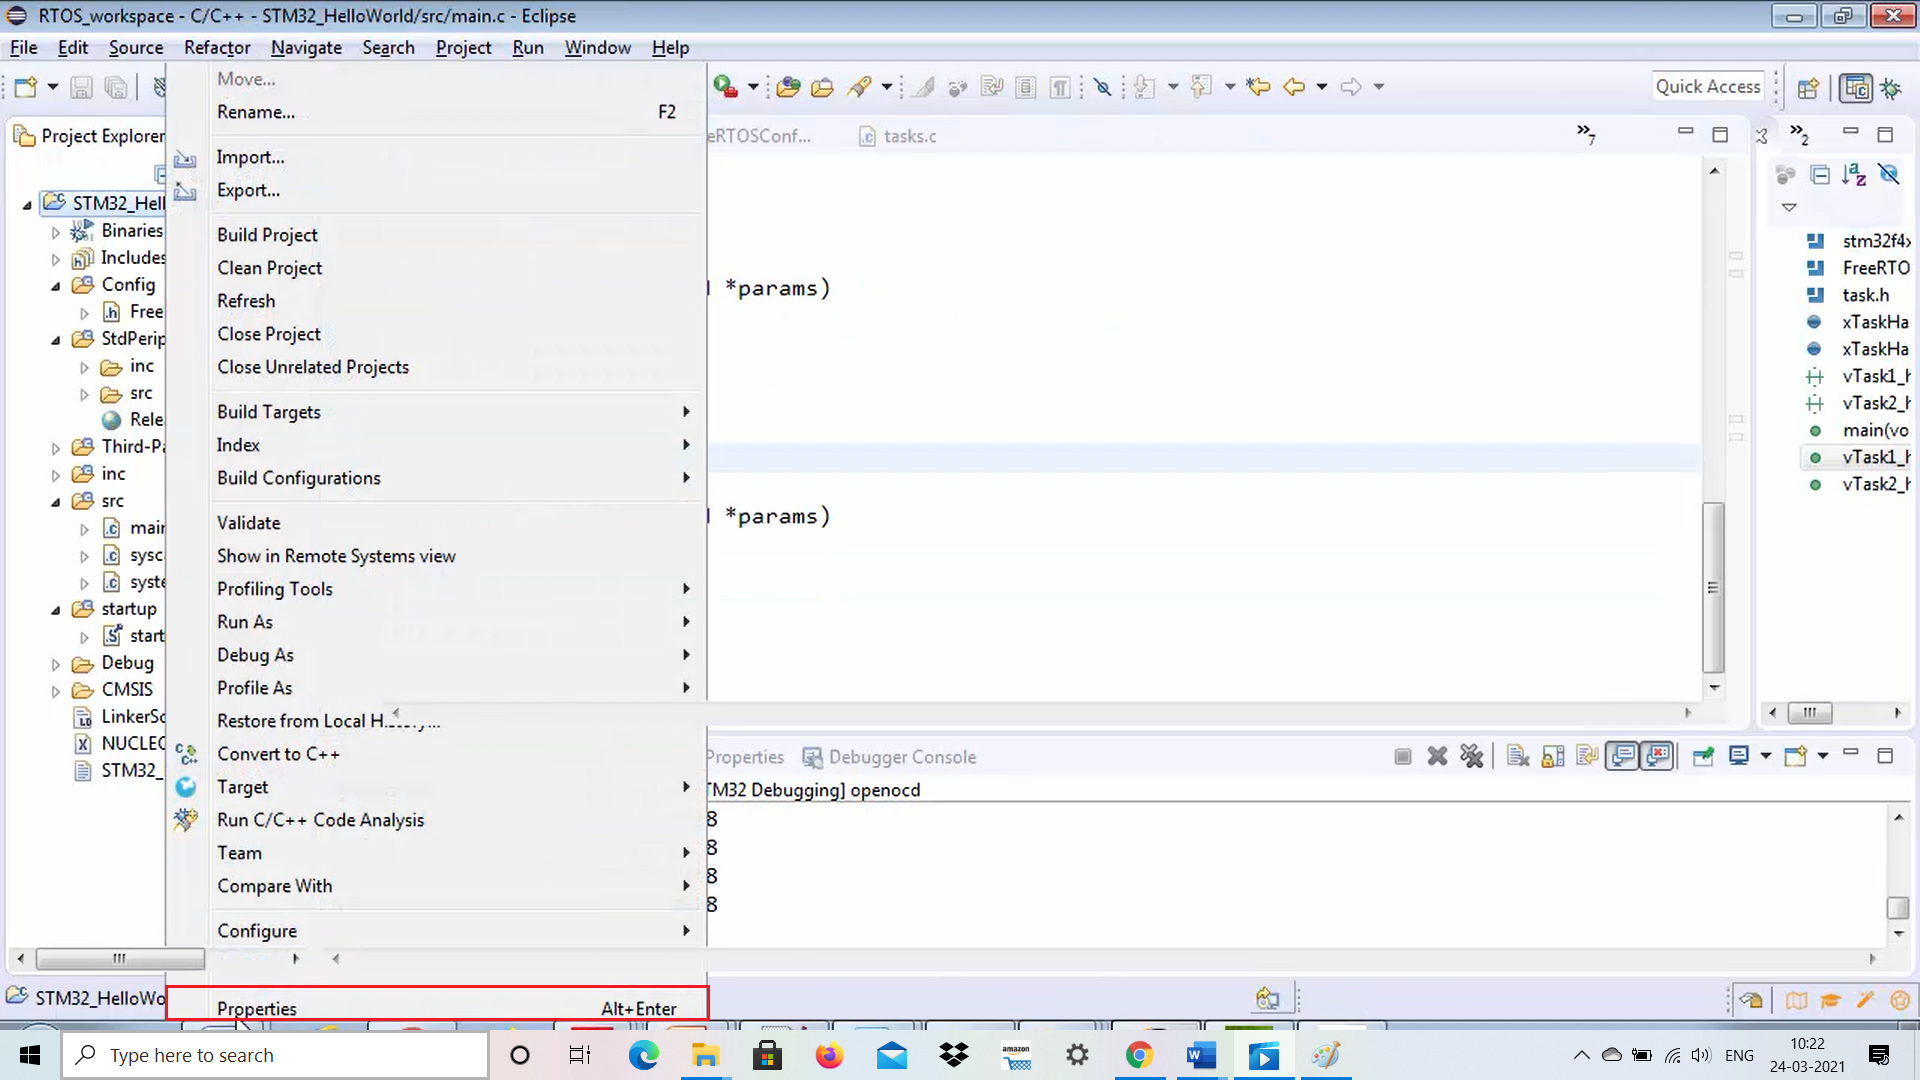
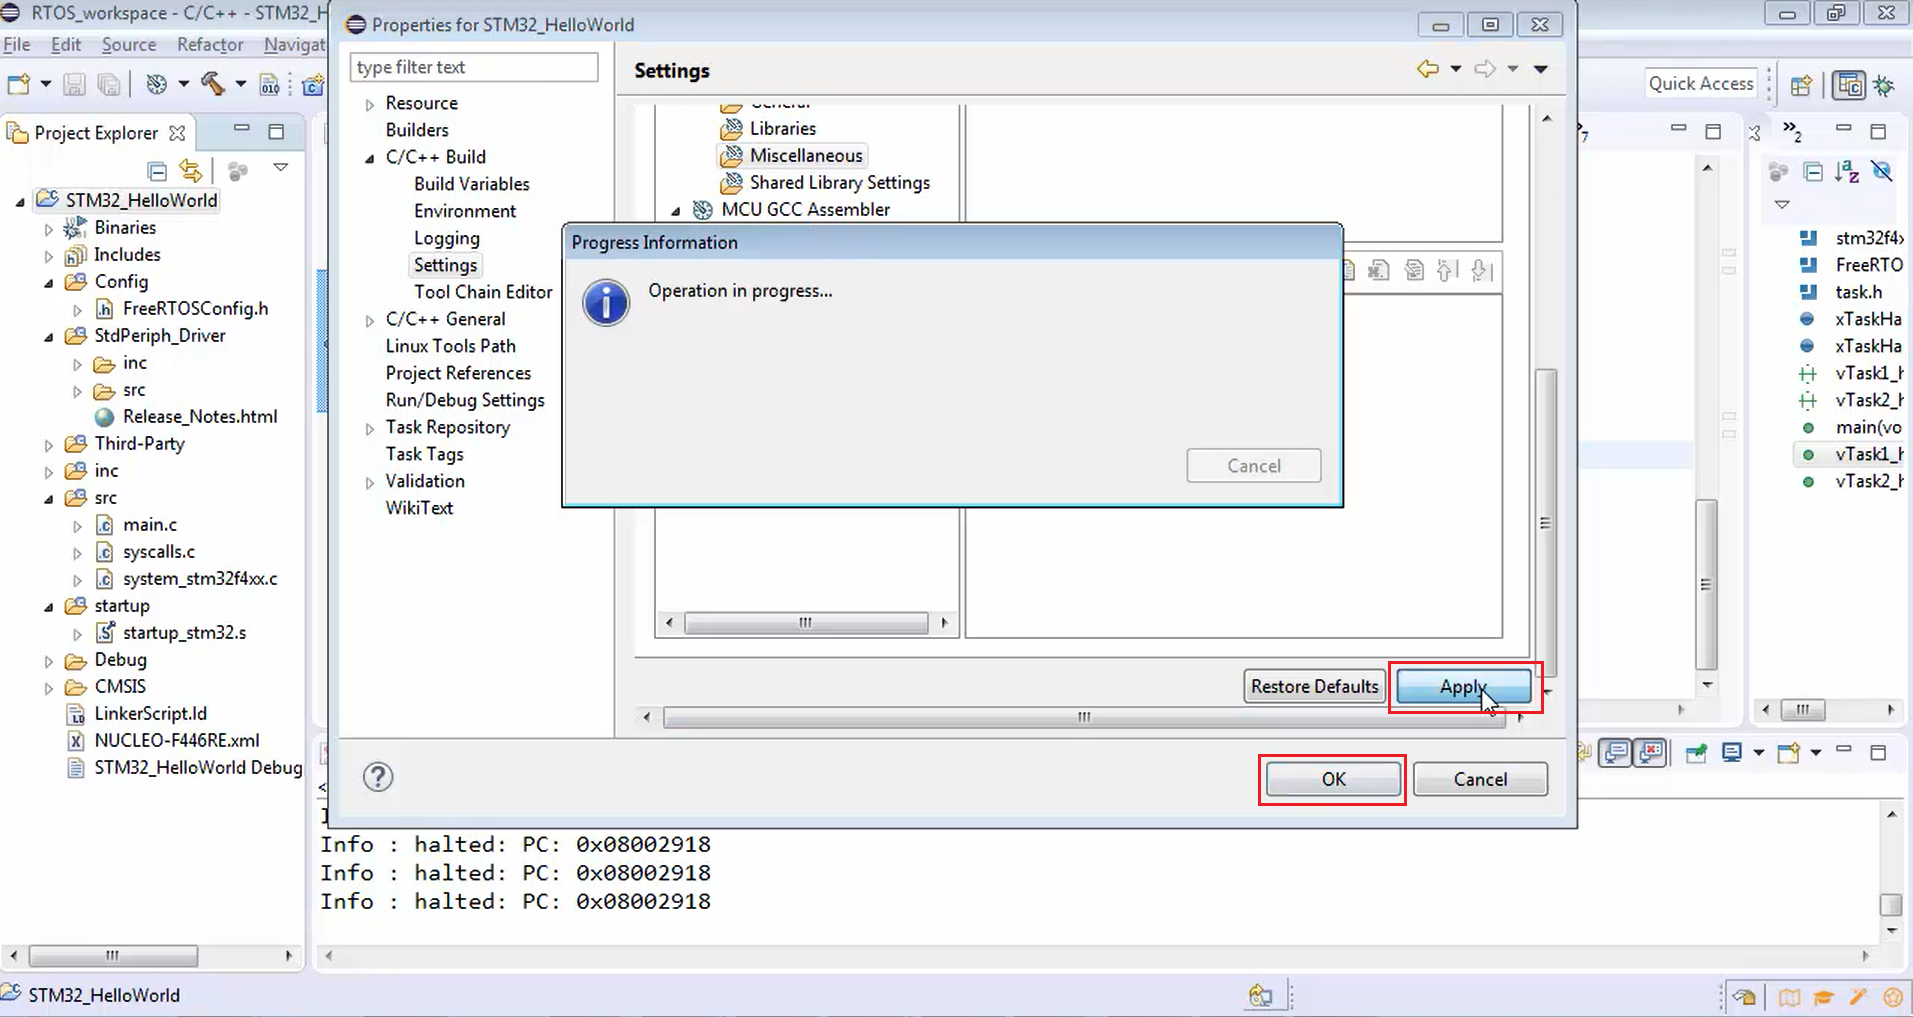
After that, right-click on the project, go to properties (Figure 6), then go to C/C++ build, go to settings (Figure 7), click on MCU GCC linker, then go to miscellaneous (Figure 8) and in linker flags tab just paste the copied line, as shown in Figure 9, after that click apply and ok (Figure 10).


2. After that, let’s do the second step, i.e., debug configuration of your application.
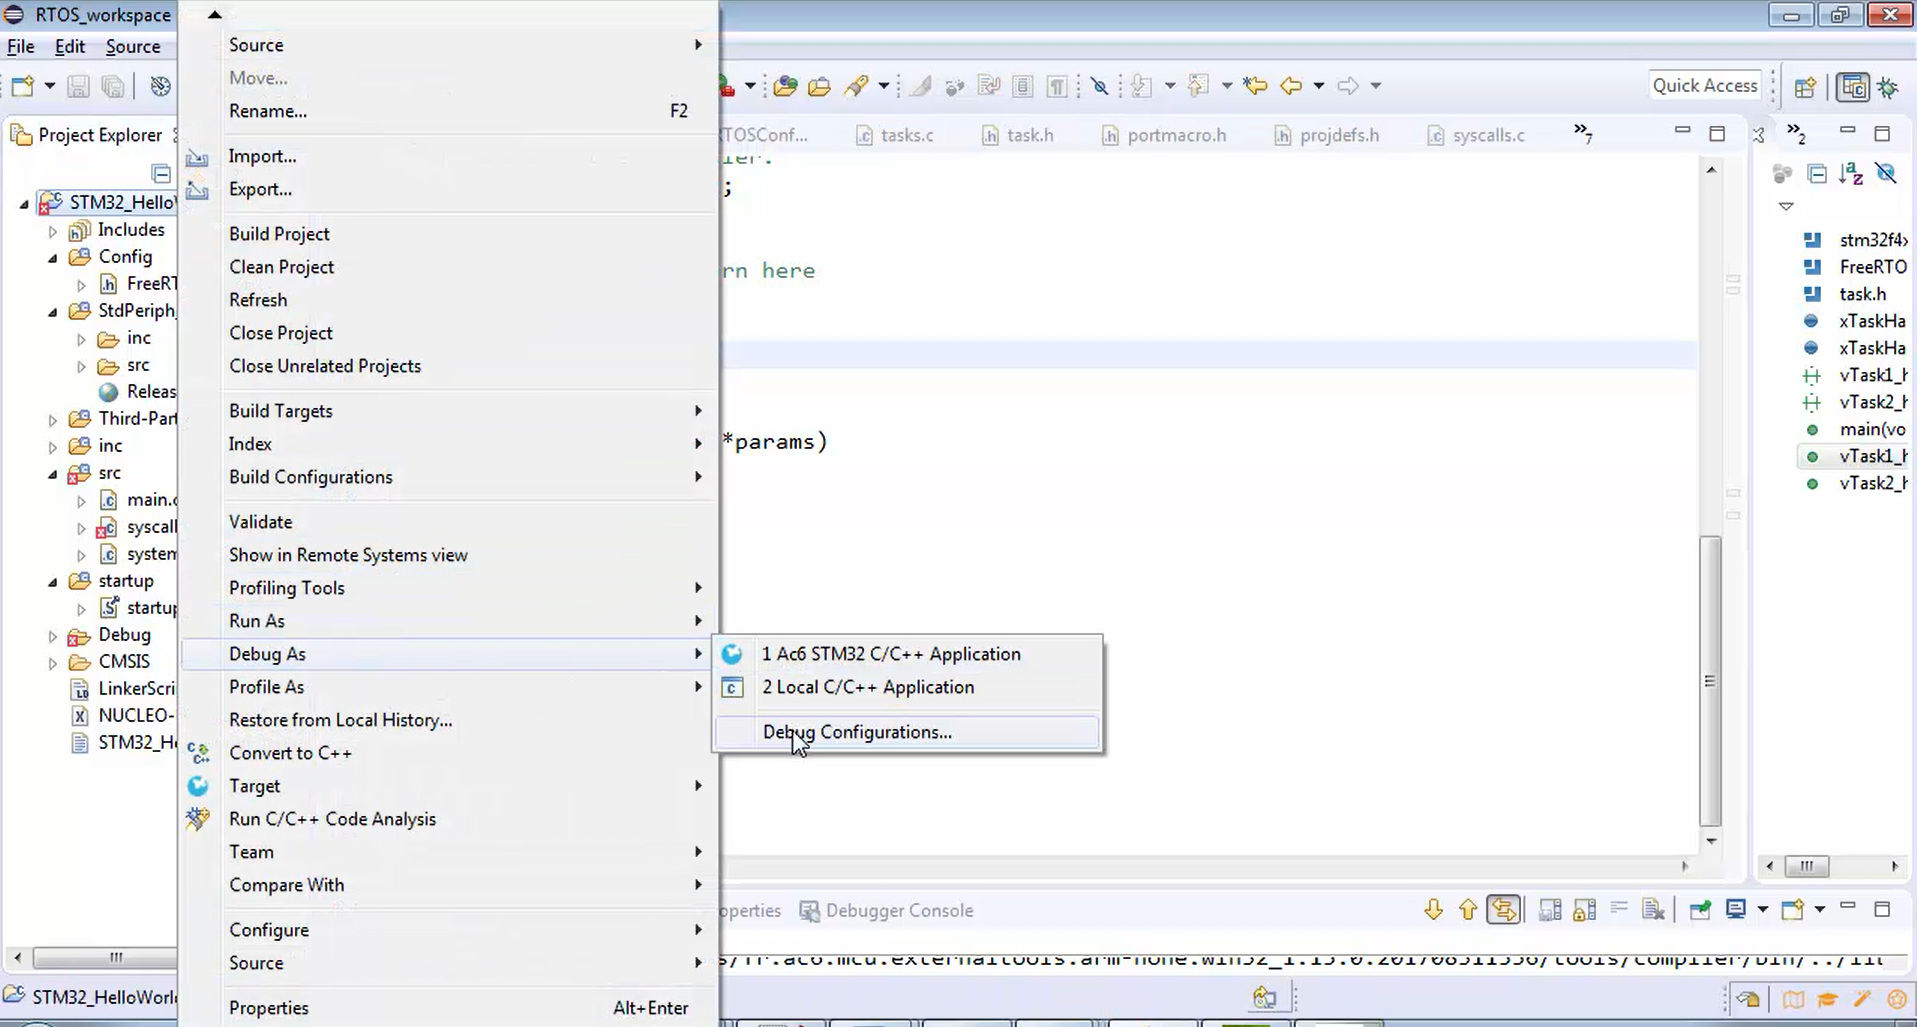
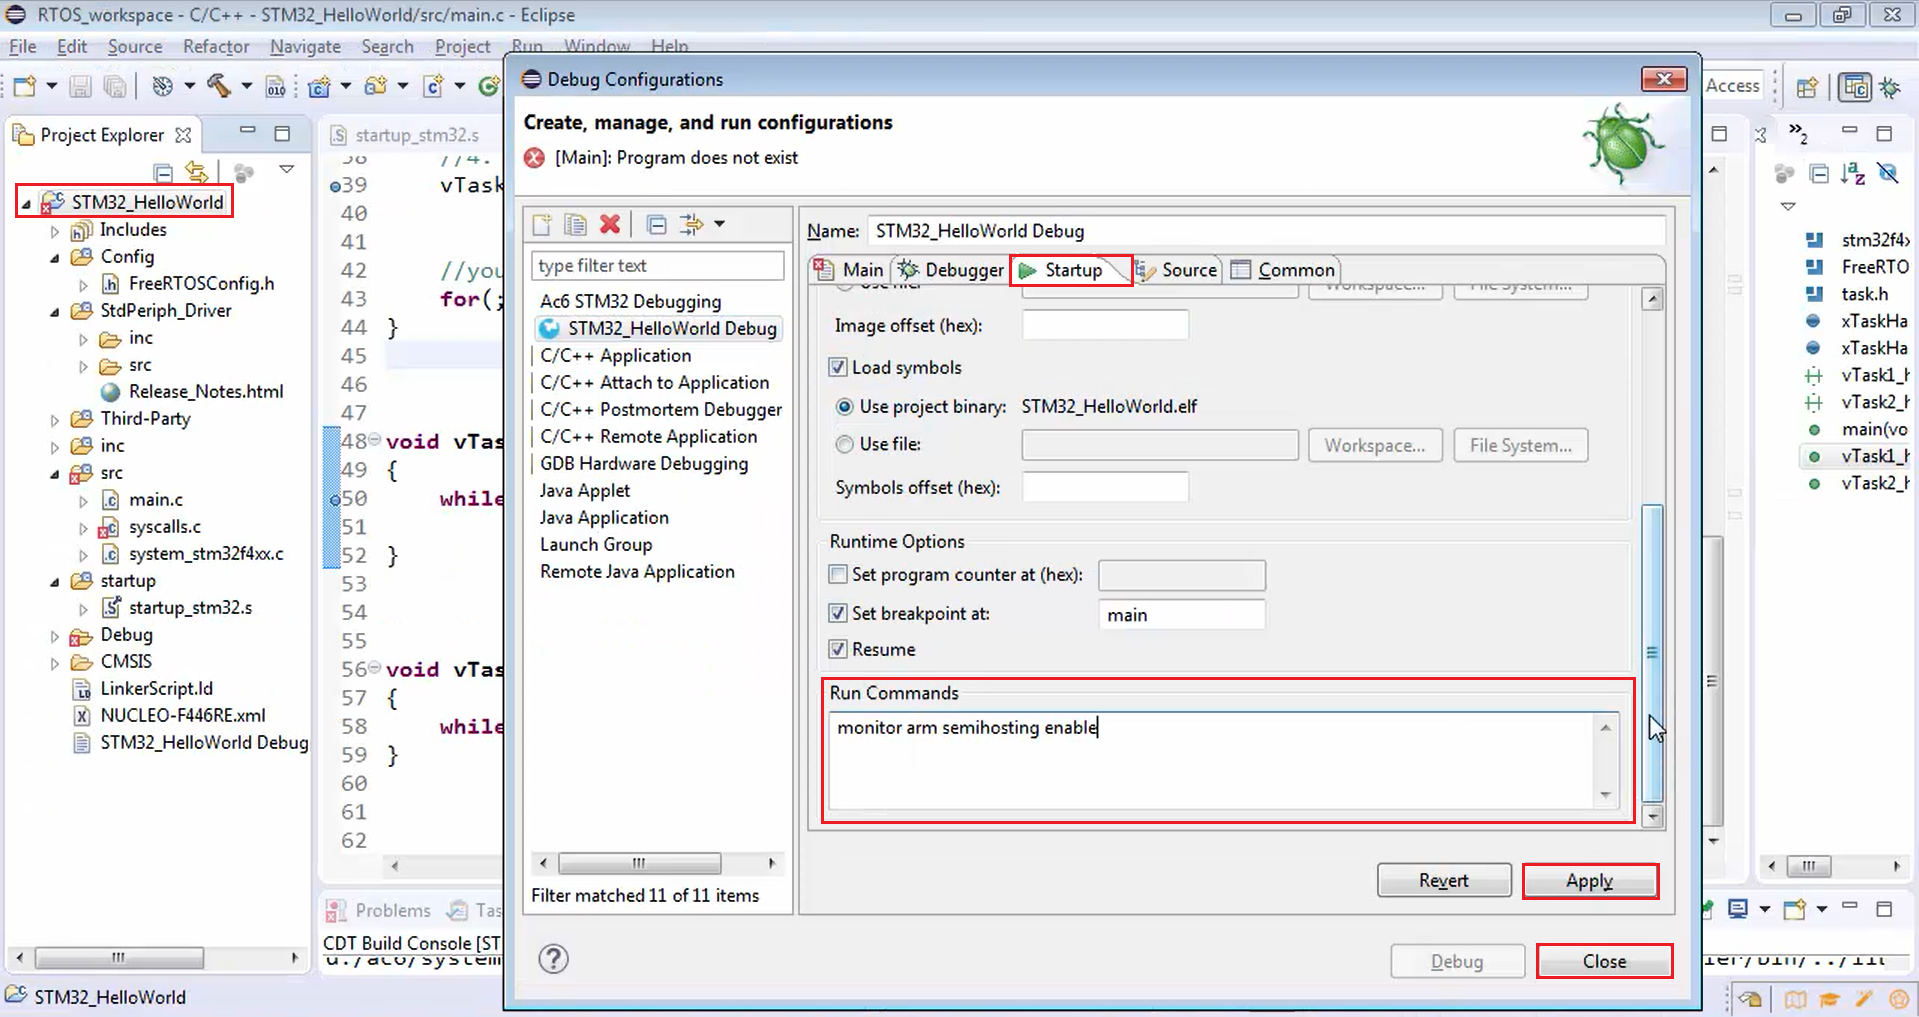
For that, right-click on your project, go to debug as and then go to debug configurations (Figure 11). Select your project, go to startup, just browse here, you will see run commands as shown in Figure 12 there you just write the monitor arm semihosting enable command.
Now click apply. After that, click close.
3. Now the third step is in the main.c use the code marked in Figure 13.
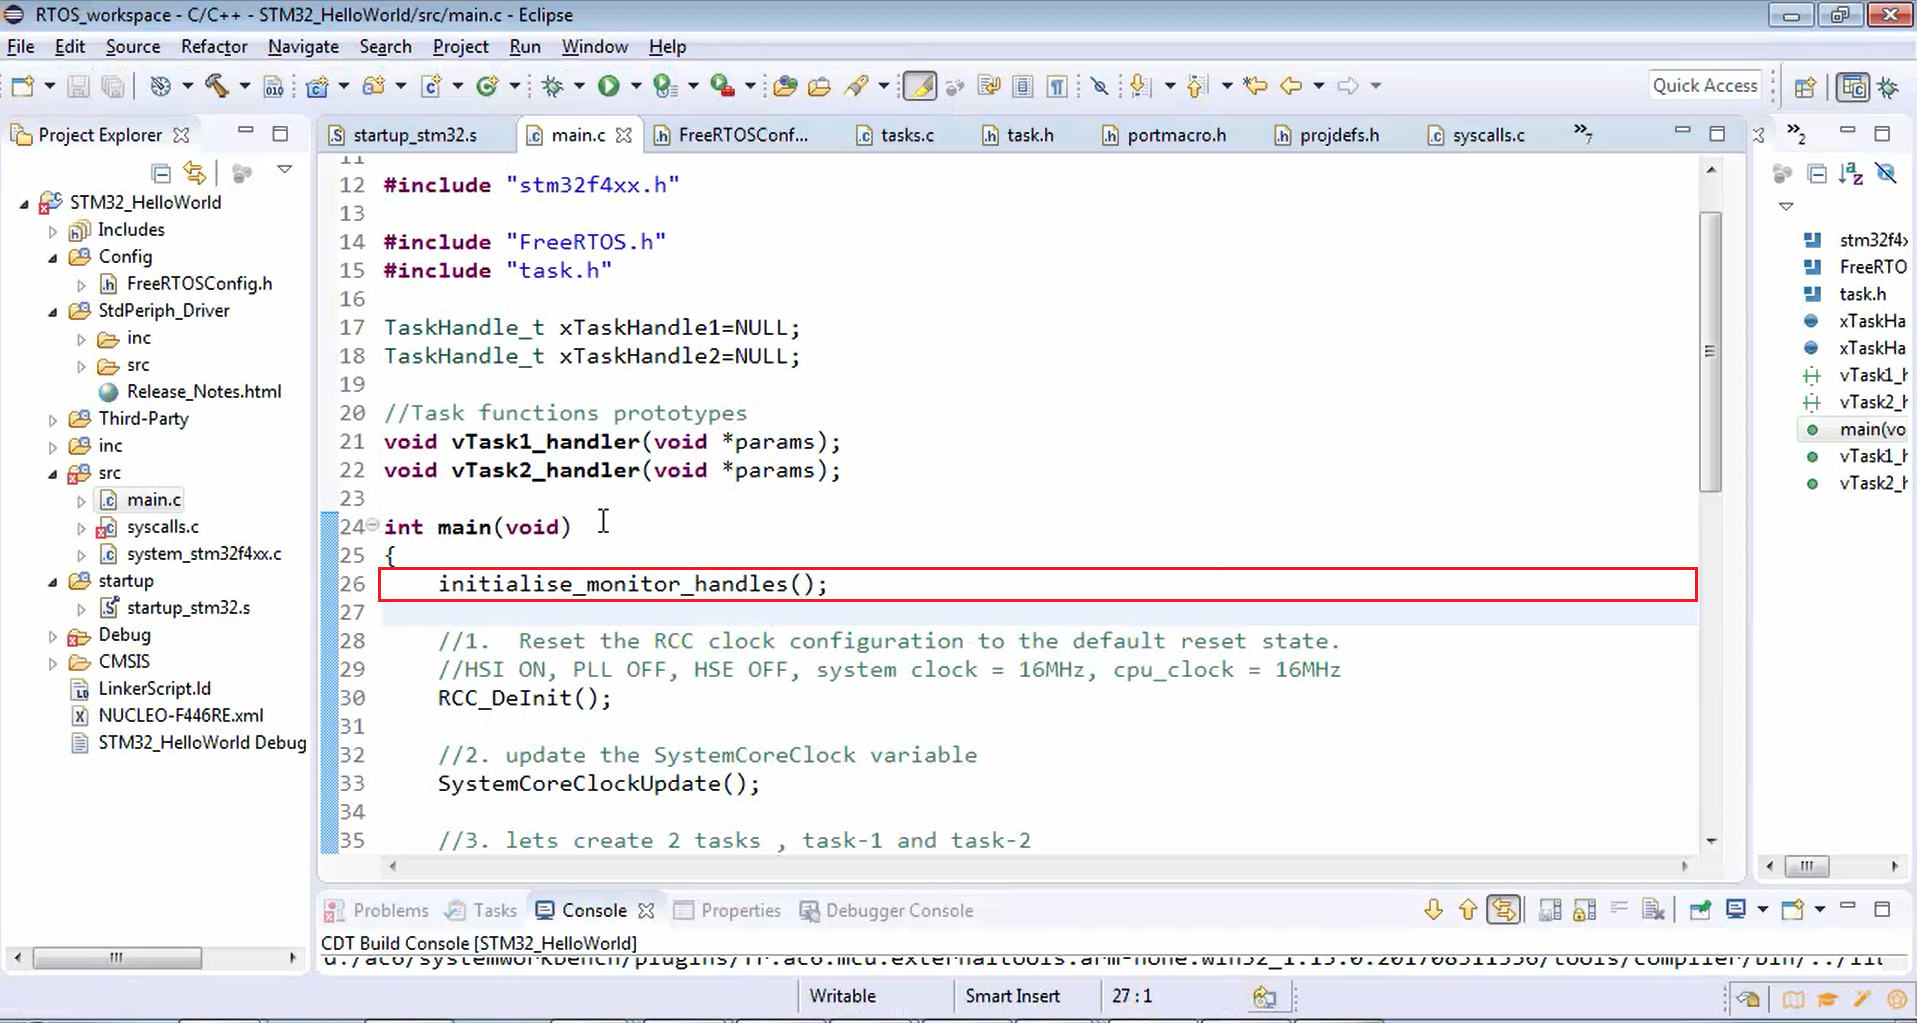
First, let’s call the initialise_monitor_handles() function as a very first function, as shown in Figure 14. It need not be the very first function, but it is better to call this before calling any printf statements.
Also, copy the extern of that function, i.e., extern void initialise_monitor_handles() and paste it in the main.c, as shown in Figure 15.
int main(void)
{
initialise_monitor_handles();
//1. Reset the RCC clock configuration to the default reset state.
//HSI ON, PLL OFF, HSE OFF, system clock = 16MHz, cpu_clock = 16MHz
RCC_DeInit();

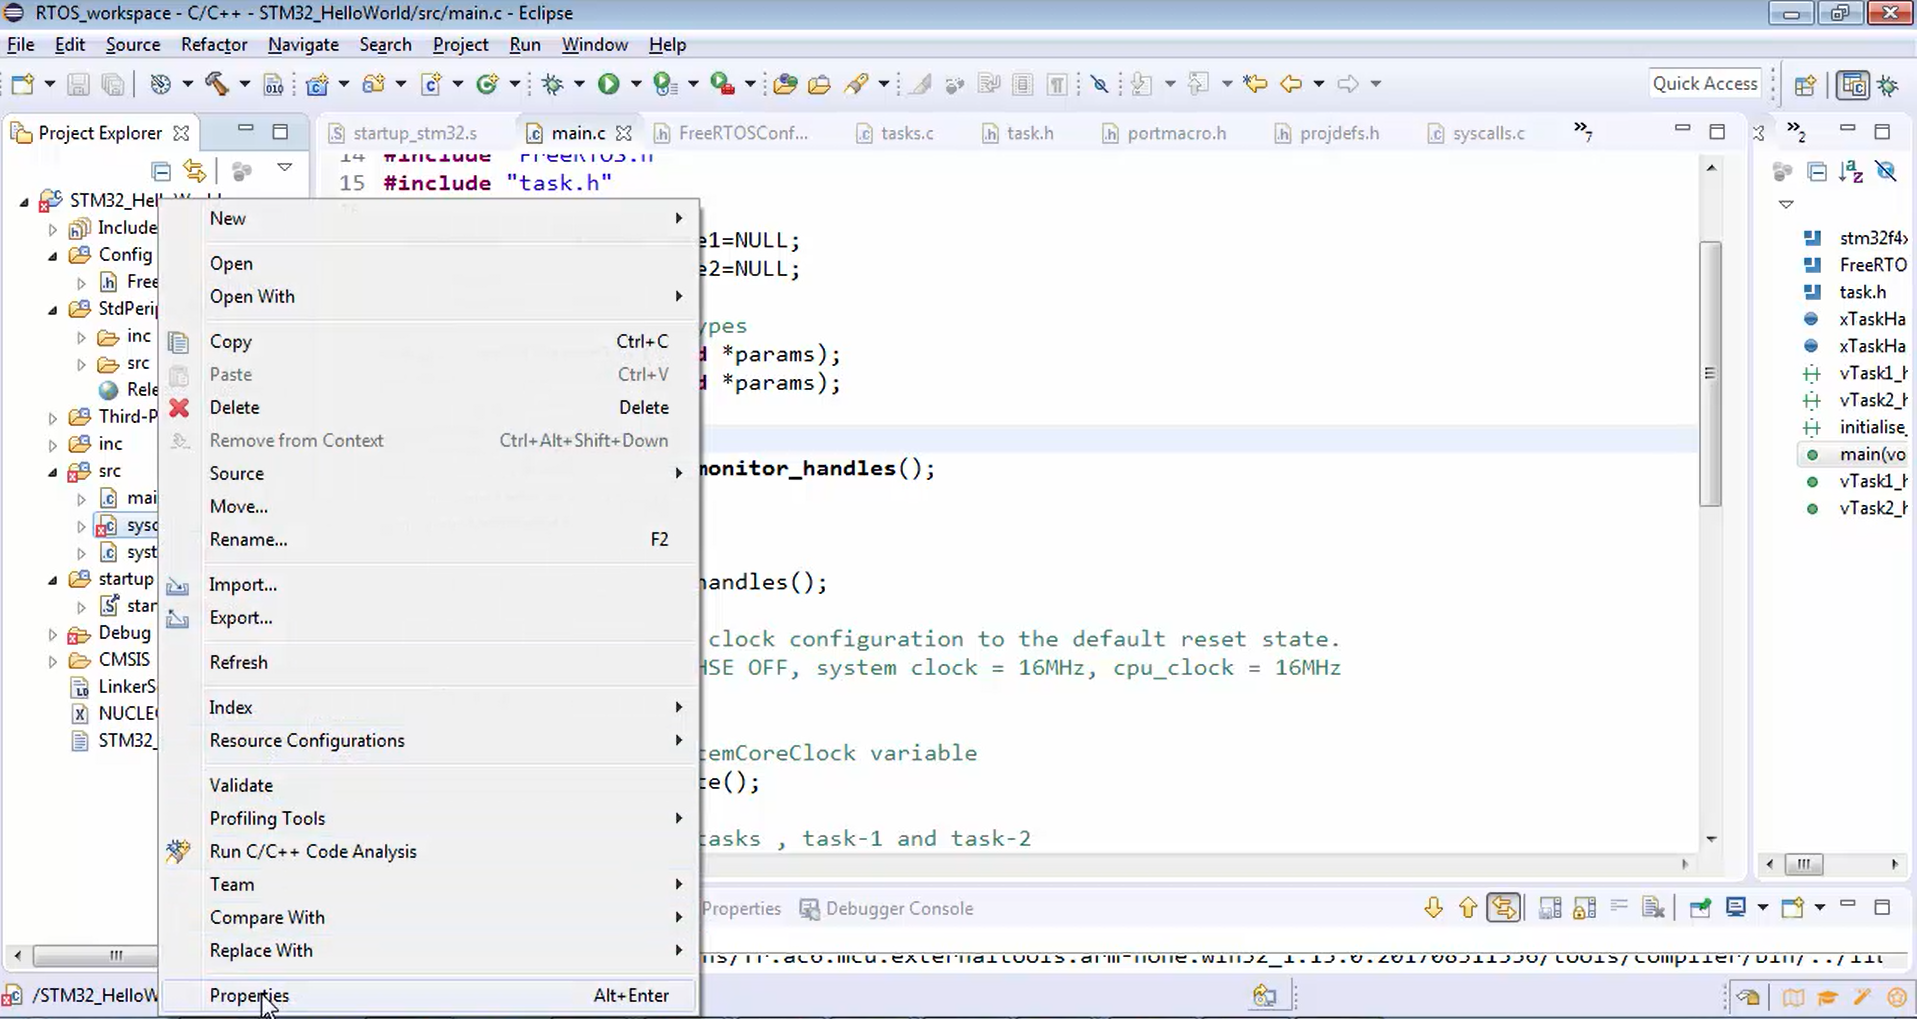
After that, you can get rid of syscalls.c, which is added by the OpenSTM32 system workbench.
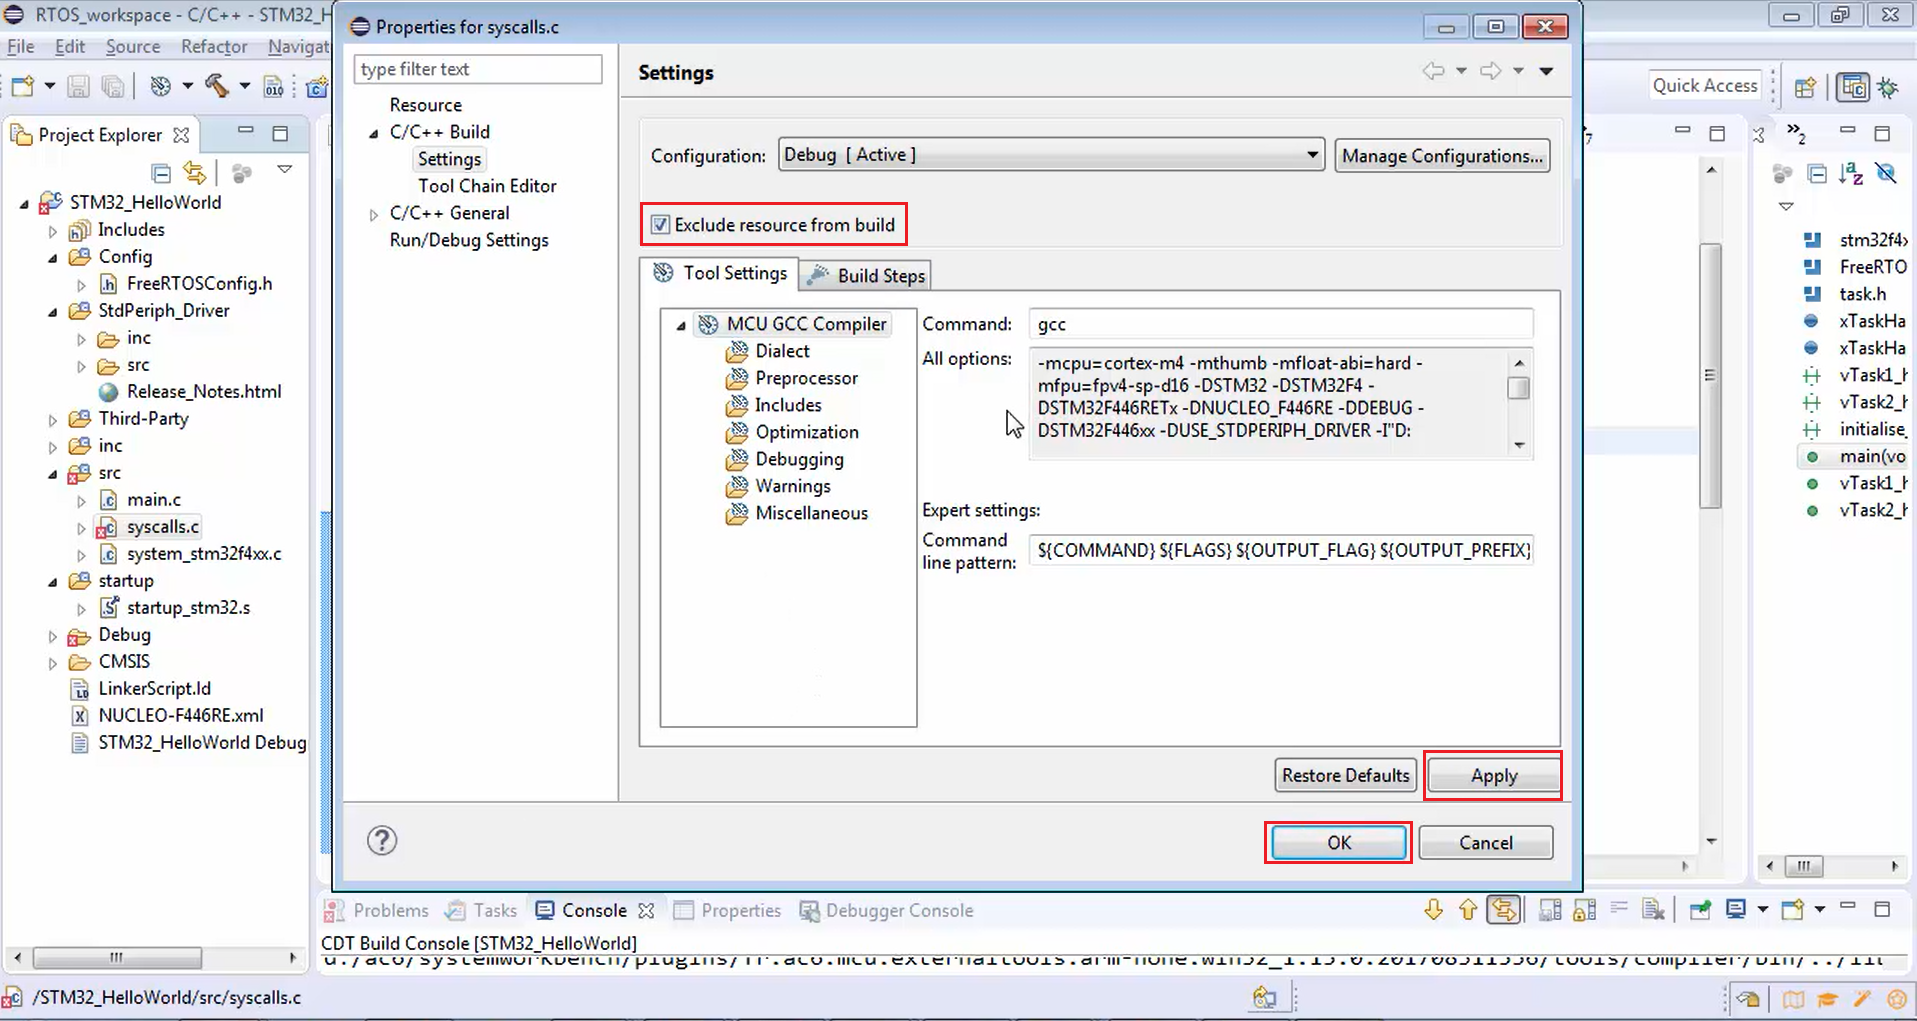
Just right-click on that, go to the properties (Figure 16), and exclude that from the build (Figure 17) because we don’t need that file. Click apply and then ok.
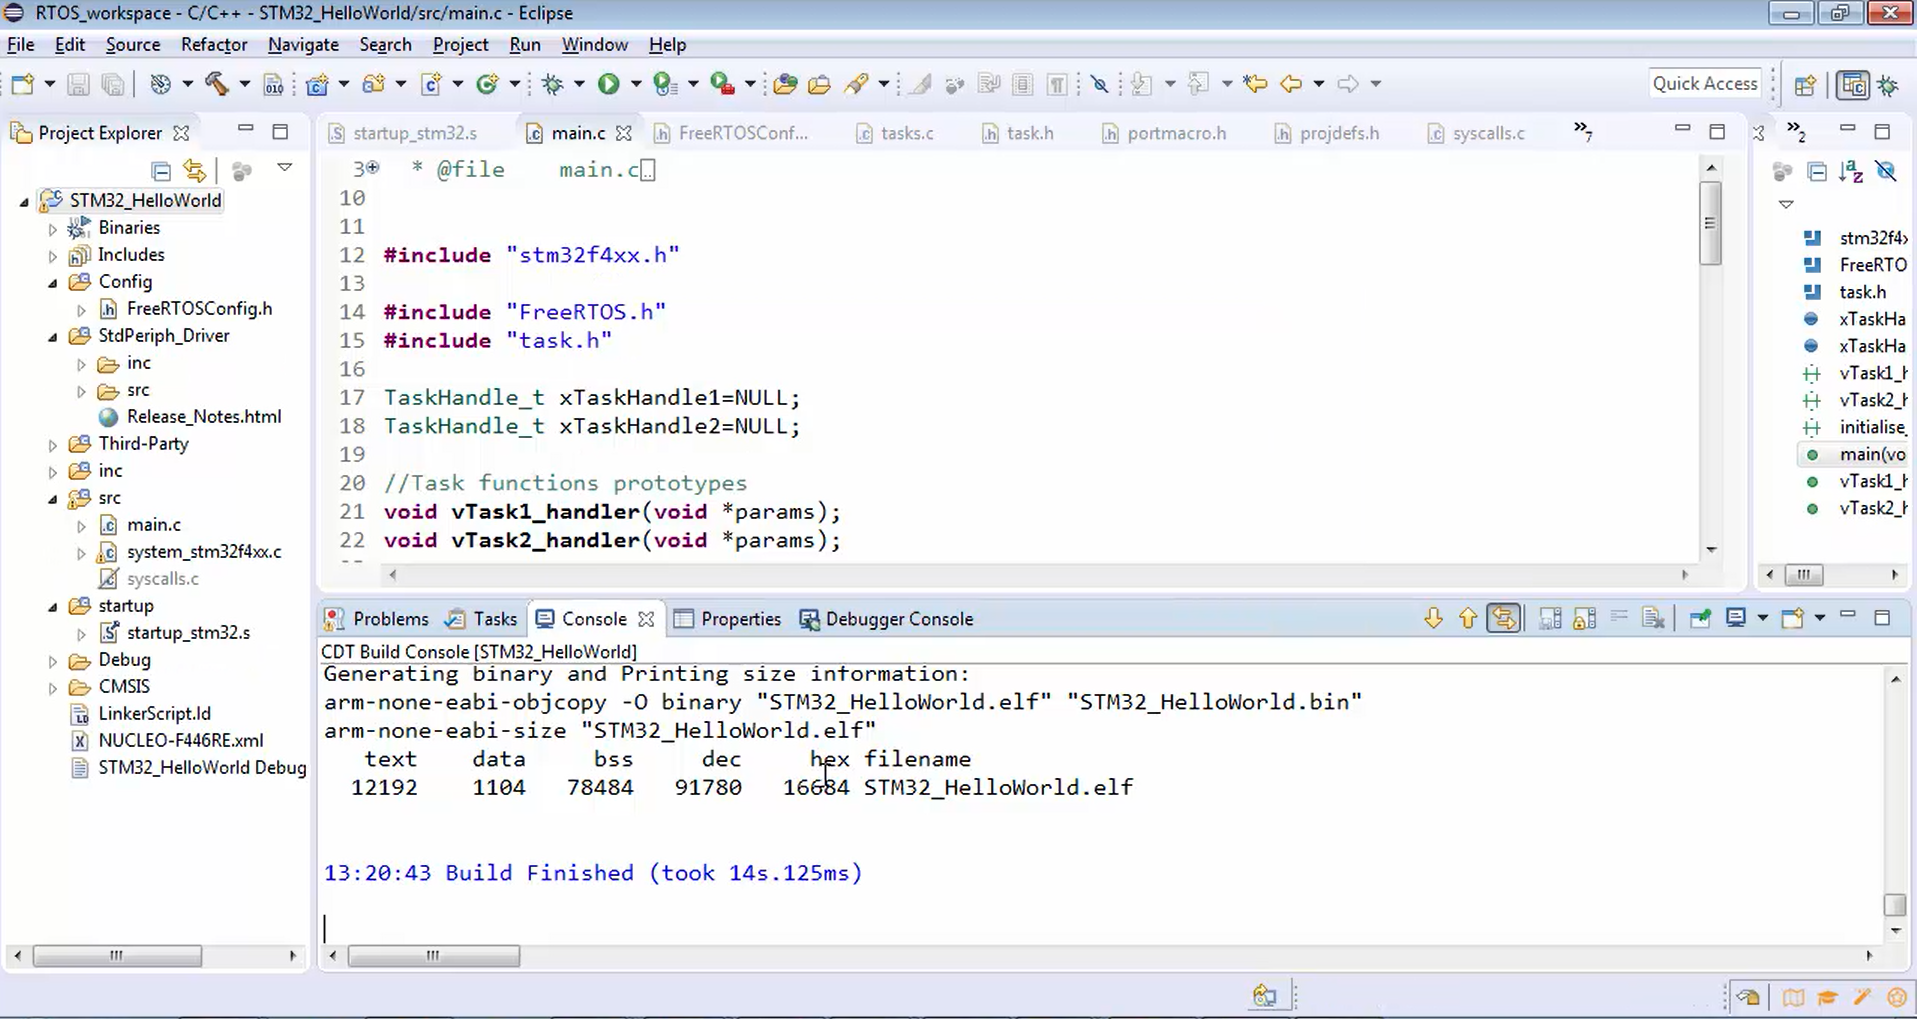
Now let’s try to build the project (Figure 18) and see whether it gives any error or not.

See the logs in Figure 19. The project was built successfully without any errors.
Summary:
To enable the semihosting, you have to just do three things.
The first one is you have to provide linker arguments in order to work with semihosting. Figure 2 shows the linker arguments, which must be supplied to the linker.
The second step is to include the monitor arm semihosting enable command in the debug configurations of your project. That means whenever you debug the project, this command will be executed, which enables the semihosting feature.
After that, in the main function include the function call and prototype of the initialise_monitor_handles() function.
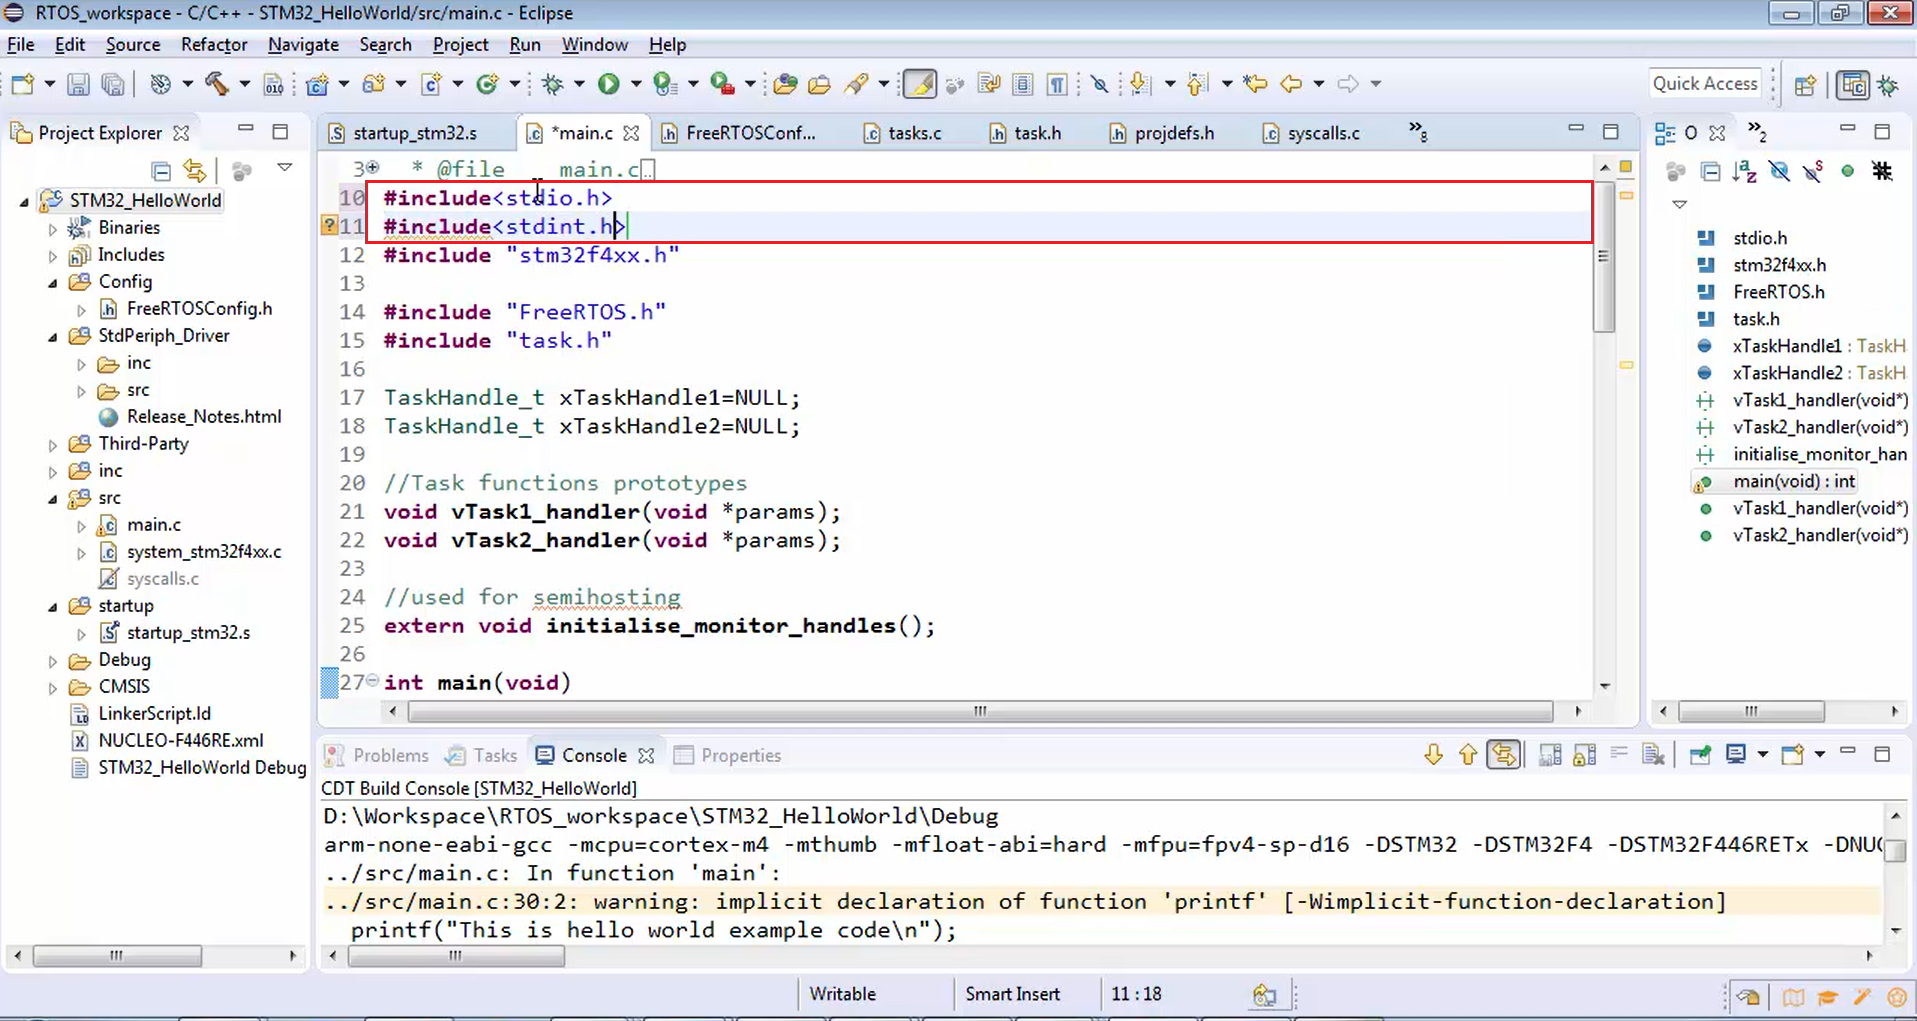
After that, you can use your printf statement. Let’s write “This is hello world example code \n” inside the printf function. Since you are using printf, include #include<stdio.h> header file, as shown in Figure 20. It is always better if you include stdint.h.
#include "stm32f4xx.h"
#include "FreeRTOS.h"
#include "task.h"

TaskHandle_t xTaskHandle1=NULL;
TaskHandle_t xTaskHandle2=NULL;

//Task functions prototypes
void vTask1_handler(void *params);
void vTask2_handler(void *params);

//used for semihosting
extern void initialise_monitor_handles();


int main(void)
{
    initialise_monitor_handles();
    printf("This is hello world example code\n");

    //1. Reset the RCC clock configuration to the default reset state.
    //HSI ON, PLL OFF, HSE OFF, system clock = 16MHz, cpu_clock = 16MHz
    RCC_DeInit();
Build the project once again. Now the project is compiled successfully without any error.
Now in the task function, let’s write printf(“Hello-World: From Task-1\n”), as shown in Figure 21. In task 2 handler also again print the same thing and write “Hello-World: From Task-2\n”.
void vTask1_handler(void *params)
{
    while(1)
    {
        printf("Hello-world: From Task-1\n");
    }
}

void vTask2_handler(void *params)
{
    while(1)
    {
        printf("Hello-world: From Task-2\n");
    }
}
Use of printf statements in task handlers
Now let’s test this code:
- First, let’s build the project.
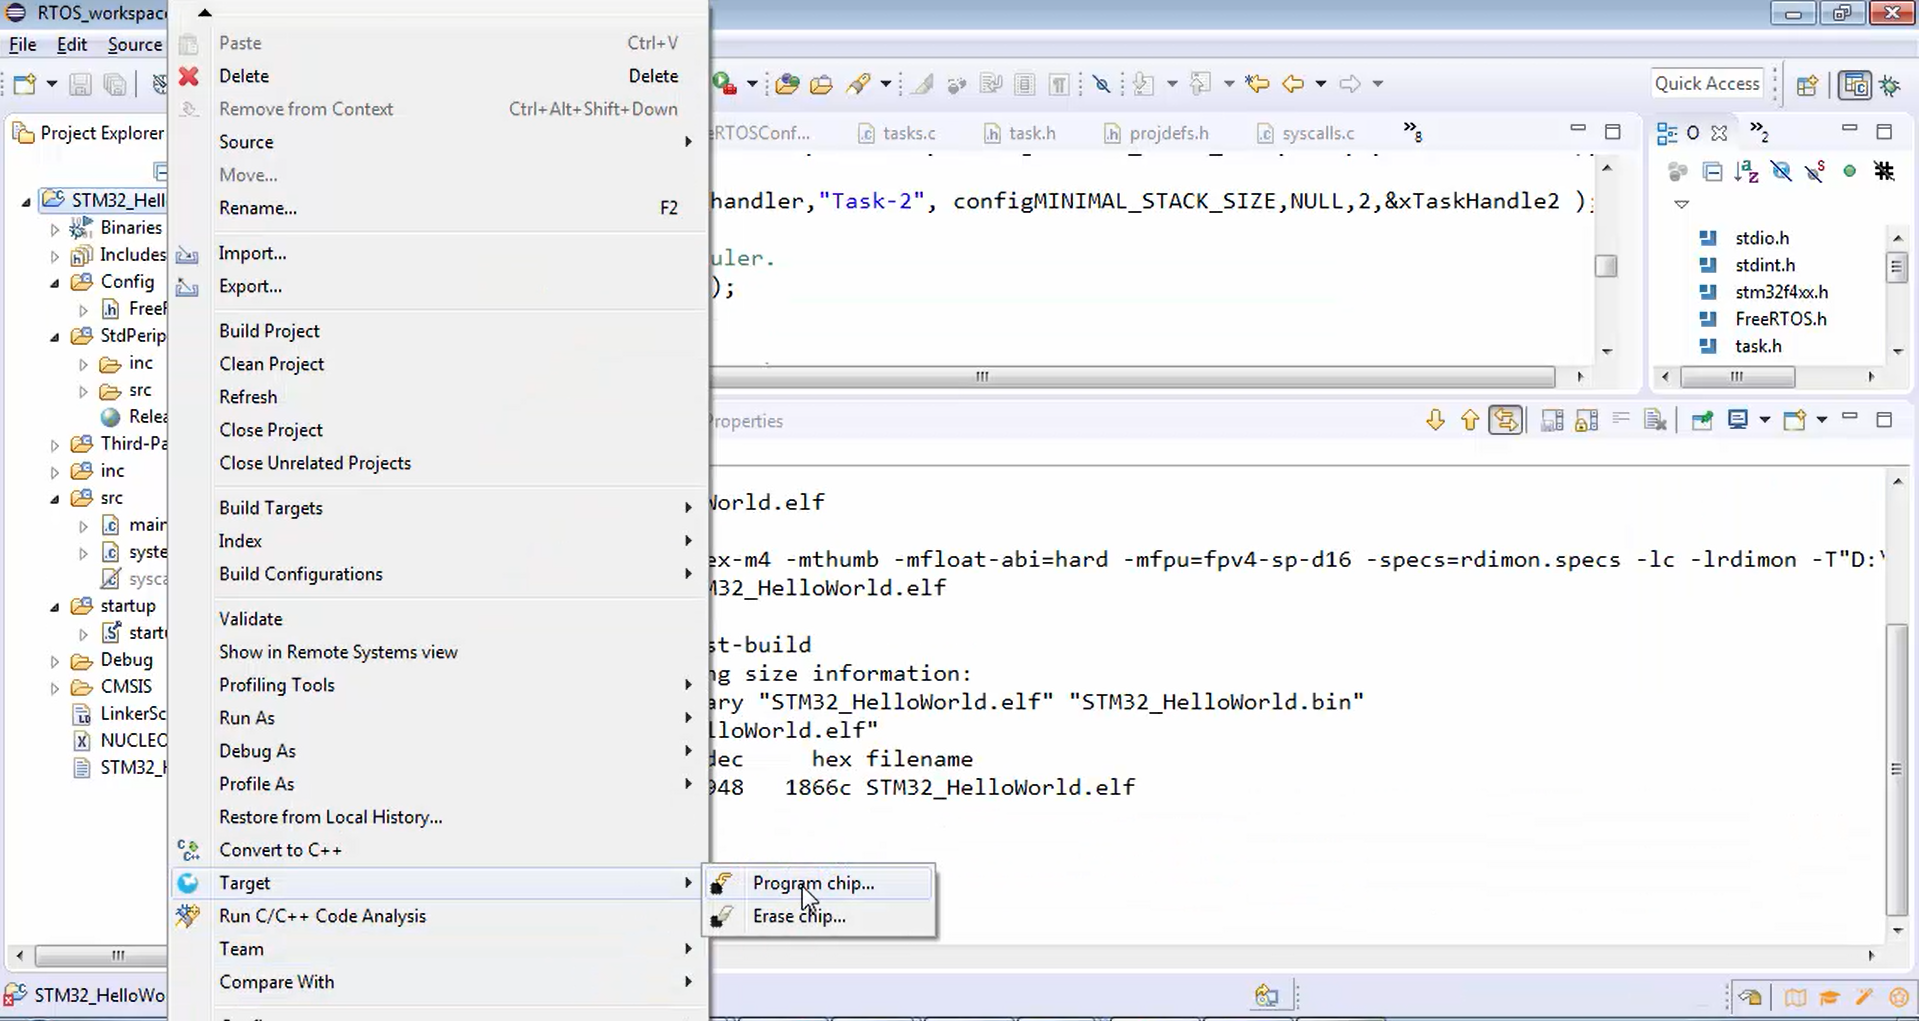
- Just flash the code (Figure 21 and 22). Now the code is running. But in order to see the logs, you have to get into the debugger mode because that works based on the semihosting technique.
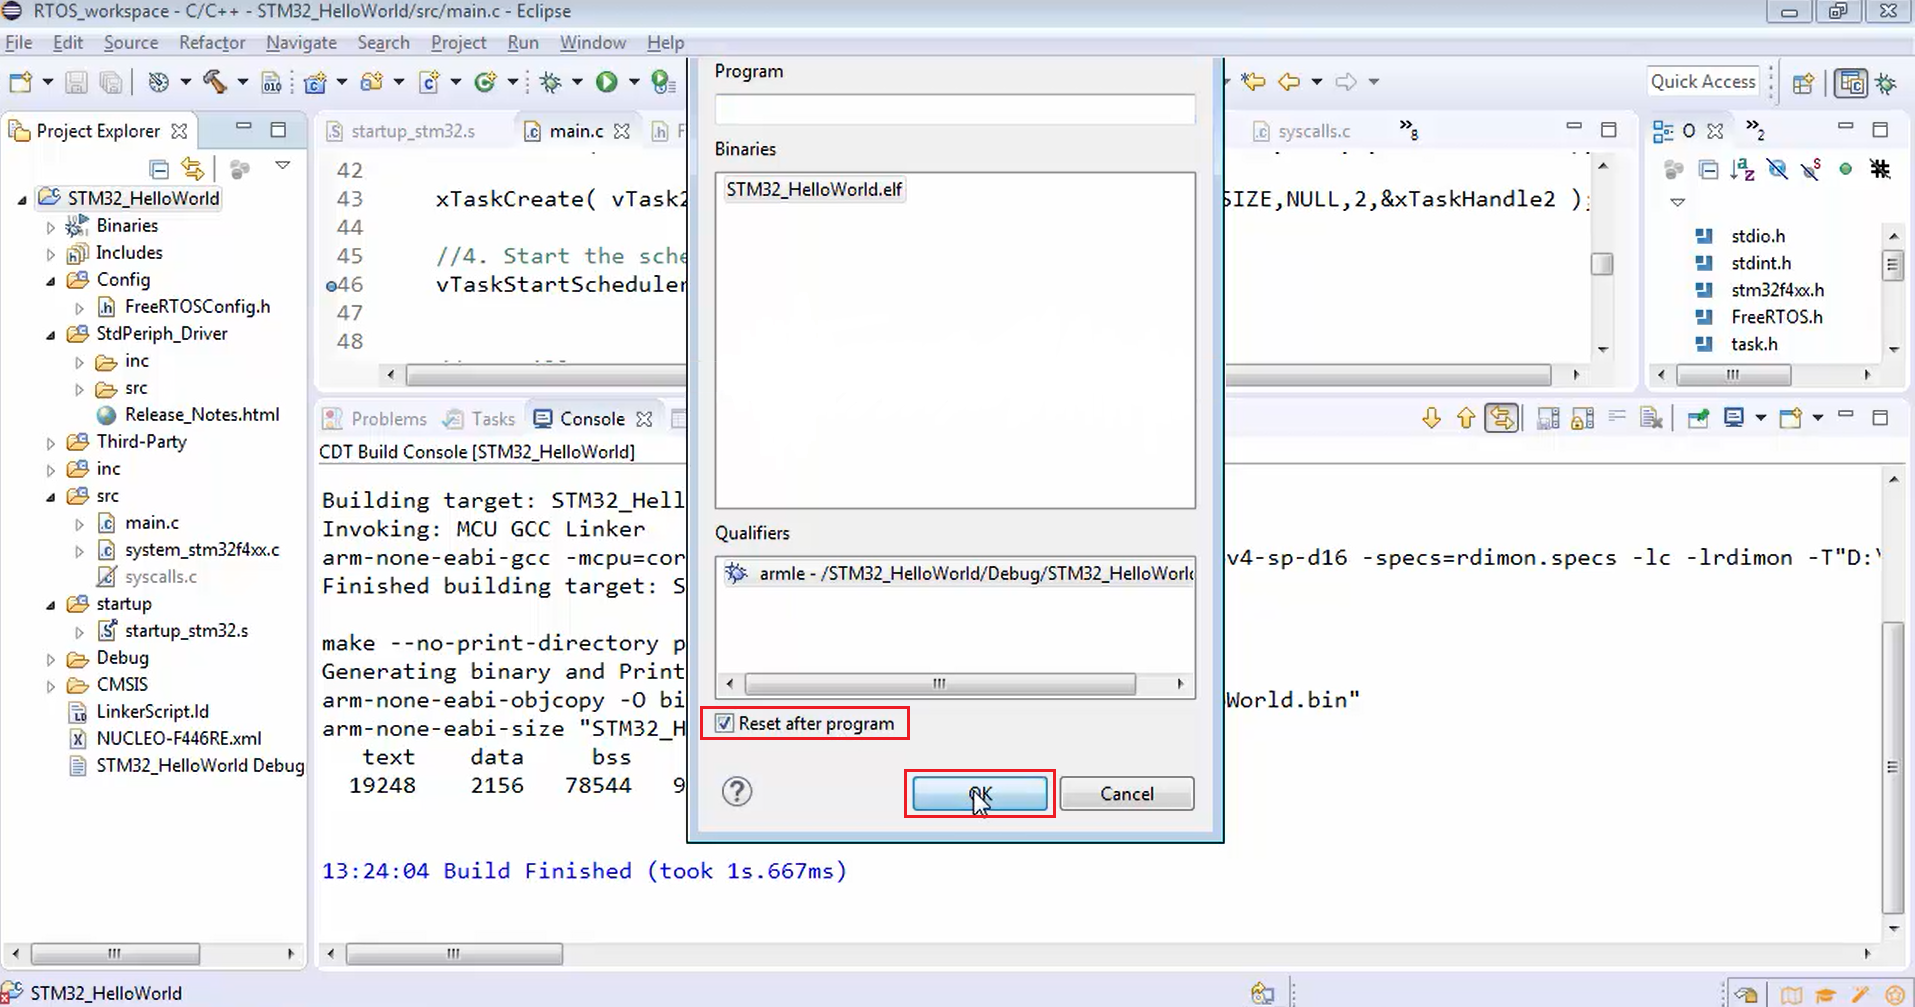
- In order to see semihosting in action, you have to be in debugger mode. Your firmware will be exchanging the information with the debugger of the IDE. That’s why you have to first trigger the debugger. To trigger the debugger, first, you have to get into the debugging mode (Figure 23).
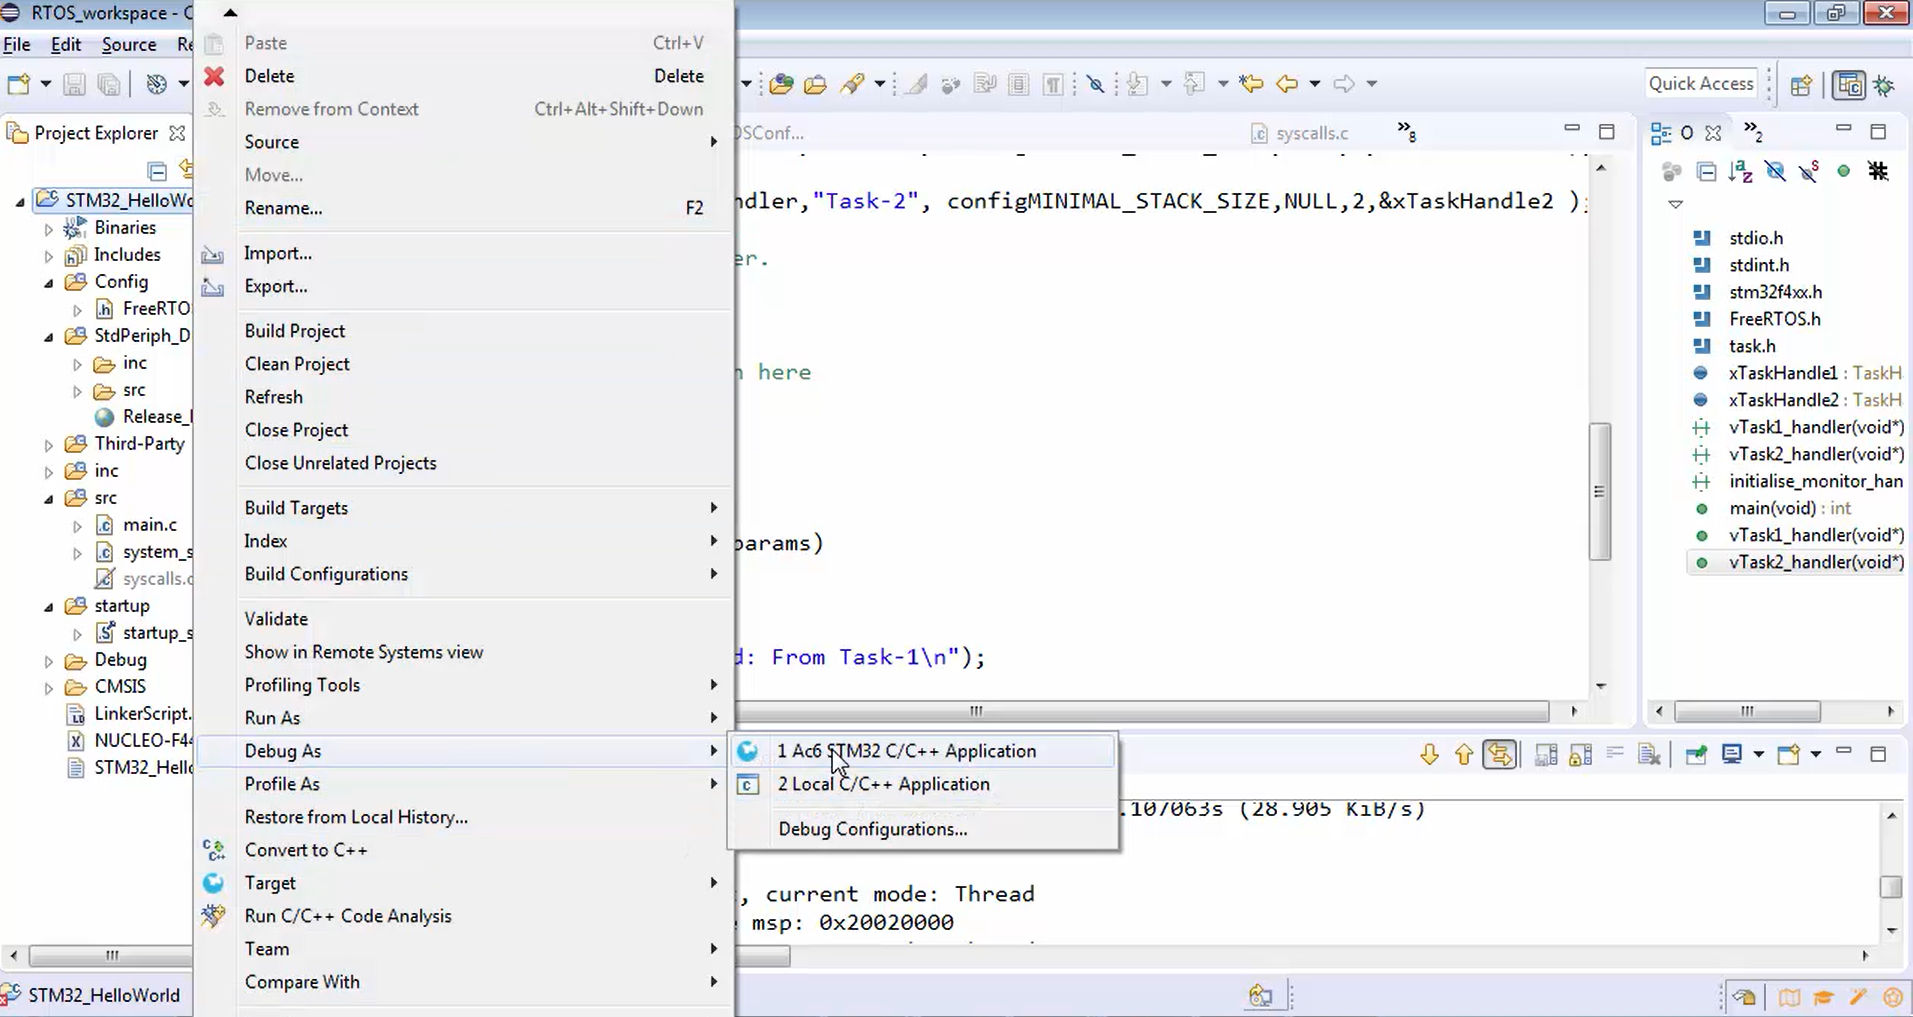
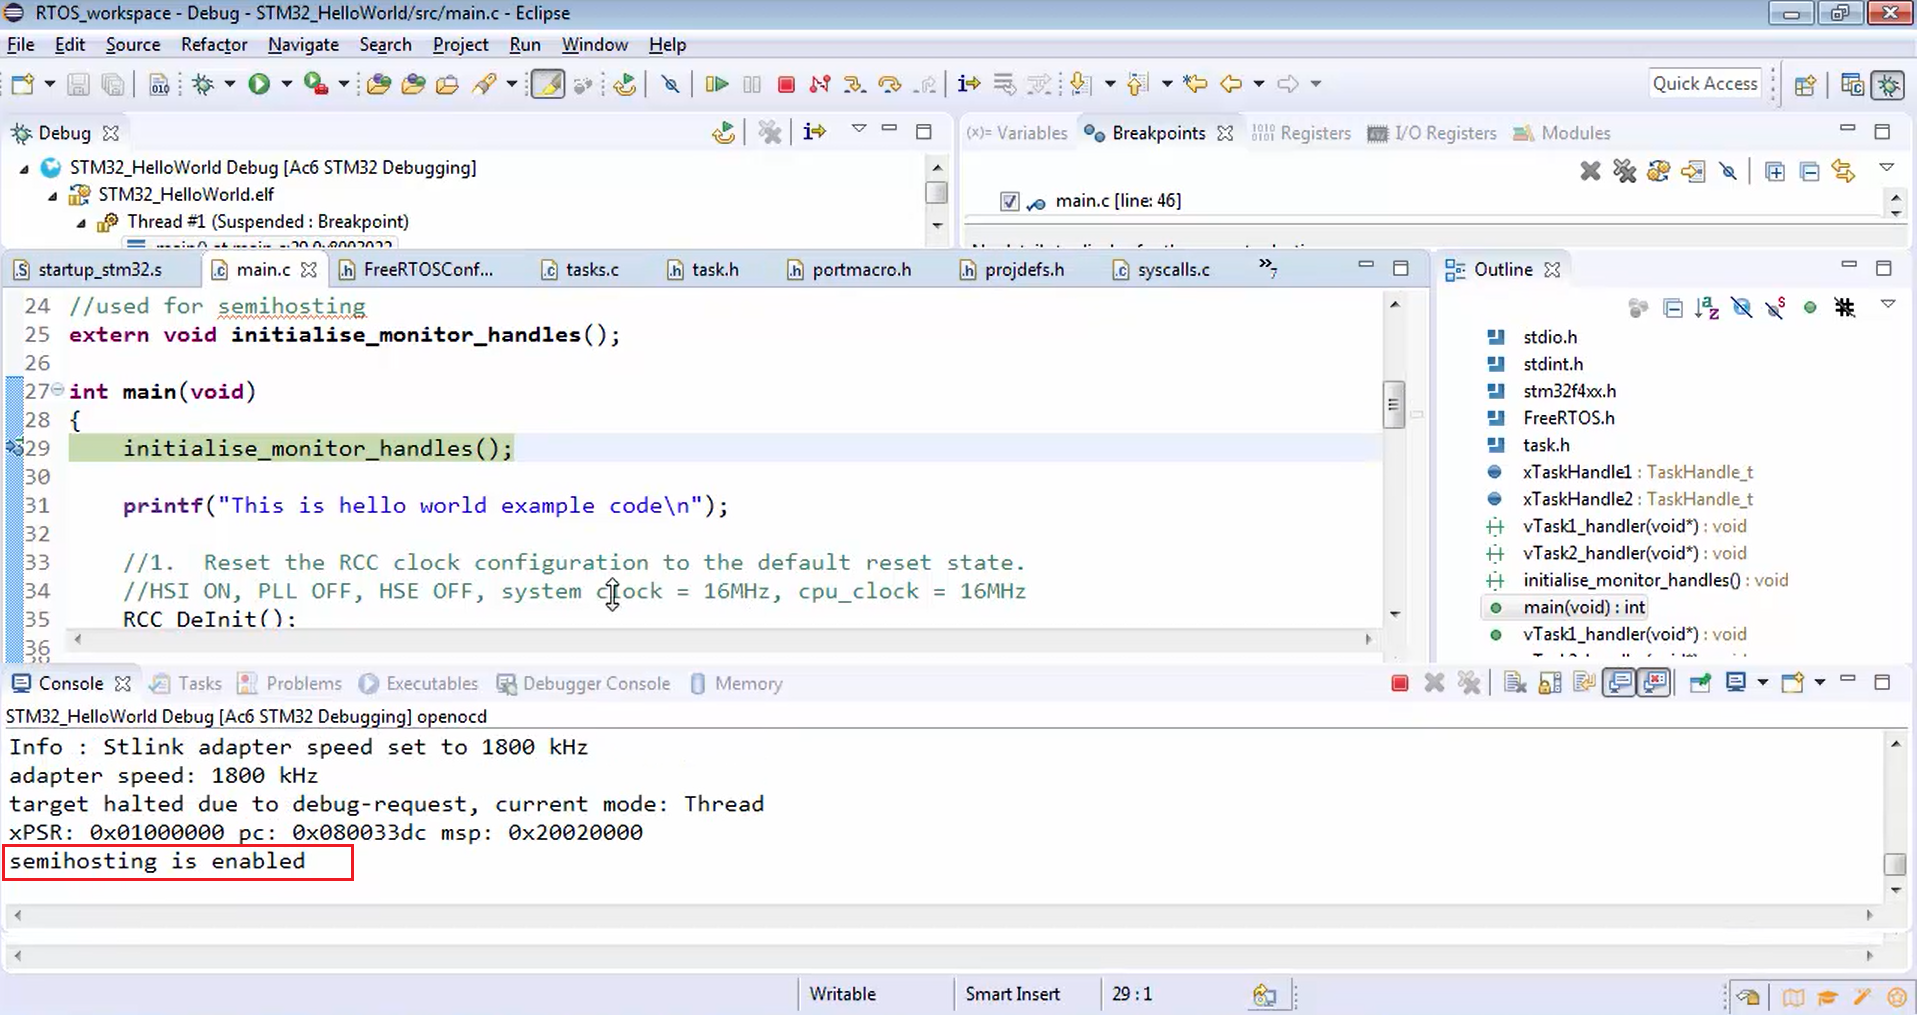
Figure 24 is showing that the semihosting is enabled. Now let’s hit run and see whether our print statements are printing the messages or not.
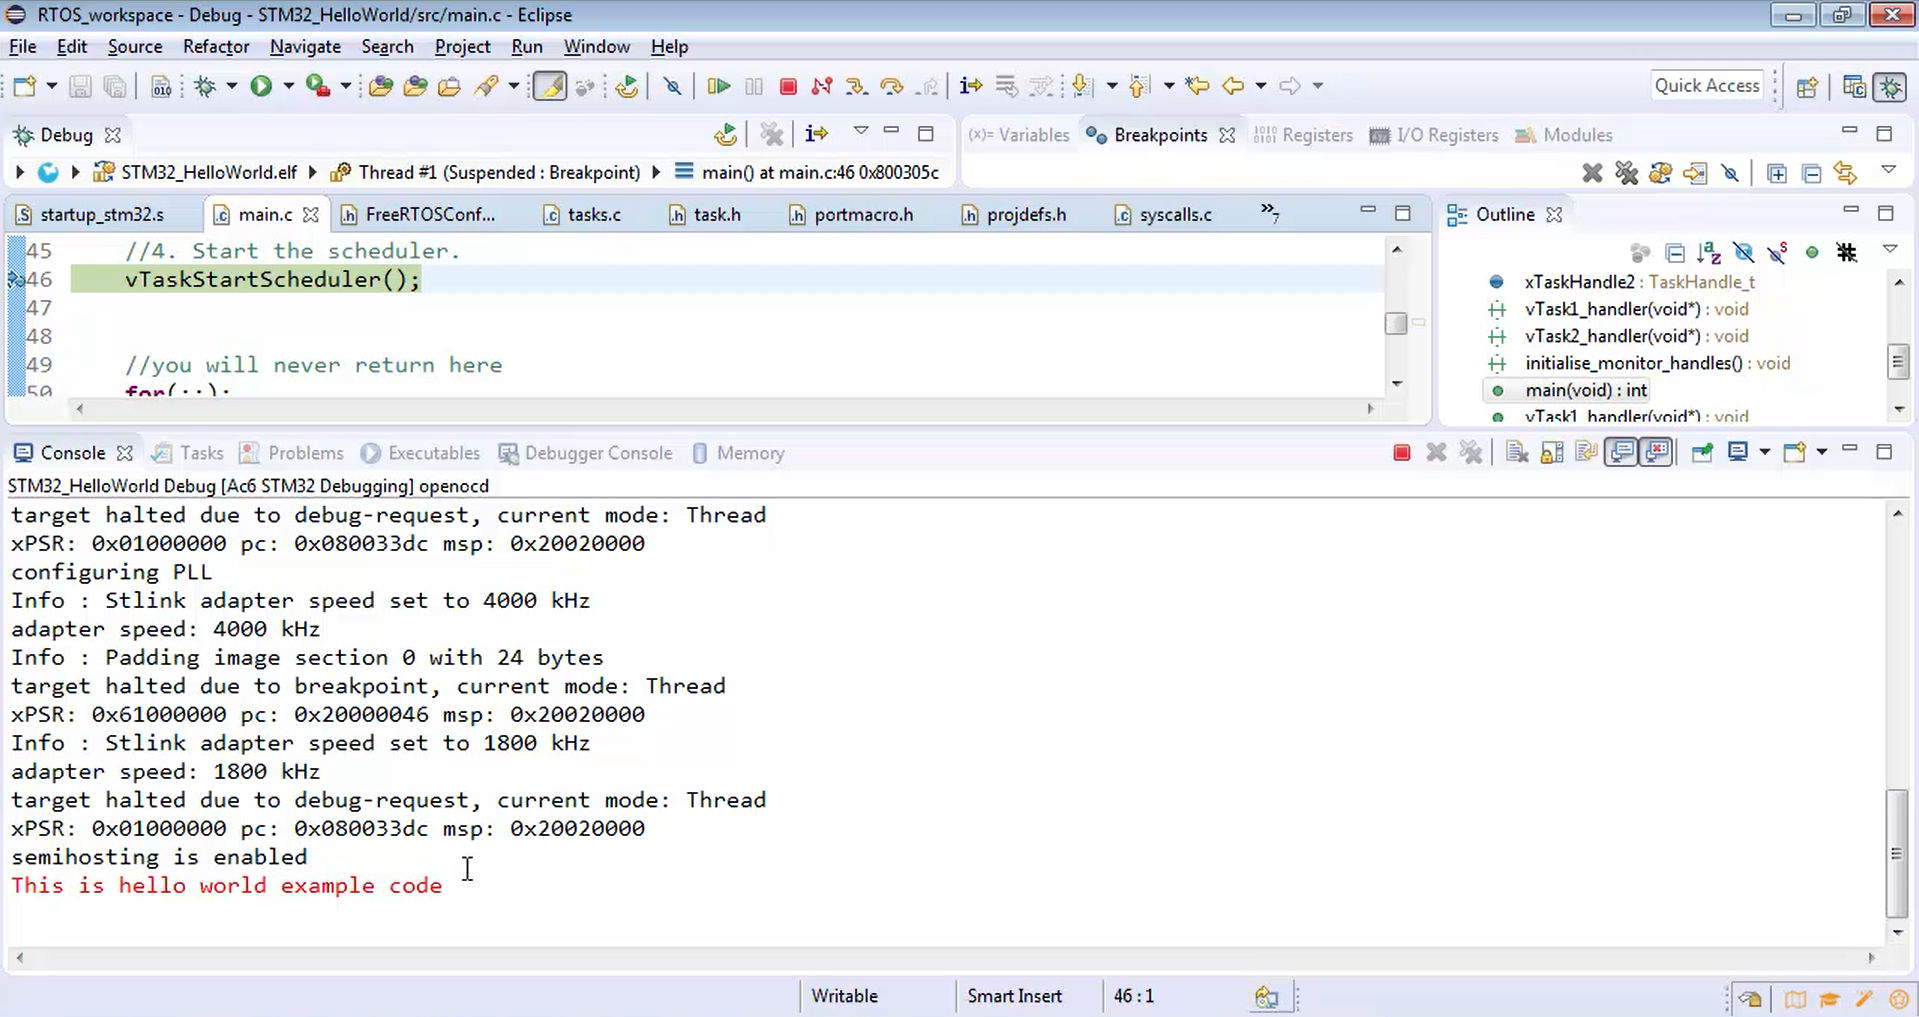
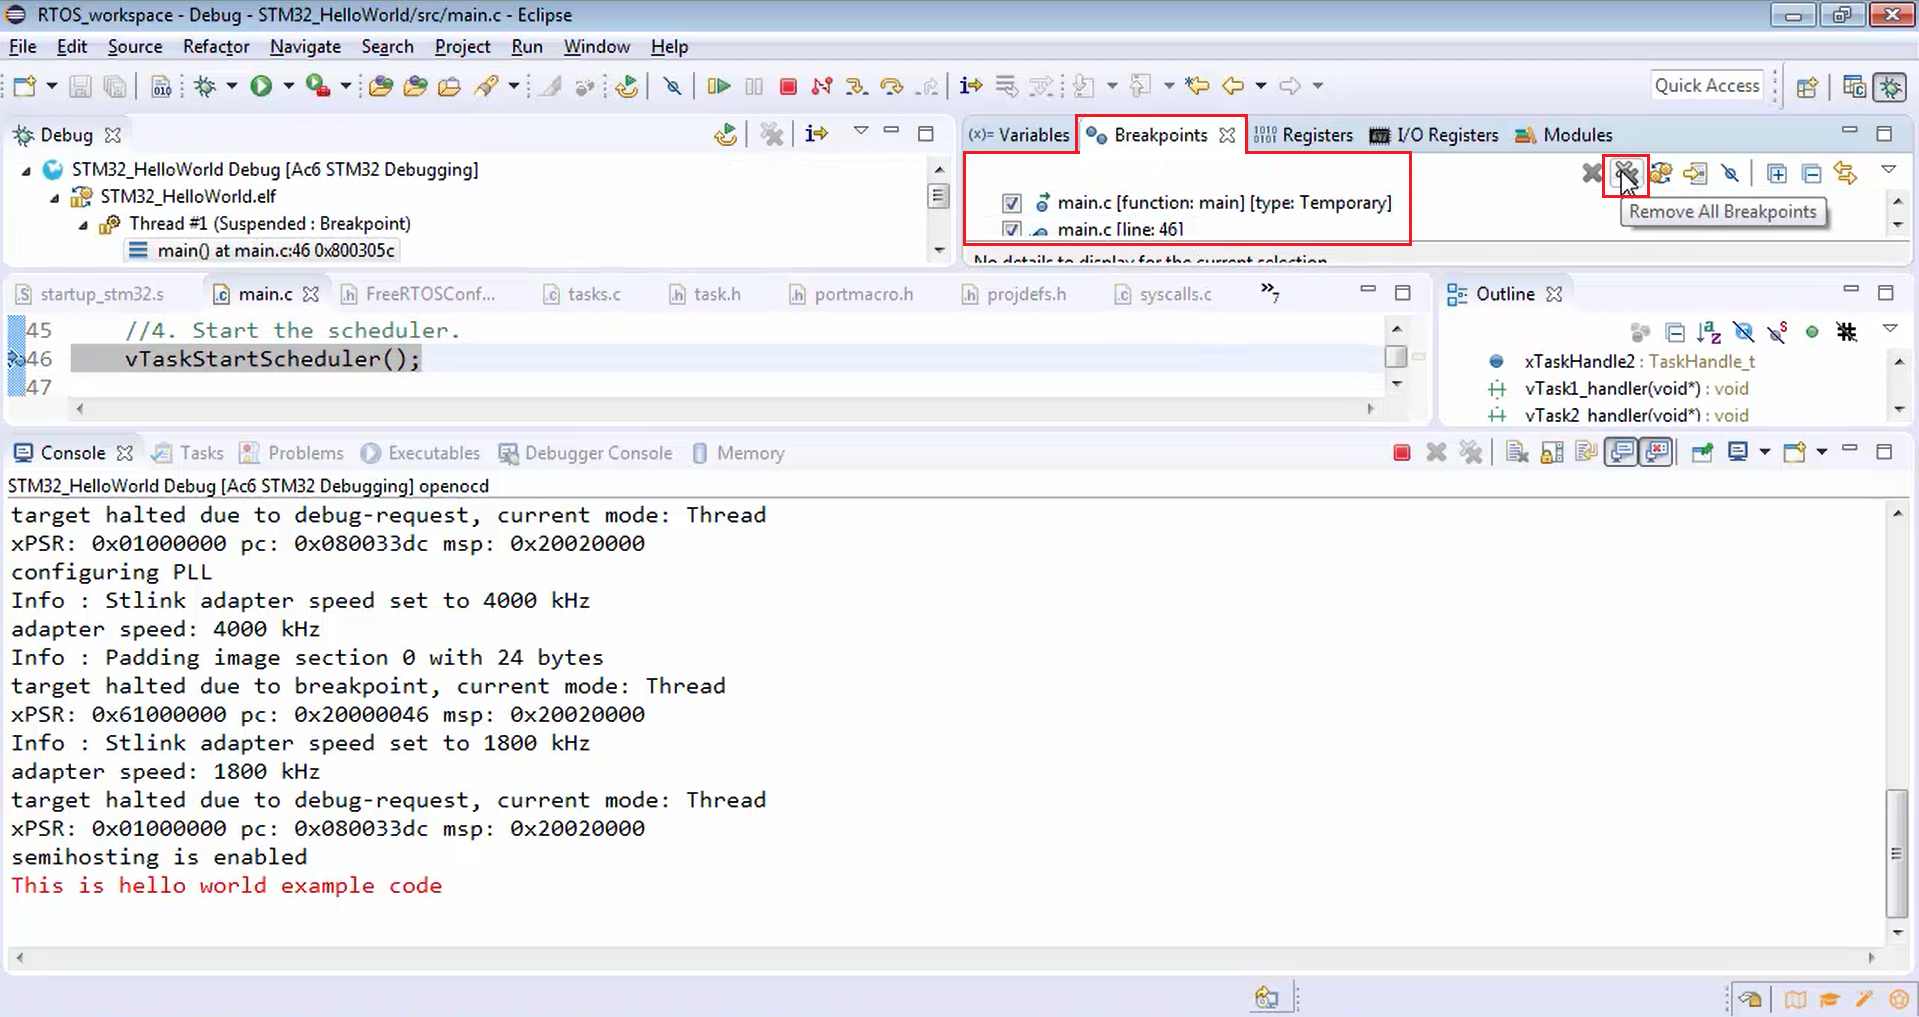
- Now your project is printing the message “The hello world example code”, as shown in Figure 25. The execution is actually halted at line 46 (Figure 25) because we have kept the breakpoint there.
- Let’s remove all the breakpoints, as shown in Figure 26.
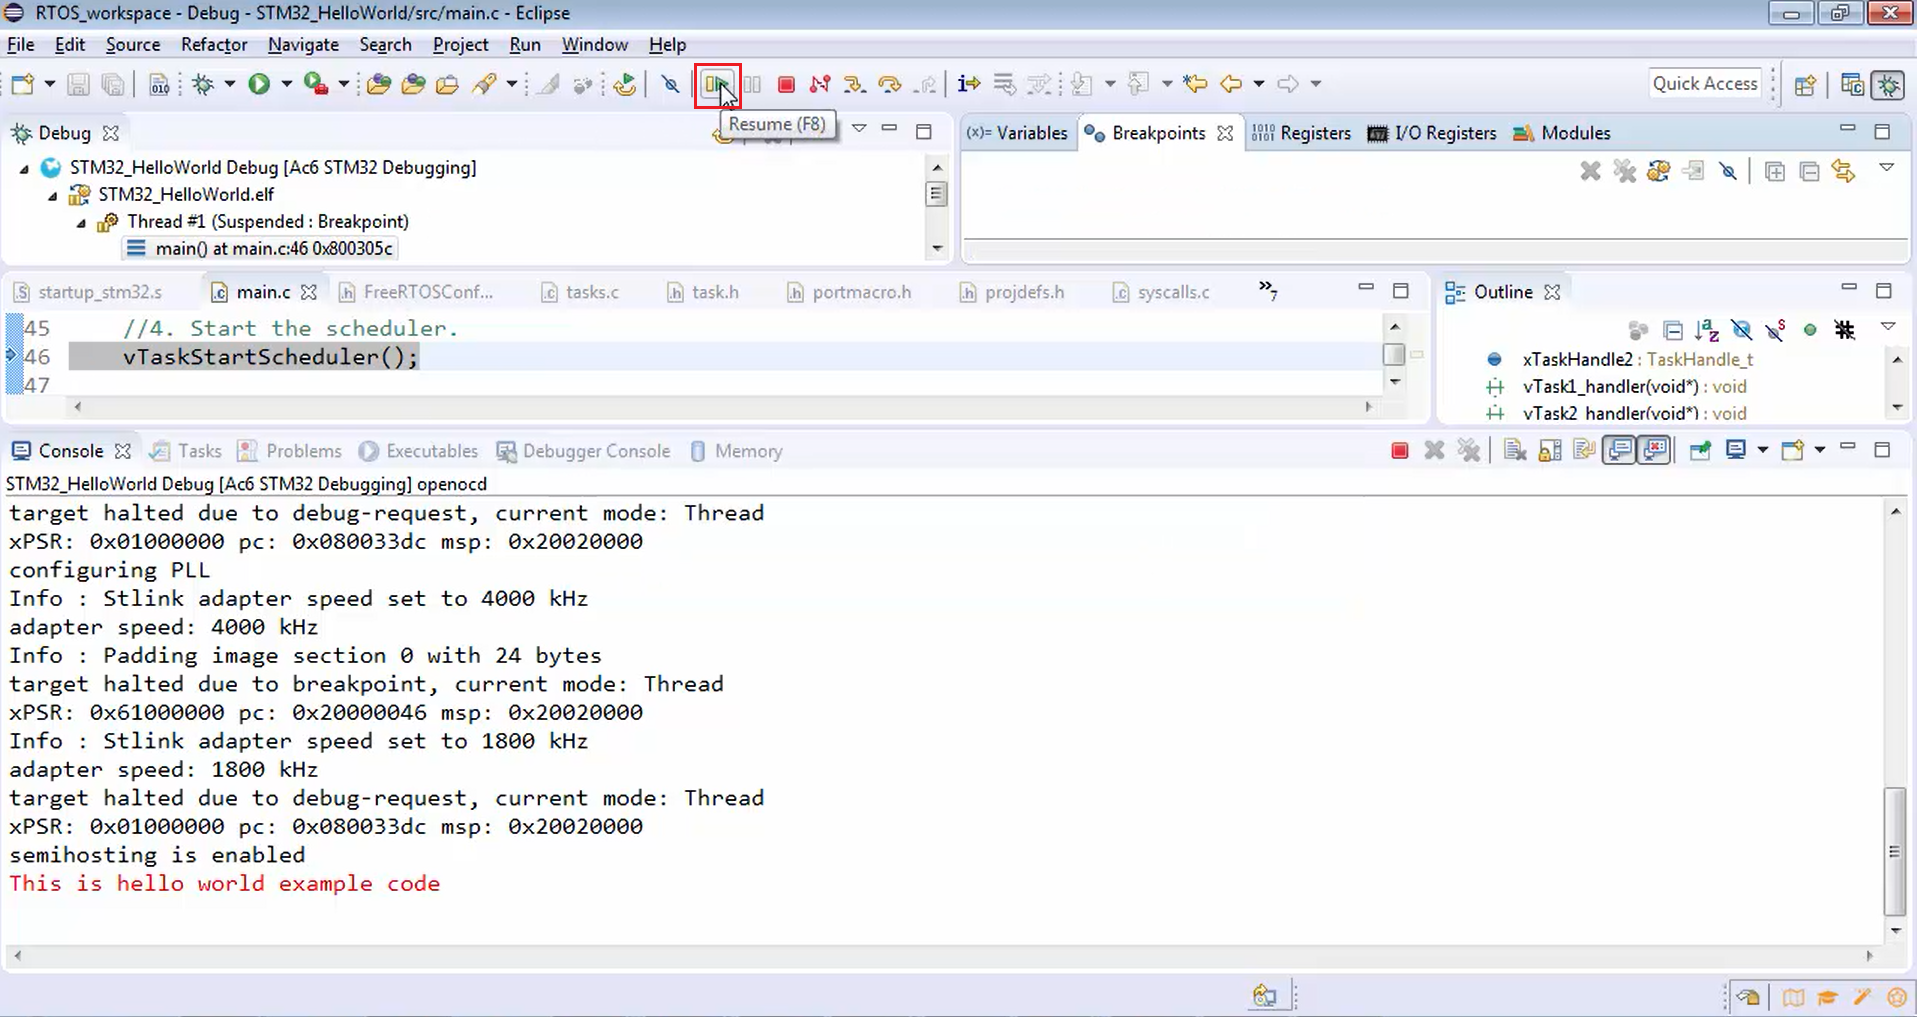
- Now hit resume once again (Figure 27). Now in Figure 28, you can observe that task 1 is running for some time quanta, and after that, task 2 will run for some time.
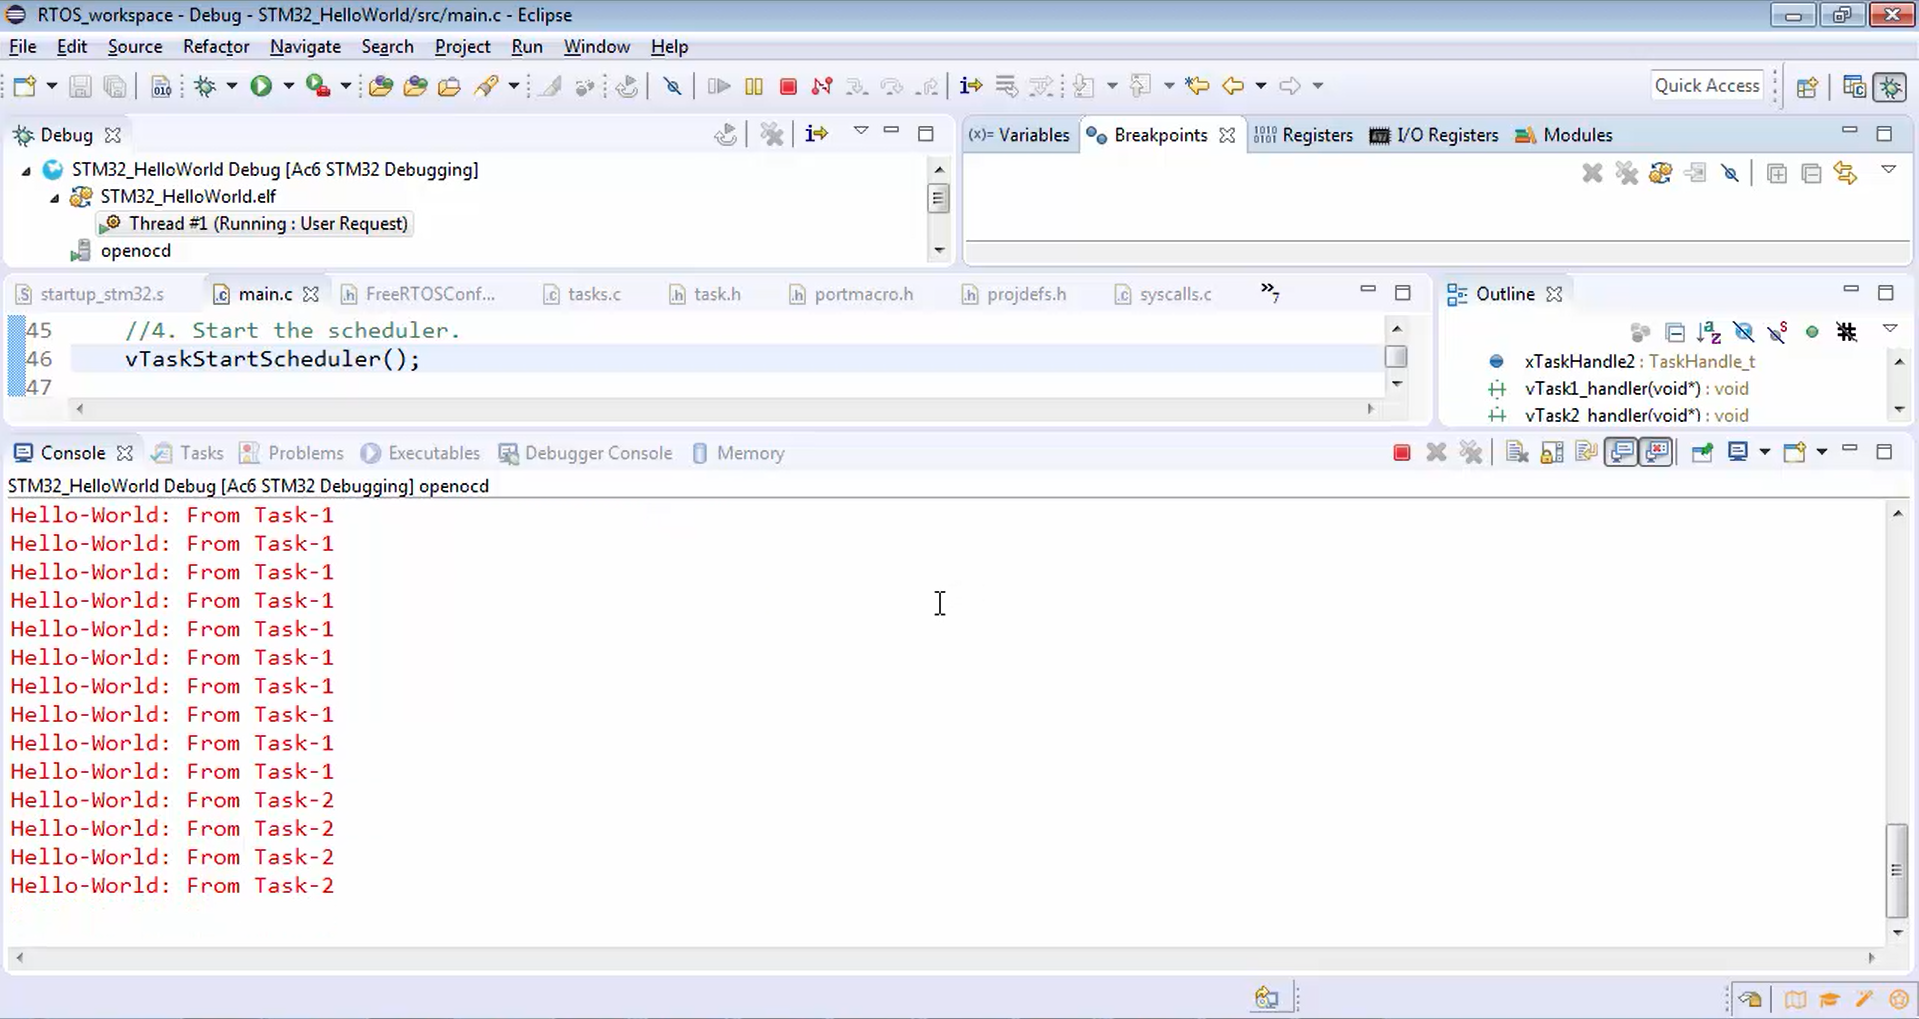
The execution of tasks looks very slow because the debugger is involved here. The software has to exchange the information with the debugger, and the debugger is printing those messages, which it got from the board. So, it looks very slow.
In this example, for the demonstration purpose, we used the semihosting technique. This will be helpful when you debug the code. Whenever you debug the code, if you want to take the help of printf to see what’s going on, you can use this technique. For production and all, we will never use this arm semihosting technique.
FastBit Embedded Brain Academy Courses
click here: https://fastbitlab.com/course1

