Pseudo character driver implementation
In this tutorial, we’ll walk you through the process of creating a pseudo character driver in Linux.
Setting up the Project Structure
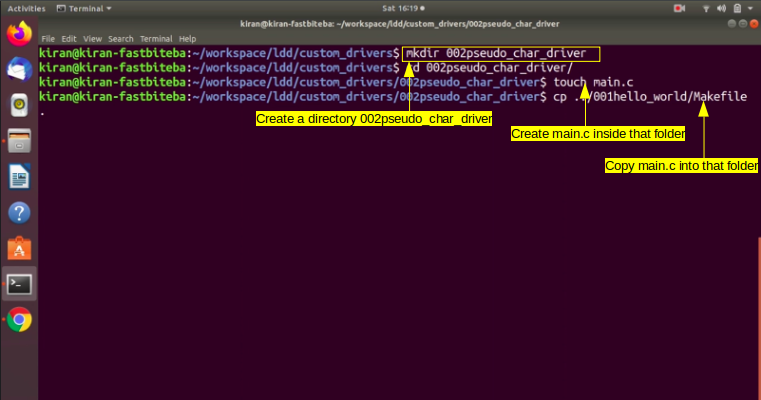
Navigate to your custom drivers folder and create a new folder named “002pseudo_char_driver”. Inside this folder, create a file named “main.c.” Here we are going to implement the code. And also, let’s copy the makefile from the previous project. 001hello_world/Makefile.
You can refer to Figure 1 for the directory structure.
Edit the main.c File
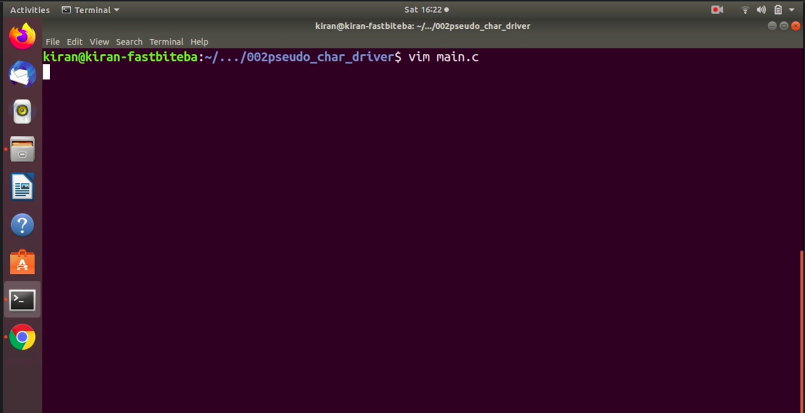
Open “main.c” using your preferred text editor (e.g., Vim), and follow these instructions:
Begin by including the necessary header:
#include <linux/module.h>. This header is essential for every module.Create the module initialization function. You can start with
static int _init. Let’s give a name for our module initialization function, and I would give pseudo character driver init.pcd_init.
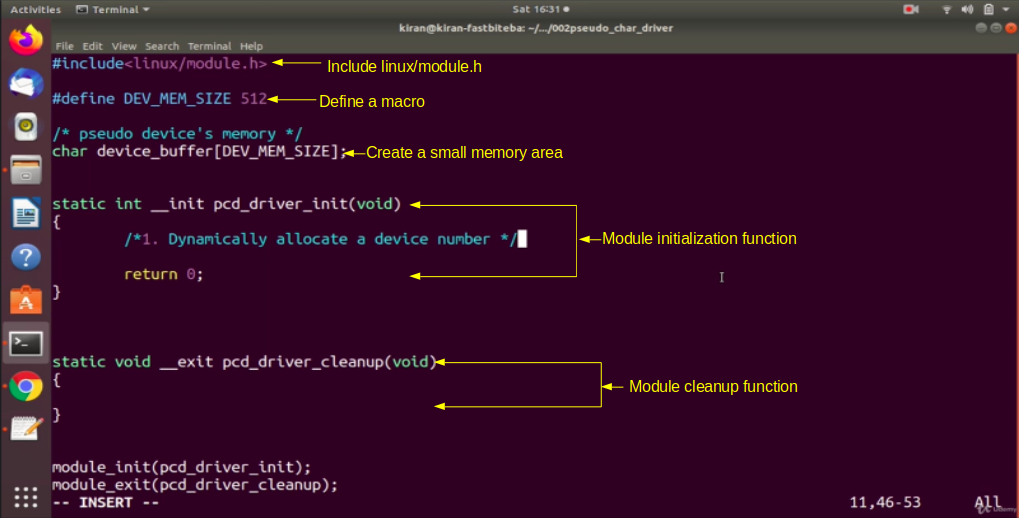
It takes no argument, so void, and this will be our init function, module_init function. Or I would call this as pcd_module_init or driver_init.
After that, let’s write the clean-up function pcd_driver_cleanup. For the time being, let’s return 0. After that, we have to do a module_init for this a module initialization function. And also module_exit.
After that, let’s create a small memory area by using an array. Let me define that char, Let me call it as device_buffer of some size. Let me call it as DEV_MEM_SIZE. And let me define this macro. #define DEV_MEM_SIZE is, let’s say, 512 bytes. This is an array of 512 bytes. This is our pseudo device.
Our read and write operations will be carried out on this memory pool.
Dynamically Allocating a Device Number
The very first thing, what we are going to do in our module initialization function, that is, pcd_driver_init, is dynamically allocate a device number. Char device_buffer[DEV_MEM_SIZE] is our device. There is only one device. Don’t worry about creating multiple device numbers. There are no multiple devices. There’s only one sudo device. That is this memory area.
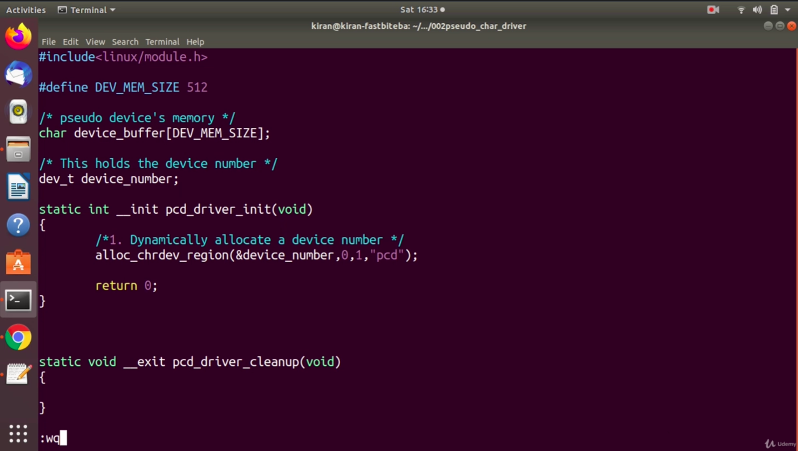
Let’s dynamically allocate a device number; for that, we have to use alloc_chrdev_region.
And the first argument is you have to supply a pointer to a variable of type dev_t. Let’s create that variable. dev_t I would call it as a device number. This is a device number. This holds the device number. Let’s send the pointer to that, device_number.
What is the second argument?
The second argument is baseminor. Let’s use 0. As I said, we are handling only one device. I would send count as 1. And after that, the device name. A name what do you want to give for this device number. Let’s use a macro for that, or use pcd. Pseudo character device. After that end this statement.
You have to check what exactly this a function is called return. For the time being, let’s not worry about error handling; later will implement the error handling. So, we finished our first task, and let’s save and exit.
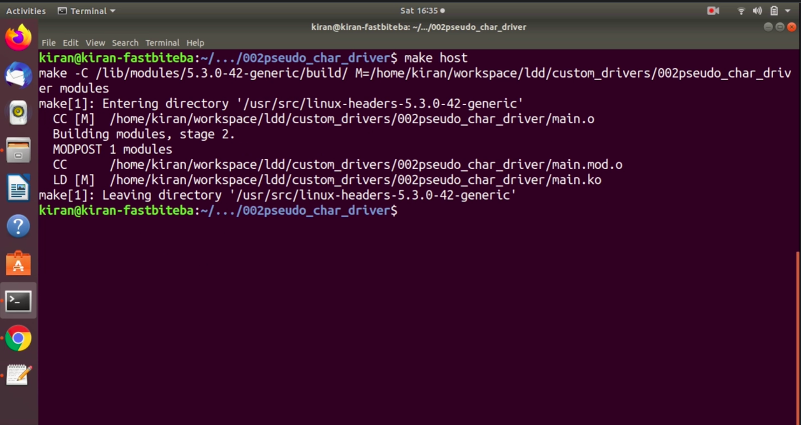
Let’s build the project. Just do make host as shown in Figure 5.
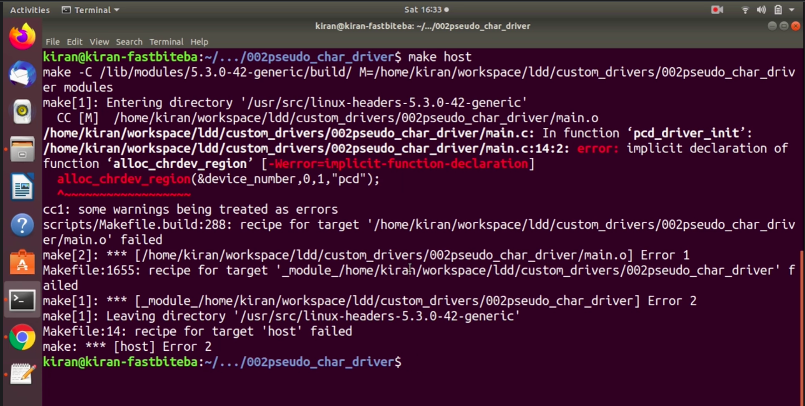
You have to include the header file.
What’s a header file?
The header file is you have to include Linux fs.h, We have to include #include<linux/fs.h>, in the main.c And there is a missing module description. Let’s add the MODULE_DESCRIPTION. Let’s save and exit.
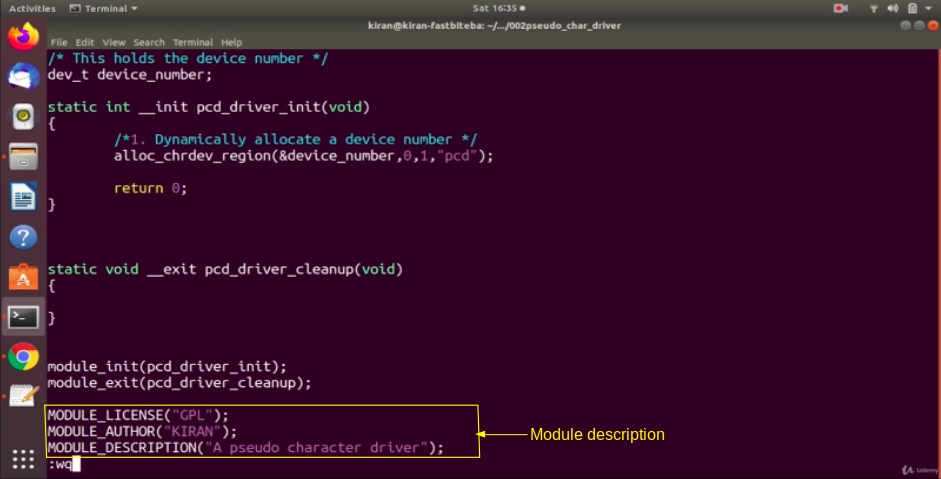
Then Make host. Now, you don’t see any warnings or errors, as shown in Figure 7.
Finish up to here, and I’ll see in the next article.
Get the Full Course on Linux Device Driver Here.
FastBit Embedded Brain Academy Courses
Click here: https://fastbitlab.com/course1

