Address of variables
In this article, let’s learn about the address of variables.
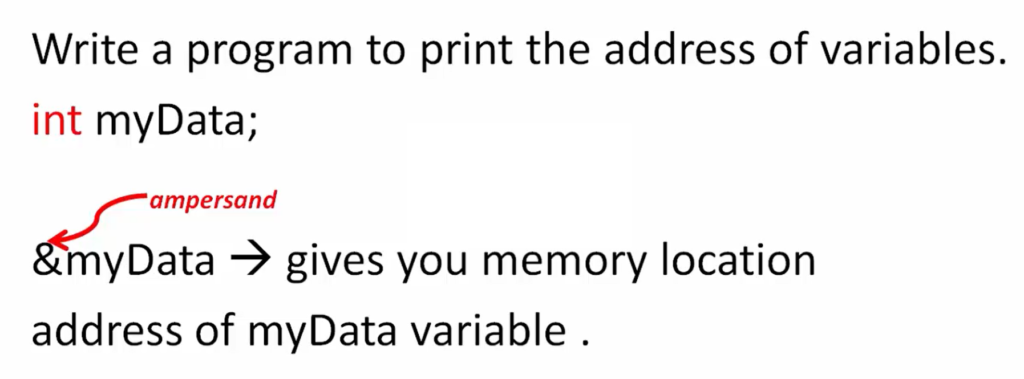
Consider the variable named myData.
When you use the notation &myData, it gives you the memory location address of myData or the memory location address of the variable . To extract this address, you have to use the ampersand(&) sign in front of the variable name. This provides the memory location address of the variable.
Exercise:
Write a program to print the address of variables.
https://www.traditionrolex.com/25
Now, let’s print the addresses of all the below variables.
#include<stdio.h>

int main()
{
    char a1 = 'A';
    char a2 = 'p';
    char a3 = 'p';
    char a4 = 'l';
    char a5 = 'e';
    char a6 = ':';
    char a7 = ')';
    return 0;
}
Exercise
To print the address of a variable, there is one unique format specifier, that is %p. This specifier allows the printing of memory location addresses..
#include<stdio.h>

int main()
{
    char a1 = 'A';
    char a2 = 'p';
    char a3 = 'p';
    char a4 = 'l';
    char a5 = 'e';
    char a6 = ':';
    char a7 = ')';
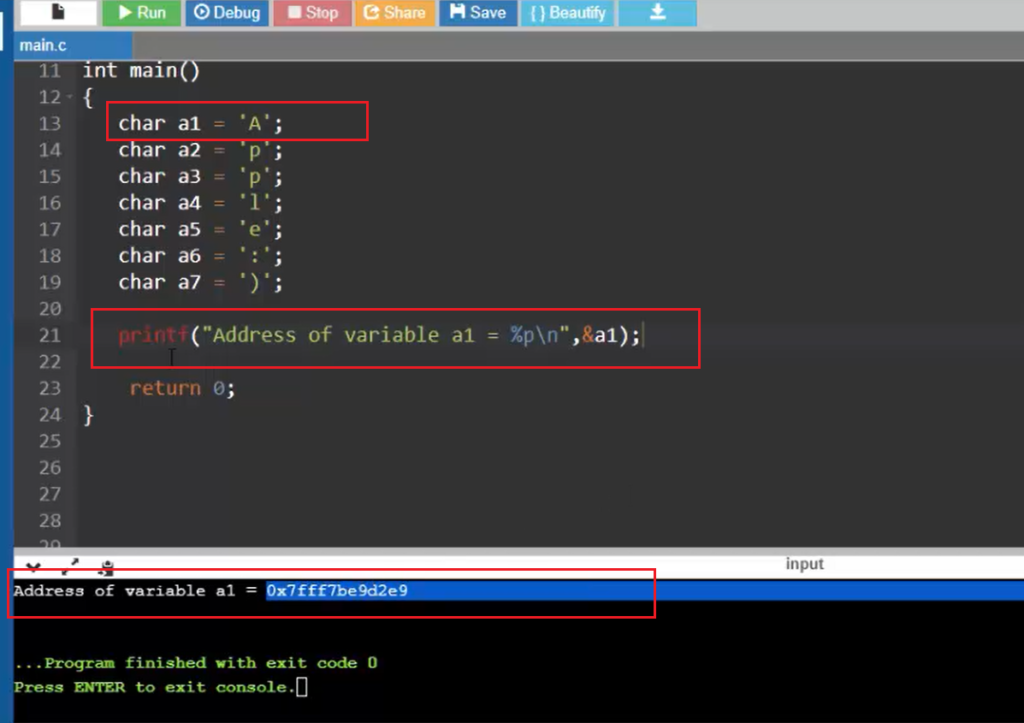
    printf("Address of variable a1 = %p\n", &a1);
    return 0;
}
Use printf to print the Address of variable a1.
So, the Address of variable a1 is equal to you can use the format specifier %p here. So, %p helps you print the Address of the variable in hexadecimal format. After that, you can give \n here. And after that, to print the Address, you have to use the argument here &a1.
Output:
The output in Figure 2 shows that the address of variable a1 is 0x7fff7be9d2e9. So, the value 65, which is the ASCII code for ‘A,’ is stored at this location( 0x7fff7be9d2e9).
So, 0x7fff7be9d2e9 is a memory address.
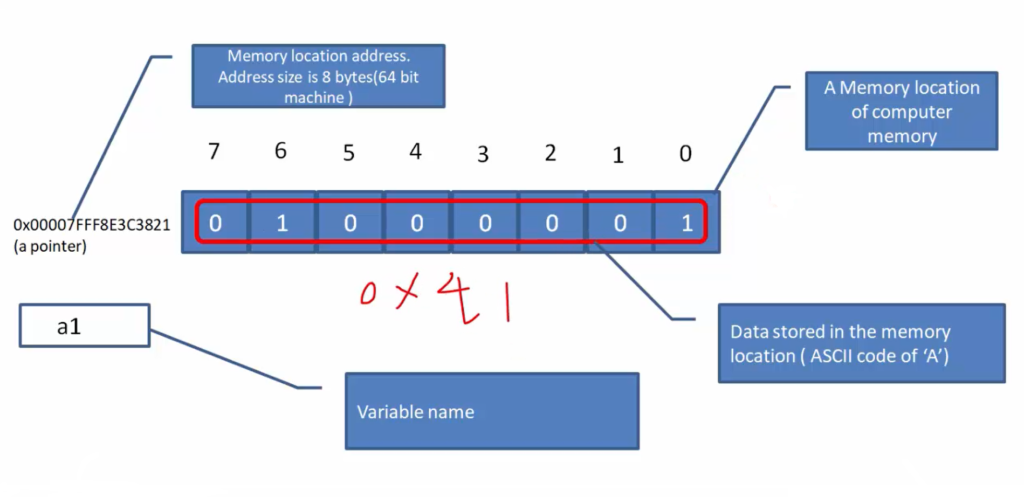
We can conclude from this experiment that there is a memory location of 1 byte, whose address is this one(0x00007FFF8E3C3821) and the address size is 8 bytes because that code is running on a 64-bit machine.
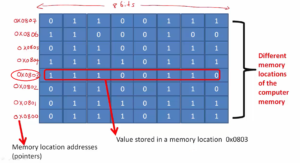
For 64 bit machine, the size of the memory location address is 8 bytes. So, this is a address(0x00007FFF8E3C3821). We also call it a pointer in ‘C’ because that points to the data. And the data is stored at that memory location, and the data happens to be ASCII code of ‘A,’ which is 0x41.
Printing All Variable Addresses
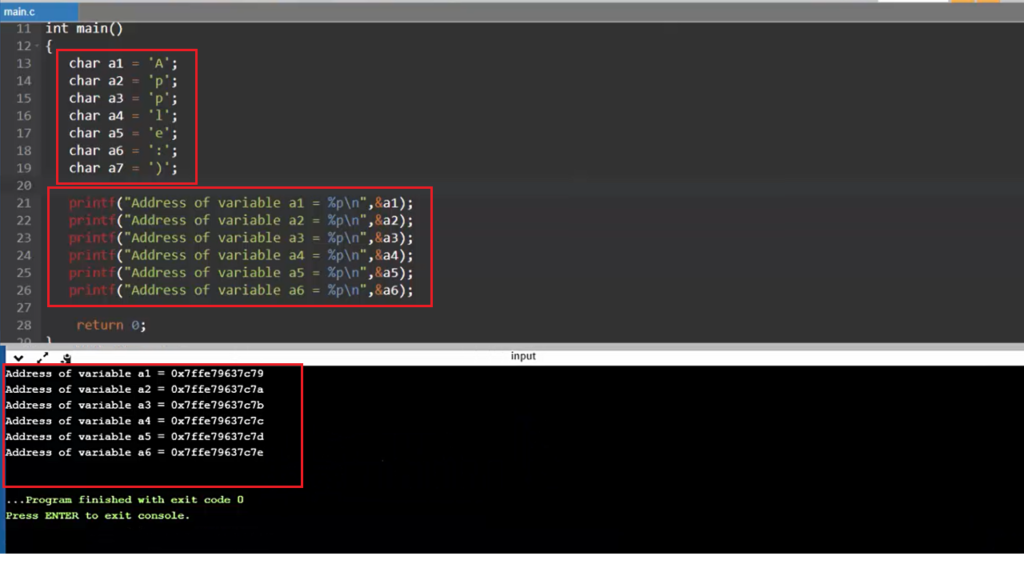
Now, let’s print the addresses of all the variables.
Let’s see how it goes. So, you can see in Figure 4 that these are consecutive memory location addresses. That means your data is stored in the consecutive memory location addresses.
Now, let’s run the same code on our machine using eclipse software, and let’s see how it goes.
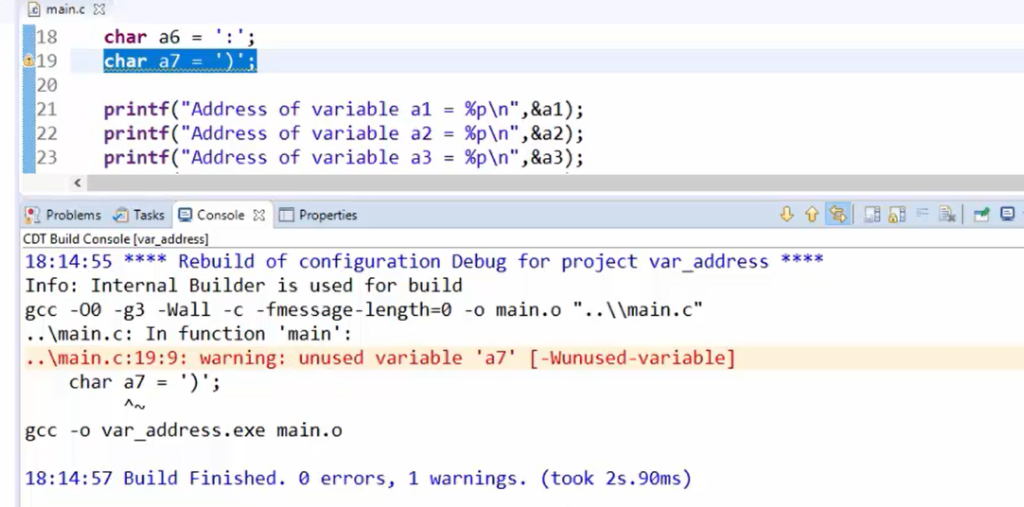
The code was compiled successfully. Actually there is one warning(Figure 5).
Note: There is a difference between the Eclipse IDE you use on your PC and this online IDE. The online IDE doesn’t show you all the warnings. So, that’s one of the drawbacks of using the online IDE.
Here the warning says that thea7 variable is unused.
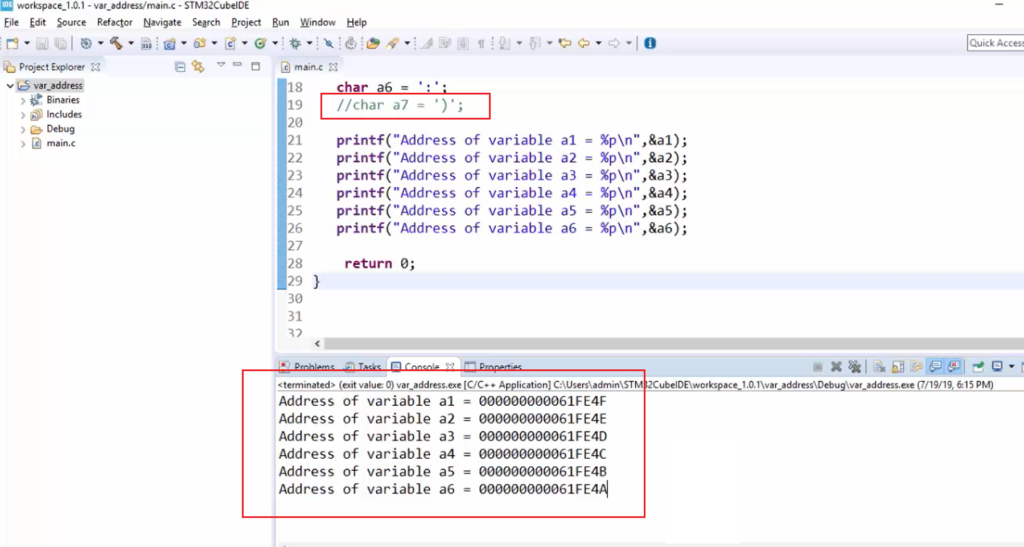
Now let’s use that, or you can comment it out the a7 variable. No problem. Let’s build once again. The build is clean.
And after that, let’s run the project. So, here we can see that on our machine, my machine is a 64-bit machine, and it shows these are the addresses of the variables(Figure 6).
Address of variables continued in the following article.
FastBit Embedded Brain Academy Courses
Click here: https://fastbitlab.com/course1
Fastbit Embedded Technologies

