Exercise-007 Coding for the TICKING state
Coding for the TICKING state
In the previous article, we added the Initial Transition Action. And now, in this article, let’s code for ‘Ticking’ state. The purpose of the Ticking state is to show the current time or display the current time.
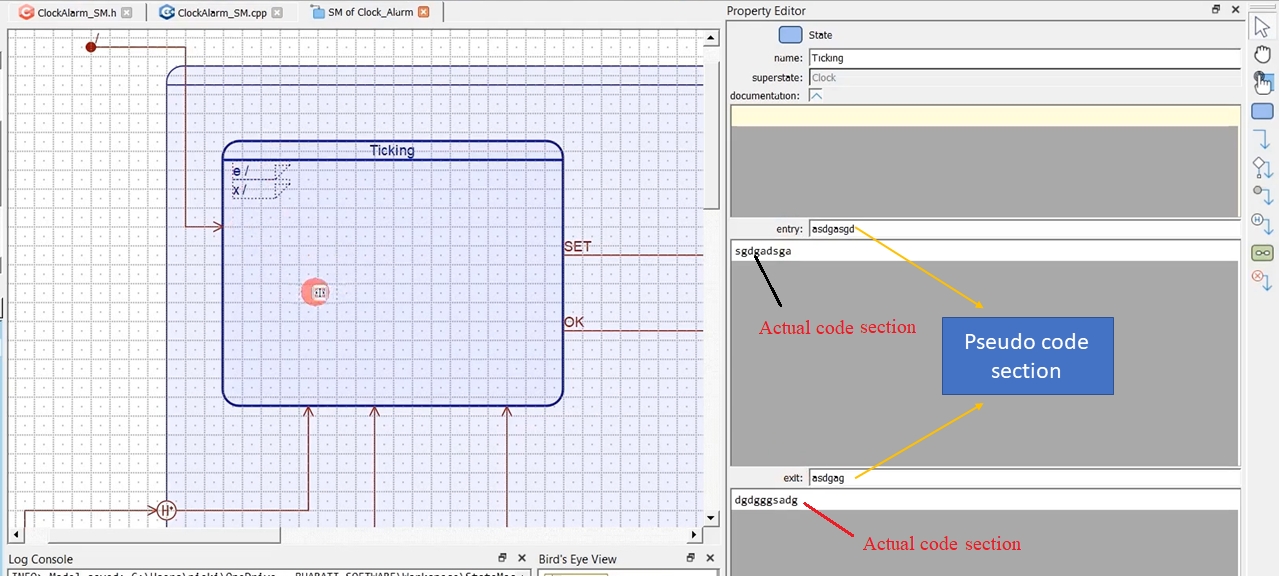
Whenever the control reaches Ticking state, we have to show the time to the user on the LCD display. That’s why let’s define some Entry actions for this state.
You see ‘entry’ and ‘exit’ sections on the right-hand side when you click over that state. And here, you can add the actual code, and you can also add pseudo code here(Figure 1). This is a space for pseudocode space, like that.
When you define both entry and exit actions, the letter ‘e’ and ‘x’ appears here with a ‘/’ character, which signifies that the entry or exit action has been defined.
First of all, the entry action of the Ticking state will display_the_curr_time. And let’s use some functions for that.
The file contains various functions, helper functions, and other housekeeping functions to display various information on the LCD. And you can refer to that code. So, you can study that code, and you can copy that code to your project.
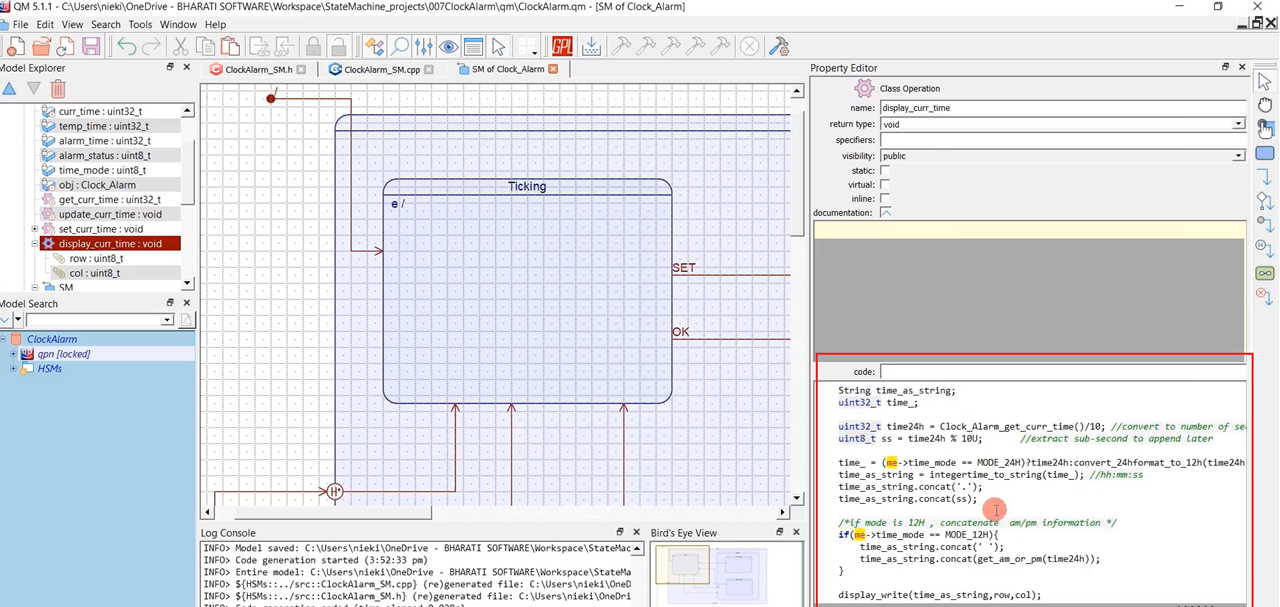
First of all, let’s look at a function called display_curr_time, which is very simple. This function actually converts the current time into a string, and it uses the function display_write to display it on the LCD.
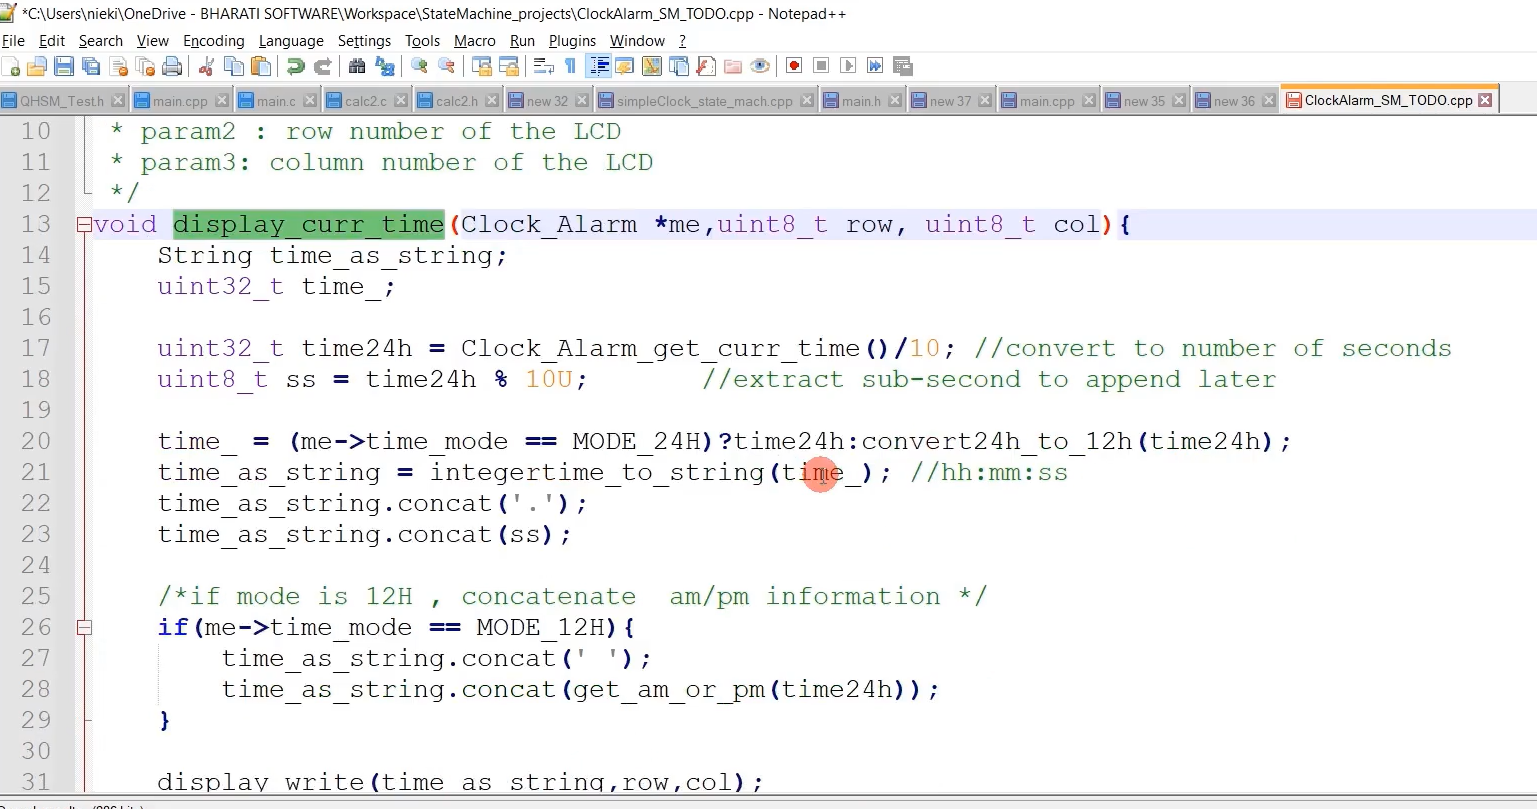
‘time24h’ variable stores the current time, and I’m getting the current time using the Clock_Alarm_get_curr_time function, which we created earlier. And I divide that by 10 because I want to consider the number of seconds. I’m not interested in milliseconds. That’s why I’m dividing that by 10. Now, the time24h variable contains the copy of the current time.
Then, if the MODE_24H, I will display that as it is. I’ll copy this value into a time variable. If the time mode variable is not 24H, we have to present the time in 12H format.
Please note that the time will always be in 24-hour format, whatever this function returns. That’s why we have to convert here 24-hour format to a 12-hour format. convert_12hformat_to_24h is a helper function defined in this file.
You can take a look at these functions, convert_12hformat_to_24h format and convert_12format_to_12 hour format. This is just simple logic to convert to study those functions.
Once you have that time information, then integertime_to_string function; this is another helper function. This function converts the integer time to a string value in hh:mm:ss format.
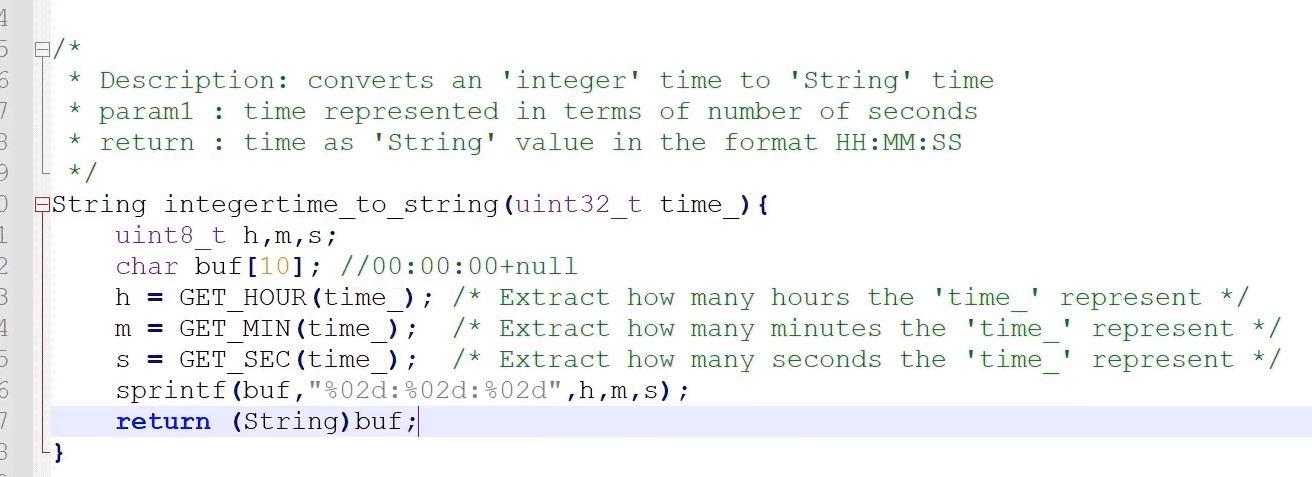
integertime_to_string is another free operation, which takes ‘integer’ time and converts into a ‘string’ in HH:MM:SS format. For that, it just extracts hour information, minutes information, and the seconds information using these macros GET_HOUR, GET_MIN, GET_SEC. These are simple macros.
The macros are defined here, shown in Figure 4.
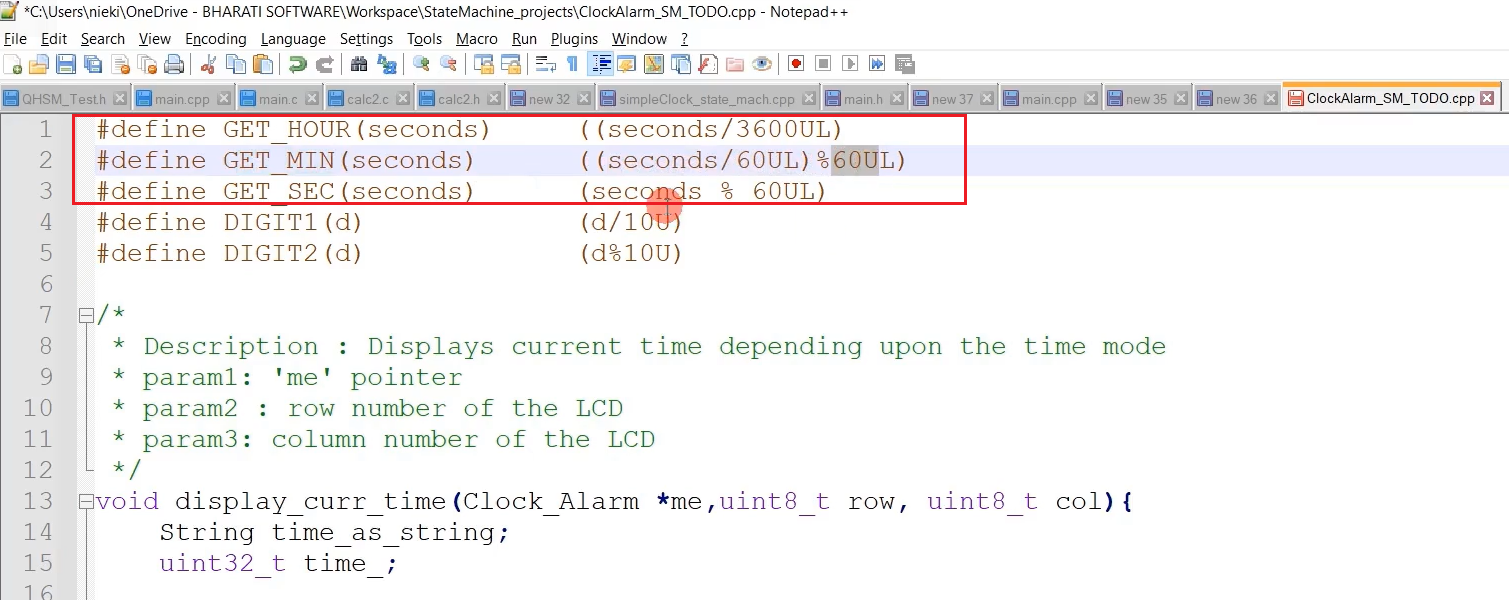
For example, GET_HOUR. It takes the number of seconds and divides it by 3600. That’s it. That is the number of hours. And for minutes, it divides by 60 first and takes the mode of 60, like that.
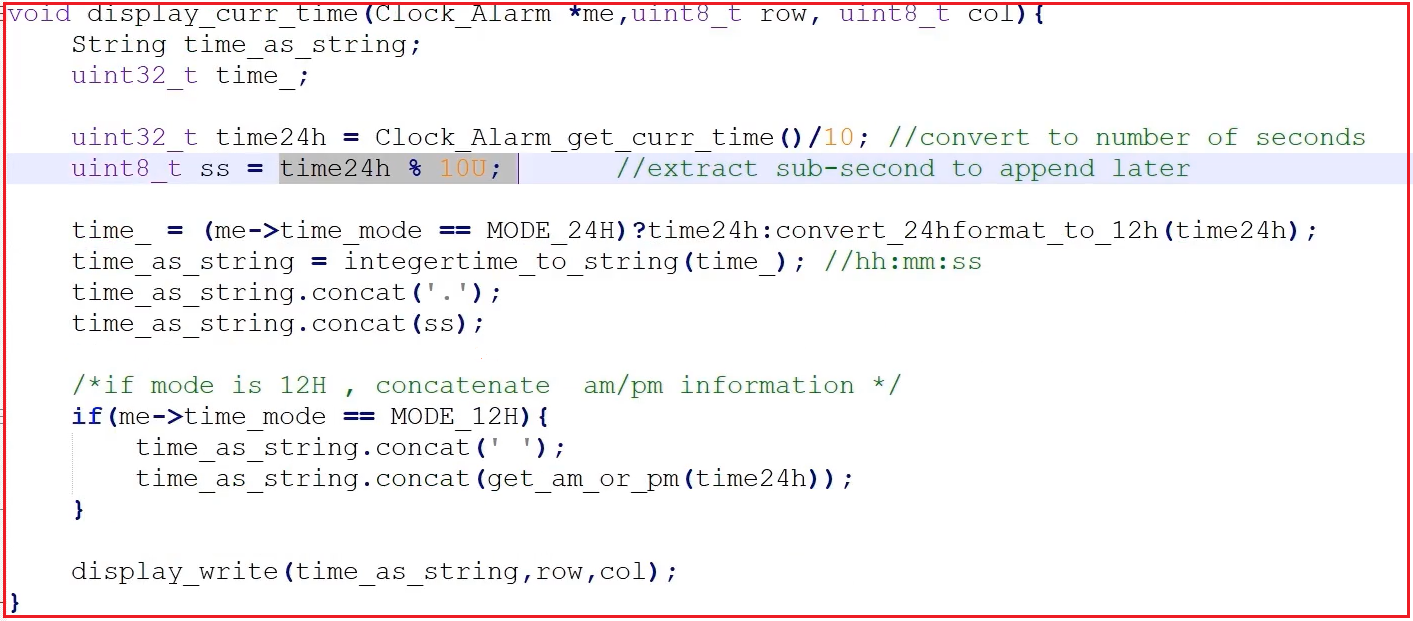
After that, we also have to show the sub-second field. time_as_string.concat(‘.’); time_as_string.concat(ss);
time24h % 10UL shows how the sub-second field is obtained; that is concatenated to the value which is returned by integertime_to_string function. Since I’m using the string object of the Arduino framework, you can access all these ‘concat’ methods. A ‘concat’ is a method of the String object.
And after that, if the mode is 12H, we should also print or concatenate the AM or PM information. get_am_or_pm(time24h) is another helper function to extract whether the given 24-hour format is AM or PM. Then, display_write is another helper function.

The display current time also takes two other parameters, the row and column number of the LCD; you have to mention that in the display_write function.

And display_write is just another helper function; it calls these two functions of the lcd.cpp. First, it sets the cursor and then prints the string.
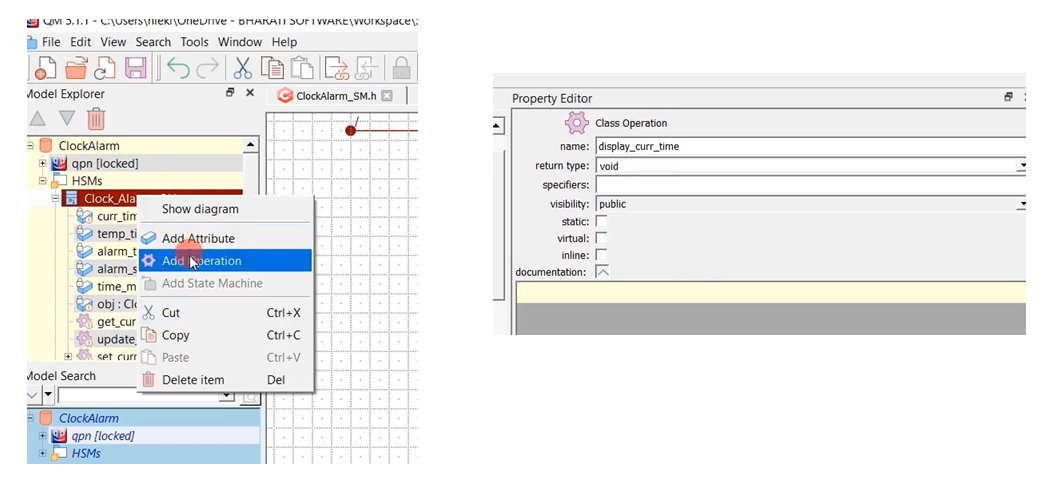
Create display_curr_time function now (Figure 6). This function has access to the ‘me’ pointer, so I’ll create display_curr_time as a class operation, which is non-static because I want access to this ‘me’ pointer.
That’s why I go to ClockAlarm and Add class operation; I’ll call this display_curr_time, return type void, the visibility you can keep it as public, which is a non-static.(Figure 8)
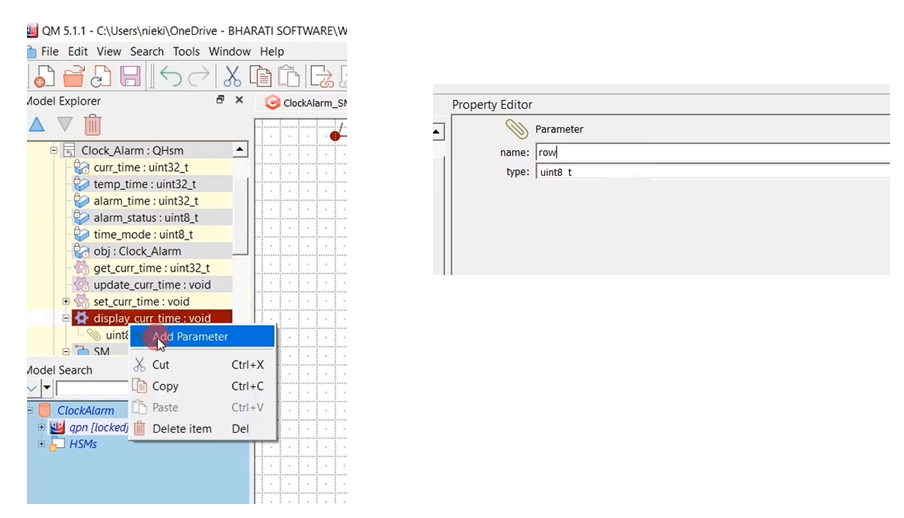
And let’s add a parameter. The first parameter is row, another one column uint8_t, as shown in Figure 9.
After code for the Ticking state, copy-paste the display_curr_time function codes(Figure 5). Save it, generate the code.
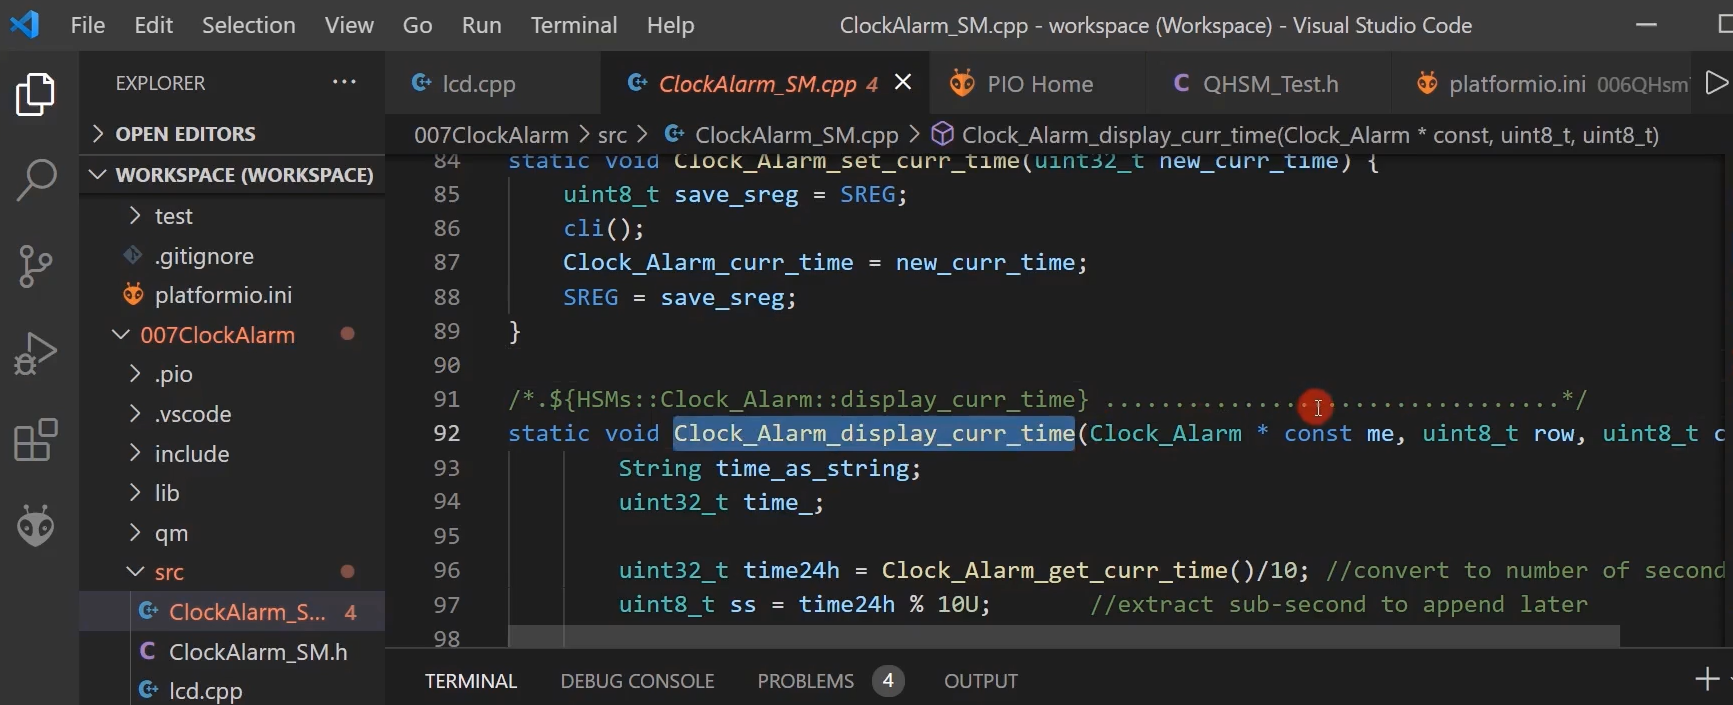
Here it is Clock_Alarm_display_curr_time, and this function I’m going to call from Ticking state as Entry action. Provide the ‘me’ pointer, row, and column number.
Clock_Alarm_display_curr_time(me, TICKING_CURR_TIME_ROW,TICKING_CURR_TIME_COL);
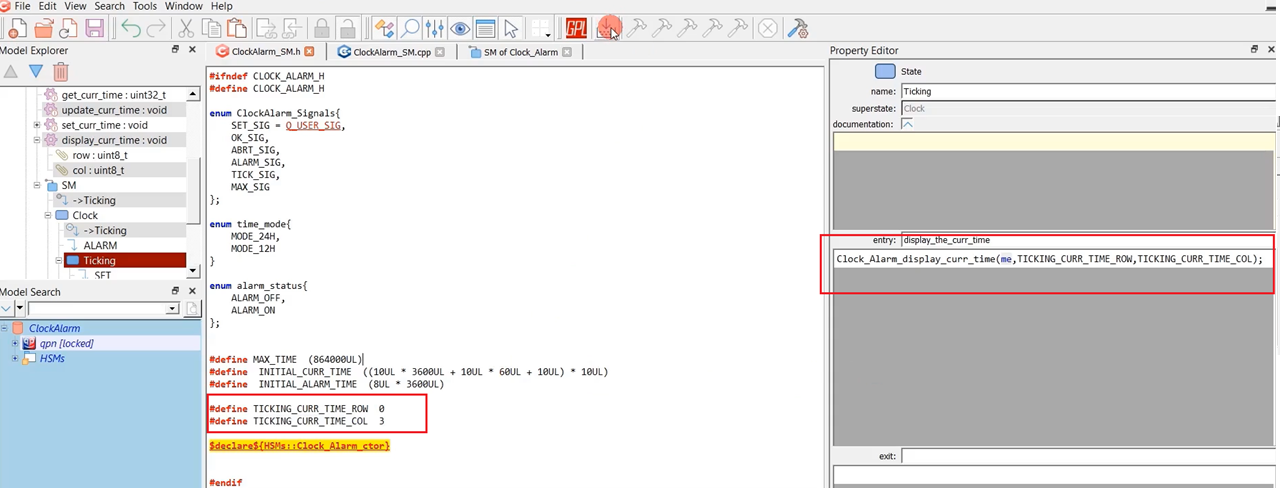
Let’s go to the SM.h, let’s define some macros.
#define TICKING_CURR_TIME_ROW, the row is 0;
# define TICKING_CURR_TIME_COL, and for the column position, I will select 3.
So, we will mention that in Ticking state as Entry action. First, you mention the row and then the column. Generate the code.
FastBit Embedded Brain Academy Courses
Click here: https://fastbitlab.com/course1

