Adding arduino Library to project in platformIO
In this article, let’s explore Arduino’s official LCD library.
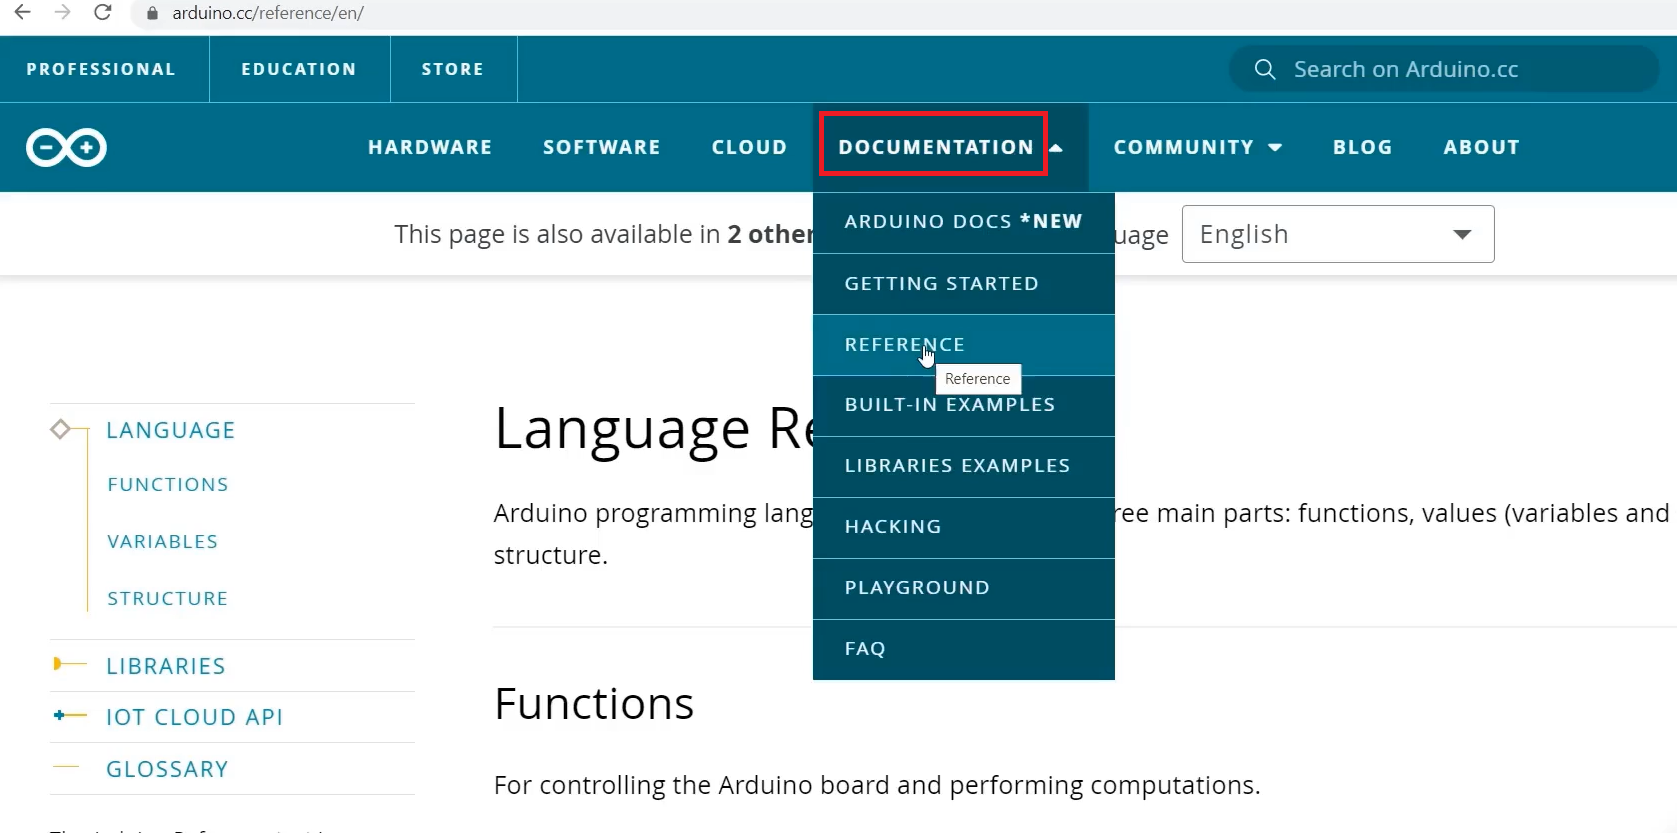
1. For that, you have to go Arduino website, go to the Documentation, go to Reference as shown in Figure 1.
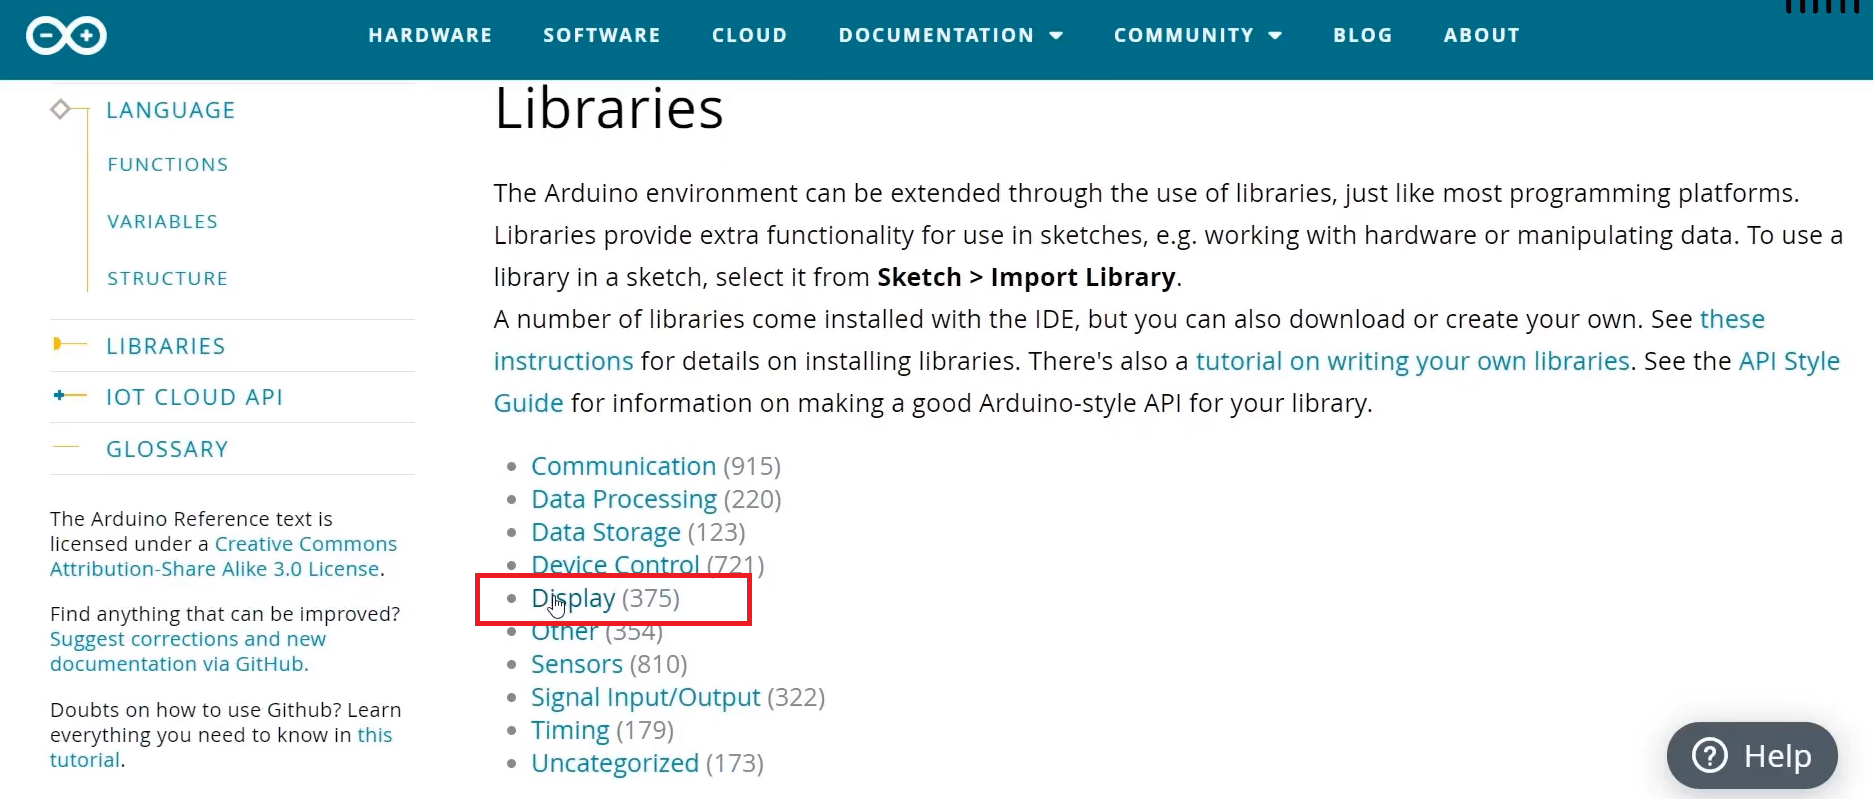
2. In the Reference, you find libraries; click on that( Figure 2).

3. In the Libraries, click on ‘Display’ as shown in Figure 3.
4. In the Display, the official libraries→ click on LiquidCrystal.

LiquidCrystal:
Allows communication with alphanumerical liquid crystal displays(LCDs).
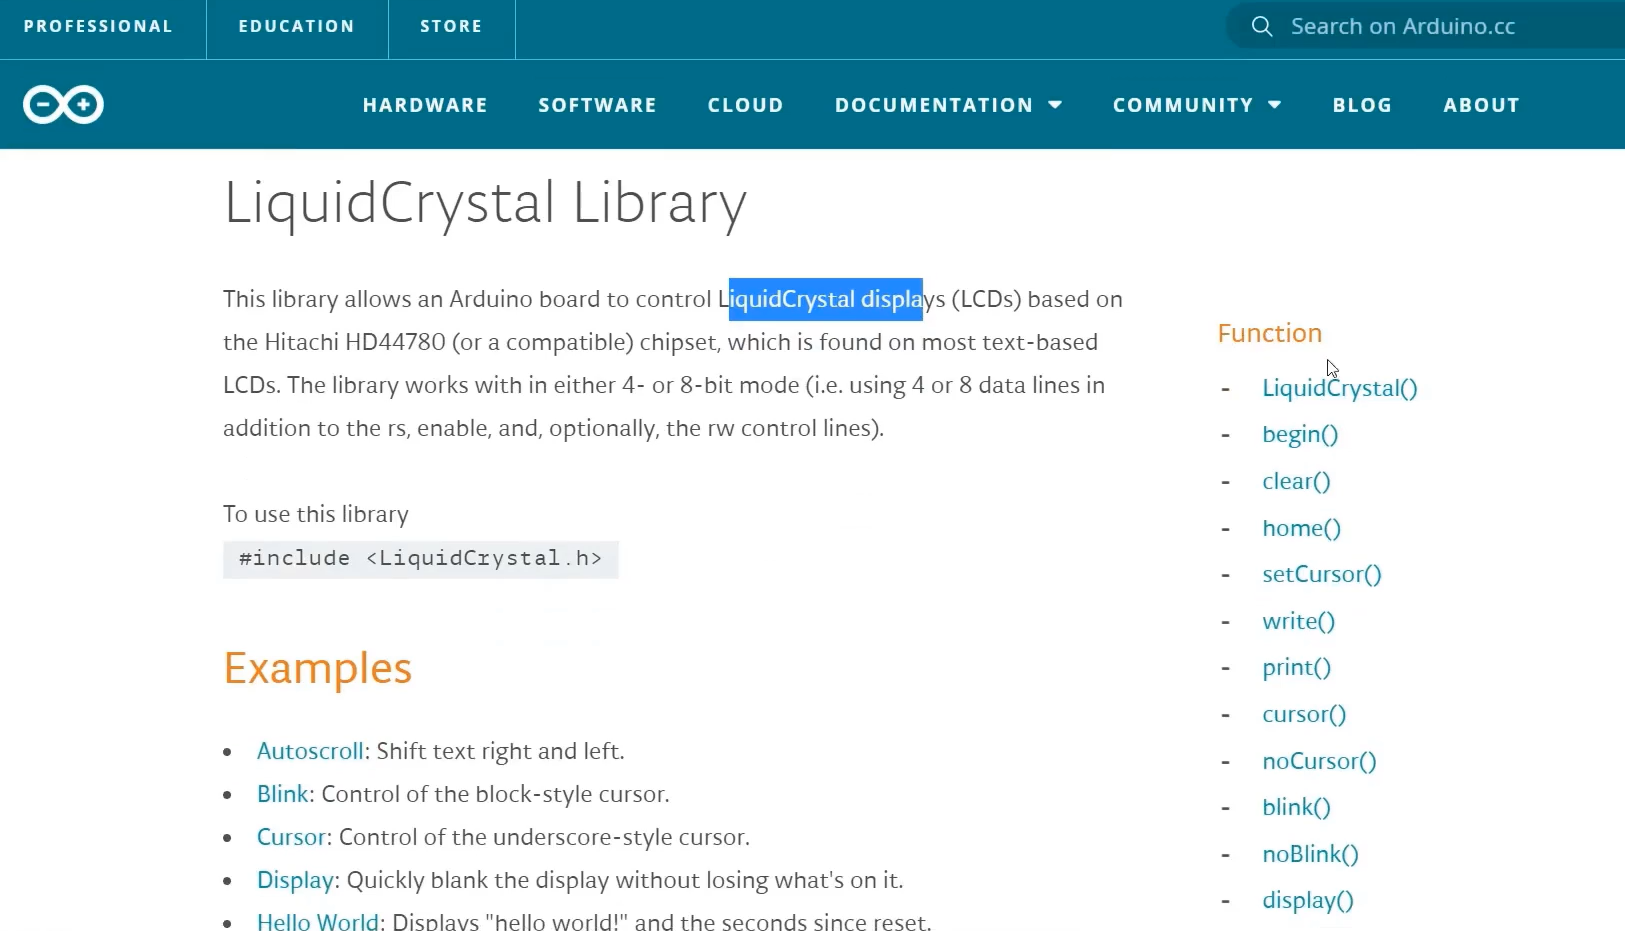
To learn more about the LiquidCrystal library(as shown in Figure 5), LiquidCrystal displays based on the Hitachi’s HD44780(or a compatible) chipset, and we are using the same chipset based 16×2 LCD. There are various examples of code they have given. And at the right-hand side, you see the methods (different methods) or functions of the LiquidCrystal library.
In our project, since we are using a PlatformIO Extension, we have first to install LiquidCrystal Library. I will show you how to install that library.
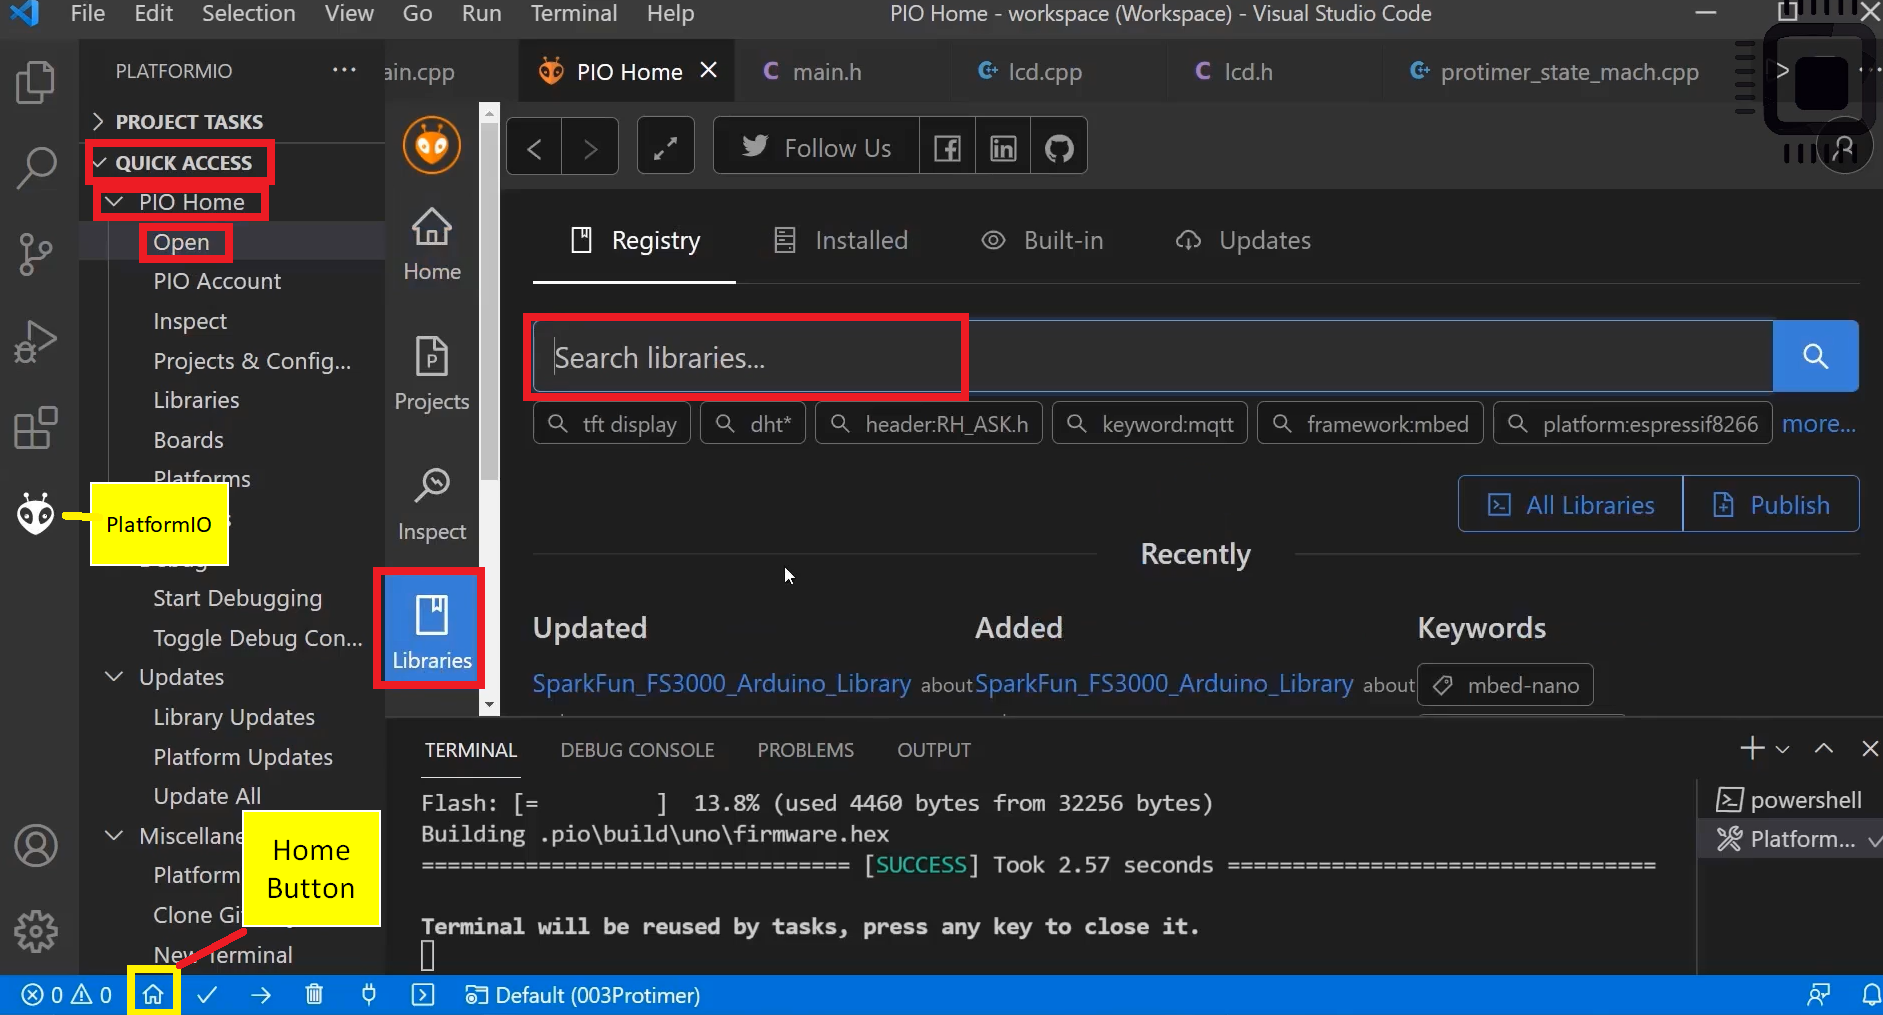
There is a Home button, or you go here ‘PlatformIO.’ A Home button(as shown in Figure 6)→ Click on that, Quick Access→ PIO Home→ Open. And then go to libraries, and in the library search LiquidCrystal.
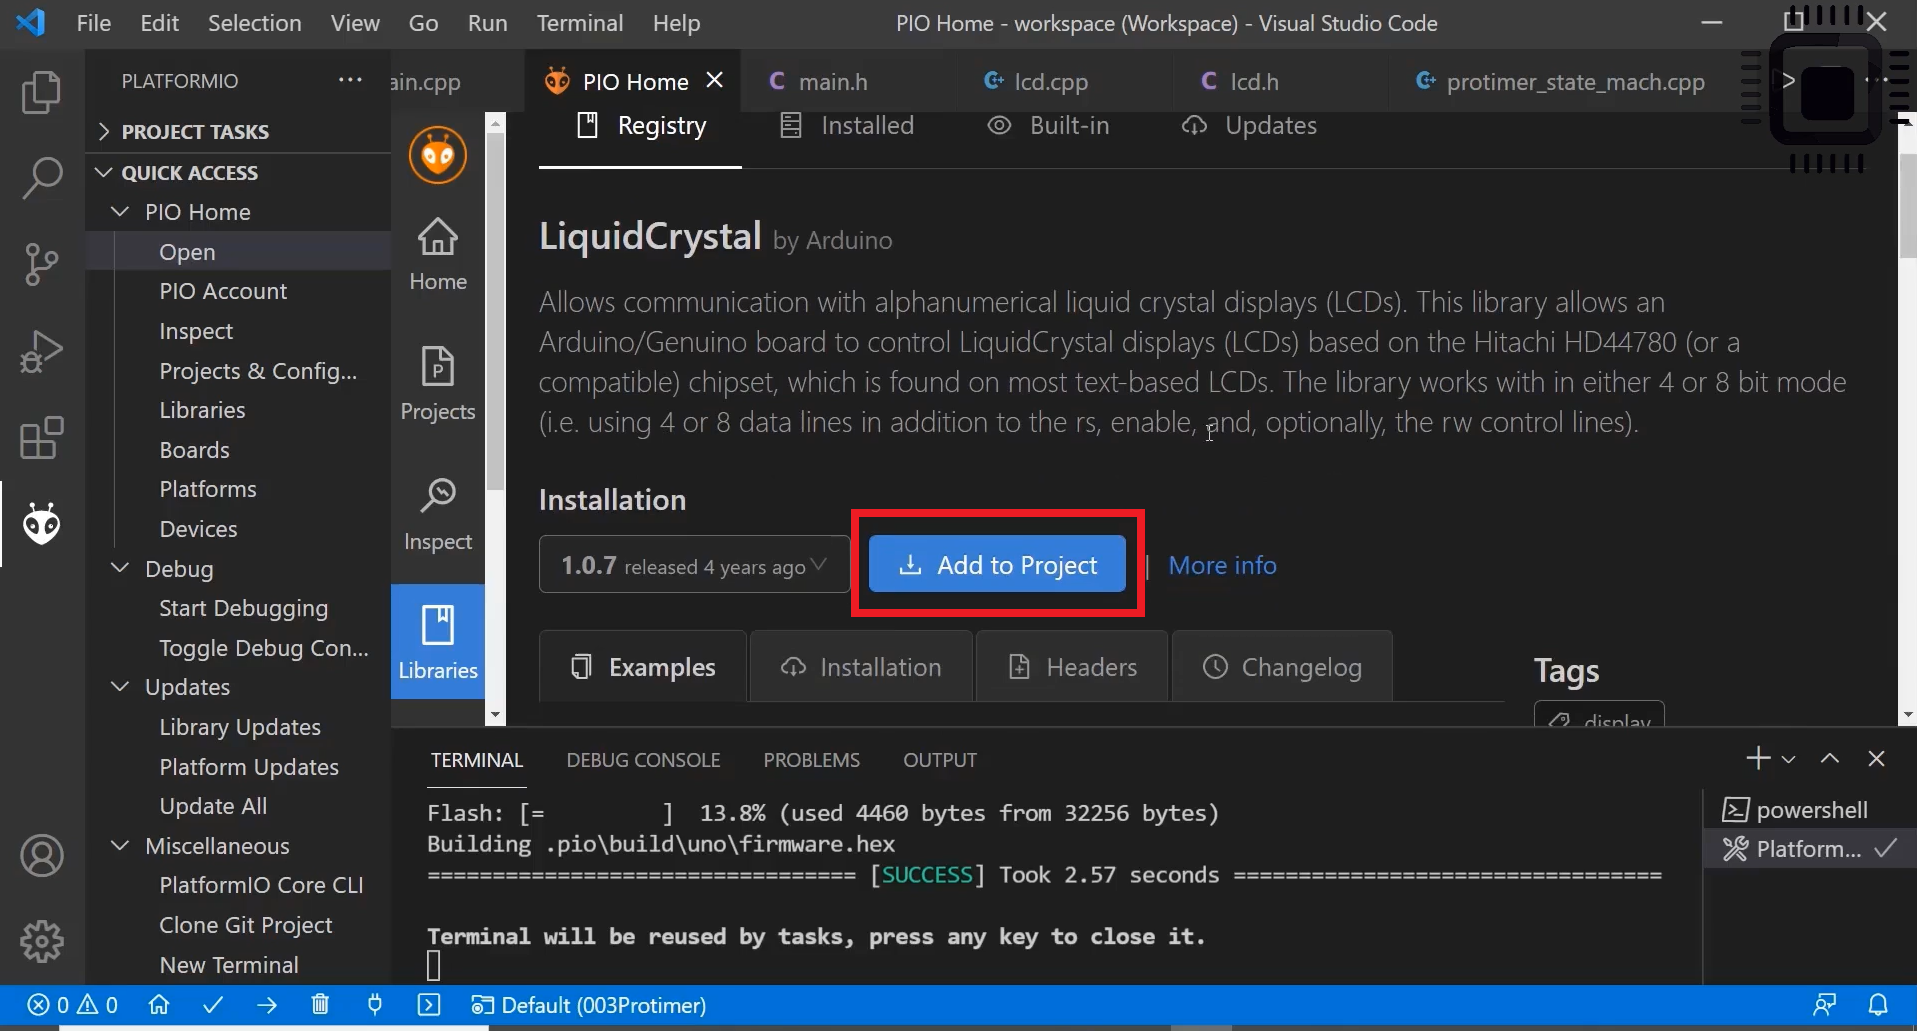
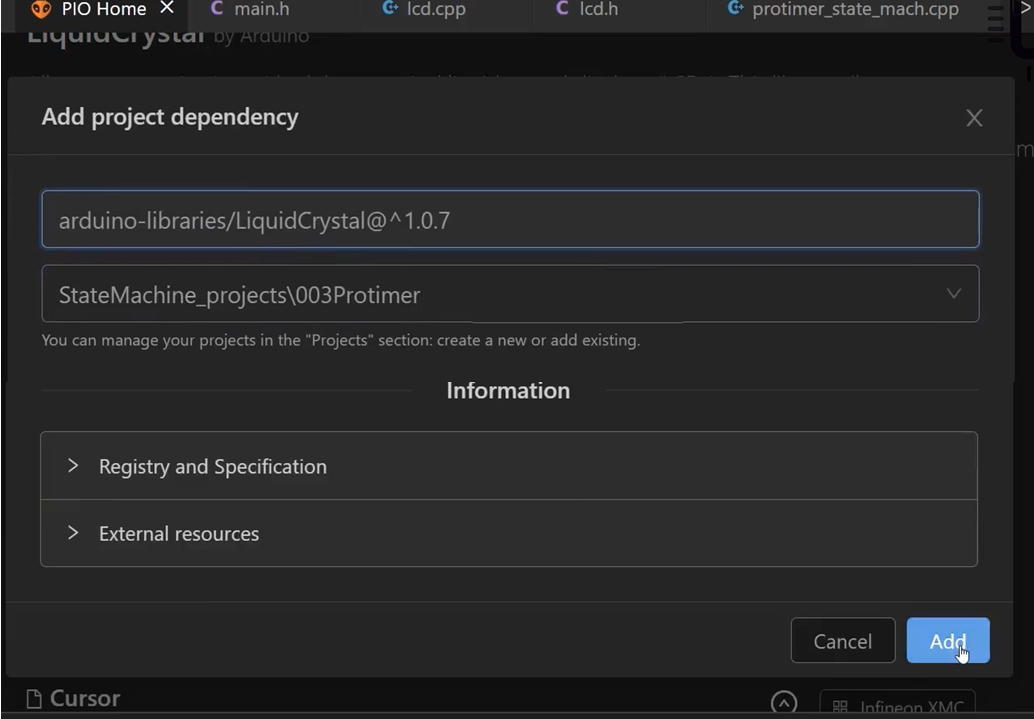
LiquidCrystal should be by Arduino. Because that’s an official one, click on LiquidCrystal by Arduino(as shown in Figure 7).

Add to project as shown in Figure 8.
You add to the project and select your project. StateMachine_projects\003Protimer is my project. I will choose that and Add.
This is Project wise library adding. You can either add project-wise or workspace-wise; you can also do that. We will do it project-wise.
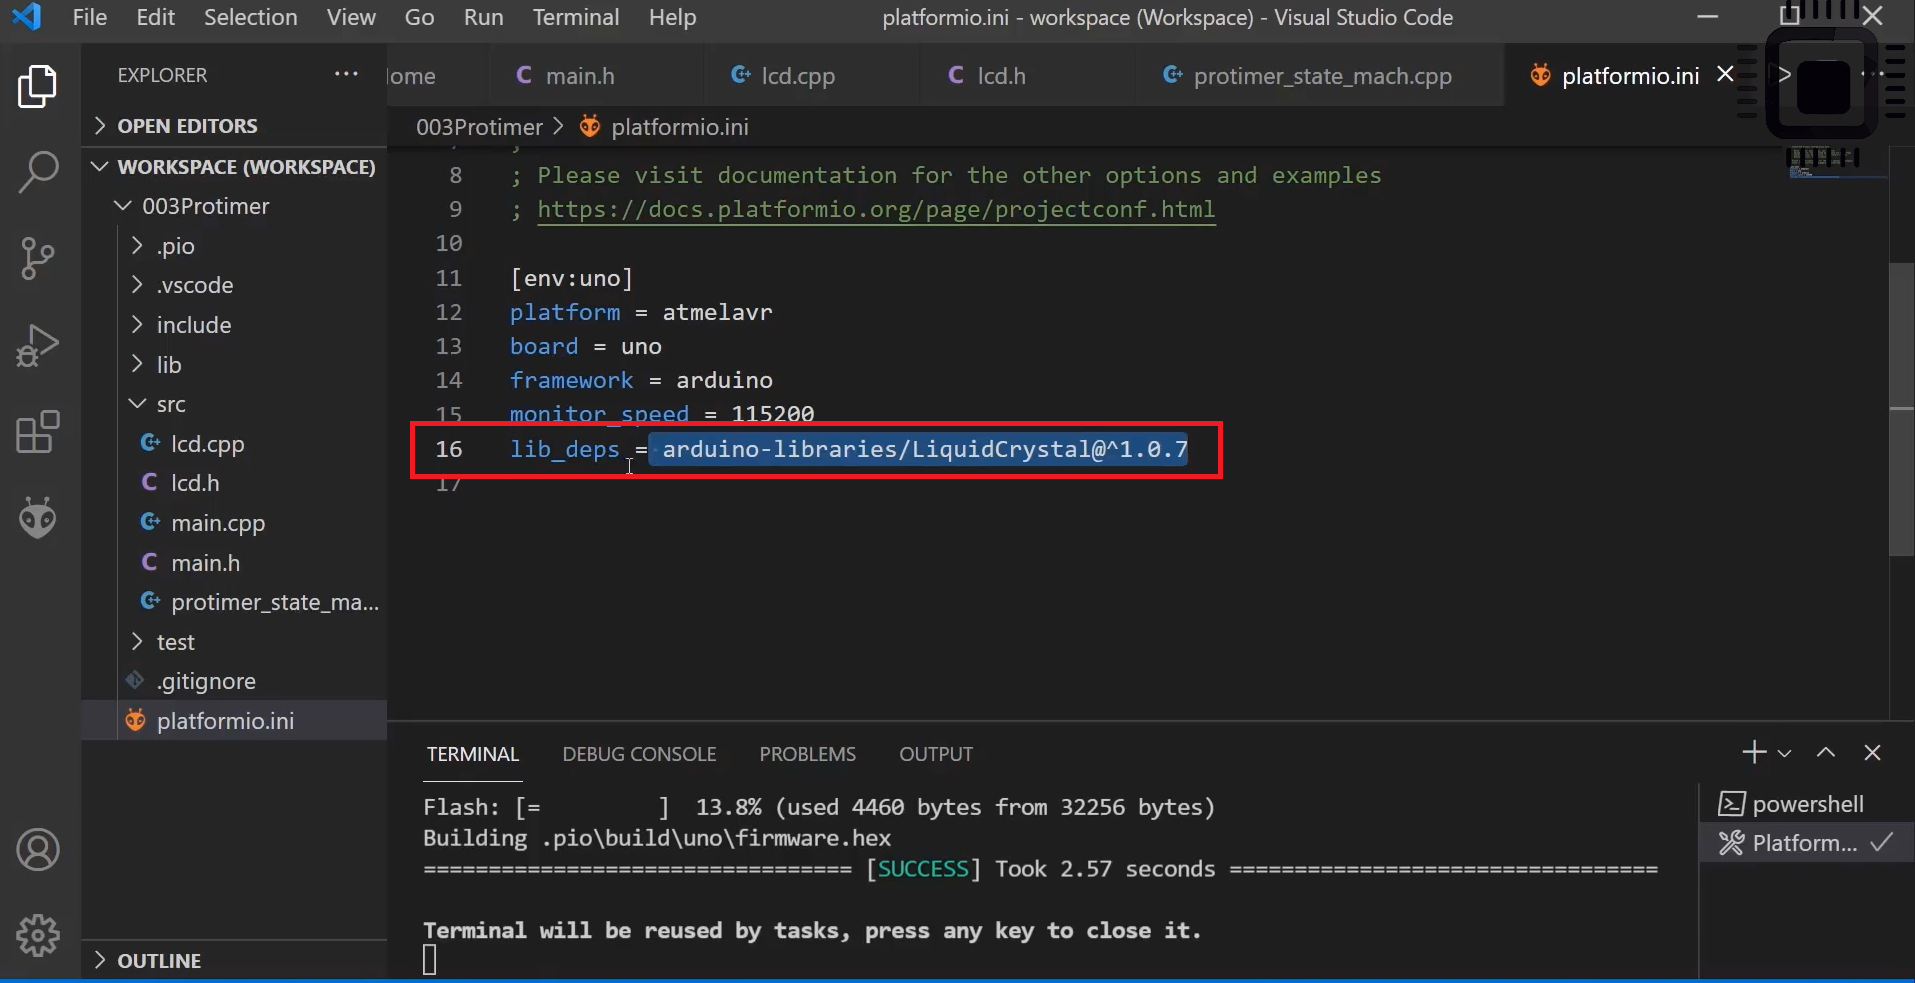
Once you add that, you can see that in the platformio.ini, that is added here library dependency as shown in Figure 10.
If you want to print text, you can use the print method. If you want to know how to use this print method, open the print() documentation. It explains how to use that. Figure 11 shows the example of the print() function.
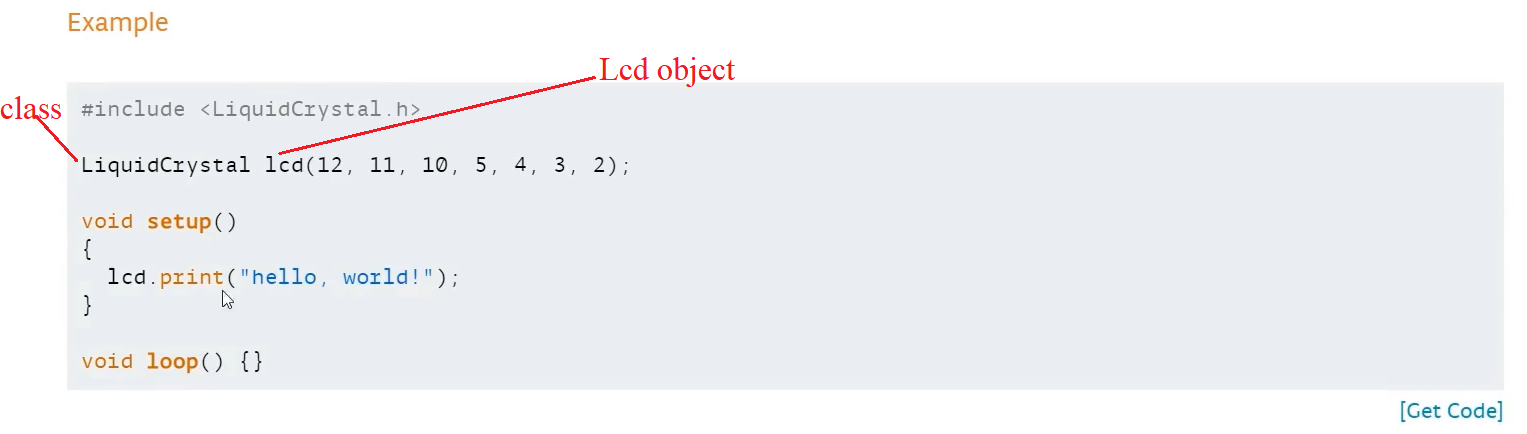
If you want to print “HelloWorld” on the LCD, you must first create the lcd object. Lcd object and LiquidCrystal class, and the PINs of the Arduino board (as shown in Figure 11) you used to connect the LCD to the Arduino board. So, you have to mention that carefully.
The documentation explains what order you have to mention the Arduino pins.
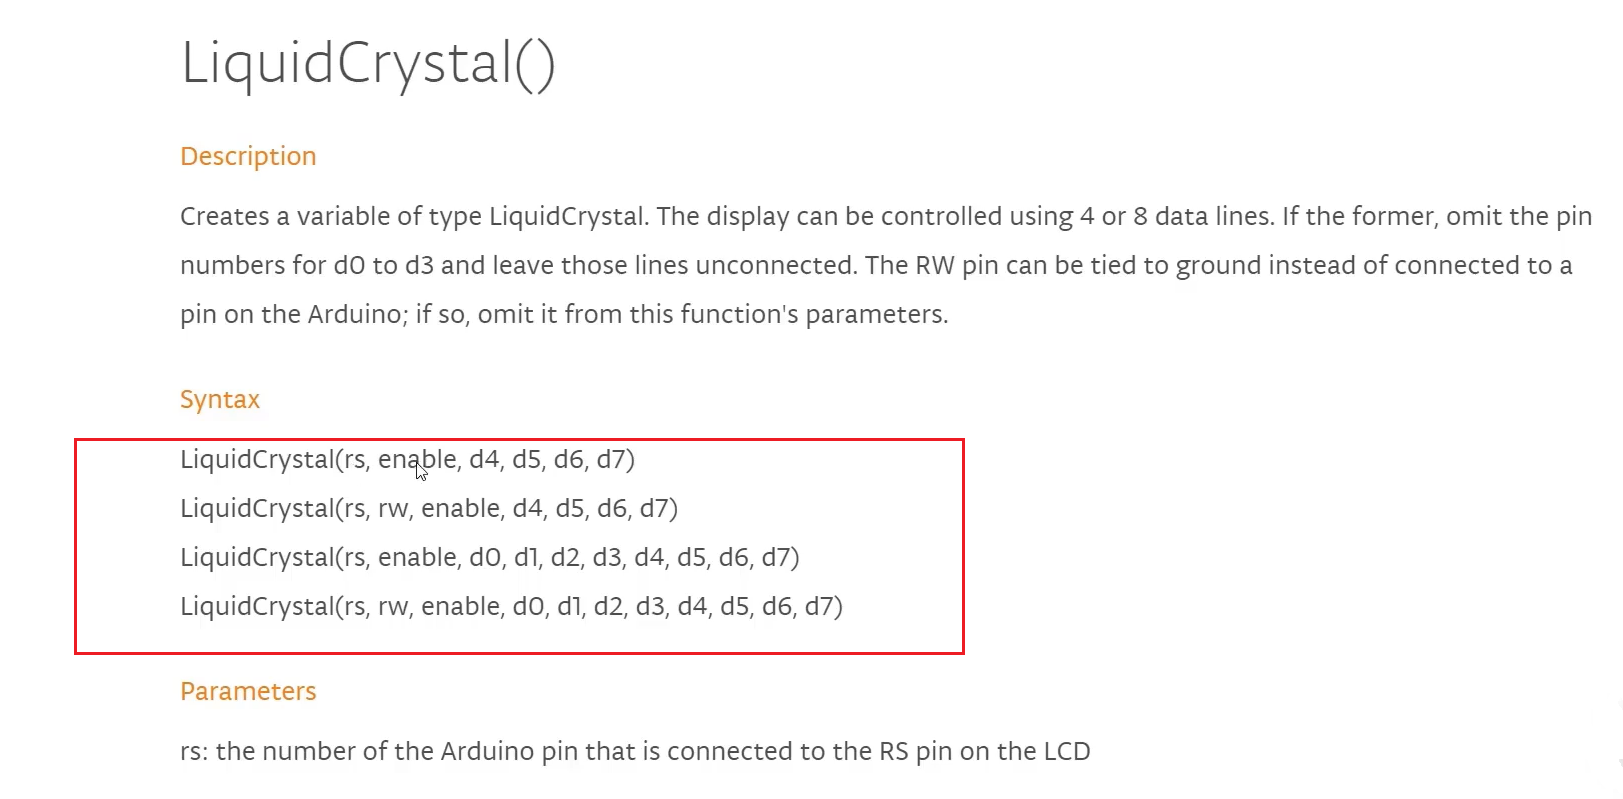
You can go to the LiquidCrystal() function. It says that you have to create the object or supply the argument to the object in this order(as shown in Figure 12).
First, LiquidCrystal(rs,enable,d4,d5,d6,d7). If you use RW, that is the Read-Write pin. If you use the Read-Write pin of the LCD, then the Read-Write pin must come second. The last two are not used in our application, so this is for an 8-bit communication. We will use LiquidCrystal(rs, rw, enable,d4,d5,d6,d7). I will show you how to use that while coding.
#ifndef LCD_H
#define LCD_H
#include<Arduino.h>

void lcd_clear(void);
void lcd_print_char(char c);
void lcd_scroll_left(void);
void lcd_scroll_right(void);
void lcd_set_cursor(int c, int r);
void lcd_no_auto_scroll(void);
void lcd_begin(void);
void lcd_move_cursor_R_to_L(void);
void lcd_move_cursor_L_to_R(void);
void lcd_cursor_off(void);
void lcd_cursor_blinkoff(void);
void lcd_insert_number(int num);
void lcd_print_string(String s);

#endif
We will go to the lcd.h file of our project, and we will add all these(as shown in Figure 12) a wrapper function. We will support all these functions to deal with the LCD.
- lcd_clear(): clears the LCD.
- lcd_print_char(): If you want to print a character on the LCD, then you use this function.
- lcd_scroll_left and lcd_scroll_right: This is to scroll the LCD display, scroll left, and scroll right.
- lcd_set_cursor: This is to set the cursor at a different position of the display, like setting the cursor at a given row number and column number.
- lcd_no_auto_scroll: This is to stop the auto-scrolling.
- lcd_begin: This is the LCD initialization.
Like this, we will give various wrapper functions.
In the upcoming article, we will implement all the functions in the lcd.cpp, and we will call these functions from our main source file.
FastBit Embedded Brain Academy Courses
Click here: https://fastbitlab.com/course1