Exercise-004 Implementation using state handler approach
In this article, let’s understand the State handler approach. This is almost similar to the previous one. But the important difference is we used the active_state variable in the main application structure to switch between different states. The active_state reveals what exactly is the current active state.
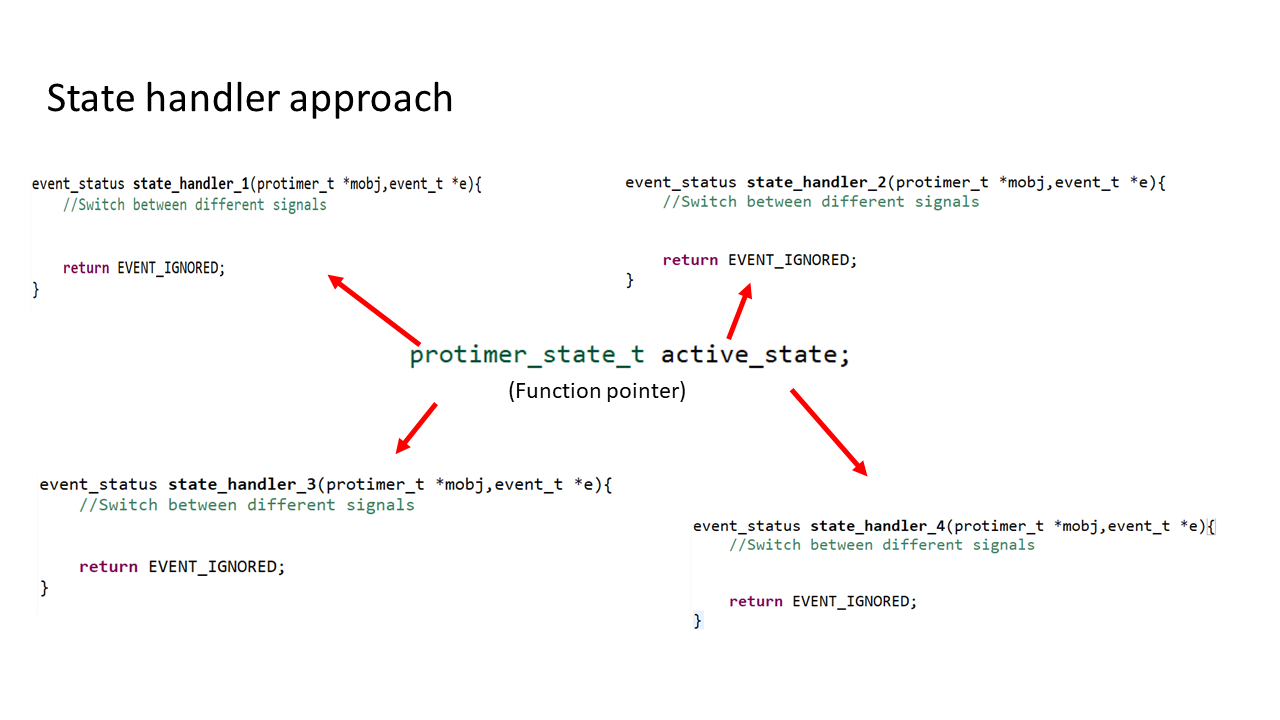
In the state handler approach, the active_state variable will be a function pointer, and by using this variable, we can directly switch between different state handlers of our project. And in the state handler, you use a switch case statement to switch between different signals.
The advantage of this method is you can get rid of the outer switch statement.
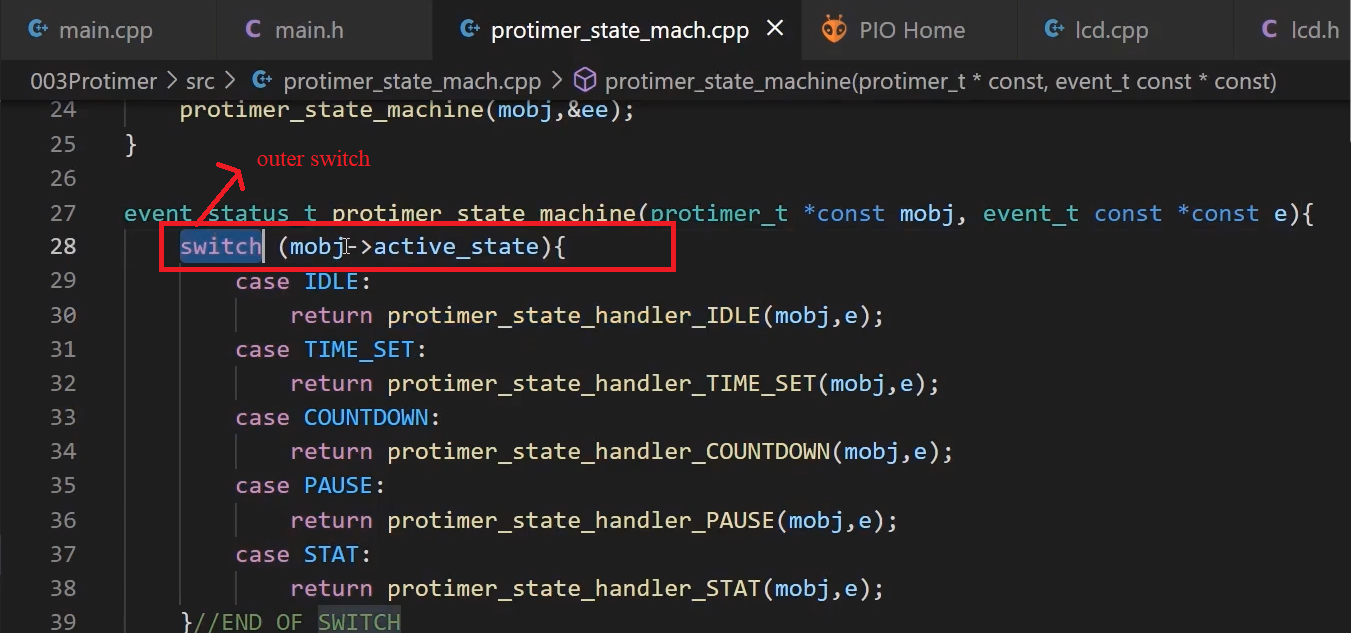
There are 2 Switch statements. One switch statement is inside the protimer_state__handler function (every state handler function). The red color line shows an outer switch statement.
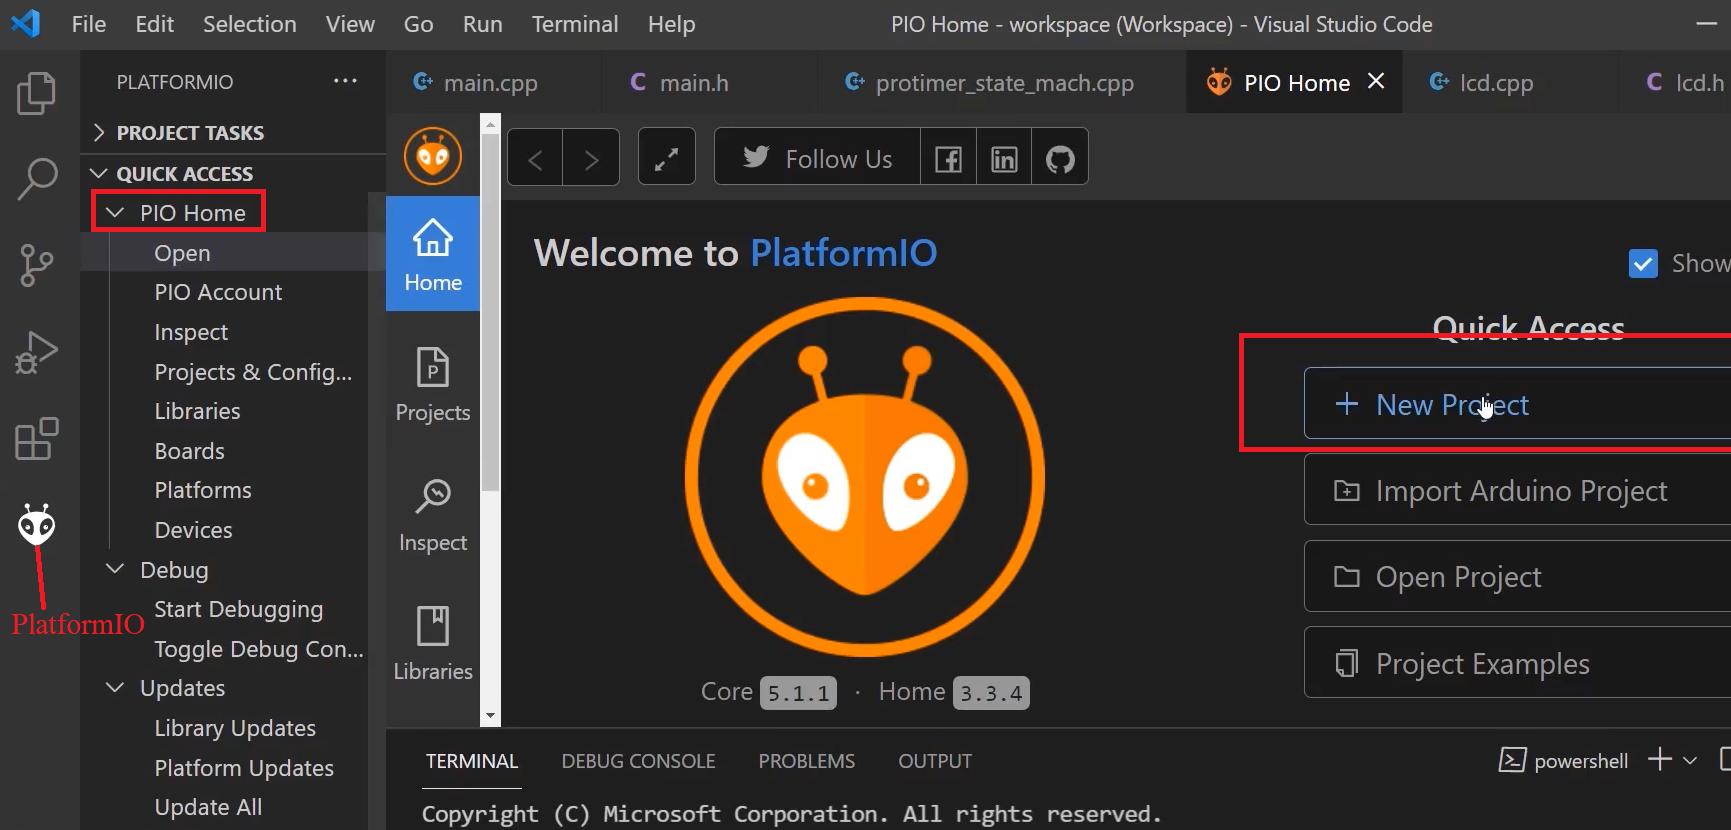
Let’s create a new project. To create a new project, go to PlatformIO and Home, and click on New project, as shown in figure 3.
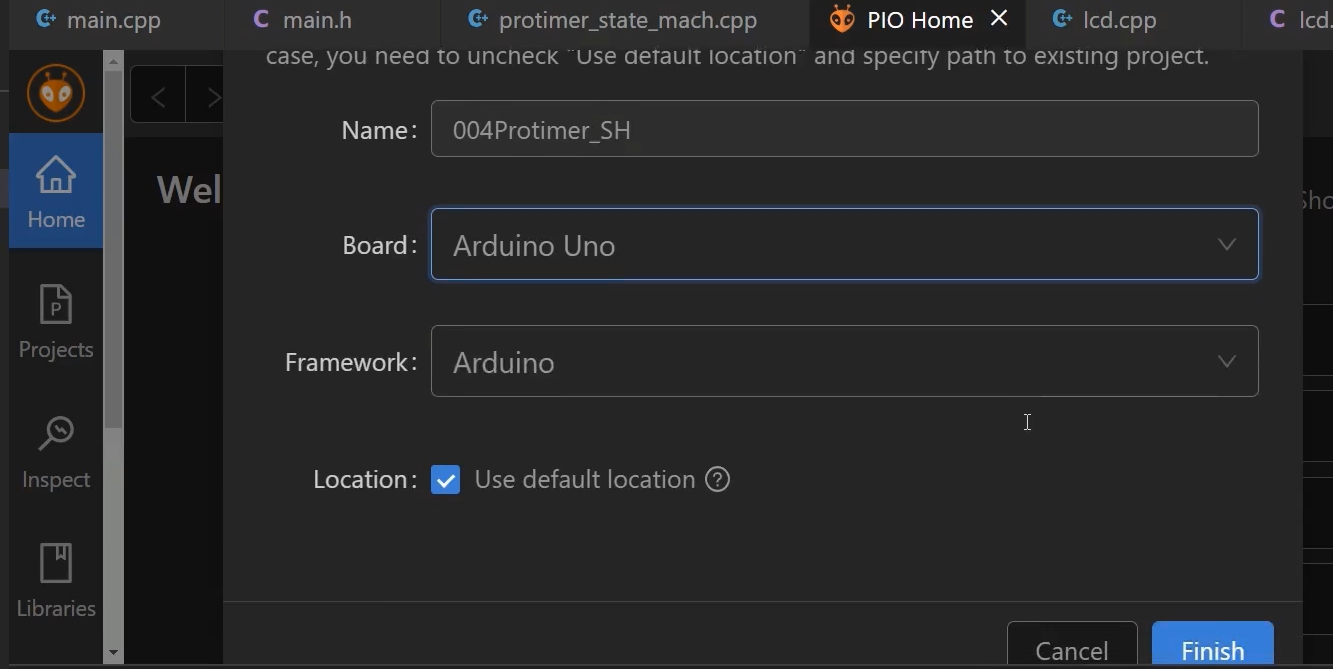
The project name is 004Protimer_SH, select the board → Arduino Uno, and finish the project after that.
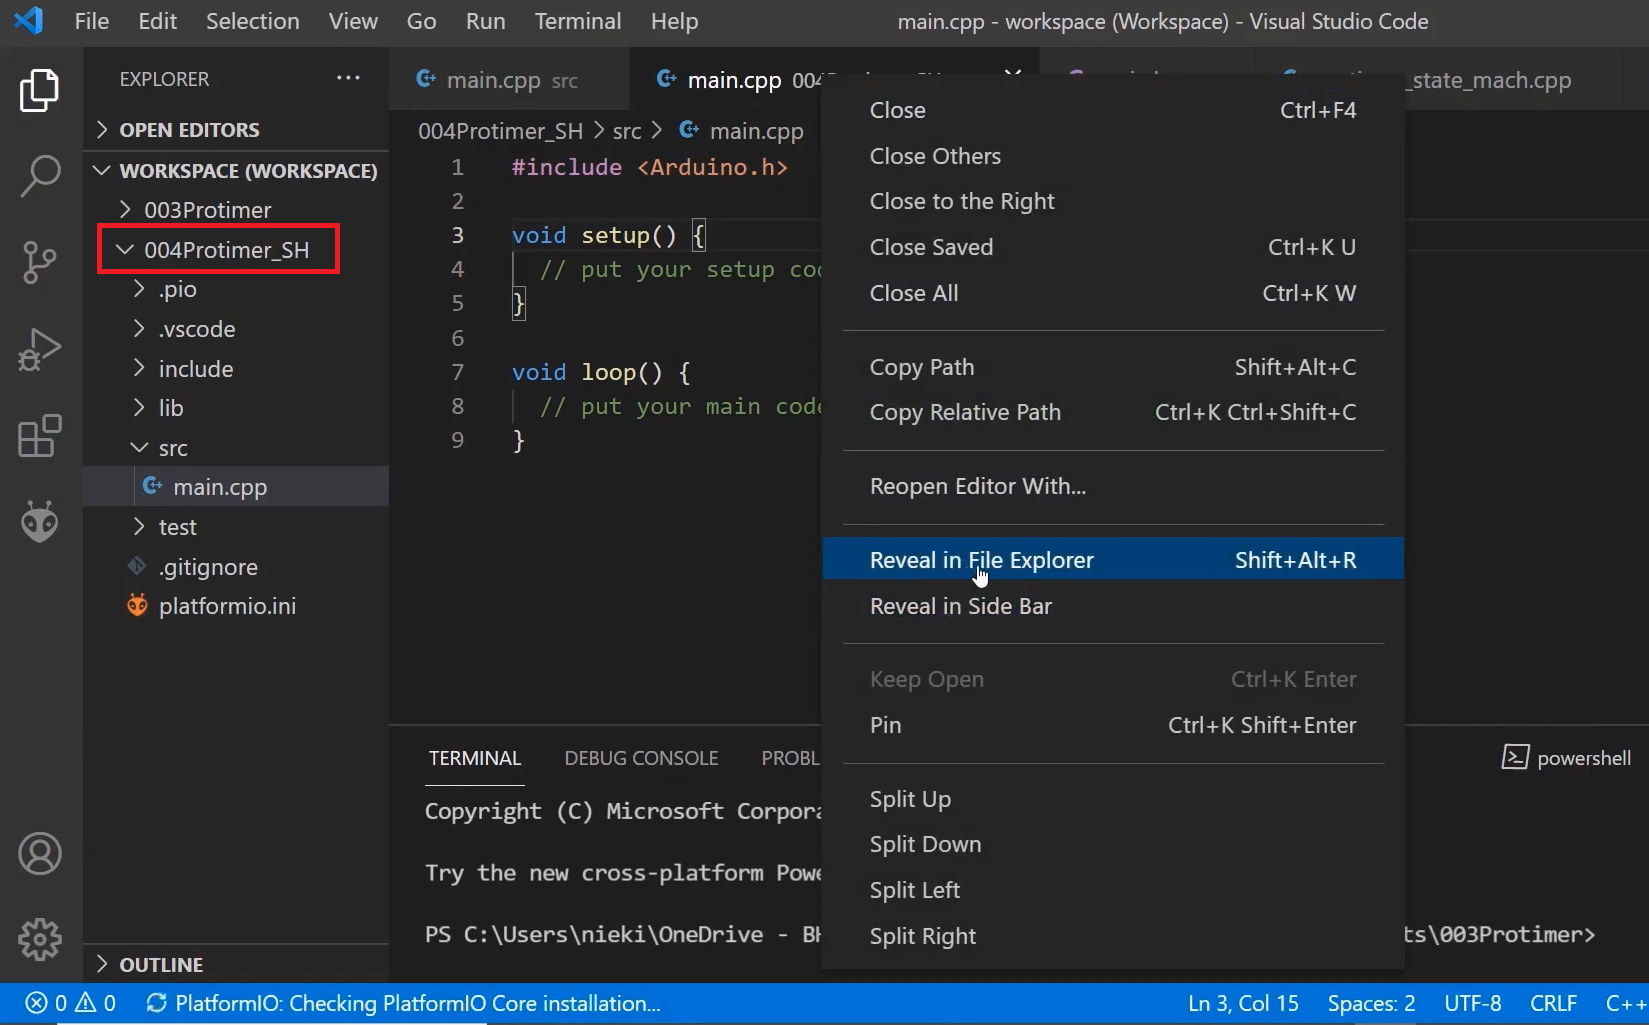
We created a 004Protimer_SH project. Go to that project folder, right-click and go to Reveal in File Explorer, shown in figure 5.
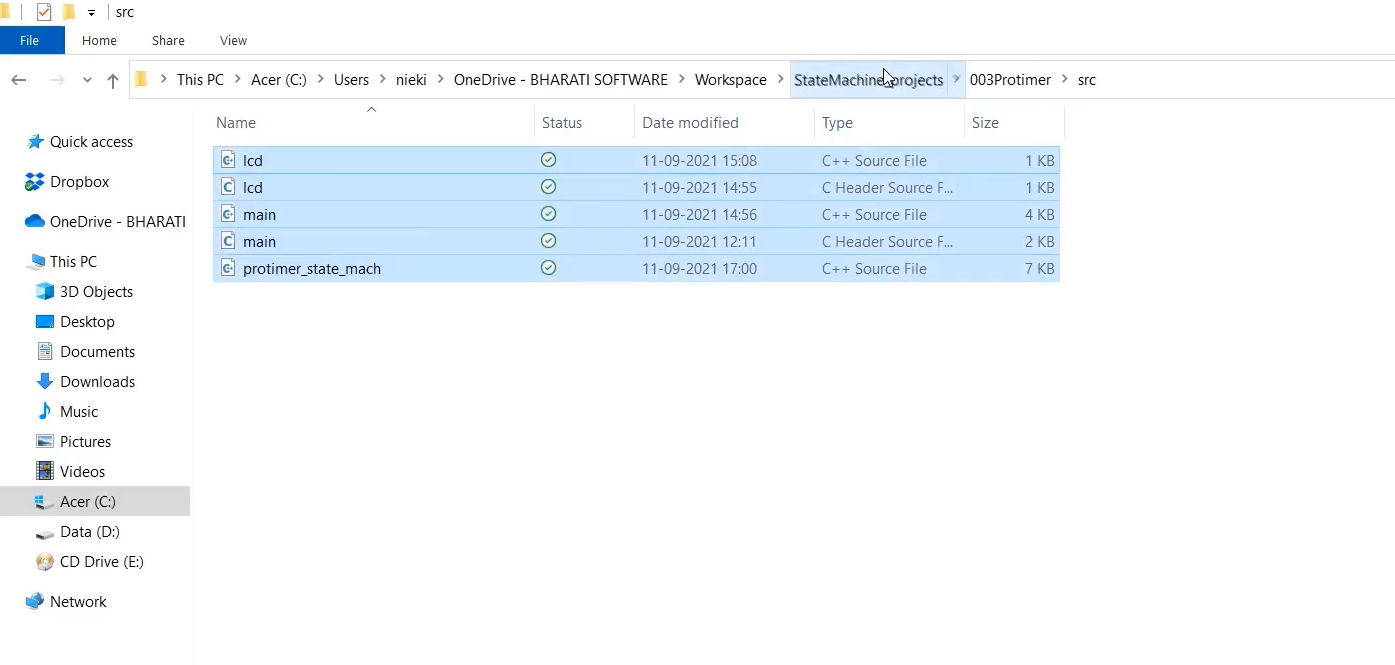
And go to the previous project, copy all the source code as shown in Figure 6, return to the new project and paste those files.
And go back to the Visual Code. In 004Protimer_SH, the yellow color line shows all those files (Figure 7).
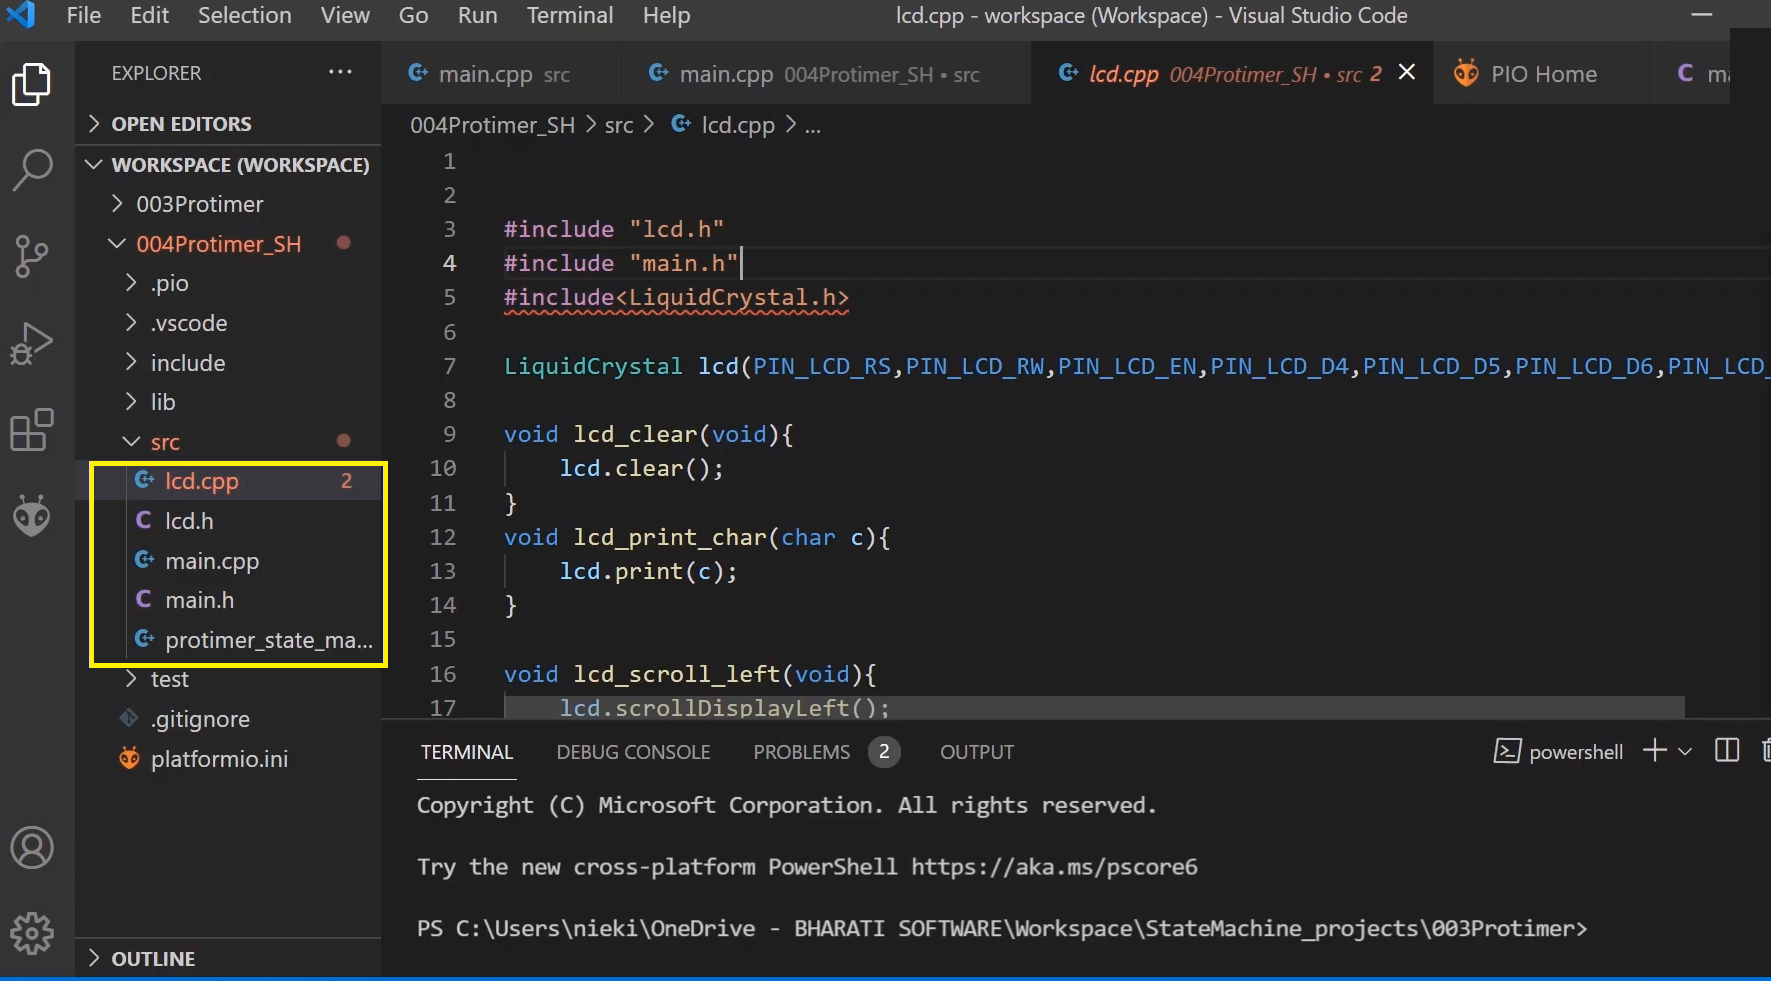
If you go to the lcd, it shows a red line because we have to add the lcd library. Because, in the previous project, we added that, but it was project-specific.
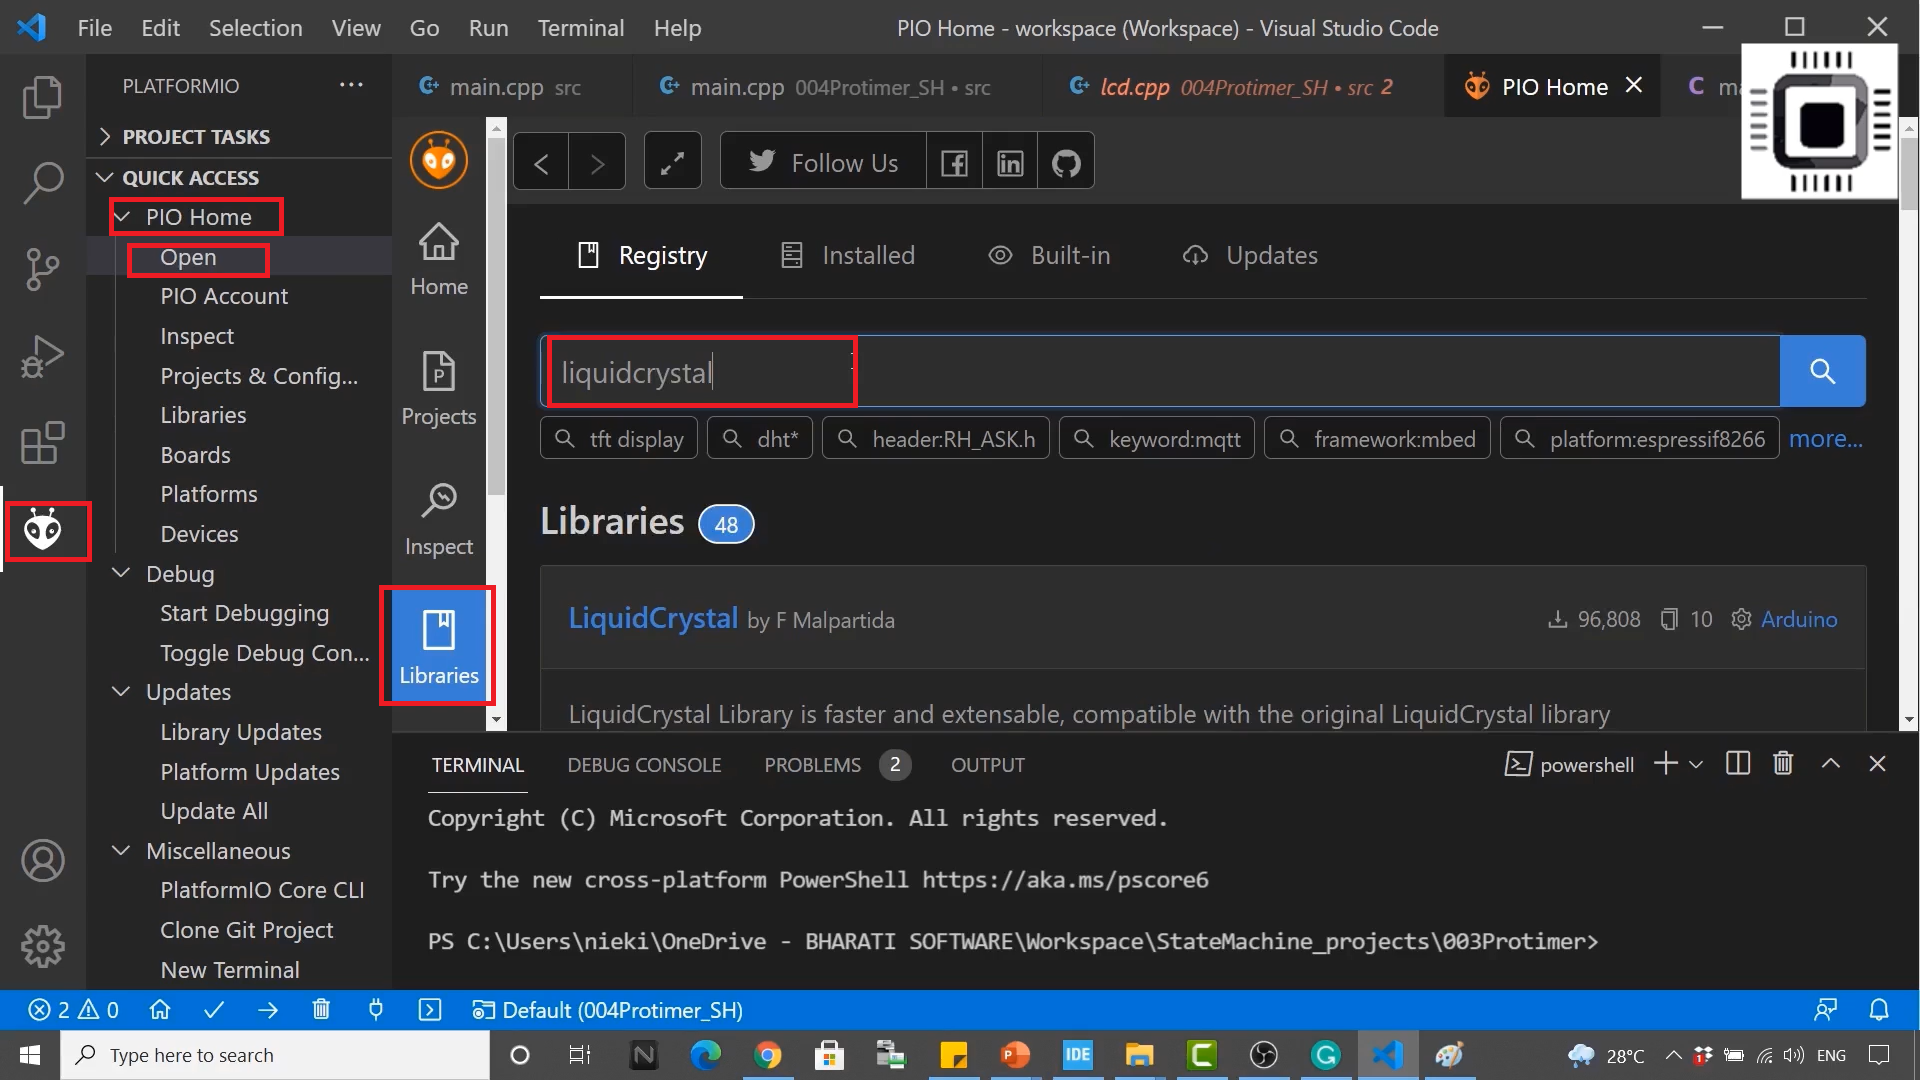
Go to PlatformIO, click on Open→ Libraries→ type Liquid crystal, as shown in Figure 8.
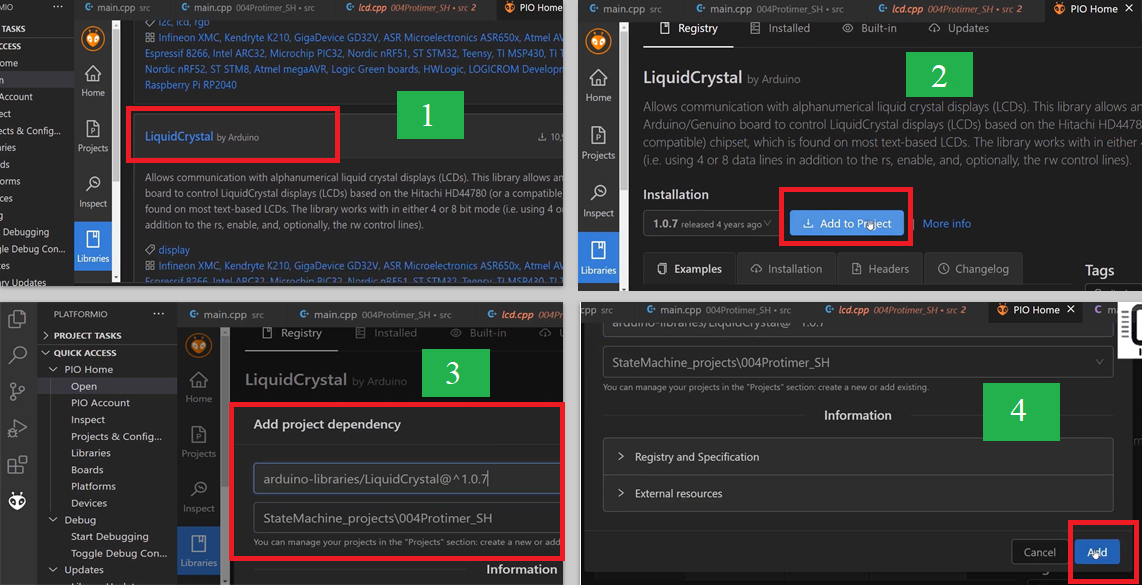
LiquidCrystal by Arduino, Click on that(1) → Add to project(2)→ select the project(3)→ Add(4), as shown in Figure 9.
Let’s make some changes to the 004Protimer_SH project. First, let’s go to the main.h. In the main.h, here, various application states are not required; we have to remove it. Because now we are not using these values to store it into a variable, then decode it using a switch statement to find out which handler to call. That’s why I’m going to remove various application states. Instead of that, we will use a function pointer.
Go to your main application structure. Now, active_state has to be a function pointer variable. This function pointer variable will hold the address of a state handler. And the state handlers prototype is something like this, as shown in figure 1, it returns event_status, and it takes these things (protimer_t *mobj,event_t,*e).
/* Main application structure */
typedef struct {
    uint32_t curr_time;
    uint32_t elapsed_time;
    uint32_t pro_time;
    event_status_t (*active_state)(protimer_t  *const, event_t const *const);
}protimer_t;
Function pointer variable
That’s why, how to convert active_state to a function pointer variable? As I explained, it takes the variable name active_state and gives a *; This is a pointer variable. Put that in the parenthesis and give its parameter list and the return value.
Our state handler prototype function returns event_status_t. That’s a return type, and it takes input parameter list, which is of this form→ protimer_t *const mobj, event_t const *const e. So, here you need not mention this variable name; this is sufficient. Now, this is a function pointer variable.
Instead of using that function variable, we can use a typedef version, as shown below. That’s the first change you have to make.
typedef event_status_t (*protimer_state_t)(protimer_t *const , struct event_t const *const);

/* Main application structure */
typedef struct {
   uint32_t curr_time;
   uint32_t elapsed_time;
   uint32_t pro_time;
   protimer_state_t active_state;
}protimer_t;
Function pointer variable
And after that, now let’s go to the protimer_init.
#define IDLE           &protimer_state_handler_IDLE
#define TIME_SET       &protimer_state_handler_TIME_SET
#define COUNTDOWN      &protimer_state_handler_COUNTDOWN
#define PAUSE          &protimer_state_handler_PAUSE
#define STAT           &protimer_state_handler_STAT

void protimer_init(protimer_t *mobj){
     event_t ee;
     ee.sig = ENTRY;
     mobj->active_state = IDLE;
     mobj->pro_time = 0;
    (*mobj->active_state)(mobj,&ee); //jump to IDLE handler
}
protimer_init
You can use a couple of macros and use this macro to represent the protimer_state_handler address, as shown above. And in the protimer_init, you can use IDLE. So, you directly store the address of the handler. Directly dereference active_state and call that handler initially. (*mobj-> active_state)(mobj, &ee). The first argument is mobj; the second argument is the address of the event. Jump to the IDLE handler to execute the Entry action. That is a second change you have to note.
Now, we have to modify the dispatcher code. By the way, the logic, whatever you had implemented in the loop function, remains as it is. That is no change at all.
static void protimer_event_dispatcher(protimer_t *const mobj,event_t const *const e){

   event_status_t status;
   protimer_state_t source, target;

   source = mobj->active_state;
   status = (*mobj->active_state)(mobj,e);

   if(status == EVENT_TRANSITION){
     target = mobj->active_state;
     event_t ee;
     //1. run the exit action for the source state
     ee.sig = EXIT;
     (*source)(mobj,&ee);

     //2. run the entry action for the target state
     ee.sig = ENTRY;
     (*target)(mobj,&ee);
  }

}
Dispatcher code
In the dispatcher code, source and target are function pointers. First, mobj-> active_state value is stored in source. And after that, call the current active_state handler with mobj and e. status=(*mobj->active_state)(mobj,e).
After that, if there is an EVENT_TRANSITION, then save the target. We have to execute the EXIT action first, copying the source to the active_state. That’s correct. After that, call the state handler represented by active_state (*mobj->active_state)(mobj, e).
And after that, you prepare the ENTRY signal. Now change mobj->active_state value to target and again call the state handler represented by active_state.
Instead of doing all these things, you can do this, as shown below. So, that’s the change you have to make.
 if(status == EVENT_TRANSITION){
    target = mobj->active_state;
    event_t ee;
    //1. run the exit action for the source state
    ee.sig = EXIT;
    (*source)(mobj,&e);

    //2. run the entry action for the target state
    ee.sig = ENTRY;
    (*target)(mobj,&e);
  }
Dispatcher code
Please test this on the hardware to see whether everything works or not, or you can even simulate this on the Tinkercad or any simulator software.
FastBit Embedded Brain Academy Courses
Click here: https://fastbitlab.com/course1

