Exercise-003 Productivity Timer demo
In this article, let’s do one more exercise, and the exercise name is Productivity Timer. I call it a ProTimer. This application tracks your productive working time.
That means the one usecase of this application could be it tracks how many hours you study or work productively in a day.
Before you start studying or working, you set the time for how many minutes you want to study. And then, you can start the timer, and you study or work until the timer expires.
And the application tracks the productive time, and at the end of the day, you will come to know how many minutes or how many hours you spent productively in a given day. That’s a usecase of this application.
We will build this application in this article using the state machine approach. Before that, let’s know the requirements we need to implement in this application.
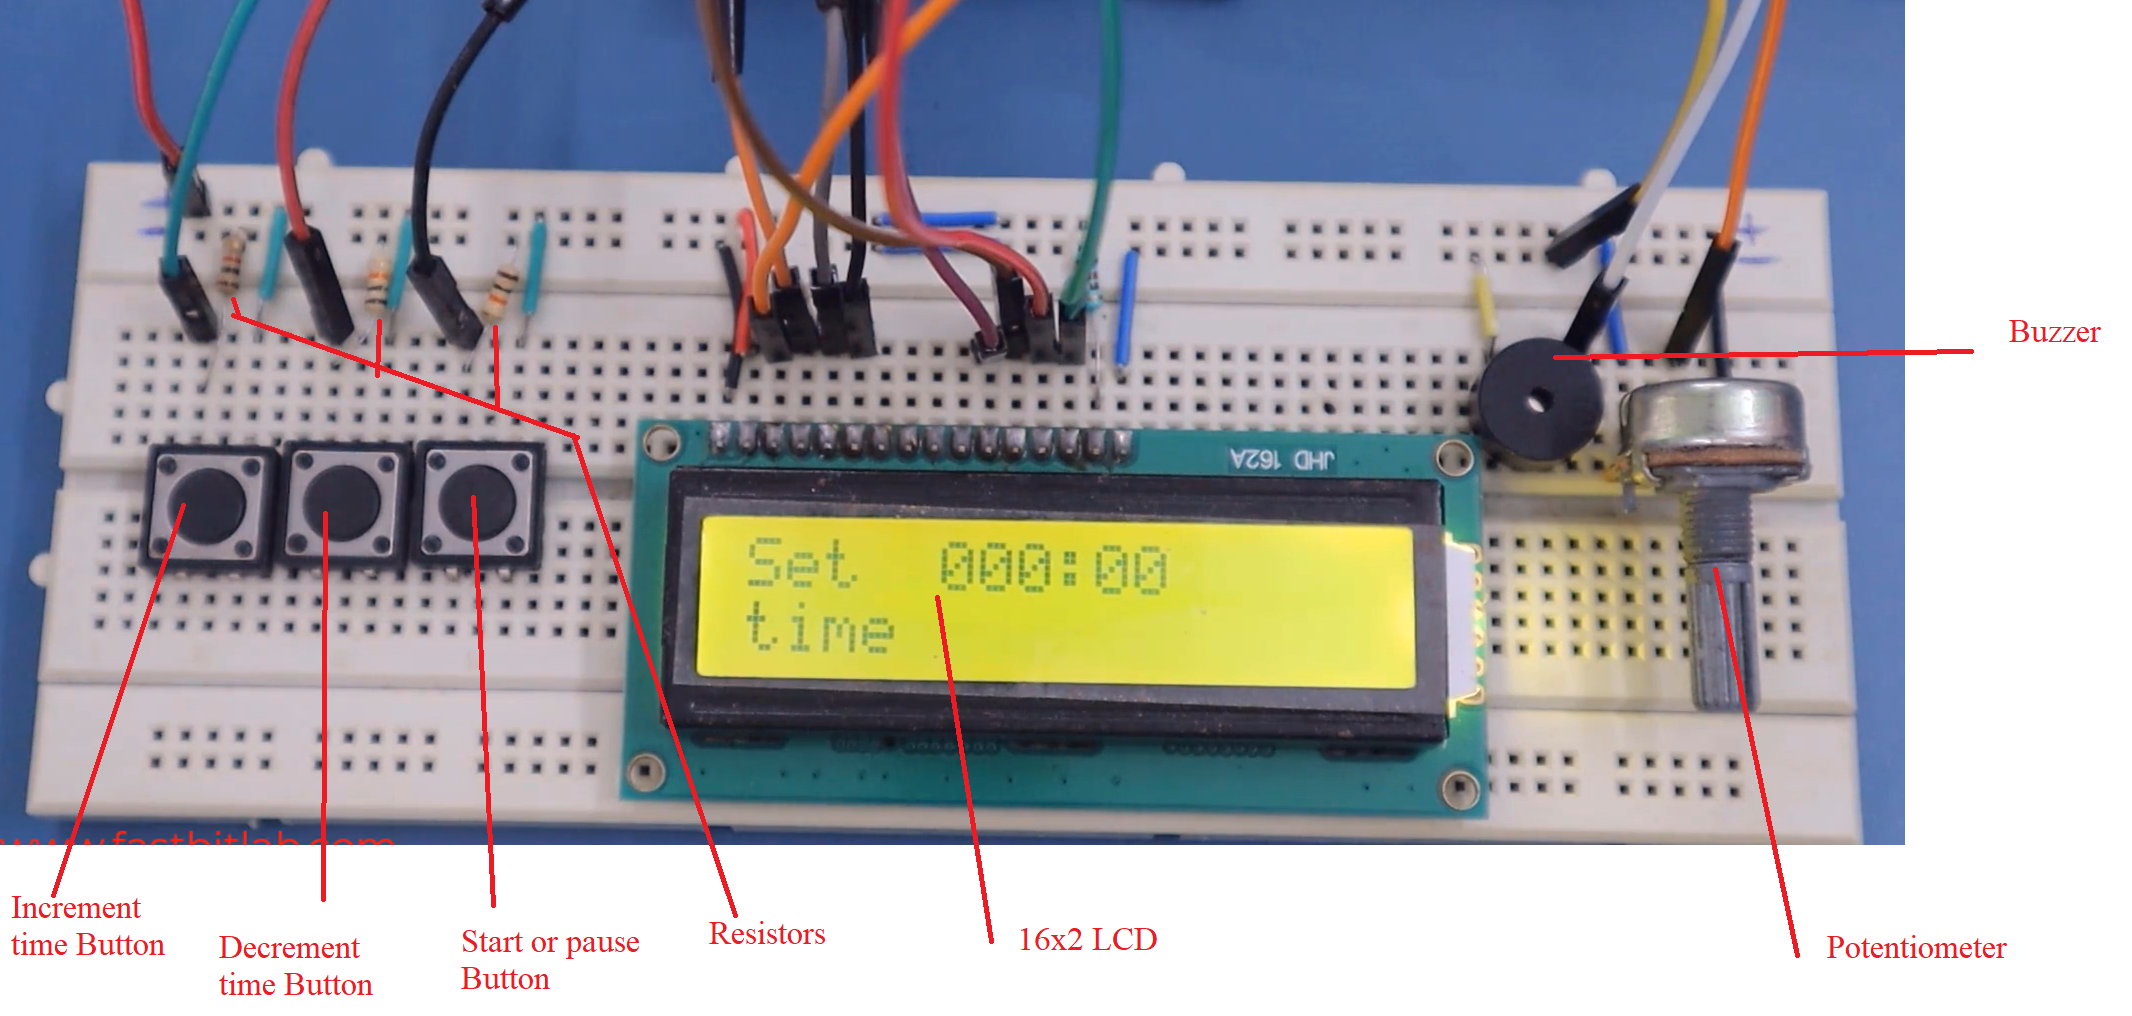
There are a couple of components in this application. All the components are connected to the Arduino Uno board.
– 16×2 LCD
-Three user buttons
-A couple of resistors to interconnect all the components
-A buzzer: an active buzzer
-A Potentiometer: Its purpose is to set the contrast for the LCD.
Three user buttons:
- Increment time button: The minutes field increases whenever I press this button. The number of minutes increases.
- Decrement time button: When you press this button, it decrements the minute’s field.
- Start or Pause timer button: It starts or pauses the countdown.
When you set the timer for 20 minutes, you can use this button to start the countdown.
If you want to pause the timer, you want to take a break, and then you can pause the timer by pressing a start or pause button. It pauses. And if you want to continue again, then you can use the same button(start button), and it continues from there.
- ABORT: Press the increment time button and decrement time button simultaneously. It is an ABORT event. When you press both the buttons simultaneously, it goes to the initial mode and starts beeping again.
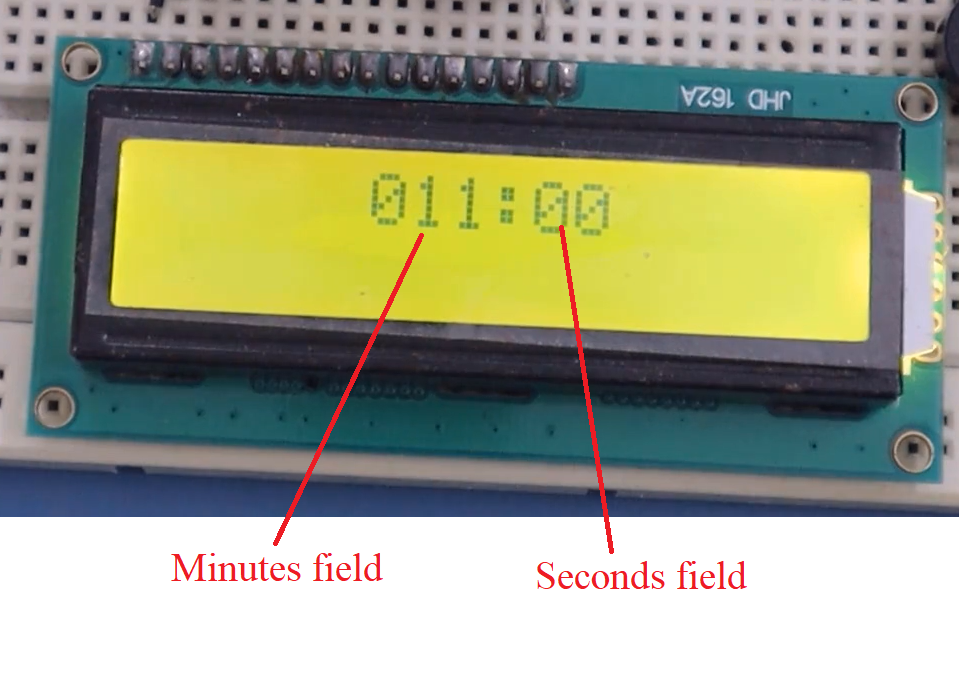
See Figure 2 that is the timer display. It has two sections—the Minutes section and the seconds section. There is no hour field in the display.
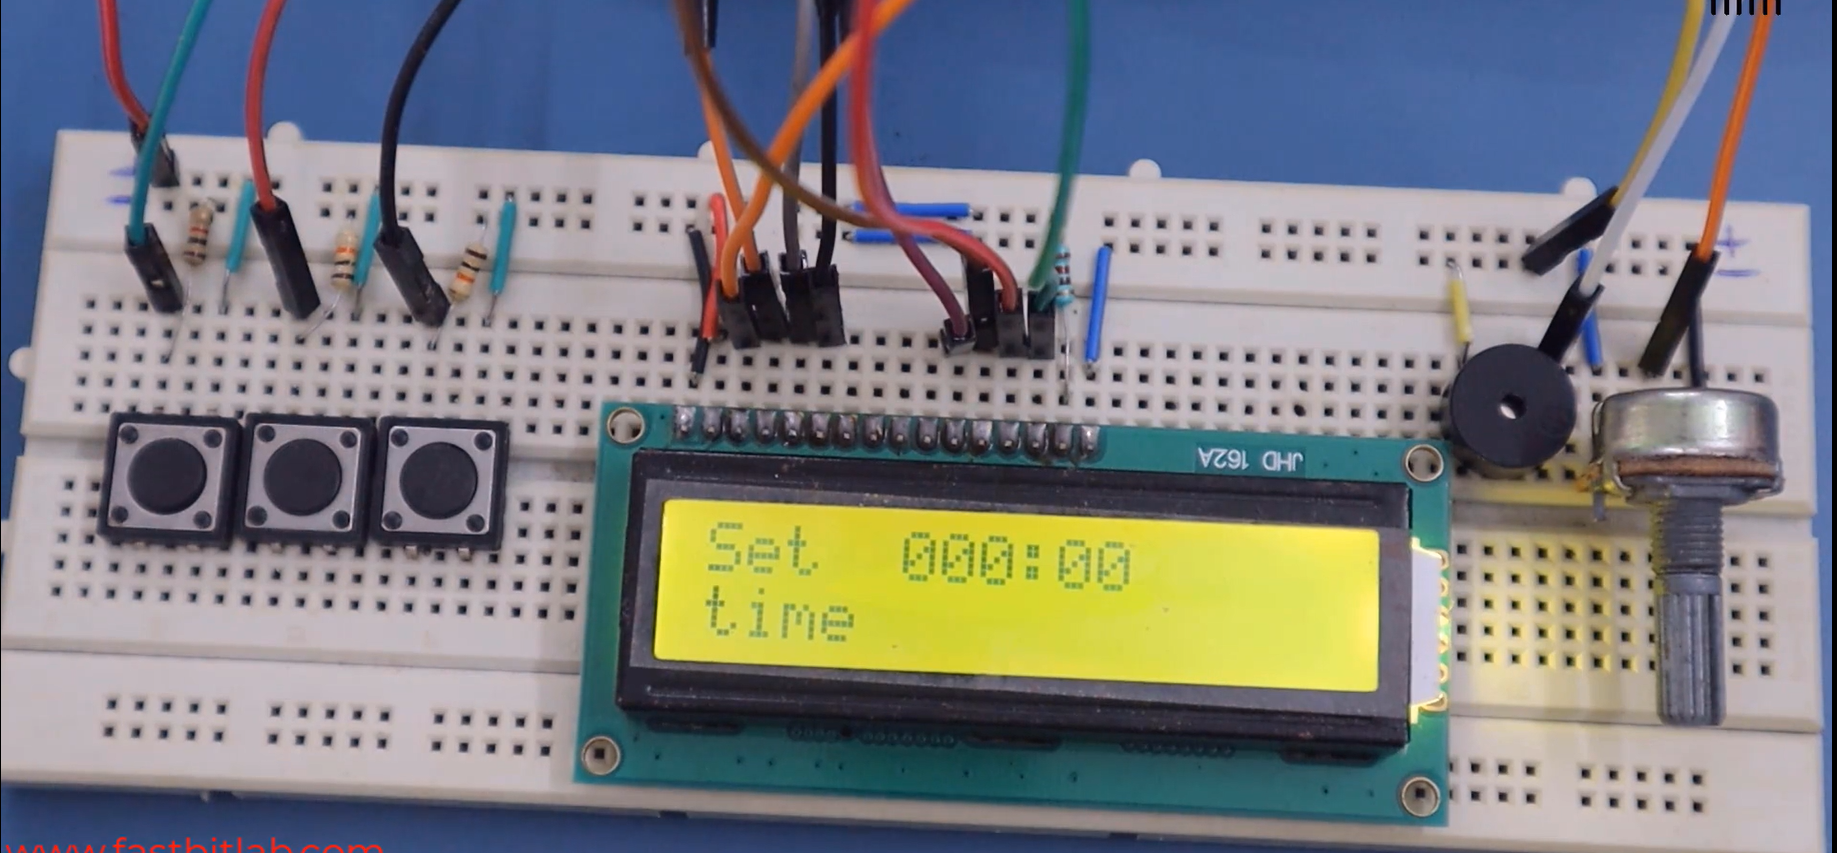
Suppose you want to know the productive time statistics when the application is in IDLE mode; figure 3 shows the IDLE mode of the application.
When the application is in IDLE mode, you can use the start or pause button to know the productive time you have spent.
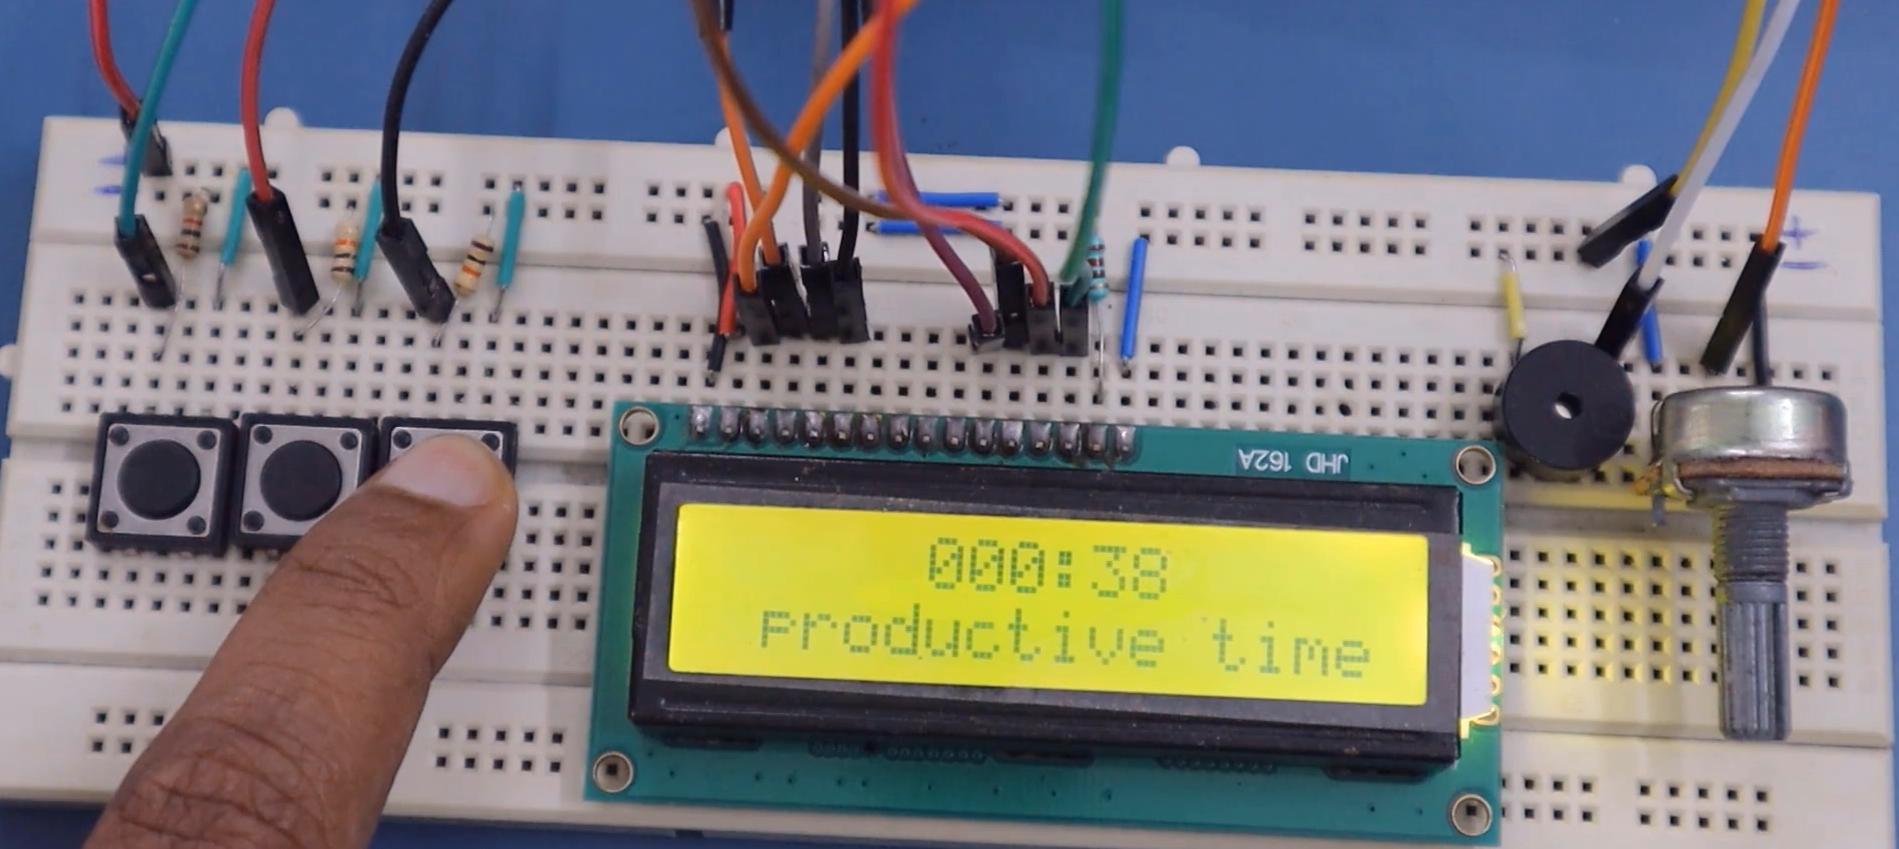
You can see that the productive time is just 38 seconds. And that’s about this application.
Let’s first implement this application using flat state machines, and the state machine comprises a couple of states.
First, the initial state is nothing but the IDLE mode, or you can consider it an IDLE state.
When it is in the IDLE state, it just beeps for a few seconds and asks the user to set the time. And whenever I press these buttons(increment/decrement time button), it moves from the IDLE state to TIME-SET mode. In this mode, it responds to the events generated by these increment time and decrement time buttons.
And after that, when you hit the start button, the countdown starts. The applications can be visualized as the counting down mode or countdown mode.
And when the timer is counting down, it doesn’t respect the increment time or decrement time events. Of course, the buttons are debounced using software debouncing, so I have not used any hardware debouncing components.
When it is counting down, it pauses if you press the start or pause button. It could be another mode or another state in the application. And whenever I press increment and decrement buttons simultaneously, it generates the ABORT event, and everything starts from the beginning.
FastBit Embedded Brain Academy Courses
Click here: https://fastbitlab.com/course1

