How to enable internet over USB?
In the previous article, we updated our kernel image.
In this article, I’m going to explain how you can enable the internet over USB. Beaglebone board can communicate to the internet over the USB cable by sharing your PC’s internet connection. You need not to use a separate ethernet cable to connect your board to the internet. The required drivers are enabled by default in the kernel and loaded when Linux boots on the BBB. But you must enable internet sharing on your HOST.
In this article, I’m going to explain these steps.
Target Settings (Beaglebone Black):
First, let’s look at target settings, as shown in Figure 1. In the target settings, you have to touch two files. One is resolv.conf, and another one is interfaces files in the /etc/network path.
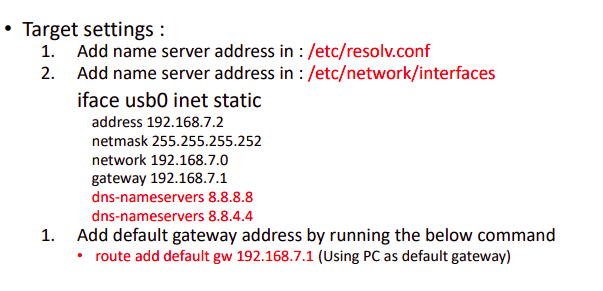
Then you have to add the default gateway address by running the below command. The default gateway in our case is our system, which is HOST.
First, let’s do the target settings, and later we can see what the host settings required in order to share your system’s internet with the target.
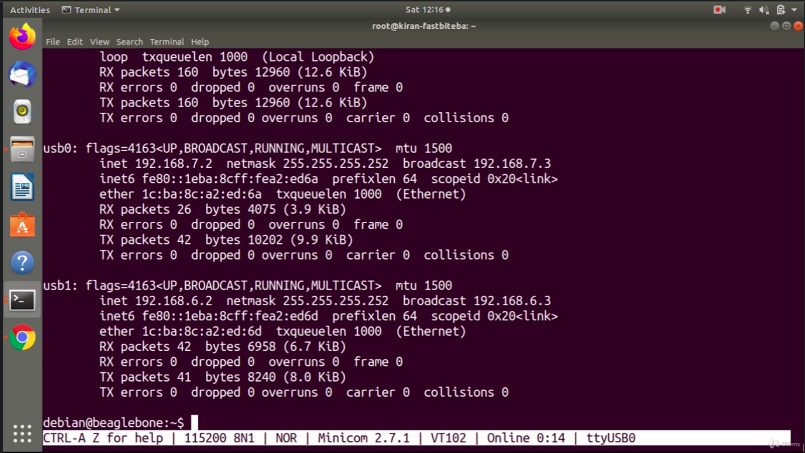
First, Let’s head over to our command prompt; In the target Beaglebone, just do ifconfig. When you do ifconfig, you should see the internet over USB interfaces such as USB0 or USB1, but we don’t see anything here, as shown in Figure 2.
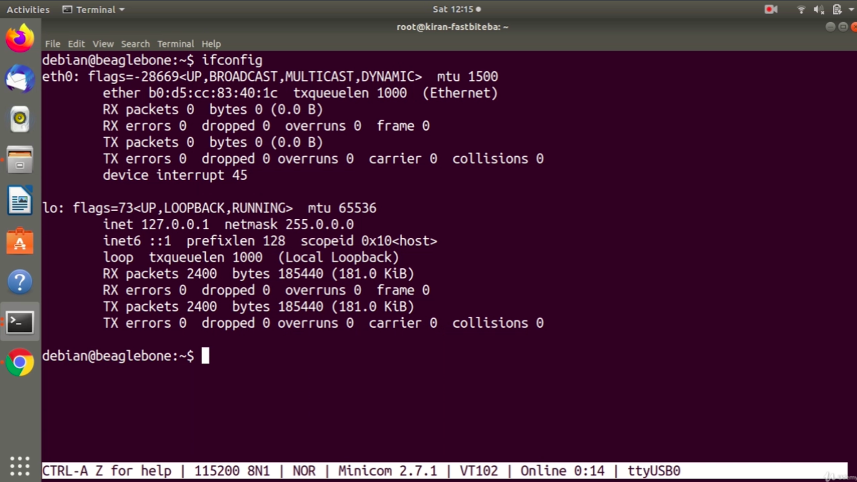
That means the internet over USB drivers are not loaded. If you are seeing something like this, then do not worry; just reboot the Beaglebone black hardware.
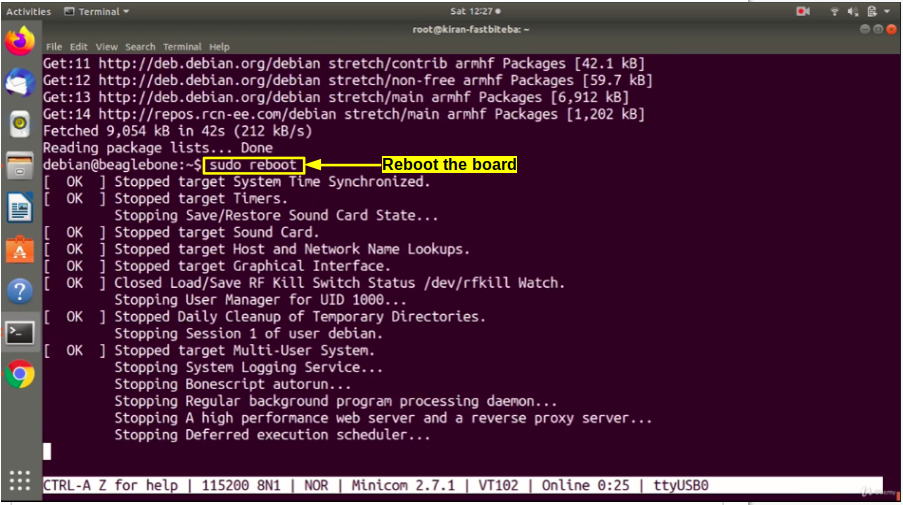
Just type the command sudo reboot, and enter the password as shown in Figure 3.

Now, the board is rebooting; just login. Just run ifconfig.
Now you see two interfaces, USB0, and USB1, as shown in Figure 4. Through this interface, the board communicates to the internet or to the network over the USB.
Now you can just ping to the host by running the ping command, then 192.168.7.1 as shown in Figure 5 . This is the host’s address.

If you just run this command, you can see that we can establish the connection.
And after that, let’s try to ping google.com, as shown in Figure 6.

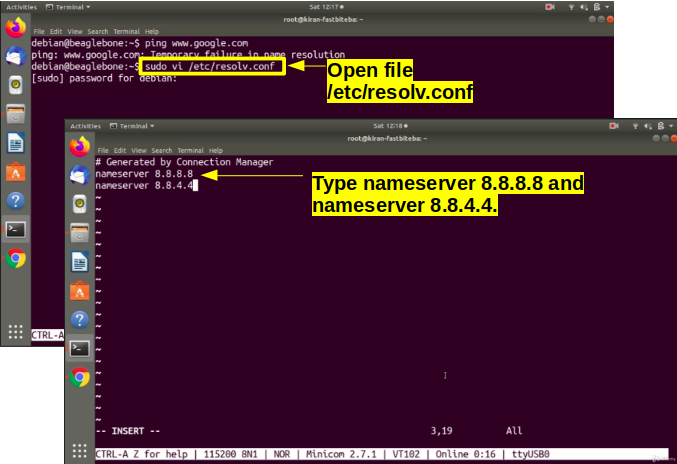
Now you see this error: Temporary failure in name resolution, which means we have to set the DNS server address. For that, what you should do is, we have to touch two files. One is the /etc/resolv.conf and /etc/network/interfaces file.
First, let’s edit /etc/resolv.conf. Just type sudo vi /etc/ resolv.conf. Enter the password. Go to the insert mode by typing I.
Here, just type nameserver 8.8.8.8 and again one more time nameserver 8.8.4.4 as shown in Figure 7.
After that, save and exit.
After that, again, sudo vi /etc/network/interfaces as shown in Figure 8.
Here, go to the insert mode and come at the end here type dns-nameservers 8.8.8.8 and one more time dns-nameservers 8.8.4.4 and save exit.

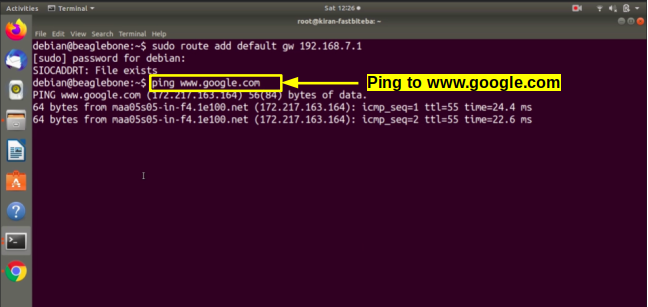
After that, go for this step add the default gateway address by running the below command route add the default gateway.
Let’s run that command sudo route add default gateway 192.168.7.1 as shown in Figure 9; this is the host IP address.
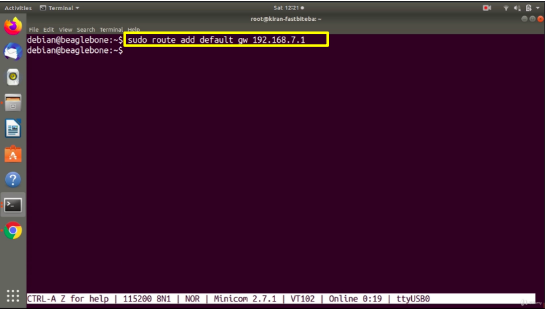
This command is really important. And whenever you reboot your Beaglebone, you should run this command.
Host Settings (Your PC):
Let’s check the host settings.
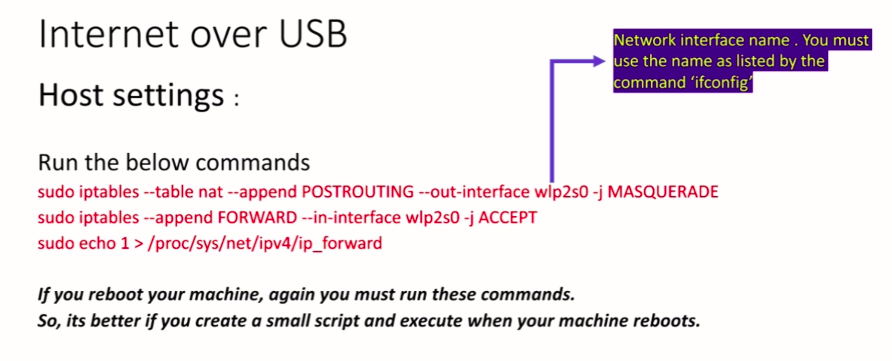
In the host setting, you have to run these commands to share your system’s internet connection with Beaglebone black hardware. And remember that if you reboot your machine again, you must run the below commands as shown in Figure 10.
It’s better to create a small script and execute it when your machine reboots.
I have attached a script in this link: https://drive.google.com/drive/folders/1BpRVKHExRejeZYEuAFjDn2WBZdt5dIZh?usp=sharing
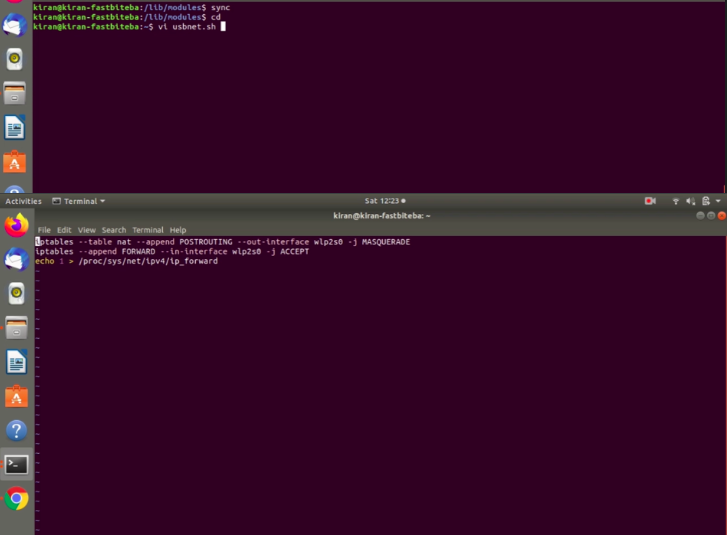
Just download that script usbnet.sh. That’s a script name. Keep that in your home directory. And just run that script; it will enable internet sharing.
Let’s go to our command prompt. Let me go to the host. Here, I have copied that script from usbnet.sh.
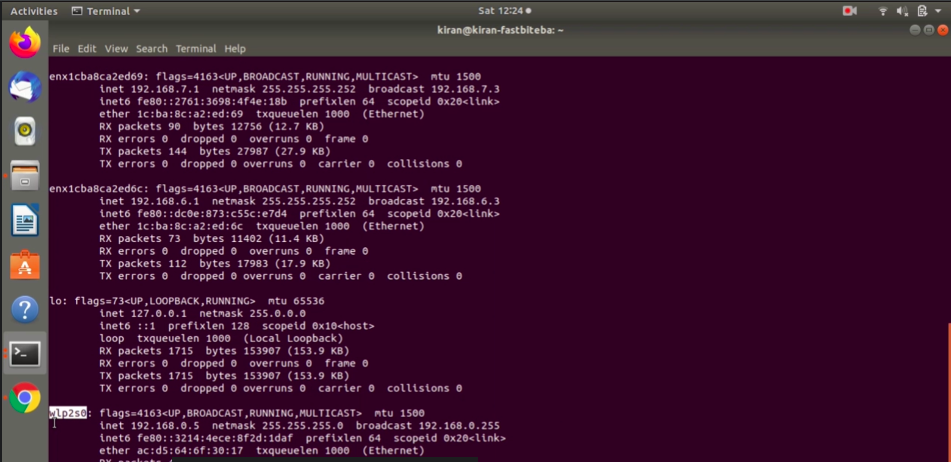
Here, you have to verify the interface name wlp2s0 as shown in Figure 11. That is true for my machine, but it may be different for your machine. So, you have to change it.
Let’s see how to change that.
Just run ifconfig on your machine. My machine is connected to the Wi-Fi, and this is a wireless interface. Wlp2s0. That’s why I used this name in the script, as shown in Figure 12.
If yours is something different, then you have to use that name.
You might not be using Wi-Fi, or you may be using a wired connection or something like that, then you should check what is your primary internet connection interface when you run ifconfig, and you have to use that name. That’s the reason I used this name here. Network interface name. Please, verify this name.
That is very important. After that, what you do is just give executable permission to the script. Change mode + x usbnet. Sorry, I have to run sudo with it. And after that, just run that script sudo usbnet.sh. That’s it.

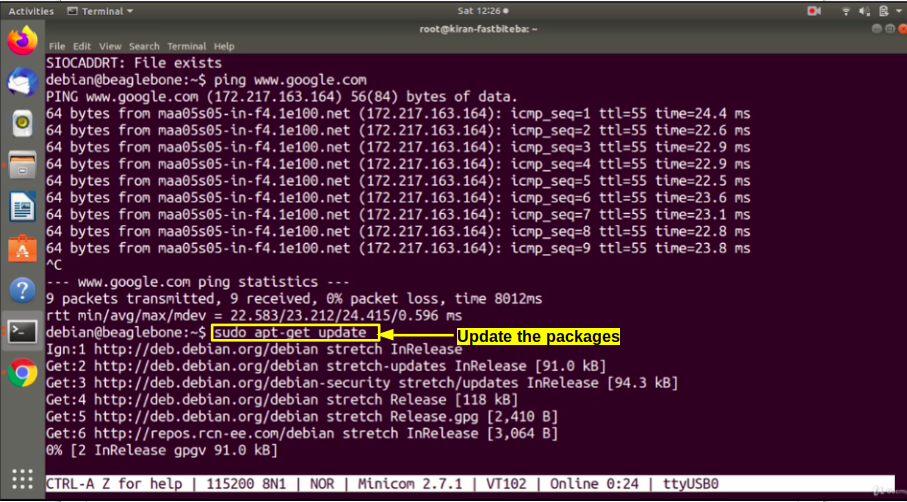
Go to your target and ping www.google.com. Now you can see that it can do the name resolution, and it can ping, as shown in Figure 14.
And then run the command sudo apt-get update as shown in Figure 15.
You can install any packages if you want by running sudo apt-get install on your Beaglebone hardware.
Now let’s just reboot the board, as shown in Figure 16.
Let’s see what happens when we reboot the board, whether we can still communicate on the internet or not. Now, let’s try to ping to google.com; now you see we cannot communicate Figure 17.

What you should do is, you have to add the default gateway once again. Because, the default gateway entry is removed, so you have to add that again. sudo route add default gateway 192.168.7.1. Now let’s try, it connects.
Whenever you reboot the host, then you should run that internet sharing script again. Please remember that.
So, with that note I would like to end this article and I’ll see you in the next article.
FastBit Embedded Brain Academy Courses
click here: https://fastbitlab.com/course1