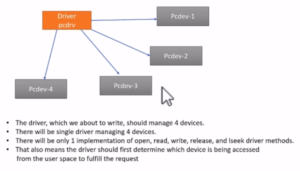
Implementation of I2C master receive data API: Part 1
Let’s implement the I2C master receive data API. Before writing code, first, download the file shown in Figure 1 and then copy it to driver source code.

- Copy the I2C_MasterReceiveData API and paste it in the I2C driver.h file (Figure 2) to give the function prototype in the header file.

- Copy the entire function and paste it into the I2C driver.c file, as shown in Figure 3.

Now let’s start coding according to the comments.
Steps to implement I2C_MasterReceiveData API:
1. Generate start condition: To generate the start condition, copy the master send data and paste it into the master receive data API, as shown in Figure 4.

2. Confirm that the start generation is completed. This is done by using a while loop, as shown in Figure 5.

3. Send the address of the slave with R/W bit set to 1 because the master is reading the data from the slave (Figure 6). The R/W bit can be set to 1, as shown in Figure 7.


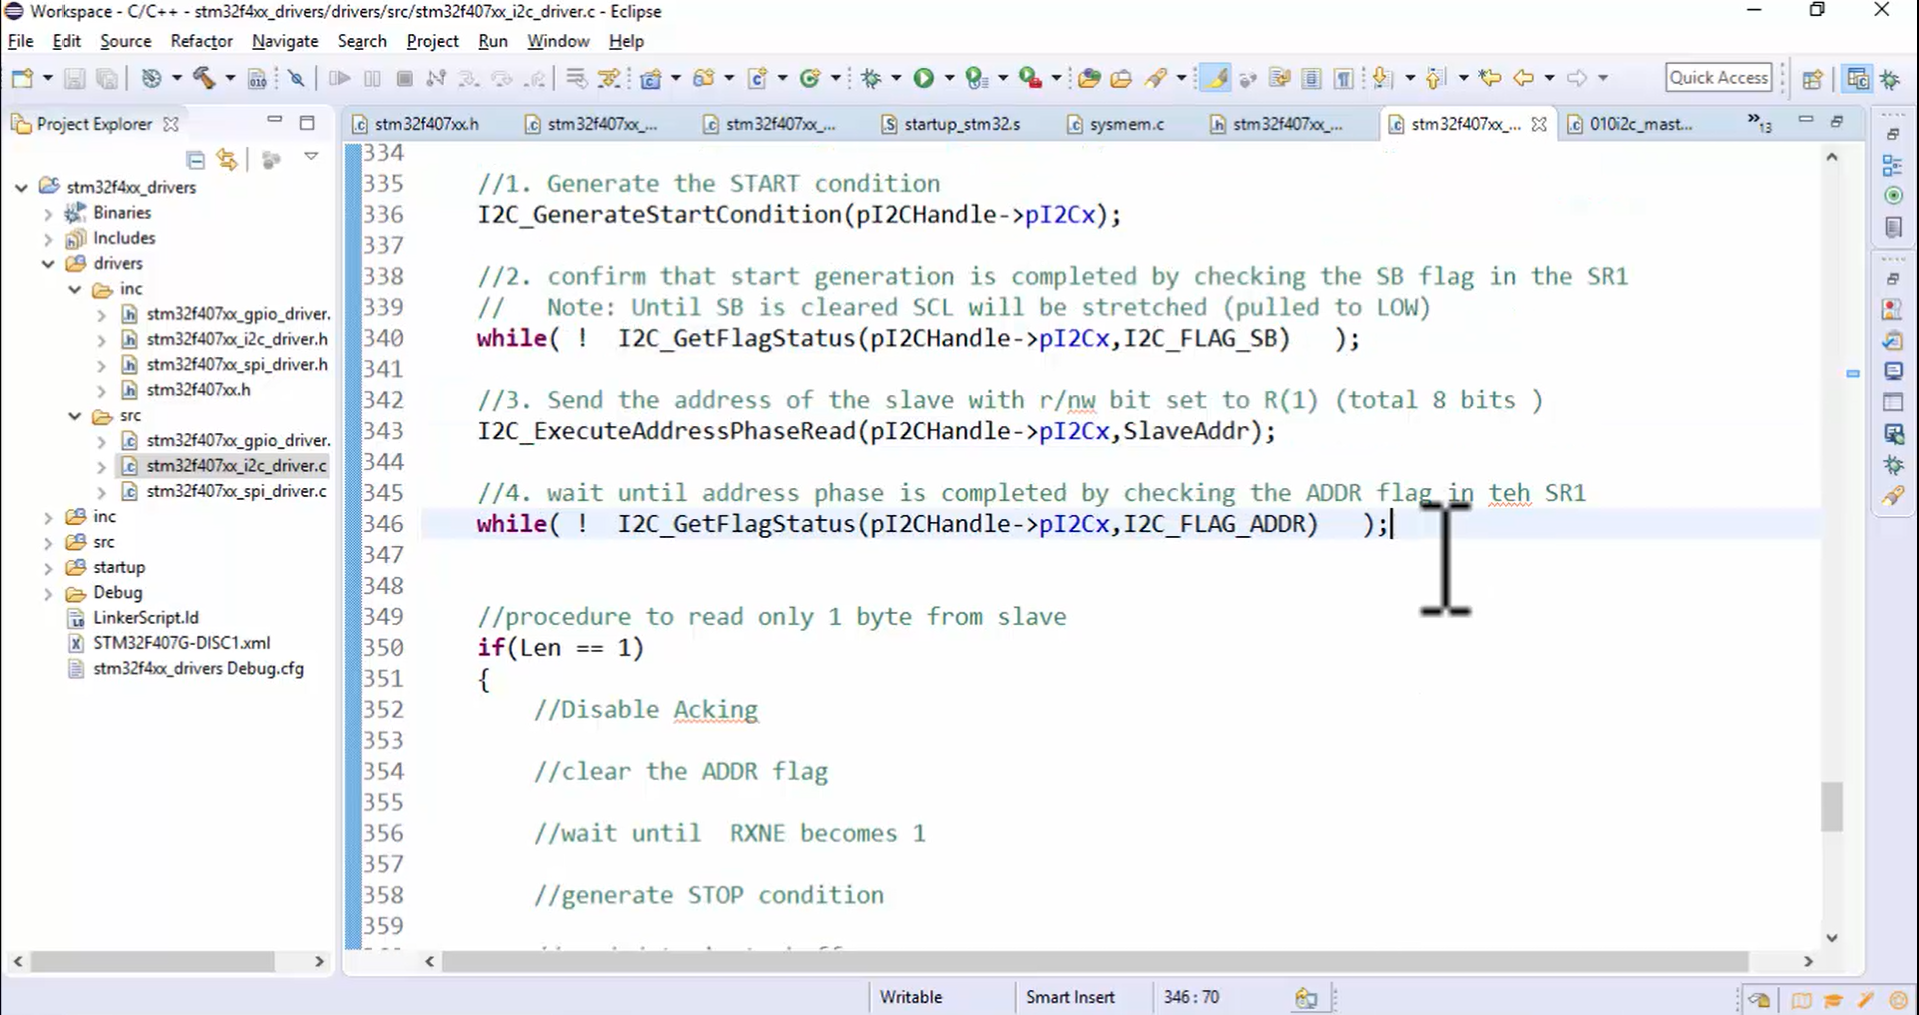
4. Wait until the address phase is completed by checking the ADDR flag in the SR1 register, as shown in Figure 8.
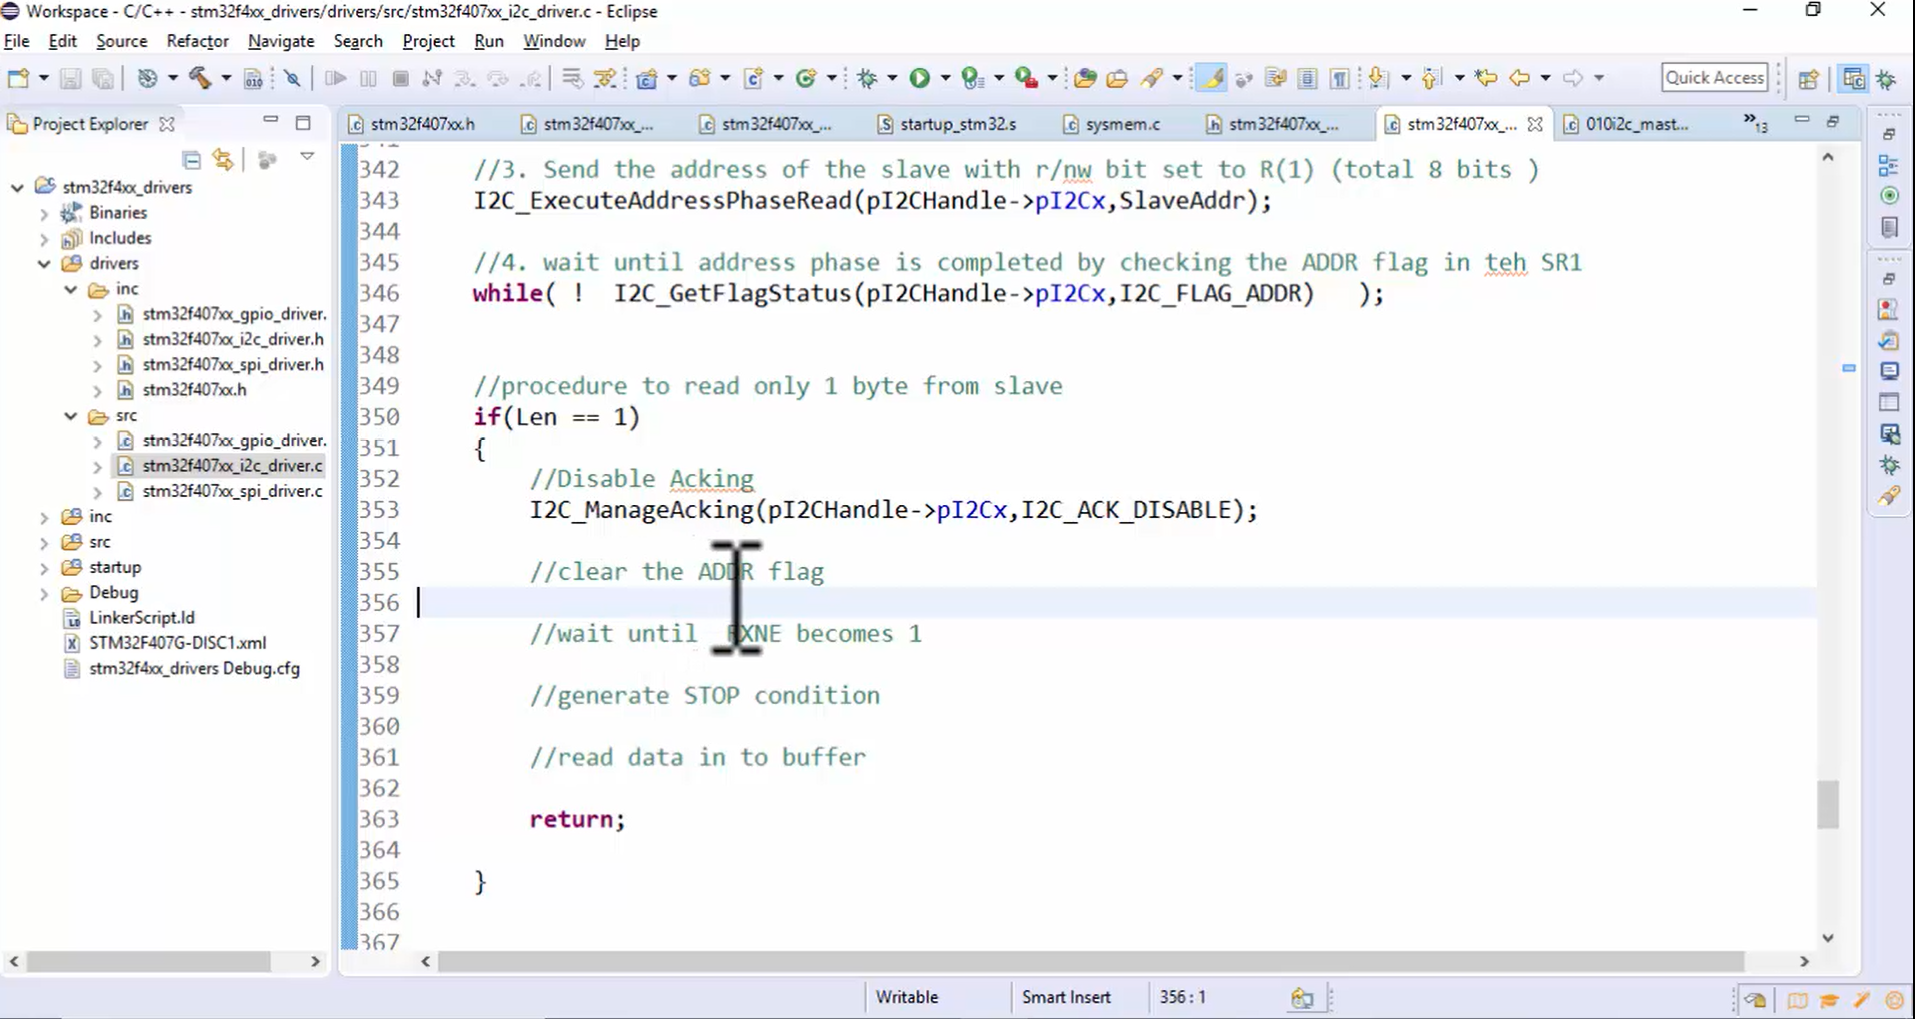
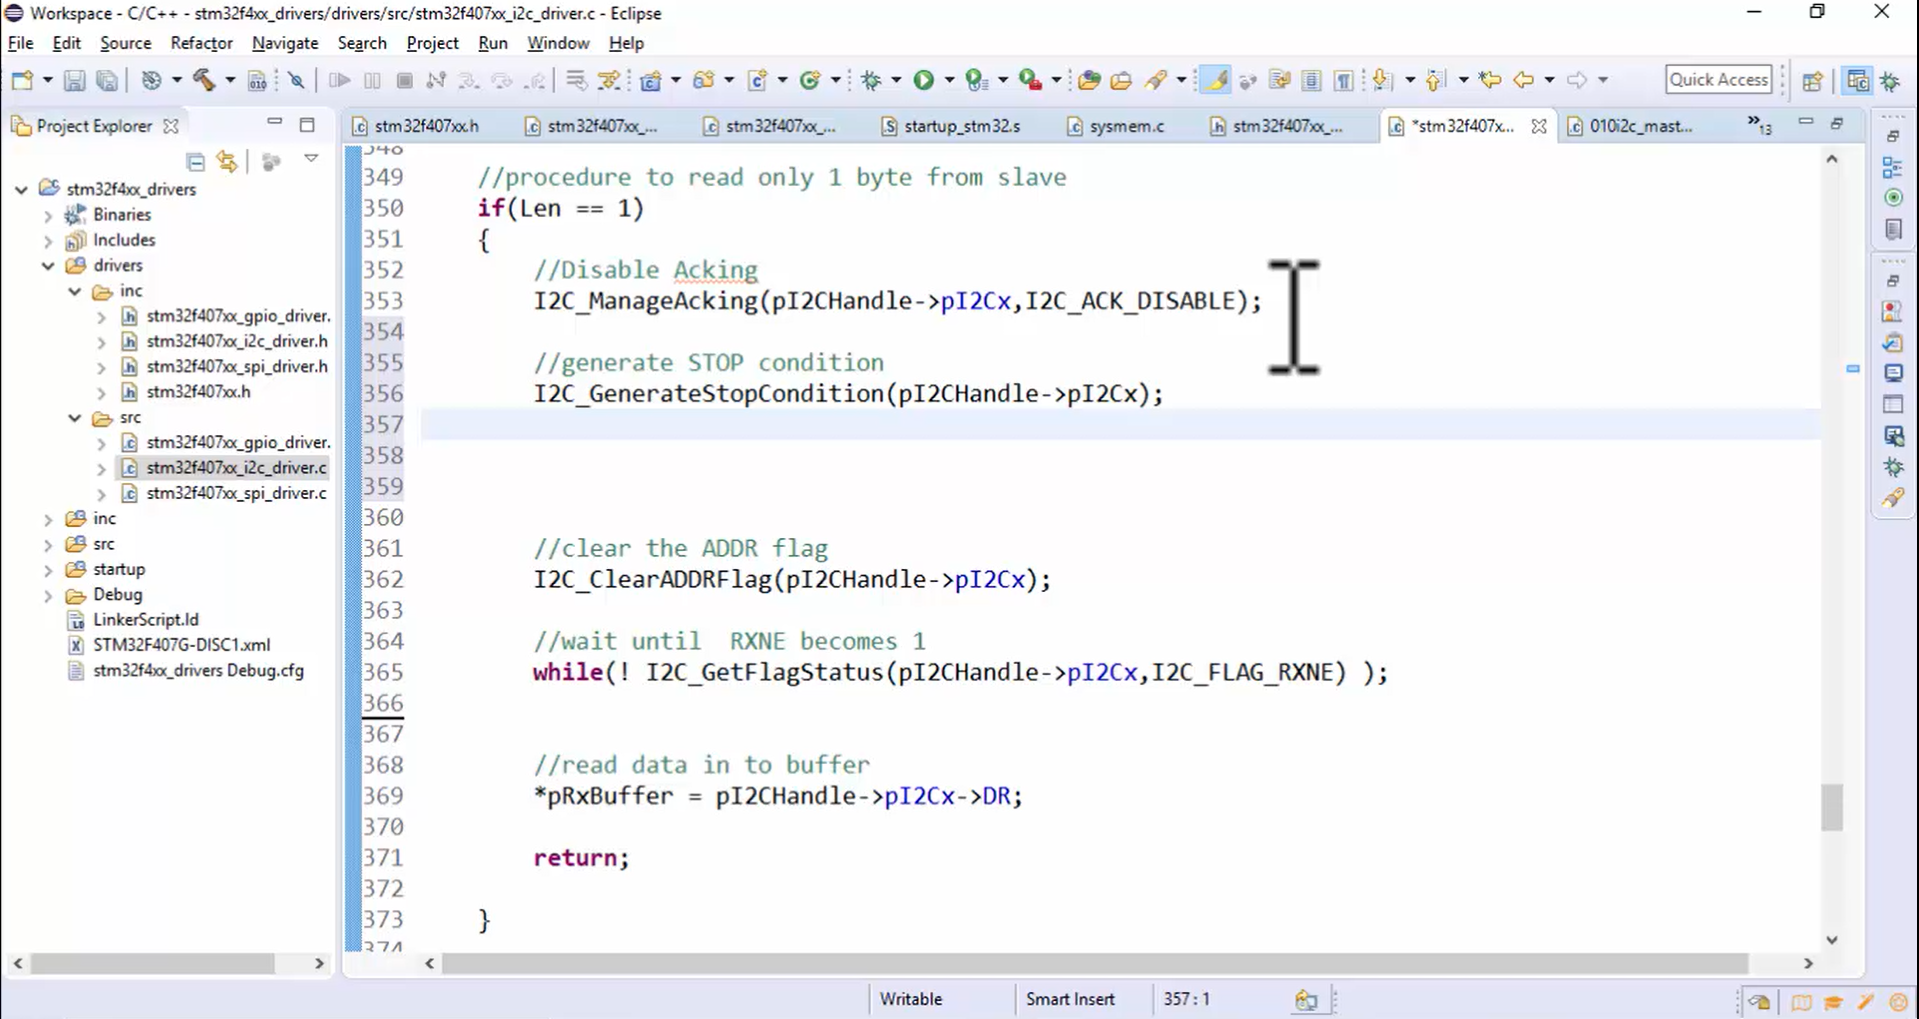
5. Procedure to read only one byte:
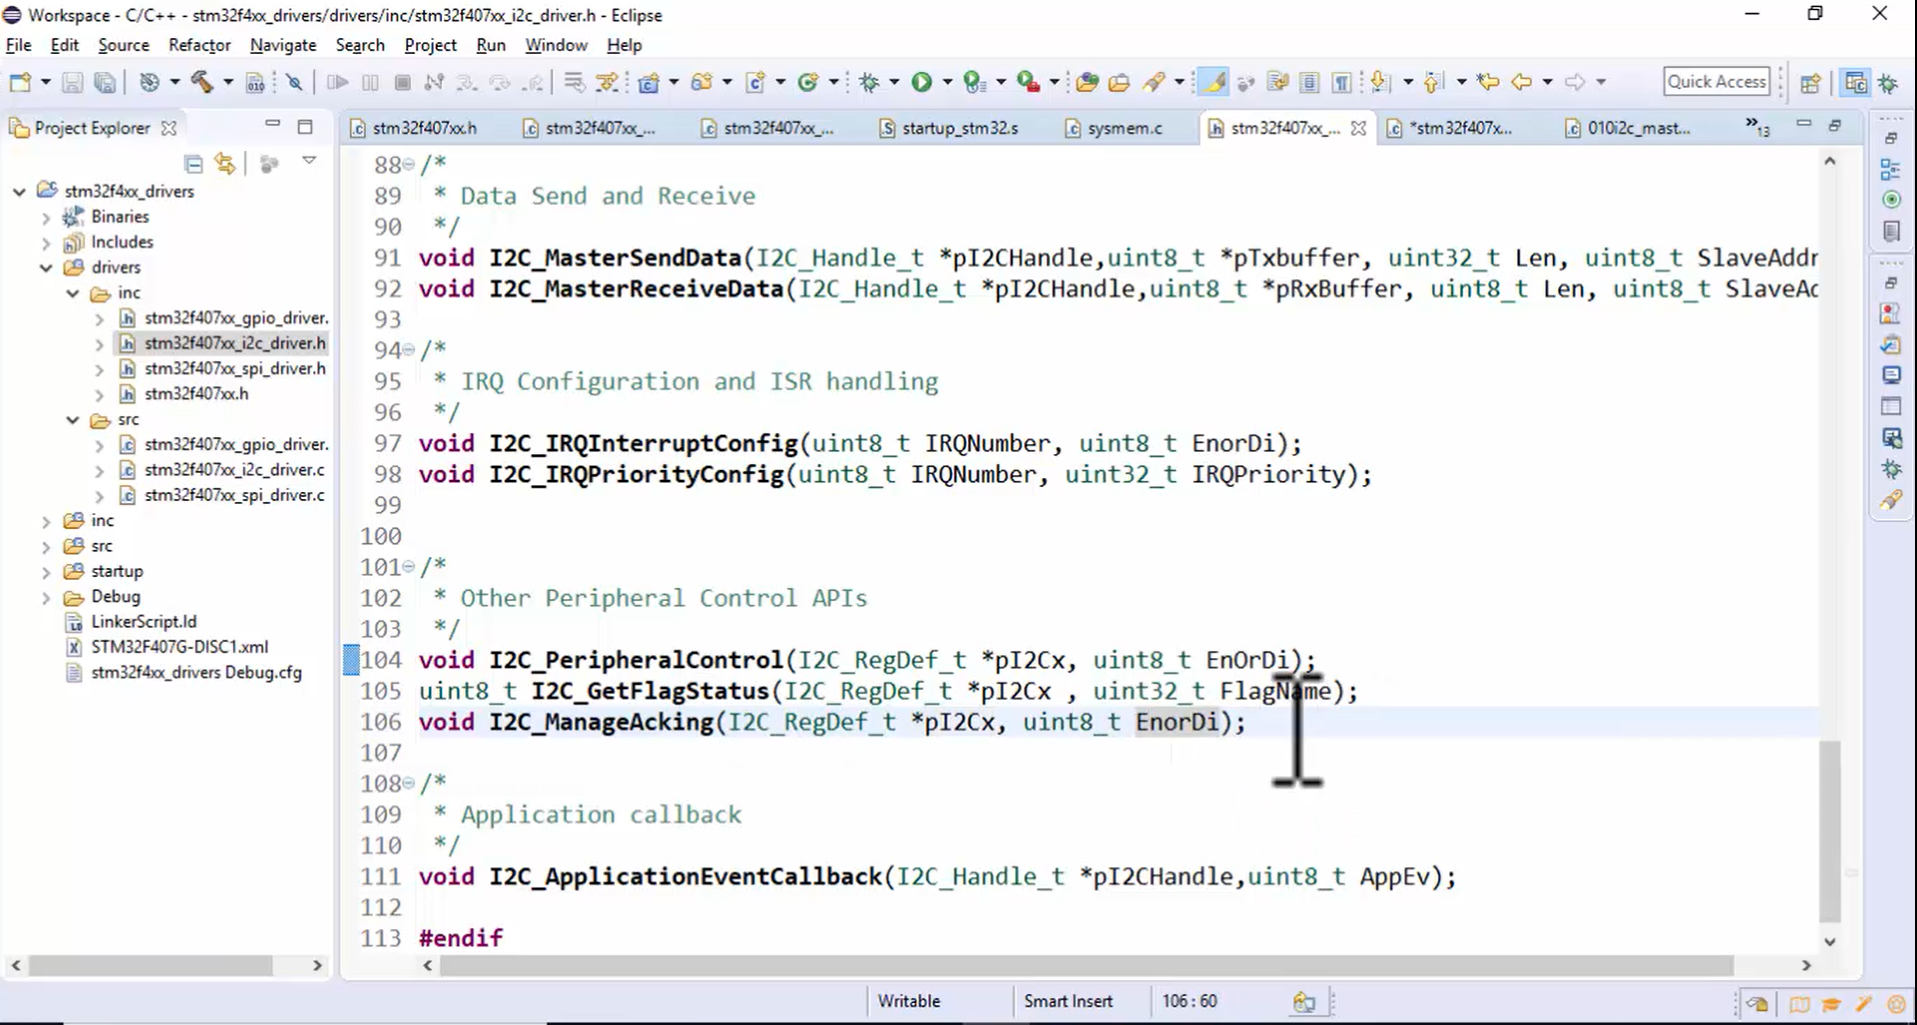
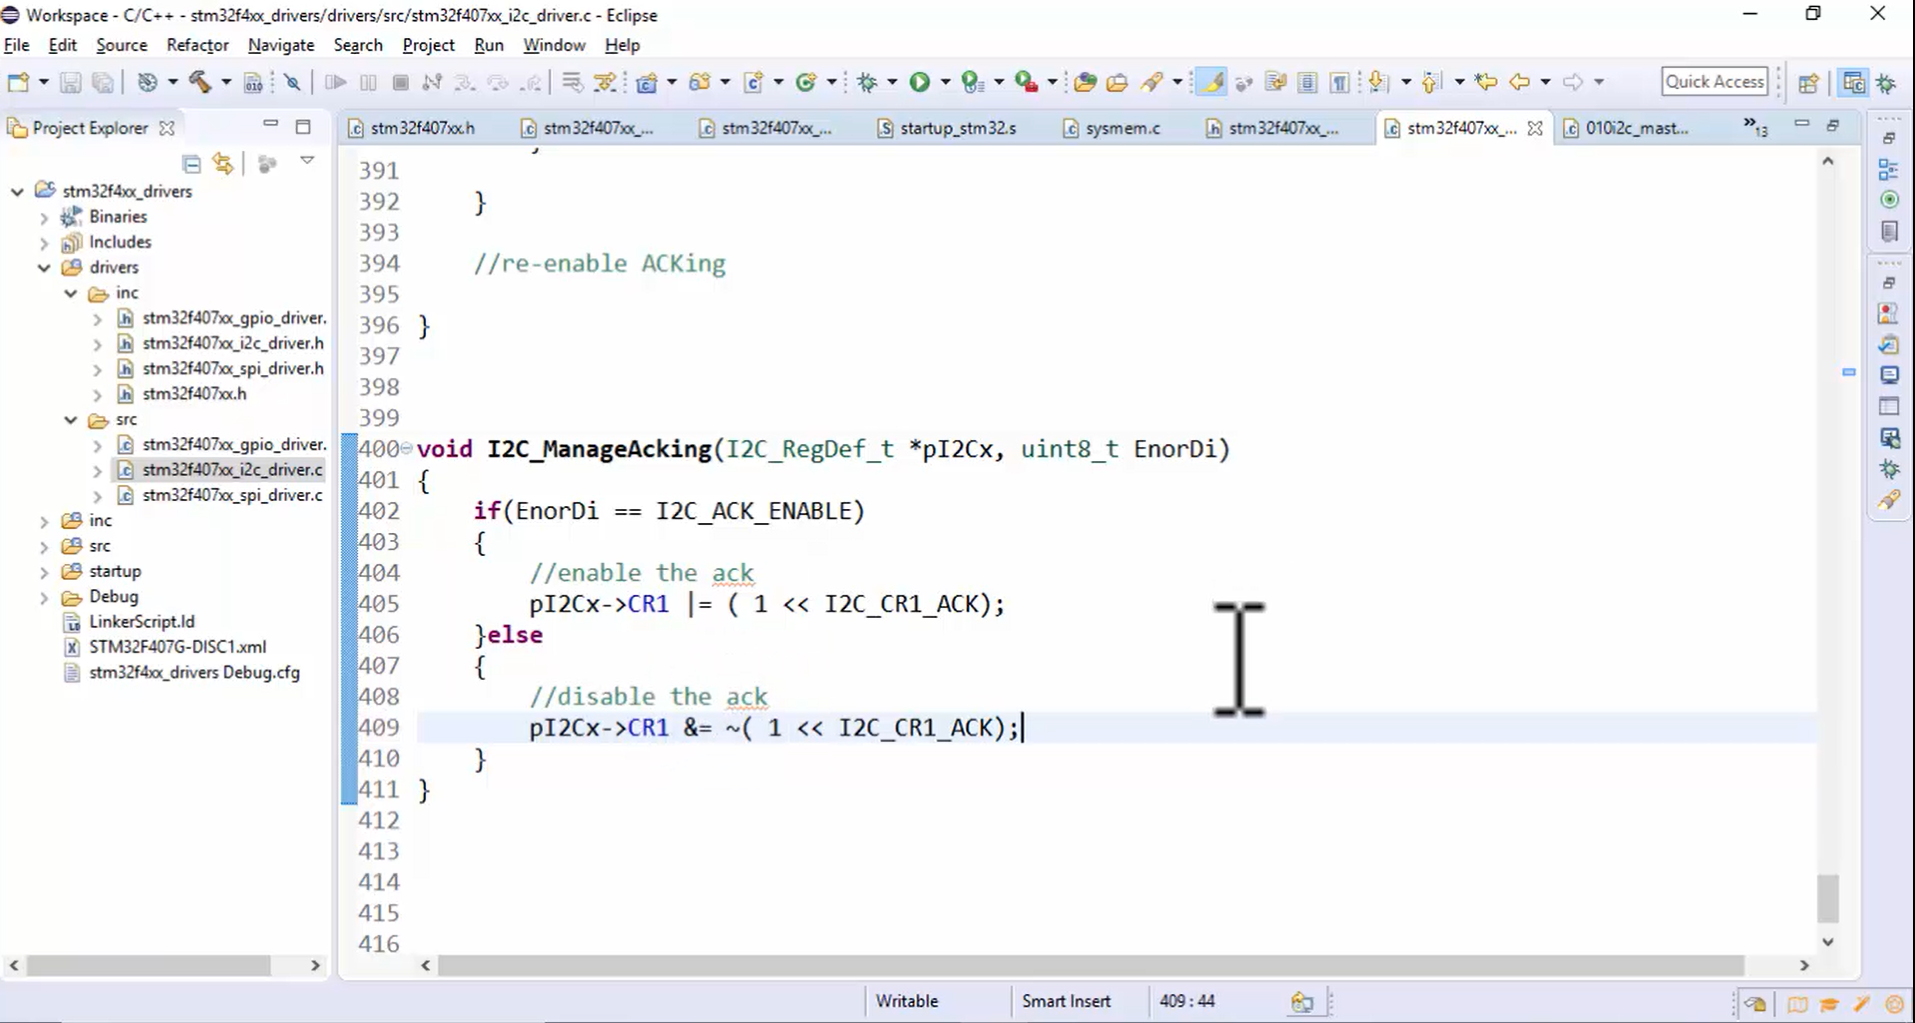
- Disable the Acking by creating the I2C_ManageAcking() API to manage the Acking (Figure 9). Then go to the driver.h file and paste the I2C_ManageAcking() API in other peripheral control APIs section, as shown in Figure 10.
Implement I2C_ManageAcking() API in driver.c, as shown in Figure 11. The Acking is managed by using ACK_ENABLE and ACK_DISABLE macros. If it is ACK enable, then set the 10th bit of the CR1 register. Otherwise, clear that 10th bit.
- Clear the ADDR flag (Figure 12).

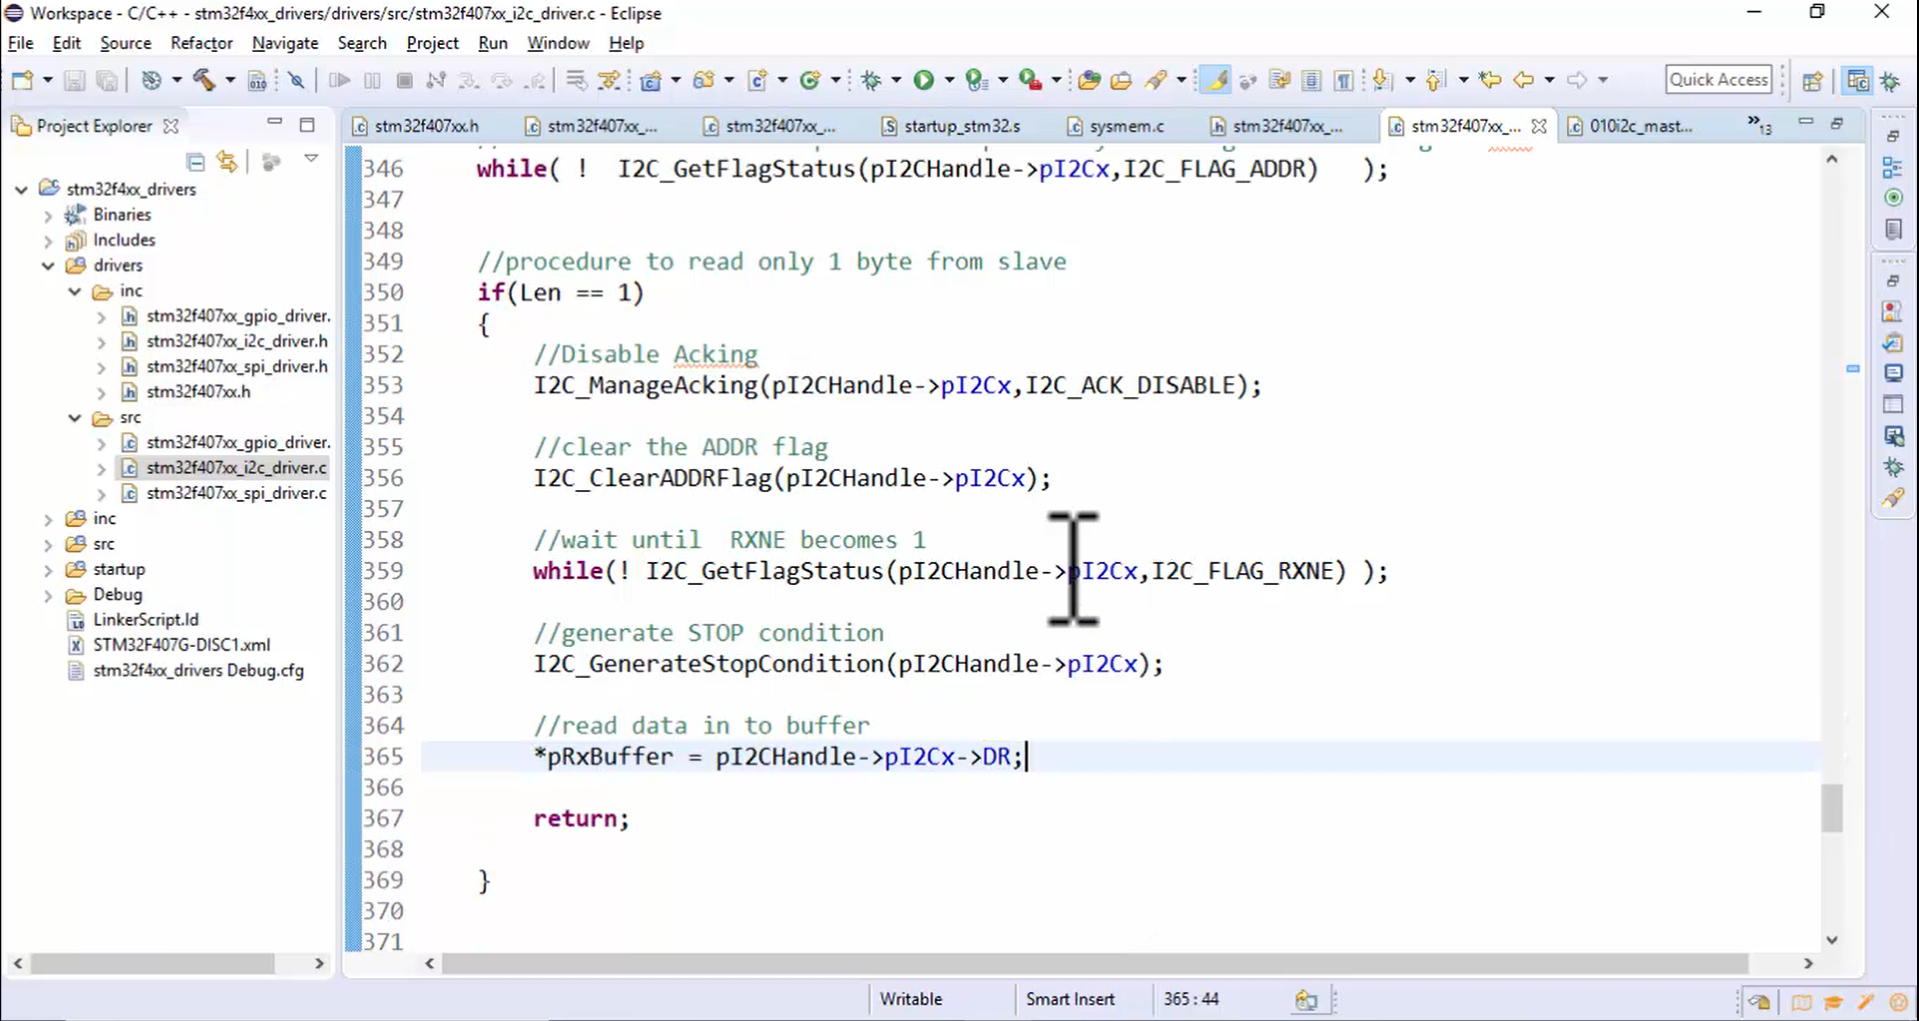
- Wait until RXNE becomes 1 (Figure 13).
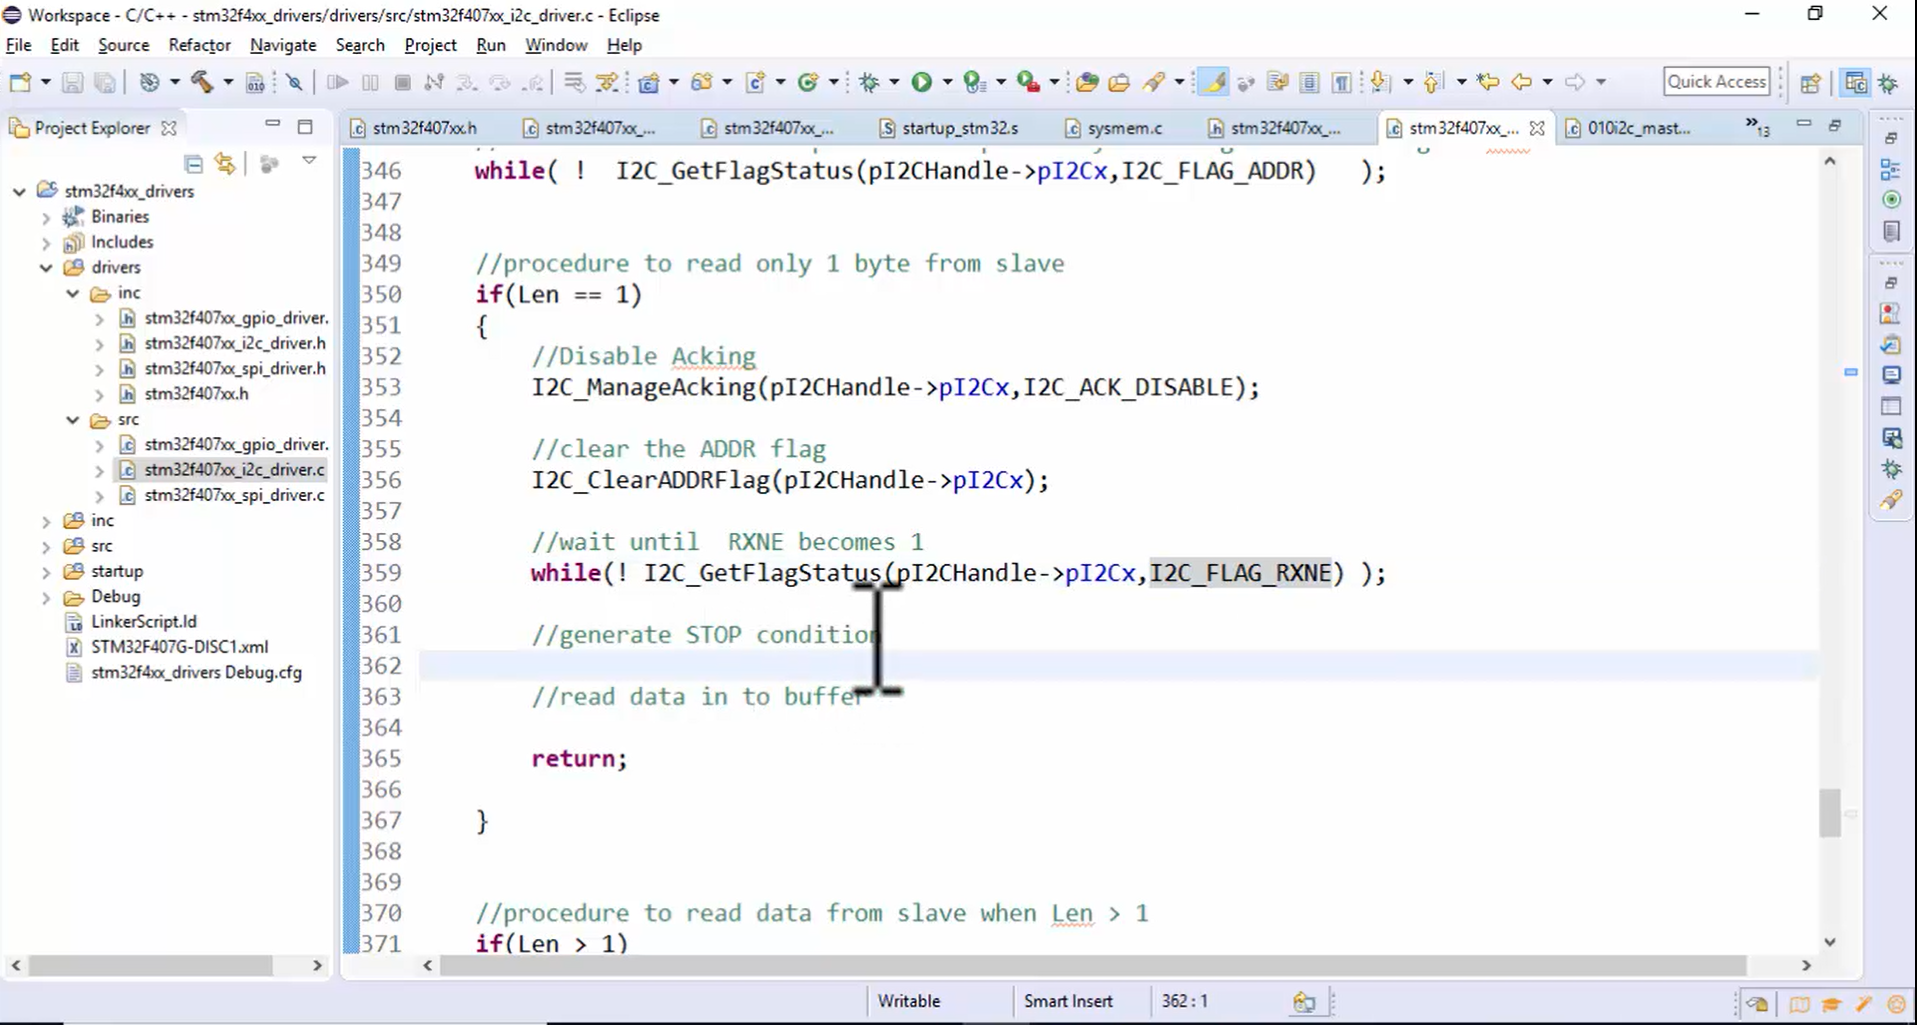
- Generate the stop condition, as shown in Figure 14.
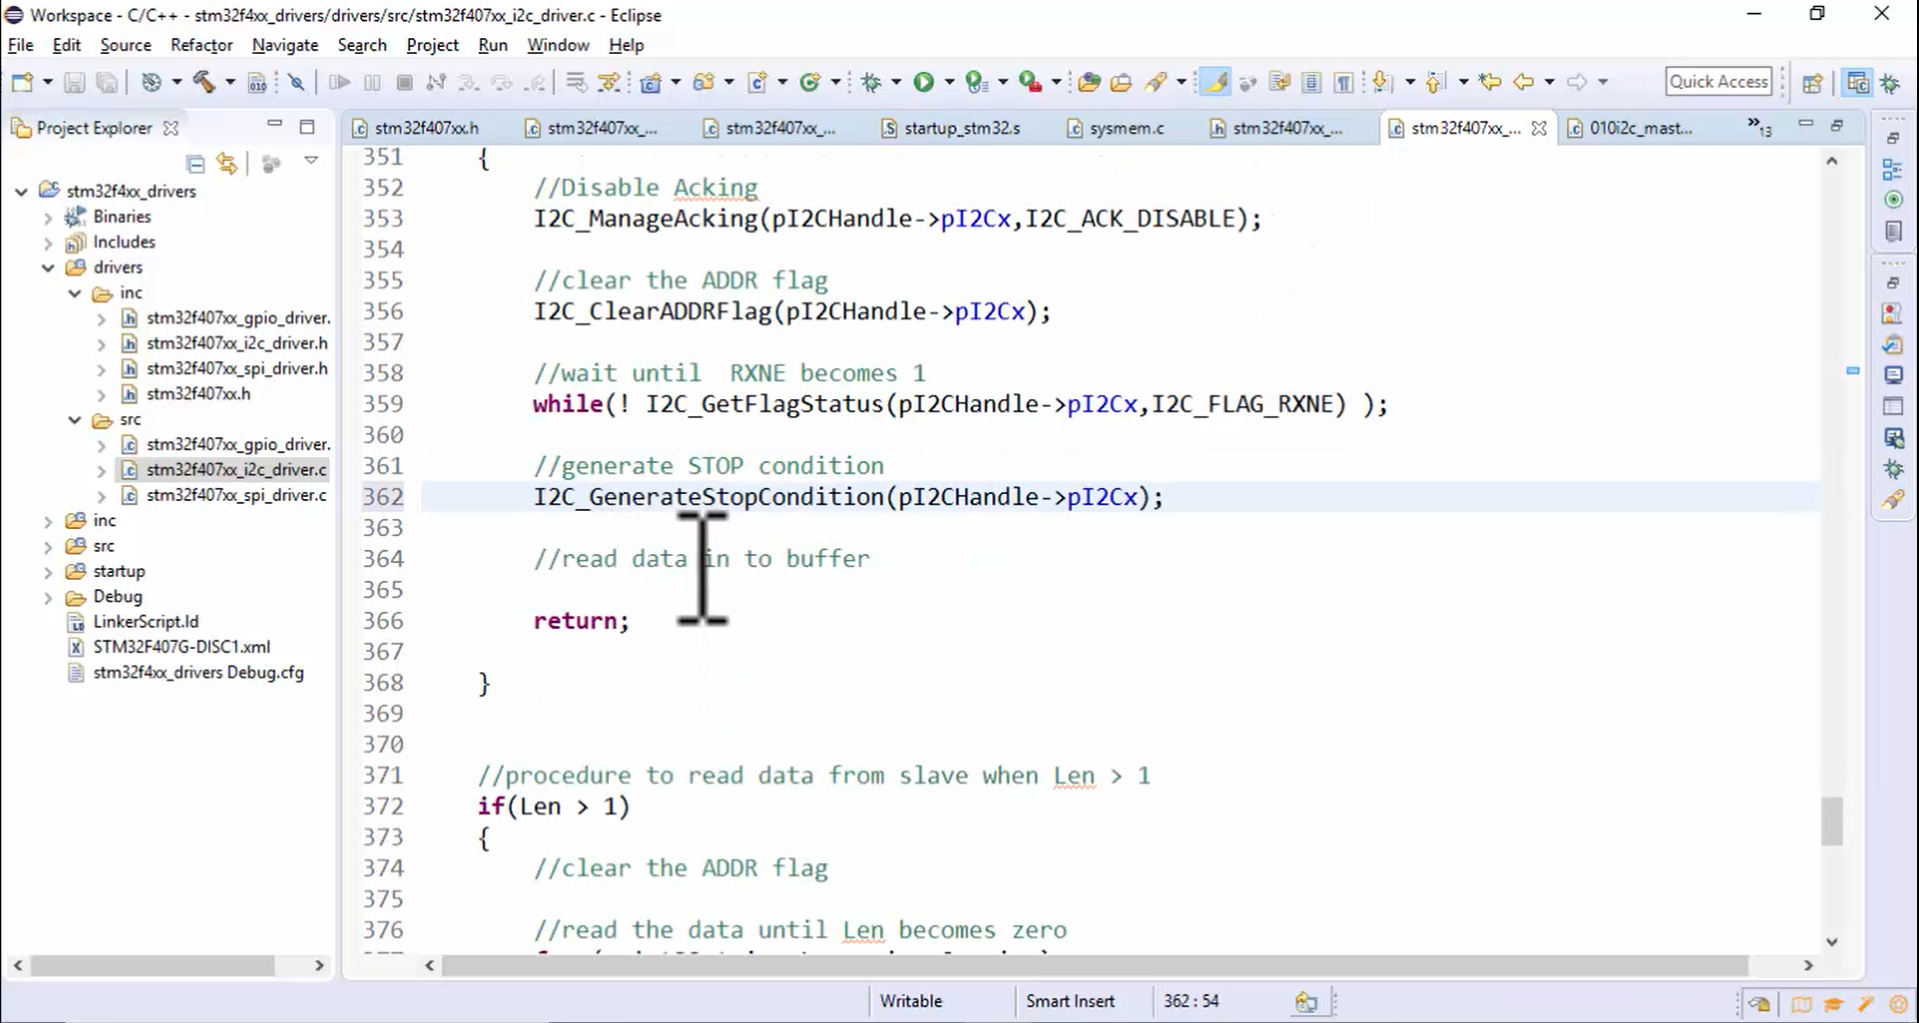
- Read the data into the buffer: Read the data register value into pRXBuffer, as shown in Figure 15.
You can generate the stop condition either after confirming RXNE or before confirming RXNE. Therefore, slight changes to the code are made, as shown in Figure 16.
Fastbit Embrdded Brain Acdemy Courses