Exercise – LED control Mealy machine example
Light control Mealy machine implementation:
In this exercise, we will implement the Light control Mealy machine.
For this exercise, you need a

In this article, you learn about the Arduino board, its peripherals, and its programming interfaces, and some of the APIs used to control the peripherals, etc., and know the APIs provided by the Arduino community to do various things.
Arduino Uno Board:
The Arduino Uno board has many pins and a couple of holes(figure 2). Those holes are connected to the microcontroller, which is there on the Arduino Uno boards.

Digital pins:
- 0 to 13 are digital pins. Total 14 digital pins.
- A few pins are PWM pins in the digital pins, which are marked with the symbol tild(~).
Arduino PWM pins:
- Uno : 3, 5, 6, 9, 10, 11 are PWM pins
- On these pins Arduino uno can generate PWM signals
- PWM signal frequency :
- 490Hz on 3,9,10,11
- 980Hz on 5 and 6
Analog pins:
- A0 to A5 are analog pins. Six analog pins.
- Suppose you have any analog sensors or are doing some projects related to the analog to digital converter or digital to analog converter. In that case, you can use analog peripherals at analog pins.
ATmega328P Microcontroller:
It is an 8-bit microcontroller from Atmel.
Example:
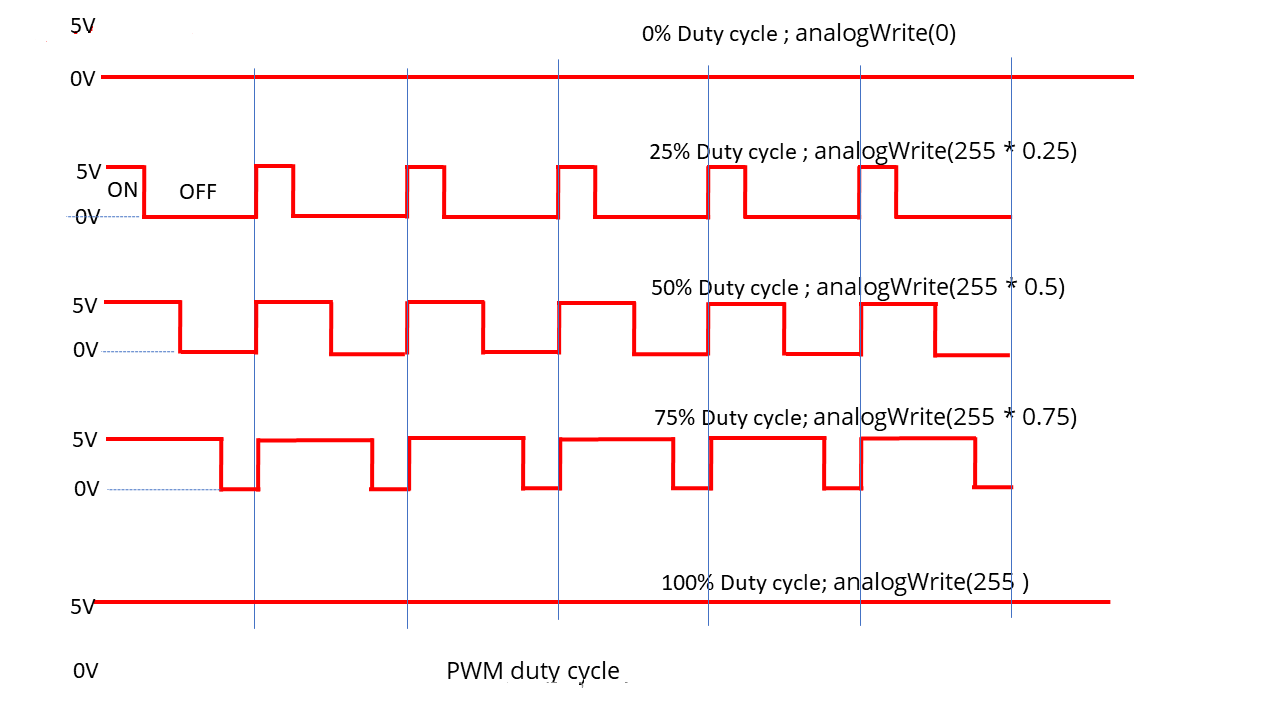
- When you supply 0 to the analogWrite(), that is to say, 0% duty cycle. That means the signal is always at 0 volts, which means it’s 0 volts. (Figure 3)
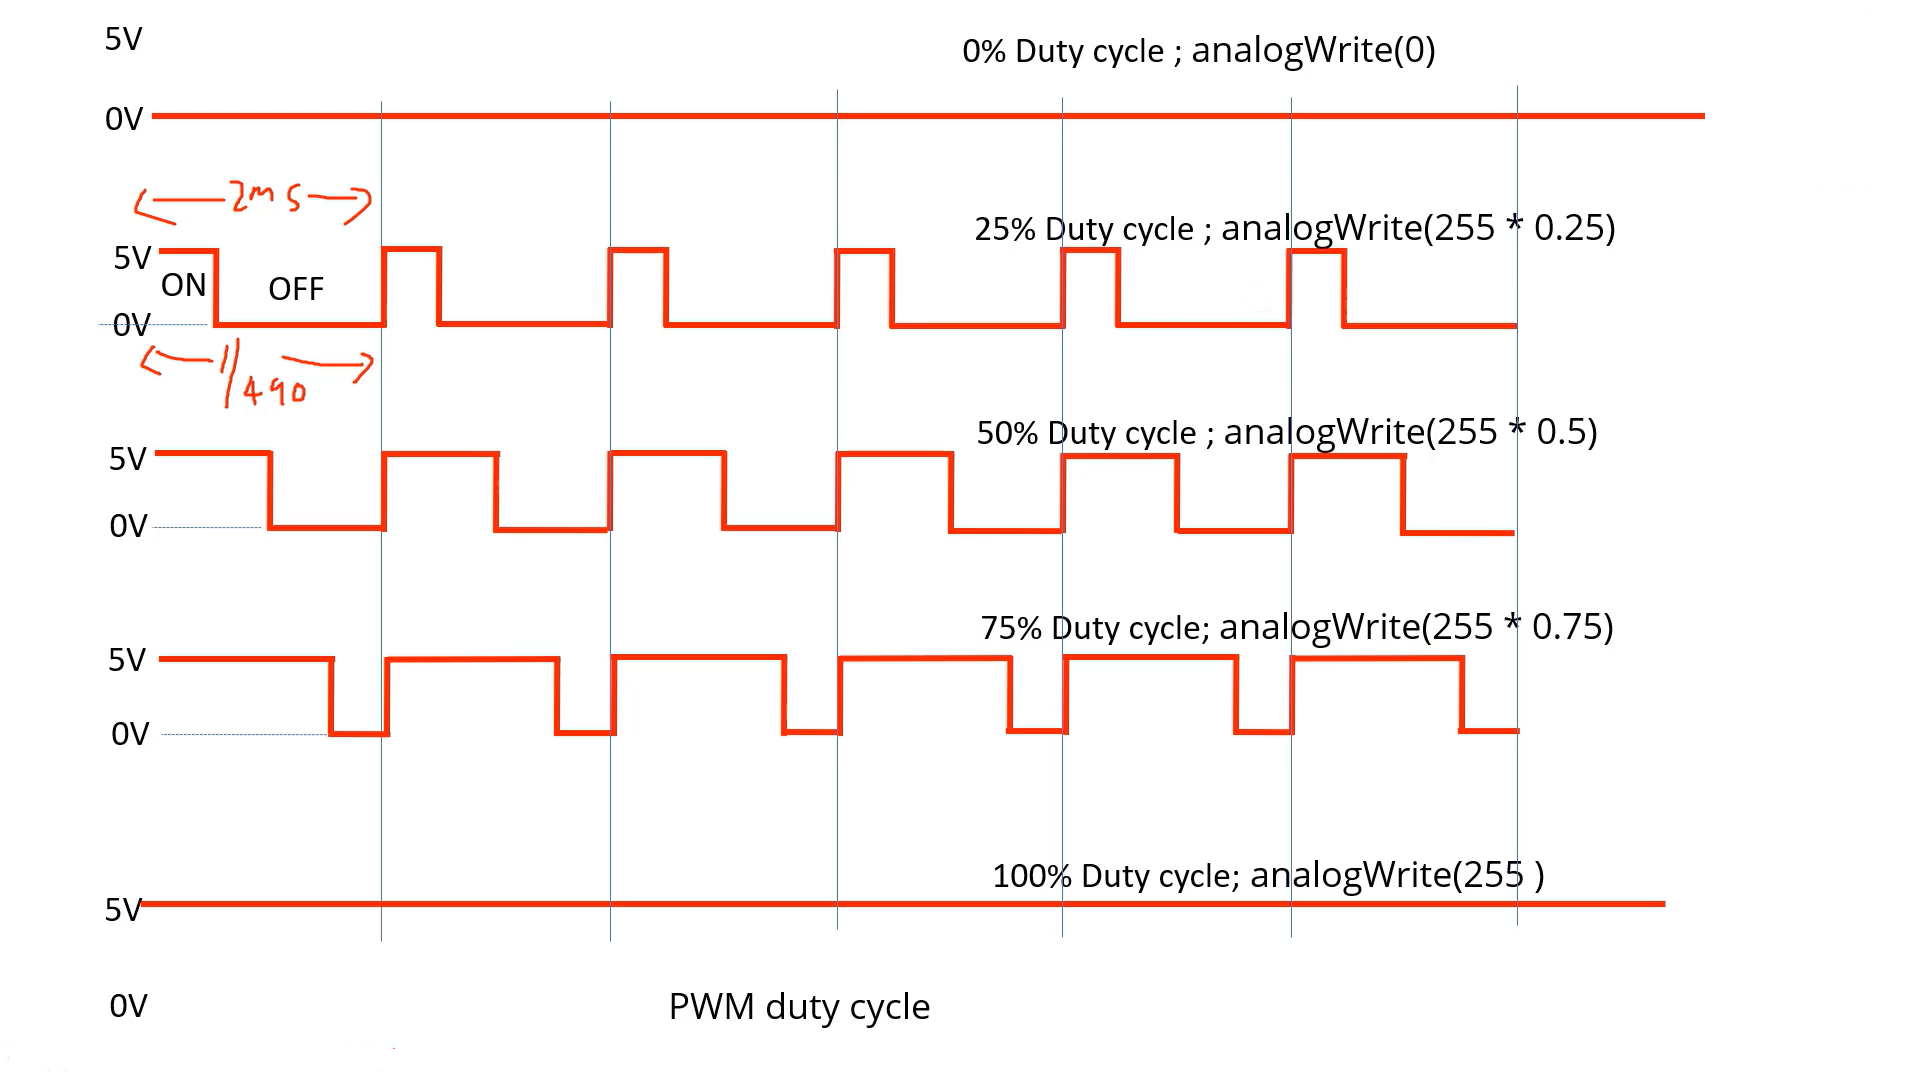
- When you want to create a PWM wave with a 25% duty cycle, that means 25% of the time it will be ‘ON’ and 75% of the time it will be ‘OFF.’ And its time period is 1/490 because the frequency is 490Hz. That comes around two milliseconds. 2 milliseconds is the time period of the PWM wave. And out of that 2 milliseconds, 25% of the time it will be ‘ON’, that means, the signal will be 5 volt and the rest of the time it will be 0 volts. (Figure 4)
- If you take the average voltage, it comes around 25% of 5 volts. That is an average voltage. And that much voltage is fed to the LED.
Changing intensity of an LED
- Connect the LED to any of the PWM pins
- Change the duty cycle of the PWM wave using the Arduino API analogWrite()
- Use the Arduino serial interface to send ON, OFF events from HOST
For this exercise, we need two buttons. One button sends the ‘ON’ event, and another sends the ‘OFF’ event. Instead of using the buttons, we will send ‘ON’ and ‘OFF’ commands or events through the Arduino serial interface. We will send the commands from HOST.
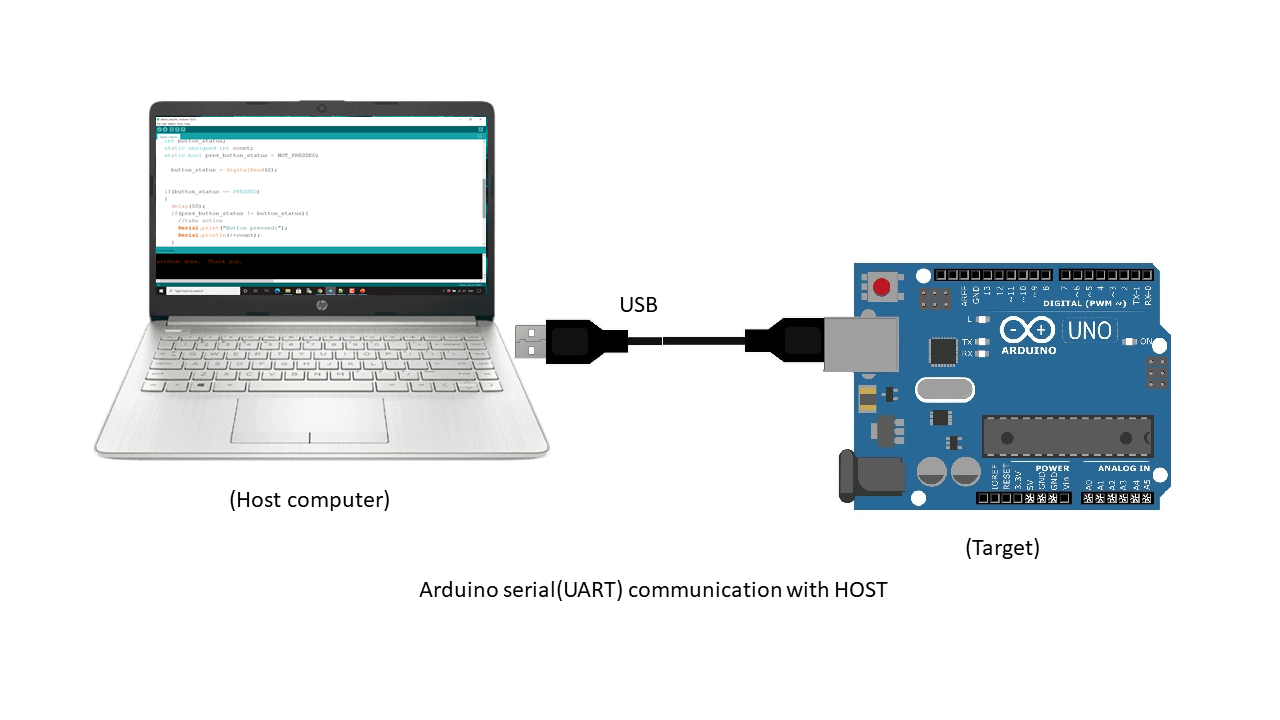
Figure 5 shows the Arduino serial communication with HOST. It shows the Host(our computer) and the target(Arduino board). We can do serial communication between the USB cable.
When you connect the board to the computer through the USB cable, a virtual COM port is created in the Host.
analogWrite()
The analogWrite() function generates the PWM wave with the desired duty cycle.
Description
It writes an analog value to a pin. It can be used to light a LED at varying brightness or drive a motor at various speeds. This function generates a steady rectangular wave of this specified duty cycle until the next call to analogWrite() or digital functions.
Note: On Arduino Uno, the function analogWrite() has nothing to do with the internal analog peripheral, like ADC. Because the Arduino Uno doesn’t have the DAC peripheral. DAC peripheral it doesn’t have.
- In some other boards, in addition to the PWM capabilities on the pins, the MKR, Nano 33 IoT, and Zero boards have true analog output when using analogWrite() on the DAC pin. But it is not the case with the Uno board.
- And the Due also has a true analog output. True analog output means using the internal DAC peripheral.
- For Uno, you know, this function produces a rectangular wave of desired duty cycle.
- You do not need to call pinmode() to set the pin as an output before calling analogWrite().
- The analogWrite function has nothing to do with the analog pins or the analogRead function.
Syntax:
analogWrite(pin, value)
Parameter:
It has two parameters: pin and value.
Pin number: A PWM pin number you should mention. Allowed data types: int.
Value: It controls the duty cycle: Between 0(always OFF) and 255(always ON). 0 means, 0% duty cycle; 255 means, 100% duty cycle; and any in between numbers you can use to achieve different duty cycles of the PWM wave. It has allowed data types: int.
analogRead()
The analogRead() functions use the ADC peripheral because the analogRead() function converts the applied input voltage to a digital number.
Hence, the analogRead() takes the help of the Uno’s ADC peripheral, and Uno indeed has the ADC peripheral.
FastBit Embedded Brain Academy Courses
Click here: https://fastbitlab.com/course1

