Testing pseudo char driver
In this article, we’ll test the file operation methods of our pseudo-character device driver, which we’ve recently developed. We’ll first test it by running Linux commands, and in the next article, we’ll create a user-level Linux application for testing our driver’s methods.
Before we begin testing, let’s compile the code for the host environment (Figure 1).
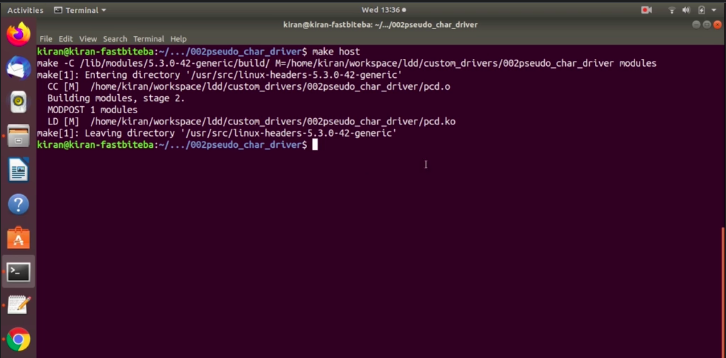
Let’s first test on the host, then we can test on the target. We have got pcd.ko and now let’s load that. Let’s first load the driver pcd.ko. Driver is loaded.
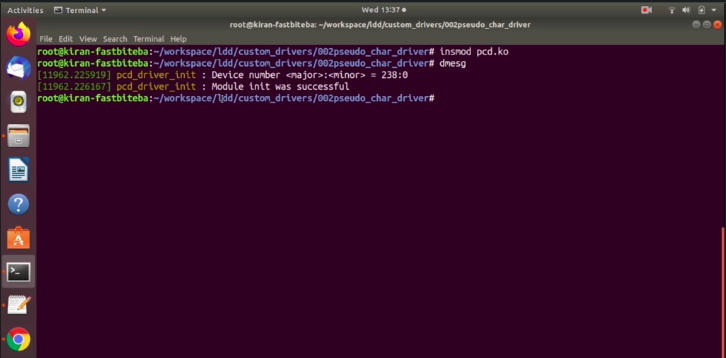
You can see that the device number is 238:0 (as shown in Figure 2), module init was successful.
Let’s use the echo command to send data to our device: “Hello, welcome to the course.” The open method of our driver gets called.
So, let’s send this string to /dev/pcd. That’s our device file. Echo command will write this data to our device. Let’s hit enter. Let’s check dmesg as shown in Figure 3.
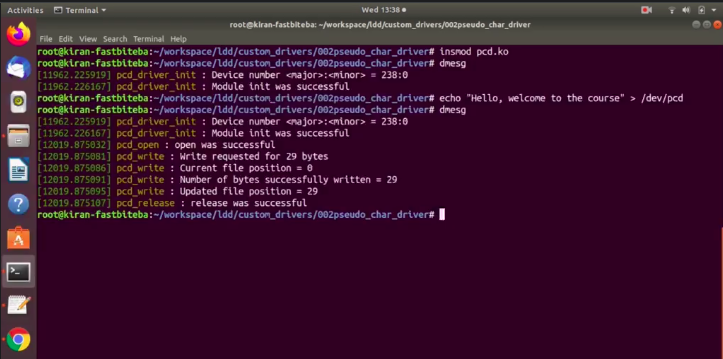
These are the logs as shown in Figure 3, let’s understand this.
First, what happened was echo issued an open system call. Echo command opened our device. That’s why the open method of our driver gets called here. This message is from our driver. pcd_open : open was successful. Then echo command requested for write. Write requested for 29 bytes. This is collectively 29 bytes. These are the activities of our write method.
The current file position initially it was 0. Whenever open happens, the file position is always 0. So, the number of bytes successfully written = 29. That was successful.
And after that, the file position is updated 29, then here the write method returned, and then echo issued a close system call that’s why the device was closed. That means this (Hello, welcome to the course)message is now stored in our device memory. So, our driver’s device memory.
Now, let’s read this. Let’s use cat command to read that. cat /dev/pcd. Let’s hit enter, as shown in Figure 4.
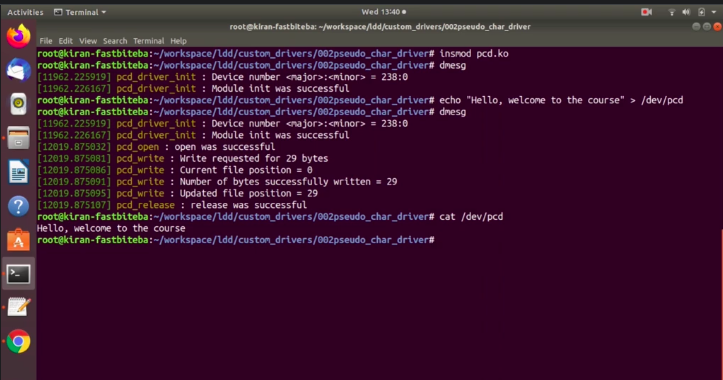
The cat command successfully read our device buffer.
Let’s again check the activities using dmesg |tail command as shown in Figure 5.
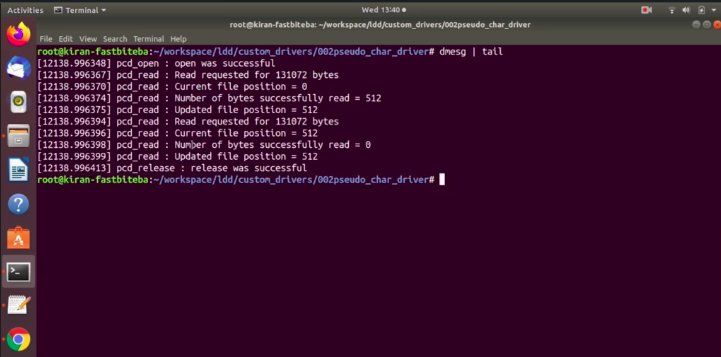
The first cat command opened our device, open was successful. And after that, read requested for these many amount of bytes. This is because cat initially tries to read this much amount of bytes.
Why?
Because that’s how the cat application is written. The current file position was zero. These are all the activities happened from our read method. Number of bytes successfully read is 512. Because, our device memory size is just 512 bytes. And the file position is updated to 512.
Here, the read method returned to the cat. But cat command was not happy. Because it requested for these many amount of bytes. But, our driver said it read-only 512 bytes. So, cat again requested for read.
You can see that it again requested here. Because, that’s how the cat application is written. The current file position was 512, so there is nothing to read. That’s why, our driver returned zero. EOF.
When the end of file is received, the cat application understands that there is nothing to read from the device. That’s why the cat command issued close system call, and it released the device.
Let’s do one thing. Now, let’s create one file(as shown in Figure 6), and let’s save this.
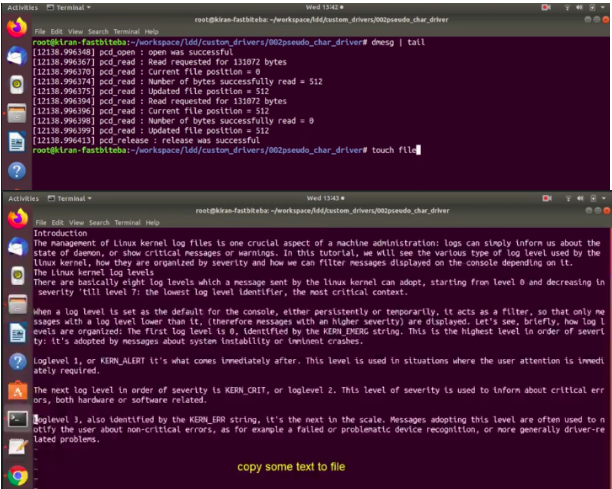
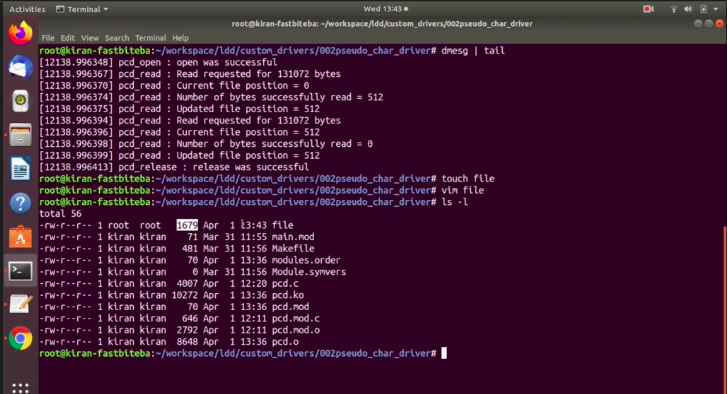
This file is of approximately one thousand six hundred bytes. 1.6k is shown in Figure 7.
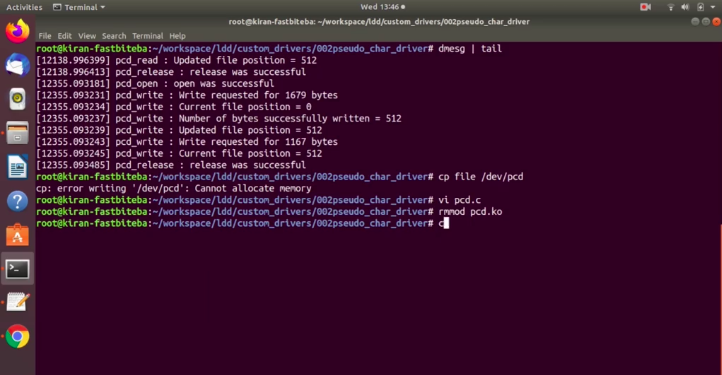
Let’s try to copy this file to our device file. Let’s see what happens. Hit enter as shown in Figure 8.
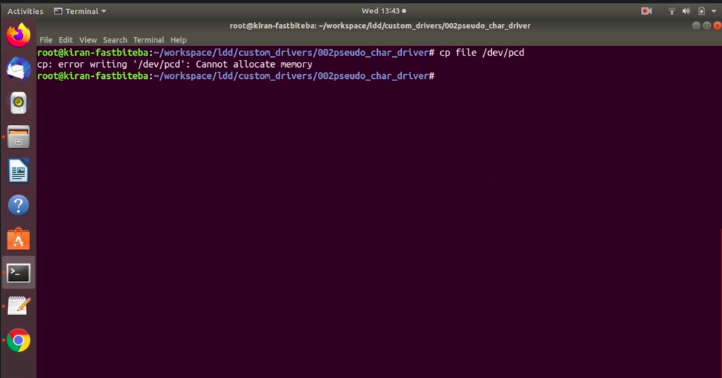
The copy command says error writing ‘/dev/pcd’: cannot allocate memory.
What happened? Let’s analyse. Let we run dmesg | tail as shown in Figure 9.
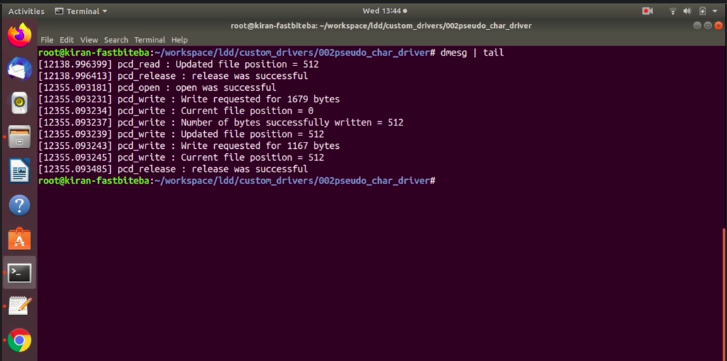
This was the open method. Cp: the copy command opened our device. Write requested for 1679 bytes, that was the size of the file. That’s correct. Write was successful for 512 bytes. So, updated file position 512 bytes. . That means our file position has reached end of file here. When our driver’s write method written 512, the copy command was not happy, and it again issued another write command. For this(1679 bytes), much amount of bytes -512 bytes.
For the second time, it requested 1167 bytes. But the current file position is already 512. There is no space to write more data. That’s why, our driver returned NOMEM. It returned no memory. That’s why this command returned cannot allocate memory. The copy command understood that there is no memory on the device. So, that’s why it gave up saying cannot allocate memory.
What we can do is we can keep one more a message in the write method.
/* Adjust the 'count' */
if((*f_pos + count) > DEV_MEM_SIZE)
                count = DEV_MEM_SIZE - *f_pos;

if(!count){
              pr_err("No space left on the device \n");
              return -ENOMEM;
}
Print message
Let’s keep one message as shown above. Pr_err(“No space left on the device \n”);. Let’s close this.
Let’s just remove the module, as shown in Figure 10.
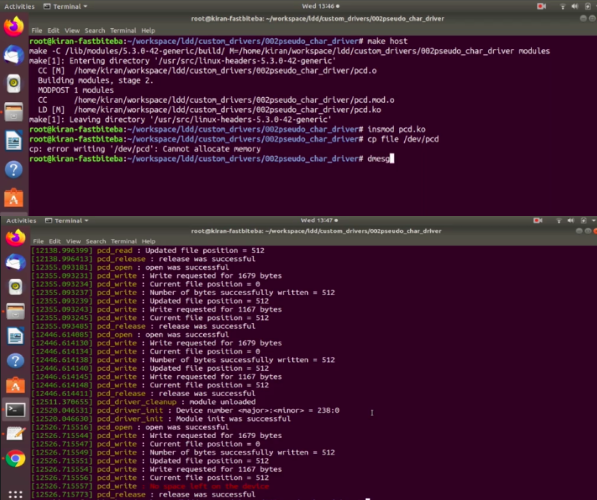
Let’s do copy file /dev/pcd. No space left on the device. So, the NO_MEM error code is written to copy command. And the copy command decoder that error code and it printed cannot allocate memory. Test this project with more commands if you know. And I will see you in the next article.
Get the Linux device Driver Full Course Here.
FastBit Embedded Brain Academy Courses
Click here: https://fastbitlab.com/course1

