Pcd driver with multiple devices code implementation part-5
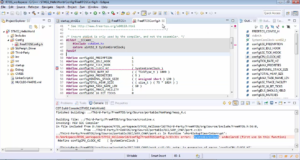
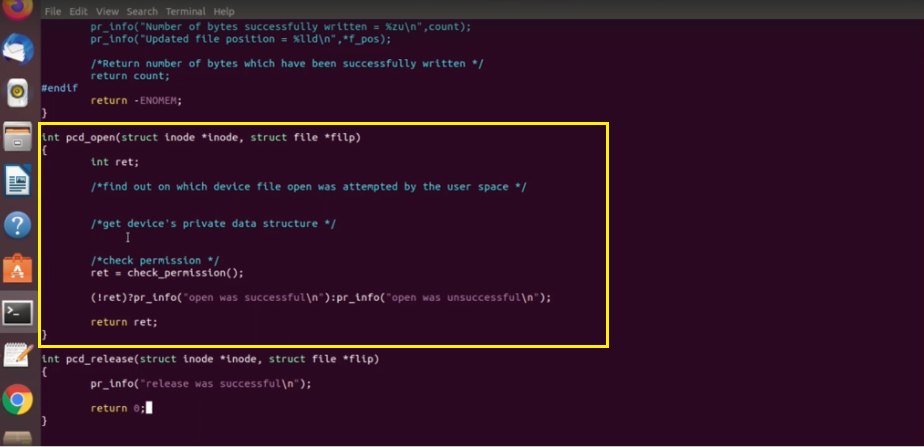
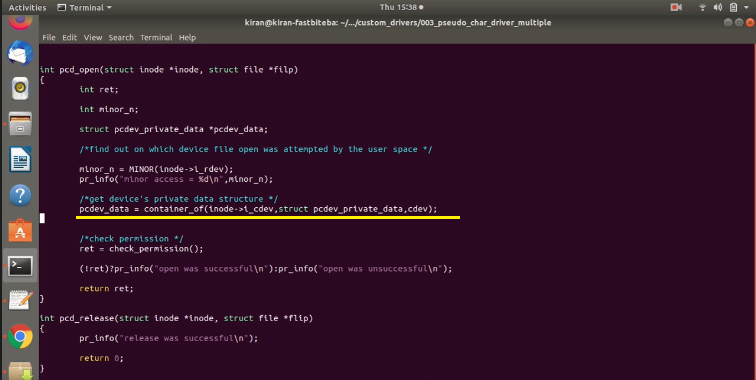
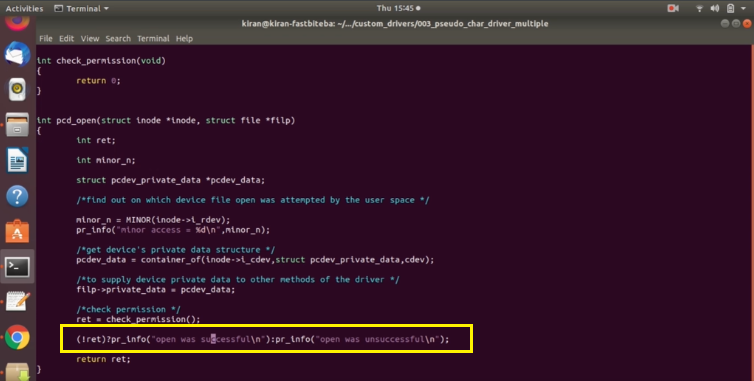
In this article, let’s implement the pcd_open method(Shown in Figure 1).
As you know, the open method of the driver gets called whenever the user space application tries to open our device file. In this open method, the virtual file system actually provides us the inode, a structure address of our device file, and also a pointer to the struct file. I think you already know this fact, that is, for every open attempt, the kernel creates the file kernel object.
In this open method, the driver must find out on which device file the open was attempted by the userspace because we have got four device files, isn’t it? You should find out on which device file the operation was attempted.
This we can easily find out by getting the information from the inode. Because for every device file, there will be one inode.
If you check the inode structure, here is an inode structure as shown in Figure 2.
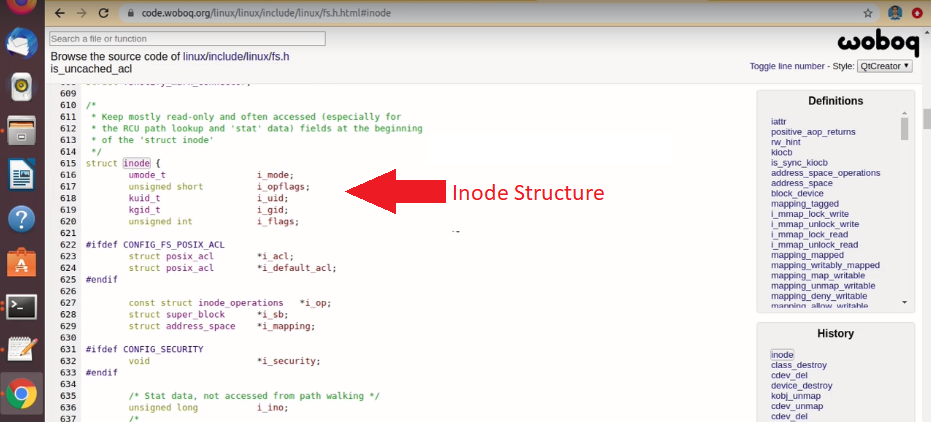
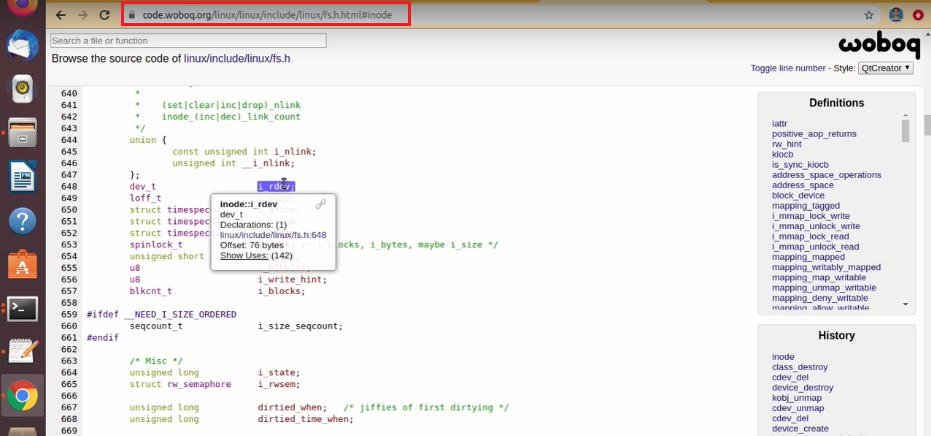
And you already know that there are two important fields, that is i_rdev, as shown in Figure 3.
This represents the device number. So, by checking this number, we can come to know which device is being accessed.
That’s why let’s create one variable here called int minor number, as shown in Figure 4.
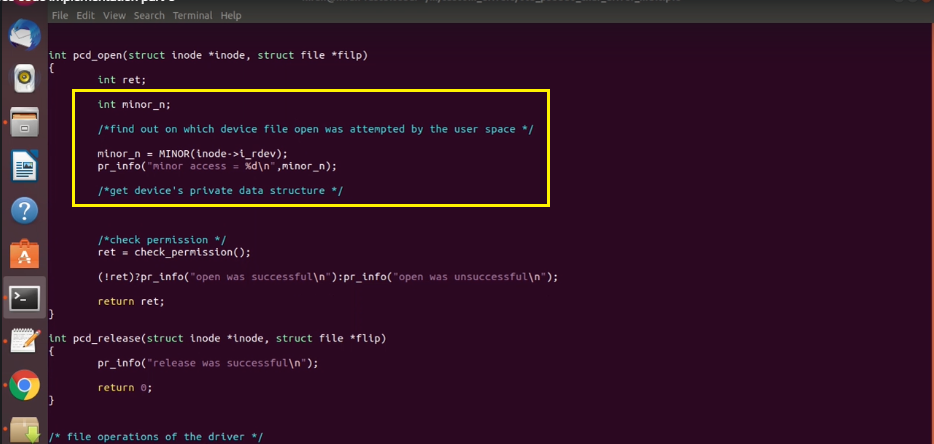
First, the driver has to find out the minor number. The minor number is equal to you can use the MINOR macro inode, just dereference to get this field i_rdev. This macro gives you the minor number. As I explained before, the driver distinguishes between different devices using a minor number. So, this gives the minor number. Let’s print that information.
And after that, you can access the device private data structure here. Why accessing the device private data structure is important?
Because, in your driver, before handling any request from the userspace like read, write, open request. There are two things the driver must do. The first one is it should identify which device is being accessed, and it should be ready with its priority structure. Because the private data structure is a structure where all the device-specific information is kept. Like its buffer, address, size, and other things. That’s why it is very important driver extract the write device-specific information.
Our device-specific structure is struct pcdev_private_data, isn’t it? Let’s create one pointer variable, as shown in Figure 5.
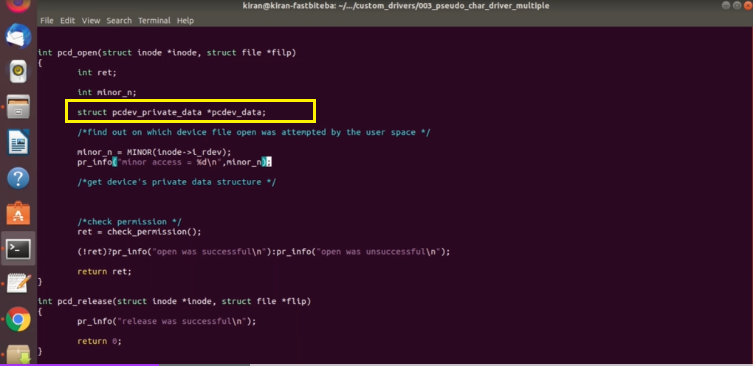
Now the question is, how do you access the device private data structure of this current device? For this, again, you can take the help of the inode structure. In the inode structure, you find another field called cdev. i_cdev. Let’s search for that. This actually holds the address of our per device cdev structure.
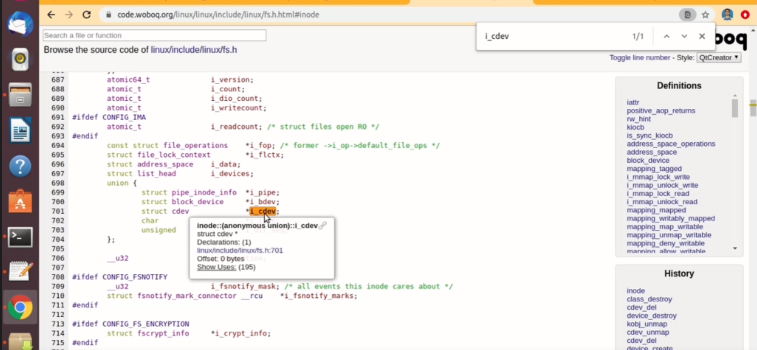
We can take the help of this pointer to access the device private data.
If you just take a look into our pcdev_private_data, there is a cdev structure, as shown in Figure 7.
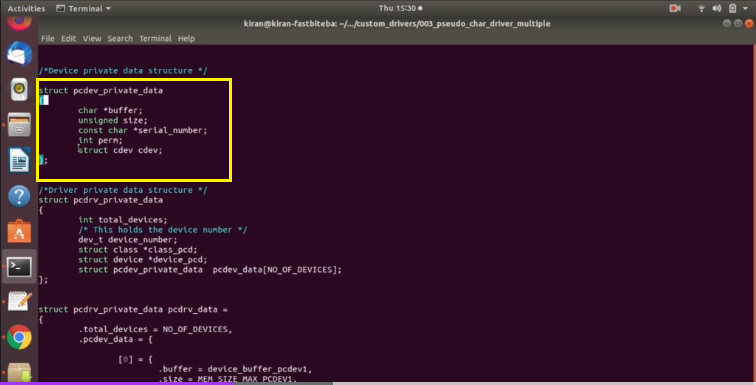
So, if I access this pointer(i_cdev from struct inode), I actually get the address of this member element(member element struct cdev cdev from struct pcdev_private_data). And by using this (member element struct cdev cdev), I can extract the container address.
Who is a container of this member( struct cdev cdev) element? This(struct pcdev_private_data) is a container of this(struct cdev cdev) member element. That’s why, by using the address of a this(struct cdev cdev) member element, we are going to extract it’s container.
For this, we are going to use something called container_of macro. Let’s explore the container_of_macro.
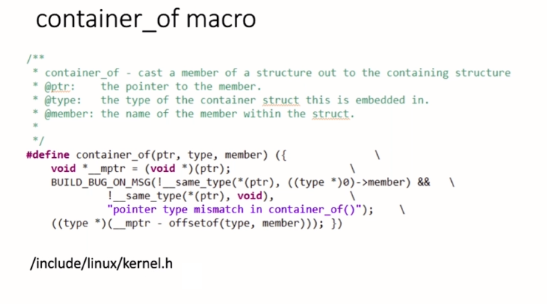
What’s a container_of_macro?
This container_of_macro is defined in /include/linux/kernel.h. This is used to cast a member of a structure out to the containing structure.
Let me explain what’s the use of this container_of. So, We have a separate article to explain how this container_of actually works. Maybe we will cover that once I finished this exercise.
But, let’s briefly see what is the use of this container_of macro.
- The container_of macro helps you to get the address of the containing structure by taking the address of its member element.
- As its name indicates, it gives you the “container” address of the member element of a structure.
- It takes three arguments. One is a pointer, the second one is type of the container, and the third one is name of the member the pointer refers to.
It actually takes three arguments, as shown in Figure 9. Let me explain those arguments.
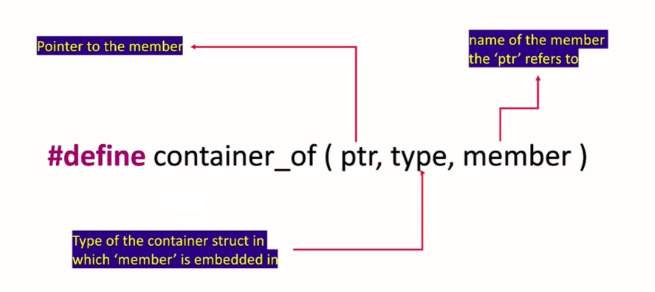
Pointer, type, and member. The pointer is pointer to the member. And the second argument is type of the container struct in which the ‘member’ is embedded in. And the third argument is member; here, you should give the member name. Name of the member where the pointer refers to.
Let’s use this container_of. Remember that we are using container_of to extract this member elements parent structure. Let’s get back to the open method. Let me use the container_of().
As I said, inode gives me the address of the device-specific cdev. That’s why I’m going to use inode, and I’m going to dereference it, and I’m going to use i_cdev. This is a pointer. And the next argument is type of the container struct. What is a container struct? That is struct pcdev_private_data. And the third argument is member name. Member name is cdev. This is a member name.
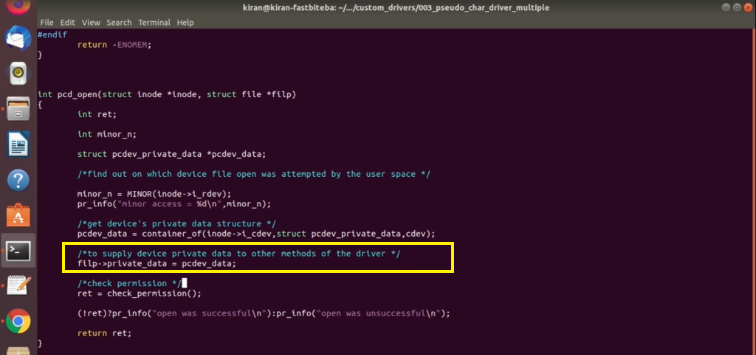
After that, that private data structure is really required for our other methods. For example, for read method and write method. Remember that, from the read method you cannot extract that. Why? Because there is no supply of inode. So, the VFS doesn’t supply inode to the read or write method.
That’s why it must be done in the open method. You have to save this for other methods. Because other methods also want to operate on that device private data, isn’t it? It has to manipulate other methods also manipulate the permission, or the buffer field, etc. That’s why you have to save this(pcdev_data).
So, where do you save this? You save this data(pcdev_data) inside the file struct. Because, once a device is opened, a struct file kernel object is created, and the same kernel object is passed to different driver methods like read and write.
Read and write, even lseek, all these a driver methods receive the same kernel object(struct file *filp). That’s why, you save that device private data inside this struct file.
We can do that by using one interesting field in this structure called private_data. So, will see that. Let’s search for struct file. Now, if you just check this file structure, you can see that, there is a field called private_data.
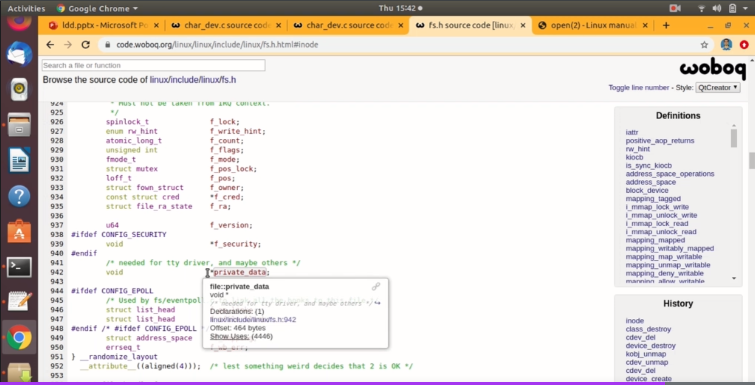
You can use this private_data field in order to supply a device private data to other methods of the driver such as read, write, lseek.
Let’s get back to the code. And what I’m going to do now is, I’m going to use this file pointer, dereference that. Let’s use the private_data field in order to store this pointer pcdev_data.
And after that, the open method also should check the permission. Because, for example, in our case, the pcdev1 device is read-only. That’s why the user application should not try to open the device file of pcdev1 with read-write access. So, the driver should detect that, and it should then report whether the open was successful or not. That’s why the permission checking should be done in the open method.
I will implement the permission checking later. For a time being, let me implement this check_permission as shown in Figure 13. So, check_permission. Let’s for a time being, let’s keep it void. And let’s just return 0. The permission is granted, something like that.
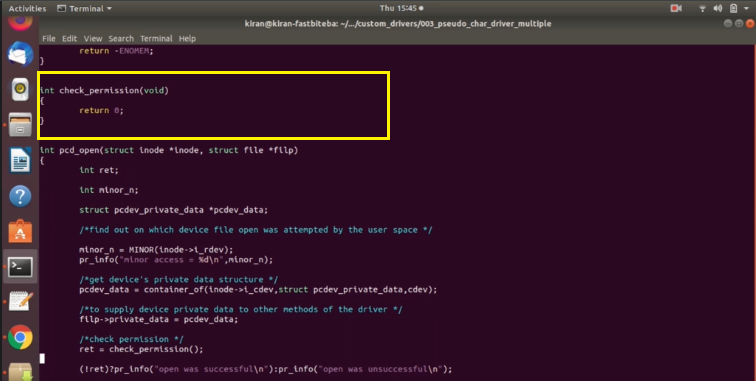
Once we finished coding for all the methods will come back to this open method and will finish this check_permission.
And after that, the final line is if the return is non-zero, then the open method of the driver concludes that the open was unsuccessful and return the error code as shown in Figure 14.
Check_permission basically returns an error code or zero. So, we’ll implement that later.
I think we have come to the end of this open method and now let’s save this and try to build it. In the following article, let’s implement read and write. I will see you in the following article.
FastBit Embedded Brain Academy Courses
Click here: https://fastbitlab.com/course1