Different compiler optimization levels
In this article, let’s experiment on different compiler optimization levels.
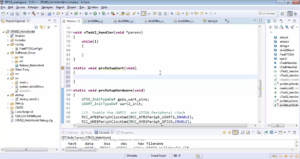
We have the pin read application(Figure 1). Let’s use different optimization levels on this program.

First of all, let me tell you where to configure the optimization level.
To configure optimization levels, follow these steps:
- Right-click on the project and select “Properties.”
- Expand the “C/C++ Build” option and navigate to “Settings.”
- Go to “MCU/GCC Compiler,” and you’ll find the “Optimization” tab.
And you can see that the optimization level by default is -O0(as shown in Figure 2). That is none. No optimization will be invoked on our program. So, we know that our code works fine with this optimization level.

Let’s change the optimization flag to -O1.

After that, click Apply, and Apply and close. Build the project, and let’s see what happens.
Let’s just take note of the -O0 optimization(Figure 4).

Here we can see that the size of the text section, which is the code section is 820 bytes and 8 is a data section size.
Let’s change the optimization flag to -O1 and let’s build the project. You can see Figure 5. That is for -O1. And here you can see that the text section is reduced. That means we indeed saved around 80 bytes of code space. So, for this application, it may not be much. This is a very small application. That’s why it is not that much improvement, but for the bigger project, it may not be trivial.

Let’s change the optimization flag to -O3.

You can see that(Figure 6), when you check that number it is not a great reduction compared to -O1, just 28 bytes less. But that’s OK because that’s all that the compiler can able to do in this application. So, achieving the reduction in code space is not a big deal, but the thing is your application should work fine.
What is the point of reducing code size?
But seeing your application doesn’t work. So, at the end of the day application should work the way you designed your application. We know that our application works fine at the -O0 optimization level.
So, you have to recheck whether your application indeed works the way it is designed in O1 optimization level. Now let’s check that.
I changed the optimization level back to -O1. Let me run the application and let me just check by changing the value of the PA0 pin. It works. That means I can keep this optimization level for this application. So, which will definitely save some bytes in the code space.
How about -O2?
It works or not with -O2. The code doesn’t work in -O2, code breaks.
You can try this at your desk, the code doesn’t work. So, if the code doesn’t work in -O2, then the code also doesn’t work in -O3. We will analyze this why the code is not working in -O2 in the following article.
Get Microcontroller Embedded C Programming Full Course Here.
FastBit Embedded Brain Academy Courses
Click here: https://fastbitlab.com/course1


