Printf and Hello World
First, in this article, let’s write a simple ‘C’ program.
Let’s write a ‘C’ code which simply displays the text Hello world on the “console” and exits.
For this, I’m going to use the online IDE, and if you don’t have internet access, then no problem; you can always use the offline IDE.
Let’s head over to the IDE. First, let’s create a new project. So let’s click on the Create New Project here, as shown in Figure 1.
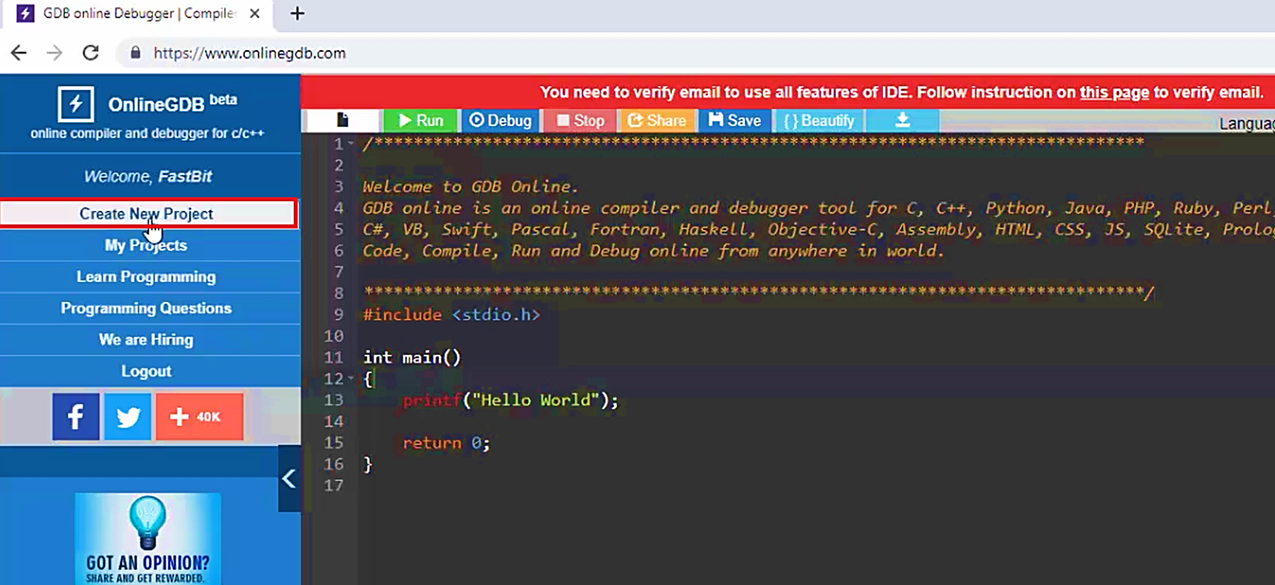
Then, let’s click Save to save our project. Let’s give the name HelloWorld and Click Save, as shown in Figure 2.
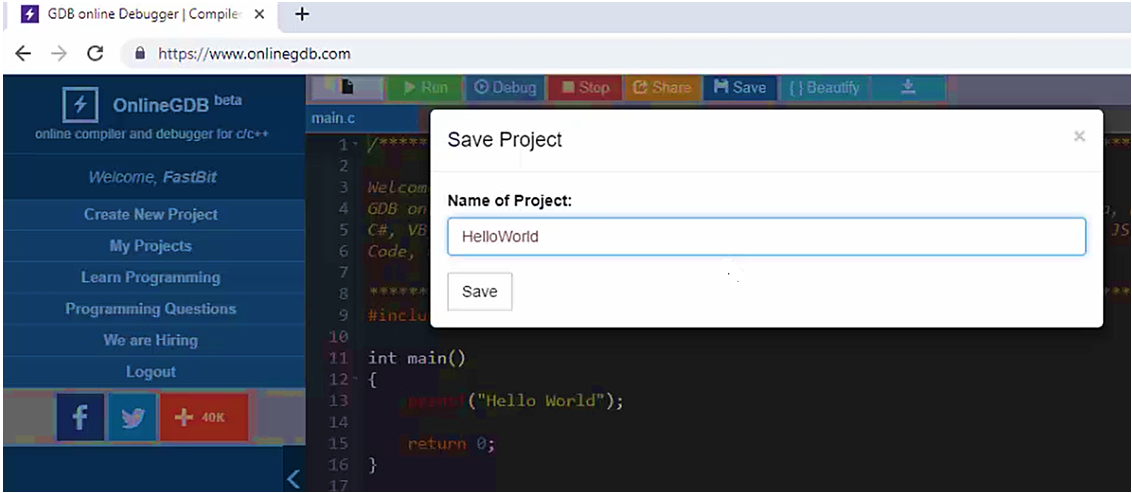
Our project name is HelloWorld, and under that project, we have one source file called main.c, which is automatically added by this tool.
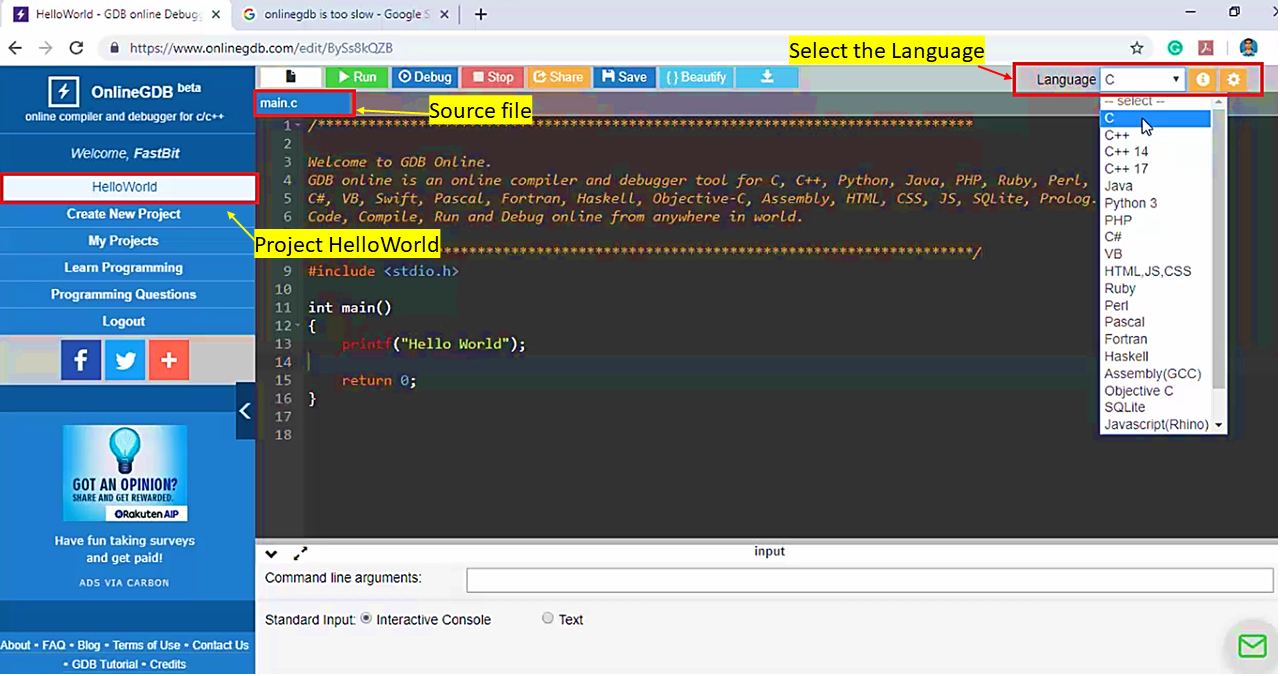
Some people may not be able to see this main.c. In that case, go to select the Language. In Figure 3, you can see that the ‘C’ language is selected automatically. But for some people, it may not have been selected. That’s why you have to select the appropriate language here.
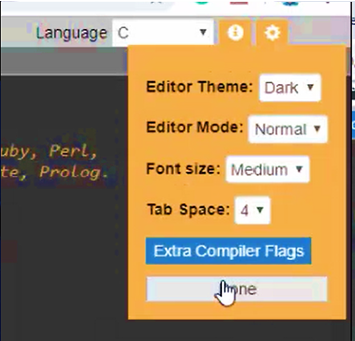
Also, if you go to the settings, you can select the theme dark or light, Editor mode, Font size, and other things you can change here, and the compiler flags you can also modify here.
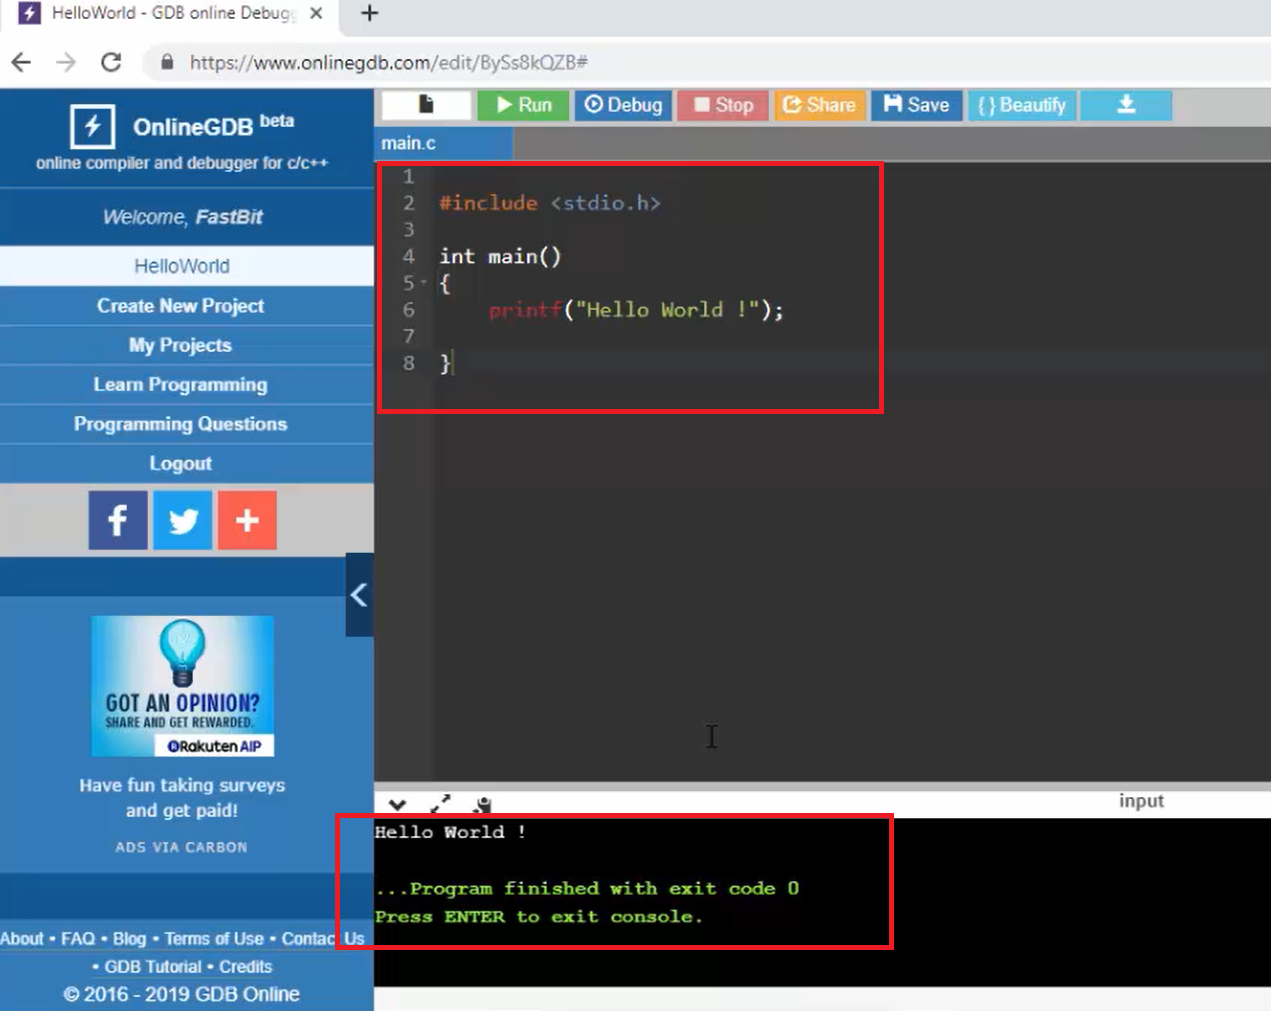
Now in the main.c, let’s delete everything. Let’s write a simple ‘C’ program that displays the text “HelloWorld” on the console.
#include<stdio.h>
int main(void)
{
printf("Hello World\n");

for(;;);
}
Please remember that every ‘C’ program has at least one function, that is called the main function. Main is the starting point of your program execution. A ‘C’ program is nothing but a collection of various functions, and it should contain at least one function, which is called the main function.
Now, let’s write the main function. Don’t worry about functions, its prototype, and other details. So, we have a separate section for that to understand functions. It would be too early to explore all those things at this point. So, let’s write a main function in our ‘C’ source file.
For that, type int main() → The function name is main, and you have to put the parenthesis (). And after that, you had to mention the return type of this function int, according to the standard. So, according to the C90 and C99 standard main should return int.
Let’s give the body of the function. So, every function will have its own body, and that is identified by the flower brackets {}.
int main()
{
}
This is called a function definition, where it has the prototype (int main) at the beginning, and it has its body. Now inside this body, we will write code, and that code will be executed by the main when the main function is called.
In this program, our job is to print the text “Hello World” and print something on the console. The ‘C’ standard library gives one function for us. That function name is printf. It can do various things, but let’s use this to print some text for the time being. Write printf and give the parenthesis. And after that, you have to mention your message in double-quotes. So, write a double quote, and the IDE will convert that into two double quotes because your message must be in between these double-quotes. So, that’s what printf expects. Here let’s write our message. Our message is “Hello World.”
printf(“HelloWorld”);
Remember that every ‘C’s executable statement should end with a semicolon (;) in’ C’ programming.
In the function’s body, we have one ‘C’ statement, that is a call to the printf function with our message. The ‘C’ statement should end with a semicolon; otherwise, the compiler will throw errors. That’s why let’s end this printf statement with a semicolon.
In Python, it is not required, but in C/ C++, every statement should end with a semicolon.
After that, we need to do one more important thing: we have to include a standard library header file. Now about the header file and why we should include that, all those things will understand later.
But, remember that in this source file, we have used a function called printf, which is not written by us. It is given by the standard library of ‘C.’ And the compiler should need to understand the prototype of that printf function. And the prototype of that printf function is written in a file called a header file, and that header file name is stdio.h, and we have to include that file in our project.
To include a file, you have to use the #include directive. This directive is used to indicate the inclusion of another file and that another file name is stdio.h. This is written by the technical committee or the developers who develop the ‘C’ standard library. Since it’s the standard library header file, it must be enclosed by lesser than and greater than symbols.
Let’s compile and run our code. For that, there is only one button in this IDE, that is Run; that will compile and run your code. Let’s click on the Run button. And you can see that it is compiled and the output is produced, and it successfully printed the text “Hello World” on the console. So, you successfully completed the very first ‘C’ application.
Now I do one small setting in this project. Go to the settings, go to the compiler flags, and give -save-temps. This is a compiler argument; Click OK, and click Done here.
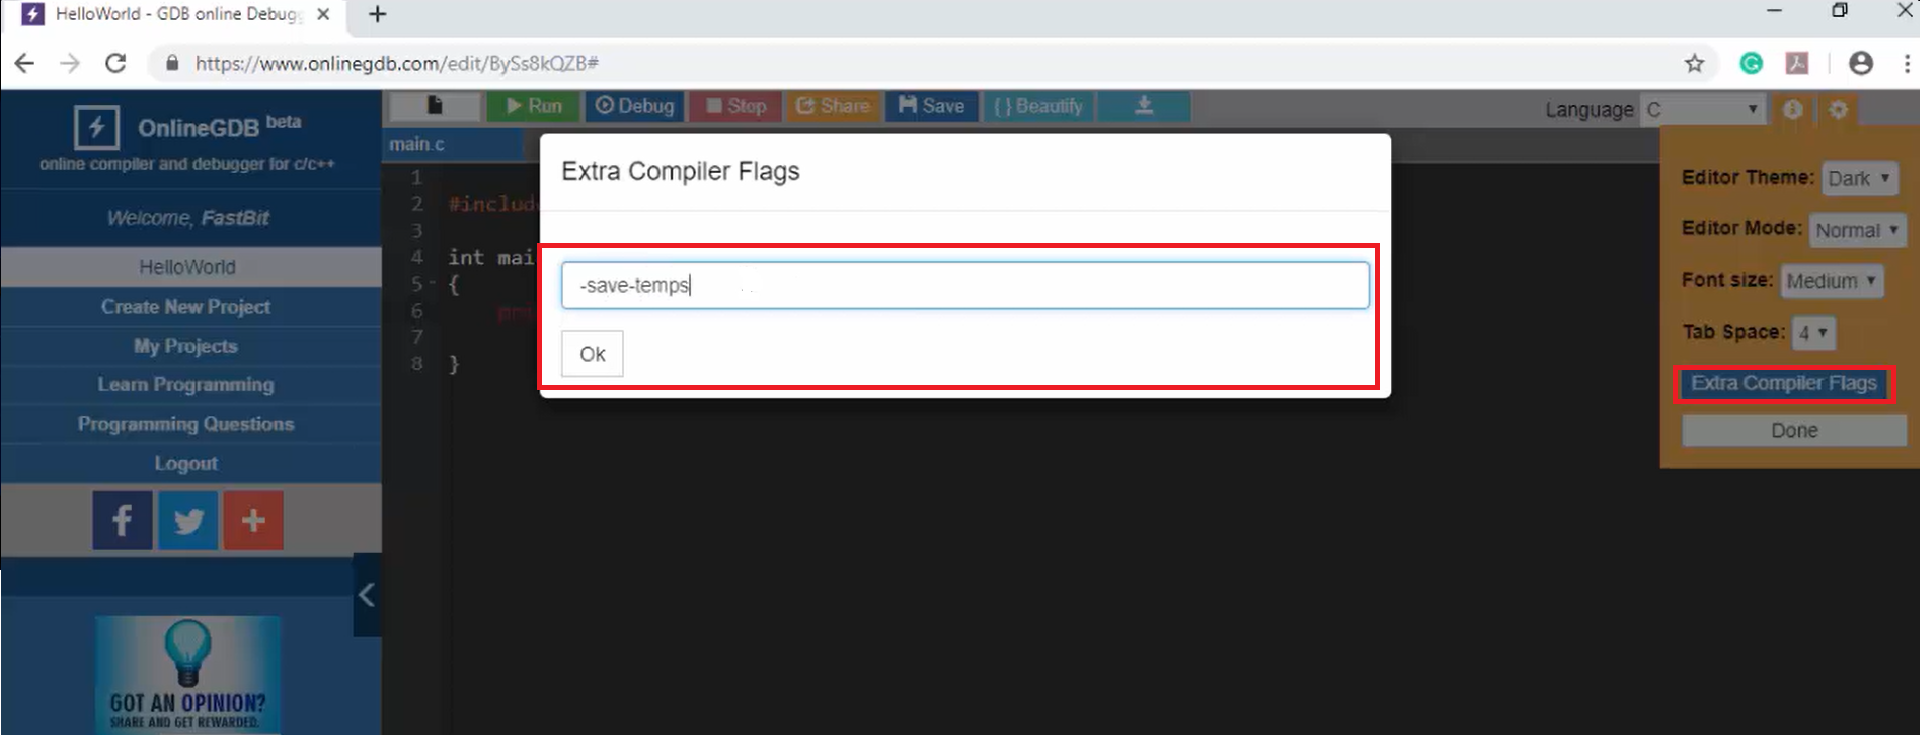
After that, run the file. It has created so many files, as shown in Figure 7. So, these are the output files produced in the process of compilation.
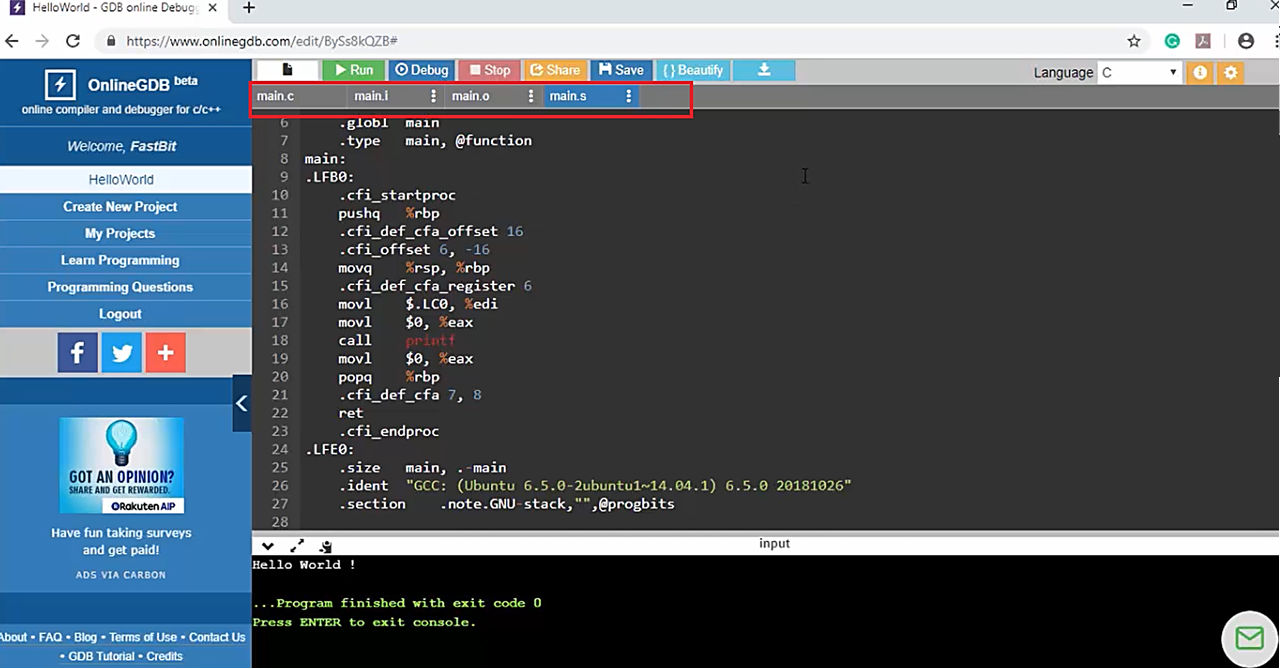
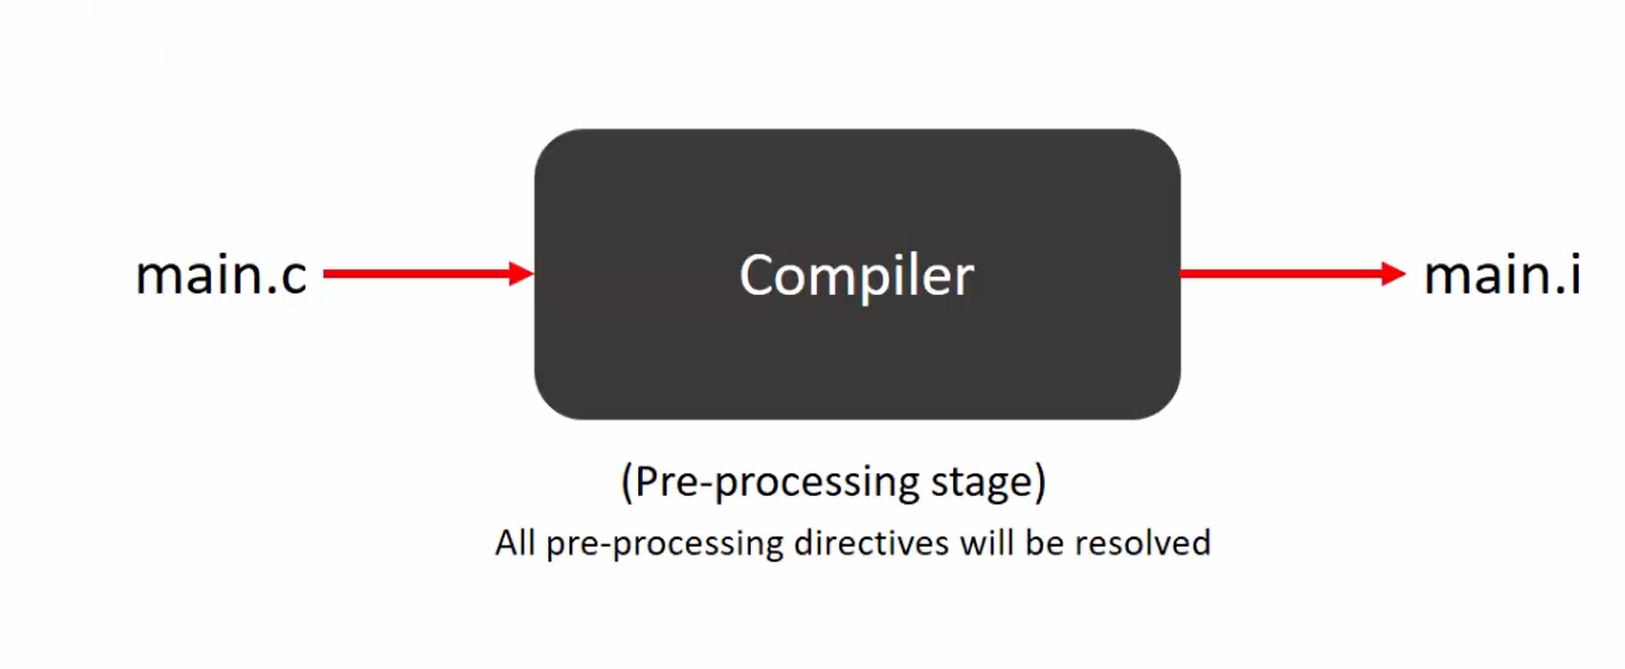
Remember that, a main.c file written by you, which is a source file which is given to the compiler for compilation. And the first file which is produced during the compilation is a pre-processed file. So, that we call as main.i.
main.i is nothing but the collection of your code(you write this) and contents of the stdio.h. Now, your main.c converted into main.i, which is a huge file. Your file had only 8 lines but looked at the main.i it now has 849 lines.
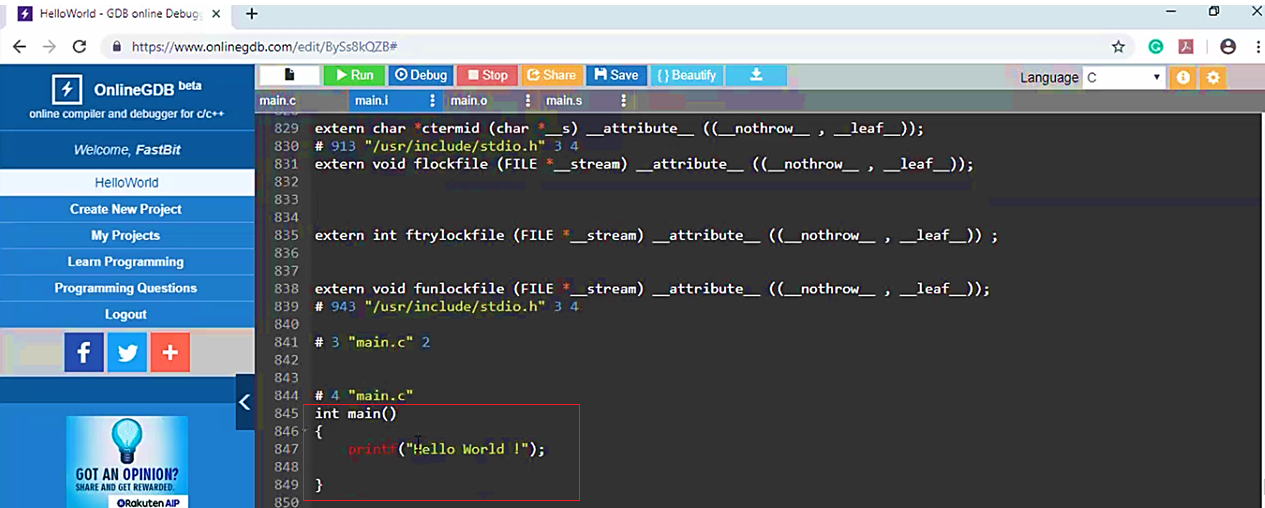
When the compiler saw this line that is #include <stdio.h>, compiler included all the contents of this file (stdio.h) into this main.c, and then it converted that file to main.i, which is an output of the preprocessor stage of the compilation process.
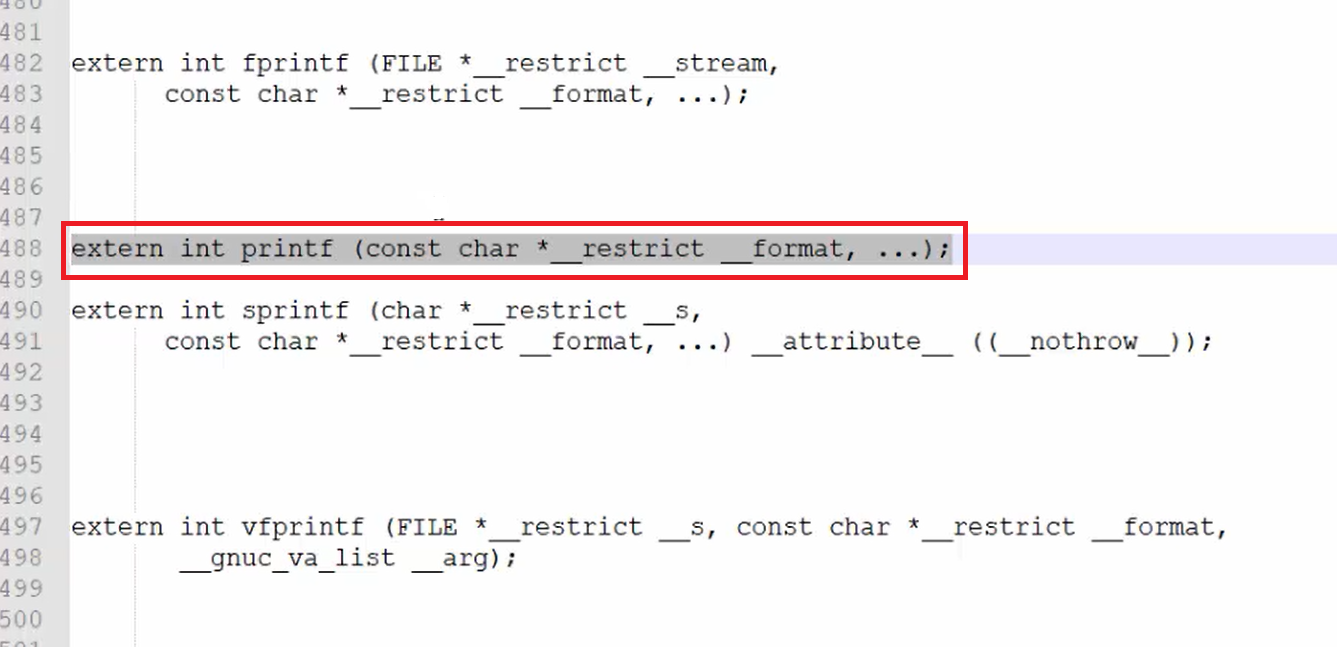
And here, the compiler looks at the prototype of this printf(“Hello World”) function. So, this is a prototype of the function printf, as shown in Figure 10. The compiler wants this signature, which is also called a function signature. So, that’s a purpose why we added that stdio.h.
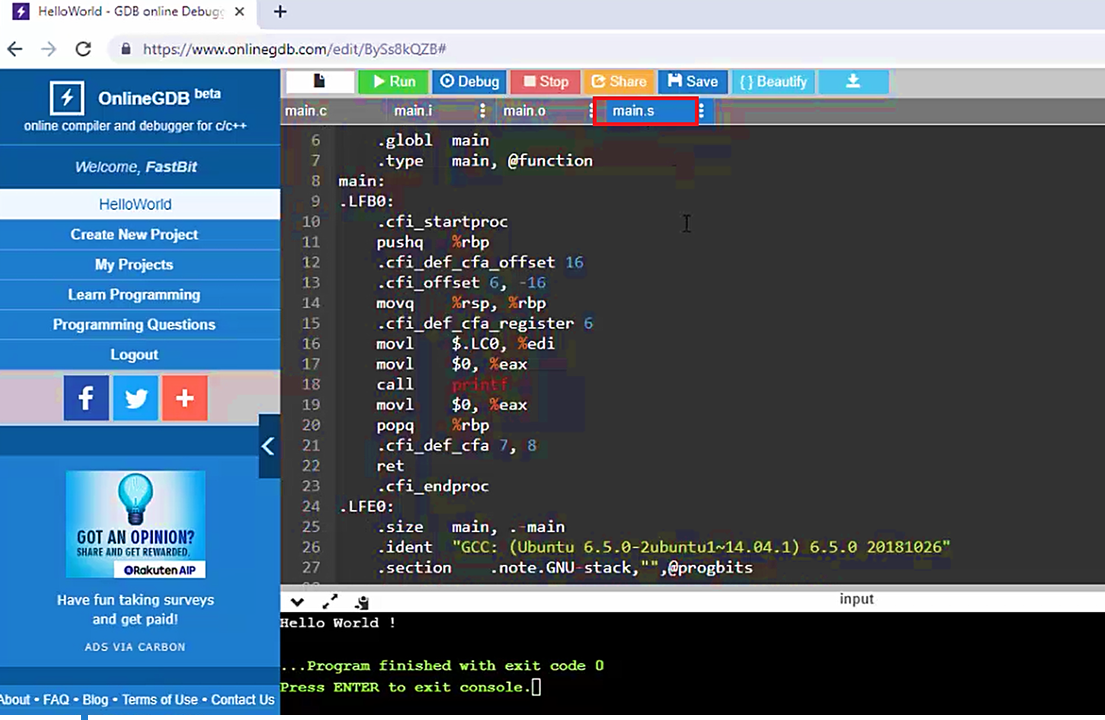
First main.i is produced, then after that main.i is converted into main.s, which is a collection of assembly instructions. So, your higher-level language is converted into a little lower-level language called assembly language. Assembly instructions are generated for your .c file.
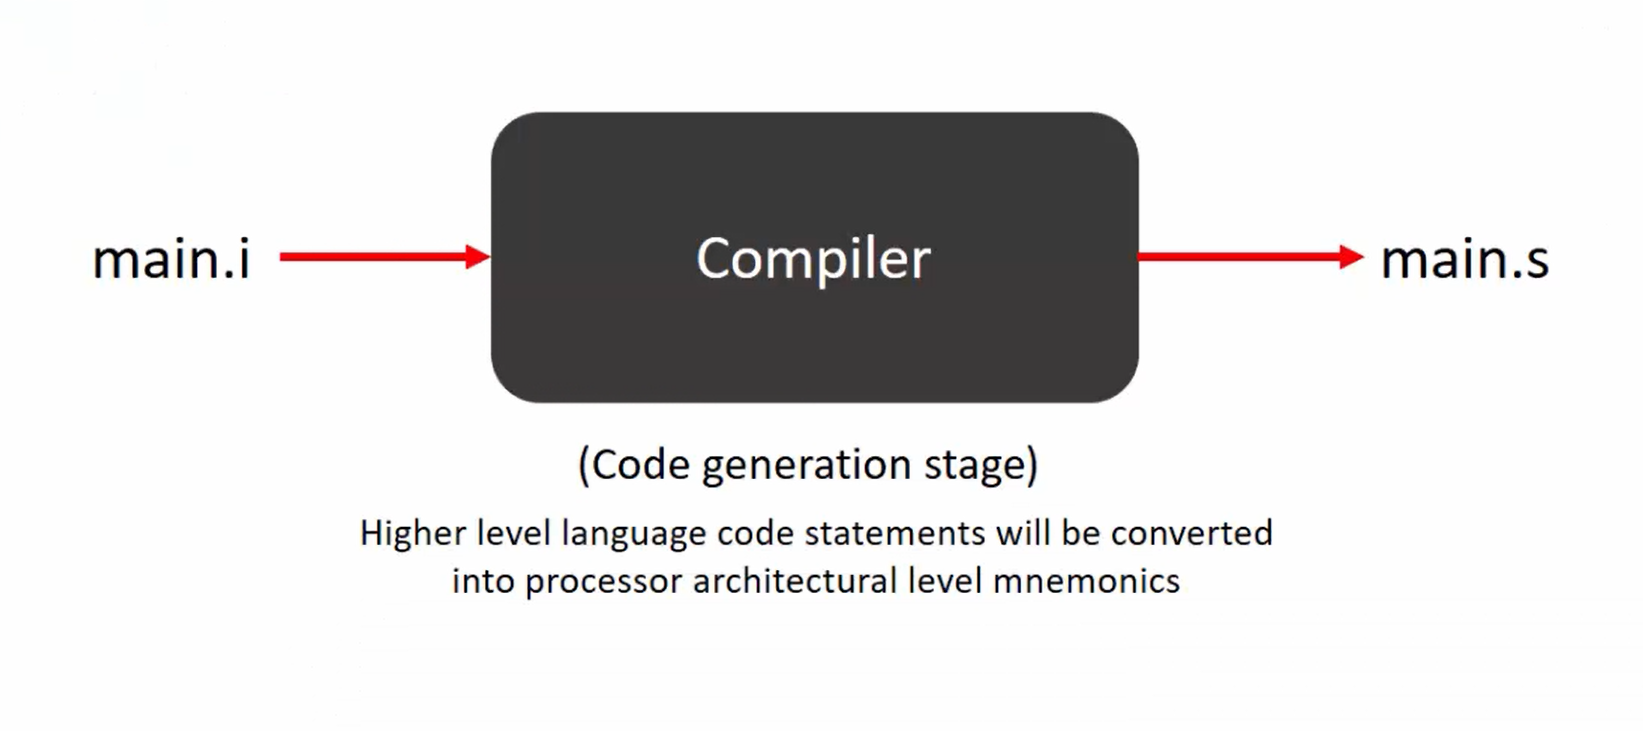
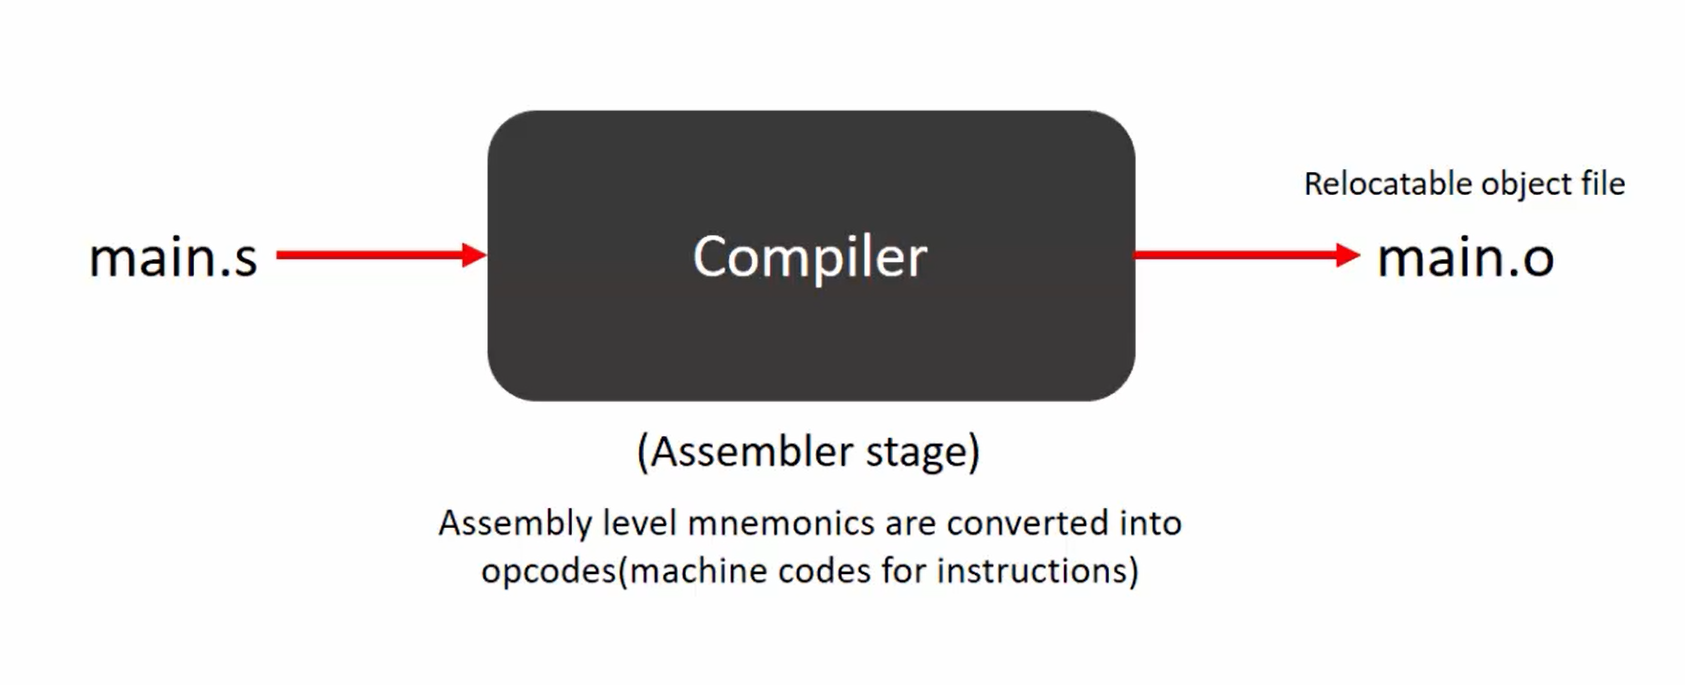
After that, the main.s file will be converted into a machine code that we call as main.o. main.o is also called the object file. So, you can see that(Figure 14) it is not possible to read the contents of this file because it contains the machine code.
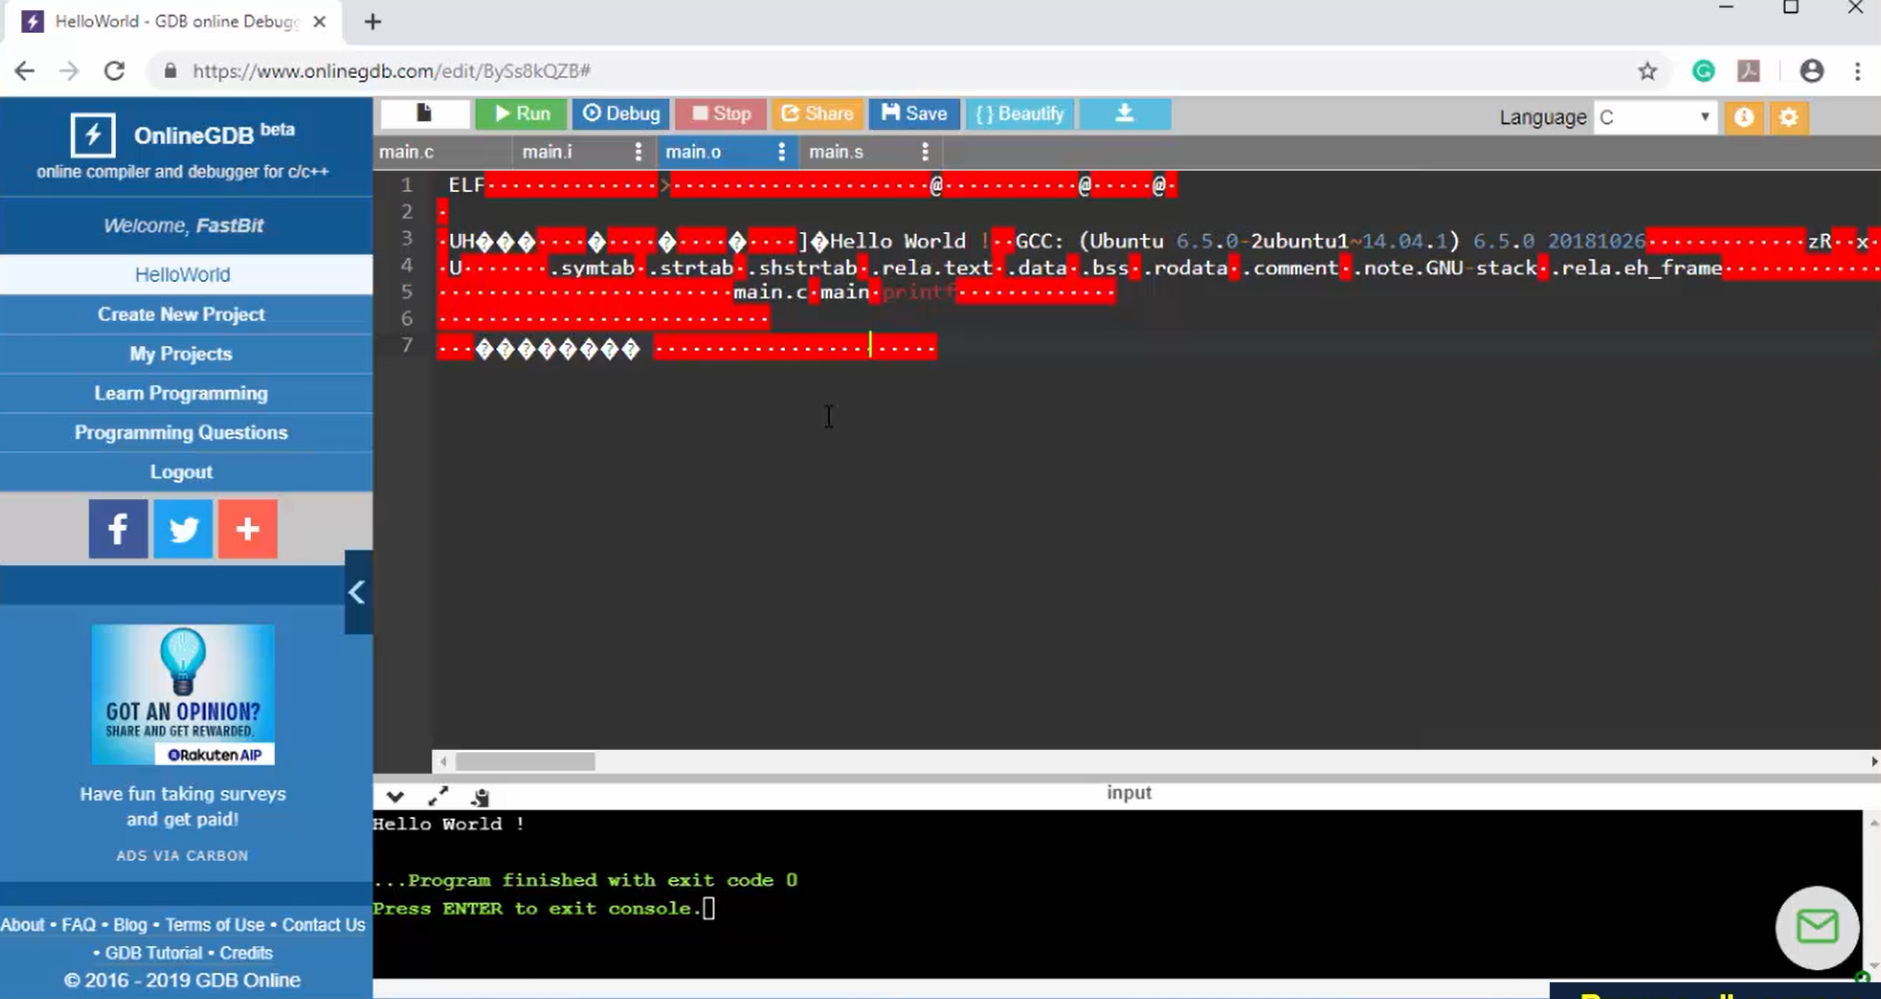
We will discuss all these things when we do programming on our target. So, that is our Embedded Target.
At this point, I just wanted to briefly introduce the intermediate files. All these intermediate files you can get by adding the compiler flag called save-temps. It is not required for each and every project. That’s about the very first application, “Hello World.”
FastBit Embedded Brain Academy Courses
Click here: https://fastbitlab.com/course1

