Testing printf over OpenOCD semihosting
In the previous article, we used the ARM Cortex M4 processors ITM feature to get the prints over the SWO line of the debugger. And this won’t work if you use a Cortex M0 based STM32 microcontroller. So, we can try the openOCD based semi-hosting technique that I will explain in this article.
By the way, OpenOCD is a debugger that helps you to program and debug your code on the board. It stands for the open onchip debugger.
So, to get the print using the openOCD debugger, you have to do a couple of settings in the project.
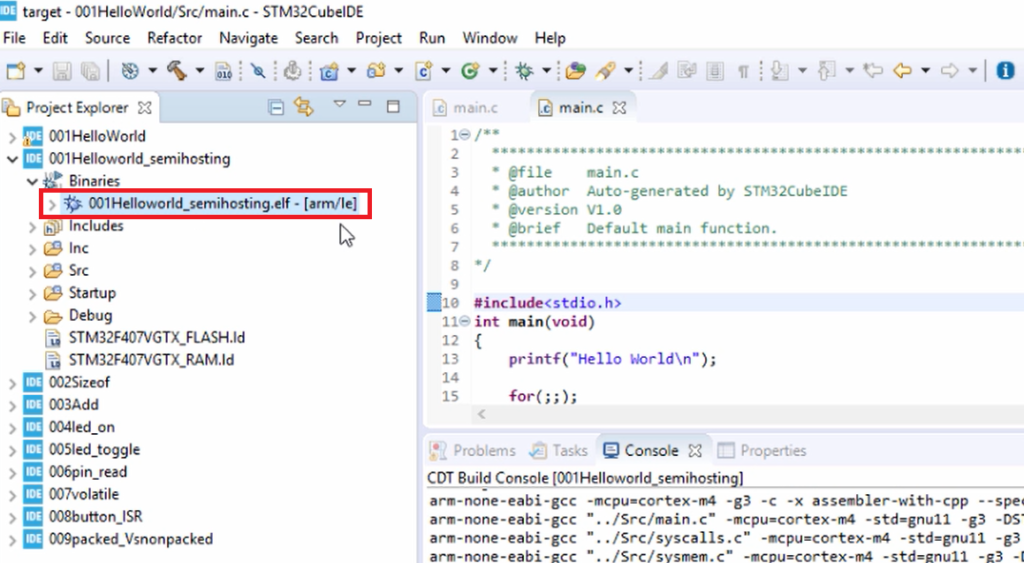
Now, let’s go to our IDE, and I have created a new project here 001Helloworld_semihosting. First, you have to build this project.
After building the project, the binary is generated here the .elf file, as shown in Figure 2.
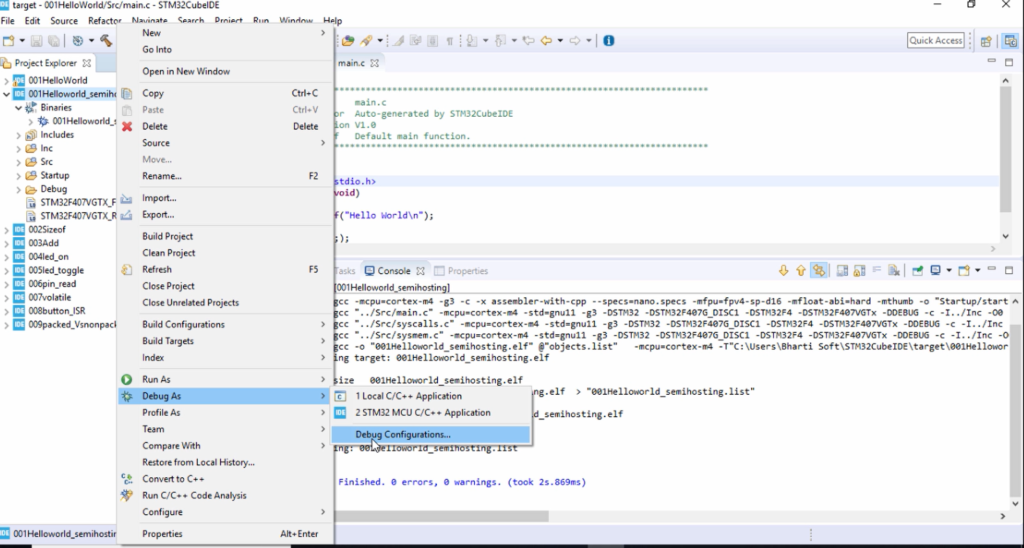
Then right-click on the project, select Debug As, and go to Debug Configurations, as shown in Figure 3.
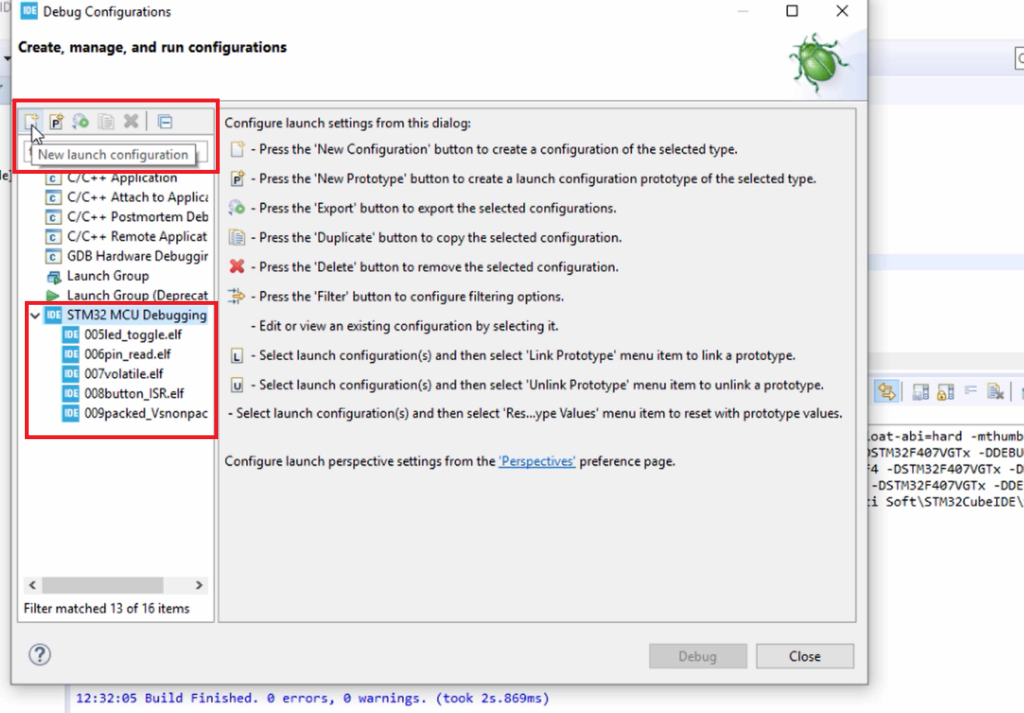
And then go to STM32 MCU Debugging; just expand that. Here, click on New launch configuration, as shown in Figure 4.
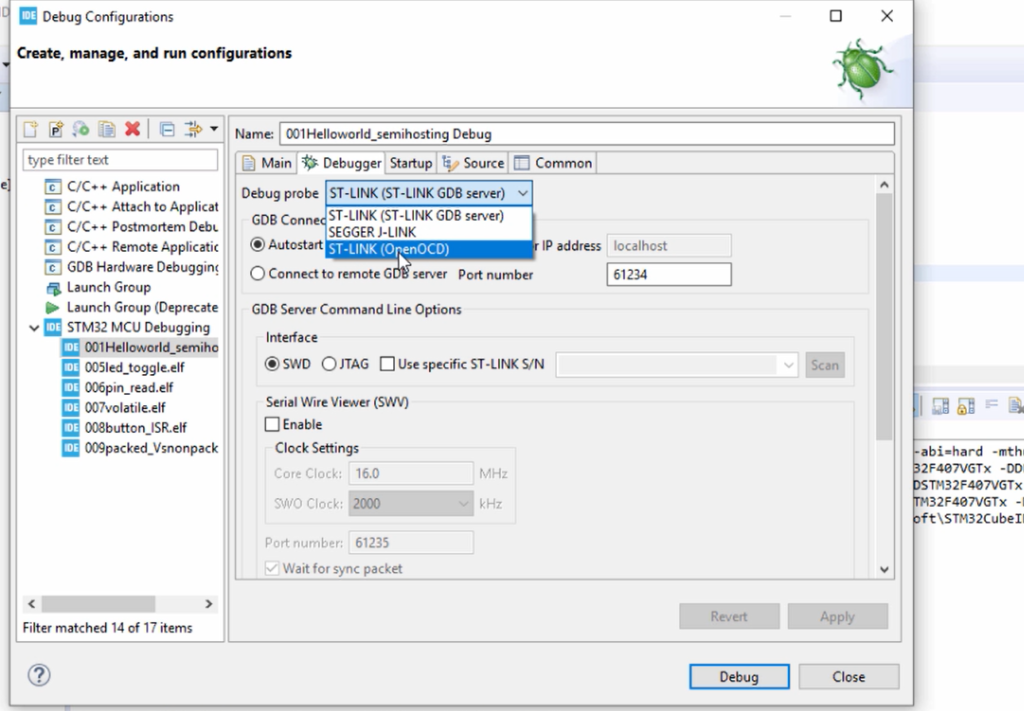
Now we are going to create a debug configuration for our .elf file. In the Debugger, you have to change the debugger now. The Debug probe or Debug software you have to change. Earlier, we used ST-LINK(ST-LINK GDB server), which is the default one for the STM32Cube IDE.
Now, you have to change this to ST-LINK(OpenOCD). That is the first change you have to make, as shown in Figure 5.
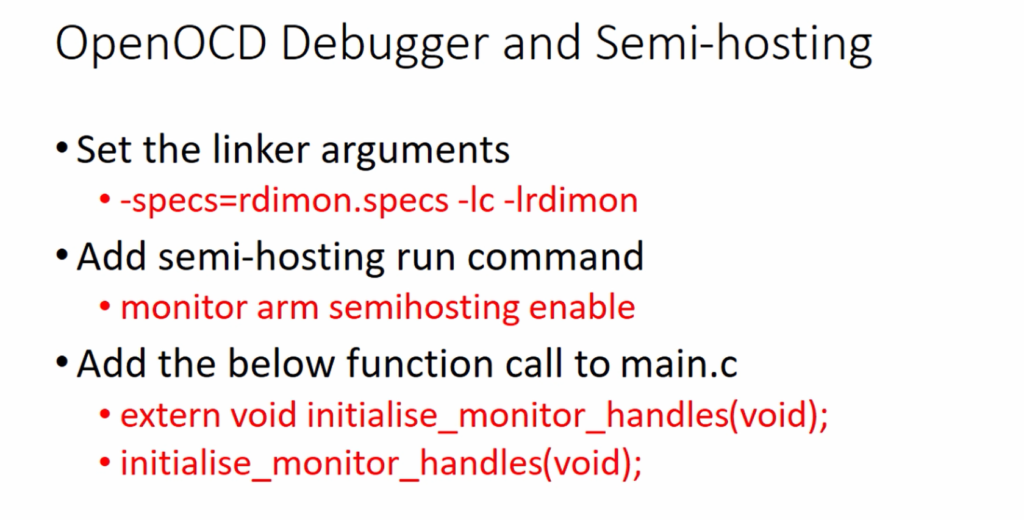
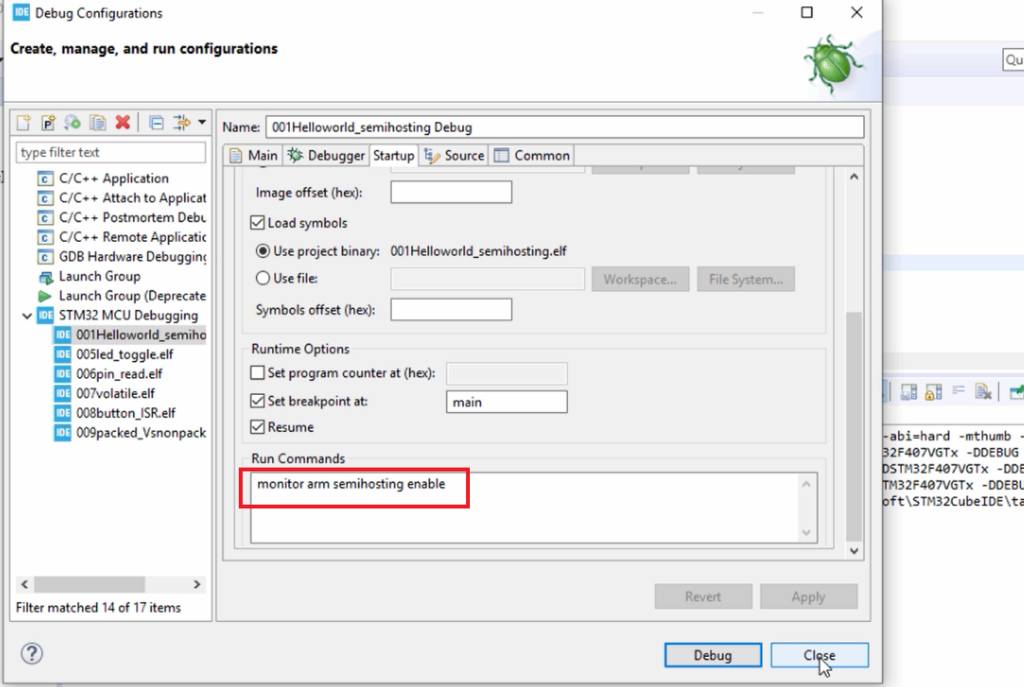
After that, go to Startup, and in the Startup tab, you have to mention the semi-hosting run command. And the command is this one monitor arm semi hosting enable(Figure 1). Just copy that command, go to the IDE and paste it here. Then click on Apply and click on Close, as shown in Figure 6.
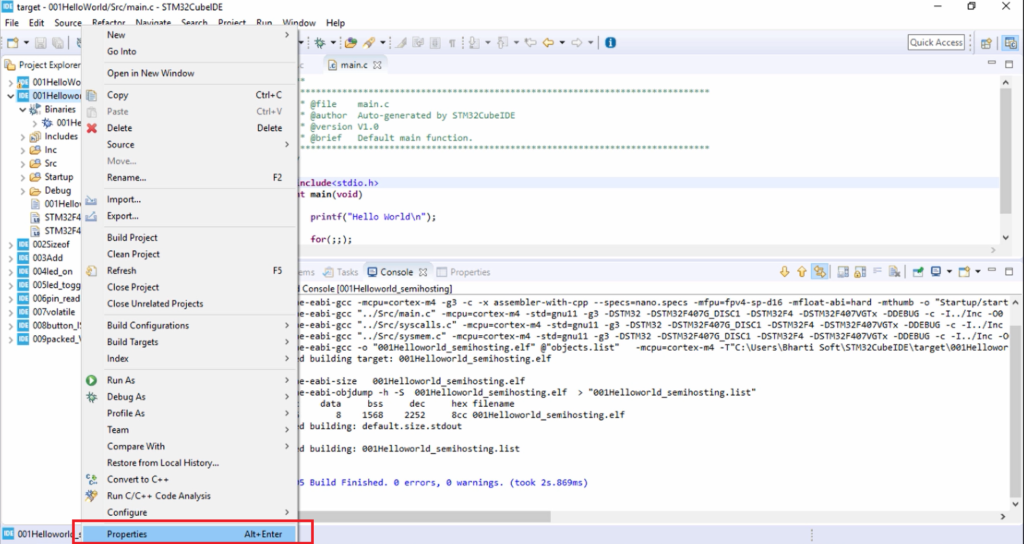
And after that, right-click on the project and go to properties.
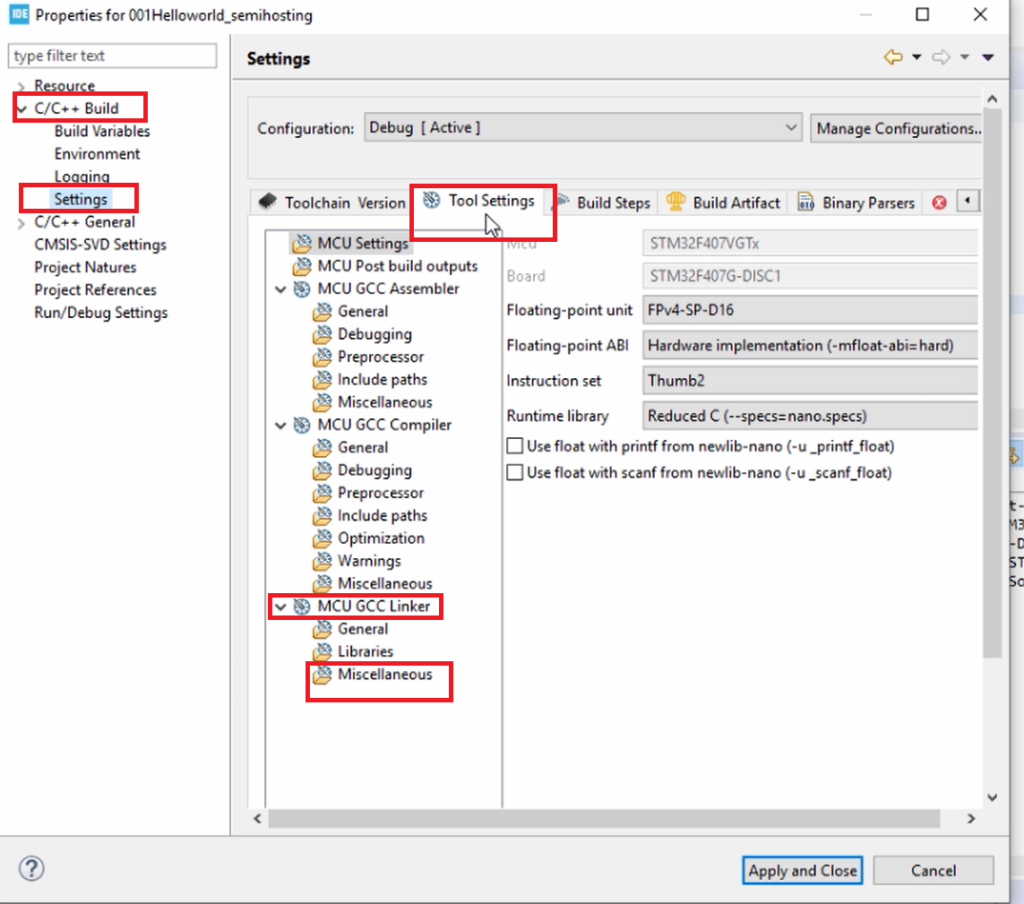
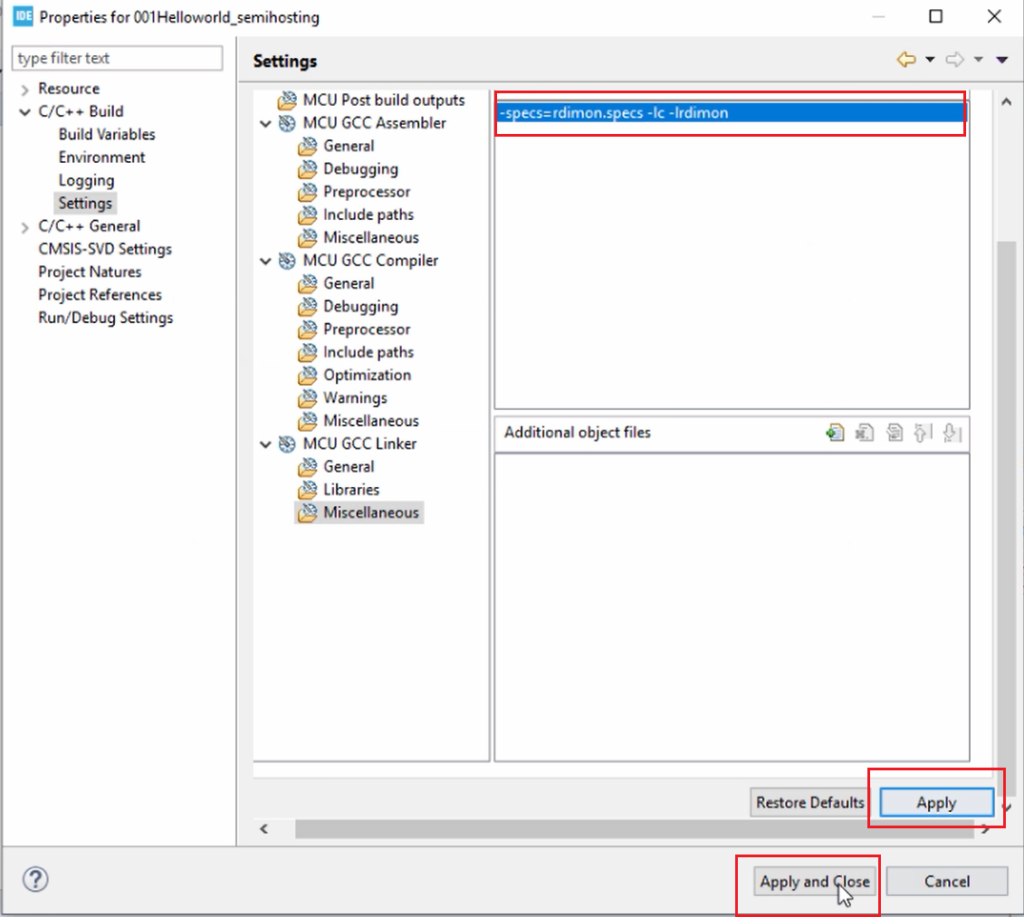
Go to C/C++ Build, go to Settings, go to Tool Settings here, go to MCU GCC Linker, and go to Miscellaneous, as shown in Figure 8.
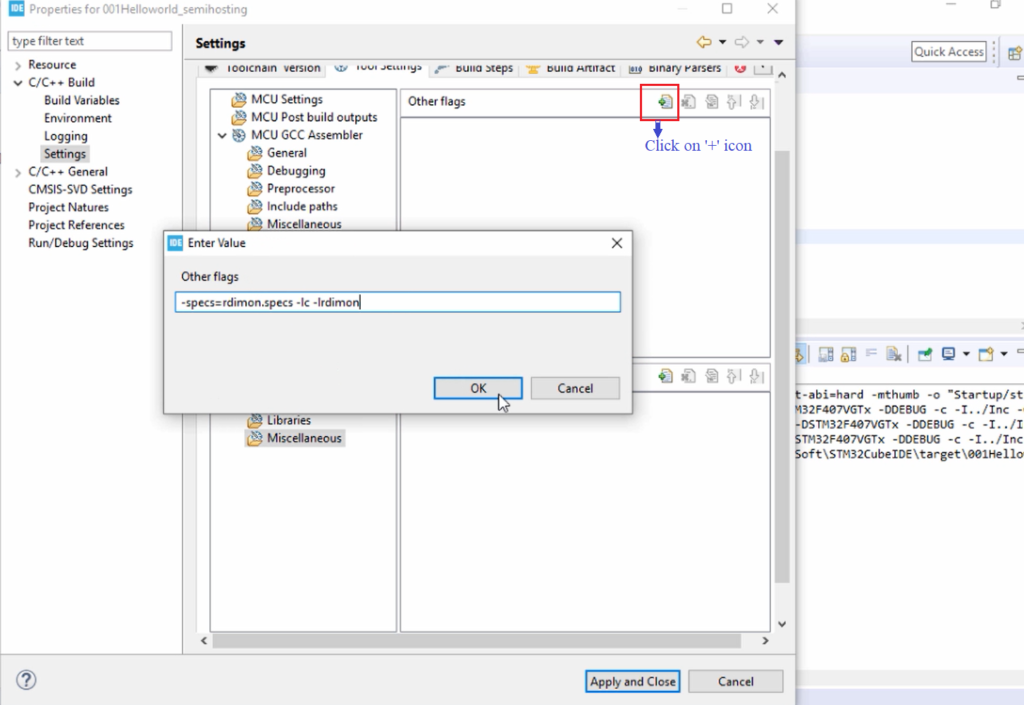
And here, you have to mention these linker arguments(Figure 1). Let’s copy these linker arguments, click on the ‘+’ icon here, paste those flags, and click on OK.
After that, click Apply here, and click Apply and Close, as shown in Figure 10.
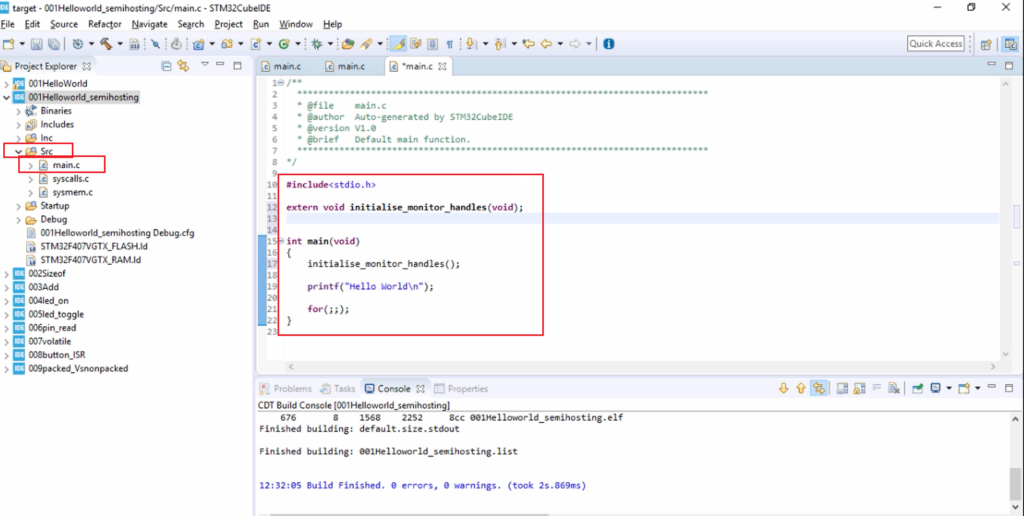
Now go to Src, go to main.c, and here, let’s write some code. The code is shown in Figure 11.
Before using any printf statements, you have to add initialise_monitor_handles(void); function call in the main function. And also, you should add its prototype. The prototype is extern void initialise_monitor_handles(void);
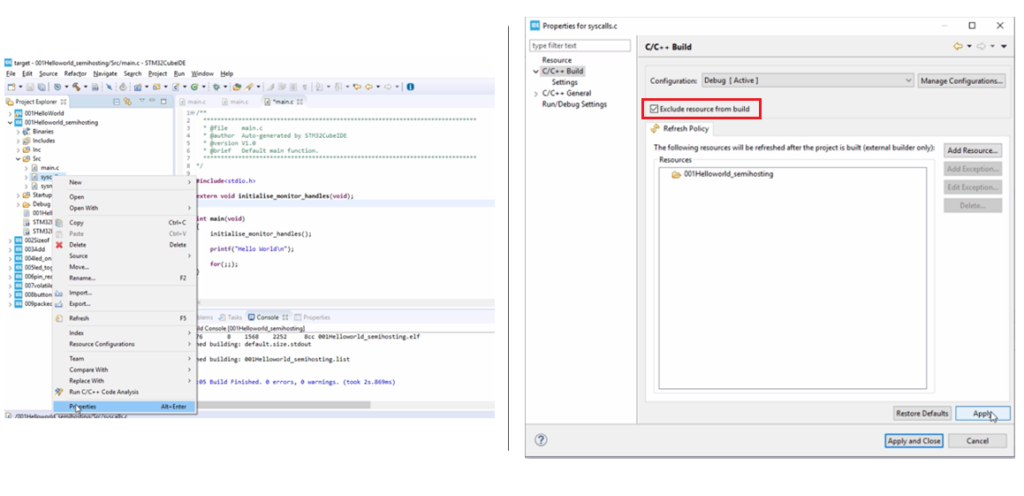
And after that, one more important thing you have to do, that is you have to exclude this syscalls.c from the build.
For that, right-click on the syscalls.c file, go to properties, go to C/C++ build, and check this exclude resource from build option. Then click on Apply, click on Apply and Close, as shown in Figure 12.
Now the syscalls.c file is excluded from the build.
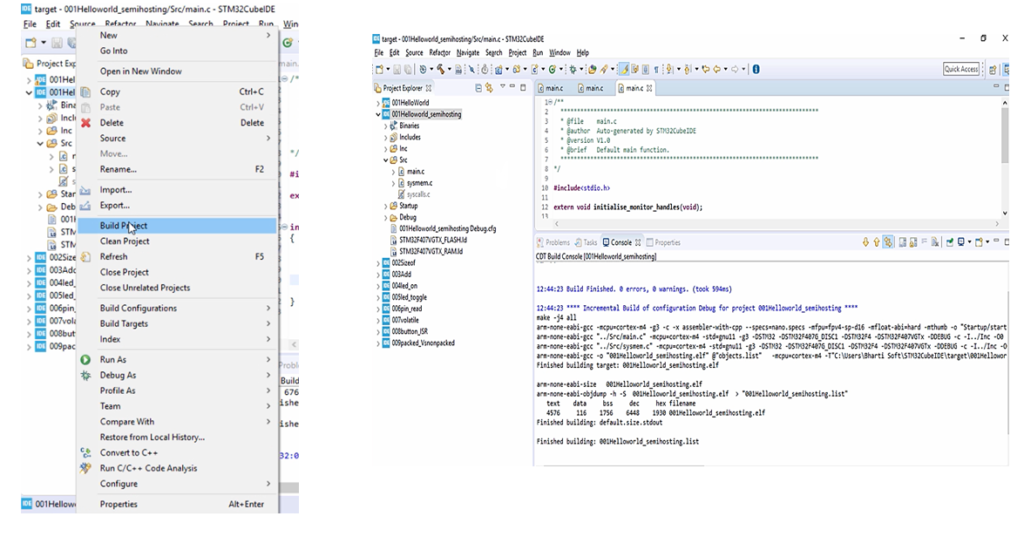
After that, build the project. Right-click on the project and click on a Build project.
Your project should build successfully. As shown in Figure 13, the project builds successfully.
And then connect your hardware to the PC. After that, debug the code. Right-click on the project, go to Debug As and Go to the STM32 MCU C/C++ Application. Then, click on the Switch.
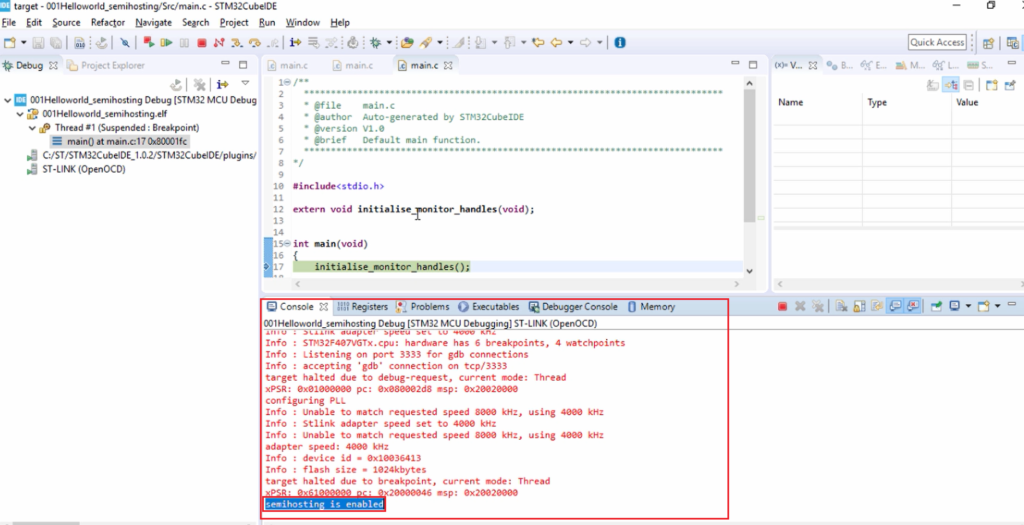
You see Figure 14, it went to a debug perspective, and the red color characters are a log that is produced by the openOCD debugger. And here, you can see that semihosting is enabled(Figure 14).
Now you can get the prints on the console. Let’s click on Step over. And again, click on Step over one more time, and here in the console, we got the print “Hello World,” as shown in Figure 15.
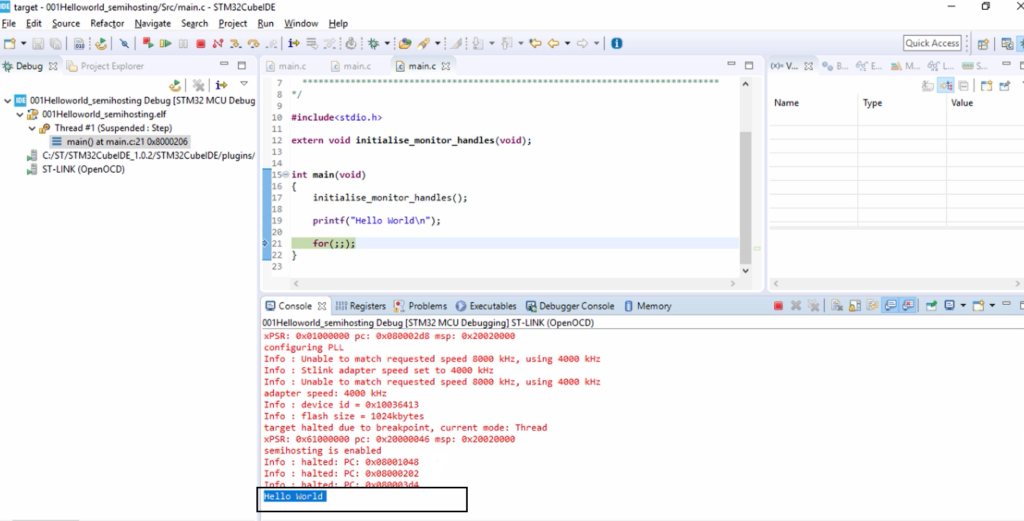
Remember that, while using prints using printf in semihosting, \n is really important. You should not miss that. The string should end with ‘\n‘ when using printf under semihosting with an openOCD debugger. So, you can use this feature whenever you want to debug your project using a prints. That’s about getting prints using openOCD and semihosting on STM32Cube IDE.
FastBit Embedded Brain Academy Courses
Click here: https://fastbitlab.com/course1

