Pcd driver with multiple devices testing
Let’s test our driver. Now, let’s first build the project; just run make host as shown in Figure 1.
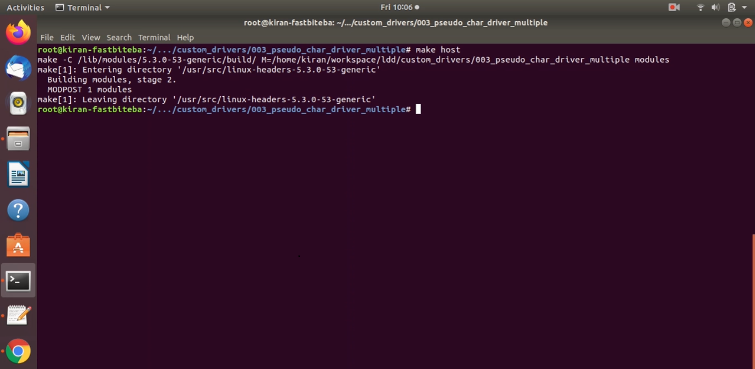
Let’s test this exercise on the host itself. Use insmod to load the driver. Let’s check the dmesg as shown in Figure 2.
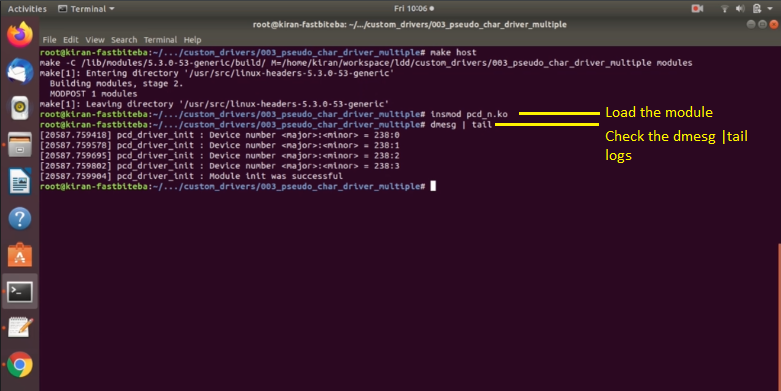
You can see that the driver_init was successful, and it has created 4 device files, and these are the device numbers. Let’s check those device files.
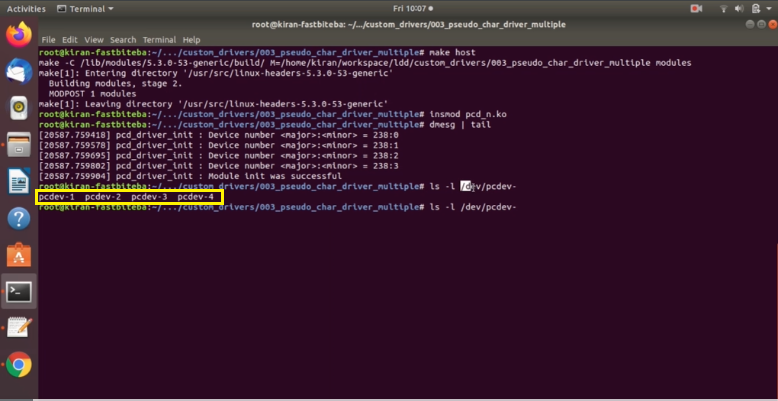
Here you can see that in the /dev directory, a 4 device files have been created, as shown in Figure 3.
Now, let’s try to write some data to pcdev-1. Let’s do that, echo. I’m going to write some data to pcdev-1, as shown in Figure 4.
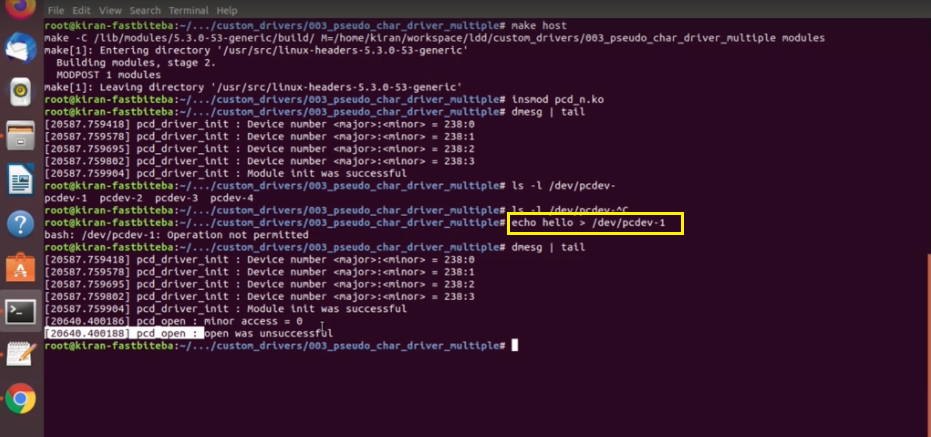
It says operation not permitted. Because our driver has a returned a negative error code. That is -EPERM. You can check the dmesg here. So, you can see that the minor access was 0.
This(pcdev-1) is a minor 0,(pcdev-2) minor 1,(pcdev-3) minor 2,(pcdev-4) minor 3, remember that. Minor access was 0, open was unsuccessful.
We use strace with dd command., if you want to know what is dd? Just type man dd as shown in Figure 5.
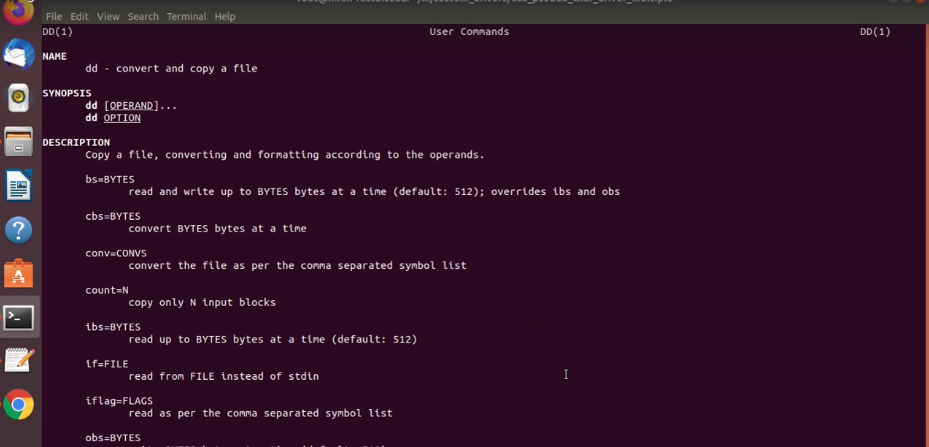
Convert and copy a file. You can use this command for read-write.
I’m going to use strace dd input file is equal to any file, any text file, or anything you can take. Let me take our .c file. And output file is the device pcdev-1. Let’s try to run this code. It takes some data from this file, that is the input file, and it tries to write into the output file, the output file is our device, as shown in Figure 6.
Now, let’s run this.
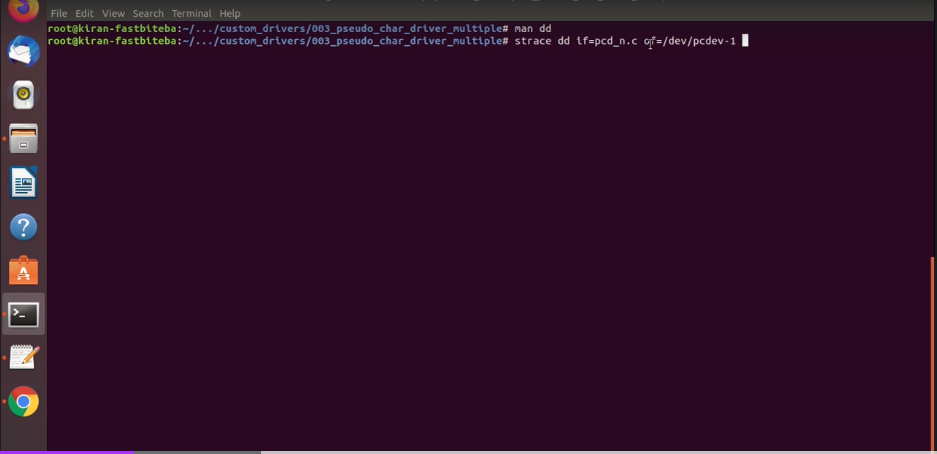
And you can see that, strace prints all the activities which are involved in executing this dd command, as shown in Figure 7.
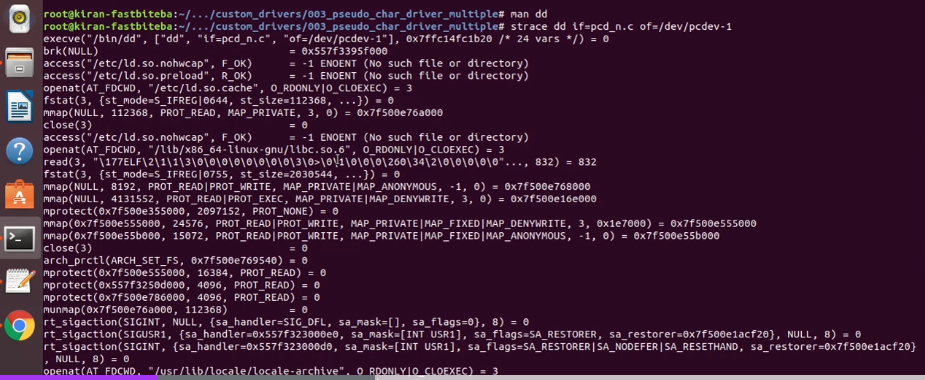
All these a system calls are involved in executing strace dd if=pcd_n.c of=/drv/pcdev-1 command. Somewhere you see, there is an open attempt. You can see that here there is an open attempt.
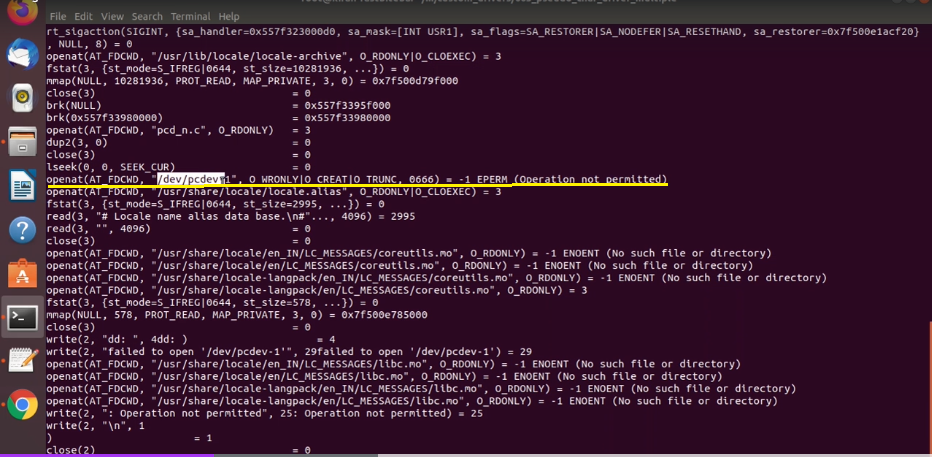
The program try to open the pcdev-1 with write-only and with these access modes. And our driver detected this write-only, that’s why our driver return this error code EPERM. You can use this strace command to a debug your user-level application.
Let’s do one more testing. What happens if I let me remove this strace. So, what happens if I use this command on pcdev-2, as shown in Figure 9.
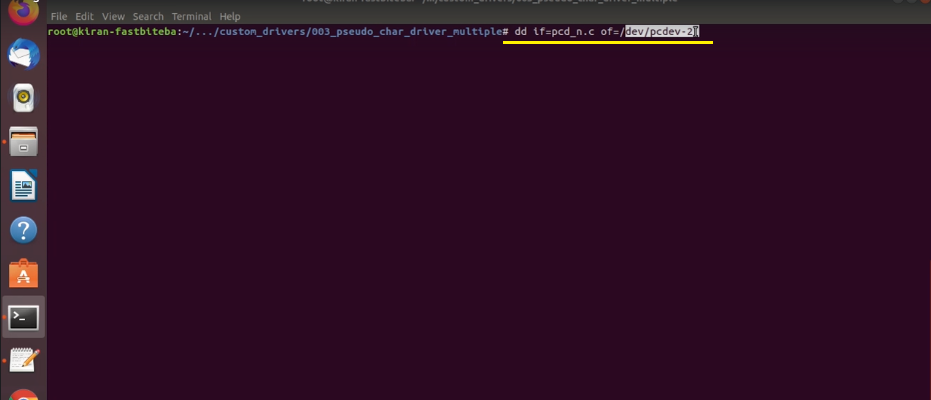
Will it be successful? Yes, it will be successful. Because this command will open this(pcd_n.c) file for read-only. And this command would open this file for write-only(/dev/pcdev-2). Write from here(if=pcd_n.c) to here(of=/dev/pcdev-2).
Let’s see what happens.
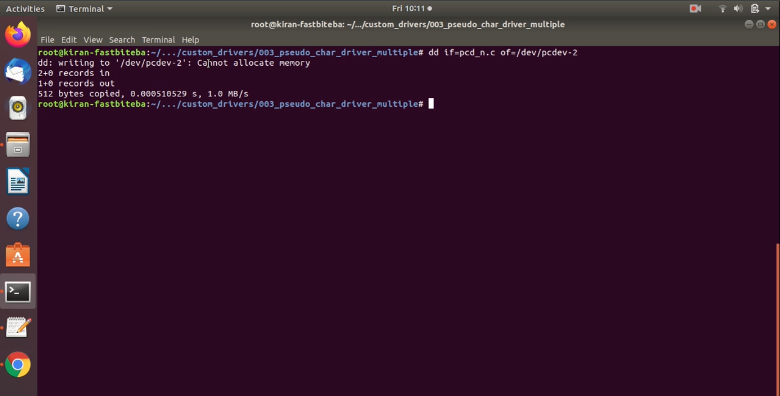
This command looks partially successful because while writing to pcdev-2 a the device memory was full, and that’s why our driver would have returned NOMEM error code. Let’s check dmesg|tail.
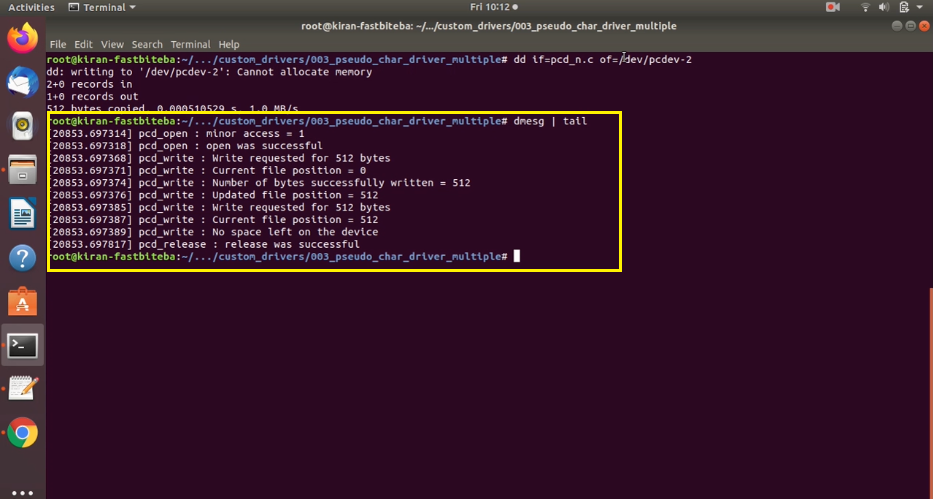
So, you can see that minor access was 1. This is minor 1. Open was successful. Write requested for 512 bytes. That means dd by default request for 512 bytes. That’s a block size of the dd command. You can change that block size using ‘bs’ argument. But you should just know that dd always tries to read or write 512 bytes at a time.
That’s why write requested for 512 bytes. The current file position was 0 in our driver. Number of bytes successfully written. Yes, it successfully written is 512 and after that, the dd command again requested for 512 bytes. You can see that. The dd command again requested for 512 bytes.
But, our device was already full because the maximum mem_size of pcdev-2 is 512 bytes. So, that’s why our driver printed here no space left on the device, and it returned NOMEM error code back to the user space. So, that’s why the dd command printed here cannot allocate memory.
That means there was a partial copy. Let’s restrict a dd command to request for data only one time. You can do that by using the count argument. Just give count = 1.
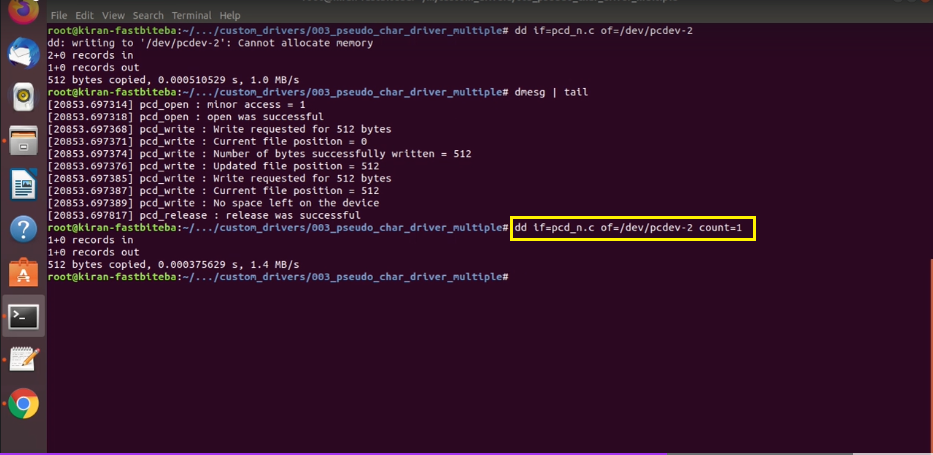
Here, you can see that now there is no error.
Let’s check the dmesg as shown in Figure 13.
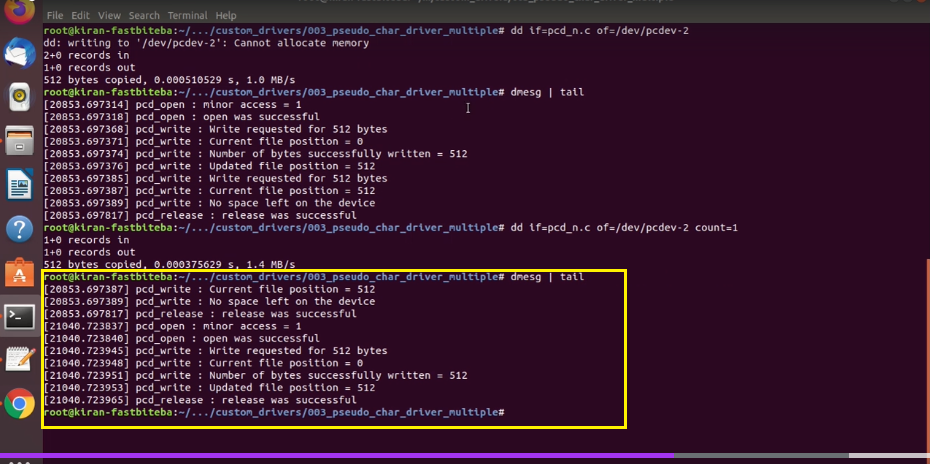
So, here you can see that open was successful, write requested for 512 bytes, and it requested for only one time.
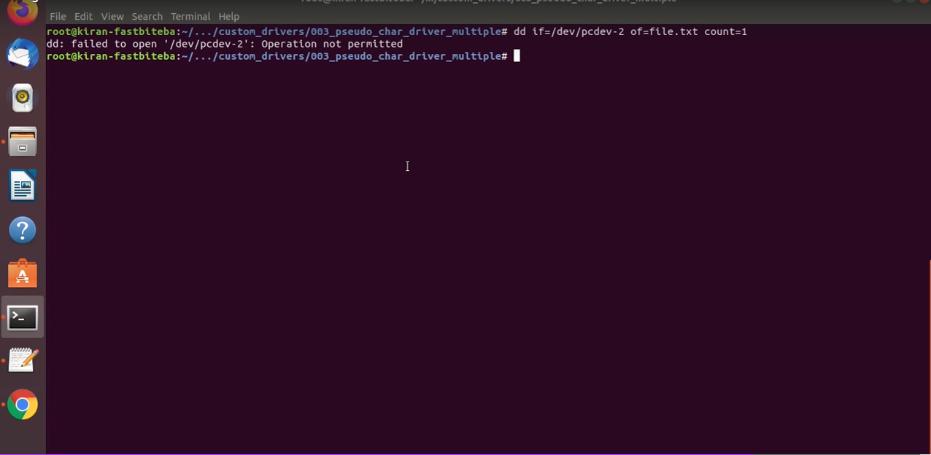
Let’s try to read from dev-2. So, let me change the input file as dev-2. The output file as some file. Some file.txt as shown in Figure 14. Let’s hit enter.
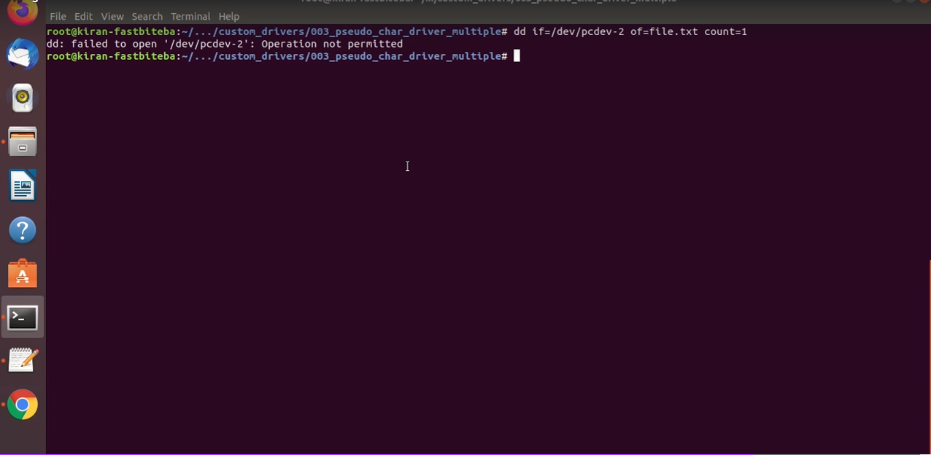
And here, you can see that it says that operation is not permitted because pcdev-2 is write-only, you cannot read it.
Now, let’s run this code one more time. But in this case, instead of pcdev-2, let me use pcdev-3 as shown in Figure 15. And you can use count = 1, and you can also restrict the block size using ‘bs’ command. By default, the block size is 512 bytes, let’s restrict to 100 bytes. 100 bytes will be read from this file, and it will written to this file. And it will be done only for one time, and the block size is 100. Let’s try.
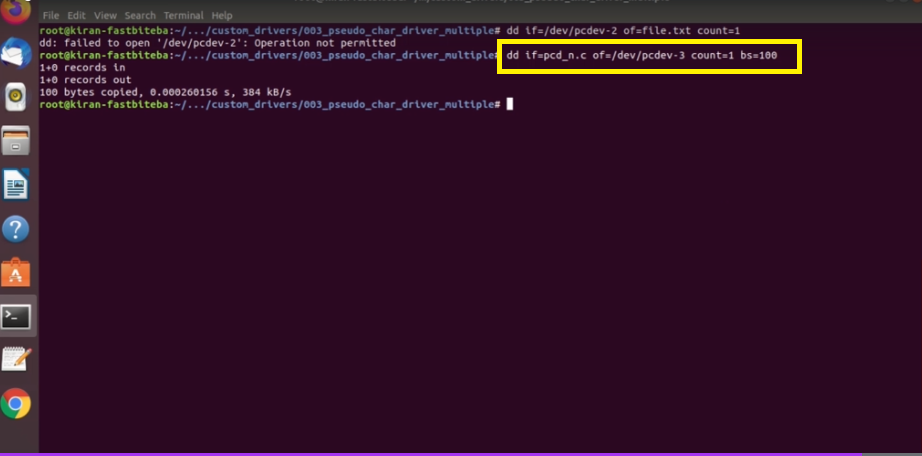
100 bytes copied.
So, let’s check the dmesg as shown in Figure 16. what does it says? So, the minor access was 2. This is minor 2.
And open was successful; write requested for 100 bytes. Because, bs= 100, current the file position is 0, write was successful, and everything was successful.
Now, you can do cat. You can use a cat command to read the dev-3 shown in Figure 17. Hit enter, and you can see that it is actually printing some data.
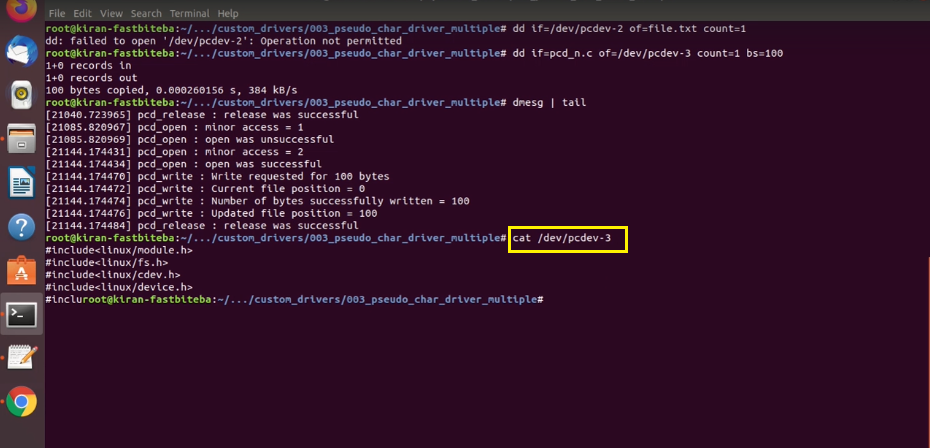
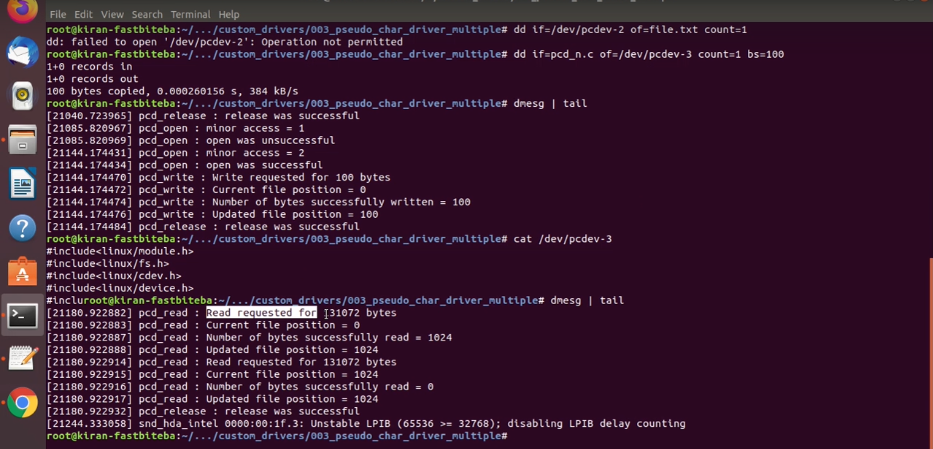
You can see that read requested for these many(131072) number of bytes. Because cat always request for these many(131072) number of bytes. But the number of bytes successfully read is 1024, and you can see that, again, cat request for these many number of bytes. But our driver actually says, nothing to read.
That’s why cat gives up, and it releases the file. And try with more commands like copy, cat, echo, dd to play with these device file. You can also use a copy command to copy from one device file to another device file.
In the following article, let’s do one more testing. So, let’s write a simple application, a linux application involving an open, read, a lseek system calls and will again test our driver.
FastBit Embedded Brain Academy Courses
Click here: https://fastbitlab.com/course1

