Pcd driver with multiple devices testing contd
In this article, Please download and open the file from this link: https://drive.google.com/file/d/1toWCdzLVCDoyOGyhD17vVnMfAl-JDzNE/view?usp=sharing
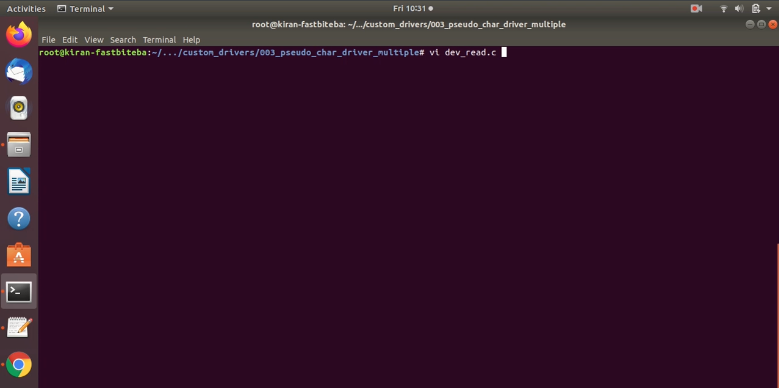
I’m going to explain that program now. The file name is dev_read.c. This is a very simple program to open and read data from the device file.
Let me explain this program. So, there is a buffer here, as shown in Figure 2, the global buffer. Where I’m going to keep the data, whatever I’m going to read from the device.
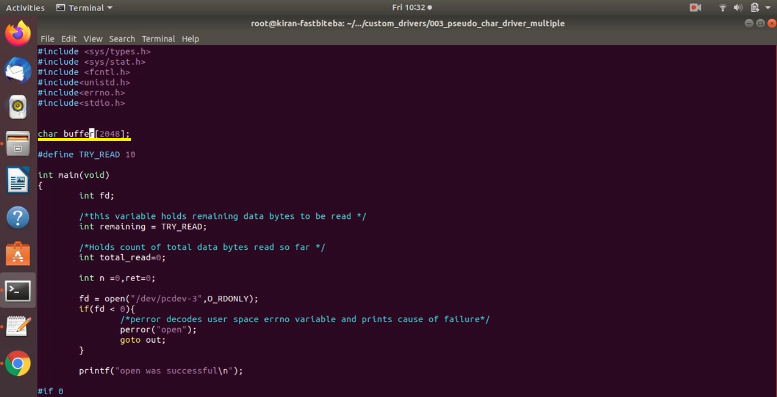
Let me just explain what this program does. First of all, I actually open a device file here. In this case, I select pcdev-3. You can take this device file information through the command line itself. But for this exercise, I just hardcoded it.
You can implement the command line version. I’m going to open this device file with read-only access mode.
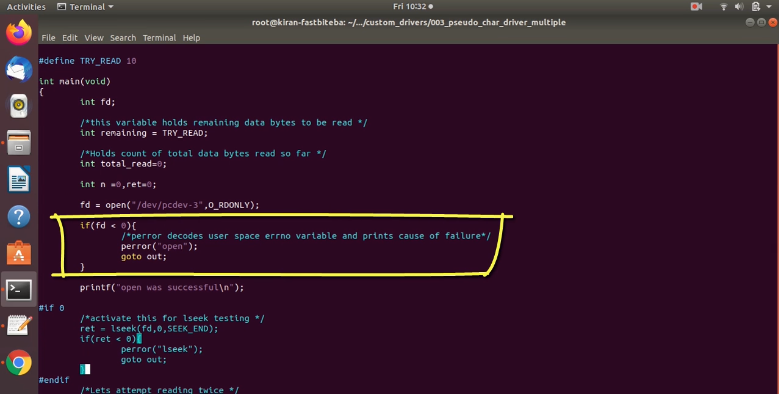
So, this does the error checking here(shown in Figure 3). If open returns negative value, then the open is failed. And appropriate userspace errno variable will be set, you can use this perror API to decode that errno value and print the meaning of that.
If the open is failure, then I just go to the end, and I execute close(fd), and I just return.
So, please note that many people argue that using goto is bad in programming, that is true. But it is OK if it is a straight jump, and if it is simple in kernel module development, and the goto is used. If it is a straight jump and it is very helpful in error handling.
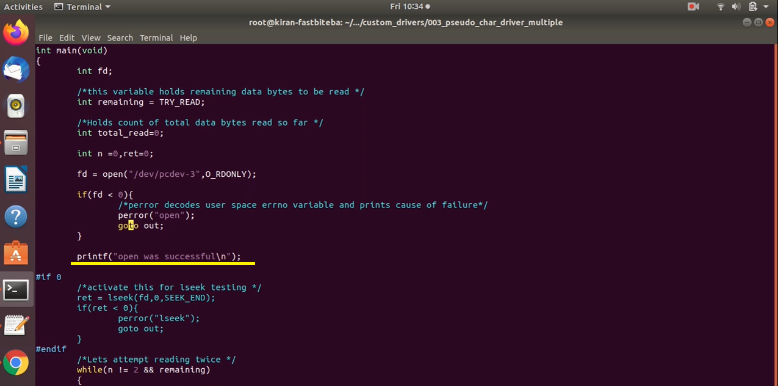
And after that, it prints “open was successful” here, as shown in Figure 5.
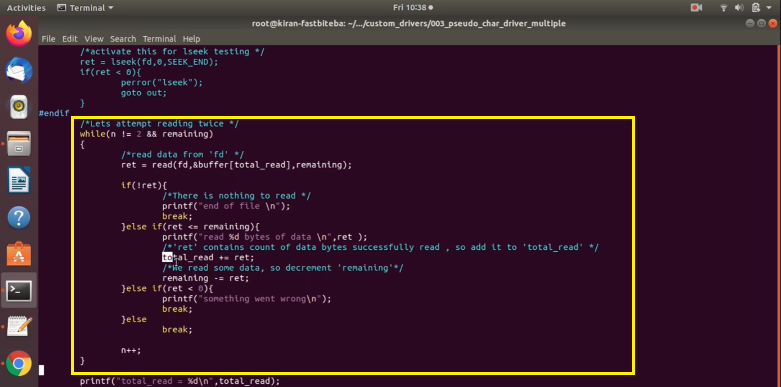
And this is a block where it does reading. We are going to attempt reading twice. Here is a read API.
Let’s just explore this read.
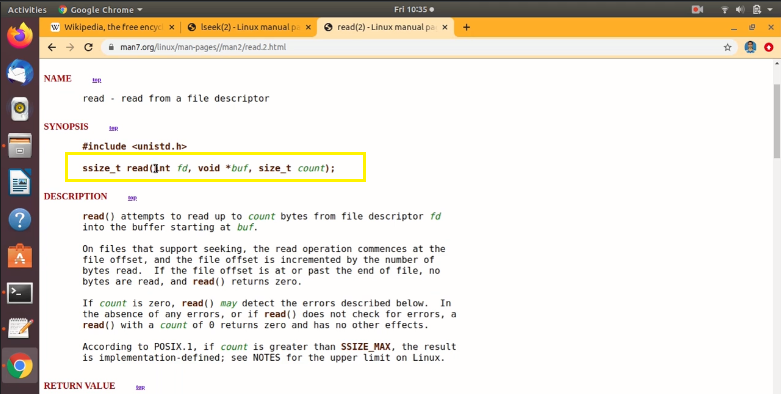
Read from file descriptor, and it takes these 3 arguments (shown in Figure 7). The fd, which you got from open and this, is a place to give your user buffer pointer, and this is how many bytes you want to read.
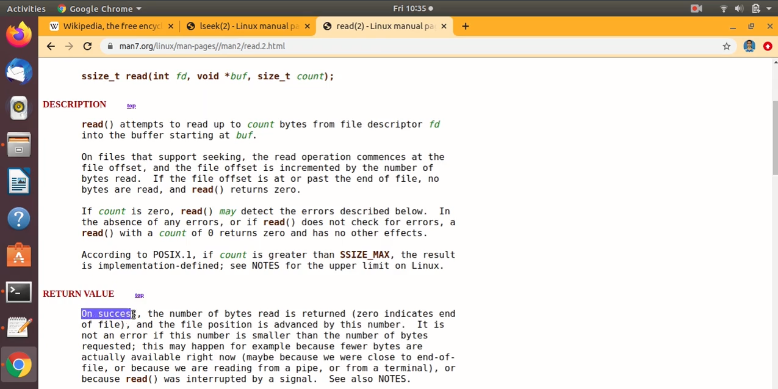
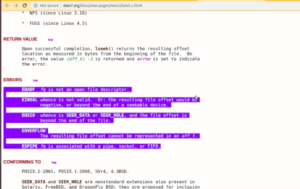
Remember that, on success, this read can return either 0 or a positive value. On success, the number of bytes read is returned. If it is 0, then that indicates end of file, and the file position is advanced by this number.
It is not an error if this number is smaller than the number of bytes requested. This may happen, for example, because fewer bytes are actually available right now. The read system call may also return negative value. If it is negative value, then that could be because of these reasons. So, read returns 0 or a positive value or a negative value.
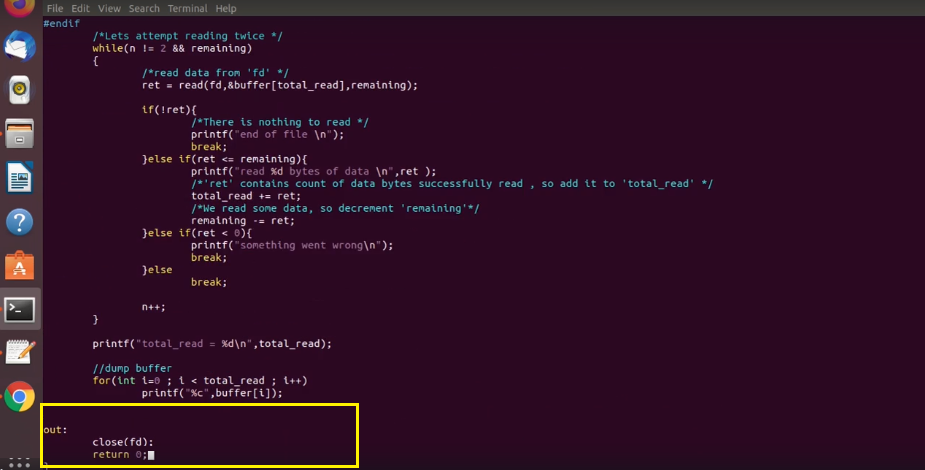
That’s why I’m checking for all those conditions. If it is 0, then I just print this is end of file, and I just break this loop. And if return is negative, then something went wrong. I just break. If the return is positive, then this block will get executed, as shown in Figure 9.
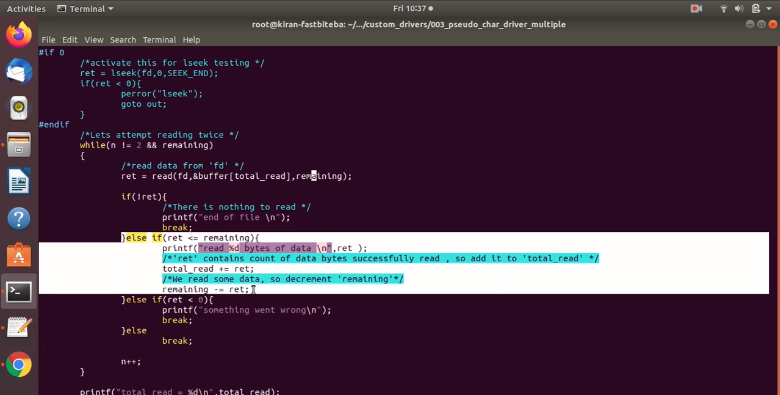
Let’s see how we use read here (shown in Figure 10).
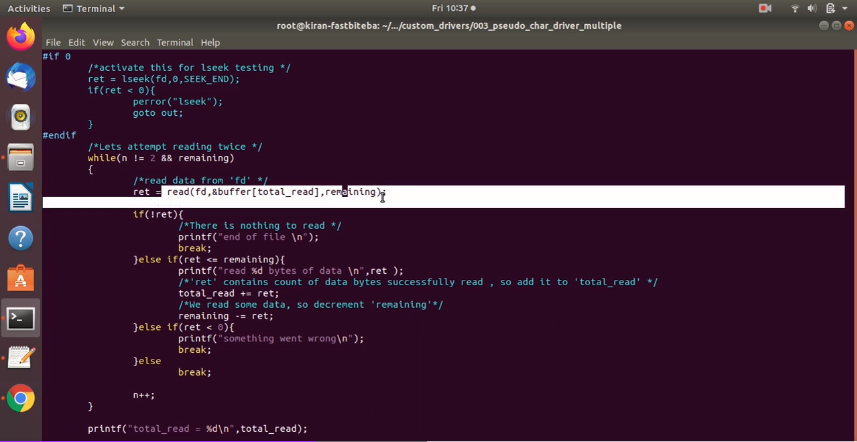
First of all, I give fd here and the buffer address. This buffer is traced by this variable total_read. So, this total_read is initially 0. That means we start from the beginning.
This(total_read) variable actually holds count of total number of data bytes read so far. Initially, it is 0. And the remaining variable holds the remaining data bytes to be read. Initially, it is(remaining) initialized to this(TRY_READ) value.
It is(TRY_READ is now 10. That means this program wants to read 10 bytes of data. That’s why the remaining is initially set to 10. So, the remaining is used as a count here.
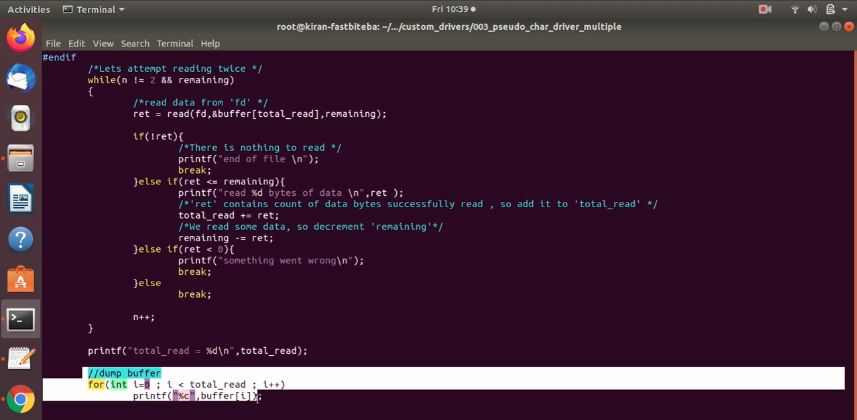
Let’s say, you execute this(ret=read (fd,&buffer[total_read], remaining) system call and it returns 5. Let’s say 5 is less than remaining. That’s why the total_read is incremented by 5. Remaining is decremented by 5, and this logic again tries to read one more time.
That’s why n != 2, and the remaining shouldn’t be 0. If remaining becomes 0, then there is nothing to read. This while loop breaks. I hope you get this. So, it tries to read one more time.
And after that, it just dumps the buffer here (as shown in Figure 11).
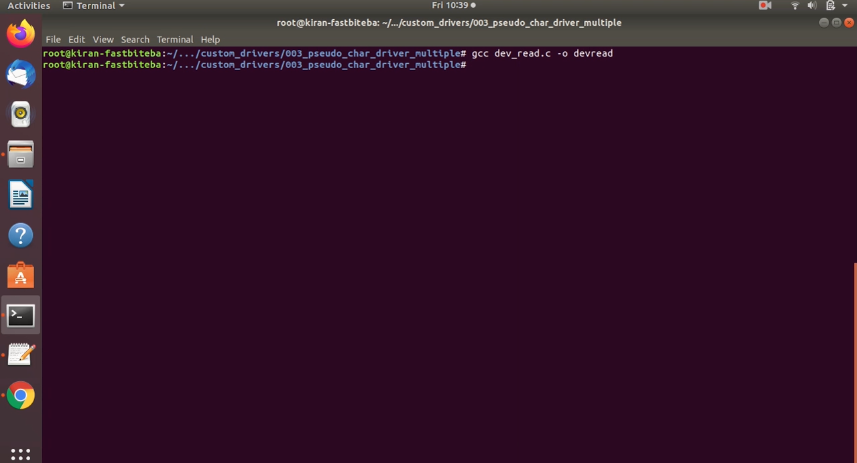
Let’s try this. Download this code and just compile that with gcc, -o. Let me give the name dev_read.
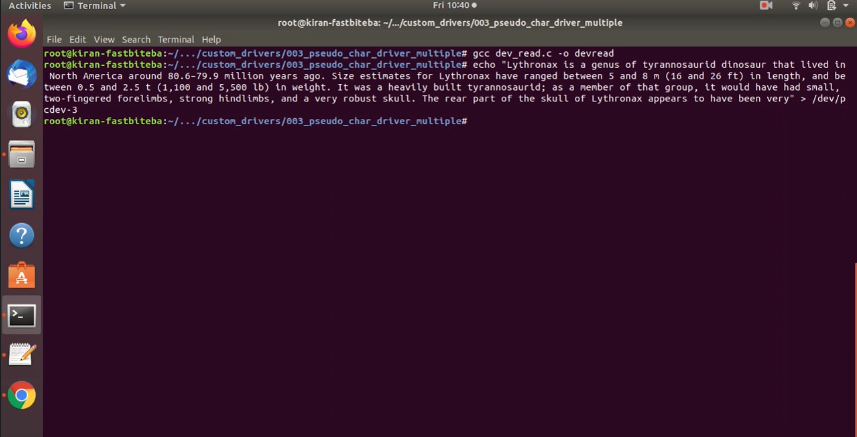
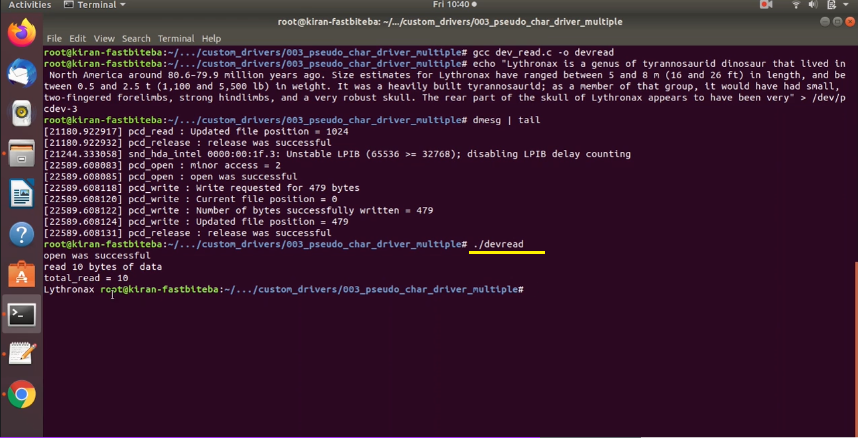
Before testing this, let me use the echo command to put some data into the pcdev-3. I copy some data. I paste here. And let’s put this in /dev pcdev-3.
Let’s do dmesg| tail as shown in Figure 14.

You can see that we actually wrote 479 bytes.
Let’s execute /devread.
So, you can see that we actually read 10 bytes of data. So, our application read 10 bytes of data from this device file.
So, now let’s edit this code to get the read count via the command line.
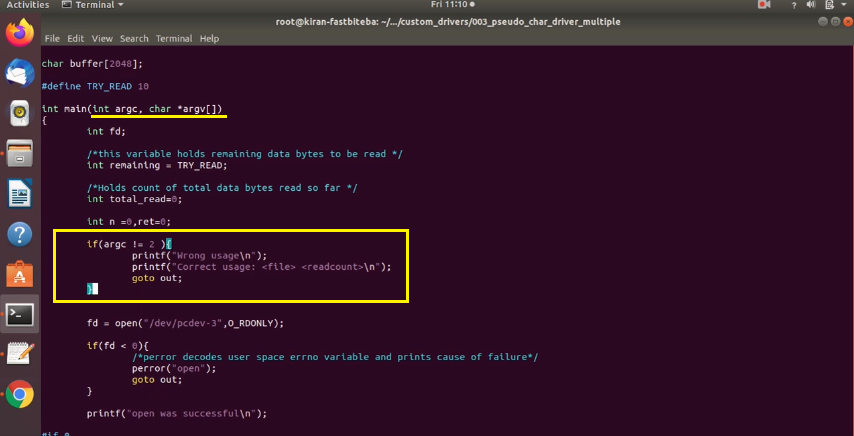
Let’s make use of the command line arguments. So, that’s why let’s edit this main arguments as int argc, and the second argument is argv.
Here, let’s just test a if(argc !=2), then let’s conclude that it’s wrong usage. Printf “wrong usage”. Usage is you have to execute the file with the read count. So, goto out. That means you have to execute this program with a readcount value.
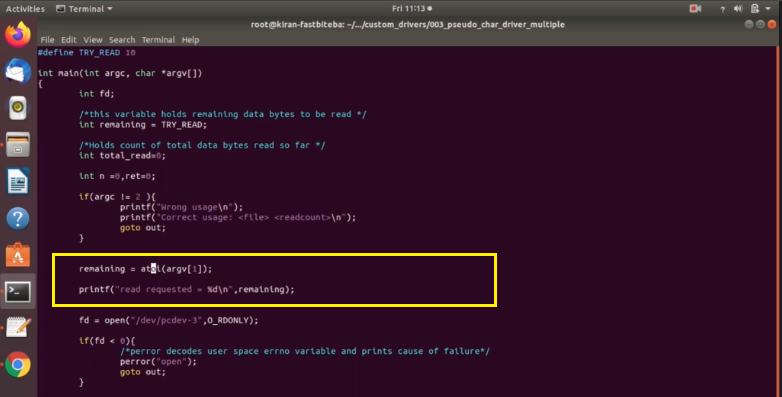
And now, let’s extract the read count from this a argv pointer variable, as shown in Figure 17.
Basically, it contains a string data. The argv actually contains the string data. That’s why we have to use atoi. (ASCII to integer) of argv1. Remaining is equal to. Let me just print the initial value of a remaining.
For this atoi standard library call, you have to include stdlib.h. Let’s include that.
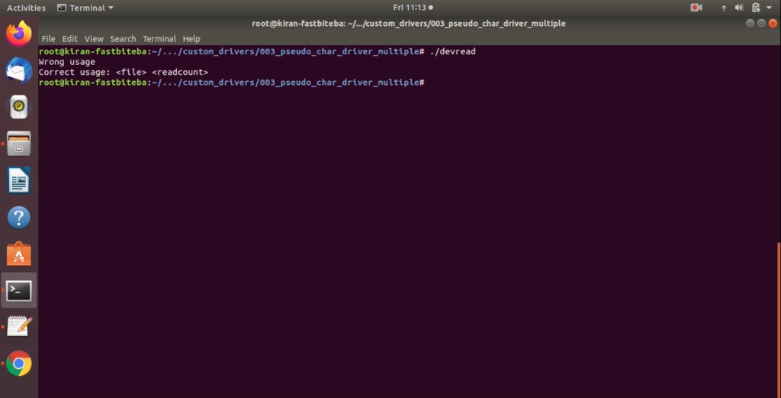
Let’s compile, and let’s execute. So, here it is. It’s a wrong usage.
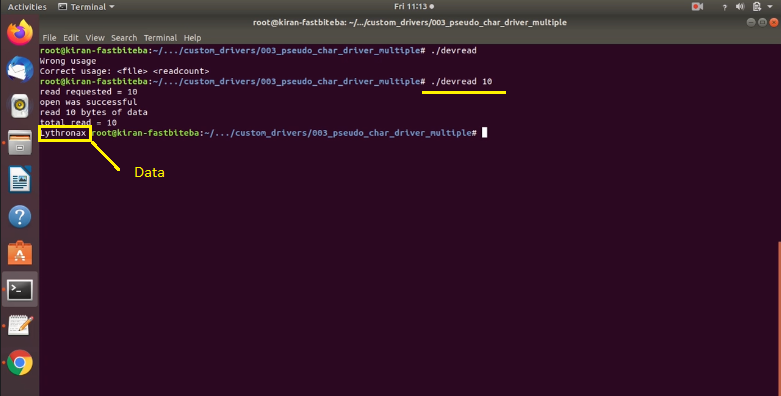
Let’s execute with 10, as shown in Figure 19. Read requested is 10, open was successful, read 10 bytes of data. This is a data.
Let’s request for 10000 bytes, as shown in Figure 20, and here it is. Read requested 10000 bytes. But, the first read actually got only 1024, because our device has limitations. And that’s why our program again tried for reading some data, but it got zero.
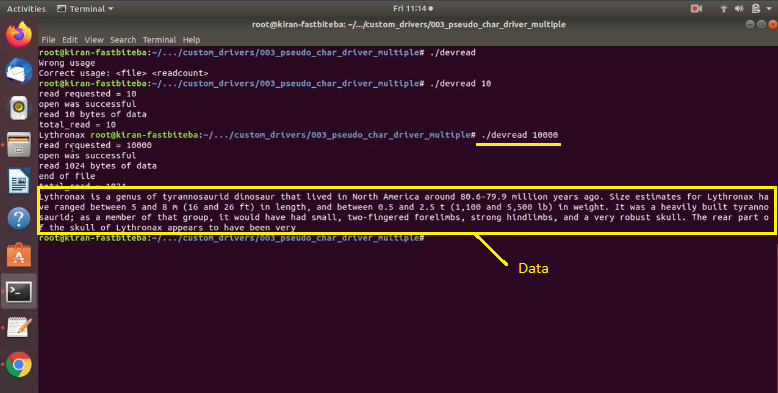
It printed end of file. That’s why the total_read was 1024, and this was the data.
Check the dmesg(shown in Figure 21).
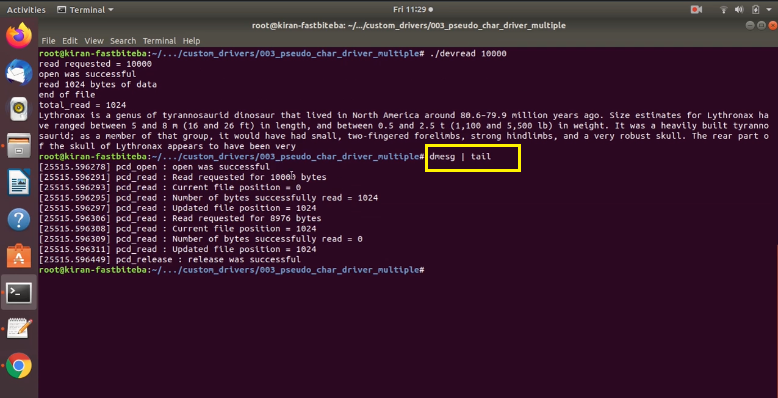
Here you can see that the open was successful, and our application requested for 10000 bytes. But the successfully read data was 1024 and you can see that, our application again requested for 8976 bytes. That was read executing for the second time.
Since there is nothing to read from the device, our driver does return zero. That’s a reason why our application printed here end of file, then our application closed the file. So, the release was successful.
I have mentioned the link to download this application at the beginning of this article, try to download it and a test your driver what you have written, and let me know if you have any questions. I’ll see you in the next article.
FastBit Embedded Brain Academy Courses
Click here: https://fastbitlab.com/course1