LVGL project for STM32F746x and STM32F407 disc board
Running an LVGL (Light and Versatile Graphics Library) sample application on an STM32F746 and STM32F407 Discovery Board involves a few steps. Before proceeding, make sure you have the necessary hardware and software components:
Hardware:
– STM32F746G-DISCO development board and STM32F407-DISCO board
– Micro USB cable for power and debugging
– Computer with a compatible development environment (e.g., STM32CubeIDE)
Software:
– STM32CubeIDE (Integrated Development Environment) – Download and install it from the STMicroelectronics website.
– LVGL Library – You can download the LVGL library from its GitHub repository.
Follow these steps to run the LVGL sample application
Step 1: Set up STM32CubeIDE
- Install STM32CubeIDE on your computer.
- Launch STM32CubeIDE and create a new STM32 project for your board.
Step 2: Integrate LVGL into the Project
- Download the LVGL library from its GitHub repository: https://github.com/lvgl/lvgl
- Extract the LVGL library files into your STM32CubeIDE project’s directory.
- Add the LVGL source files to your STM32CubeIDE project:
- Right-click on the project in the Project Explorer pane and select “Import.”
- Choose “General” > “File System” and click “Next.”
- Browse and select the LVGL source files from your project directory, and click “Finish.”
Step 3: Configure STM32CubeIDE Project
- Open your STM32CubeIDE project and navigate to the “Core” and “Configuration” tabs.
- Configure the necessary peripherals such as display (if you’re using an external display) and touch controller (if applicable).
- Initialize the LVGL library, touch controller, and display (if required) in your main.c file.
Step 4: Build and Flash the Application
- Build your STM32CubeIDE project to generate the binary file.
- Connect the Discovery Board to your computer using a micro USB cable.
- Flash the binary file onto the Board using STM32CubeIDE.
Step 5: Run the Application
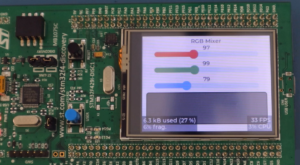
- Once the flash process is complete, the LVGL sample application should start running on your Board.
- Observe the output on the display (if you’re using one) and interact with the application using the touch interface (if applicable).
Please note that the exact steps and configurations might vary depending on the specific LVGL sample application you want to run and the hardware setup you have (e.g., display and touch controller connections). Make sure to follow the documentation and examples provided by the LVGL library for your specific use case.
Additionally, ensure that you have the necessary hardware connections and that the display and touch controller (if applicable) are supported by LVGL and configured correctly in your STM32CubeIDE project.
LVGL sample application on STM32F746 Discovery Board
The steps to run the LVGL sample application are quite similar to the previous ones.
Start by adding the necessary LVGL sources, including lvgl examples, lvgl.h, and lv_conf.h, into your project. Ensure that everything is added correctly.
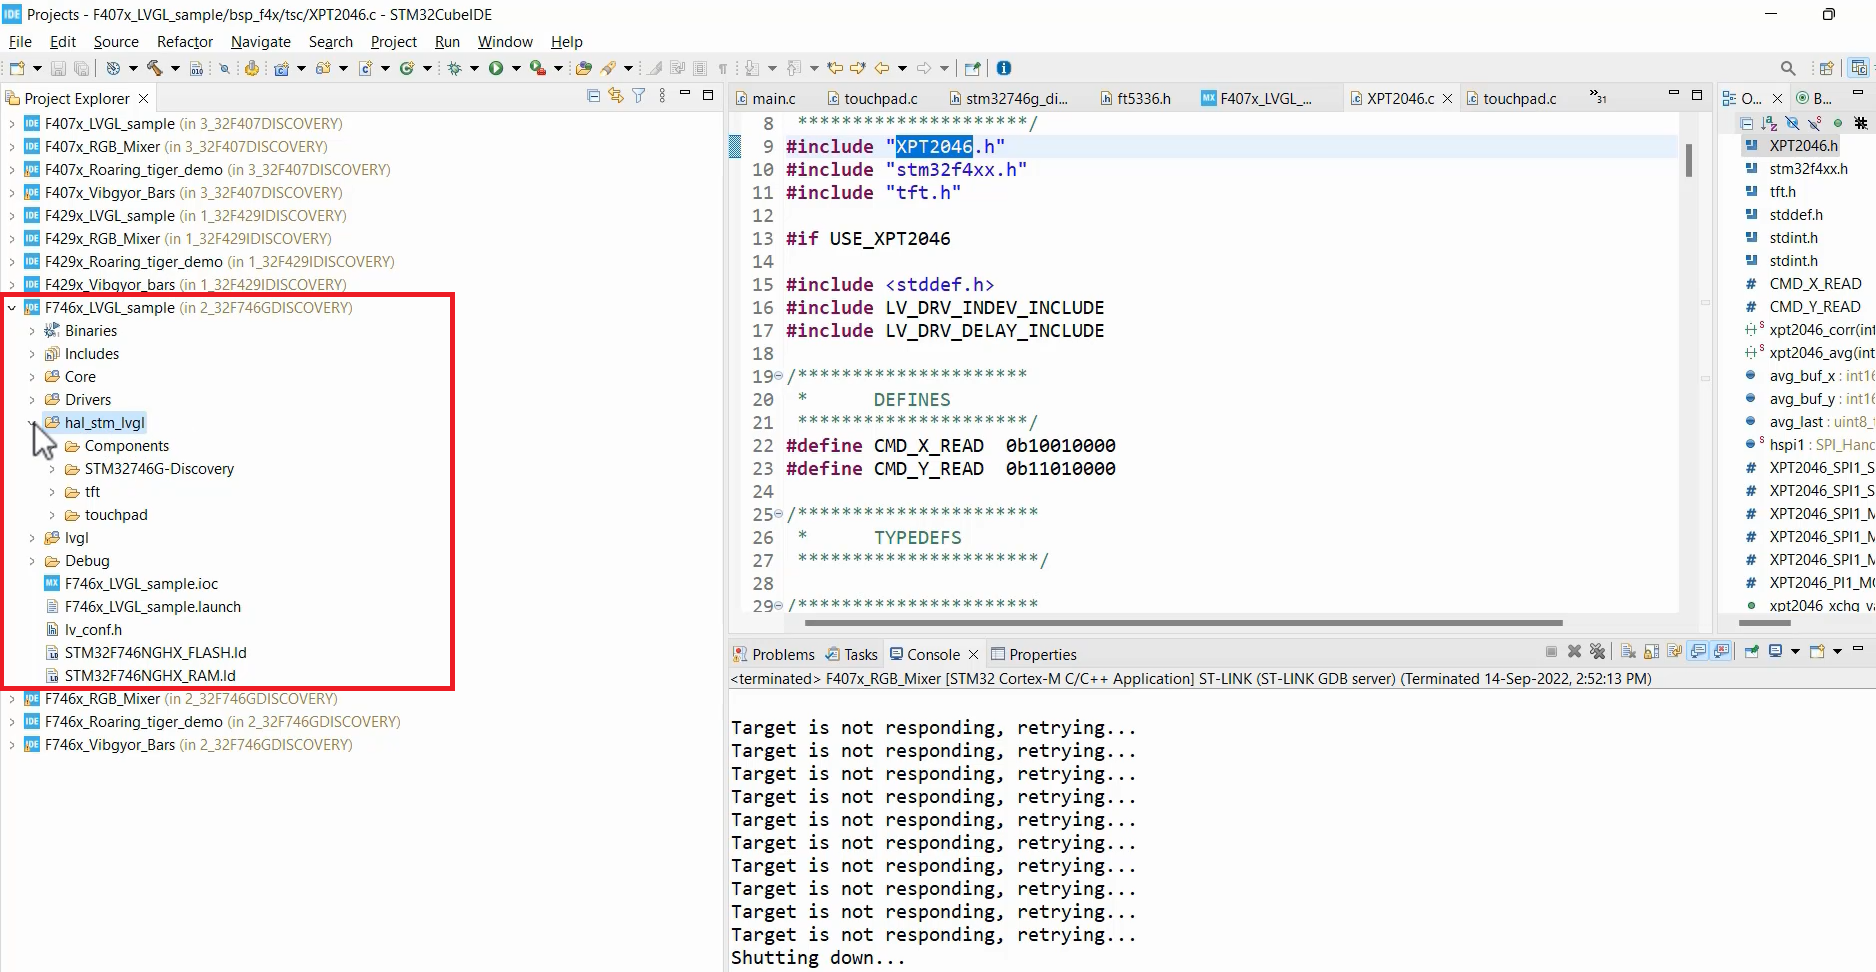
If you are using the STM32F746 Discovery Board, you’ll need to include the “hal_stm_lvgl” BSP folder (board support package folder). This folder should already be available in your repository. Make sure to include it in your project.
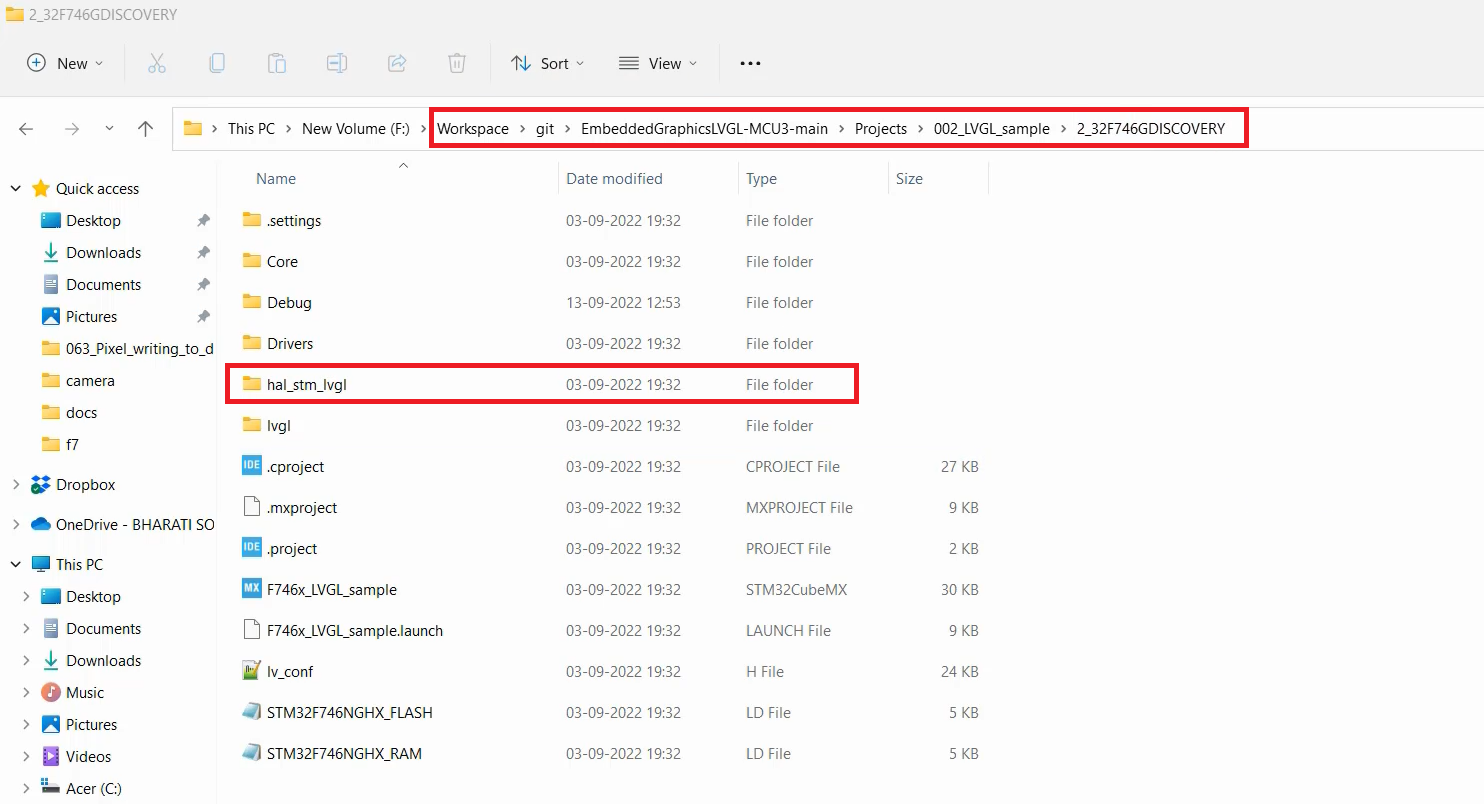
In case you are creating a new project, navigate to the ‘git’ files that you downloaded. Under Projects, go to the F746GDISCOVERY section. Copy the “hal_stm_lvgl” folder(Figure 2) and paste it into your project directory(Figure 3).
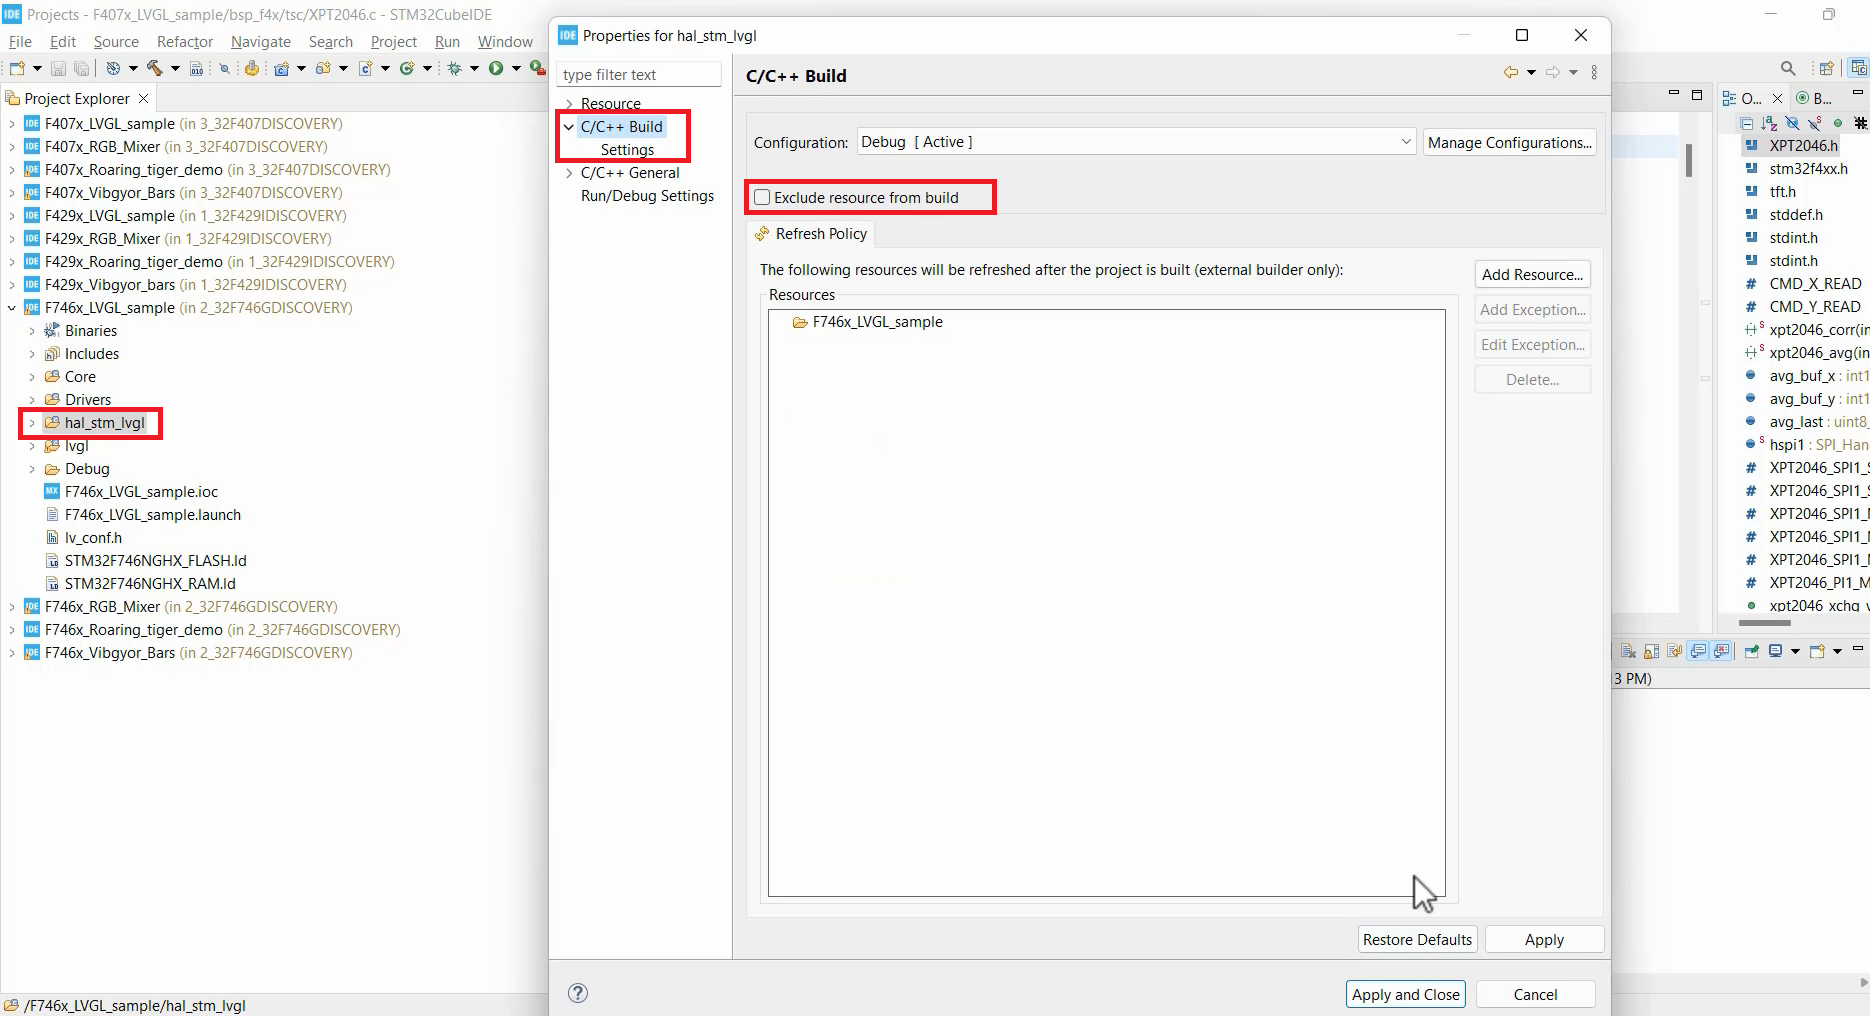
After pasting the “hal_stm_lvgl” folder, make sure it is included for the build.
To do this, go to project properties and find the C/C++ Build settings. In this section, ensure that the “Exclude resource from build” option is unchecked for the “hal_stm_lvgl” folder.
And it contains a couple of folders. I took this hal_stm_lvgl folder from the LVGL repository, and it includes some files provided by STMicroelectronics. Inside this folder, all the files are given by STMicroelectronics and are related to the board support packages for the touchscreen and some general code specific to the Discovery board.
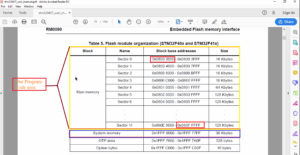
For the components, you will need this particular folder. It contains essential details like HBP (Horizontal Back Porch), VBP (Vertical Back Porch), HSYNC width, and VSYNC width related to the display.
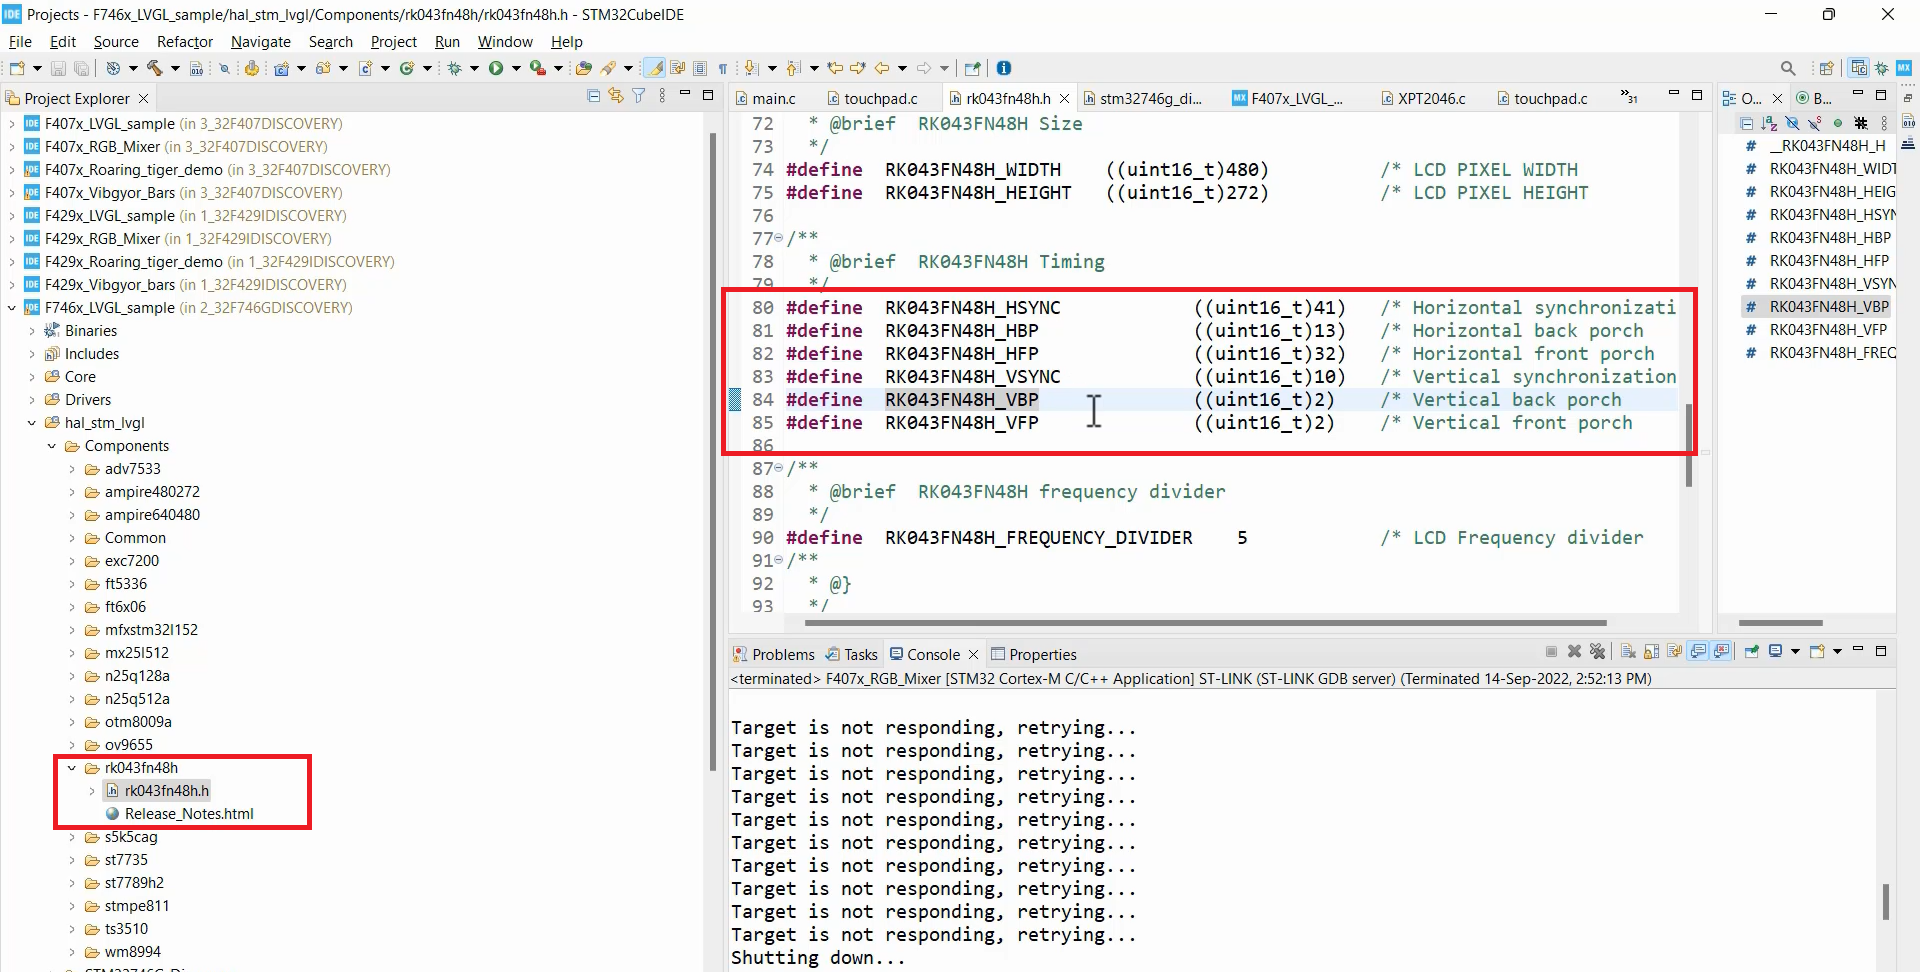
Also, the “ft5336” Components folder is essential. It contains the driver for the capacitive touchscreen controller used on this board. Additionally, there is a “tft.c” file that includes the flush function, and it also has a “touchpad” component. So, it’s crucial to ensure that all these folders are present in the project.
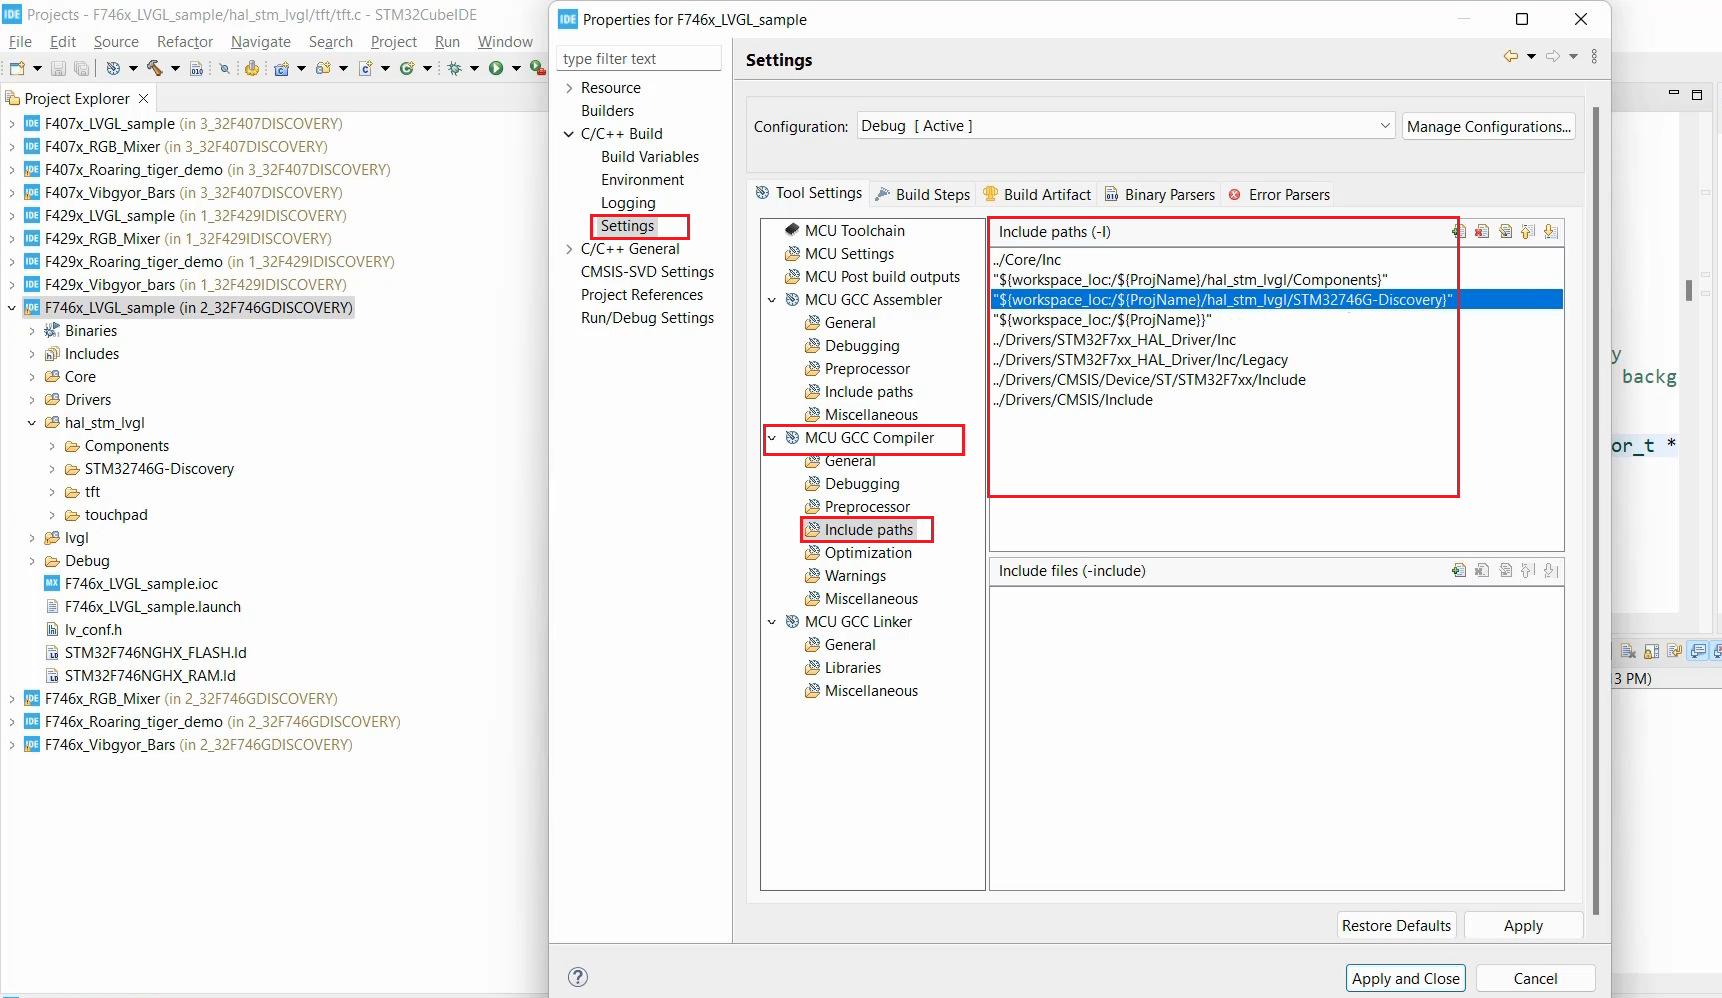
Another important step is to set the include paths correctly.
Go to the Properties of the project and navigate to Settings. Under Settings, access Include paths and make sure to add these entries(Figure 5). One entry should point to the Components folder, and the other should point to the mentioned path. By doing this, your project should compile successfully.
Please note that there are additional steps you need to follow. In Debug mode, click on the .ioc file. These steps involve adding peripherals and using the device configuration tool. When creating a new project, you’ll have access to the device configuration tool. In this tool, you must set the clock configuration for the system clock.
Clock configuration settings
However, you don’t need to perform any clock configuration for the LTDC (LCD TFT Display Controller) separately. The initialization for the LTDC is taken care of by the “tft_init” function itself. If you navigate to the “tft_init” function, it will lead you to “tft.c” where the “LCD_Init” function is responsible for handling the LTDC configuration.
And in the Connectivity, make sure that you enabled the I2C3 peripheral, need not to configure it, you just enable it. Because, I2C3 is used for touchscreen functionality.
Go to the “Multimedia” section and ensure that the LTDC (LCD TFT Display Controller) is enabled. In this case, you should select RGB888(24) bits, because the display type is RGB888, 24 lines are there for the RGB data..
Once this configuration is set, you can run the project on the STM32F746 Discovery Board.
LVGL_sample application on the STM32F407 Discovery Board
Now, let’s discuss running the LVGL_sample application on the STM32F407 Discovery Board, which is connected to an external display.
For this project, you need to use the “bsp_f4x” folder provided.
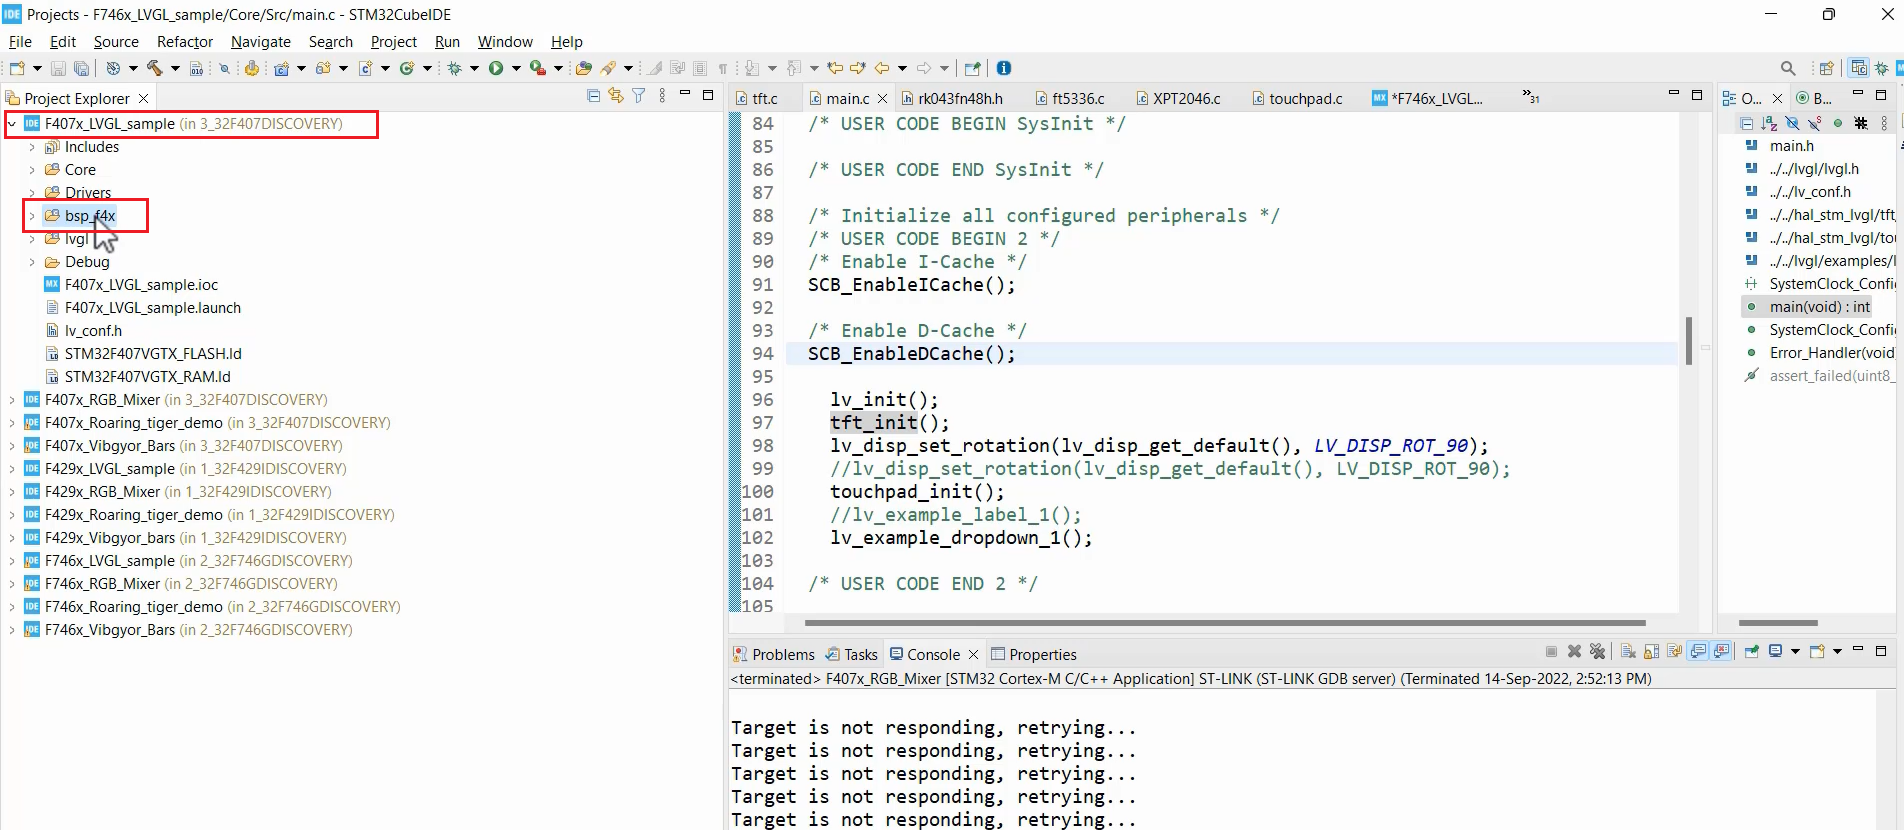
In case you are creating a new project, navigate to the ‘git’ files that you downloaded. Under Projects, go to the 32F407 Discovery section. Here you see the “bsp_f4x” folder (Figure 7).
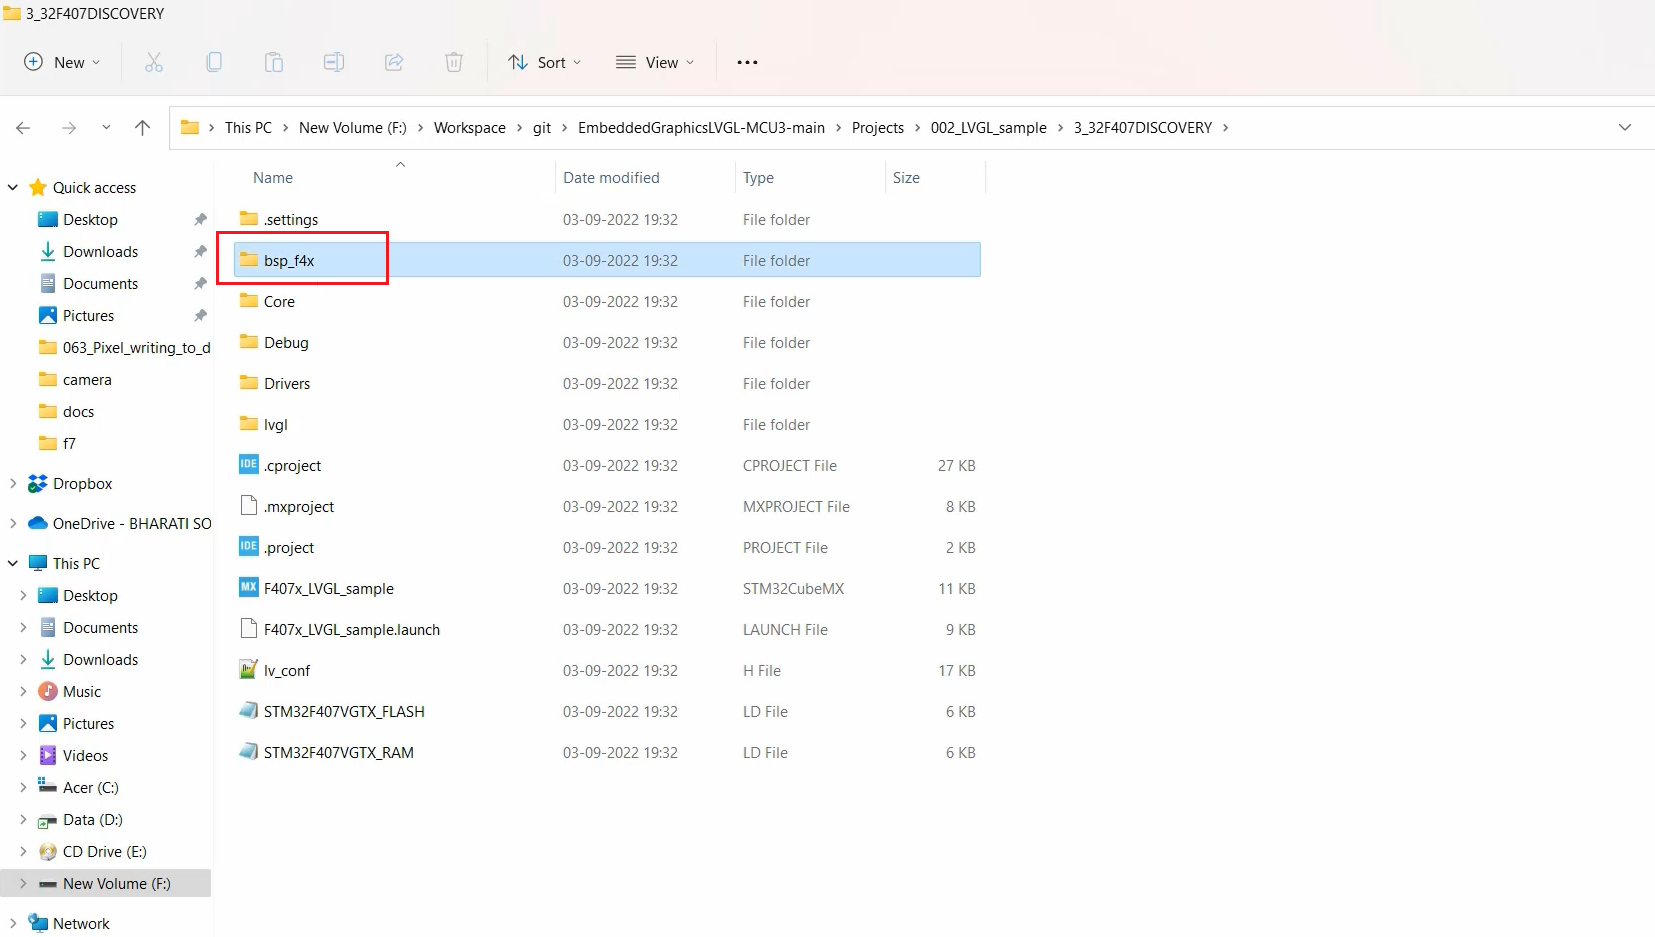
Copy the “bsp_f4x” folder and paste it into your project directory.
The “bsp_f4x” folder has three sub-folders: lcd, lvgl, and tsc. This time you need to enable LVGL and touch screen(tsc) functionalities since they are required.
If you don’t need these functionalities, you can turn them off by going to the project properties.
For this project, you need to configure the Include Path settings. To do this, Right click on the project →Properties→ go to Settings and ensure that the three paths pointing to the three folders are correctly set.
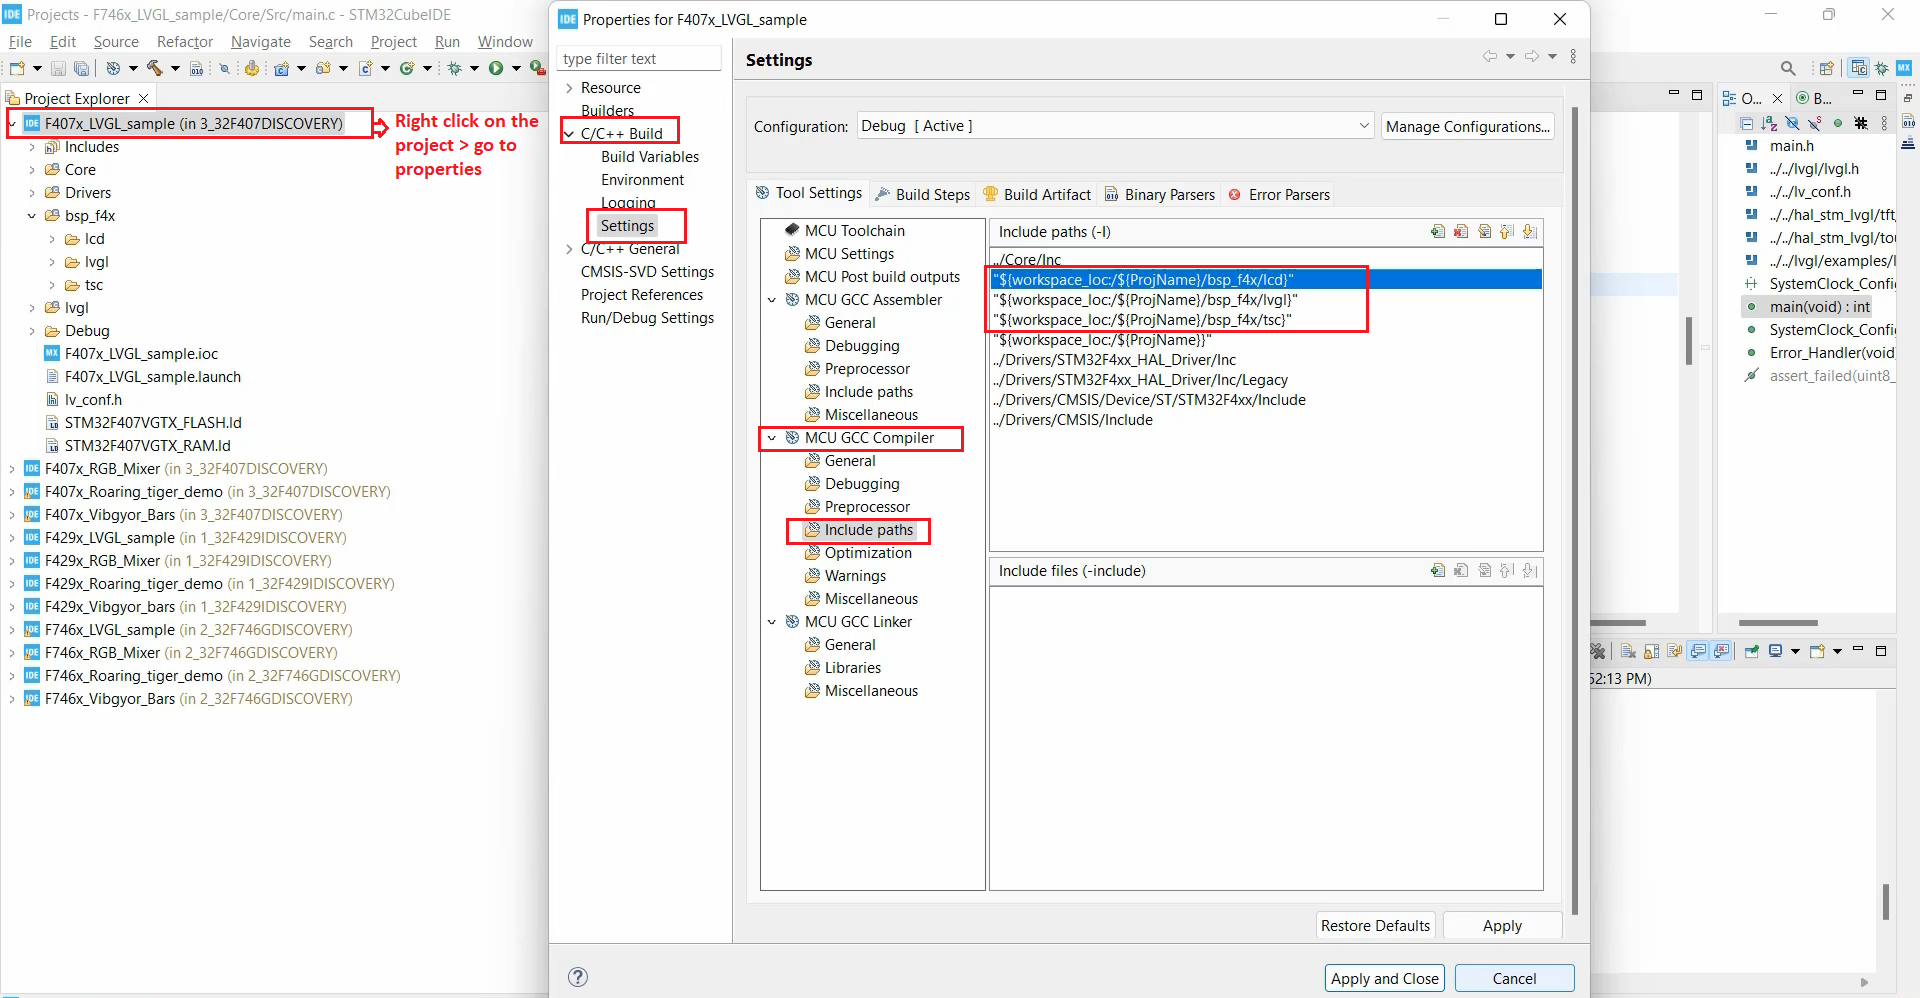
If you are unsure how to do this, click on the ‘+’ sign, go to Workspace, select the project folder, and click OK to add the necessary paths.
With these configurations in place, you should be able to run the LVGL_sample application on the STM32F407 Discovery Board successfully, connected to the external display. If you encounter any issues, refer to the documentation and examples provided by the LVGL library for further assistance.
FastBit Embedded Brain Academy Courses
https://fastbitlab.com/course1