Use of Push Button with BeagleBone Black Using Linux Kernel Interrupts
In this project, it shows how to use a push button with the BeagleBone Black by writing a simple Linux interrupt driver.
It explains step by step how to test the GPIO pin, how to write the driver, and how it responds when the button is pressed. The goal is to help you understand the basics of GPIO, interrupts, and driver development on embedded Linux.
Prerequisites
Before you start, make sure you have:
• BeagleBone Black (BBB) board
• Debian Linux running on the BeagleBone Black
• Kernel headers installed on your BBB
• Push button, Resistor (1kΩ) and jumper wires
• Basic knowledge of C programming
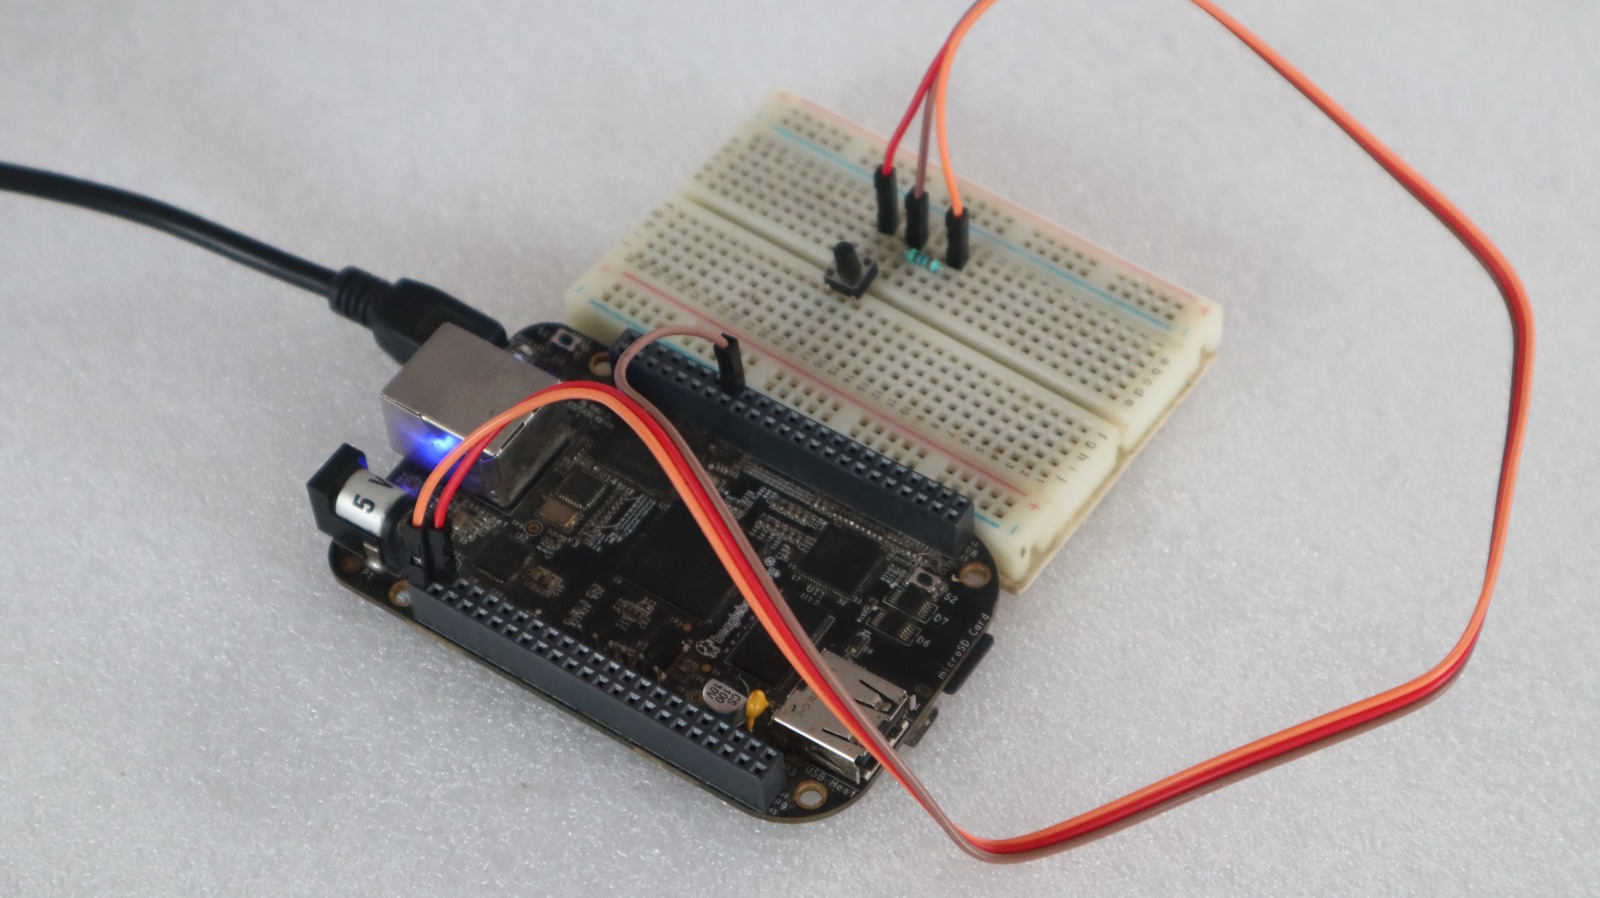
Hardware Setup
• Connect one side of the push button to P8_16 (this is GPIO46).
• Connect the other side of the push button to 3.3V.
• Put a 1kΩ resistor from P8_16 to GND (pull-down).
Steps To Run Project
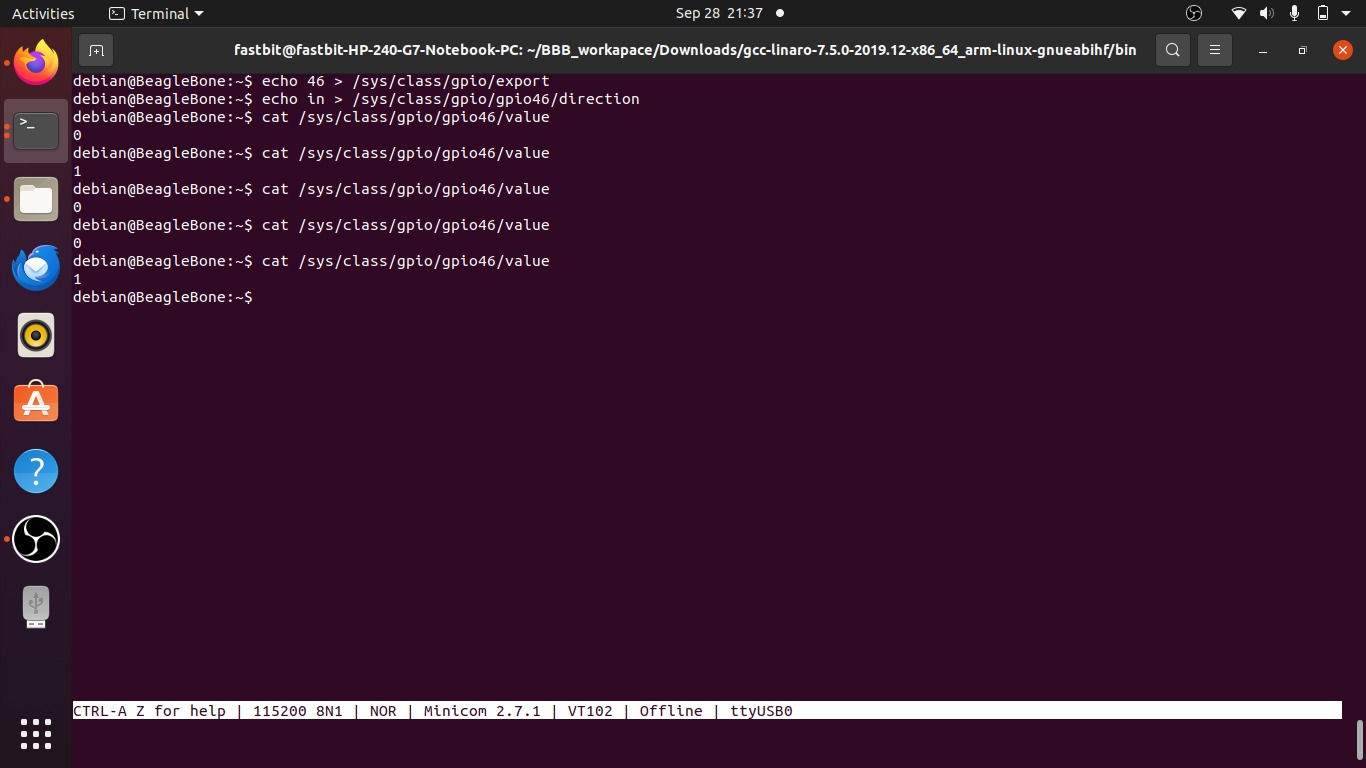
Step 1: Verify GPIO in sysfs
Before writing a kernel driver, it’s important to test the GPIO pin manually using the sysfs interface.
This ensures your button is correctly connected and the pin is functional.
• Export the GPIO pin using command:
echo 46 > /sys/class/gpio/export
• Set the GPIO as input using command:
echo in > /sys/class/gpio/gpio46/direction
• Read the GPIO value using command:
cat /sys/class/gpio/gpio46/value
• Test the button
Press and release the button while running the cat command repeatedly. We should see the value change between 0 (LOW) and 1 (HIGH), confirming that the GPIO pin is working correctly
Step 2: Creating Linux Driver Project
On the host machine, create a project folder and add two files: main.c and Makefile. You can copy the driver code and Makefile content from ours Drive .
Step 3: Core Driver Implementation
The key components of the Linux driver are shown below, along with how it initializes, uses a counter to handle button presses, and cleans up.
➢ Driver Registration
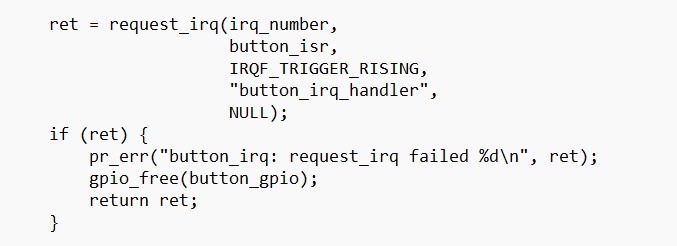
This part is where the driver registers with the kernel to handle interrupts for the GPIO pin.
“request_irq” tells the kernel to call this function (button_isr) whenever the IRQ happens. The “IRQF_TRIGGER_RISING” makes sure the handler triggers when the button goes from LOW to HIGH. If registration fails, the driver releases the GPIO and returns an error.
➢ Interrupt Service Routine (ISR) with Button Press Count
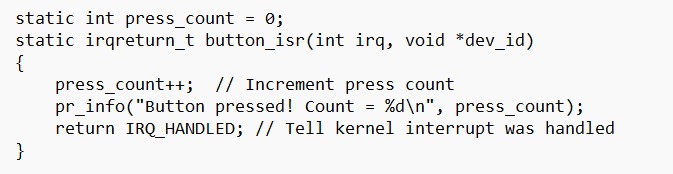
This function is called every time the button is pressed. It increments a counter to keep track of how many times the button was pressed and prints the count in the kernel log. Returning IRQ_HANDLED tells the kernel that the interrupt was successfully handled.
➢ Initialization Function (button_init)

The initialization function runs when the driver is first loaded. In this step, the driver starts by showing a log message that it is being set up. It then checks if the GPIO number we are using is valid. After that, it requests control of the GPIO pin so no other program can use it. Once the pin is reserved, it is set as an input because we are connecting a button to it. The driver then changes the GPIO pin number into an IRQ number, which allows it to work with interrupts.
Finally, it registers the interrupt handler so that whenever the button is pressed (going from LOW to HIGH), the handler will run.
➢ Exit / Cleanup Function
When you remove the driver using rmmod, this function cleans up and freeing interrupt and freeing the GPIO, so system stays clean.

Step 4: Build the Kernel Module
• To build the module on the host machine, simply run make. This will generate main.ko (kernel
module file).
• To clean the build artifacts, simply run make clean.
Step 5: Build and Run on Target (BeagleBone Black)
- Create folder on Target.
- In Host Transfer the main.ko file to the Target: scp main.ko debian@:/home/debian/
- In the BBB Insert the module on the BBB: sudo insmod main.ko .
- Now you can see in the screen that Button is pressed when you press the button
- To remove the module: sudo rmmod main.ko.