Importing projects into STM32CubeIDE workspace
In the previous article, we installed STM32CubeIDE. And in this article, let’s download all the source codes and import all the projects into the STM32CubeIDE.
This is a very important step; I would suggest you follow this.
First, create a folder called Embedded C. In your machine, you can create it anywhere you prefer. And in that Embedded C folder, create three more folders.
- Instructor: Here you are going to save the source codes given by the Instructor.
- My_workspace: Where you are going to develop your applications as you make progress in this article.
- Downloads: Where you are going to keep all the downloaded files or whatever you download software or whatever you download from the web, you keep that in downloads.
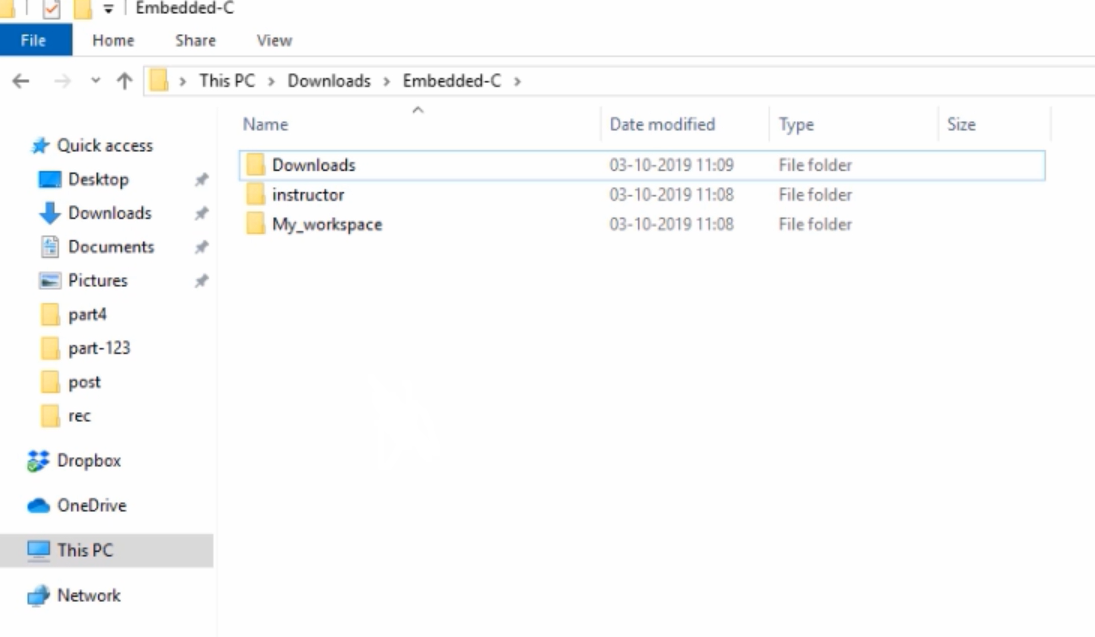
After that, you go inside the instructor folder and create two more empty folders called ‘host’ and ‘target.’ The reason for this is that we are going to keep all the projects which we write for our host machine, we are going to keep in the host folder. And whatever the projects we are going to write for our Embedded target, we will keep them in the target folder. So, create two more folders, ‘host’ and ‘target.’
You should create the same folders under My_workspace also.
After that, you have to launch your STM32CubeIDE. Let’s launch it.
Here you can see that(Figure 2) it asks you to select a directory as workspace.
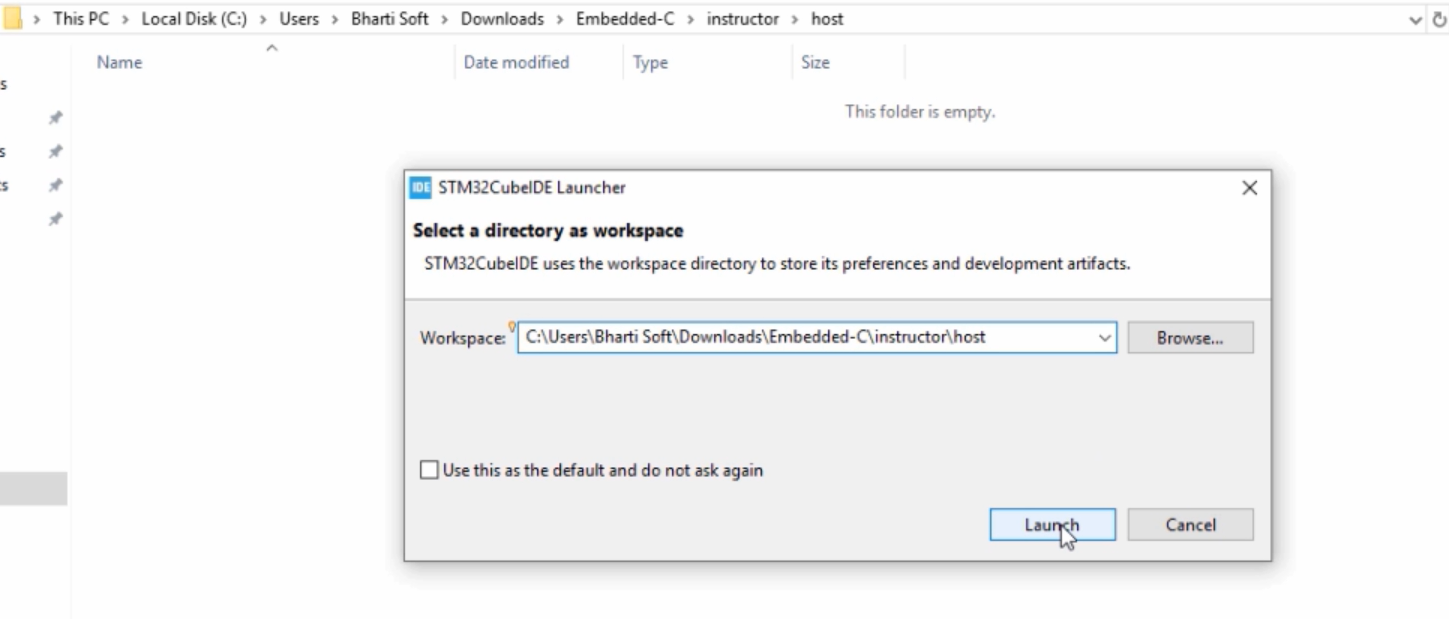
So, what you have to do is, you have to go to your Embedded-C folder, go inside the instructor, go inside the host, and select the path, as shown in Figure 3.
Then come to STM32CubeIDE Launcher and paste that path. And click on Launch.

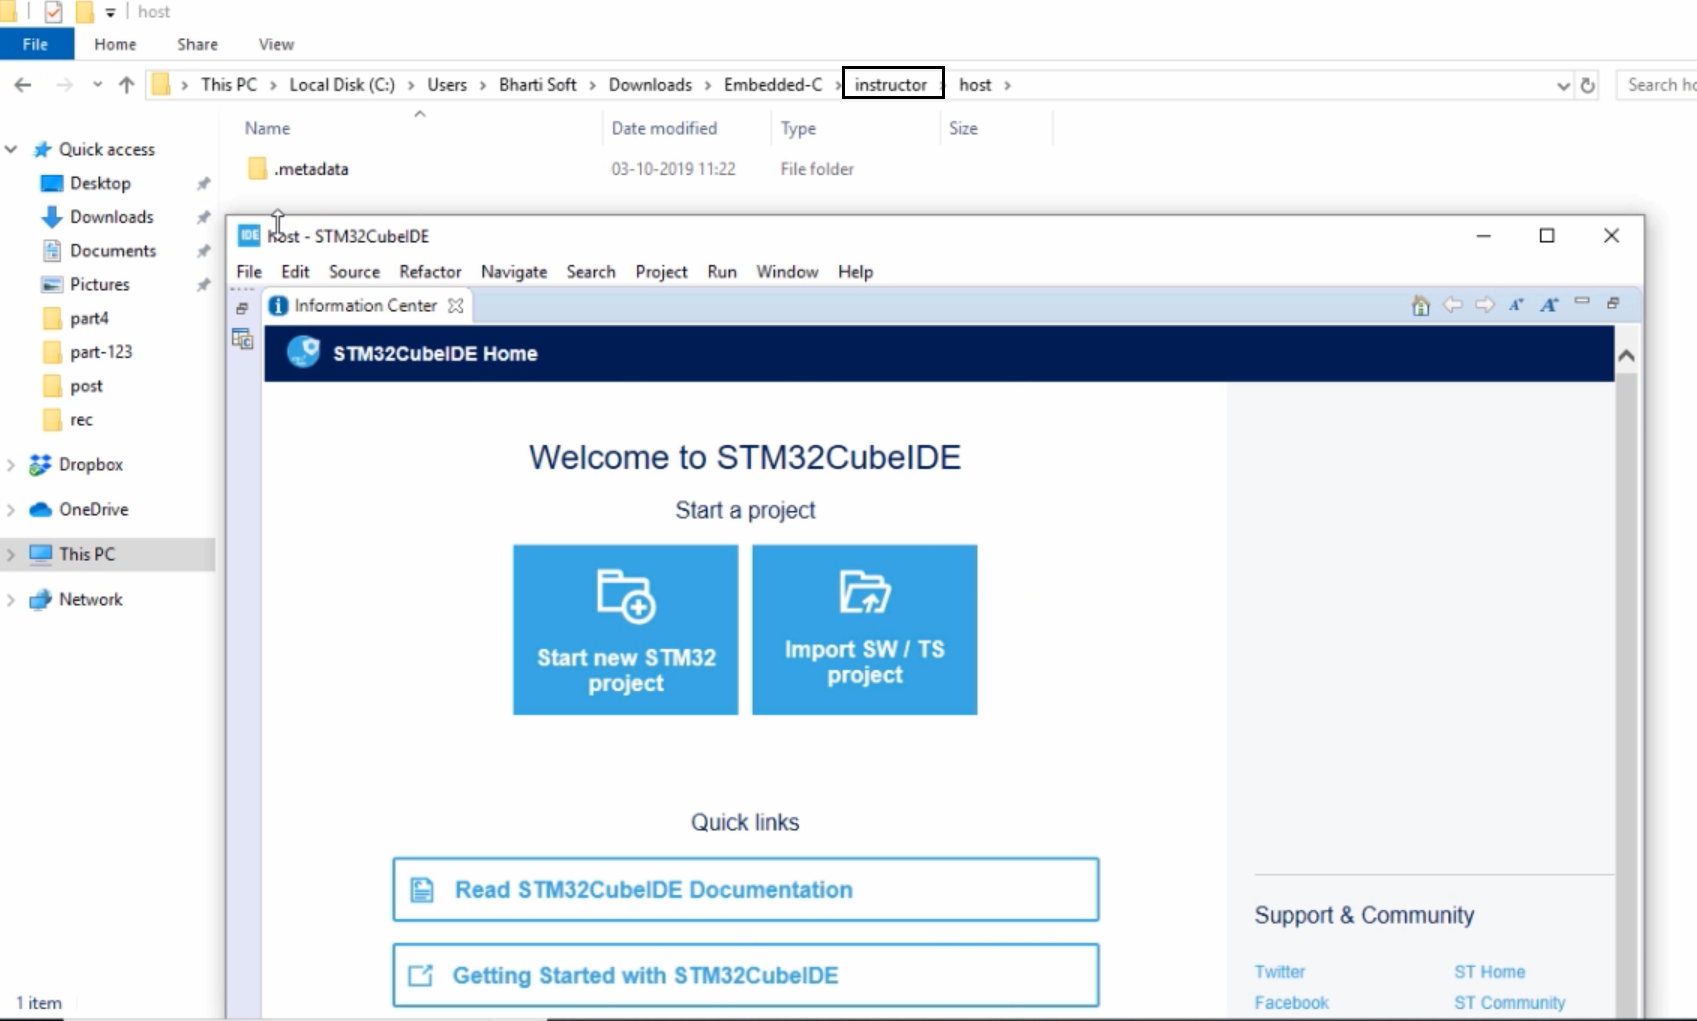
Now you created an eclipse workspace called Host, which is under an instructor. Here, you will keep all the projects that the instructor writes for the Host.
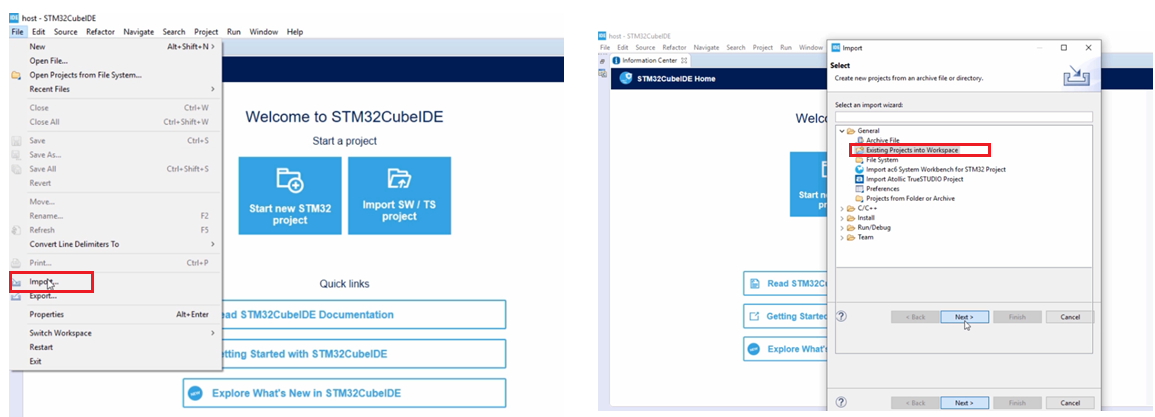
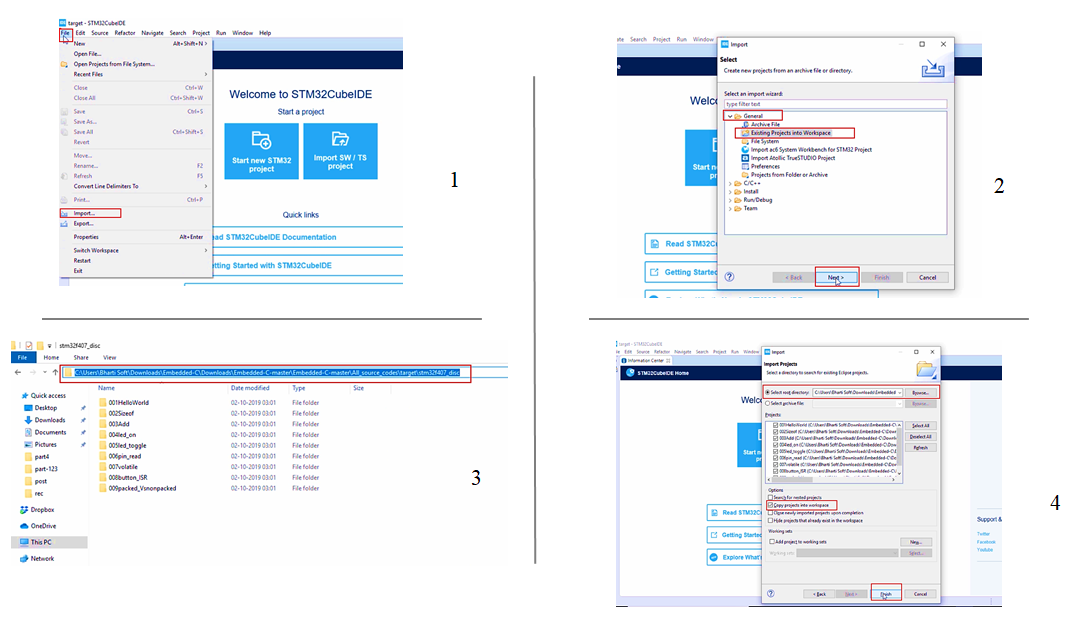
You go to file and click on Import. Then, go to General, and here go to Existing Projects into Workspace. Click Next, as shown in Figure 5.
Here you have to select the root directory.
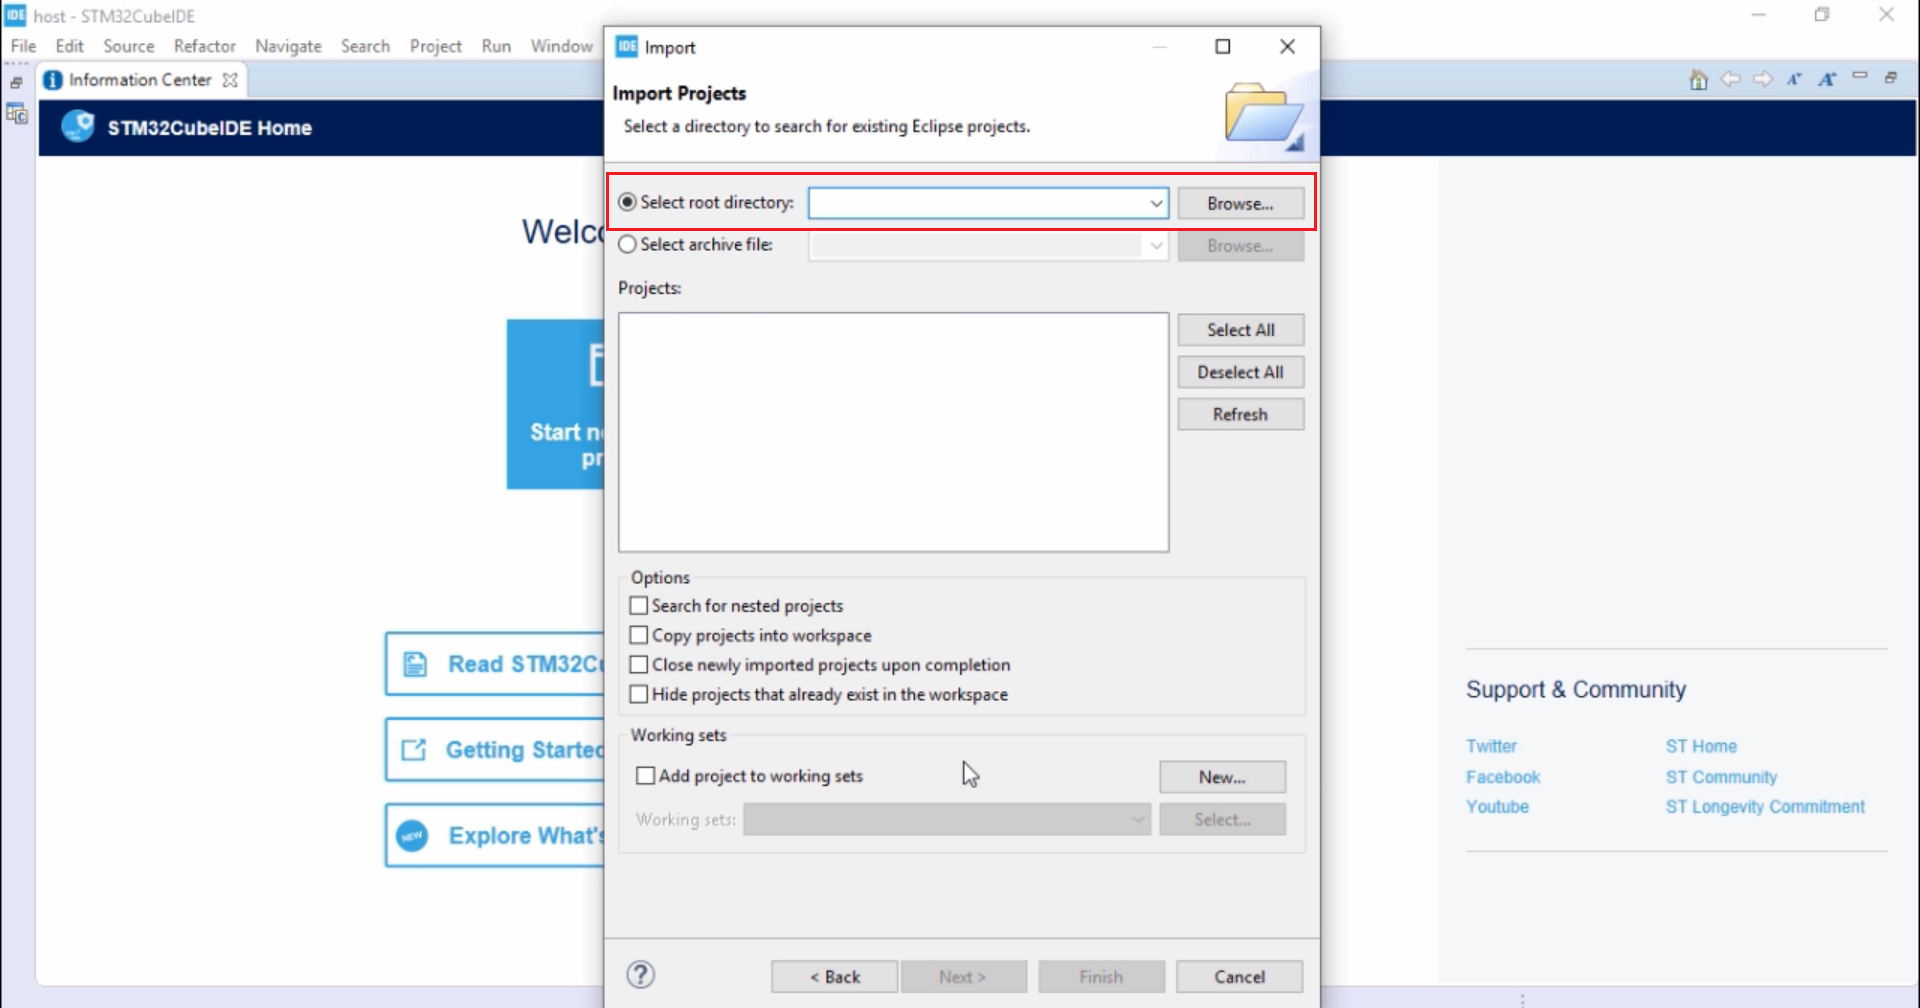
For that, go to the Embedded-C folder → downloads → go to Embedded-C-master → All_source_codes → host. You copy that root directory path.(Figure 7).

After that, we paste that path and then click Browse, as shown in Figure 8. It will automatically select all the projects. And also you Click this option ‘Copy projects into workspace,’ and then click on Finish.
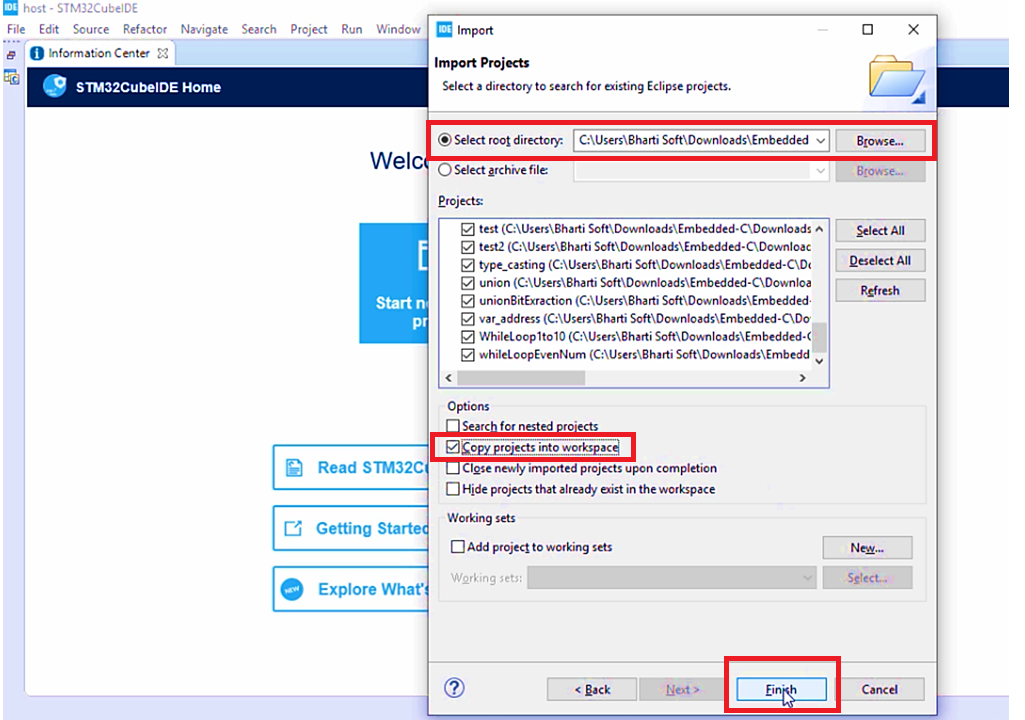
After that, click on the Restore Icon.
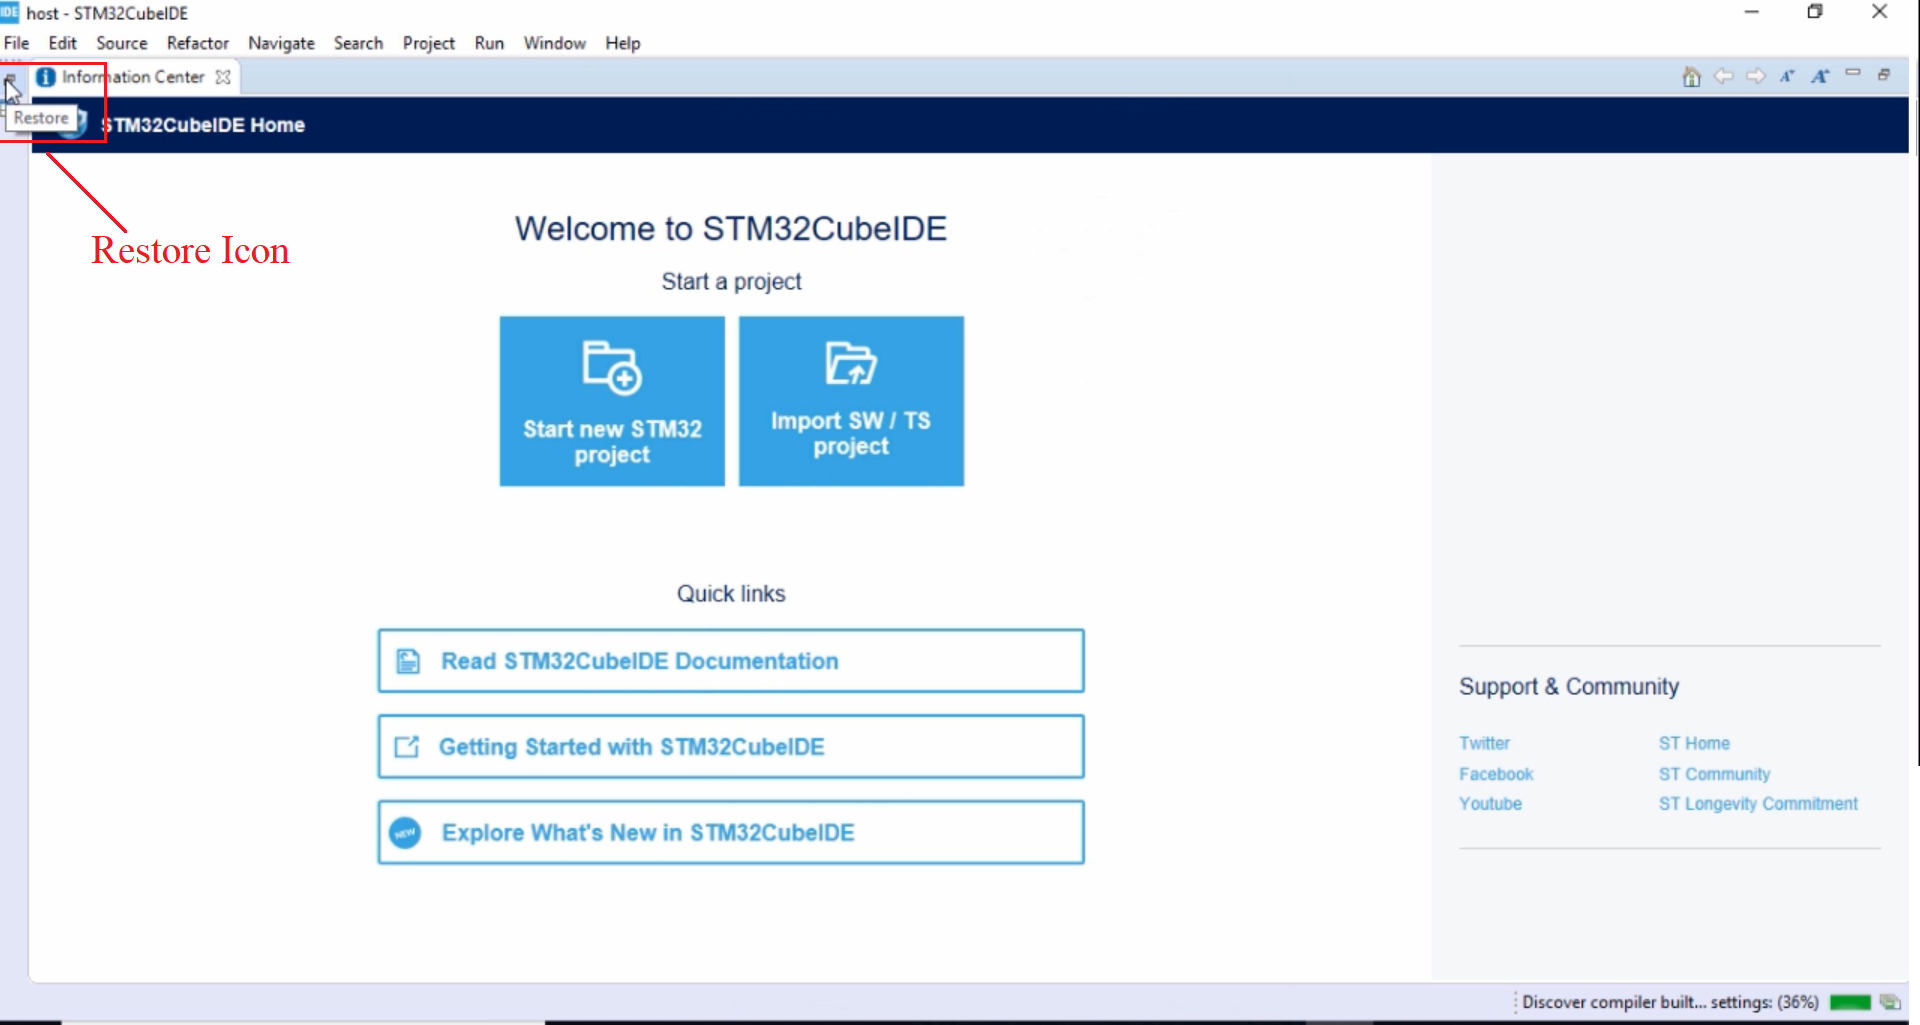
We can see that all the instructor projects are imported into your local machine.
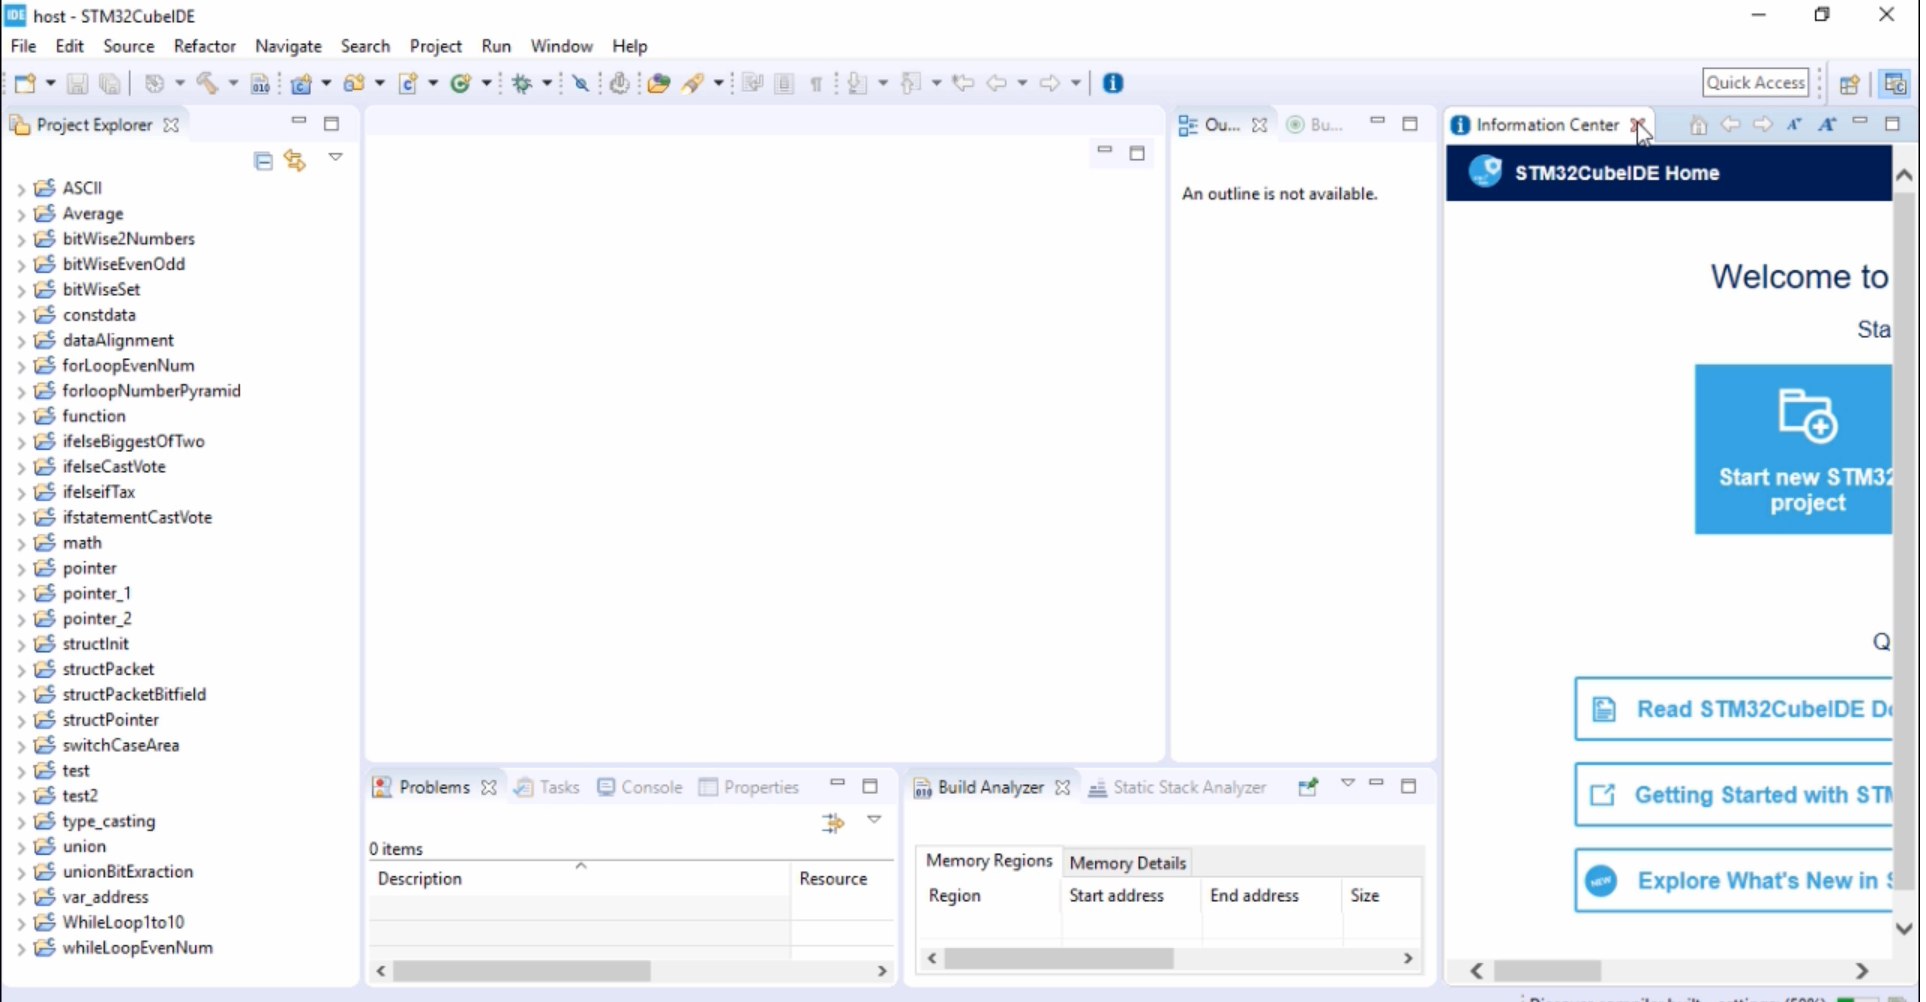
Here, you can close the information center and also close the Build Analyzer, and close that Static_stack, so you can close everything.
If you see Red cross marks for all the projects, then don’t worry. That means some path settings are missing. So, you can do like this. Go to windows and go to preferences (shown in Figure 11).
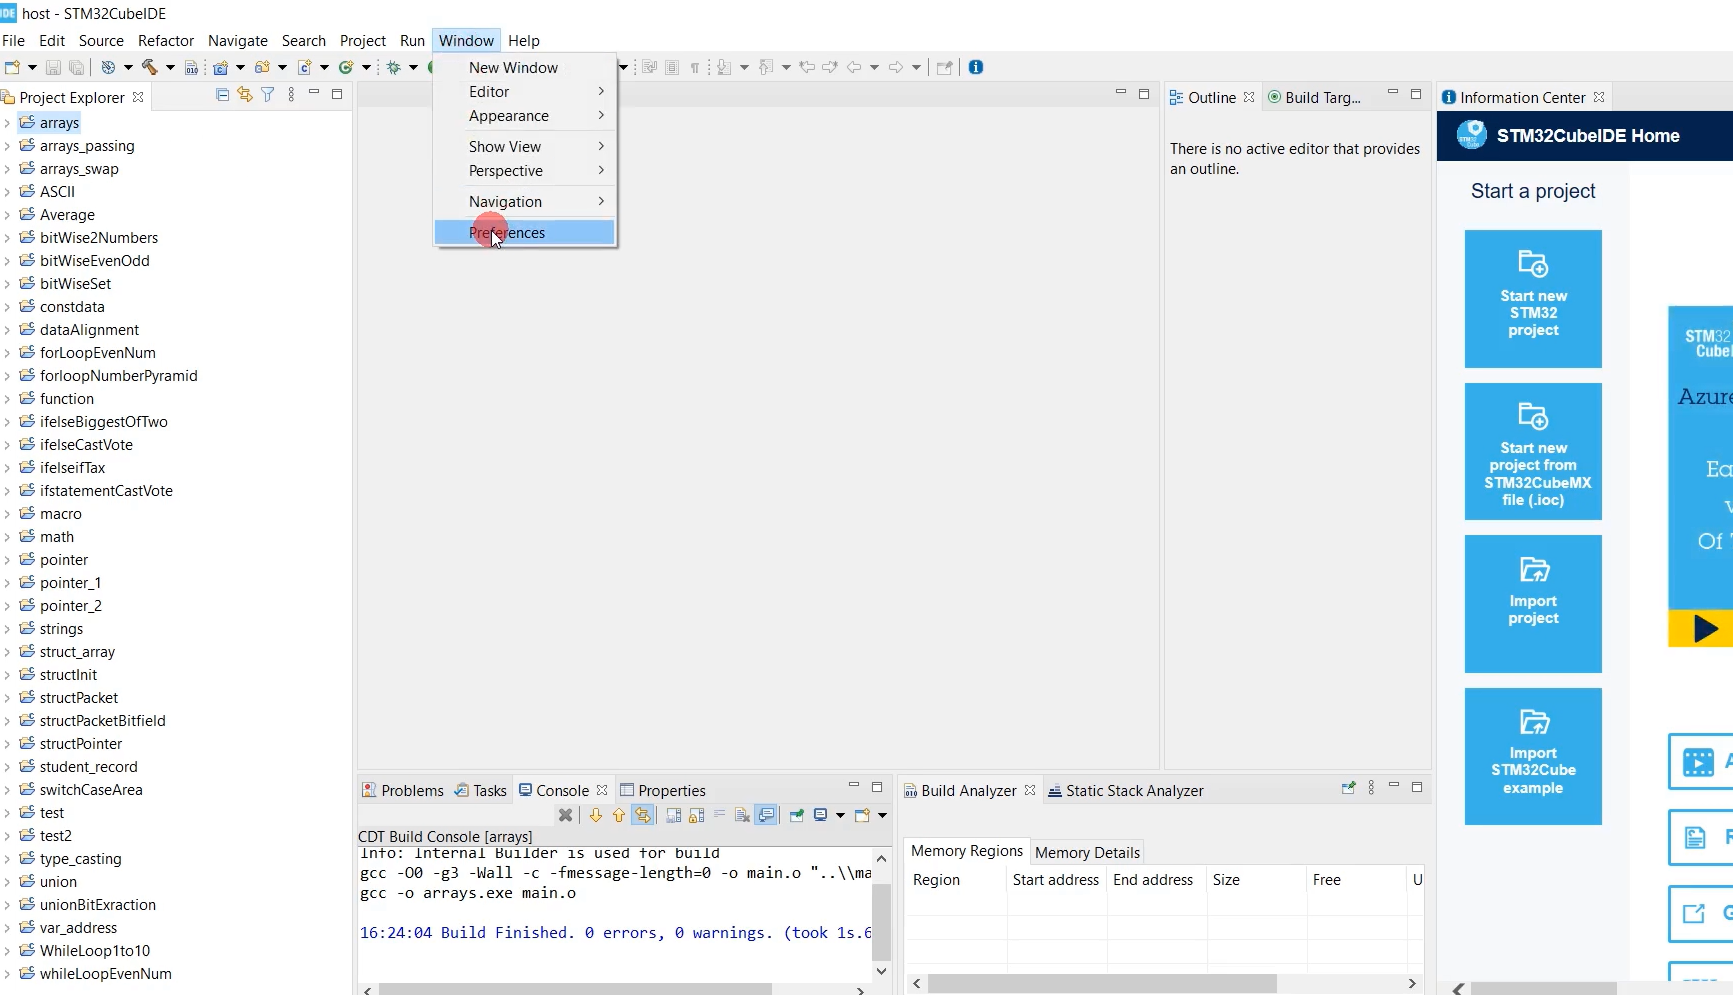
This is only if you see Red cross marks for all the projects. Otherwise, you need not do it. You can directly compile.
For example, I can select this array_passing project, right-click, and build the project.
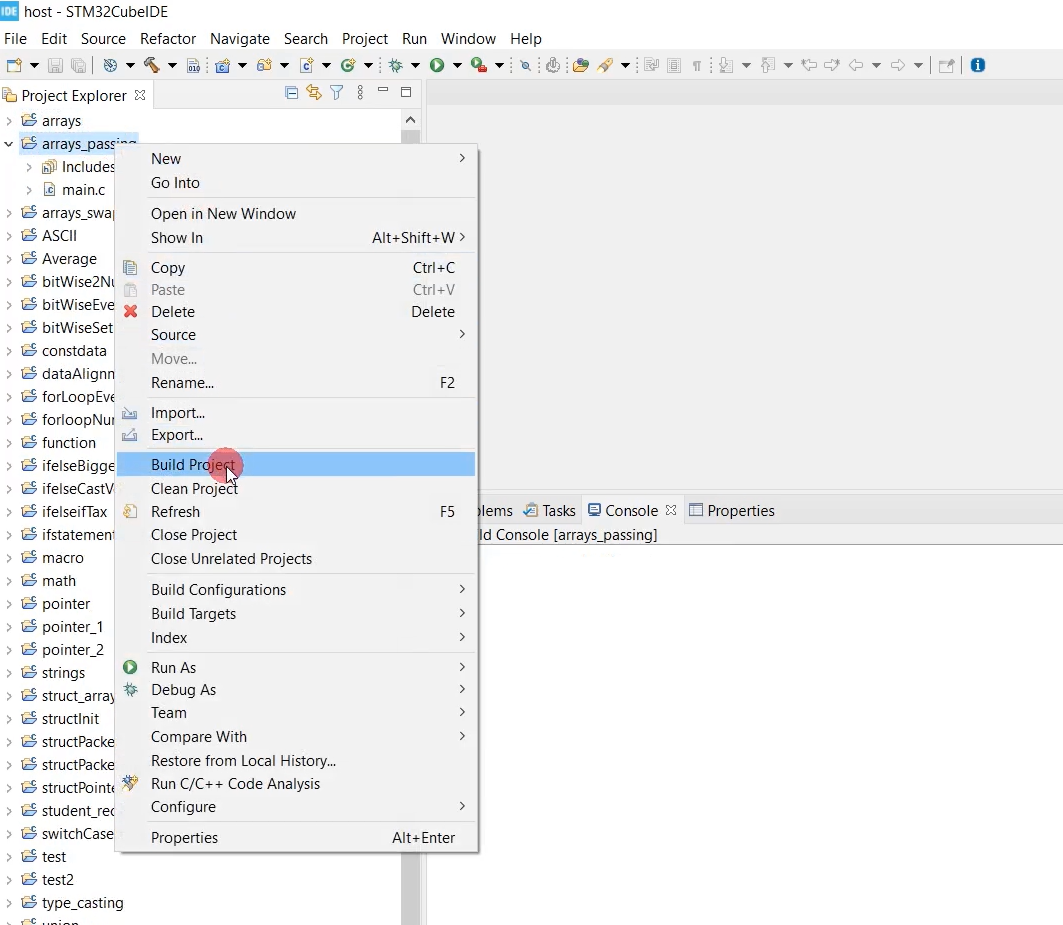
You can see that the project has been built.
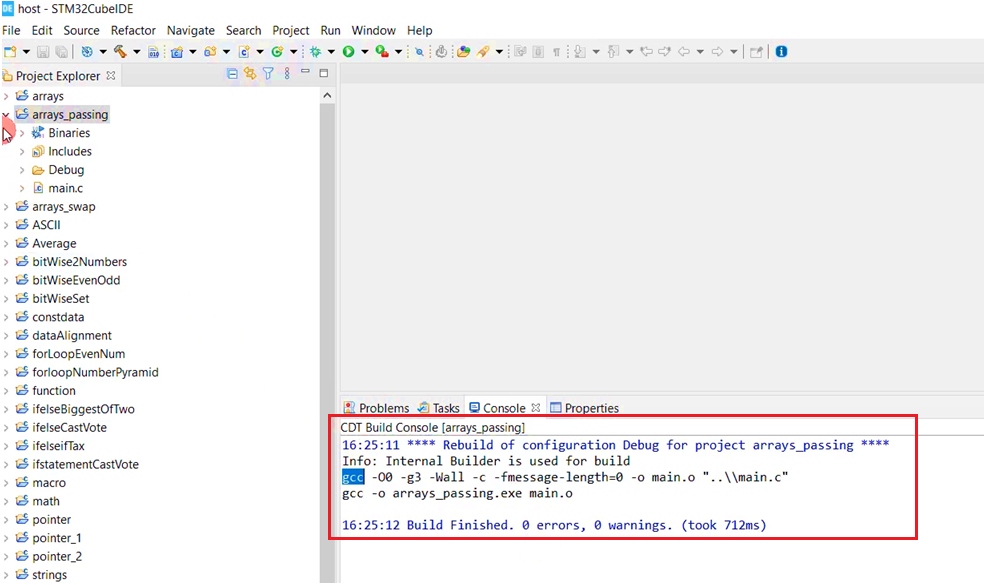
You can see that the ‘gcc’ compiler is invoked, and the project is compiled successfully.
Sometimes you may see the Red cross marks for all the projects, and it may say ‘gcc’ is unrecognized.
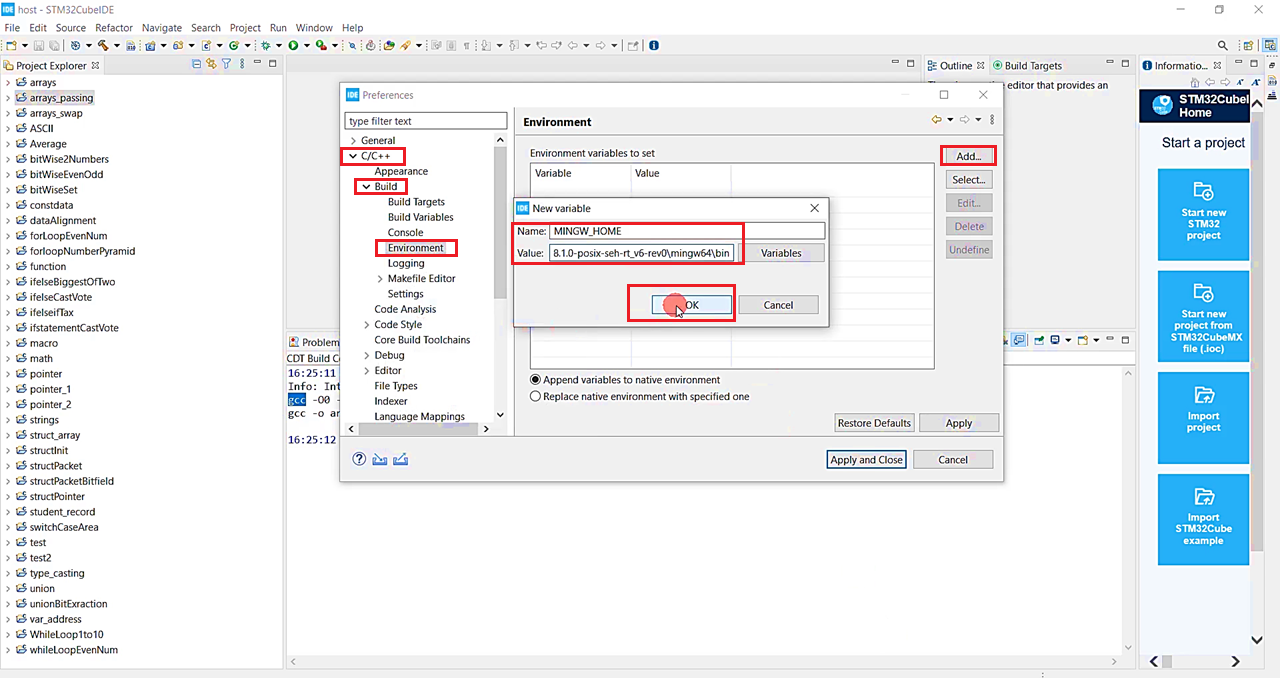
Then you can go to Windows→ Preferences(Figure 11). Expand this C/C++, and go to Build, Environment (Figure 14).
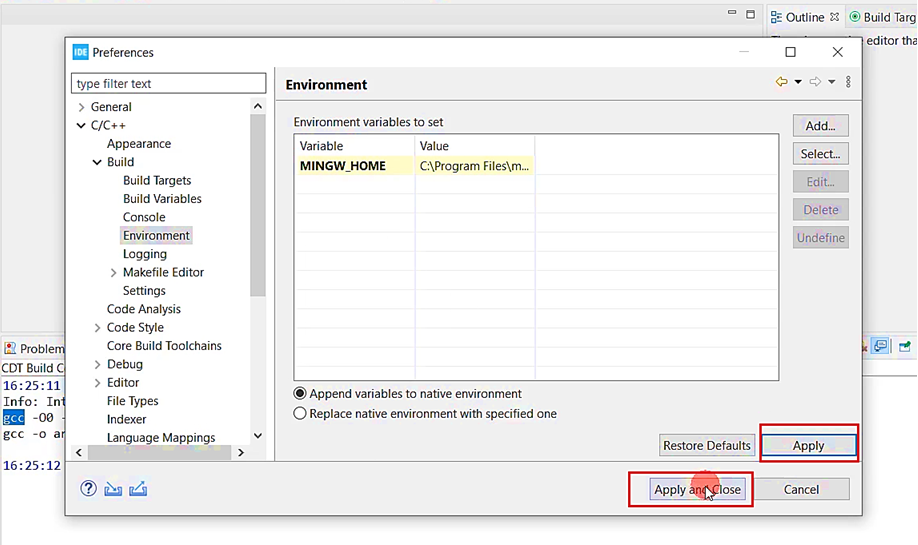
And here, you have to add one variable; the variable name is MINGW_HOME. And the value is the path where the MinGW binaries are present. You have to copy that path and paste it into the value field.
And click Apply, Apply and Close.
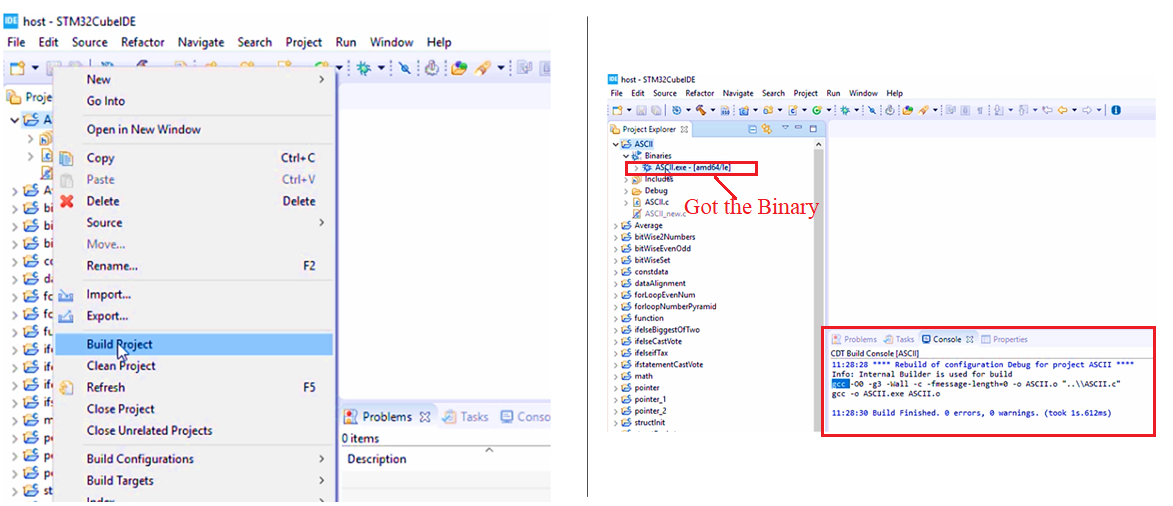
Let’s take the first project, ASCII. Right-click on that project and try to build that project. So, this is called compiling.
Check the console here. So, you can see that it builds successfully. The ‘gcc’ is invoked, the project has been built successfully, and you got the binary. So, you should not get any errors here.
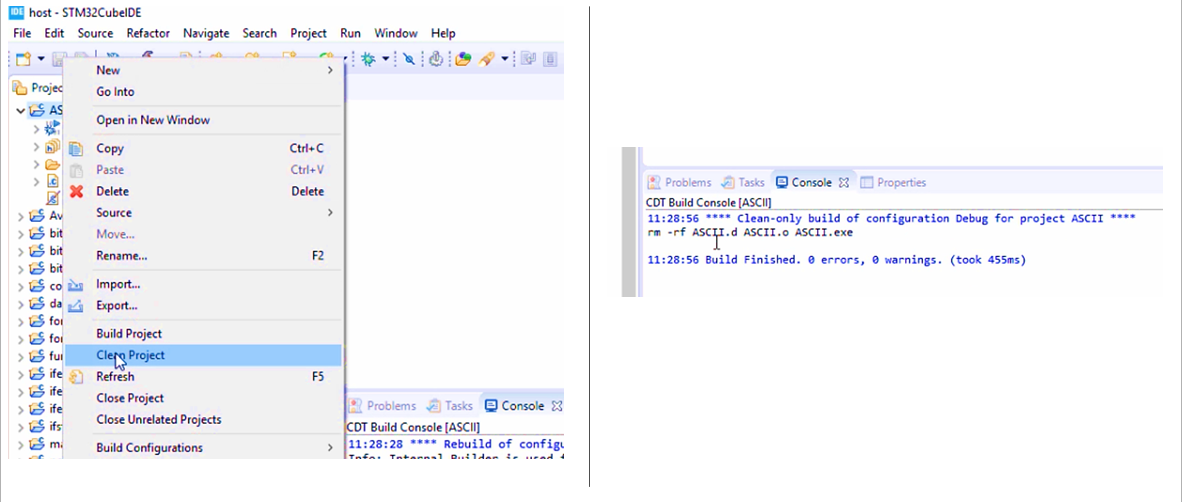
If you want to clean this project, click on Clean Project. It should clean up your project. That means the binary which is generated got deleted. At least these two activities you should be able to do.
Now you imported all the host projects written by the instructor of this article. Now, let’s import all the Embedded target projects written by the instructor.
For that, go to file, go to Switch Workspace, and click on Other option. Here, instead of the host, you mention the target.
Or you can go to your Embedded-C folder, and there you go inside the instructor, go under the target, copy that target path and go to your eclipse and paste that path. Click on Launch.
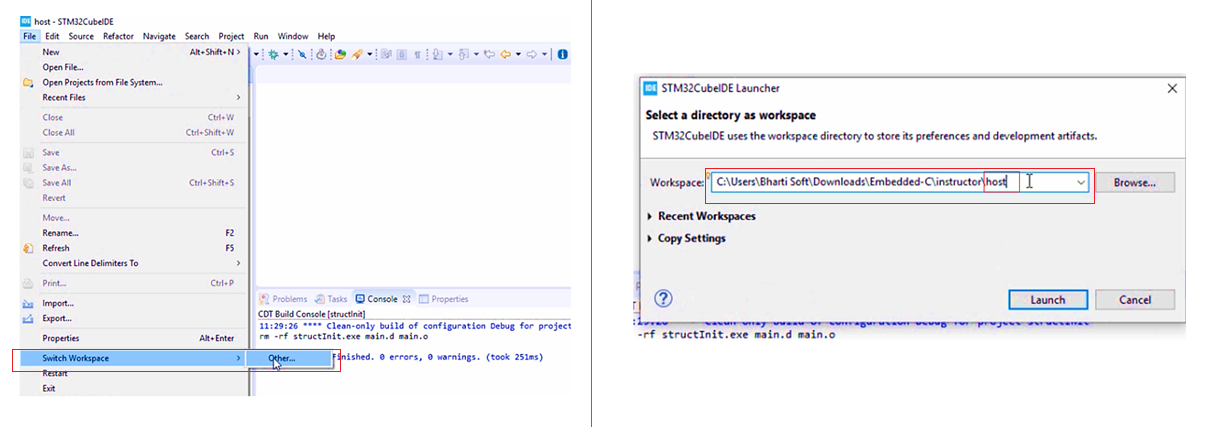
Figure 19 shows the new workspace of Target, where we are going to keep all the projects of the Embedded target.
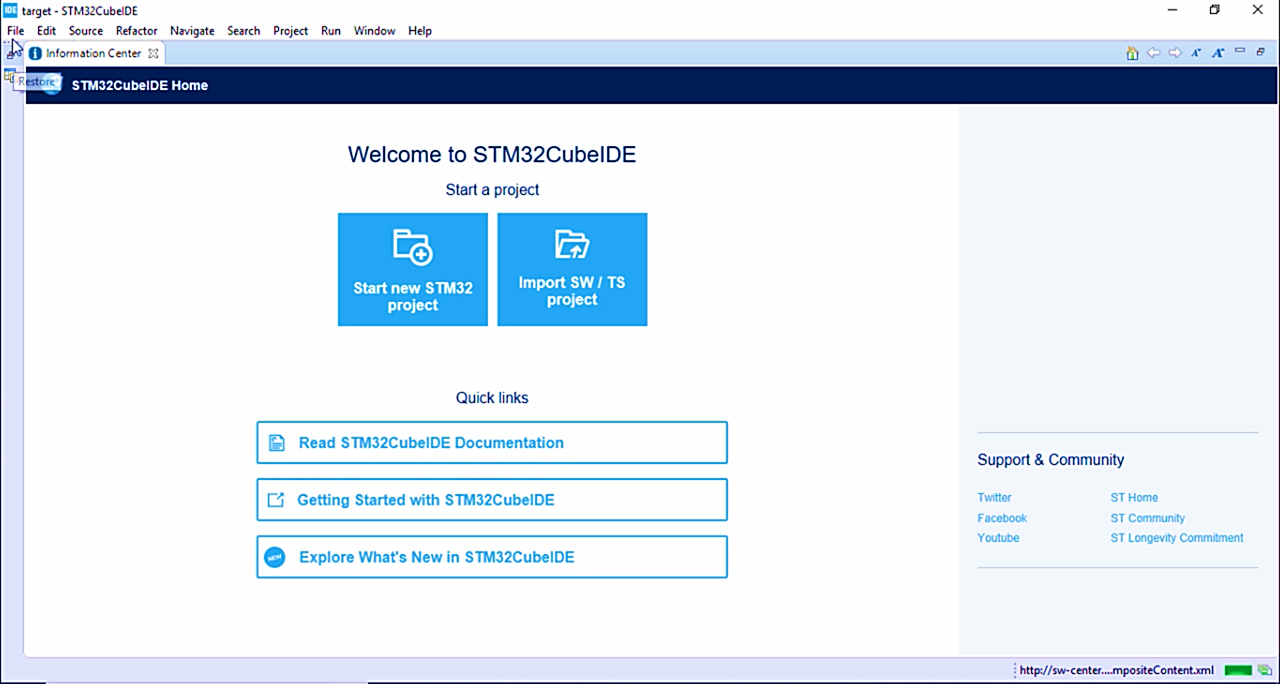
Again the same procedure.
- Go to File and Click on Import.
- General→ Existing projects→ click Next. Paste the root directory path of the target.
- Or go to Downloads, Embedded-C-master, All_source_codes, go-to target, and go to stm32f407_disc. Copy the path.
- And then go to Eclipse and paste that path and click on Browse. And click on Copy projects into workspace option and then Finish.
And then click on Restore, and then close the information center, close the Build analyzer.
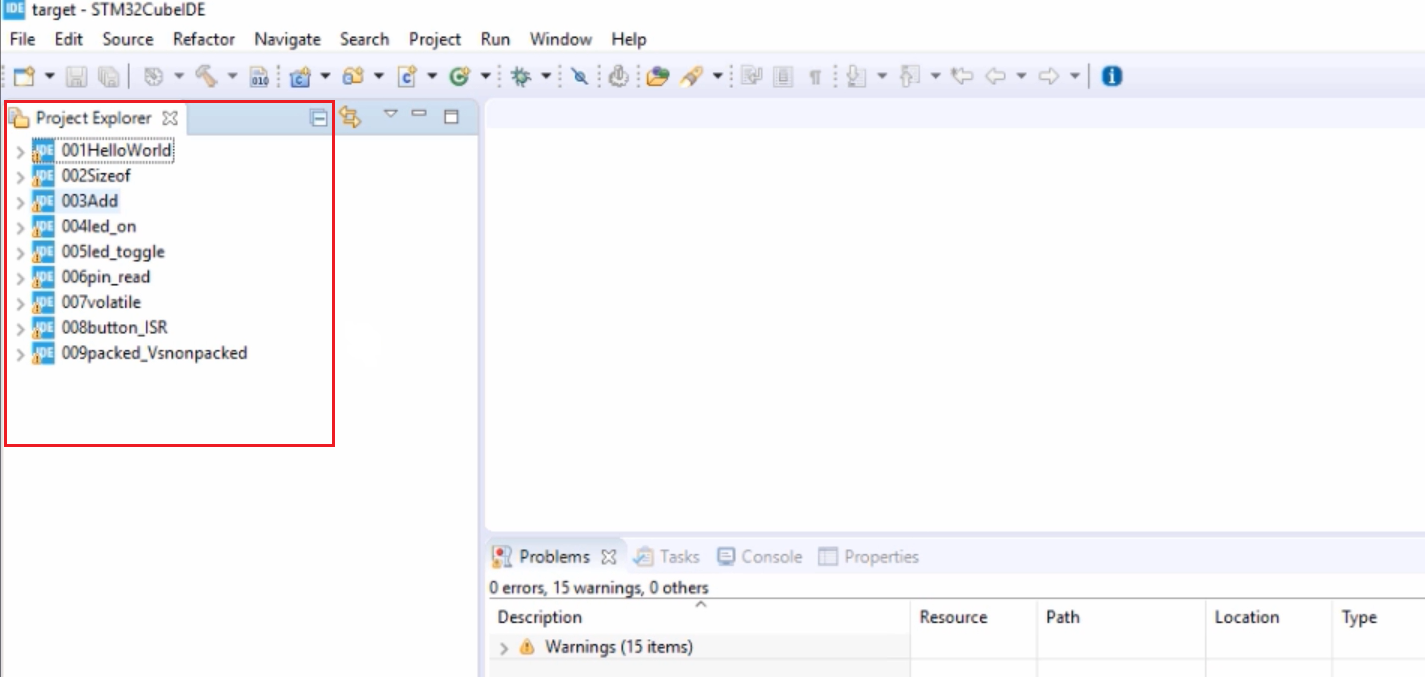
Here we can see that these are the projects written for the Embedded target, as shown in Figure 21. There are more projects to come, so for I have just uploaded these projects into the repository.
Let’s try compiling. Now let’s select one project and then right-click on that and click on Build.
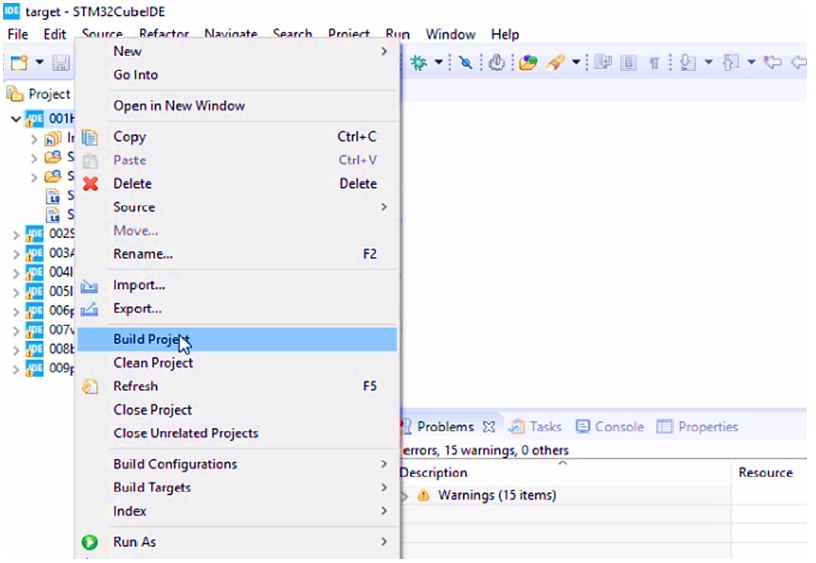
And go to the console here. And here, the project is cross-compiled. Now the compiler invoked is arm-none-eabi-gcc, so that’s a cross compiler. Now the code is built for the target. Don’t worry about all these things you will learn when creating the project.

The build was successful, and now try to clean that—Right-click on the project and select Clean project. You see, the console, the clean was also successful. ( Figure 24) . The binary got deleted.

You just imported all the projects created by the instructor. So, now the instructor folder has all host projects and target projects. Do not change any code in the instructor folder because it is given by the instructor. This is for your reference. If you have any issues while working on the project, then you can come back to this folder and check the code or launch the workspace and build the code. But do not try to change the projects.
You create your own project in the My_workspace folder. So, here you create the project for the host and the project for the target as instructed in this article. For that, let’s create two more workspaces under host and target.
For that, you have to go to the Eclipse and again switch the workspace. Let’s click on the Other option. And instead of the instructor, now you give My_workspace. That’s it. Or go to the My_worspace folder→ host, and copy that path. Paste that path in the Eclipse and click on Launch.
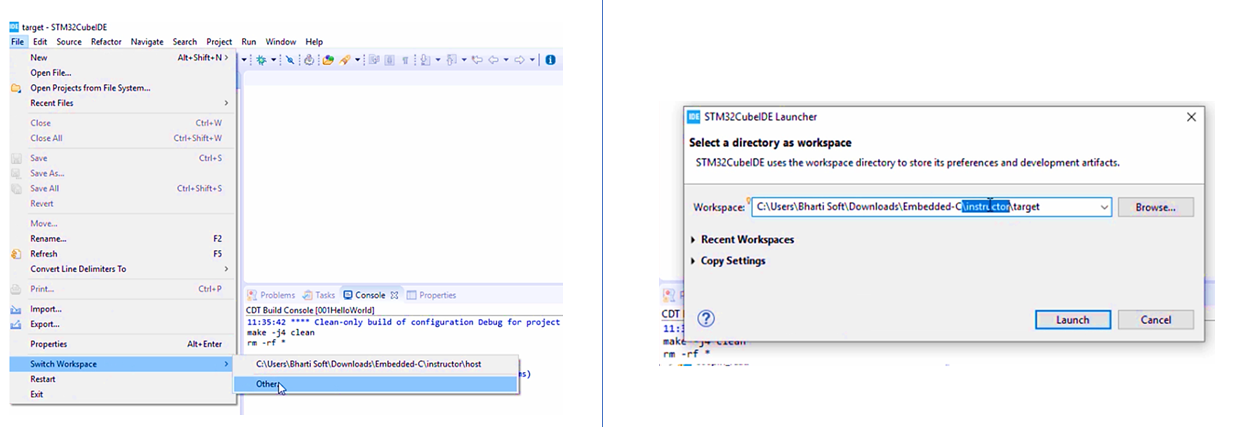
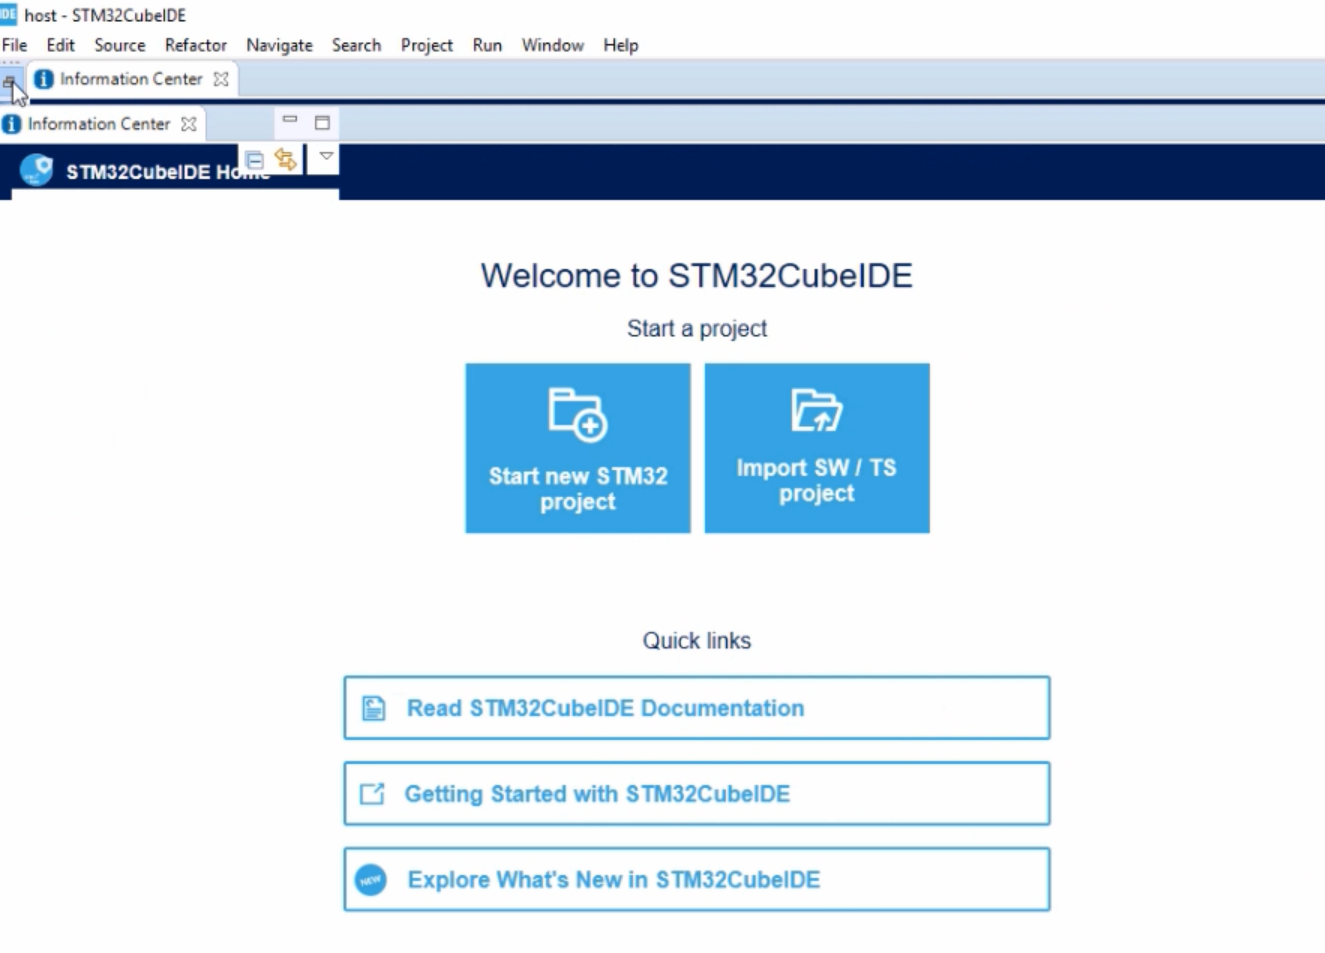
This is our workspace for the host(Figure 26). Whenever you want to create a project, you create it here. So, that will be taught in the article.
And after that, let’s again create one more workspace for My_workspace\target. Whatever the project you want to create for your target, you create it here as taught in the article.
In the following article, let’s see how to create a project.
FastBit Embedded Brain Academy Courses
Click here: https://fastbitlab.com/course1

