Adding codes to files using QM tool
In this article, let’s code for QHSM_Test.h.
QHSM_Test.h file I have marked as external, but for the time being, let me remove this restriction and make it Internal.
Important note: When the files are marked as “Internal” (i.e. ‘external’ option is unchecked), DO NOT edit the files using external IDEs.
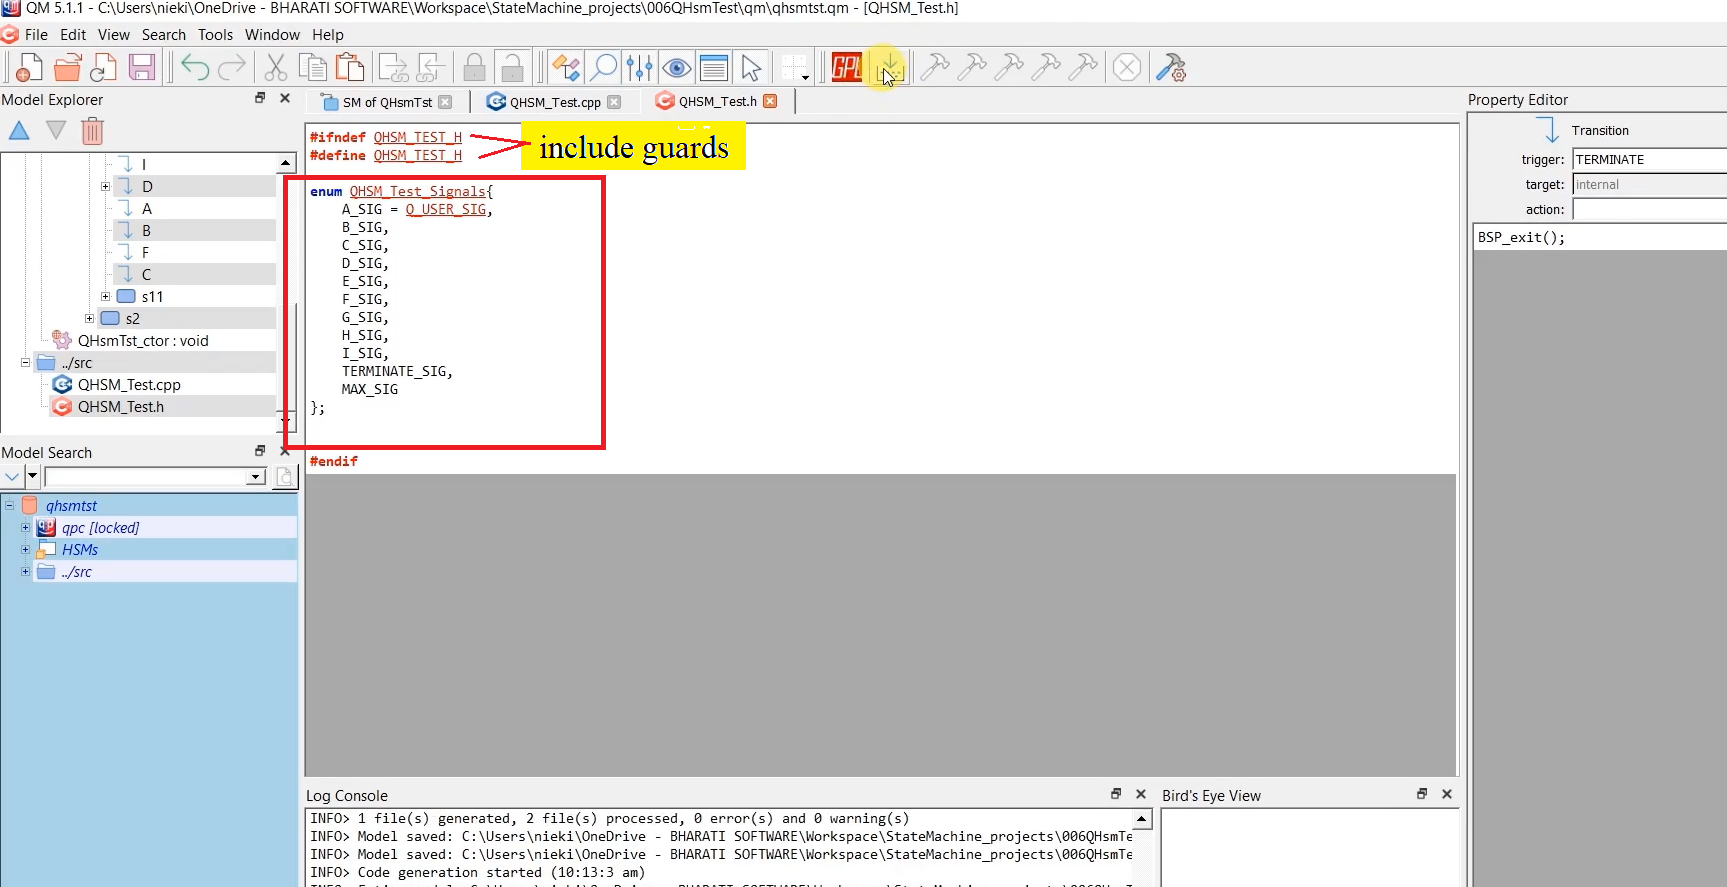
First of all, add the include guards.
Here, let’s create an enum QHSM_Test_Signals to include all the state machine events.
If you click on that state machine, as shown in Figure 2, it takes many events and events from ‘A’ to ‘I,’ and one more event is called TERMINATE.
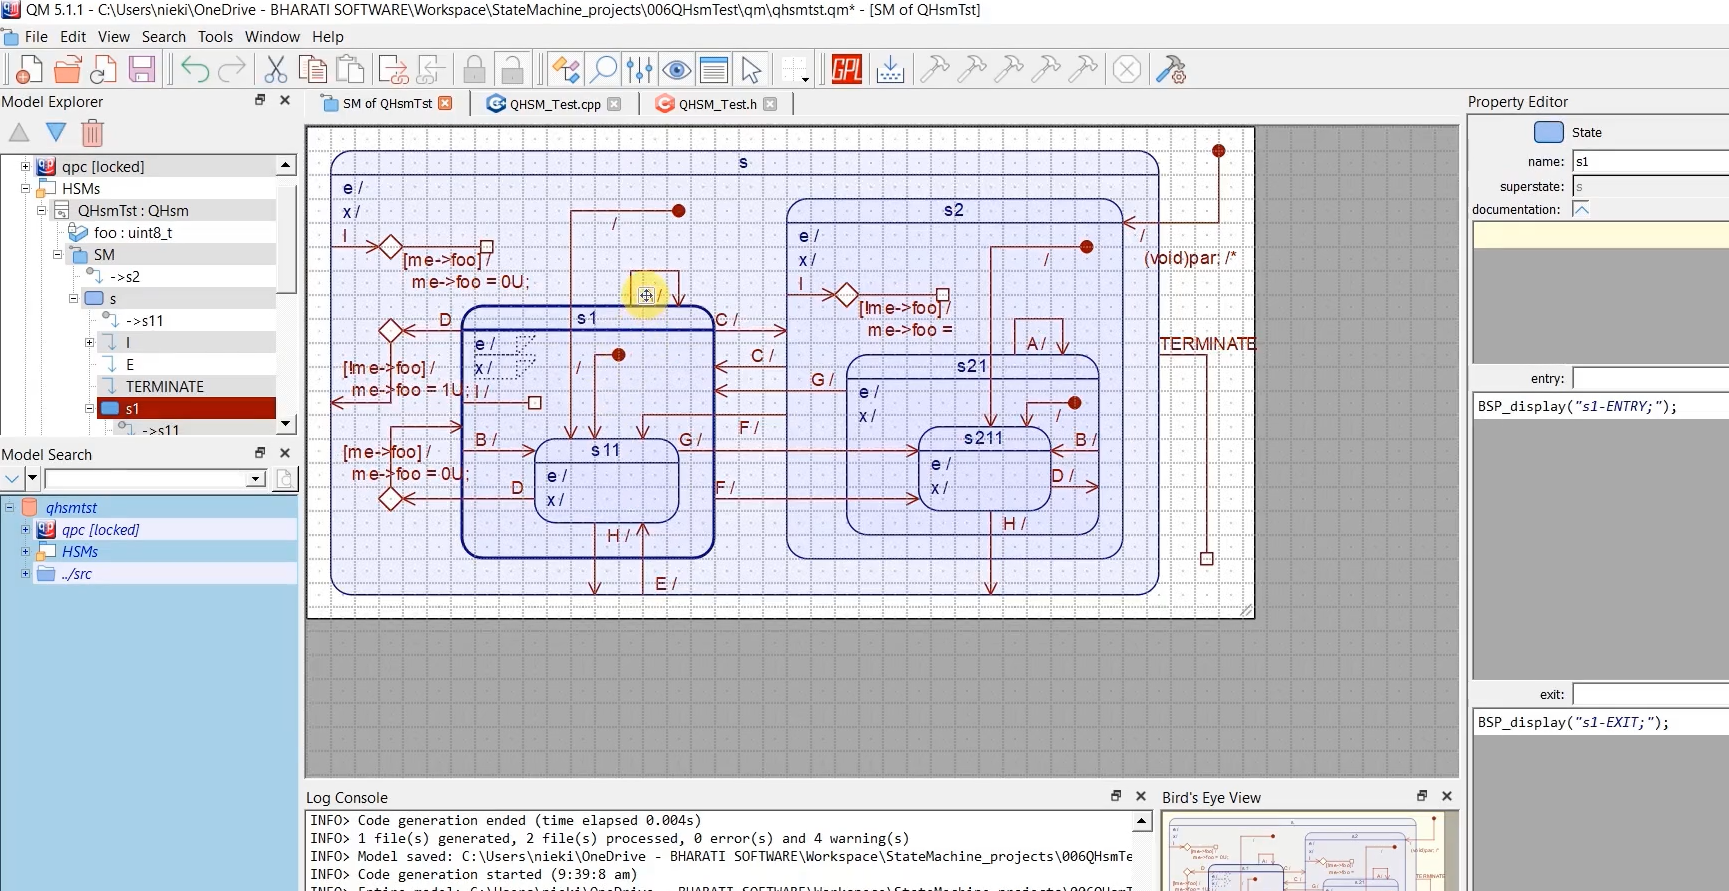
Let’s code that in the QHSM_Test.cpp file, as shown in Figure 1. A_SIG, you have to mention this _SIG with an event. Because, when it has generated the code for the state machine model, you can see that the framework uses the _SIG. So, _SIG postfix with every event. That’s why you have to use that.
Events are from ‘A’ to ‘I.’ And after mentioning all the events, you have to mention a macro MAX_SIGNAL at the end.
MAX_SIG → This enumerator constant indicates the total number of events supported by the application. So, keep that at the end. The framework may use this macro, I don’t know, but this is required.
And after that, A_SIG is the beginning of the first user event.
In the QP-nano documentation files and here in ‘qpn.h’, there are some reserved signals of the framework, like Q_ENTRY_SIG, EXIT_SIG, INIT_SIG, signals related to the timeouts, etc. The Q_USER_SIG is a macro, indicating the beginning of the user signals or events, as shown in Figure 3.
That’s why you have to equate the A_SIG event to Q_USER_SIG. Its value is 8, 8 is assigned to A_SIG, which marks the beginning of the application signal or user signal.
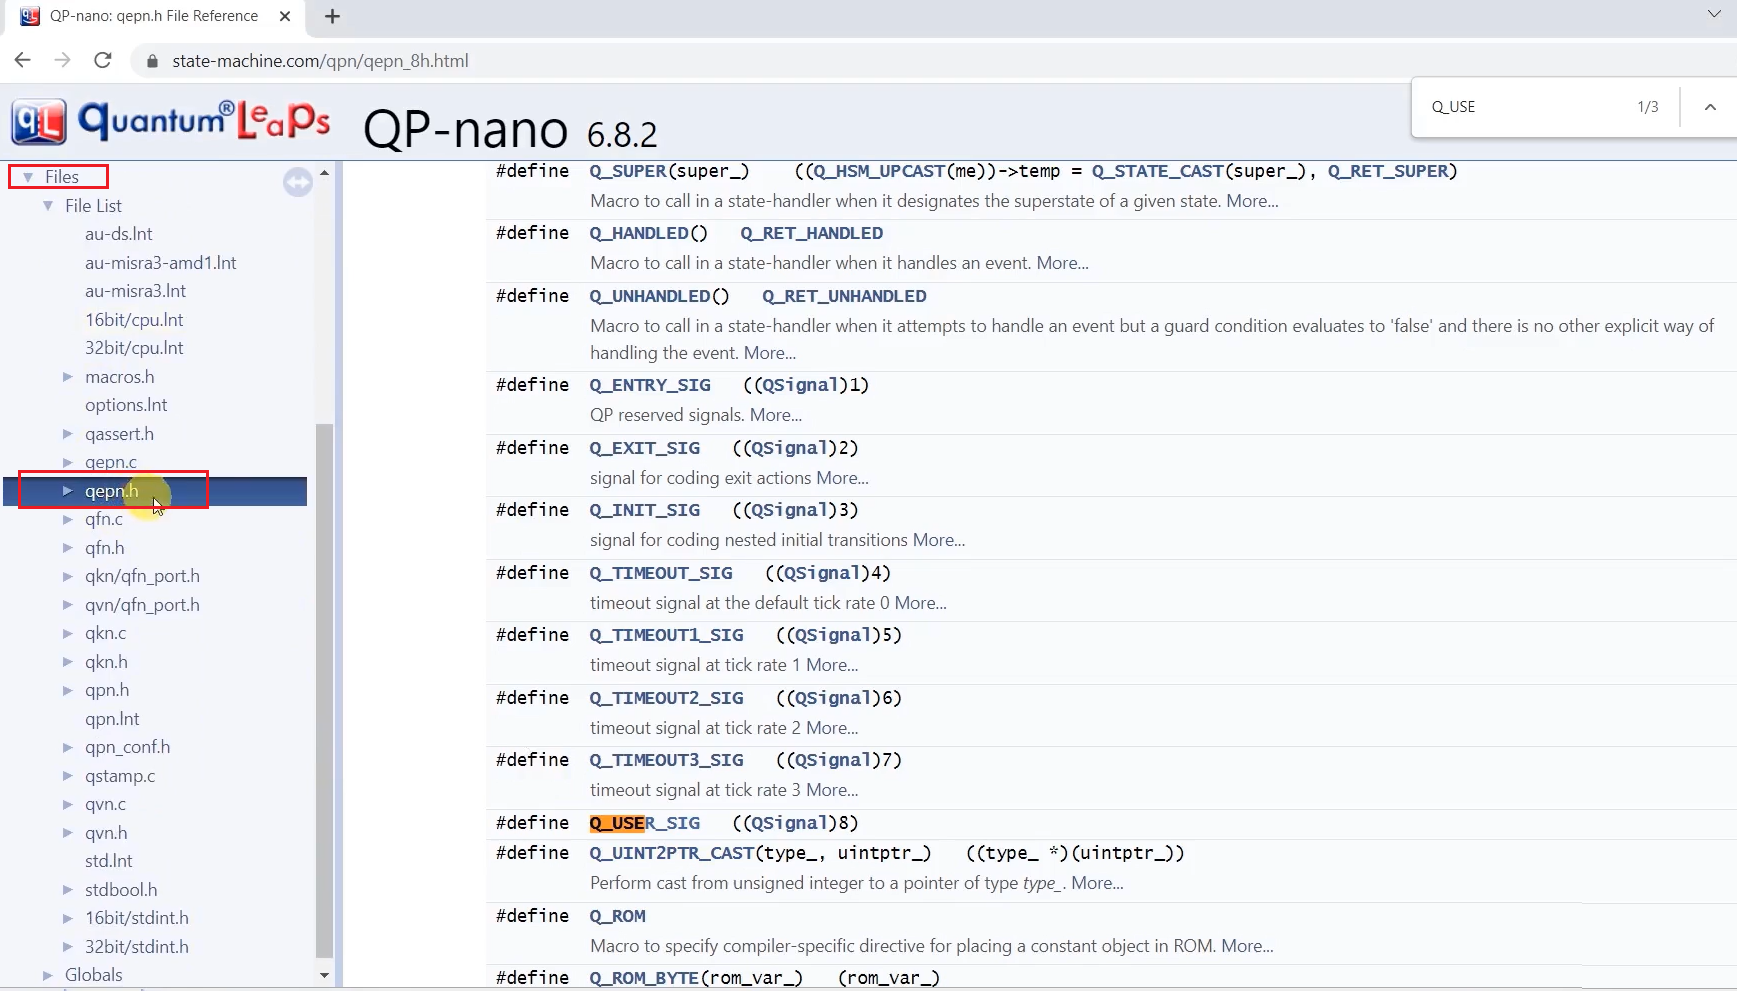
This distinguishes between the reserved signals(Figure 3) because the first reserved signal is Q_ENTRY_SIG, which starts from 1 here. If you don’t do this, the values will conflict with these reserved signals.
Let’s save and generate the code. And in the IDE, go to QHSM_Test.h file, and you can see the state machine events code, as shown below.
#ifndef QHSM_TEST_H
#define QHSM_TEST_H

enum QHSM_Test_Signals{
       A_SIG = Q_USER_SIG,
       B_SIG,
       C_SIG,
       D_SIG,
       E_SIG,
       F_SIG,
       G_SIG,
       H_SIG,
       I_SIG,
       TERMINATE_SIG,
       MAX_SIG
};


#endif
State machine events
Now, let’s work on resolving some errors.
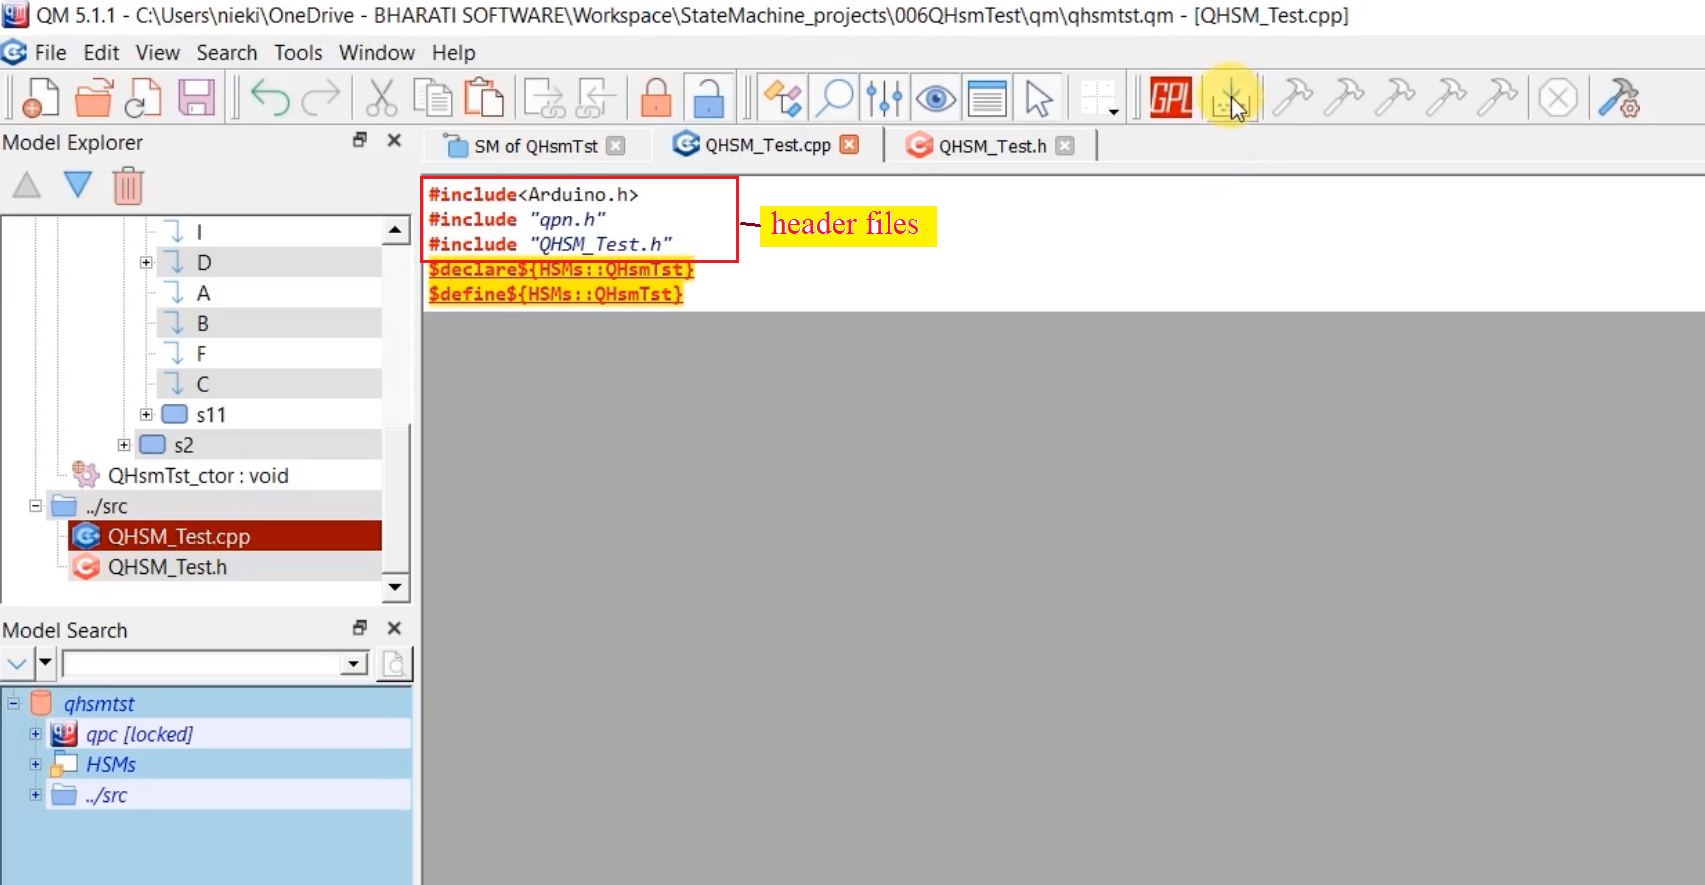
Go to QHSM_Test.cpp, here you have to include some header files, as shown in Figure 4.
First header file of the Arduino framework → #include<Arduino.h>
Then the header file related to the QP-Nano framework → #include “qpn.h”
Next, the header file related to the QHsm_Test header file → #include “QHSM_Test.h”
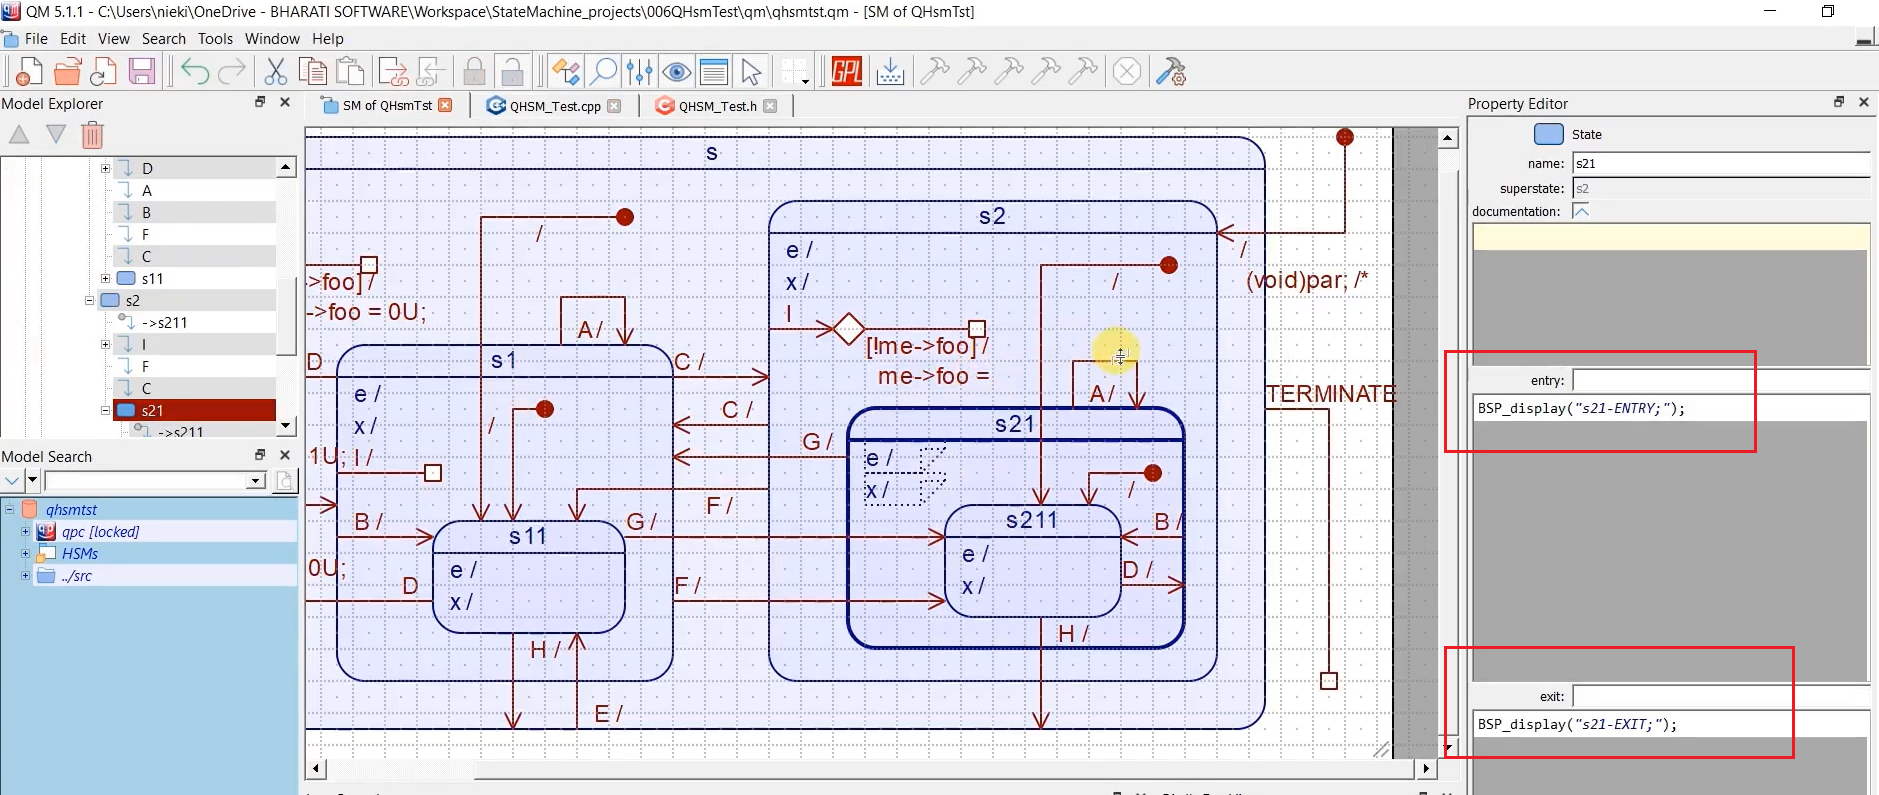
If you check the state machine model, you can see that it uses different actions for different transitions.
For example, if you consider s211 state, the model has defined ENTRY action and EXIT action. Now we have to give the implementation of these functions ‘BSP_display’.
For that, create one file. Right-click on src → New file→ name it as ‘bsp.cpp’. And create another file, ‘bsp.h’, here you can keep any peripheral related or BSP related code. The codes for these are not generated by the QM tool. This is our BSP code to drive various peripherals.
In the ‘bsp.h’, write the include guards. #ifndef BSP_H and # define BSP_H.
Create 2 functions BSP_display() and BSP_exit(). Just write this String str. It doesn’t return anything, so ‘void.’ Just give the declarations here.
#ifndef BSP_H
#define BSP_H

void BSP_display(String str);
void BSP_exit(void);

#endif
bsp.h file
And let’s give the implementation in bsp.cpp. Arduino header file #include <Arduino.h>. And here, we will use a serial.print() to print some text on the serial terminal, as shown below.
#include <Arduino.h>

void BSP_display(String str){
Serial.print(str);
}

void BSP_exit(void){
Serial.println("Bye!!");
}
bsp.cpp file
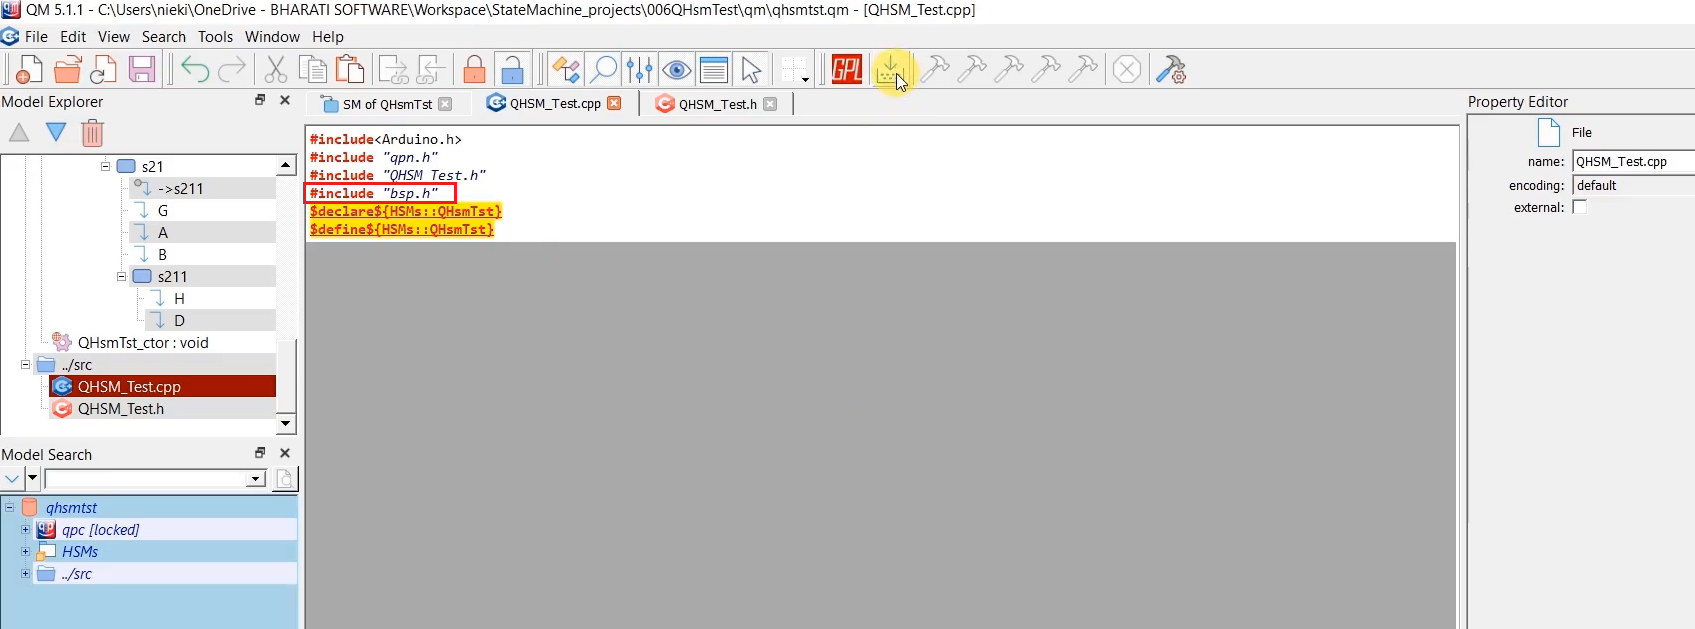
Add the bsp.h header to QHSM_Test.cpp file, shown in Figure 6.
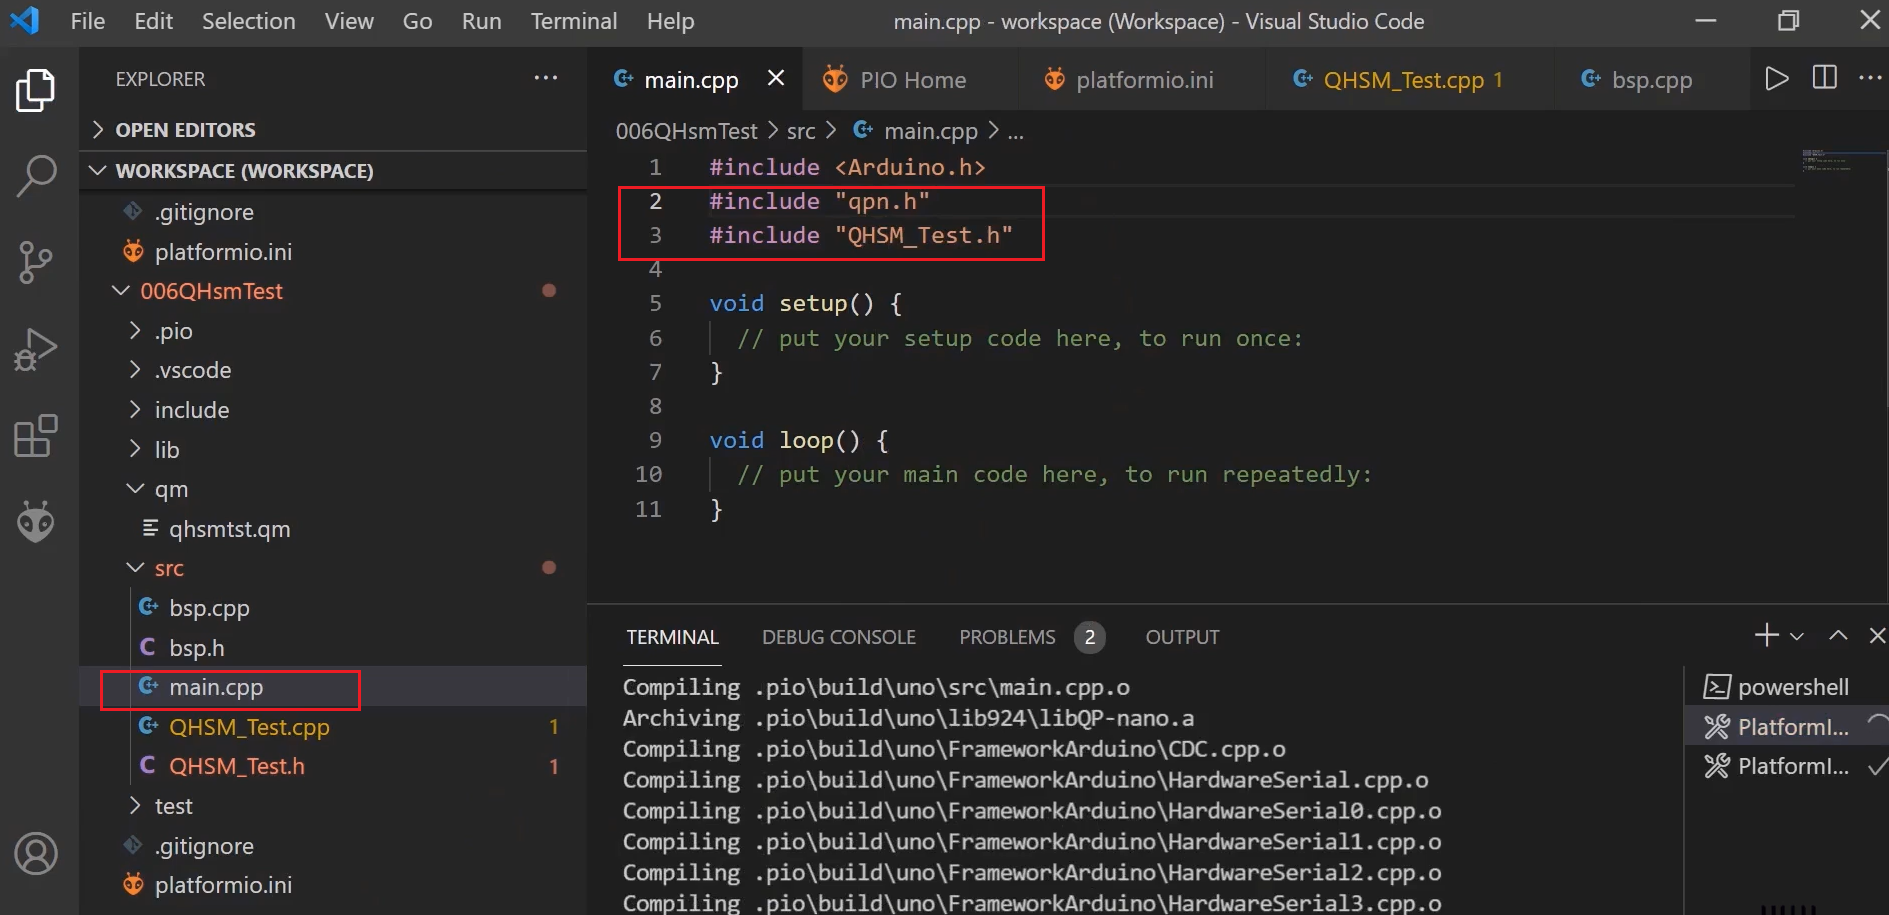
Let’s go to the main.cpp. The main.cpp produces the events. It takes the event or generates the events, sending it to the state machine. That’s why it has to know what events are supported. That’s why #include QHSM_Test.h.
Before including QHSM_Test.h header file, you include the qpn macro. #include “qpn”, as shown in Figure 7.
In the upcoming article, we will explore some of the APIs of the QP-Nano to post the events to the state machine. For this, we have to explore the QP Nano APIs.
FastBit Embedded Brain Academy Courses
Click here: https://fastbitlab.com/course1

