Adding a class attribute
In this article, we will explore some of the APIs of the QP-Nano to post the events to the state machine.
Just head over to API Reference – QP-nano.
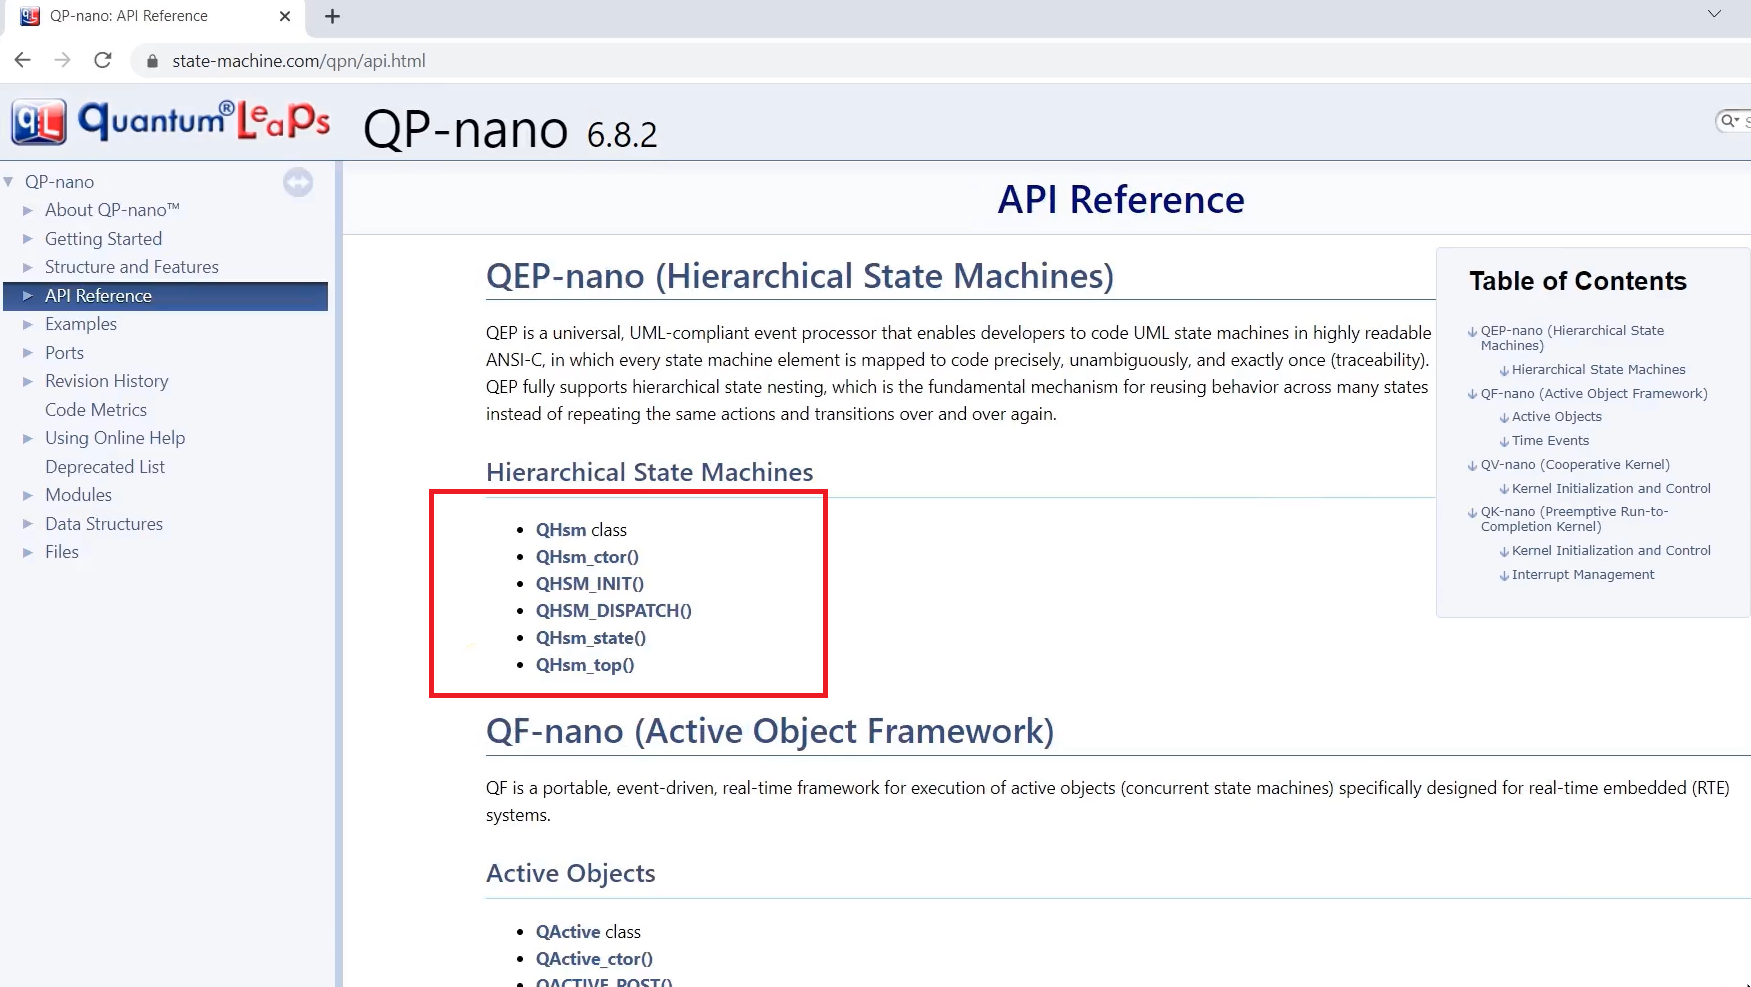
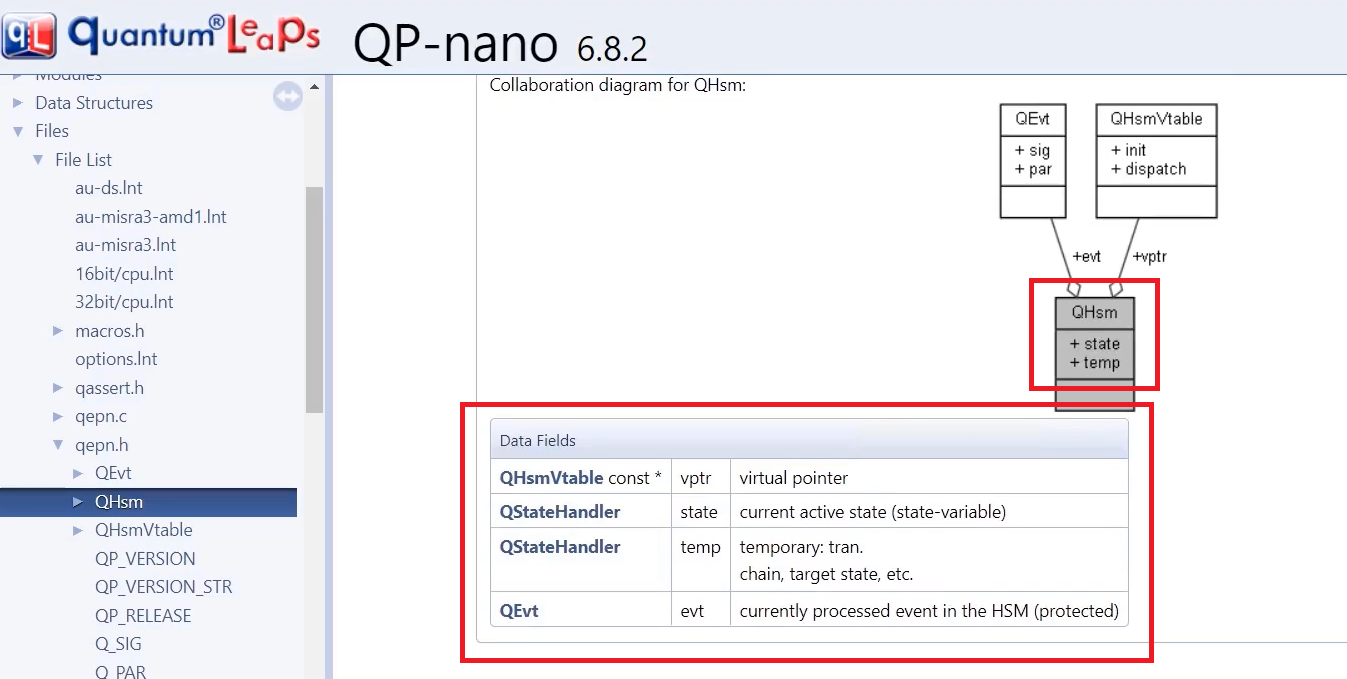
The hierarchical state machine APIs are shown in Figure 1.
First, we have to call the hierarchical state machine QHsm_ctor(), the constructor. And after that, QHSM_INIT. And if you have any events, you can use this macro QHSM_DISPATCH to dispatch the event. And also some helper functions to get the current state, etc. These things have to be called in this order only. First, you have to call the QHSM_ctor() and then the QHSM_INIT.
So, the framework is based on the superclass QHsm. You explore that QHSM class. And you can see that this class QHsm contains these attributes or data fields, as shown in Figure 2.
Our application structure or application class is derived from the QHsm superclass. So, we have already embedded the QHsm superclass in our application structure.
You can see that QStateHandler has one important field that holds the pointer to the current active state handler. This is a state variable. So, our class inherits this(QStateHandler), or our structure inherits this. That’s why now you have to initialize QStateHandler, a state variable of the QSM class.
How do you initialize the QStateHandler state?
The initial state must be initialized first, which you can do by using the constructor QHSM_ctor().
QHSM_ctor():
Performs the first step of HSM initialization by assigning the initial pseudostate to the currently active state of the state machine.
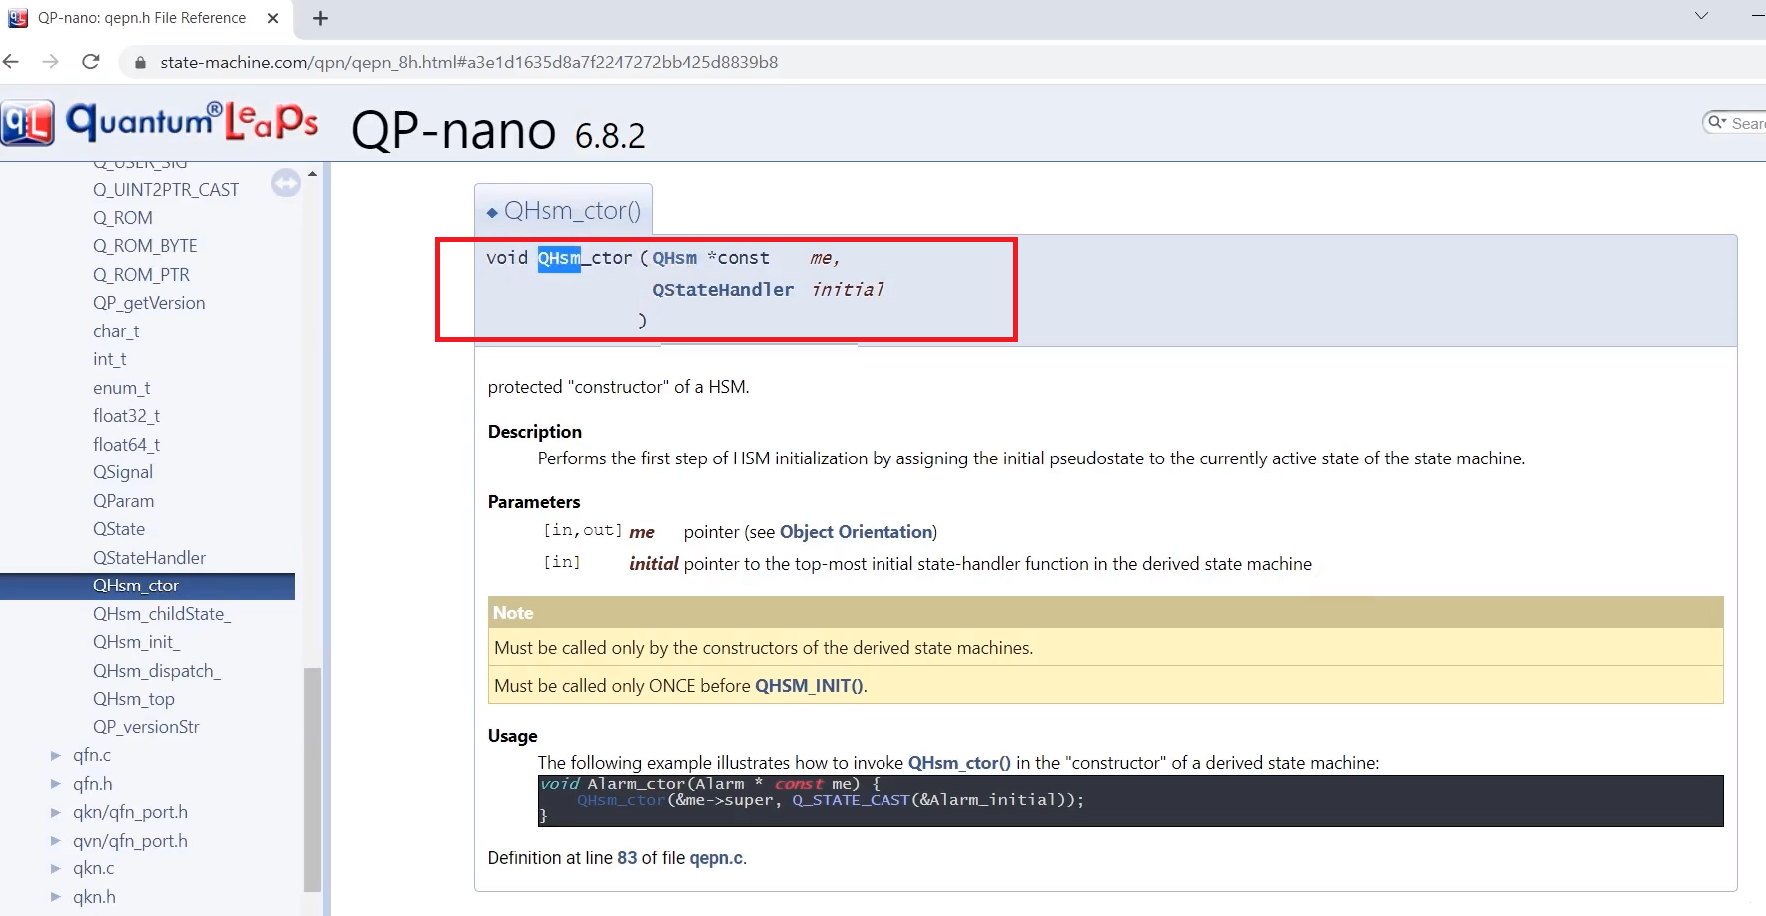
It initializes that state data field. You have to call this function from your main.cpp; from the setup function, you can call that.
For this API, you have to provide two fields. You have to provide the ‘me’ pointer, which is nothing but a pointer to the superclass. And you have to mention the address of the initial state handler of your state machine.
Let’s understand attributes, like Adding attributes using the tool.
There are two types of attributes.
- Class attribute
- Free attribute
1. Class Attribute:
As this name signifies, adding an attribute to the class is called a Class attribute.
I mean, you can see that in Figure 4, you have to right-click on the class name, and you have to select the attribute (Add Attribute option). This is like adding a class attribute.
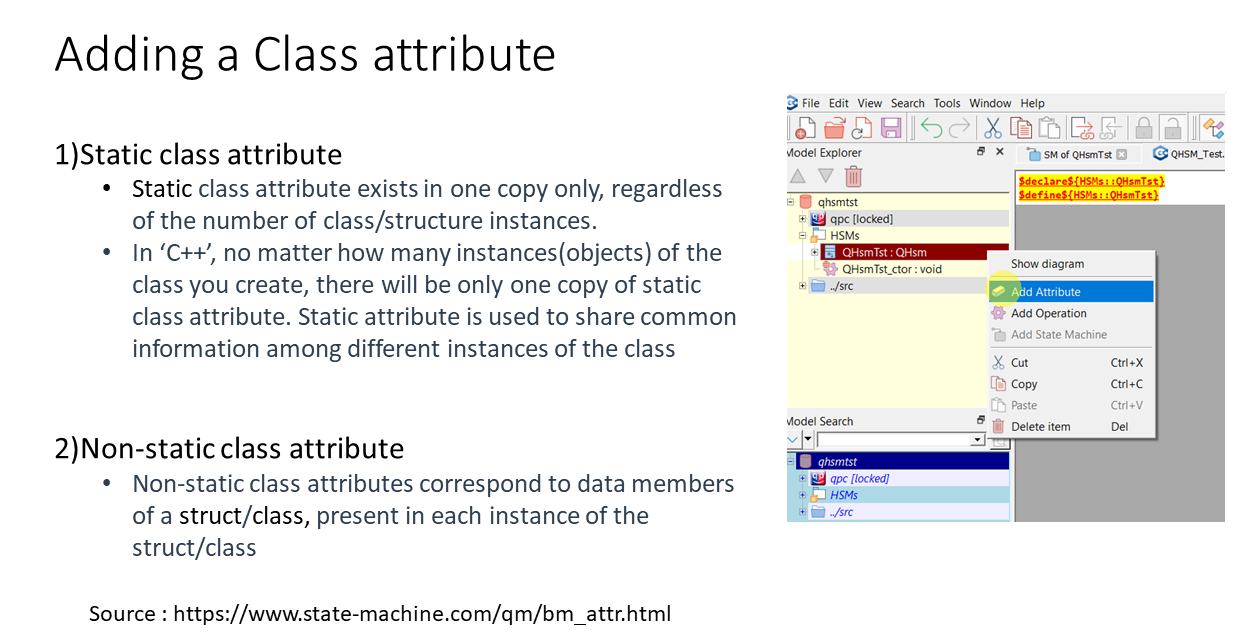
In the class attribute, there are two types. Static class attribute and Non-static class attribute. So, all are well documented in this link:
https://www.state-machine.com/qm/bm_attr.html
Basically, these terminologies are being taken from the C++ programming language. Because, in C++ programming language, when you write a class, you can define static class attribute or non-static class attribute. First, let’s understand what exactly these are by analyzing a C++ class.
For example, SomeClassName is a class in C++, and int somedata is a non-static class attribute. Because there is no static keyword present here, that’s why it’s a non-static class attribute.
And int some_static_data, this attribute is a static class attribute because there is a ‘static’ keyword.
class SomeClassName{
   private:
      /*non-static attribute*/
      int somedata;

      /*static attribute declaratin*/
      /*one copy for all the objects of this class*/
      static int some_static_data;

    public:
      /*non-static method*/
      void setdata(int data){

      }

     /*static method*/
     static void static_fuction(int data){

     }
};

/*definition of static attribute of class 'SomeClassName' */
int SomeClassName::some_static_data = 0;
int main(void){
    return 0;
}
Example
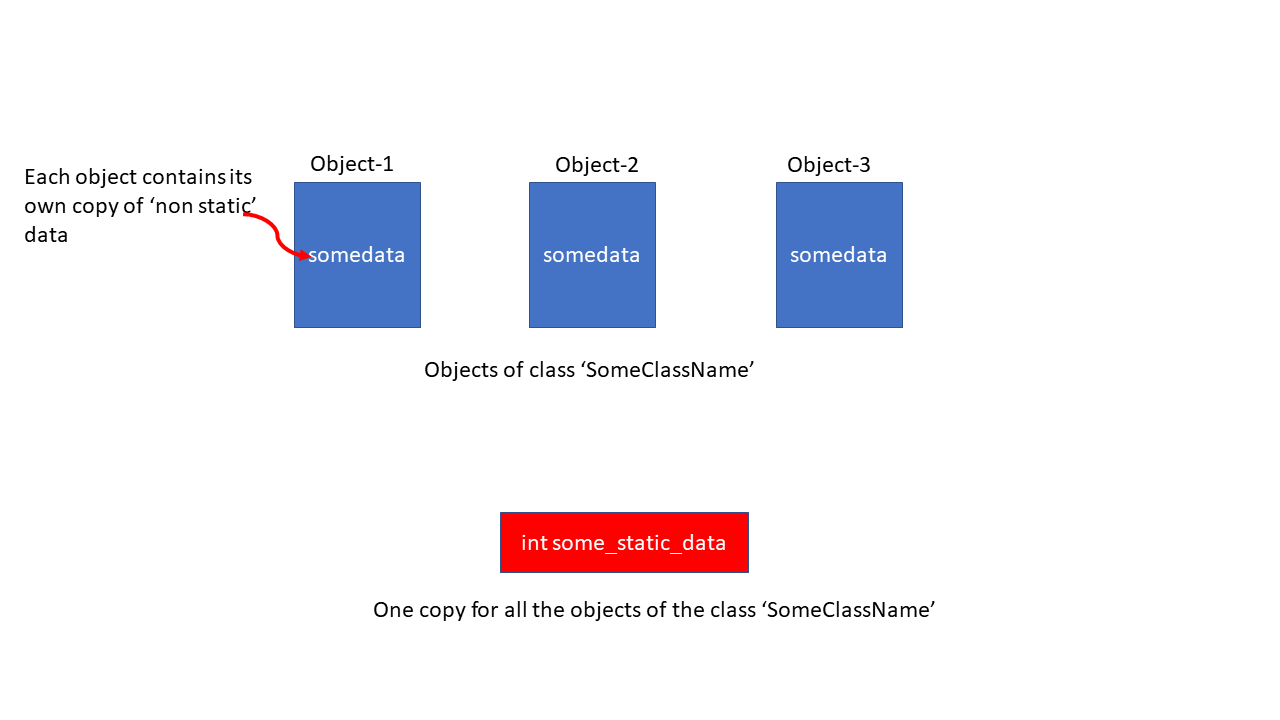
You see here, when you create a number of objects of SomeclassName class, each object will contain its own copy of ‘non static’ attribute or ‘not static’ data.
The object-1 will have its own copy of somedata, that is, the int somedata variable; Object-2 will have its own copy of that ‘non static’ data, etc.
But, you see, the objects will not have one copy of ‘static’ data. Static data is common for all objects. That’s why there will be only one copy for all the objects of the class ‘SomeClassName.’ There will be only one copy of some_ static_data created in the memory.
How to declare and define static int some_static_data a static attribute in C++?
You see above example, static int some_static_data is not a definition. This is a static attribute declaration. Now, the definition you must do outside the class.
You see, it’s just like in C, it’s just like defining a global variable. But you cannot access this straight away here or in some random functions because its visibility is protected by the private keyword. That’s why the ‘static’ and ‘non static’ class attribute concepts are taken from the C++ programming language.
And if you want to implement a similar thing in C, you can create one global variable and treat it as a ‘static’ attribute of a structure. You can use that global variable to share information between different instances of a structure. You can do something like that in’ C, ‘ and we’ll see how to do that next using that tool. I hope you get the idea of static and non-static class attributes.
Static class attribute exists in only one copy. And static attributes are used to share common information among different instances of the class or different instances of the structure in C.
Whereas non-static class attributes correspond to data members of a struct or class present in each instance of the class or structure.
Now, Let’s do some experiments with a tool to understand that.
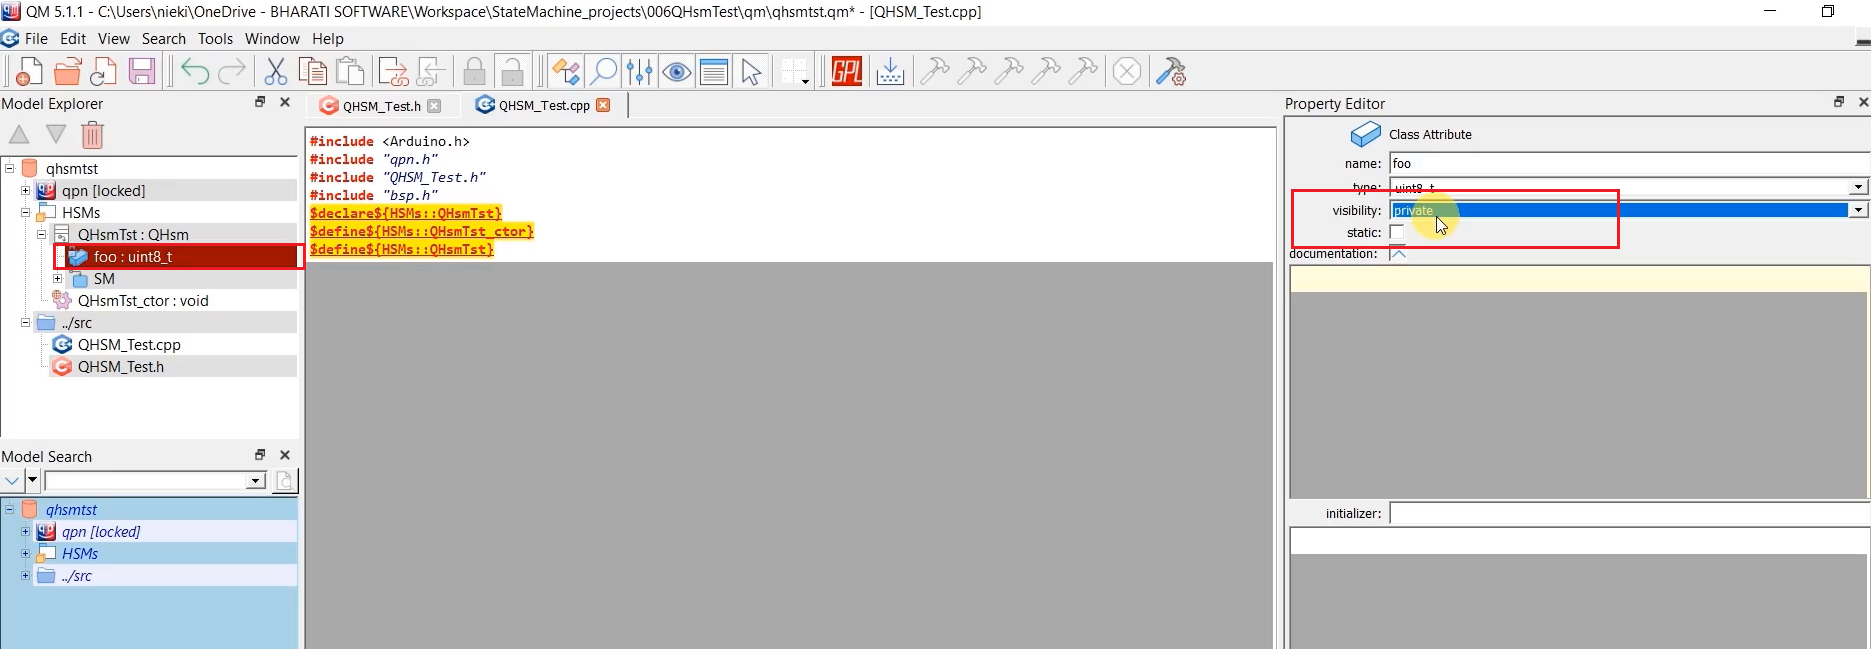
For example, here, there is a variable ‘ foo’, which is inside this class. But, that is marked as non-static; the static checkbox is not checked. Hence, it is non-static.
If static is not checked, ‘foo’ is considered the member element of QHsmTst:QHsm structure or this class. You can choose these options. So, the visibility option is not that relevant in a ‘C’ programming language. It would be useful in the C++ language because the member elements can be segregated into Private, Public, or Protected.
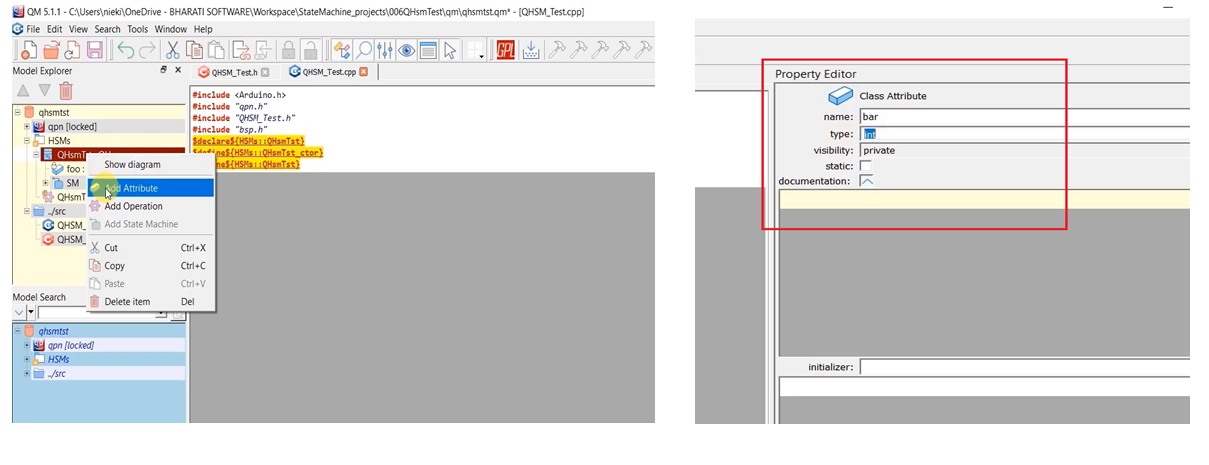
Create one more attribute if you want. I’m creating a class attribute, which is non-static. The name of this attribute is ‘bar’ and keep this private, and I don’t check this static, type of this attribute as ‘int.’ Let’s generate the code, as shown in Figure 7.
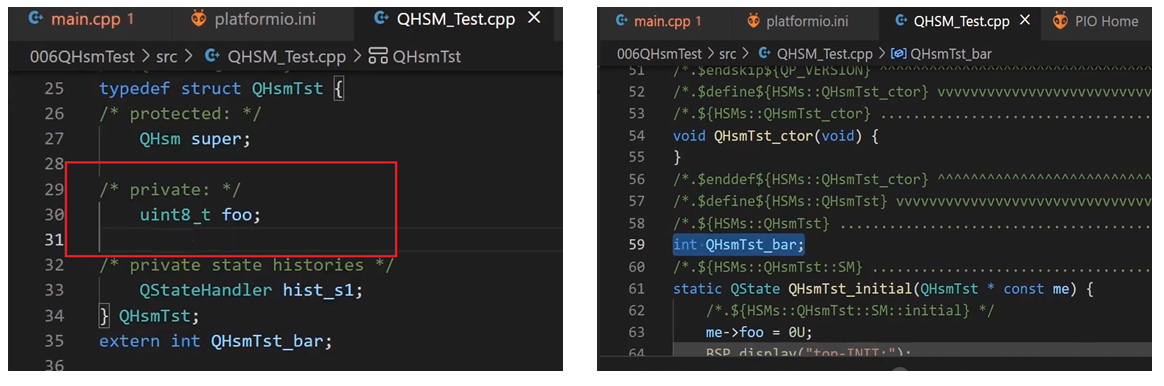
typedef struct QHsmTst {
/* protected: */
QHsm super;

/* private: */
uint8_t foo;
int bar;

/* private state histories */
QStateHandler hist_s1;
} QHsmTst;
Select non-static for bar function
You can see that above, two variables or member elements have been created under QHsmTst class. These are non-static. If you want to create member elements inside this QHsmTst structure, use the non-static option.
If I select ‘static’ for this bar, it has disappeared from the structure and gone outside. You can see that it is now considered a global variable in this file, as shown in Figure 8. QHsmTst prefix is automatically attached by the QM tool ‘bar’ variable name. QHsmTst_bar is a static class attribute.
We can get more information in the user manual of this tool by visiting this link:
2.Free Attribute
Attributes attached to a package are called free attributes. In C/C++, such free attributes correspond to variables defined directly at file scope (either using ‘static’ variables or global variables). So, free attributes are either static or global variables, so they are not confined to the class as static or non-static attributes.
Free attributes can be limited to a file scope using a ‘static’ keyword, or you can define free attributes as global attributes.
That’s why you don’t see a static checkbox for the free attribute because it is not confined to a class. So, you can make that variable as file scope or global; you can select that in the tool while creating the free attributes.
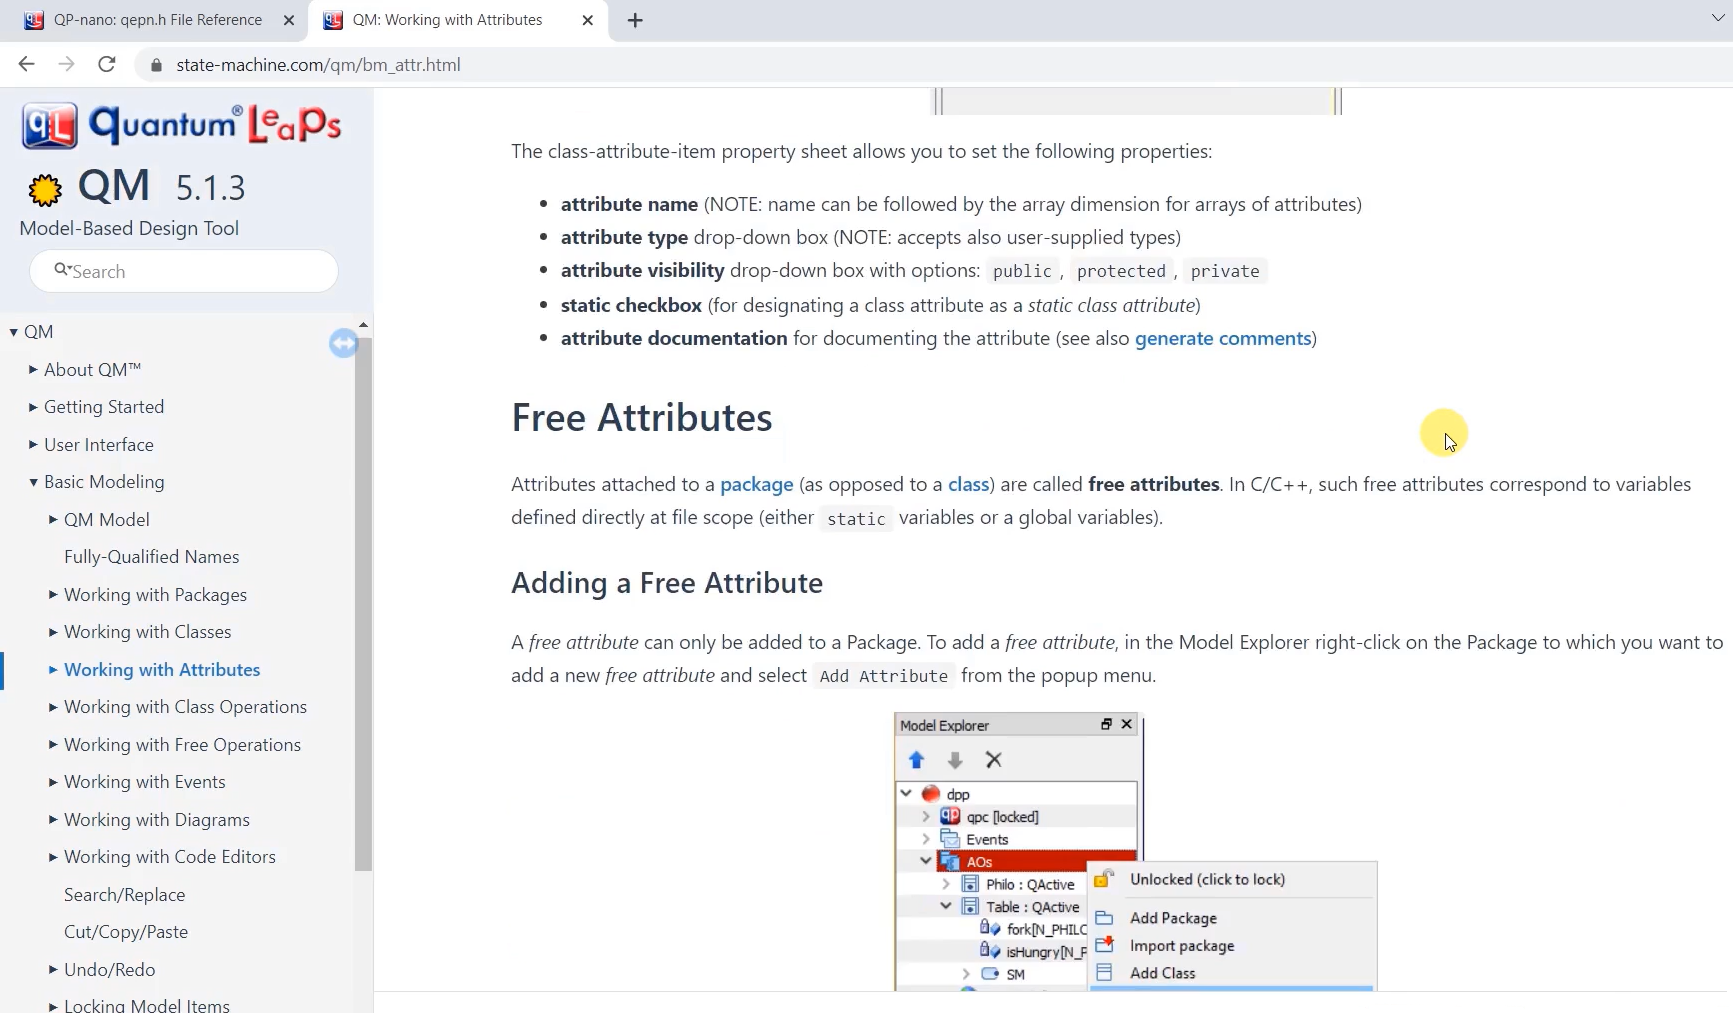
You have to Right-click on the package, and if you select Add Attribute over there, that is adding a Free attribute.
For that, click on the HSMs package and create Add attribute. I’ll just add ‘attr1’ (that’s the variable’s name), type is ‘char.’ You can control the visibility, whether you want to make it a global variable or a file scope variable; let’s use it as a file scope variable. And you can give some documentation here and any initialization values. I’ll provide =10; here, as shown in Figure 10.
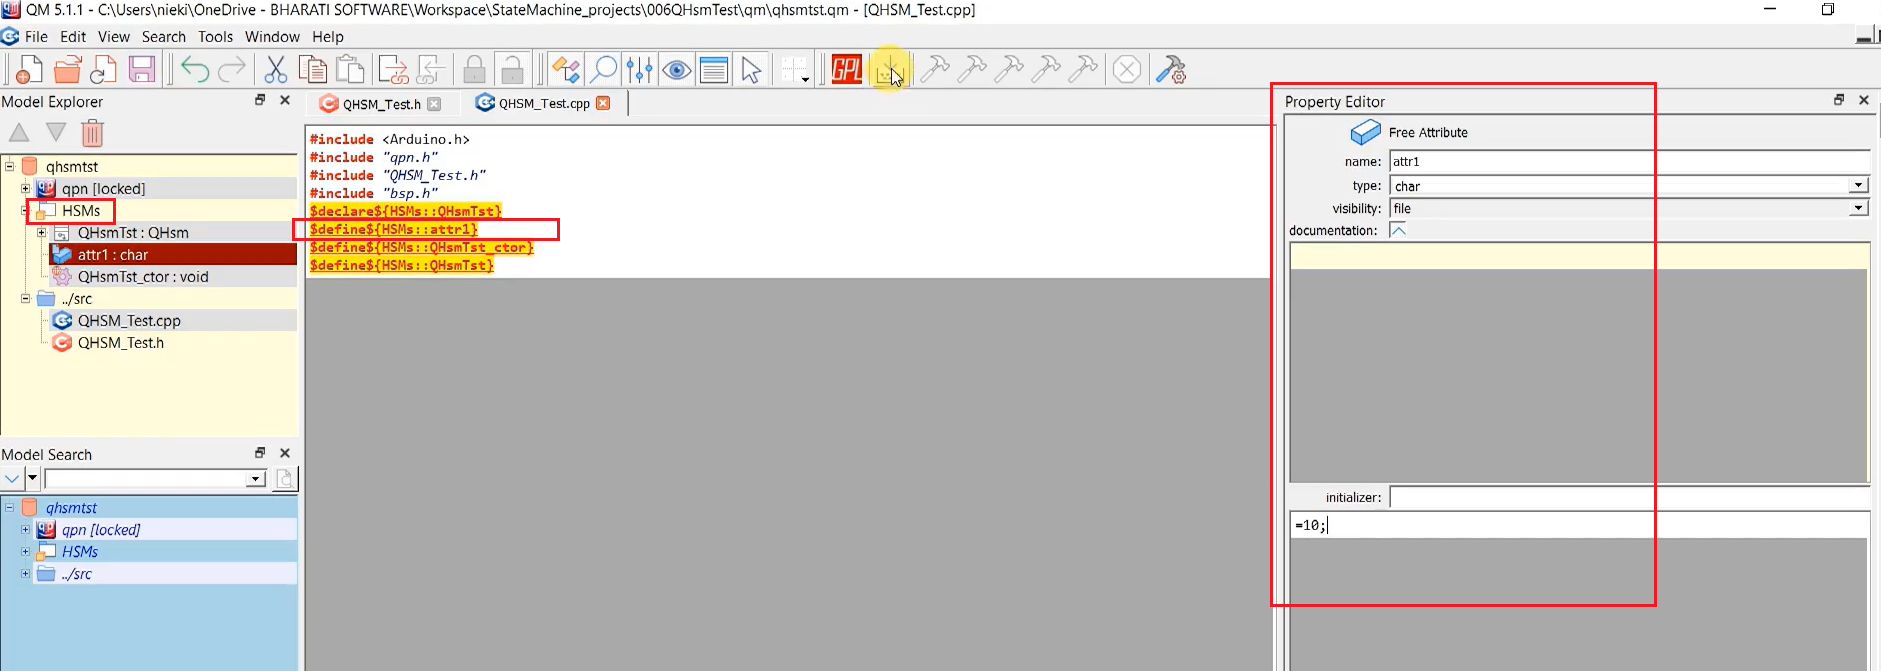
We will define the ‘attr1’ variable. #define, and drag and drop attr1 variable. Save and generate the code.
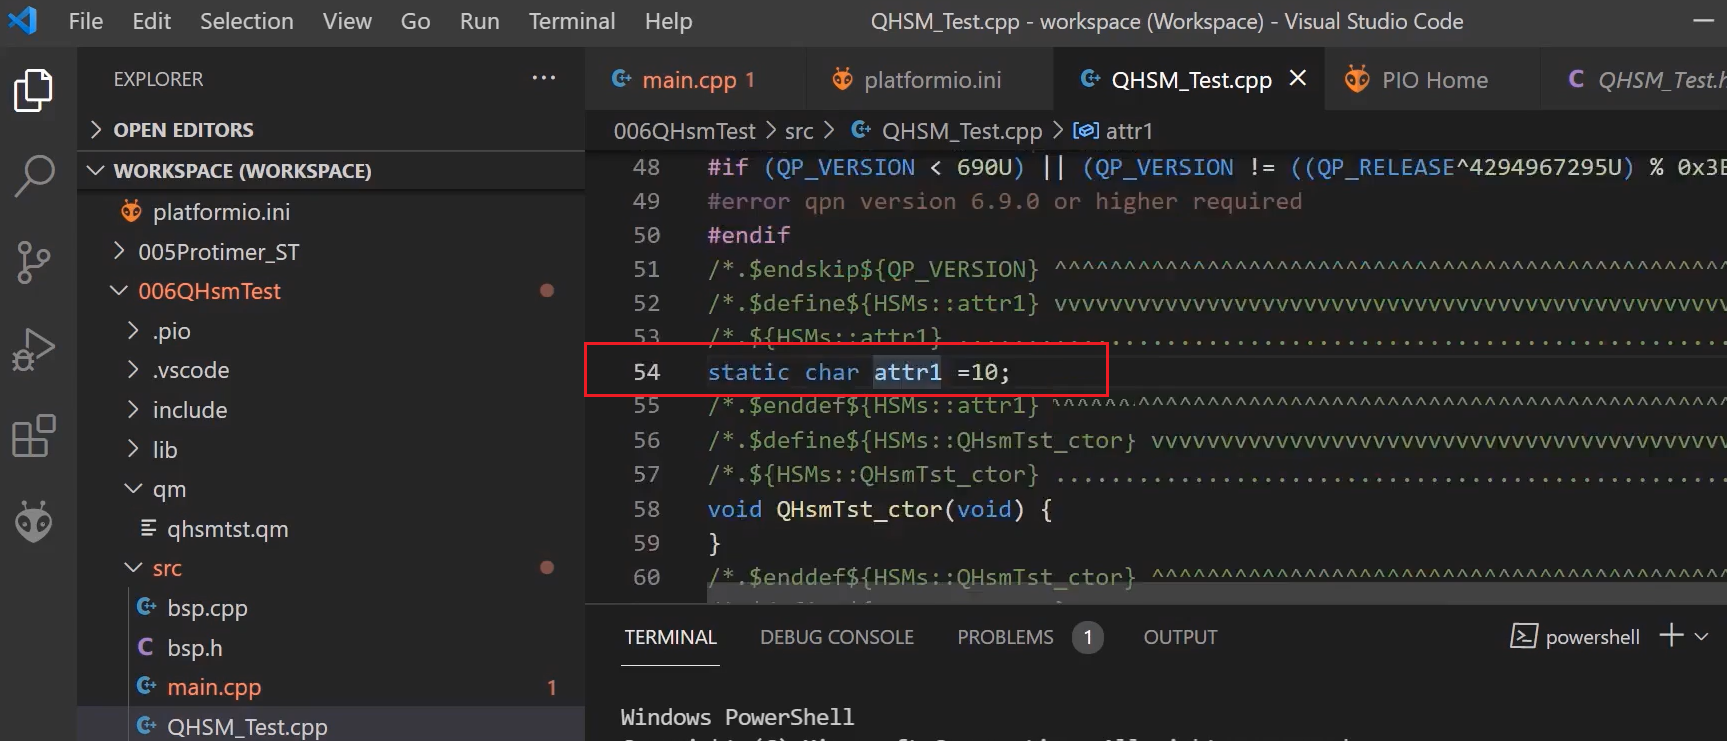
And you can see that that is created as a static variable.
As you can see in Figure 11, since it is a free attribute, this tool doesn’t attach the class name to it, whereas it has attached a class name to the class attribute, QHsmTst_bar. It has attached the class name here or a structure name.
That’s about adding attributes.
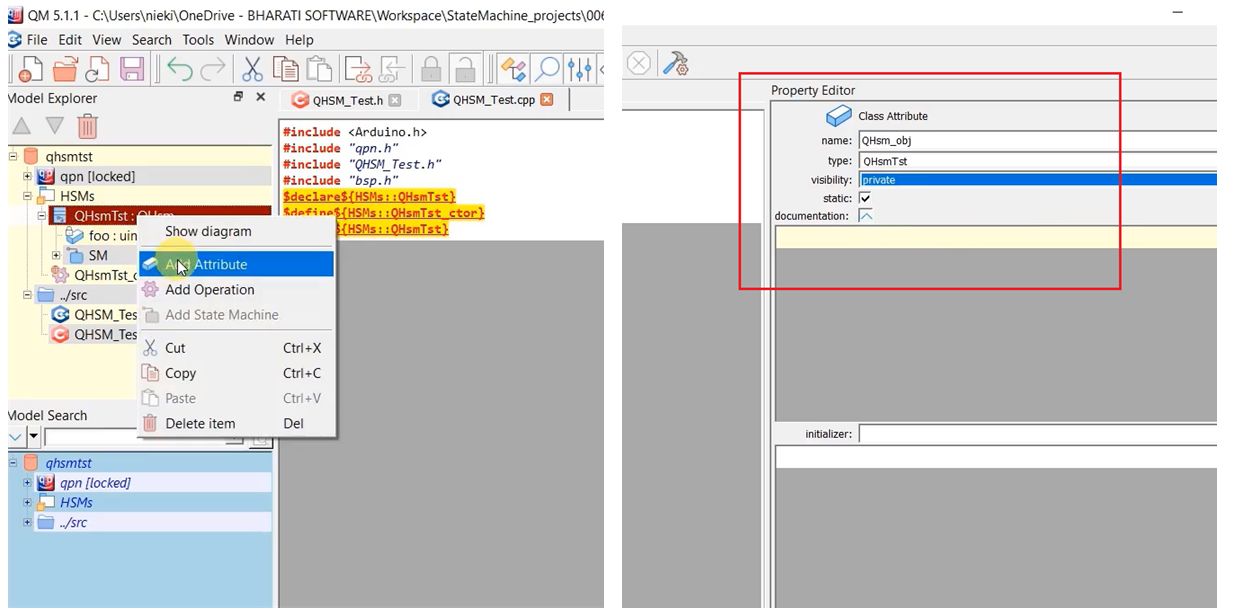
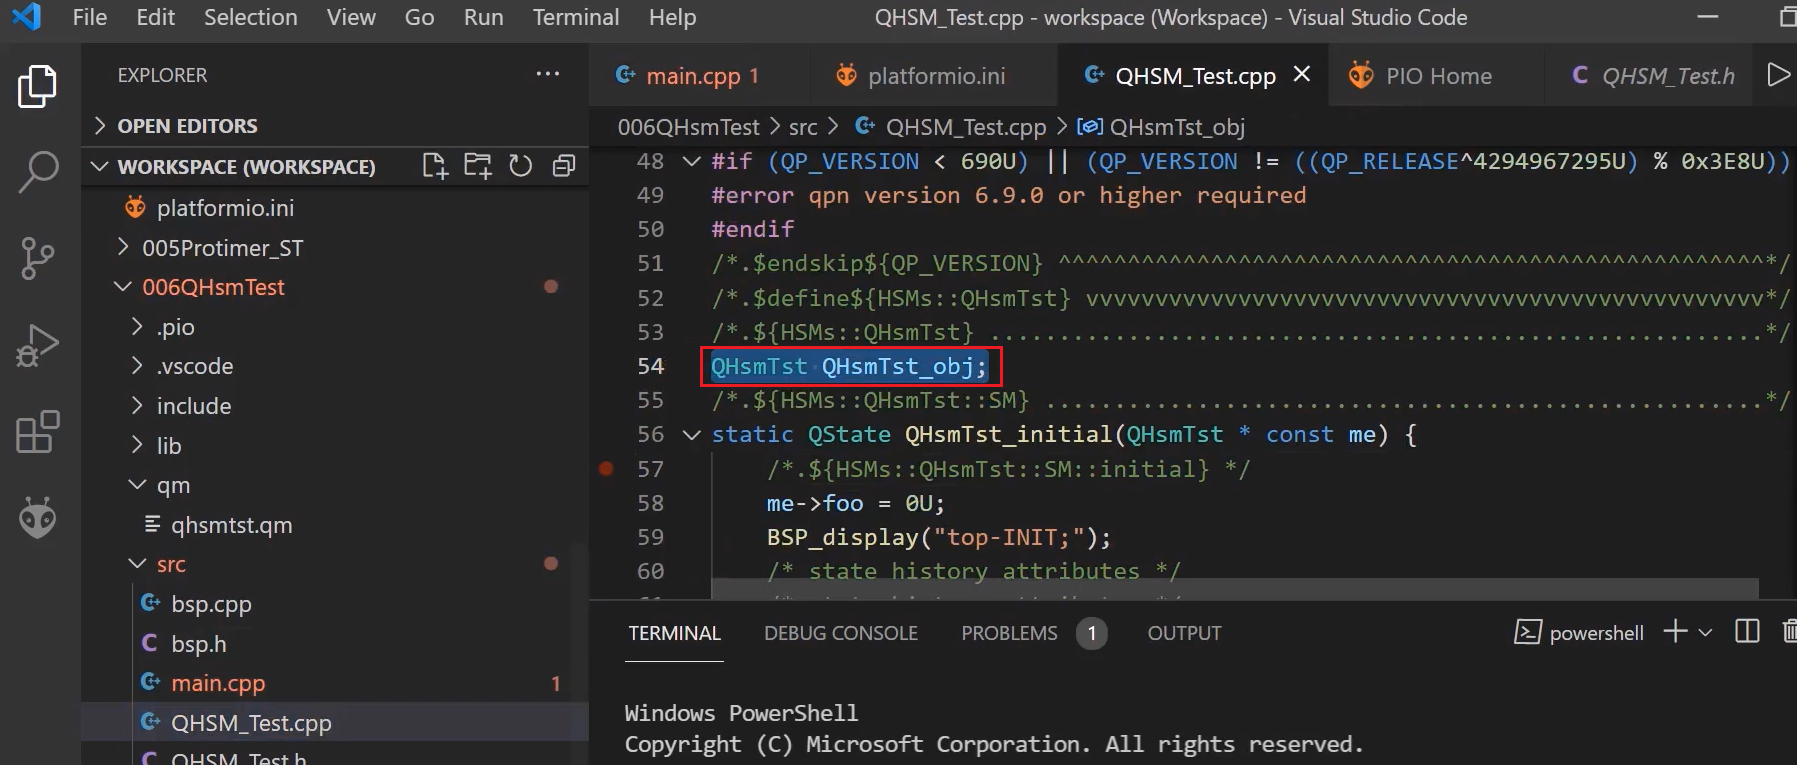
Now, our job is to create an instance of the QHsmTst structure. We just need one instance or one variable of this structure type. Let’s go for class attribute, Add a class attribute. The name I will provide QHsm_obj, type is QHsmTst (a structure name), and it is a ‘static’ type class attribute, and I’ll keep visibility is private. And let’s generate the code.
In Figure 13, you can see that the instance of QHsmTst structure is created.
Now we have to use this instance in our main.cpp—the QHsm_ctor you have to use it. One thing is you have to extern this. But that won’t work because the QHsmTst structure now needs to be exposed outside the QHsm_Test.cpp file. Because this structure is declared in QHsm_Test.cpp.
#include <Arduino.h>
#include "qpn.h"
#include "QHSM_Test.h"

extern QHsmTst QHsmTst_obj;

void setup() {
// put your setup code here, to run once:
QHsmTst_ctor();
Using QHsmTst structure in main.cpp
typedef struct QHsmTst {
/* protected: */
    QHsm super;

/* private: */
     uint8_t foo;

 /* private state histories */
     QStateHandler hist_s1;
 } QHsmTst;
 extern QHsmTst QHsmTst_obj;
QHsmTst structure in QHSM_Test.cpp file
It is defined in QHSM_Test.cpp file. You have to expose the QHsmTst structure. Exposing this structure to the outside world breaks the encapsulation, and it exposes all the private variables or protected variables to the external files. That would definitely break the encapsulation.
How do you implement such a thing in C? For example, you have not exposed QHsmTst structure to main.cpp. Hence you cannot do extern QHsmTst QHsm_obj; like this. This will throw an error. Also, none of the functions of main.cpp know about the private attributes of the structure or class.
If any function wants to access the attributes of a class or structure, it needs the ‘me’ pointer here. So, the ‘me’ pointer is nothing but pointed to the instance of the main class or structure. That’s why it is not a good idea to extern that variable.
We can just expose the pointer to the superclass, which is embedded in the QHsmTst structure. For that, let’s create one variable or free attribute using the tool.
Why I’m creating a free attribute? Because I’m going to share that attribute with the external files.
That’s why I’m going to HSMs and clicking Add Attribute, and I will call this super_QHsmTst. Type is a pointer of the superstructure, that is QHsm *const. And visibility is ‘global’ because it will be shared with other files. And will initialize this to our main application object ‘=&QHsmTst_obj.super’.
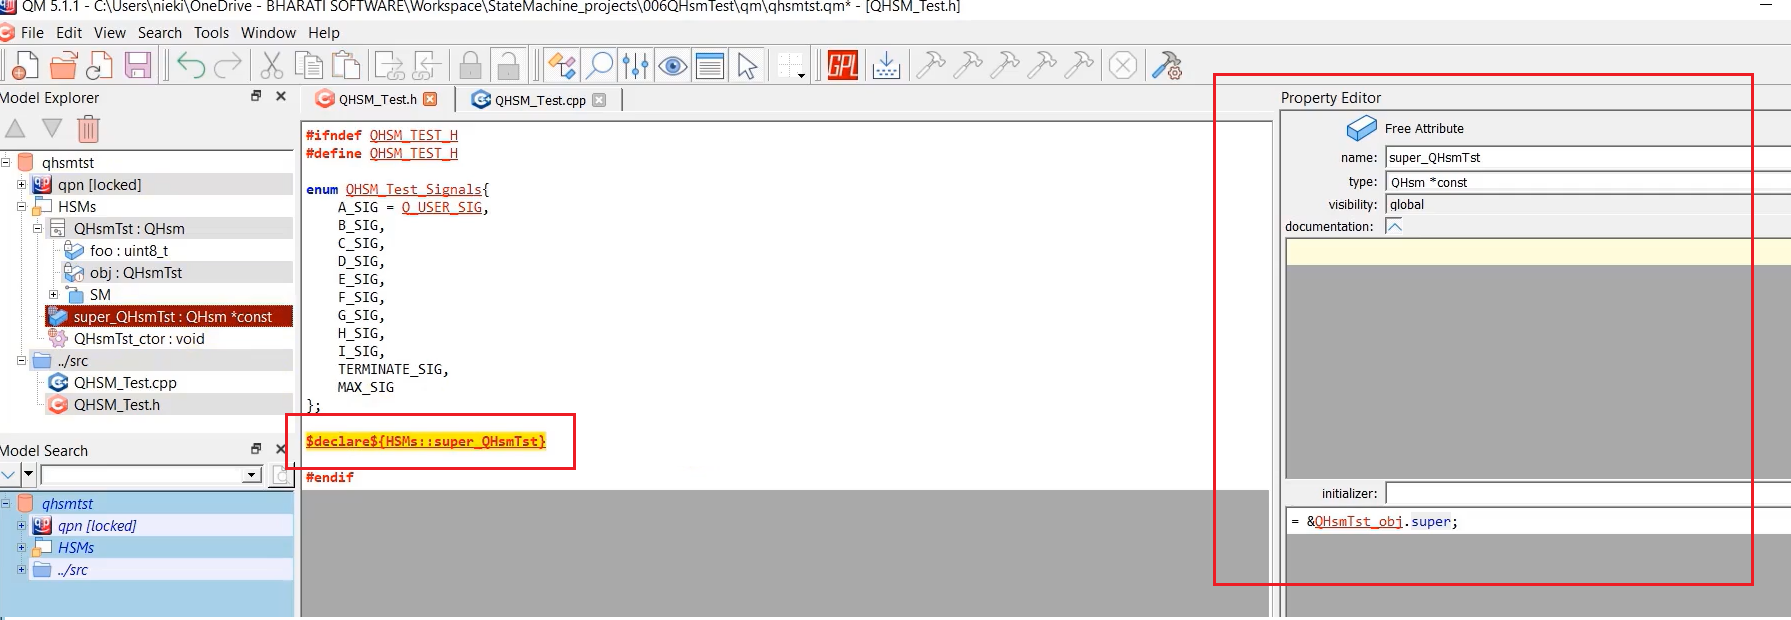
First of all, we will declare this in QHSM_Test.h. Because it is shared with other files, I will use the declare directive here. #declare, just drag and drop super_QHsmTst: QHSM *const.
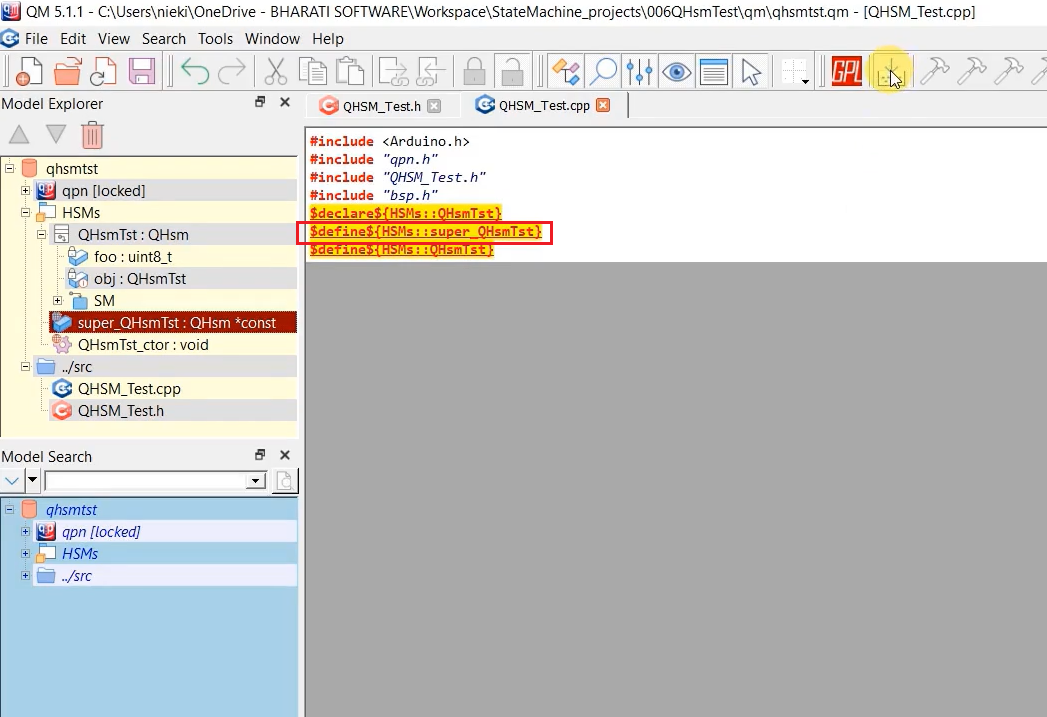
And I define this in QHSM_Test.cpp file, as shown in Figure 15. Save it and produce the code.
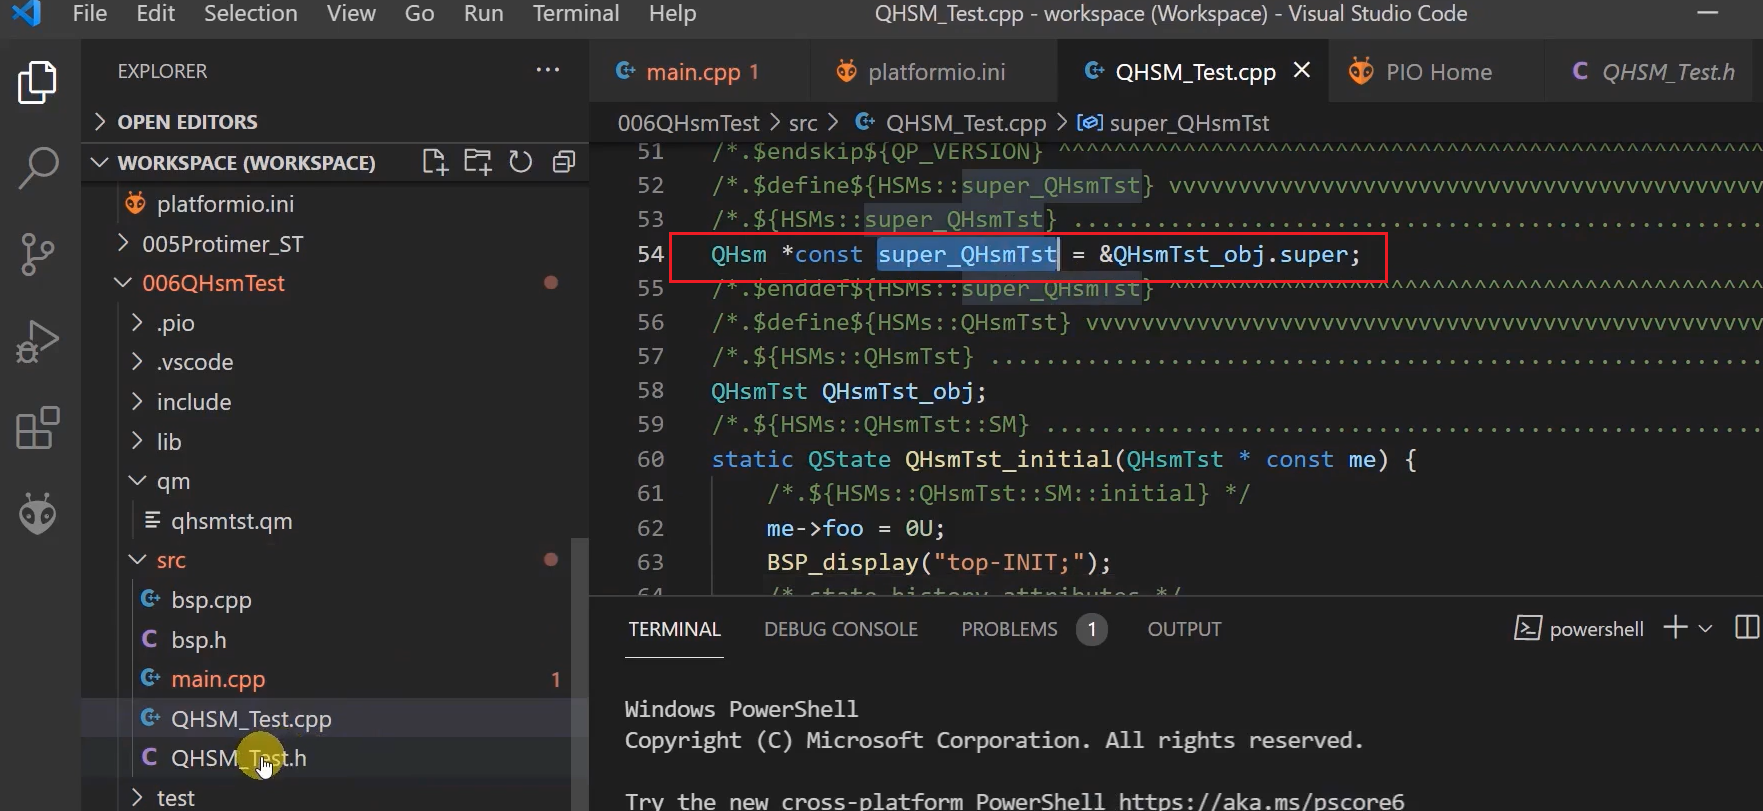
Here, you can see that we just created a pointer variable of QHsm type and saved the superclass pointer of our main application object. And super_QHsmTst pointer is shared with other files through QHSM_Test.h file. In QHSM_Test.h file, this is externed.
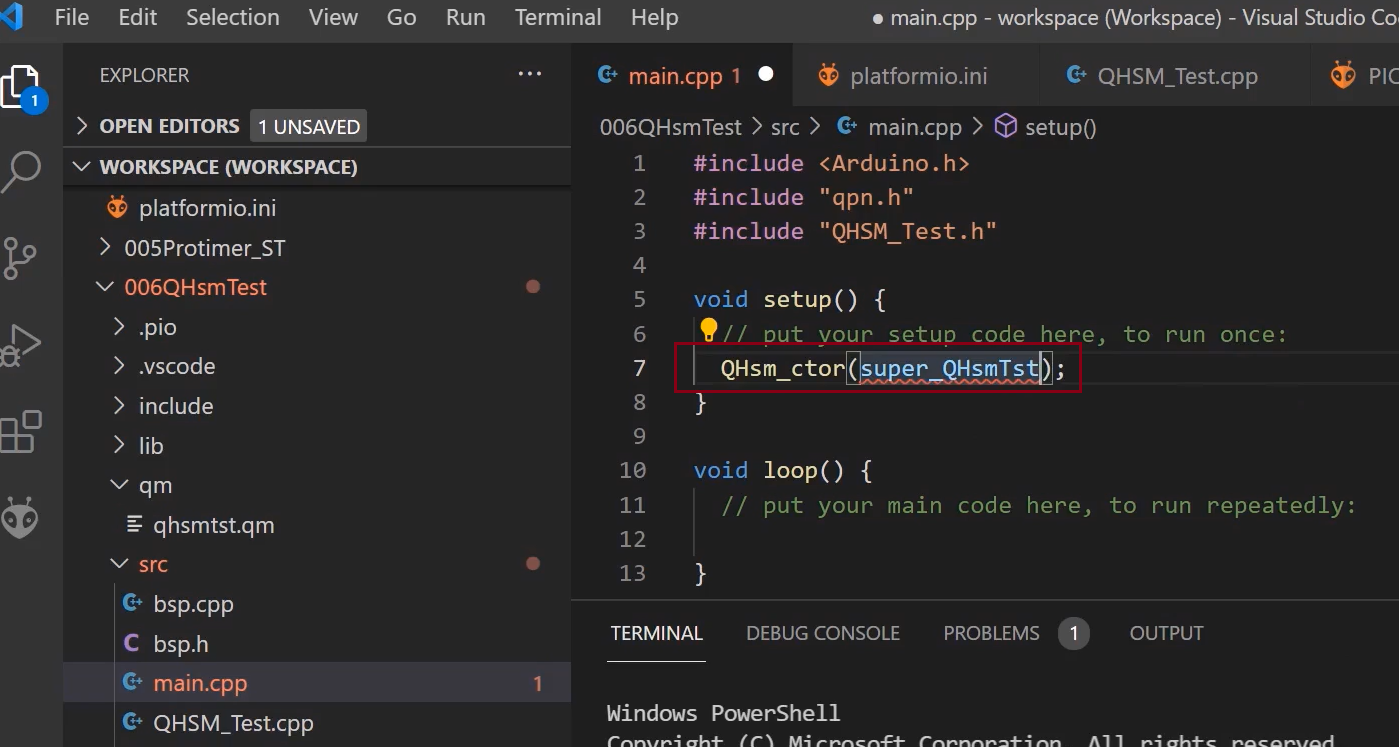
In main.cpp, as shown in Figure 17, you use that super_QHsmTst; that’s a pointer. And for QHsm_ctor(), you have to provide the address of the initial state handler.
Get the Full Course on Embedded System Design using UML State Machine Here.
FastBit Embedded Brain Academy Courses
Click here: https://fastbitlab.com/course1