Adding files in QM tool
This article will learn how to add files to the QM tool. Open a QM Model file using the QM tool.
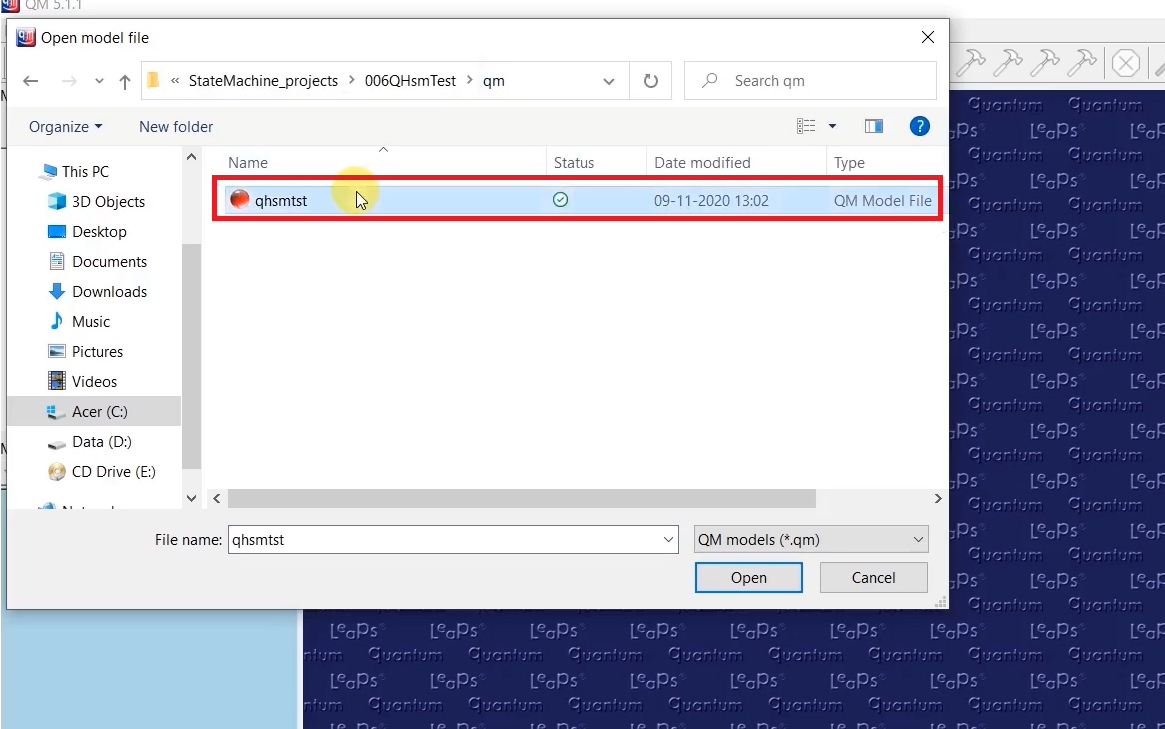
Let’s open the QM tool. And let’s open the model. Click on File→ select Open Model.
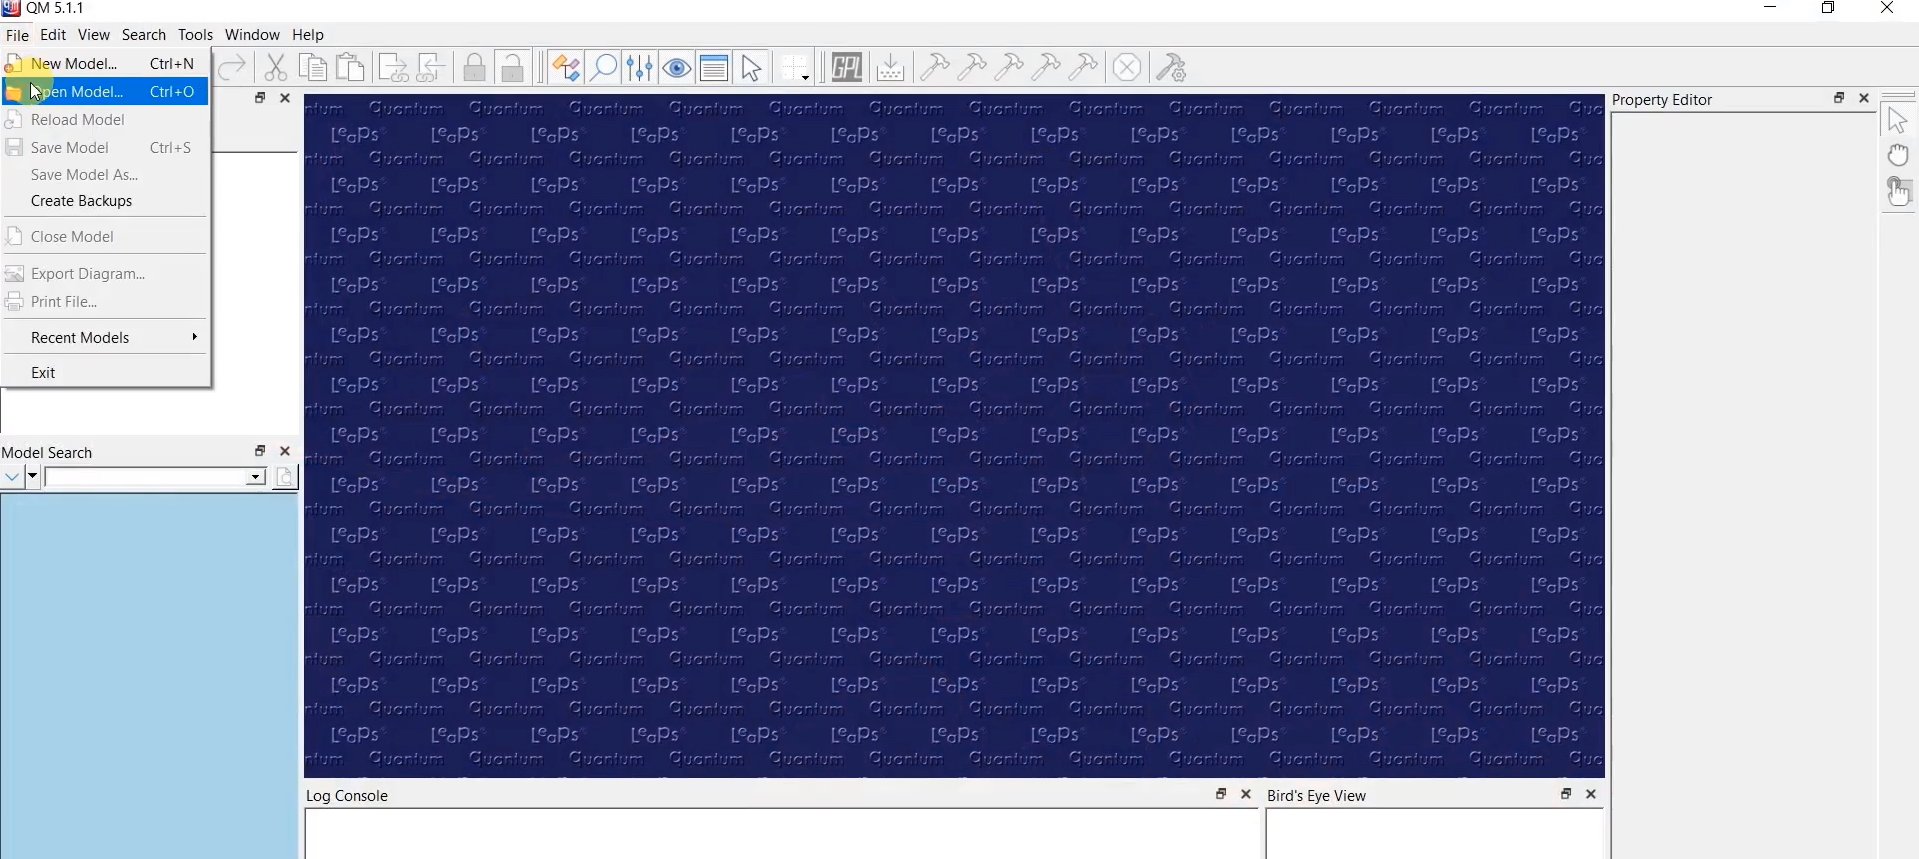
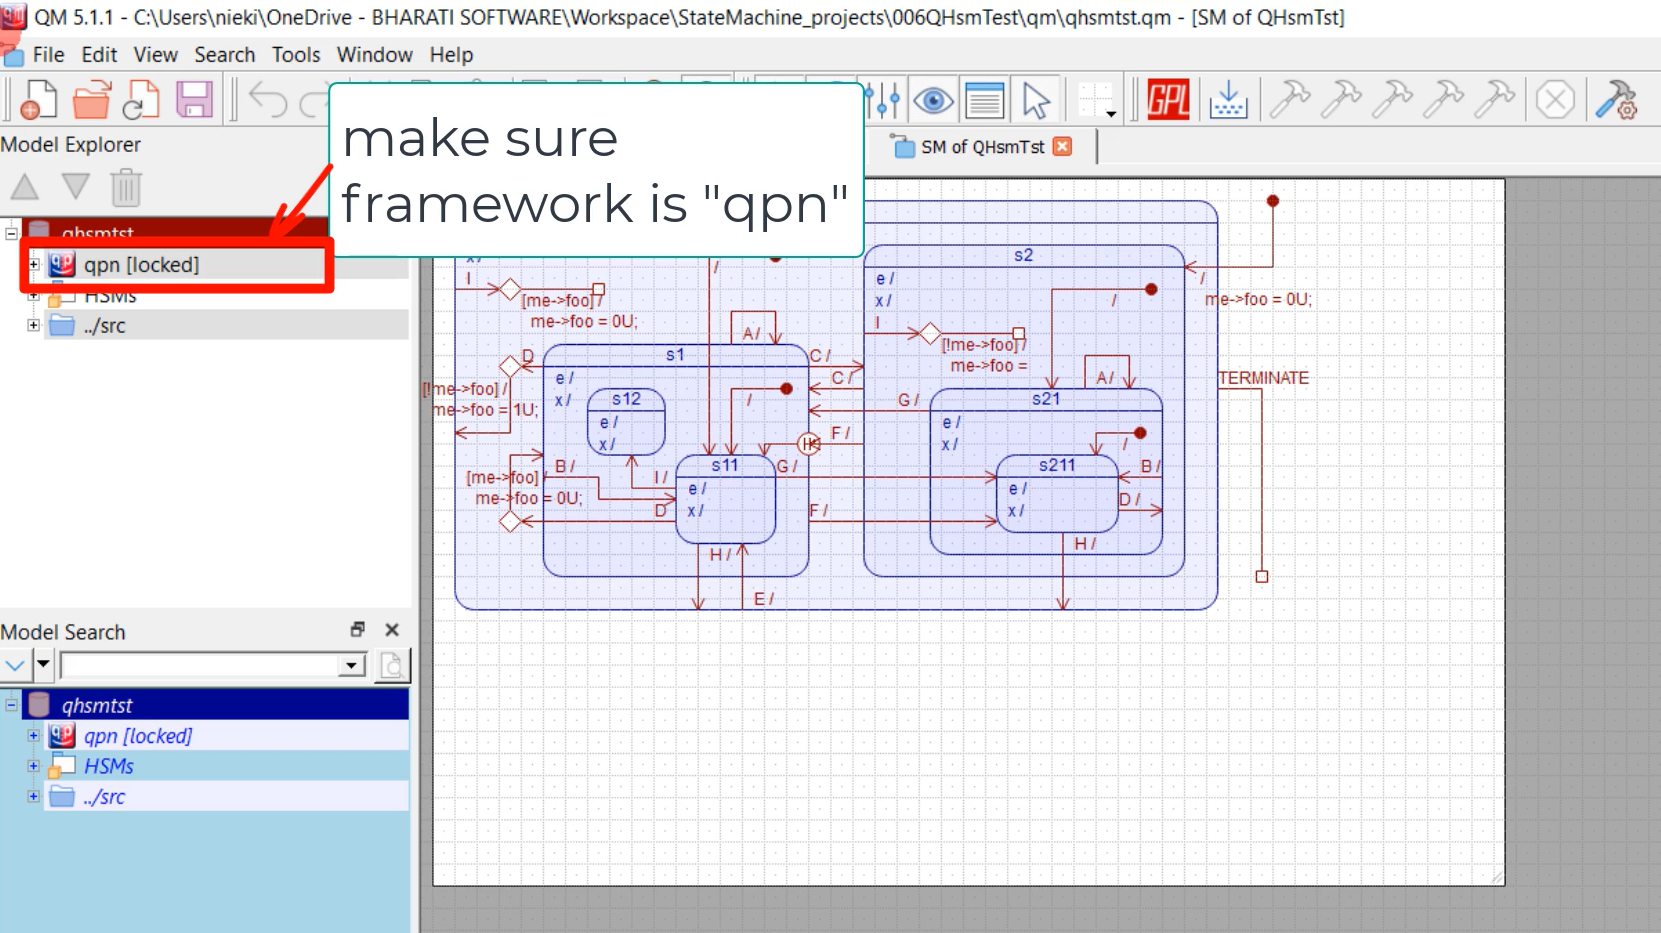
When you open that QM model file, it should show ‘qpn’ here( Figure 3). Now we have to auto-generate the code for this model. The code can be generated into files.
You can mention the file names on the left-hand side, under which you want to generate the code.
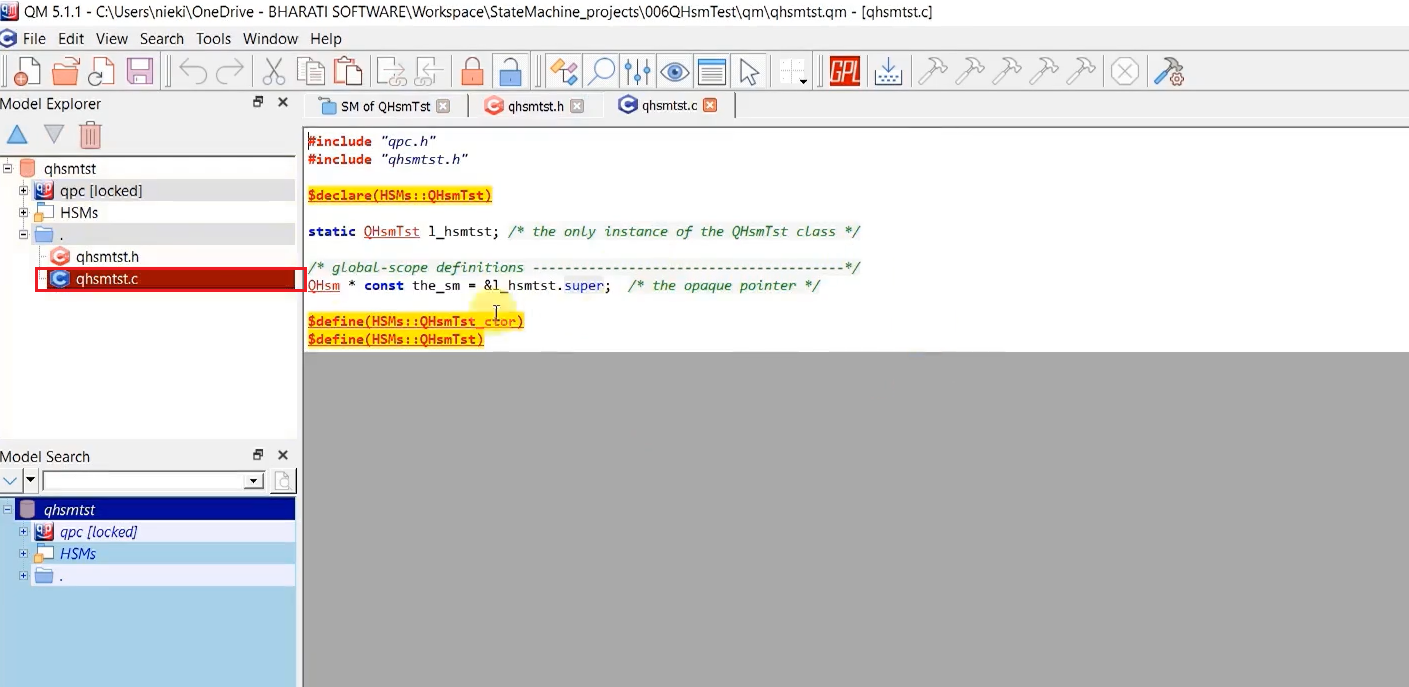
When you load the 006QHsmTest project, the project already has two files here, shown in Figure 4. qhsmtst.h header file and qhsmtst.c file.
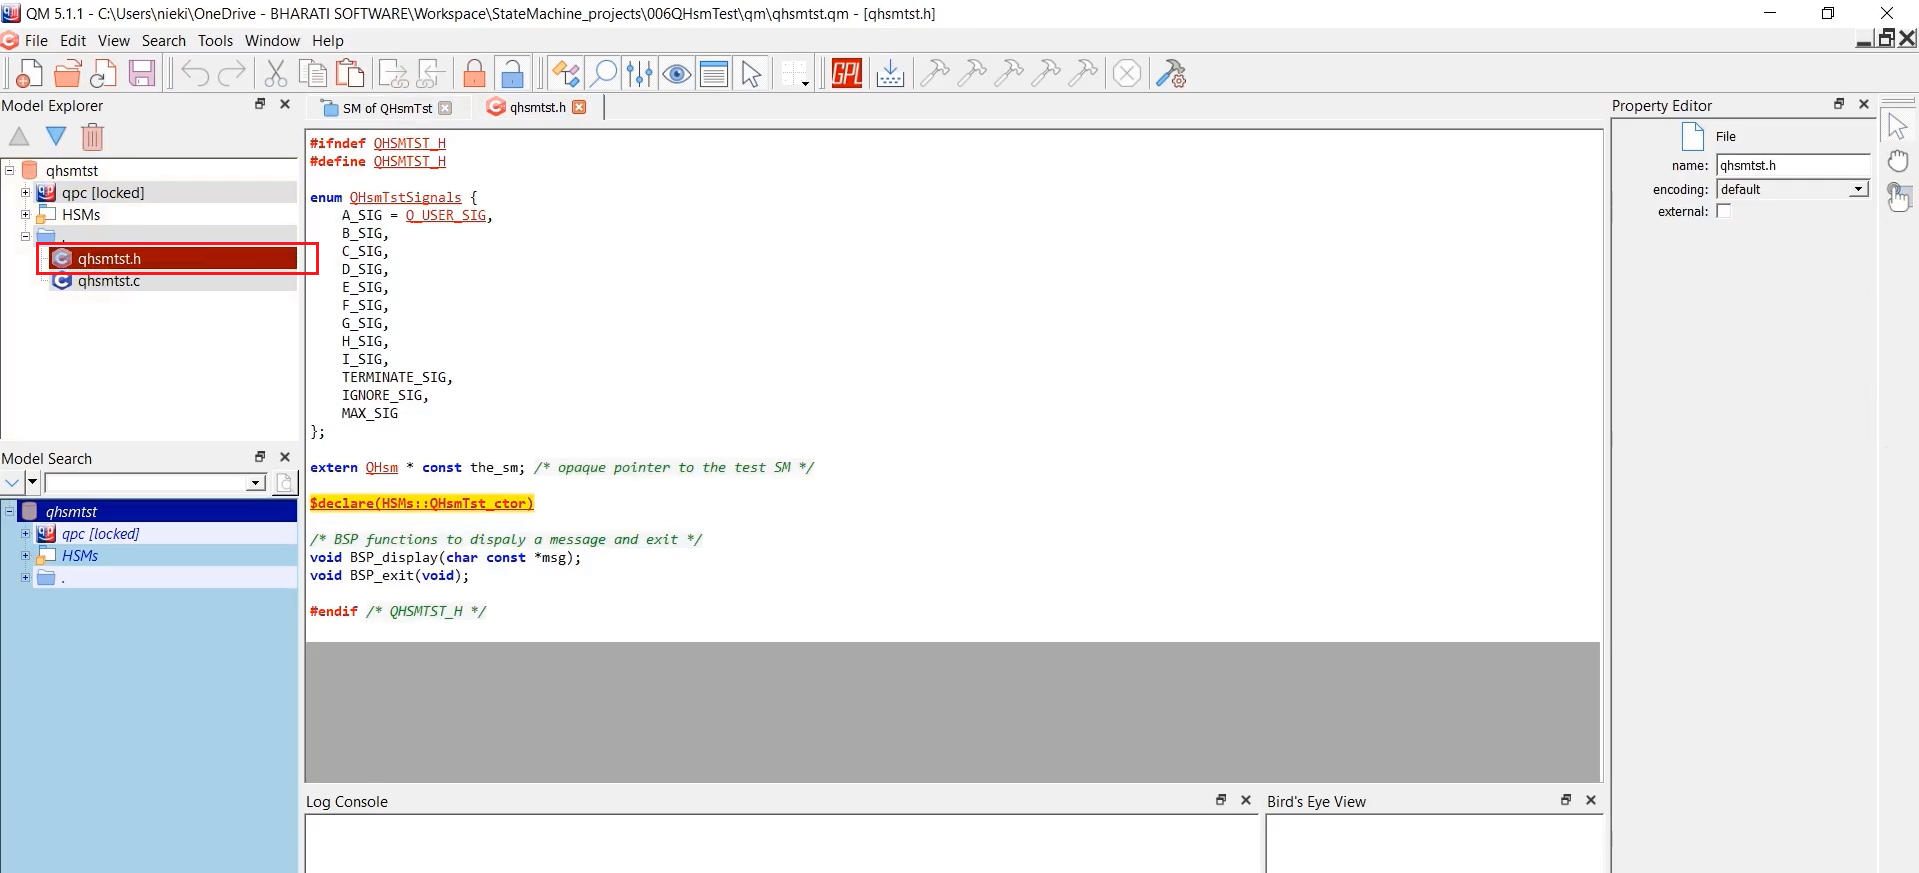
These files contain code generation directives of the QP framework to generate the code. So, using the directives, you can control what kind of code you want to generate. If you’re going to generate the function declarations, you can use the declare directive; if you’re going to generate the function definitions, you can define a directive like that.
We will do one thing: we will delete that file and create that once again to understand the usage of the code generation directives of the framework.
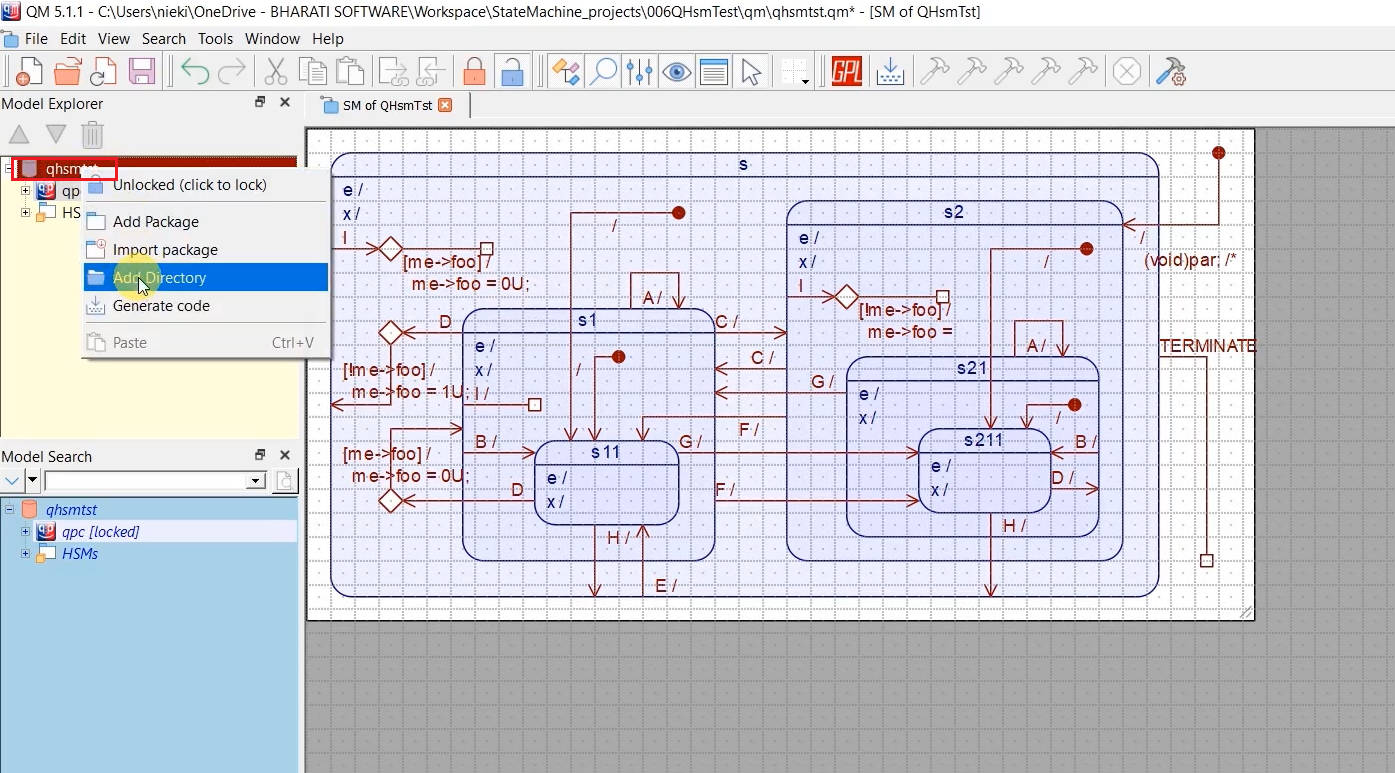
To create a directory, let’s click on the qhsmtst file and select Add directory, as shown in Figure 6.
You can mention the path of the directory. If you mention the ‘ . ‘, that signifies the directory in which this model file is present. That means, if you mention ‘ . ‘ in the directory path, it refers to the ‘qm’ folder in visual studio. Because under the ‘qm’ folder, we have the model file, as shown in Figure 7. That’s why this path is relative to the directory in which the model file is present.
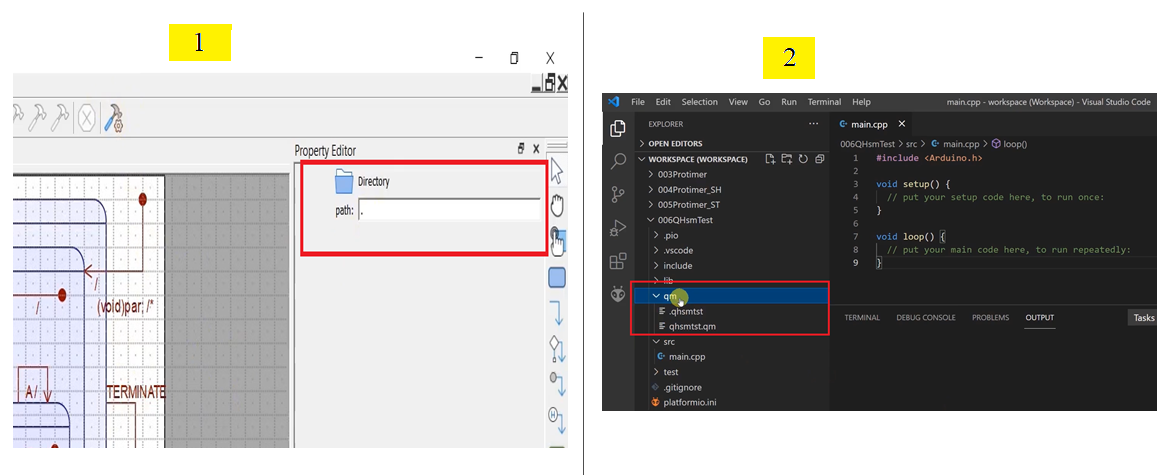
And to this ‘.’ directory, we can add files.
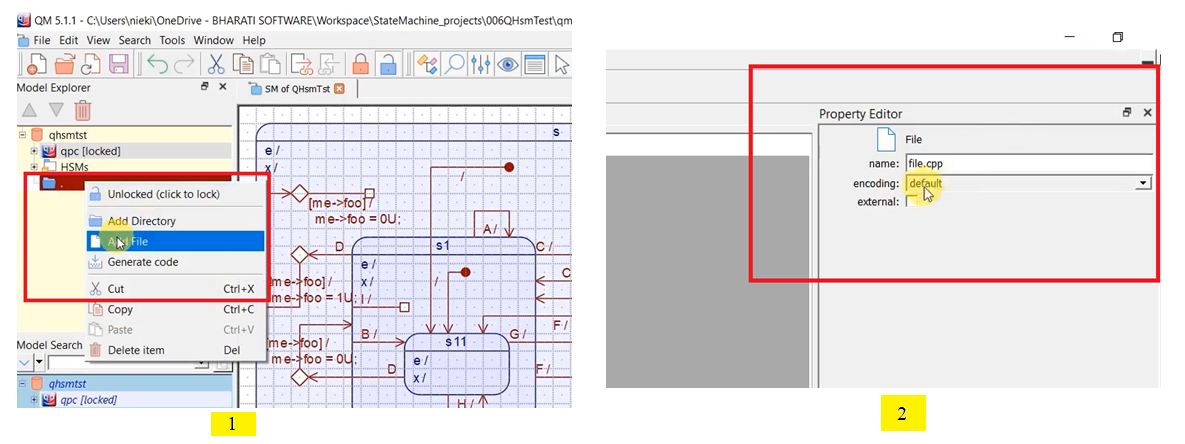
- Right-click on the directory and click on Add File.
- Give the name as ‘file.cpp’. You just created one file, file.cpp, in the current directory.
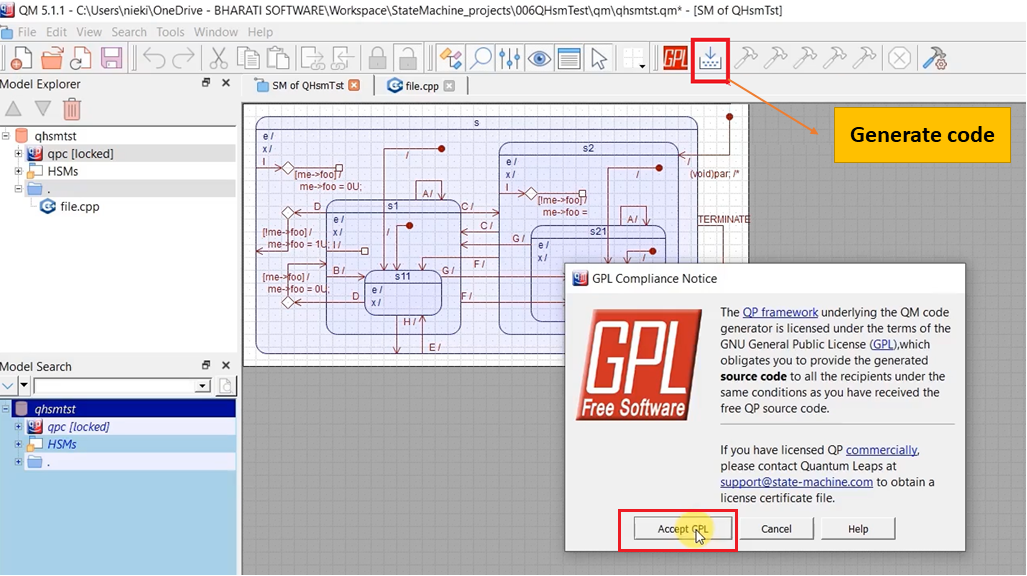
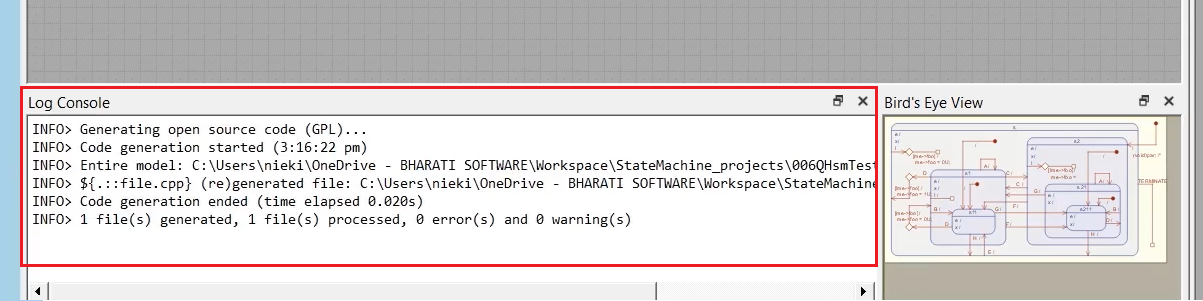
Suppose you want to see the file.cpp file, then you have to generate the code. Let’s click on generate code → Accept GPL, as shown in Figure 9.
As you can see in Figure 10, one file is generated.
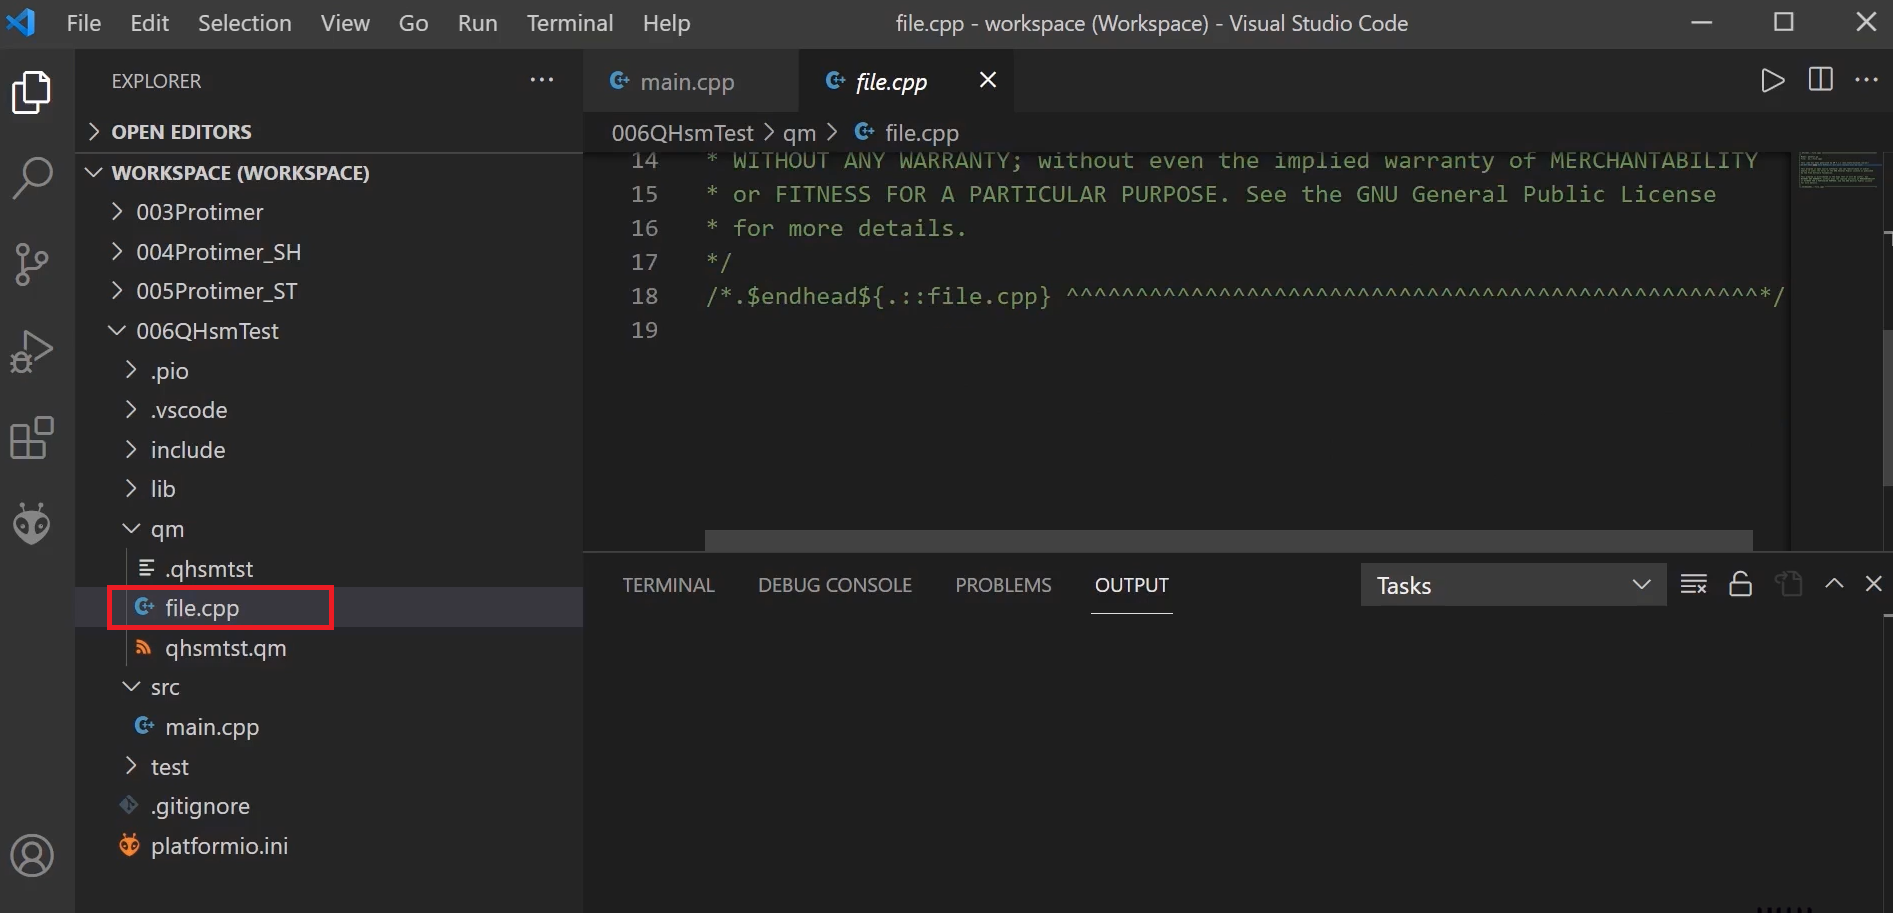
You can see the file.cpp file under this ‘qm’ folder, as shown in Figure 11. It doesn’t contain any code because we have to use the code generation directives to include code. But, I don’t want to create any files here; rather, I want to create them under source. Under source, I have already got ‘main.cpp’ and will create two files.
I’m going to create two files.
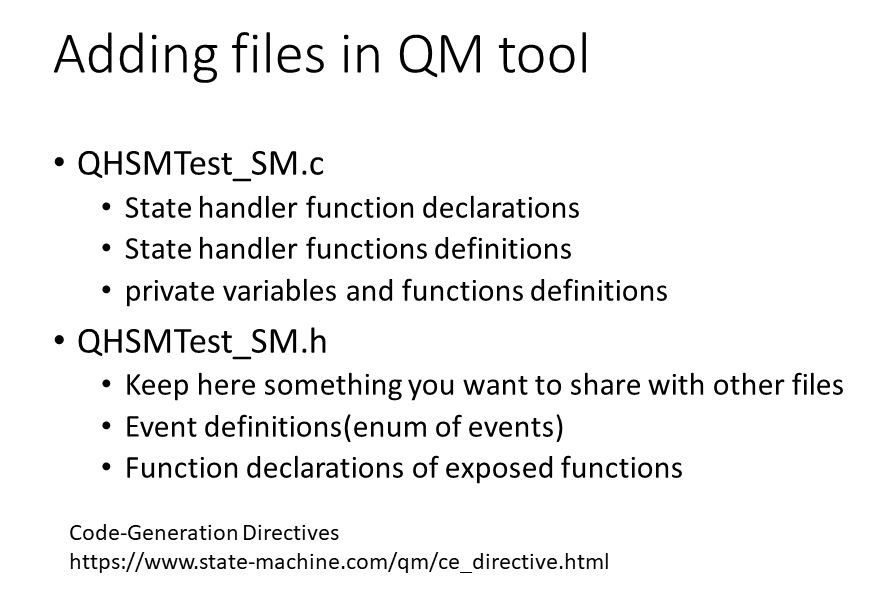
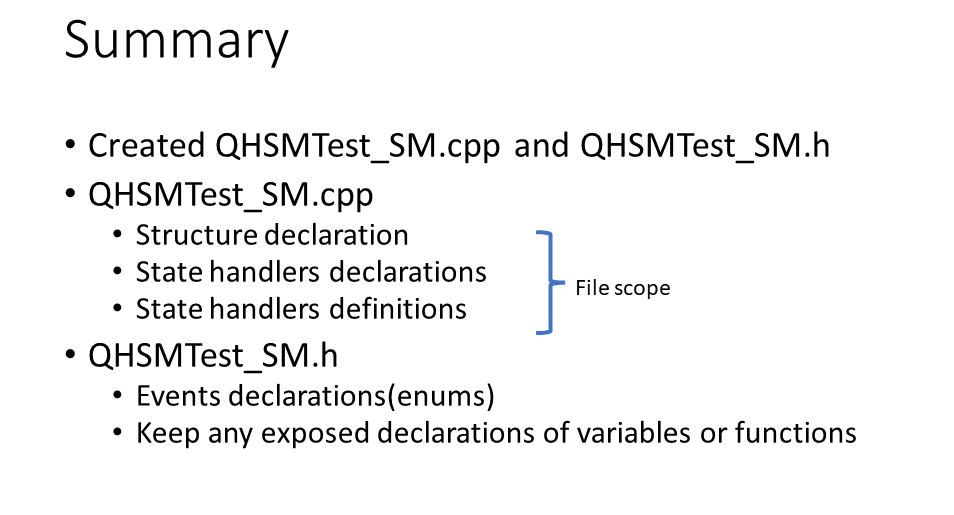
1. QHSMTest_SM.c
StateMachine.c contains all the state machine implementation. That means state handler function definitions. Usually, state handler functions will be private to a file. That’s why you can keep them as static to a file.
You can also keep state handler function declarations in SM.c.
You can also use this file to keep any private variables related to the state machine.
For our project will create this as QHSMTest_SM.cpp.
2. QHSMTest_SM.h
You can also create one StateMachine.h header file. Here, you keep everything you want to share with other files, like function declarations of exposed functions, event definitions like enum for events, etc. You can keep any details you want to share with other files in a state machine.h file.
Now, I create 2 files for qhsmtst model. One is a QHSMTest_SM.cpp and QHSMTest_SM.h file. I want to keep those two files under the ‘src’ folder.
Now, you point this path to a different directory. What you can do is you can come out of the current directory using ../, you actually came out of the ‘qm’ directory and then point to the src directory. I’ll write ‘../src’ here.
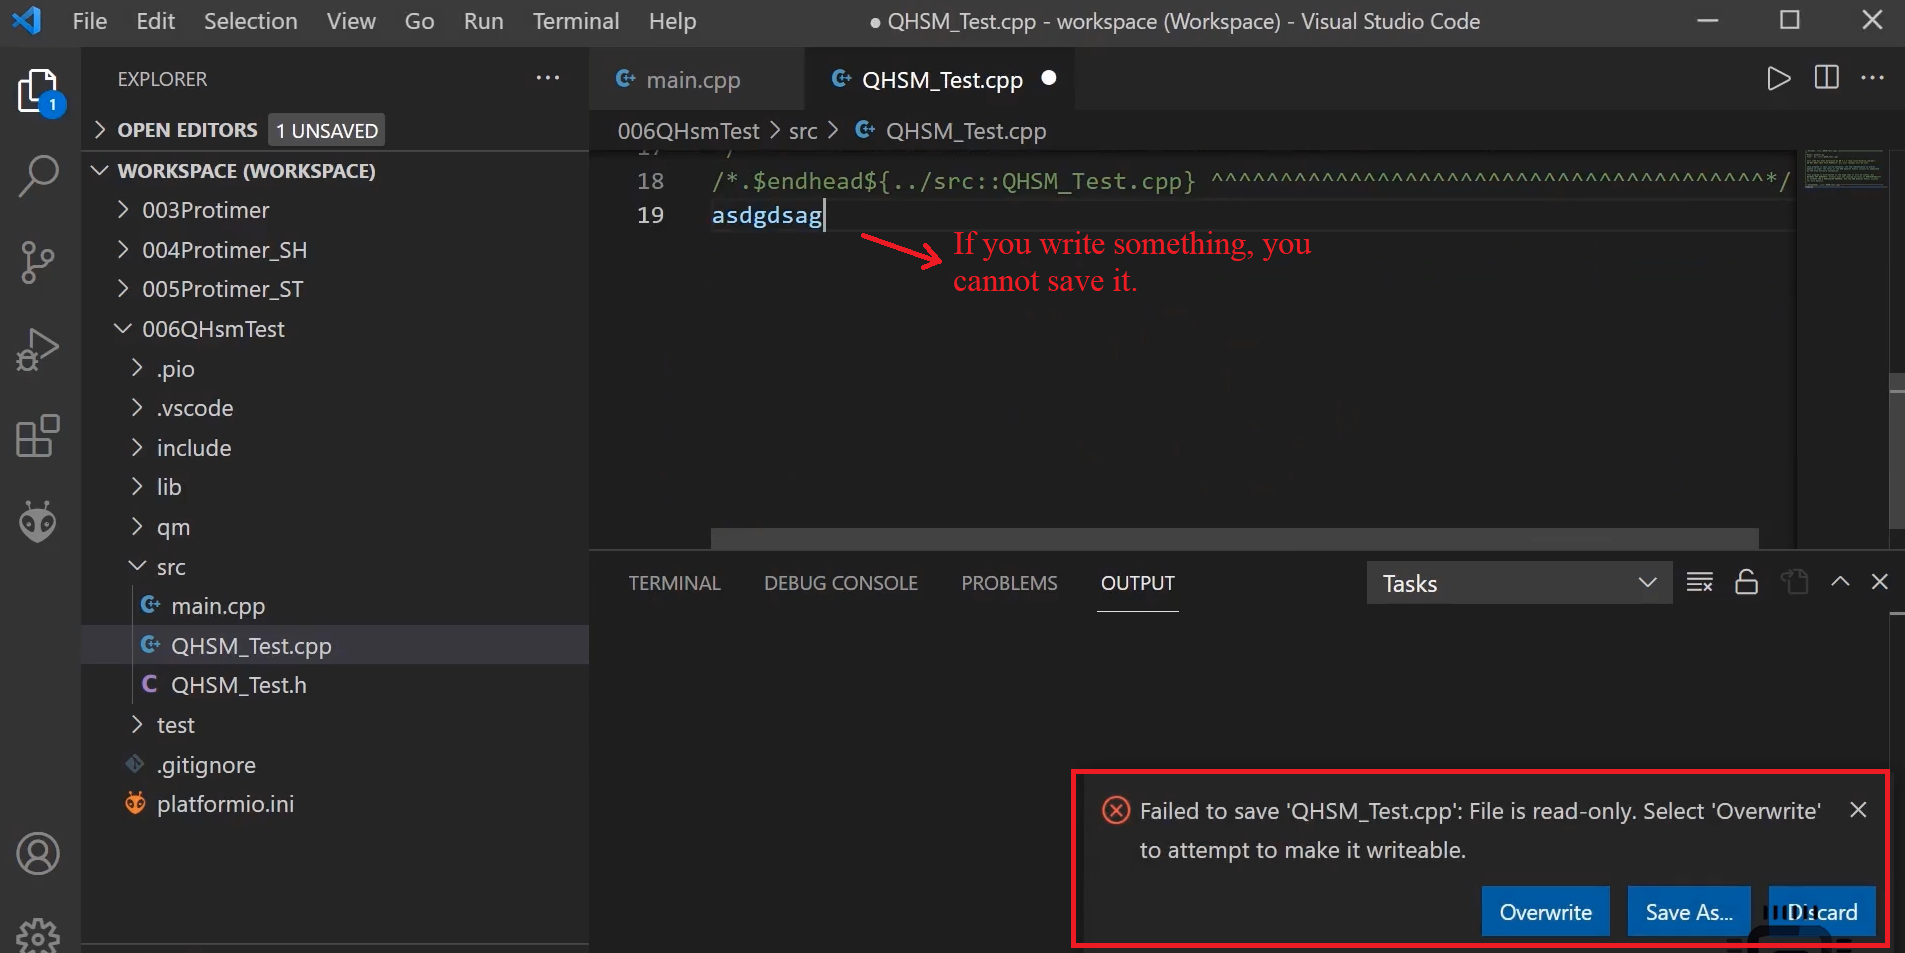
After that, let’s create two files in the ../src directory. Click on that directory → select Add File. One file is QHSM_Test.cpp, and another file QHSM_Test.h file. Save it and generate the code. And now you can see that two files have appeared under ‘src.’
If you try to edit something here, you cannot save it. You can see that these files are marked as read-only files by the qm tool. You cannot edit anything here.
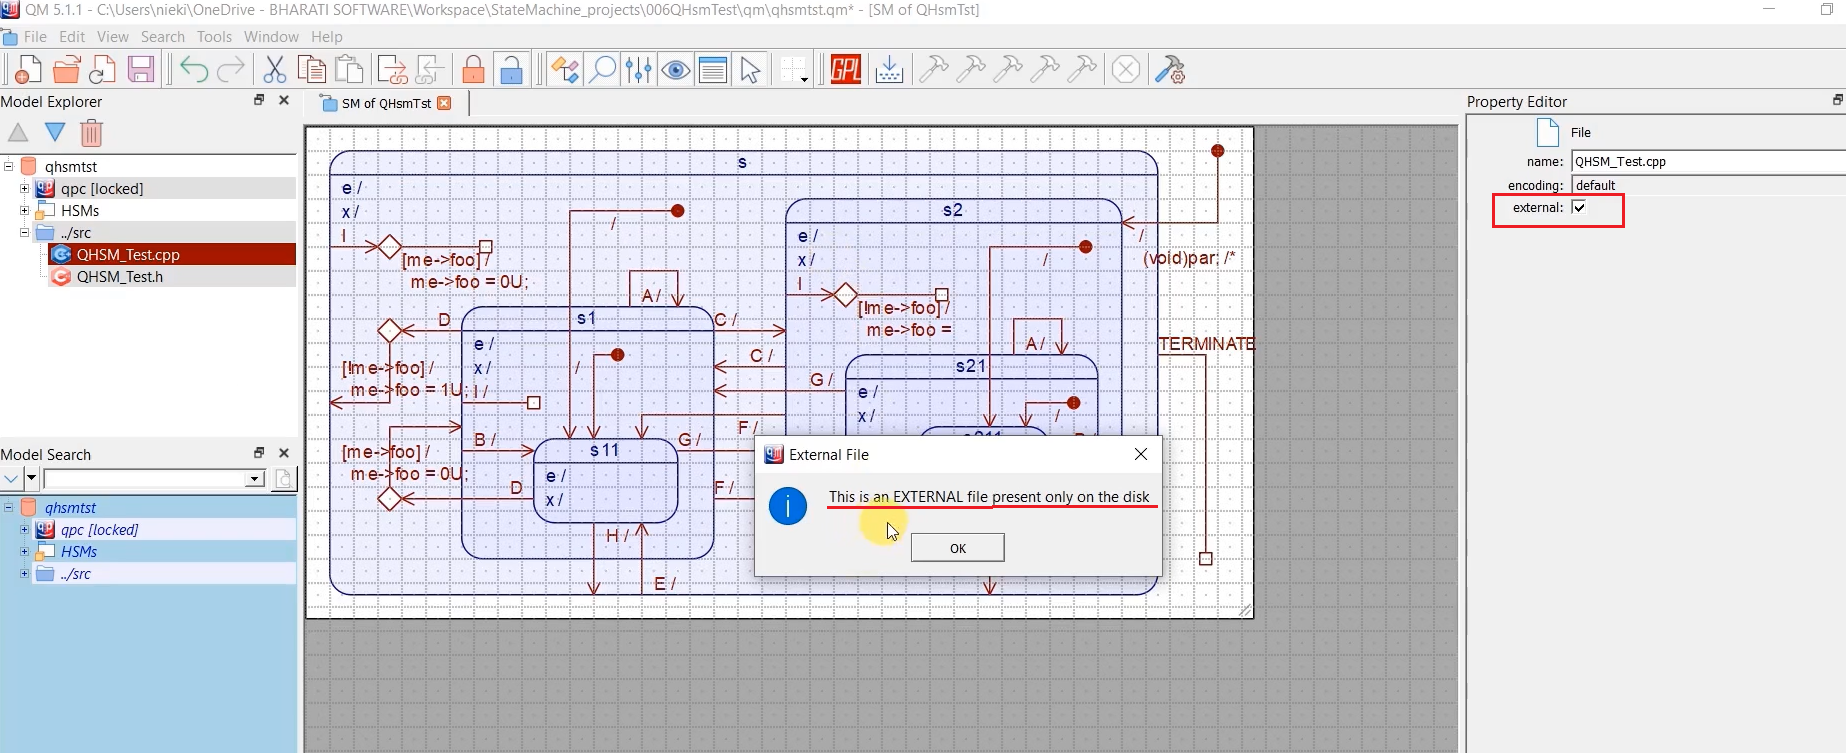
There are two ways to edit the files that you have just created. One is using the external IDE. If you want to edit the files here, you have to mark the files as external, and then you cannot open these files under this software. Because this is an external file, you have to edit these files using external IDEs.
That’s why, if you want to edit the files using some external IDEs, then you have to tick the ‘external’ option for the files, as shown in Figure 14.
We have created two files. Now let’s understand how to generate the code. For that, you have to explore code generation directives. This will know by going through the documentation.
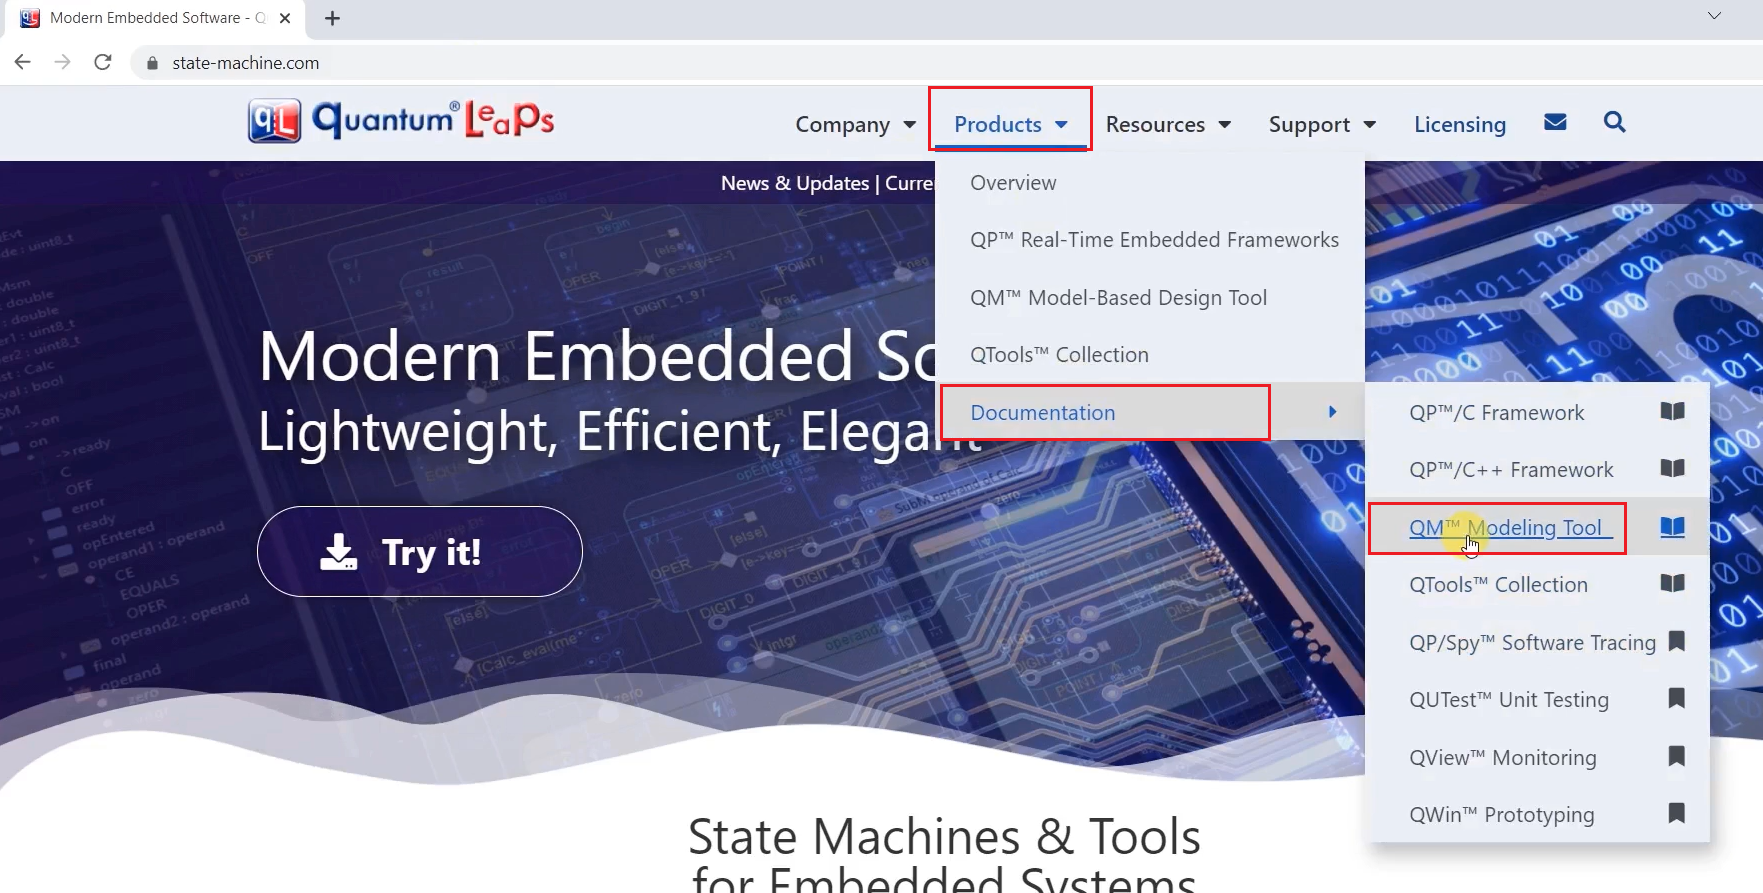
Go to Quantum Leaps website → Products→ Documentation → and click on QM™ Modeling Tool, as shown in Figure 15.
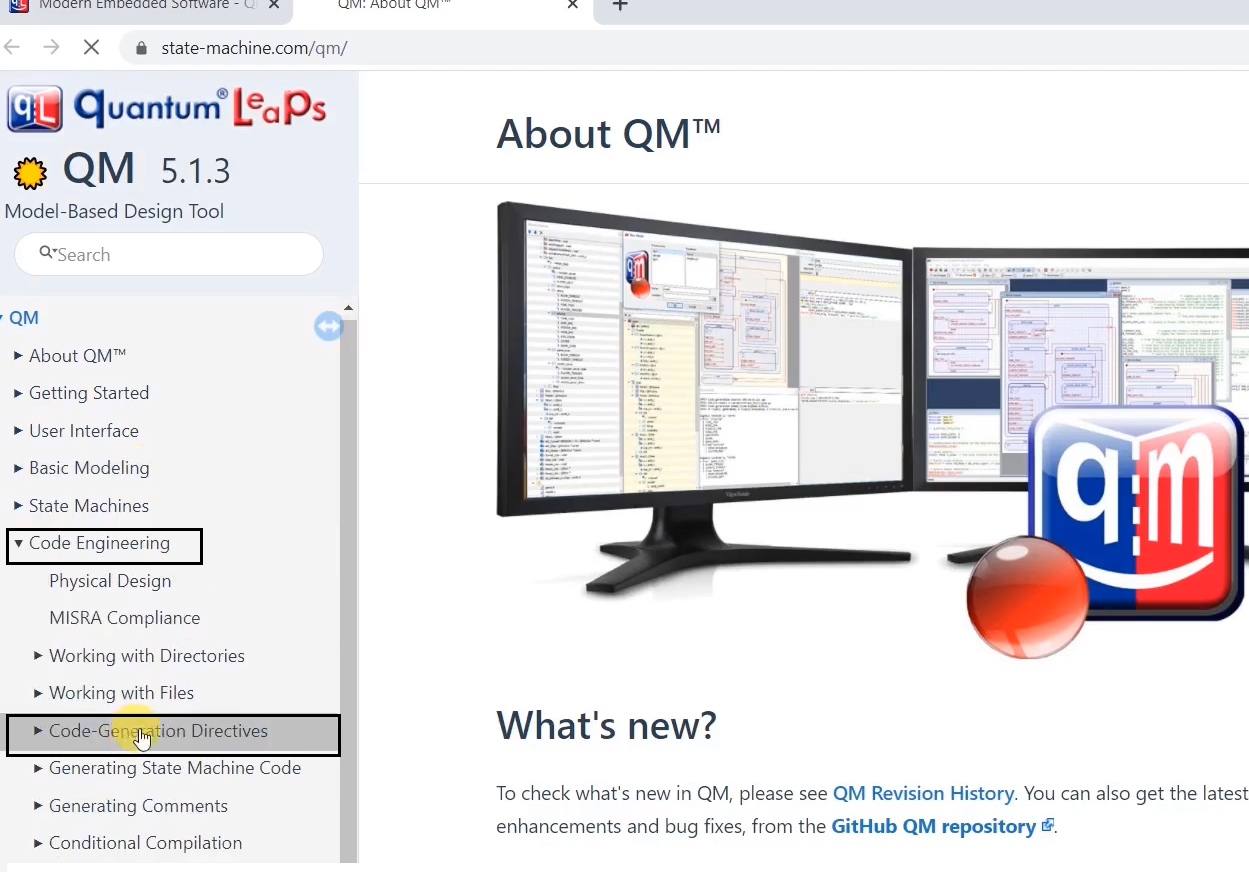
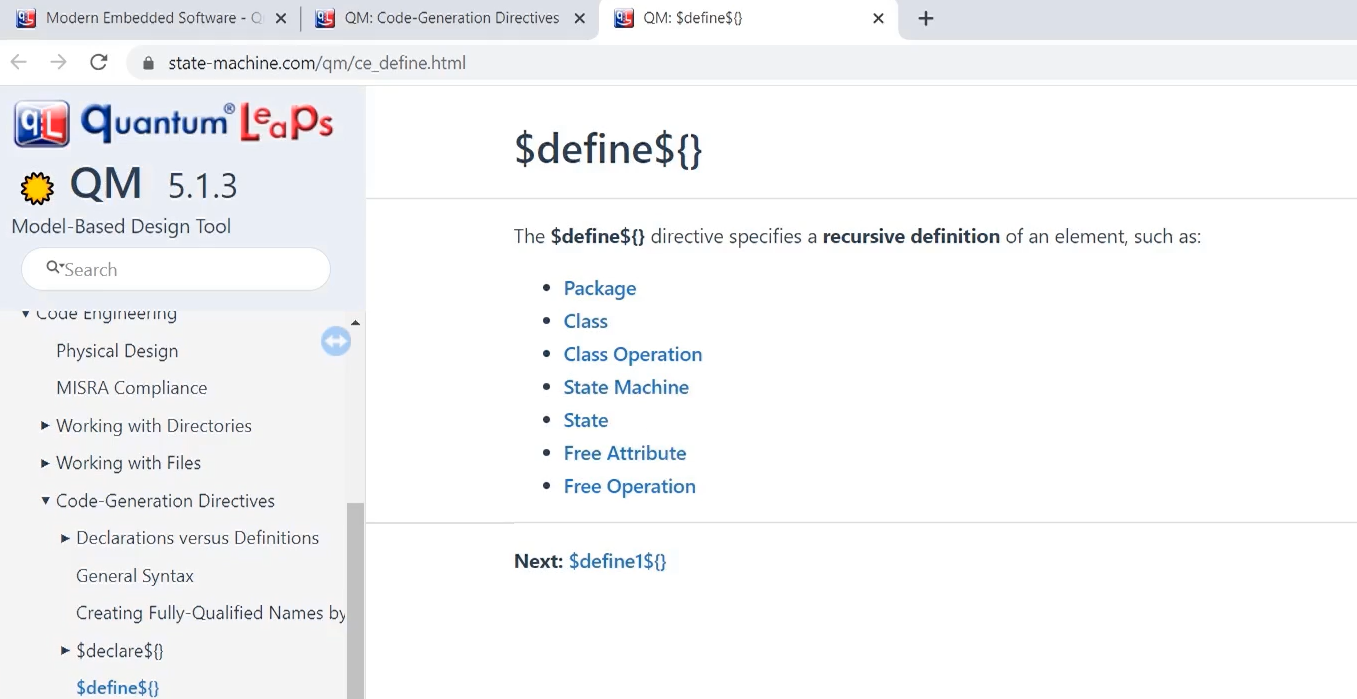
This is the complete documentation. Here go to Code Engineering and open the Code-Generation Directives.
Code generation directives are nothing but some directives. I mean, directives to the QM tool to generate the code. You can fine-tune which code you want to generate and which code you don’t want to generate, all those things using these directives. These directives give a direction to the tool to generate the code.
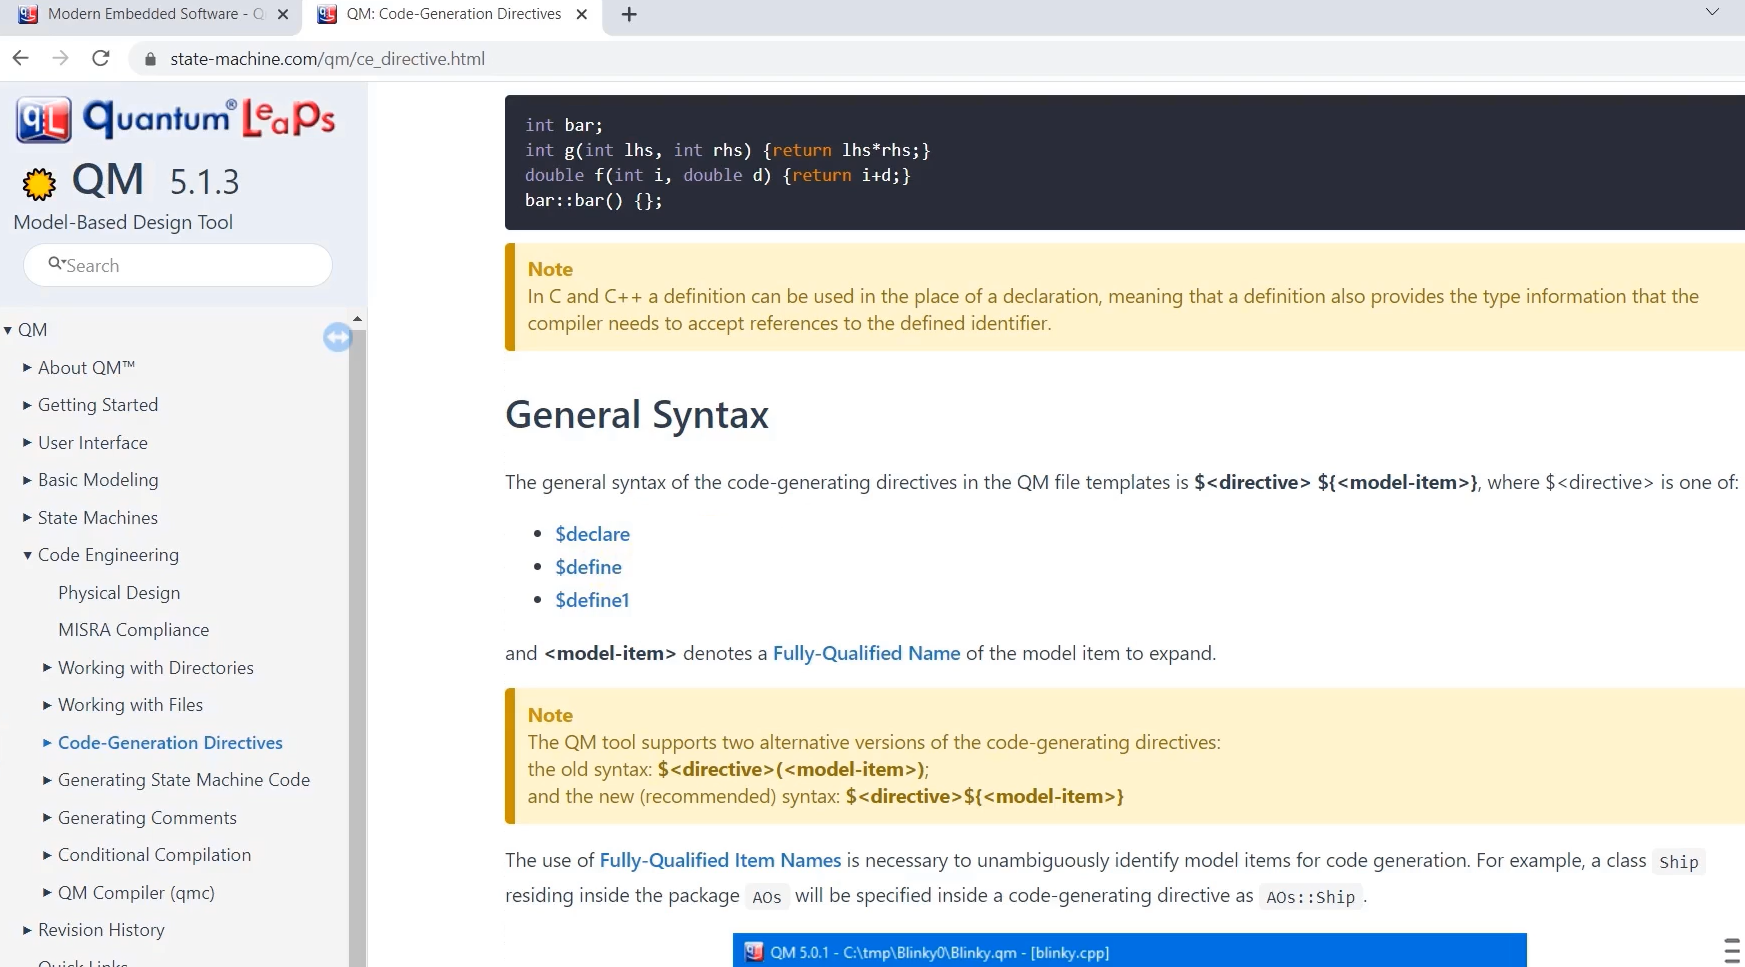
There are three major directives.
- declare directive
- define directive
- define1 directive
- You want to generate the function declarations or function signatures, then you can use the declare directive.
- Suppose you want to generate the function definitions, you can use define directive. Define directive specifies a recursive definition of an element. The element could be anything. It could be a class, an operation, a state machine, a state, a free operation, or a free attribute, like that.
Syntax: $ <directive> ${<model-item>}
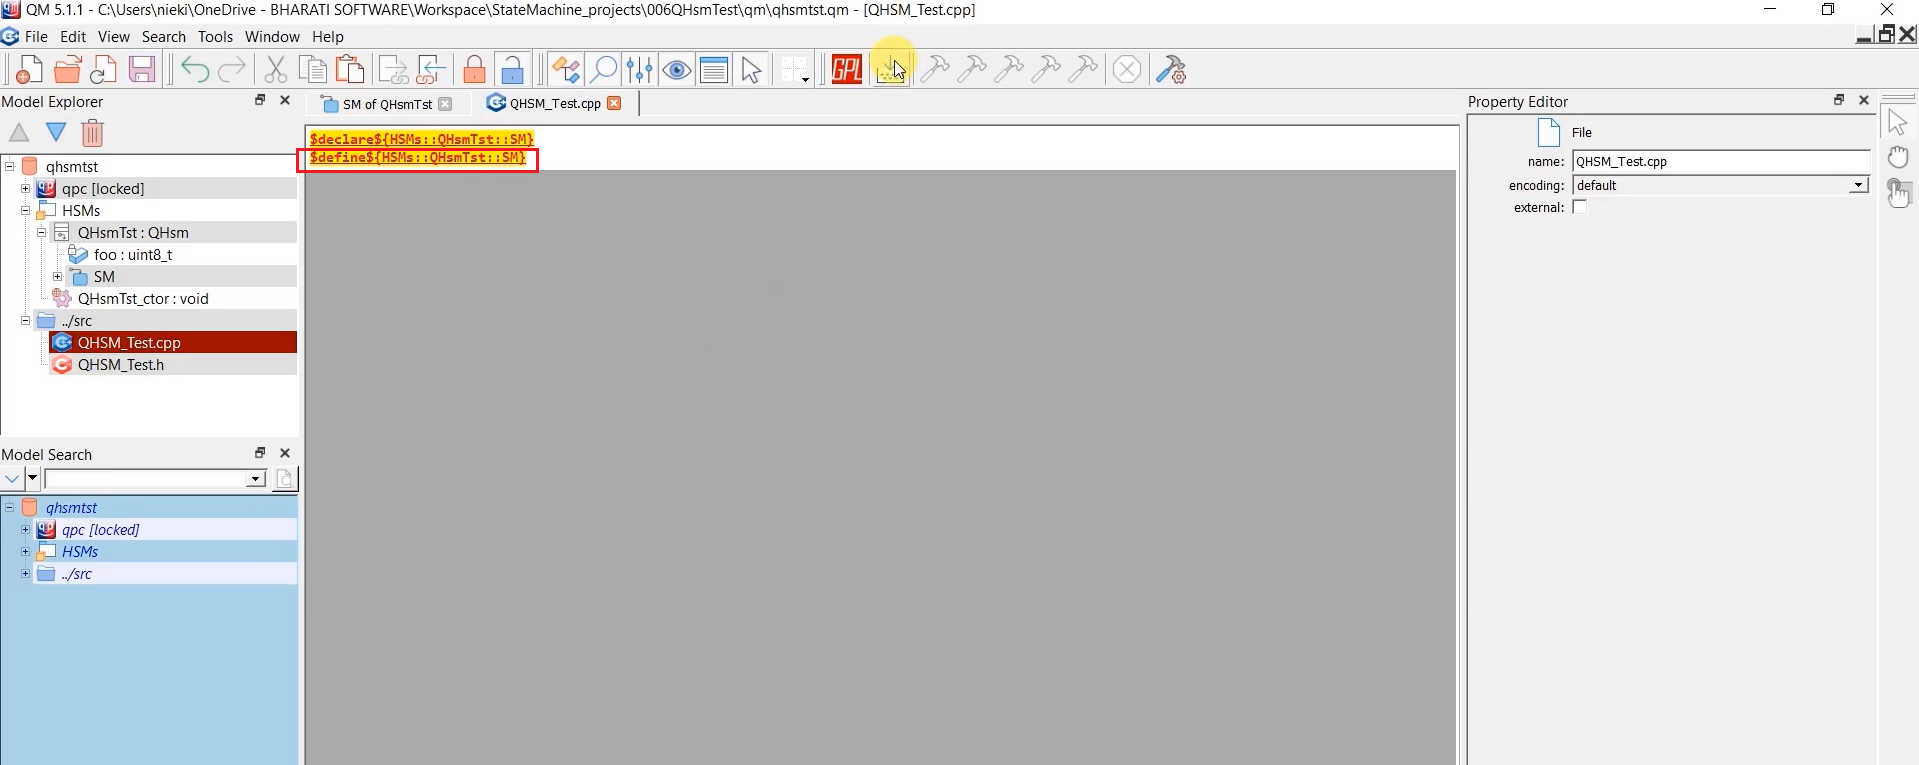
First, let’s start with our QHSM_Test.cpp file. And here, we want to create, or we want to put state handler function declarations or signatures. Let’s see how to do that.
Now head over to our IDE because I cannot edit the files in the ‘qm’ tool. That’s why I have to use my IDE.
We will do one thing. We’ll go to the tool, and for the time being, let’s temporarily make QHSM_Test.cpp file has internal, so disable the external option, then you can open this.
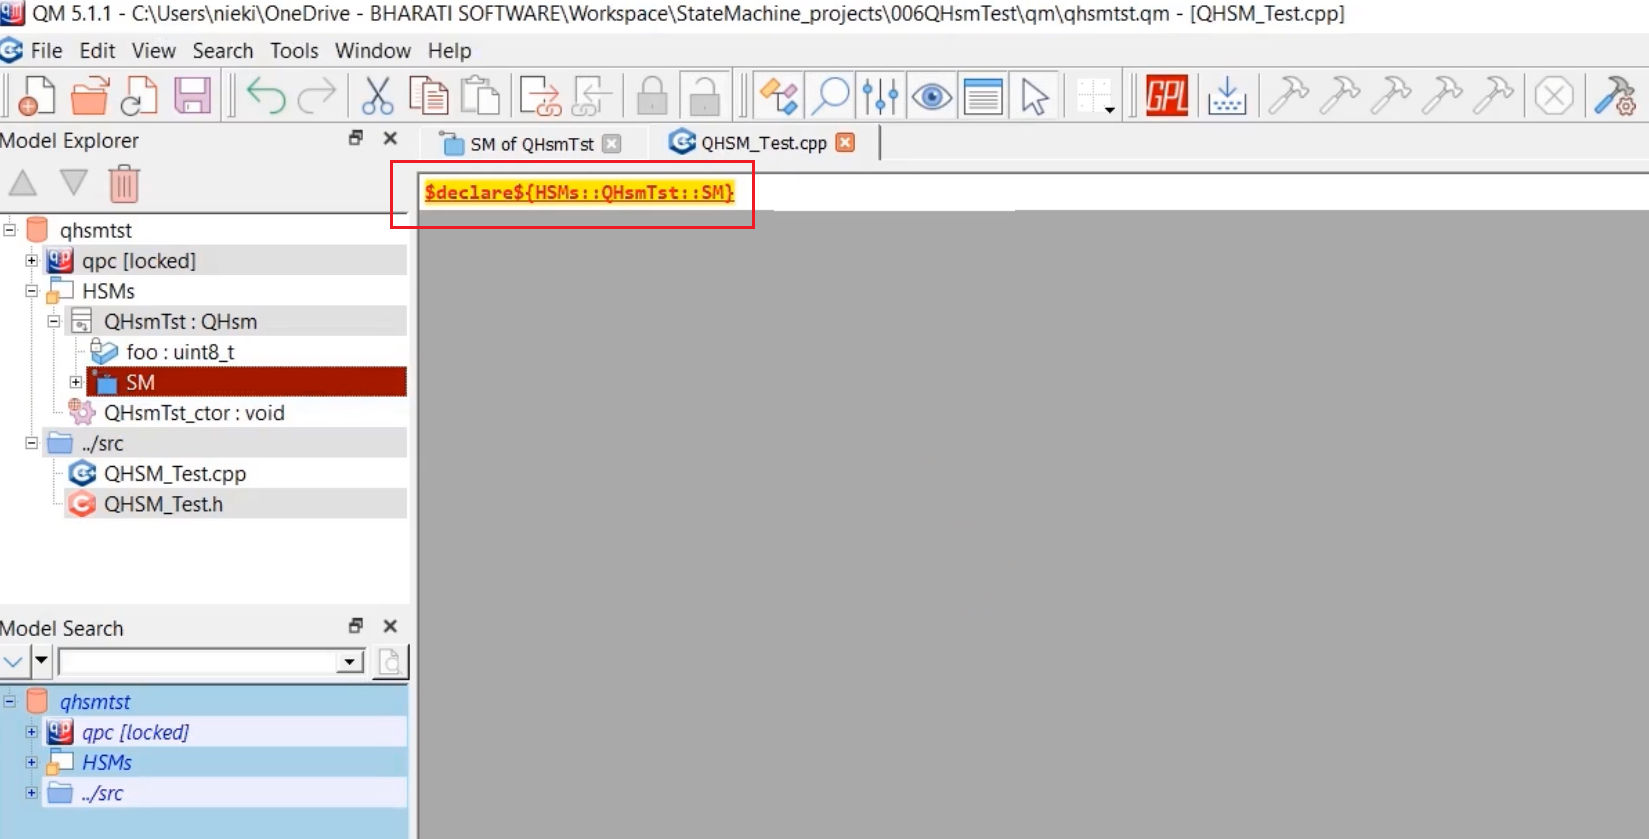
And in the tool, type ‘declare.’ Open HSM package, and under that package QHsmTst: QHsm file. QHsmTst: QHsm is a class, or we call it in ‘C’ programming to the structure. And SM is a state machine of this class. Because we write state machines to model the behavior of a class or an application object, it has got one attribute.
The state machine contains different states. You drag and drop here this one(SM). So, that completes the code generation directive, or you can manually write it. declare is the package name, and QHsmTst is the main class, under that state machine. And we are going to generate now the signatures or declarations of all the state handlers of this state machine. Save it and generate the code.
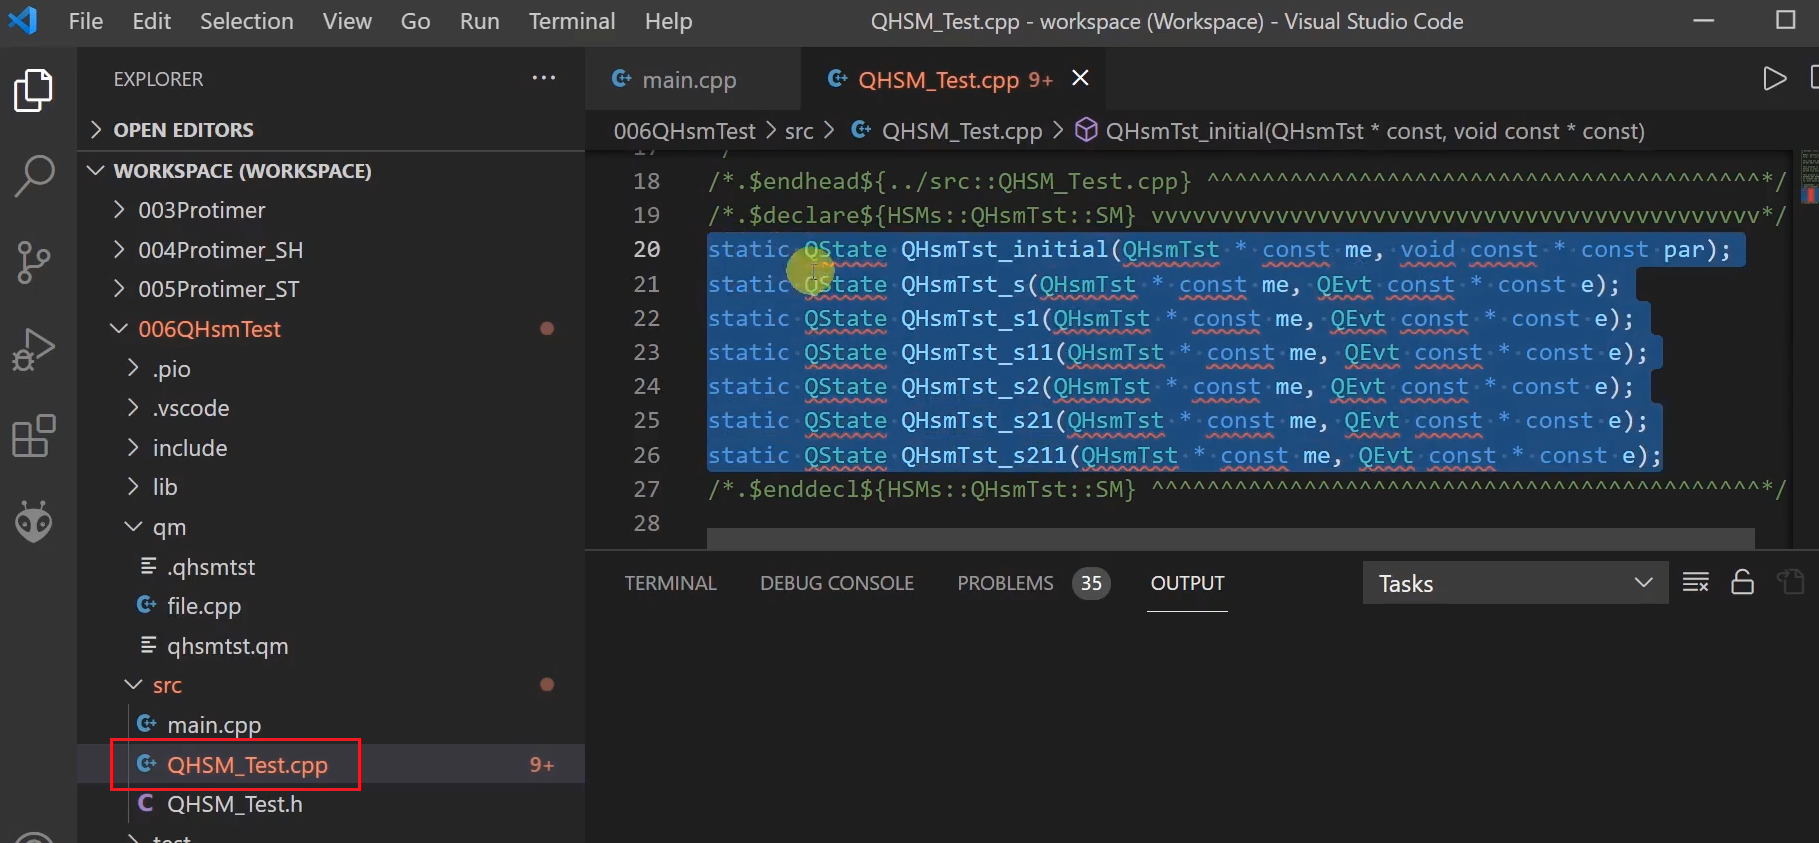
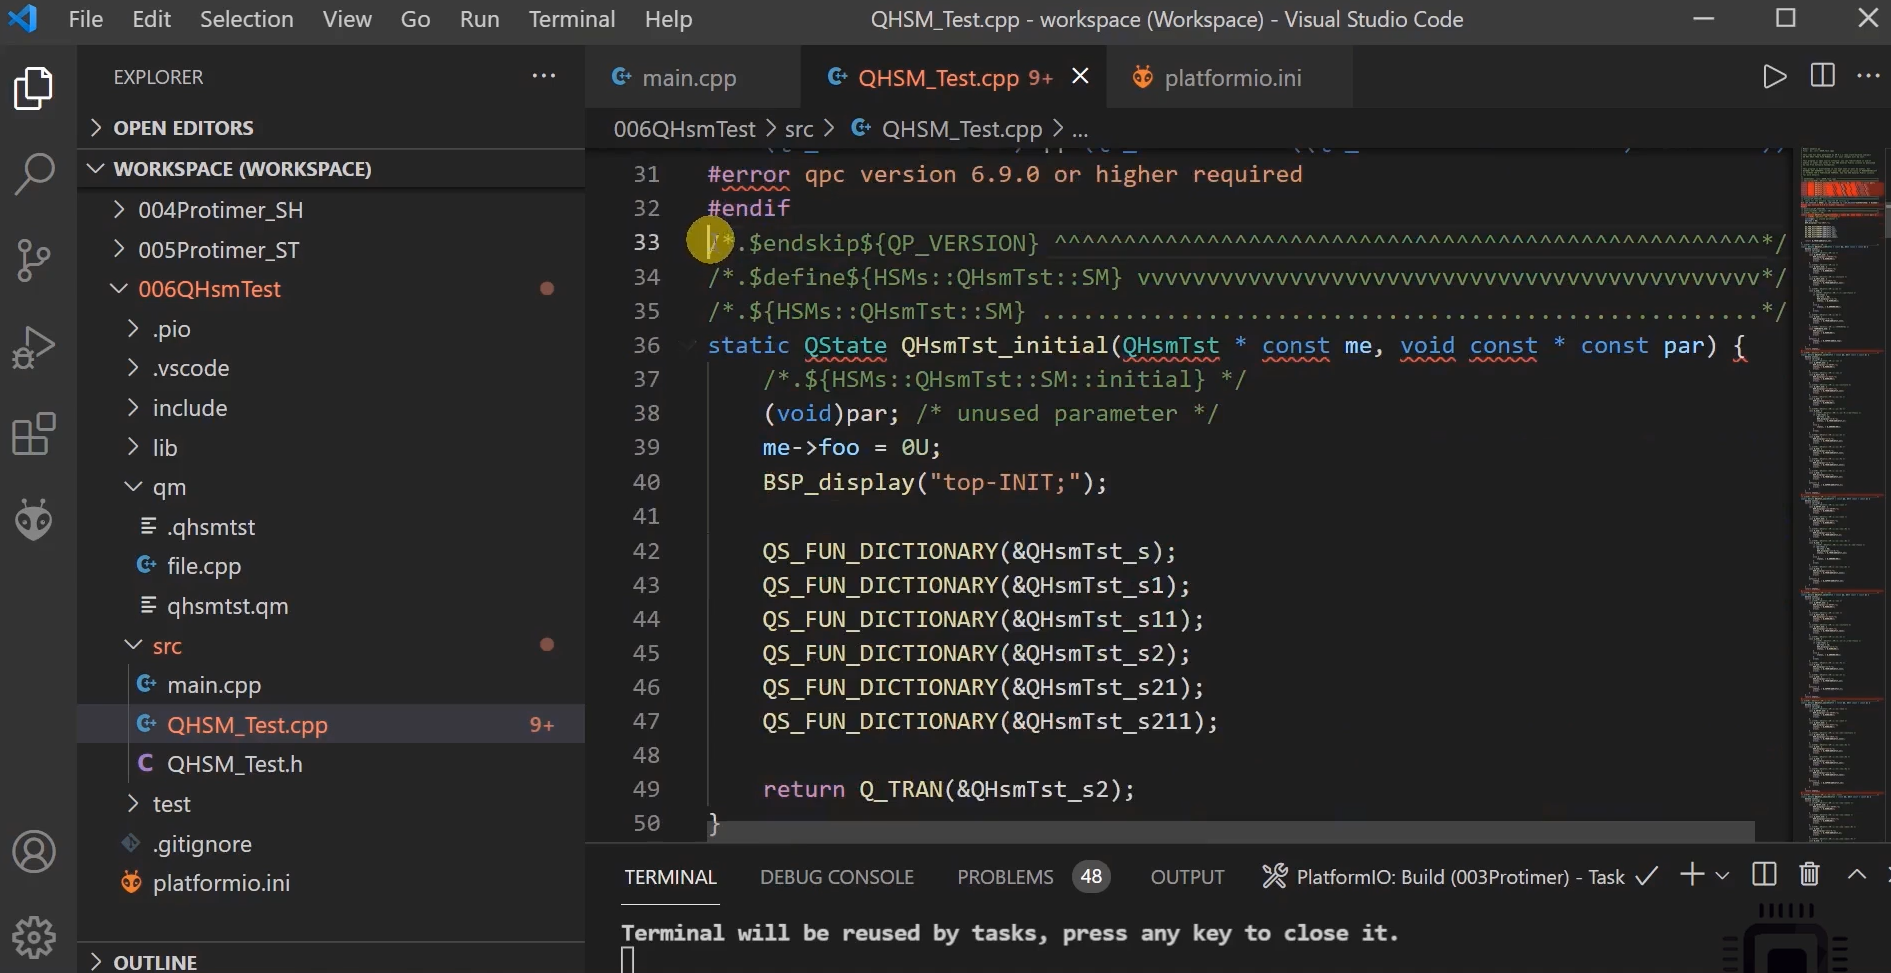
Let’s go back to IDE. And see that, under QHSM.Test.cpp file, we created the state handler’s declarations, shown in Figure 20. Now, we have to include the QP-nano Arduino library in our project. That’s why it is showing so many errors.
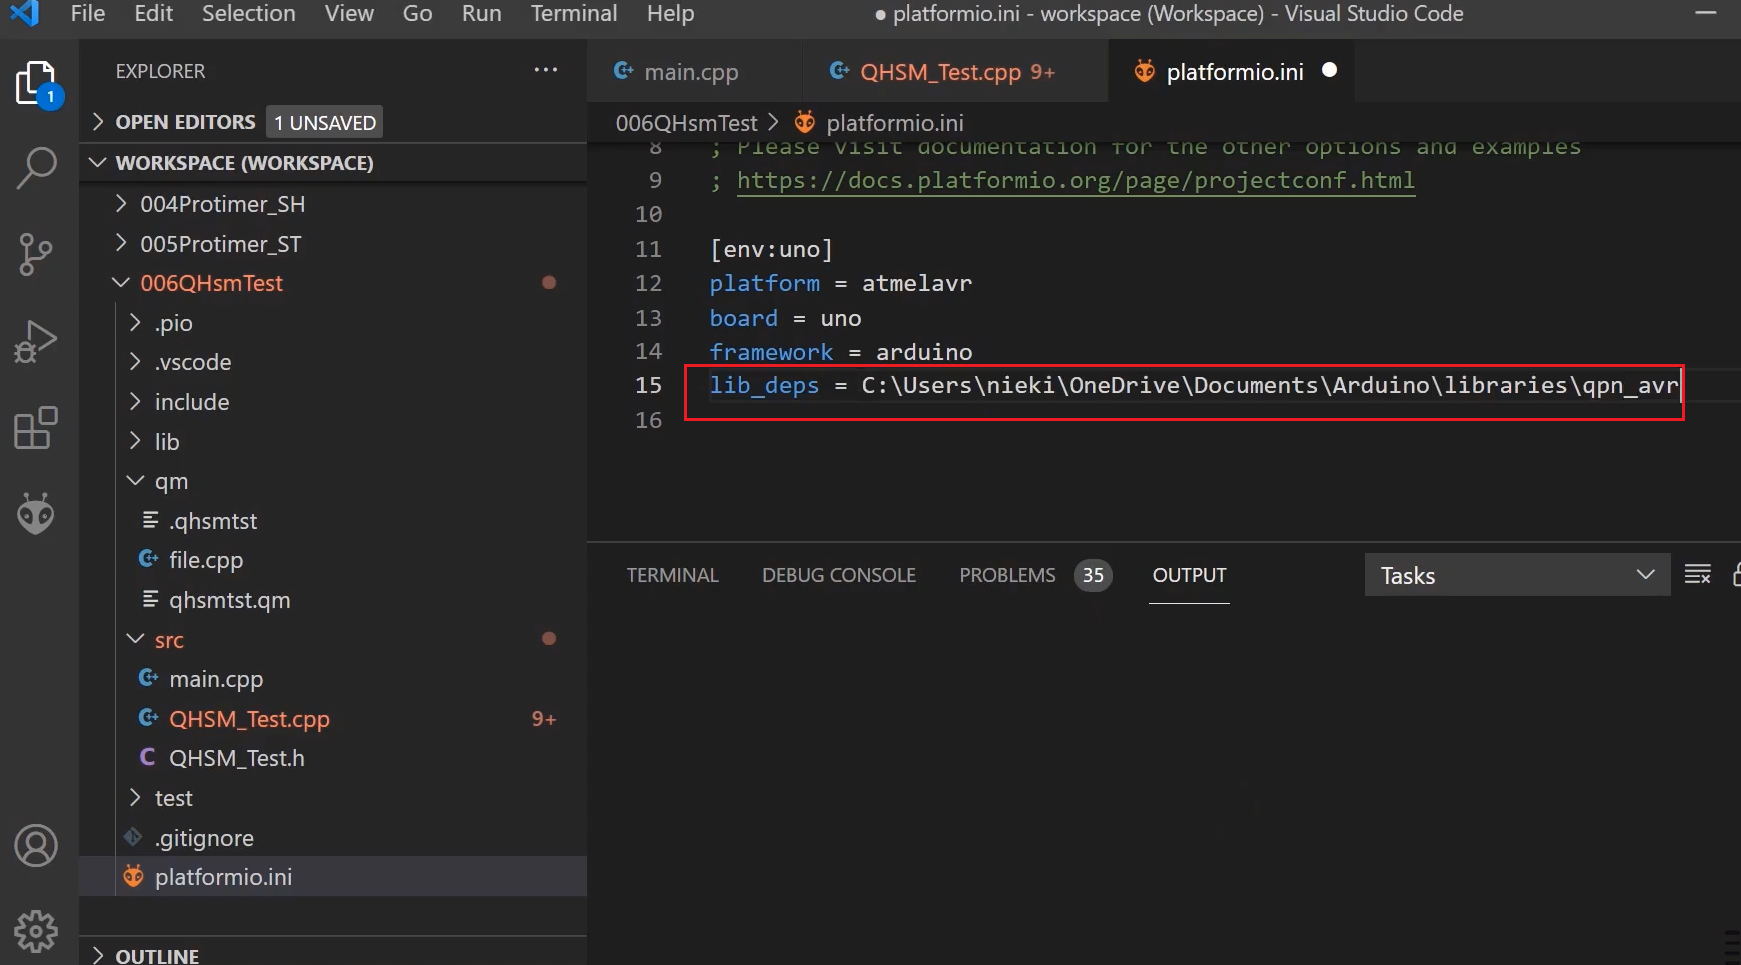
You have to edit your platformio.ini file. In our previous project, in the platformio.ini, we added the liquid crystal library, and lib_deps environmental variable points to the various library dependencies. That’s why you have to copy the variable lib_deps and go to our platformio.ini and paste it there. And ‘qpn’ Arduino library path you have to provide here, as shown in Figure 21.
And now, let’s go to our next step. That is, creating or generating the code for state handler functions definitions. Again, let’s go back to the tool.
Please note that you can only edit this file when not extern. You can also directly write these directives in the external IDE itself. That also works.
Define directive as shown in Figure 22. Save it and generate the code.
The definitions of various state handlers are shown in Figure 23.
Now, if you check in SM, we just implemented the code related to the state machine.
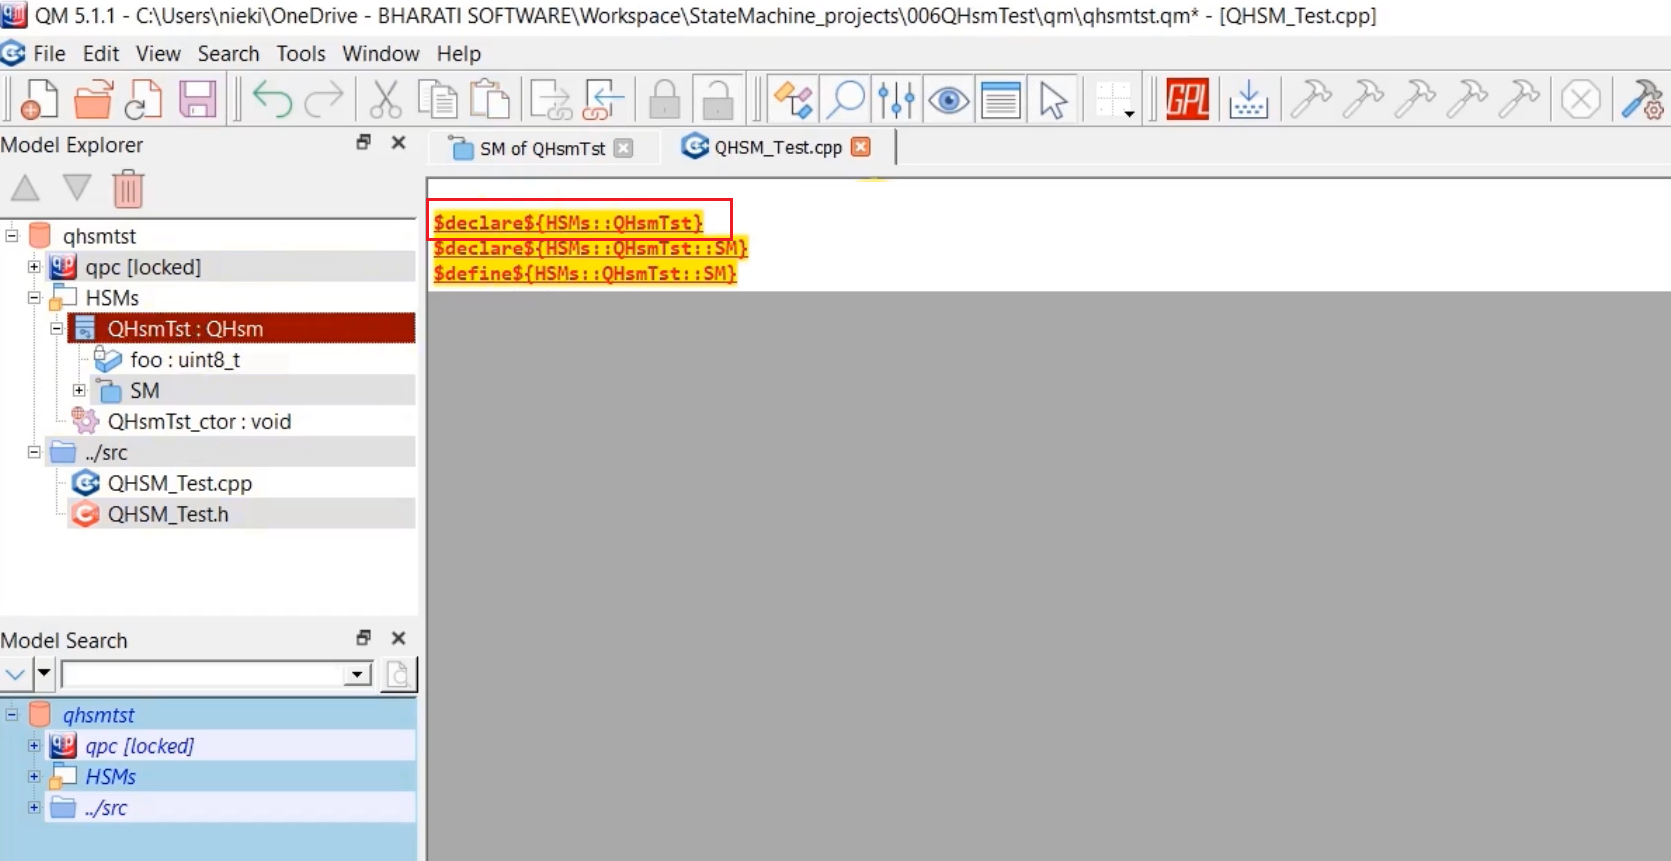
For example, if you want to declare the main application class or structure, you can do that. Anywhere you can do that. So, let’s do this at the beginning, as shown in Figure 24. I will write ‘declare.’ Drag and drop the QHsmTst: QHsm main application class. Save and generate the code.
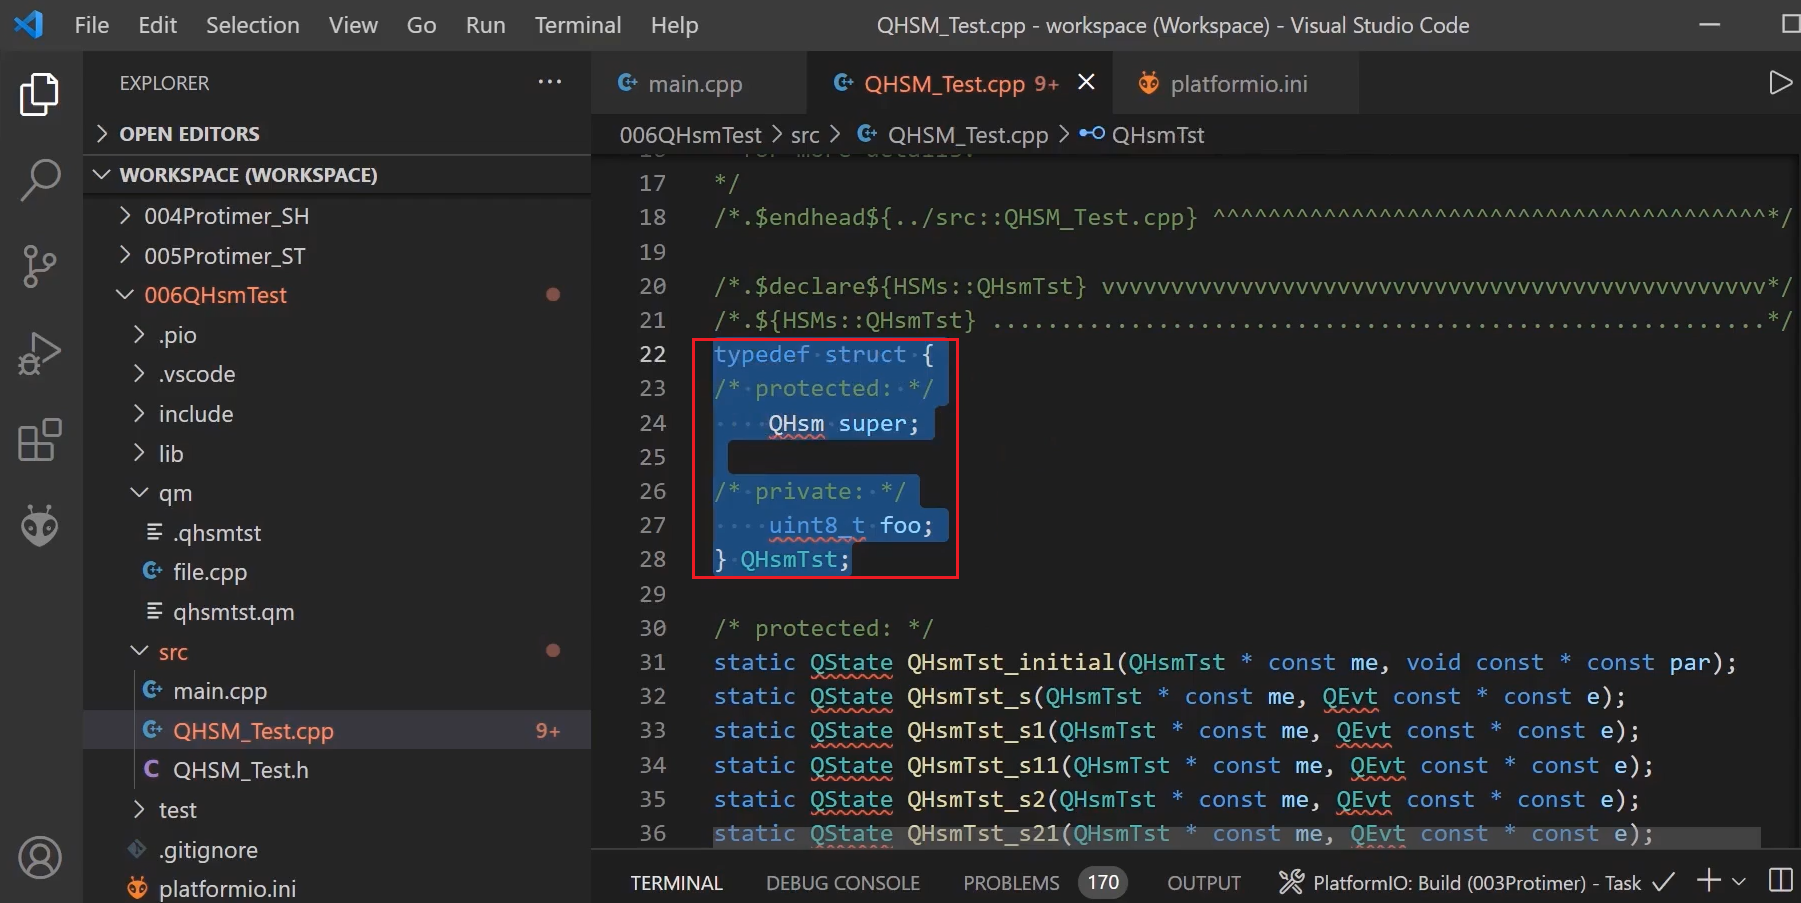
Here you can see (in figure 25) the main application structure is created.
Instead of using these three separate directives, you can use ‘declare’ and ‘define’ over this main class because this state machine and the class attributes or the structure attributes are all part of QHsmTst: QHsm main class.
That’s why you can just use ‘declare’ and ‘define’ over QHsmTst: QHsm class name. That will generate all the required codes, including the underlying state machine codes.
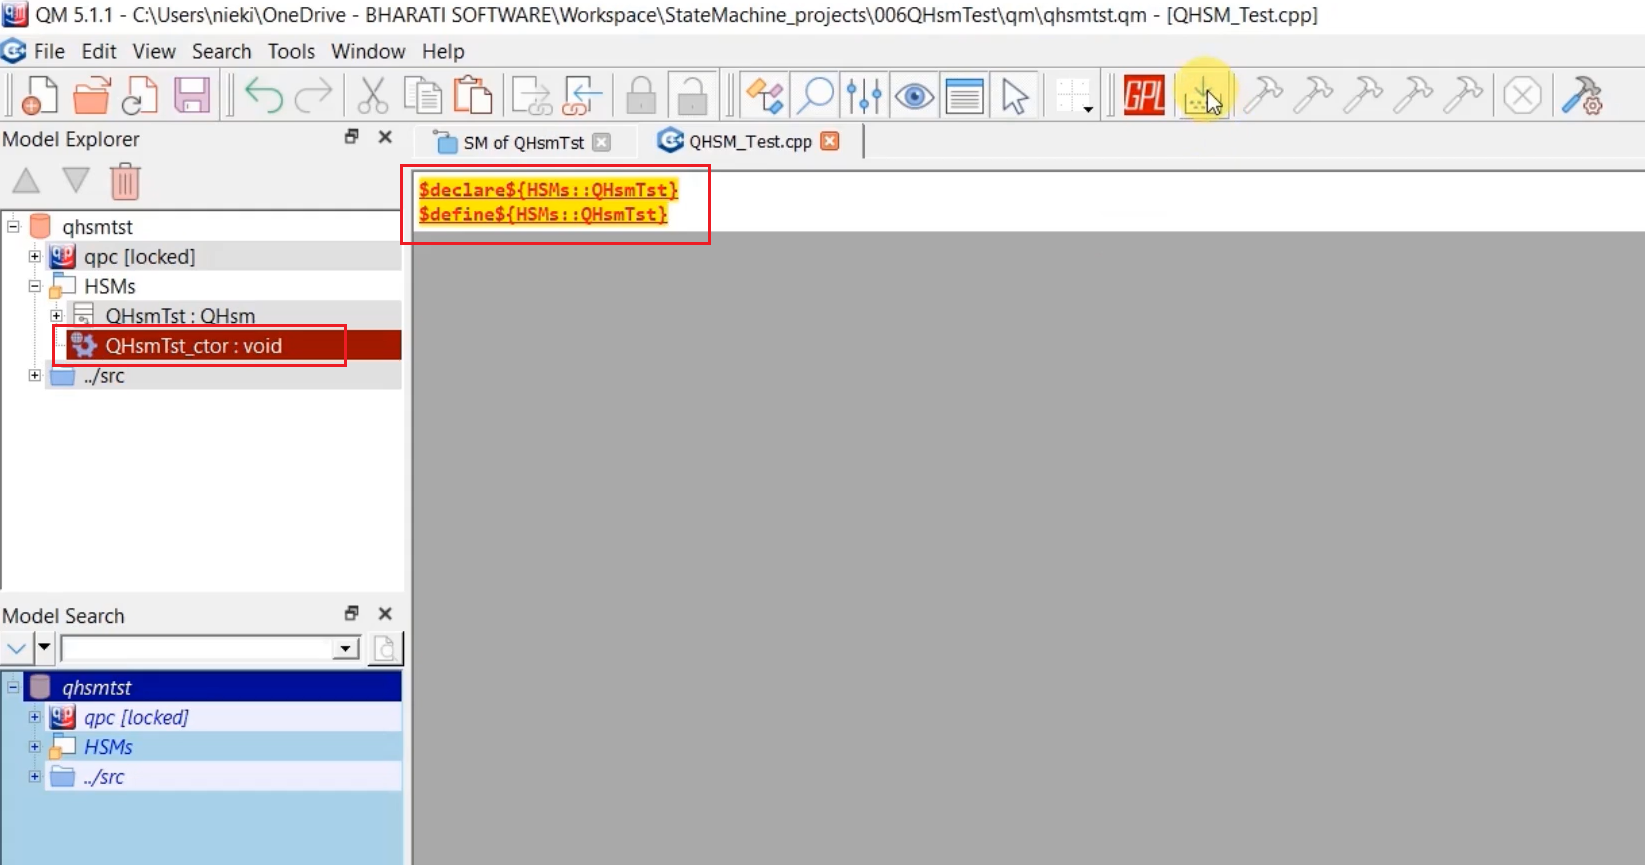
QHsmTst_ctor:void is basically a function, constructor function. It is called a Free operation. Since it is outside class, the code will not be generated, so you may have to define a separate directive for that, as shown in Figure 26. Let’s save and generate the code. And it has generated all the codes.
In the upcoming article, we will generate the code for QHSMTest_SM.h.
FastBit Embedded Brain Academy Courses
Click here: https://fastbitlab.com/course1