Common Problems in I2C and Debugging Tips
This article discusses some of the most important debugging tips related to the I2C protocol. These debugging tips are worth exploring because most of the problems can be solved by applying these steps.
First, let’s discuss one mandatory debugging step, which must be applied before thinking of anything else.
Voltage Troubleshooting:
- Whenever you face a problem in I2C, the very first debugging step would be probing the voltage on the SCL and SDA line with the help of a multimeter or logic analyzer.
- Ensure both pins maintain a stable 3.3V (or HIGH) signal. If not, address this issue first.
Common problems in I2C communication:
1. Addressing Voltage Drop:
The strong reason for not having 3.3V on both the pins will be because of not activating the pull-up resistor if you are using the internal pull-up resistor of an I/O line. Then it’s worth checking the configuration resistor of an I/O line to see whether the pull-ups are really activated or not. The best way is to dump the resistor contents.
2. ACK failure:
This is one of the most common problems in I2C communication.
The problem can’t be solved by just staring at the code but by probing the signals on the logic analyzer.
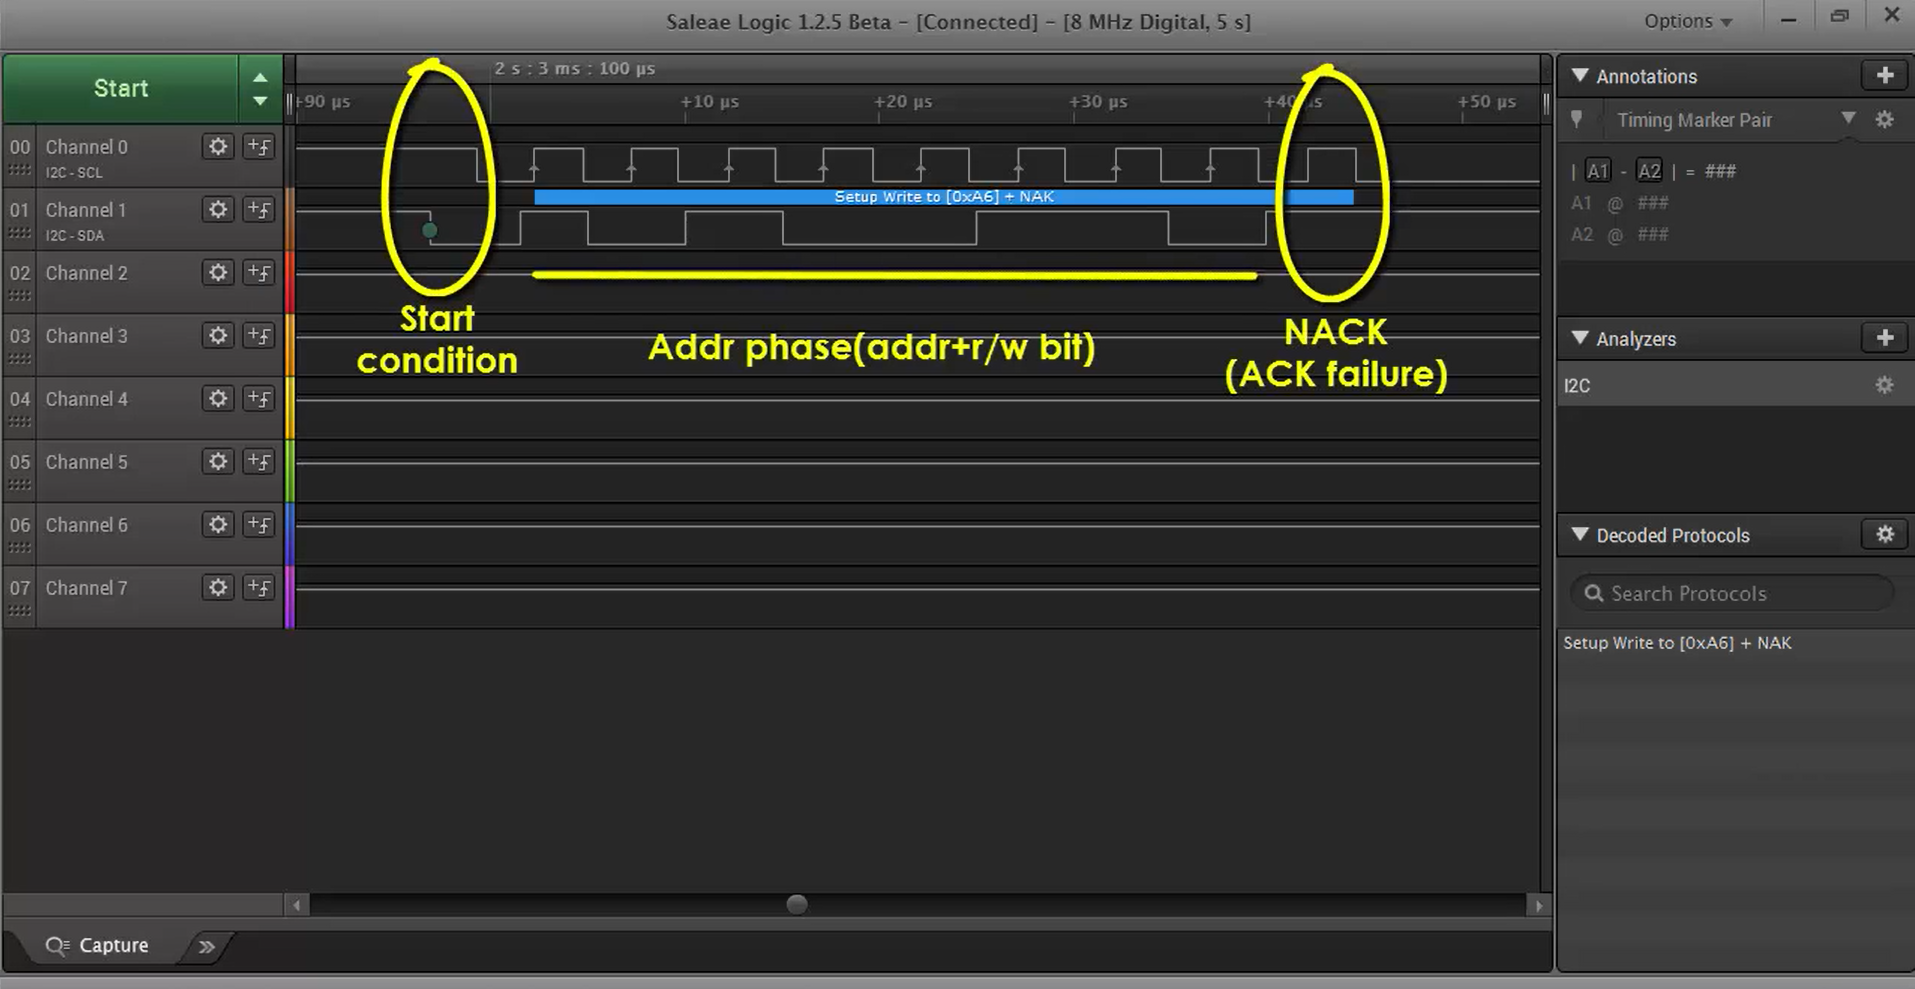
Most people just say that I2C is not working when they don’t get the expected behavior. But when you probe the signals, you will see something like Figure 1 in the case of ACK failure.

In Figure 1, you can see that the master has generated the start condition followed by the address phase, for which there is a NACK instead of ACK. So, the master firmware couldn’t be able to proceed further. Whenever you come across with this kind of error (or ACK failure), then think about the possible ways in which this could happen.
Reasons for ACK failure:
- Generating the address phase with the wrong slave address. If the address is wrong, then the slave will not respond to this address phase. As a result, you will get a NACK. So, go and verify the slave address on the SDA line again by using a logic analyzer.
- Not enabling the ACKing feature in the I2C control register (or slave configuration register). It is worth checking the I2C control register to see whether it is really enabled or not.
3. Master Clock Production:
If you ever found that the master is not producing the clock, then apply the following steps to debug the problem:
- Check whether the peripheral clock is enabled and set to at least 3MHz to produce standard mode I2C serial clock frequency.
- Check whether the GPIOs used for SCL and SDA functionality are configured properly for the alternate functionality. Otherwise, the I2C engine won’t be able to produce a clock or data on those GPIOs.
By following these expert debugging tips, you can effectively troubleshoot common I2C issues and ensure a smoother communication process
Get the full course on I2C Here.
FastBit Embedded Brain Academy Courses
Click here: https://fastbitlab.com/course1


