Creating FreeRTOS based project for STM32 MCUs Part-2
Now let’s create our very first project, which includes the FreeRTOS source codes. As a tradition, we will always start with the Hello World application.
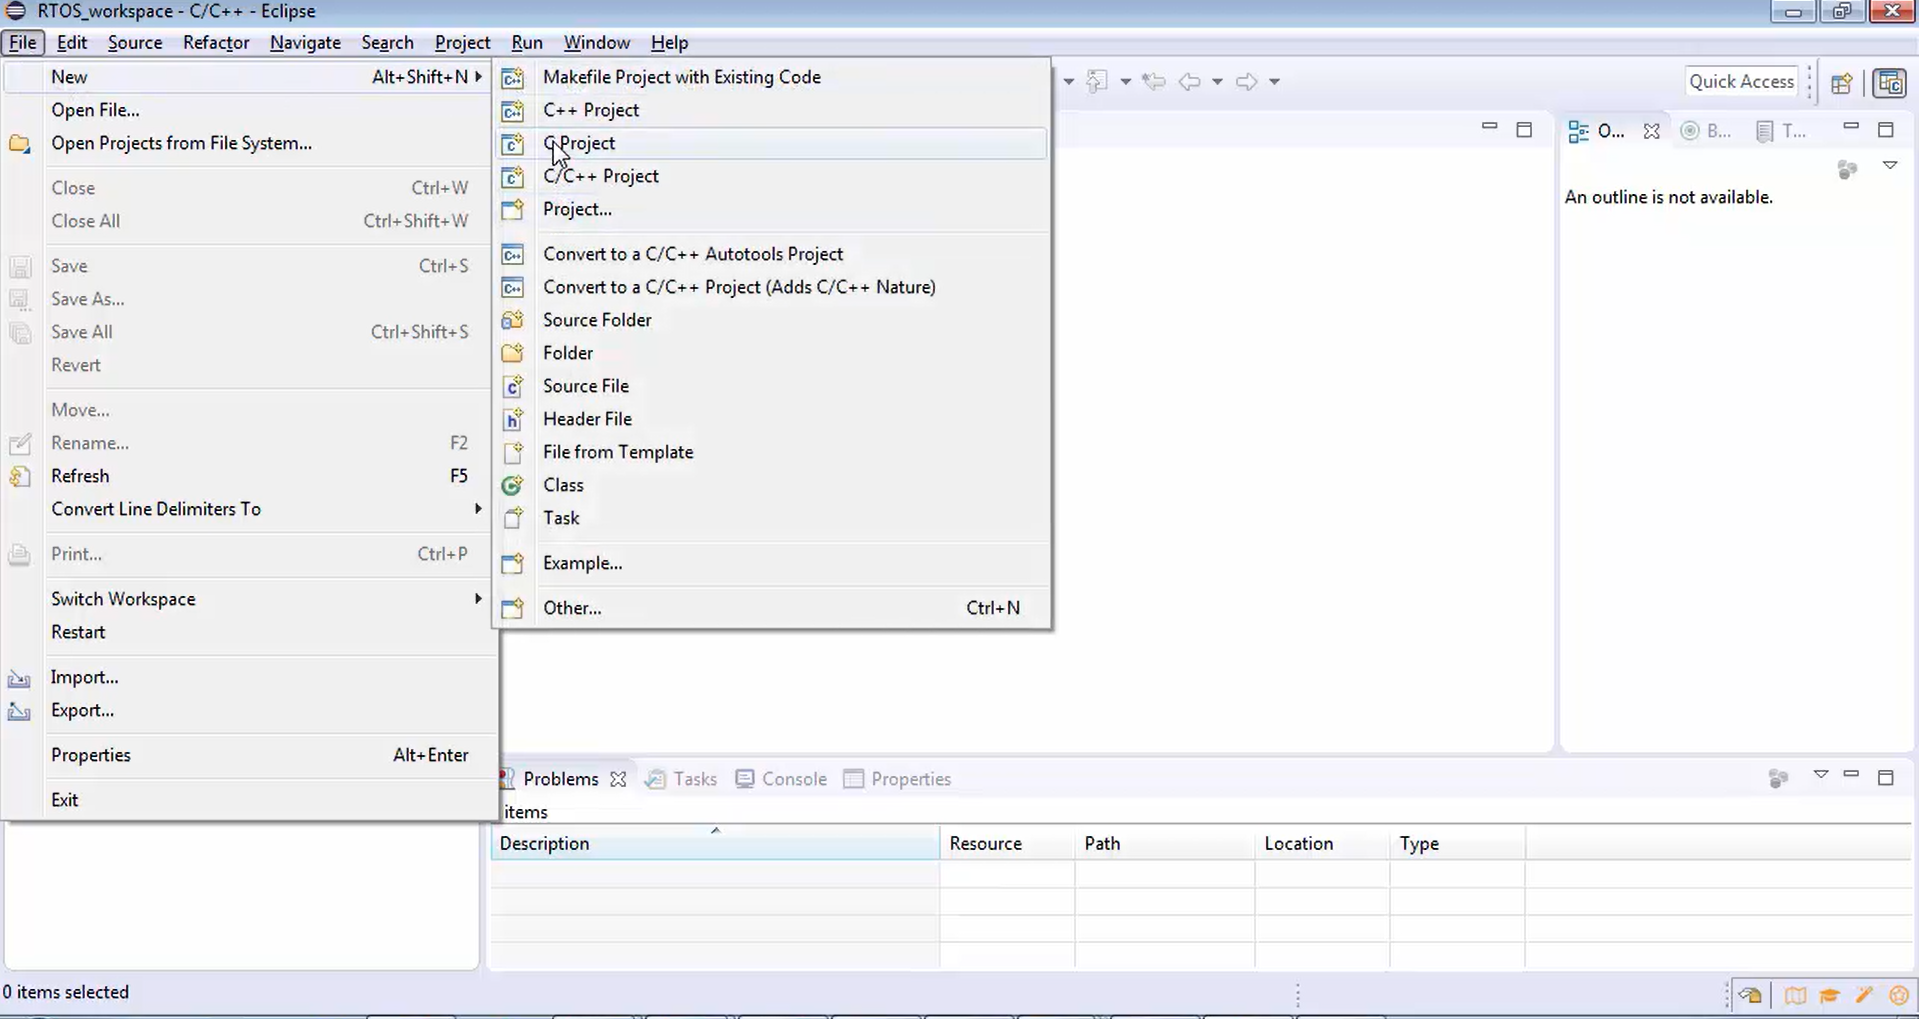
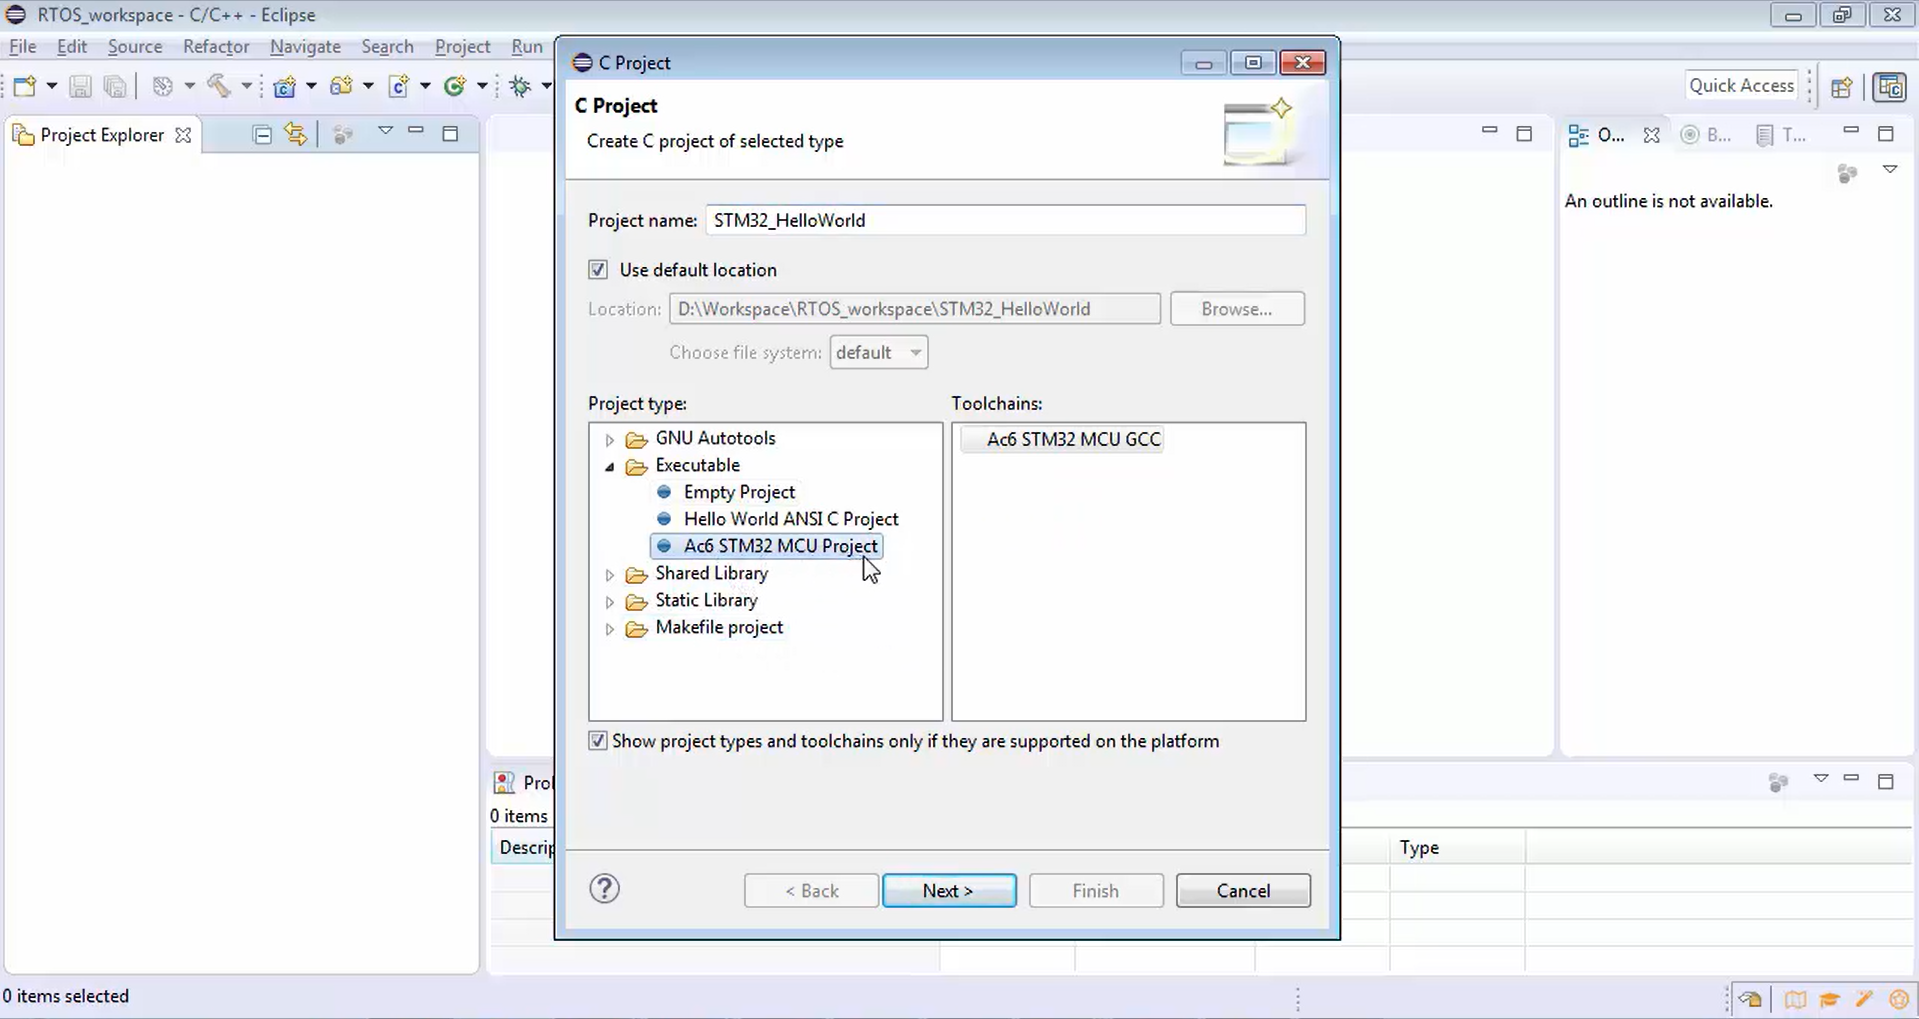
Now let’s click on the file, then click on new, and then click on C project (Figure 1).
After that, the next step is to give a project name, and you have to give the name in the project name field shown in Figure 2. Let’s give it as STM32_HelloWorld. We don’t know what exactly this application does. Maybe this application is used to print the text Hello World over to the console or UART or whatever.
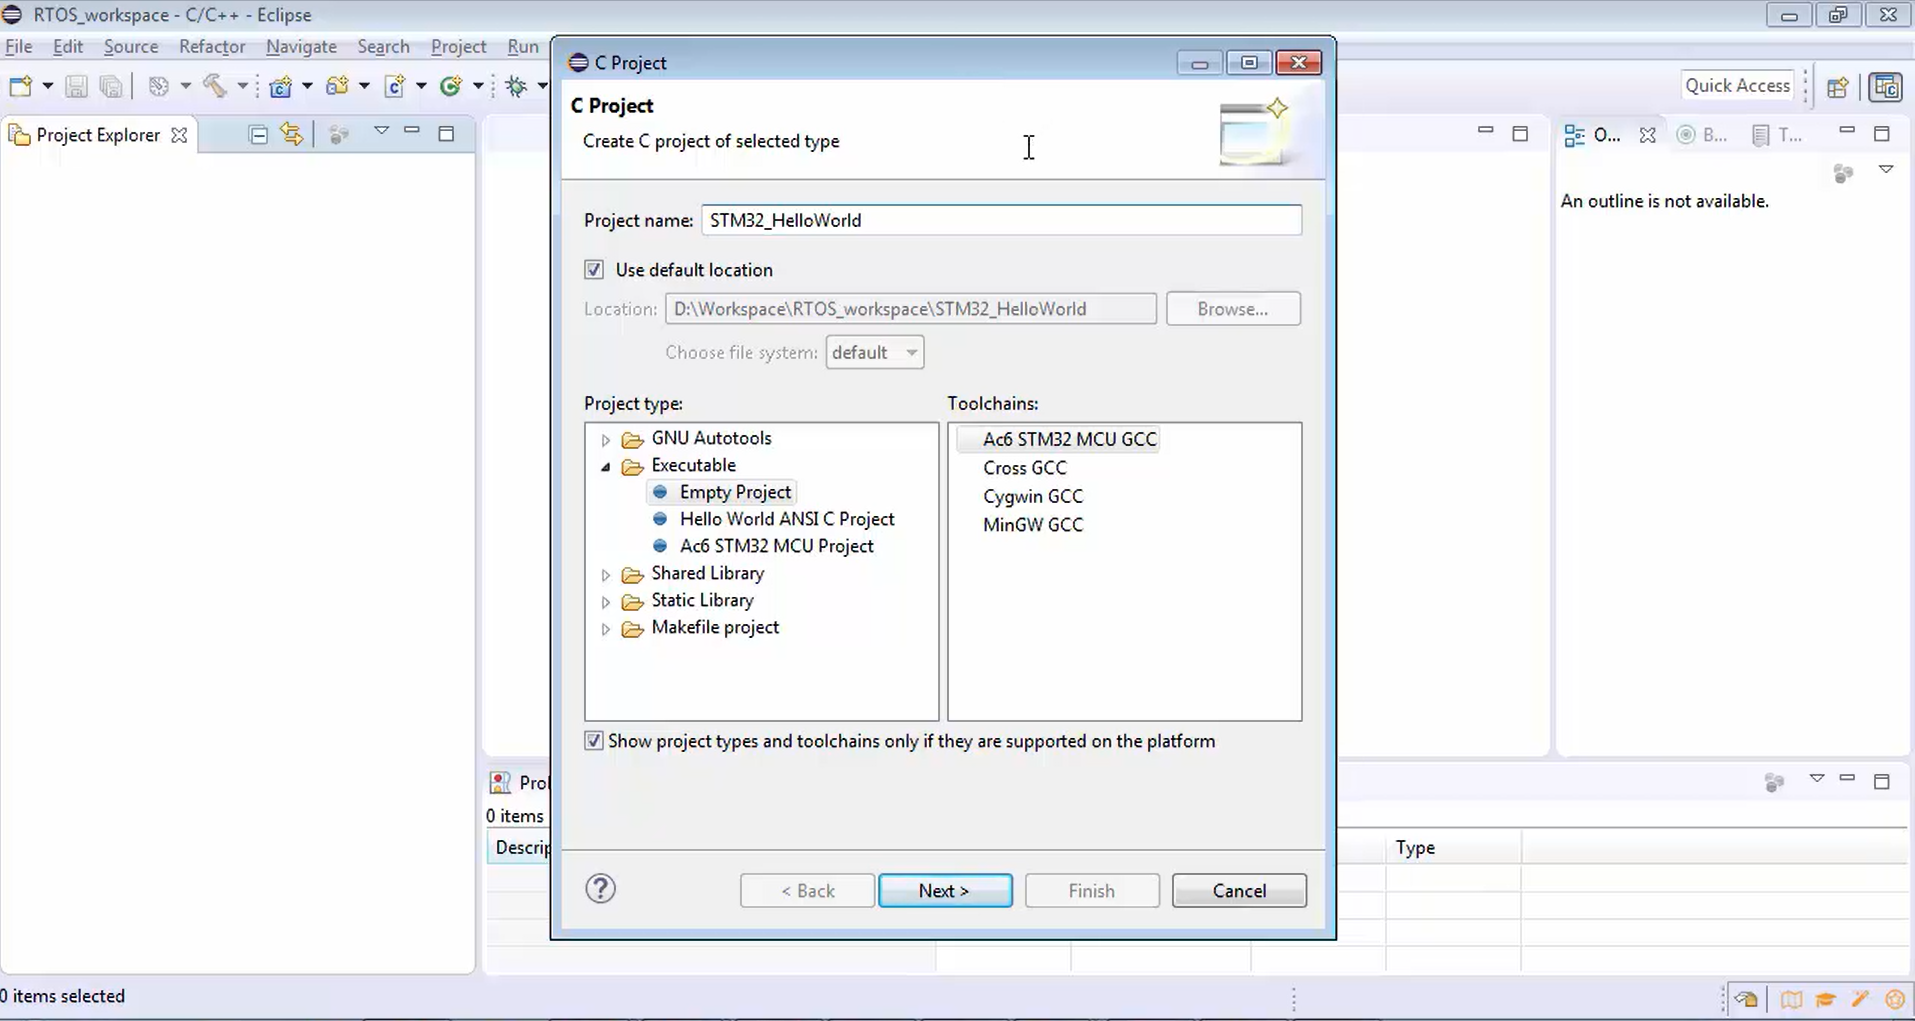
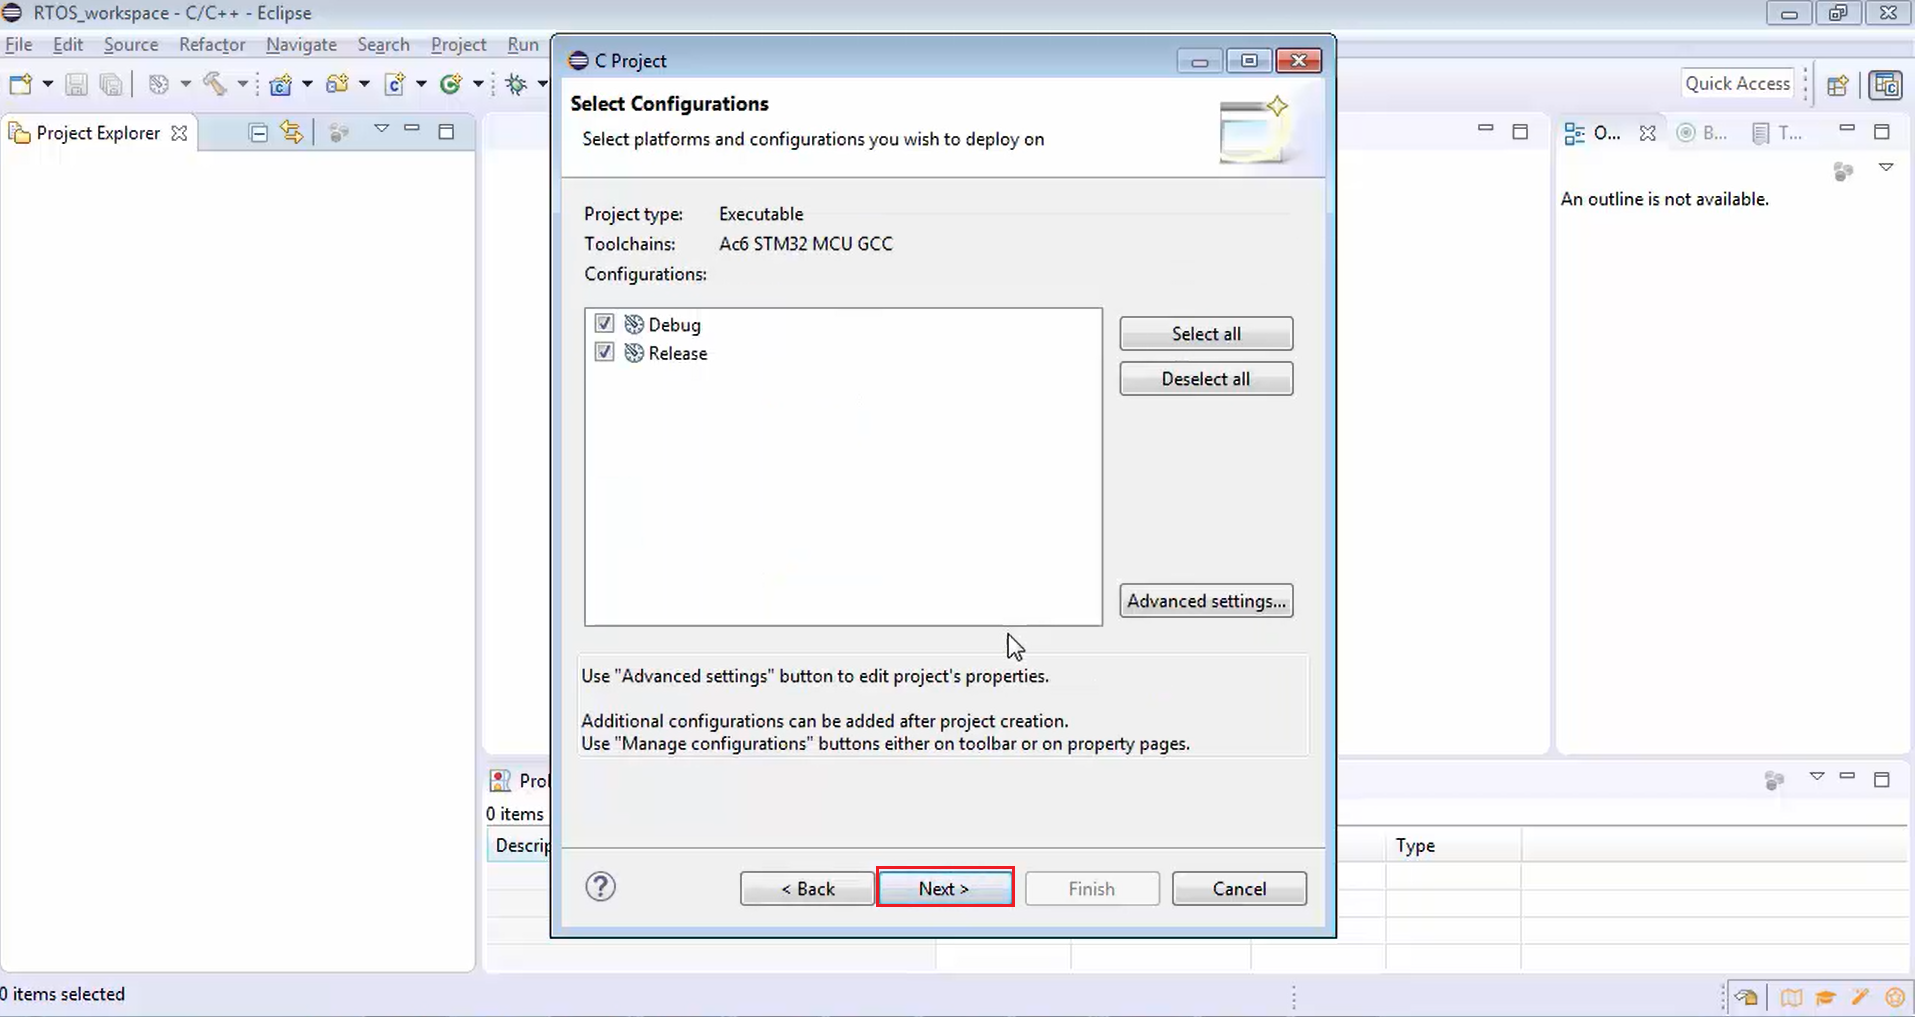
After naming the project, what you have to do is, click over the Ac6 STM32 MCU project (Figure 3), and in the location field, you can observe that this project will be created under your workspace, i.e., RTOS_workspace. And let’s click next. Again, click next (Figure 4).
After that, select your microcontroller series (Figure 5). In this course, I am using the STM32F4 series. If you are using some other series, then no problem at all. You just use that. You may be using the F7 or Lx series. You are free to choose that. Now let’s go for STM32F4 and the board, you can filter by unchecking the checkboxes shown at the top of the window. Since we only have a Nucleo board, uncheck all the options except the option show ST Nucleo boards (Figure 5). If you are using discovery, you can always filter according to that. Now let’s select the F446RE microcontroller (Figure 5), which is a board that we are using for this exercise.
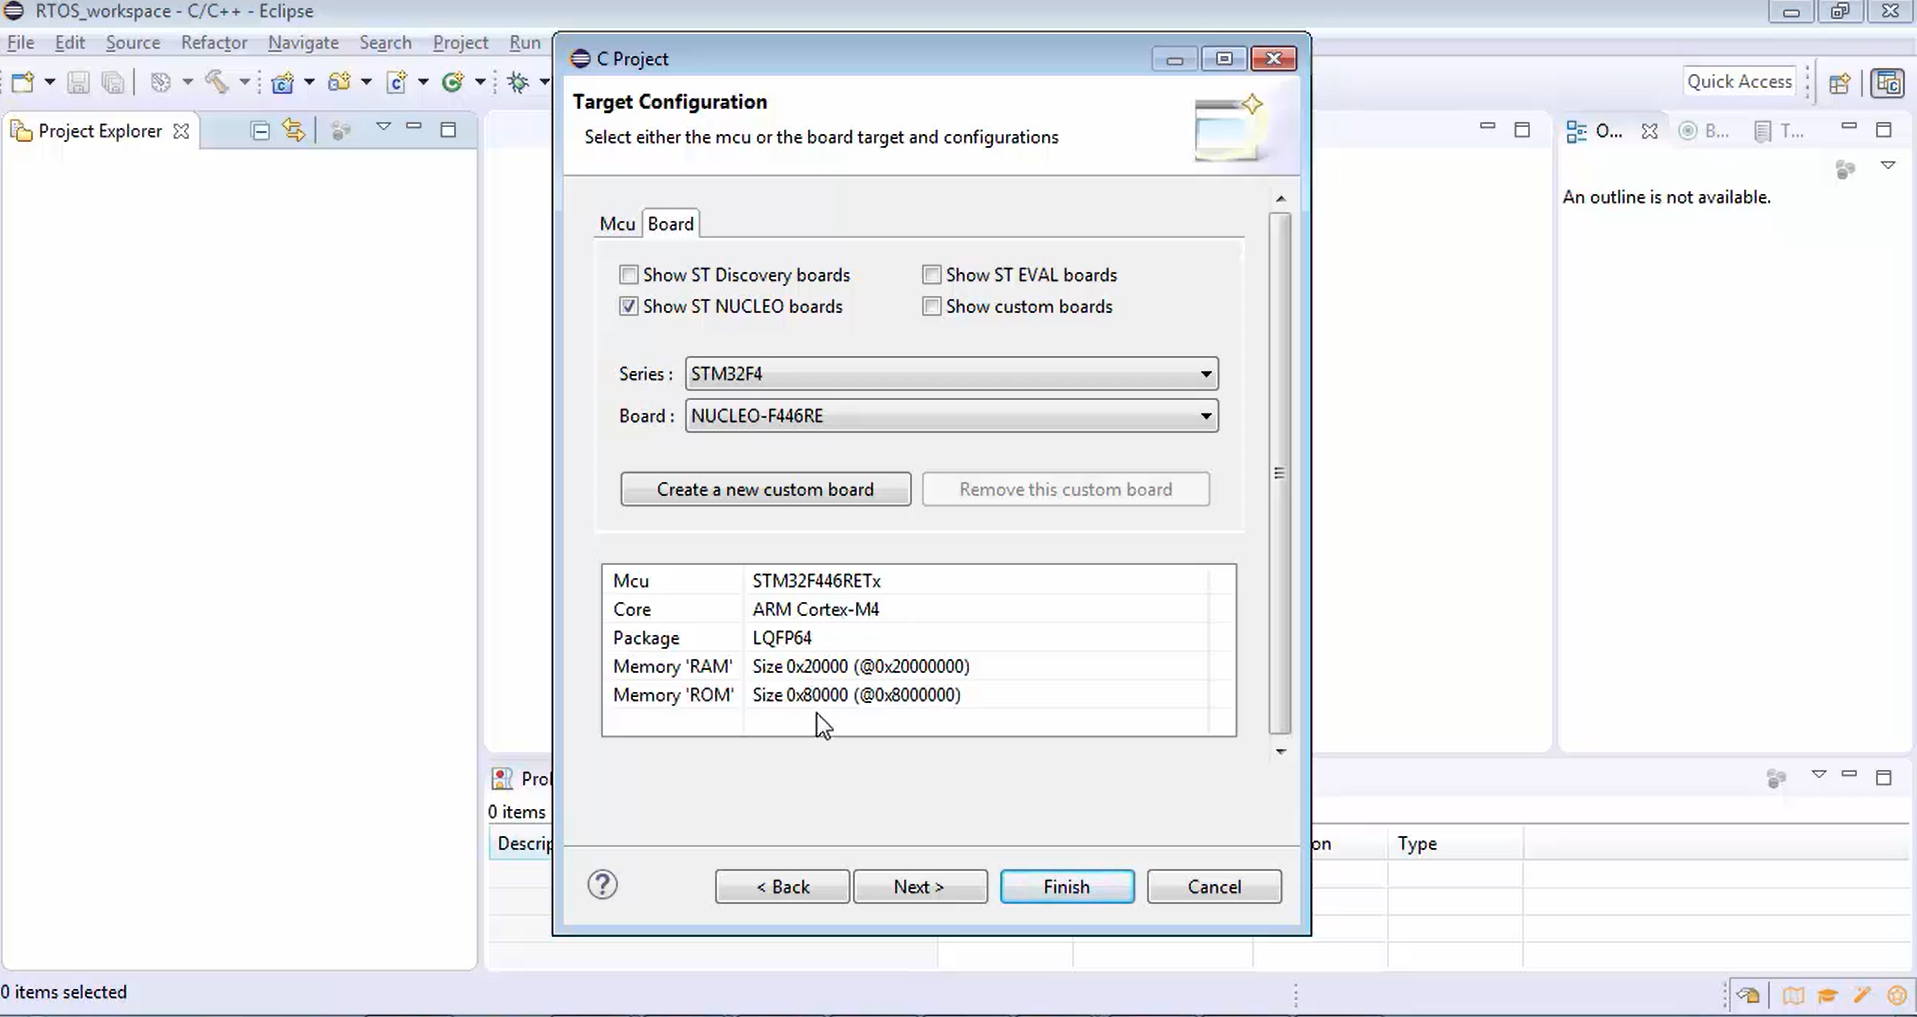
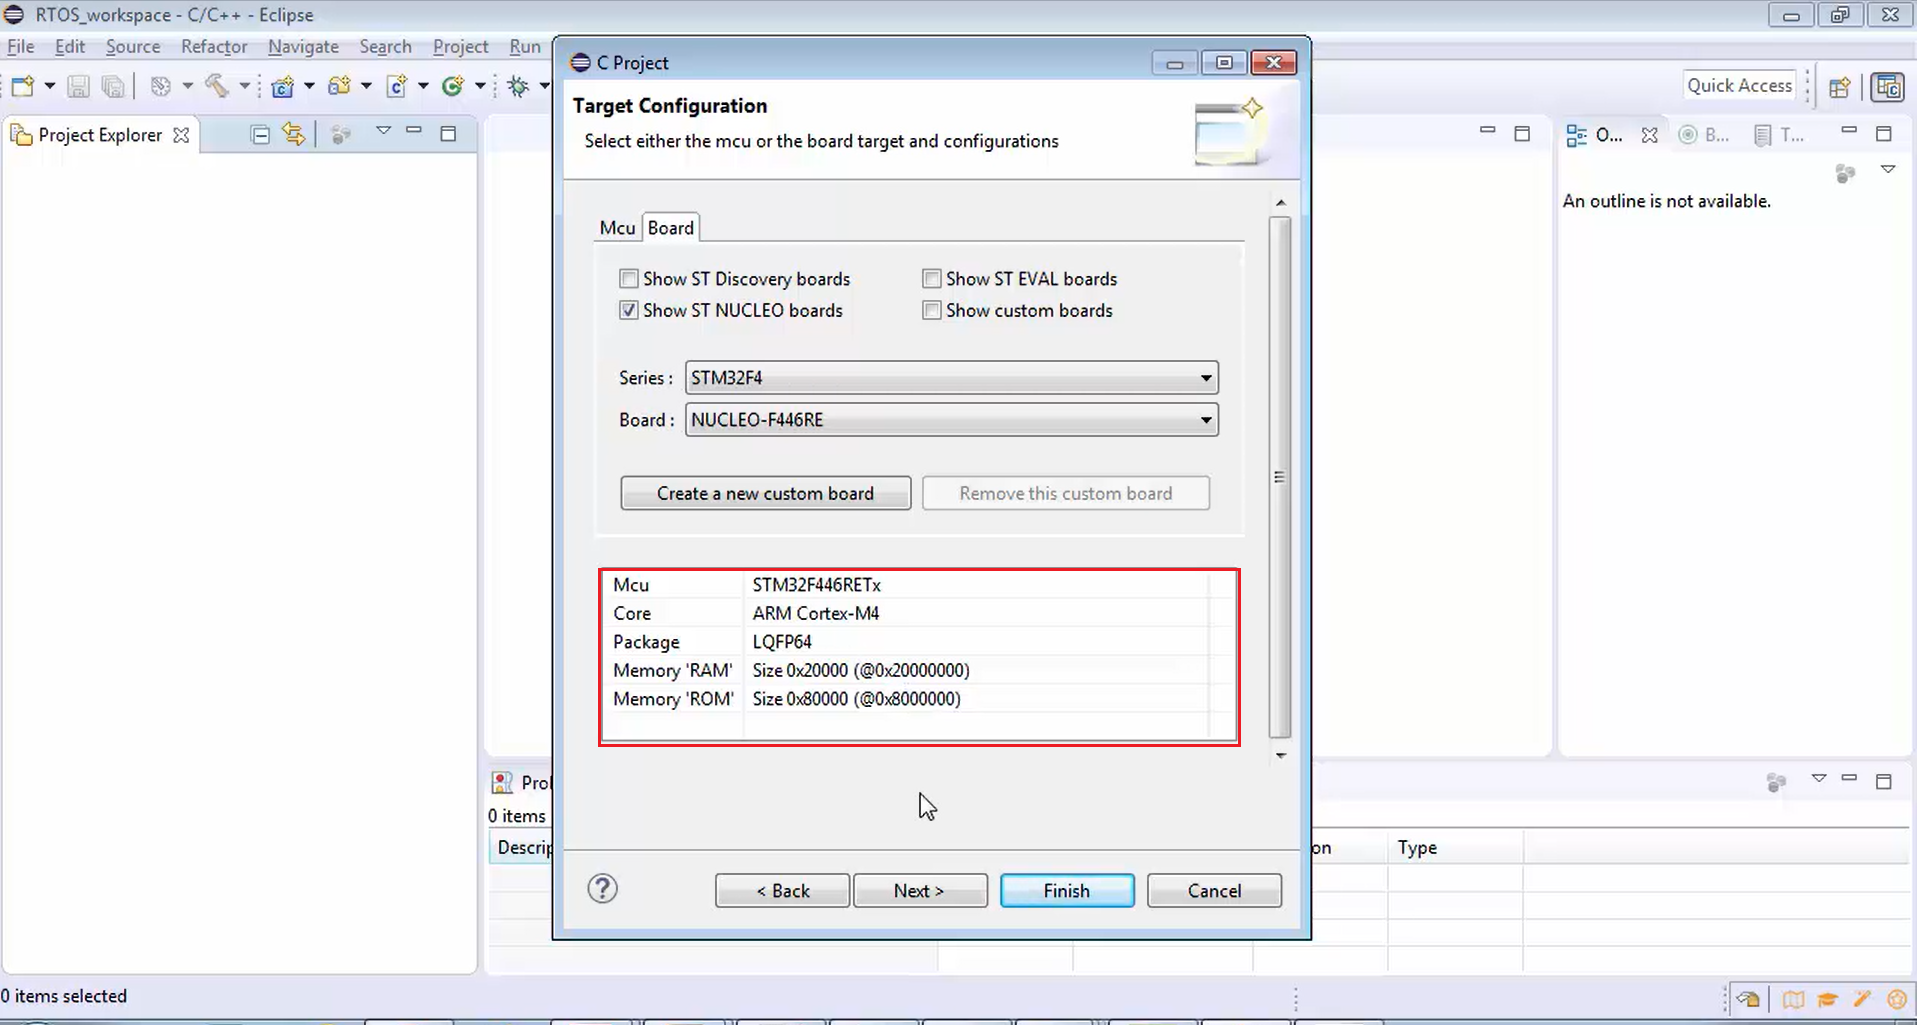
Figure 6 shows all the details. But I am not sure whether the details displayed here are true or not. You can always verify them by using the reference manual. For now, let’s believe these details are true, but if we face any issues, then we can troubleshoot using the reference manual. Now click next.
Then you have to click on the standard peripheral library, as shown in Figure 7. If the STM32 standard peripheral library is installed, then it would say firmware has been found. If it is not found, you can click on the download target firmware option marked in Figure 7 to download that.
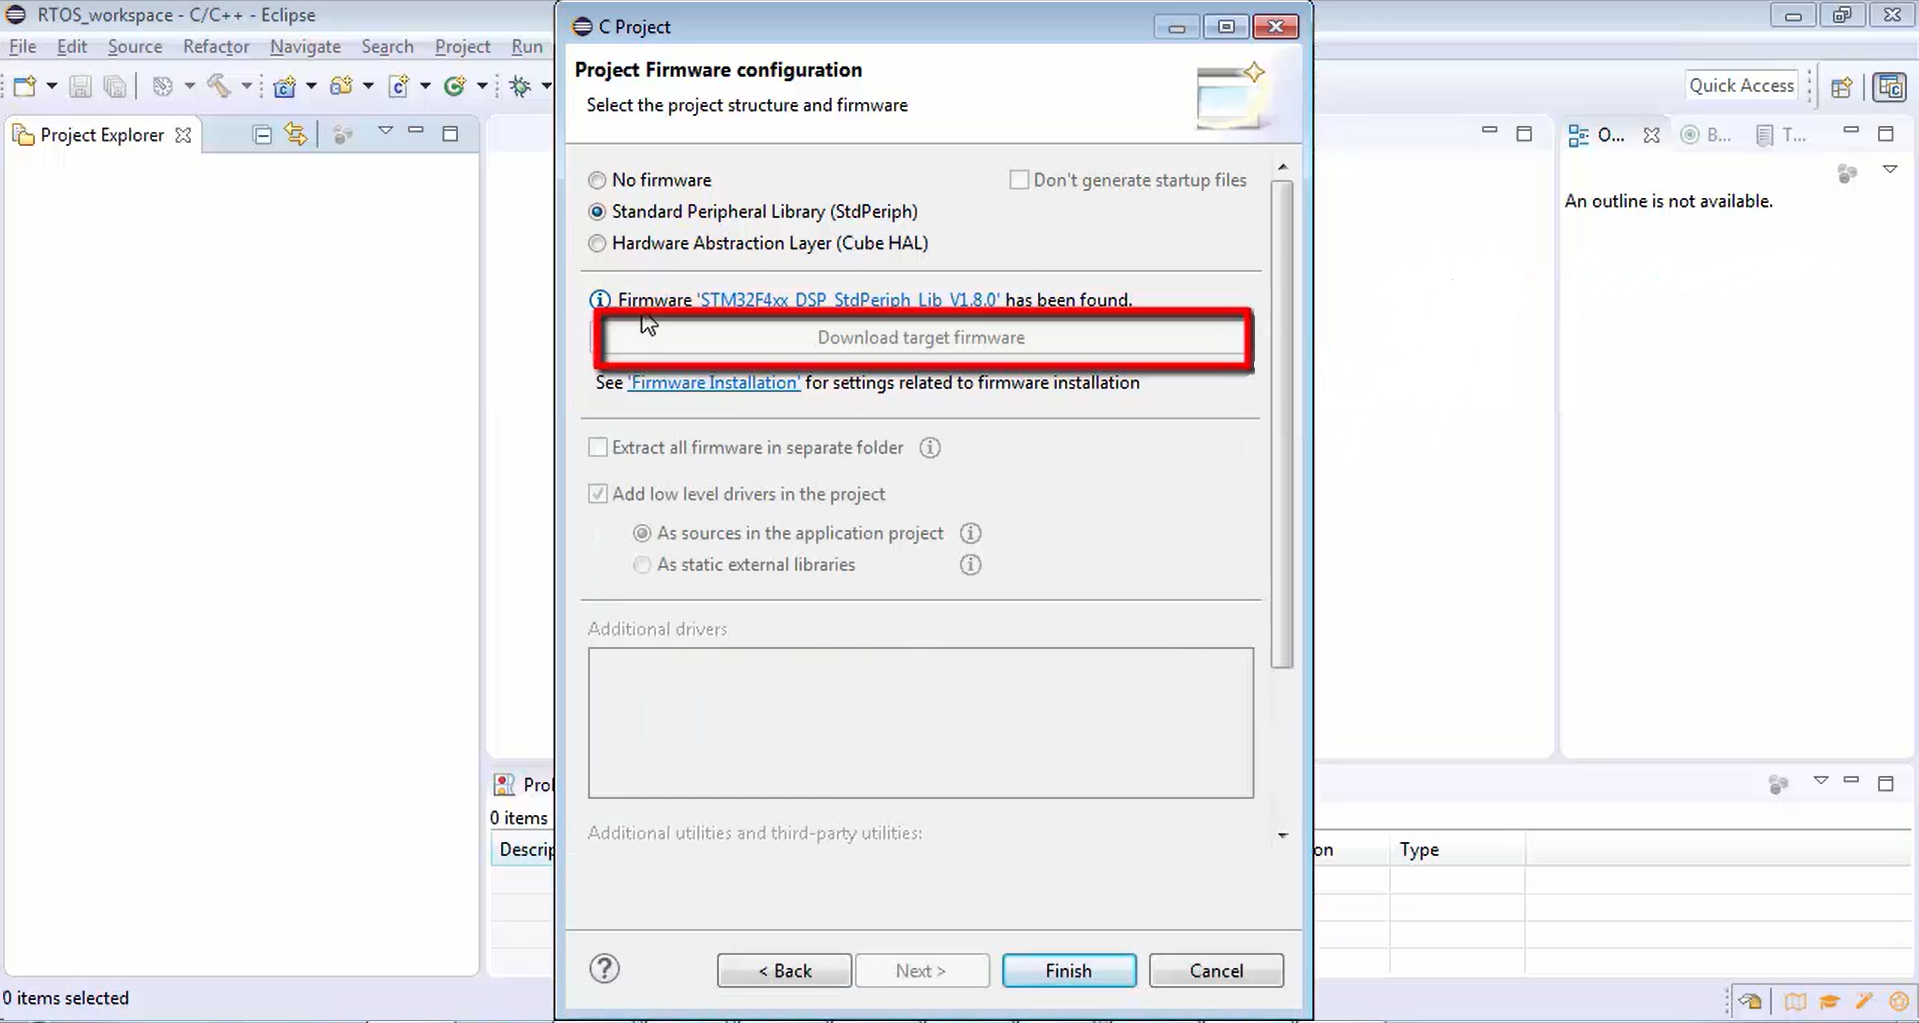
The next step is to finish. Let’s finish.
FastBit Embedded Brain Academy Courses
Click here: https://fastbitlab.com/course1

