Create new project in Microsoft visual Code IDE
In the previous article, I explain how to install the Microsoft visual code IDE . And you should also have installed the PlatformIO Extension on that.
Create new project in Visual Studio Code step by step
Let’s open the visual code IDE.
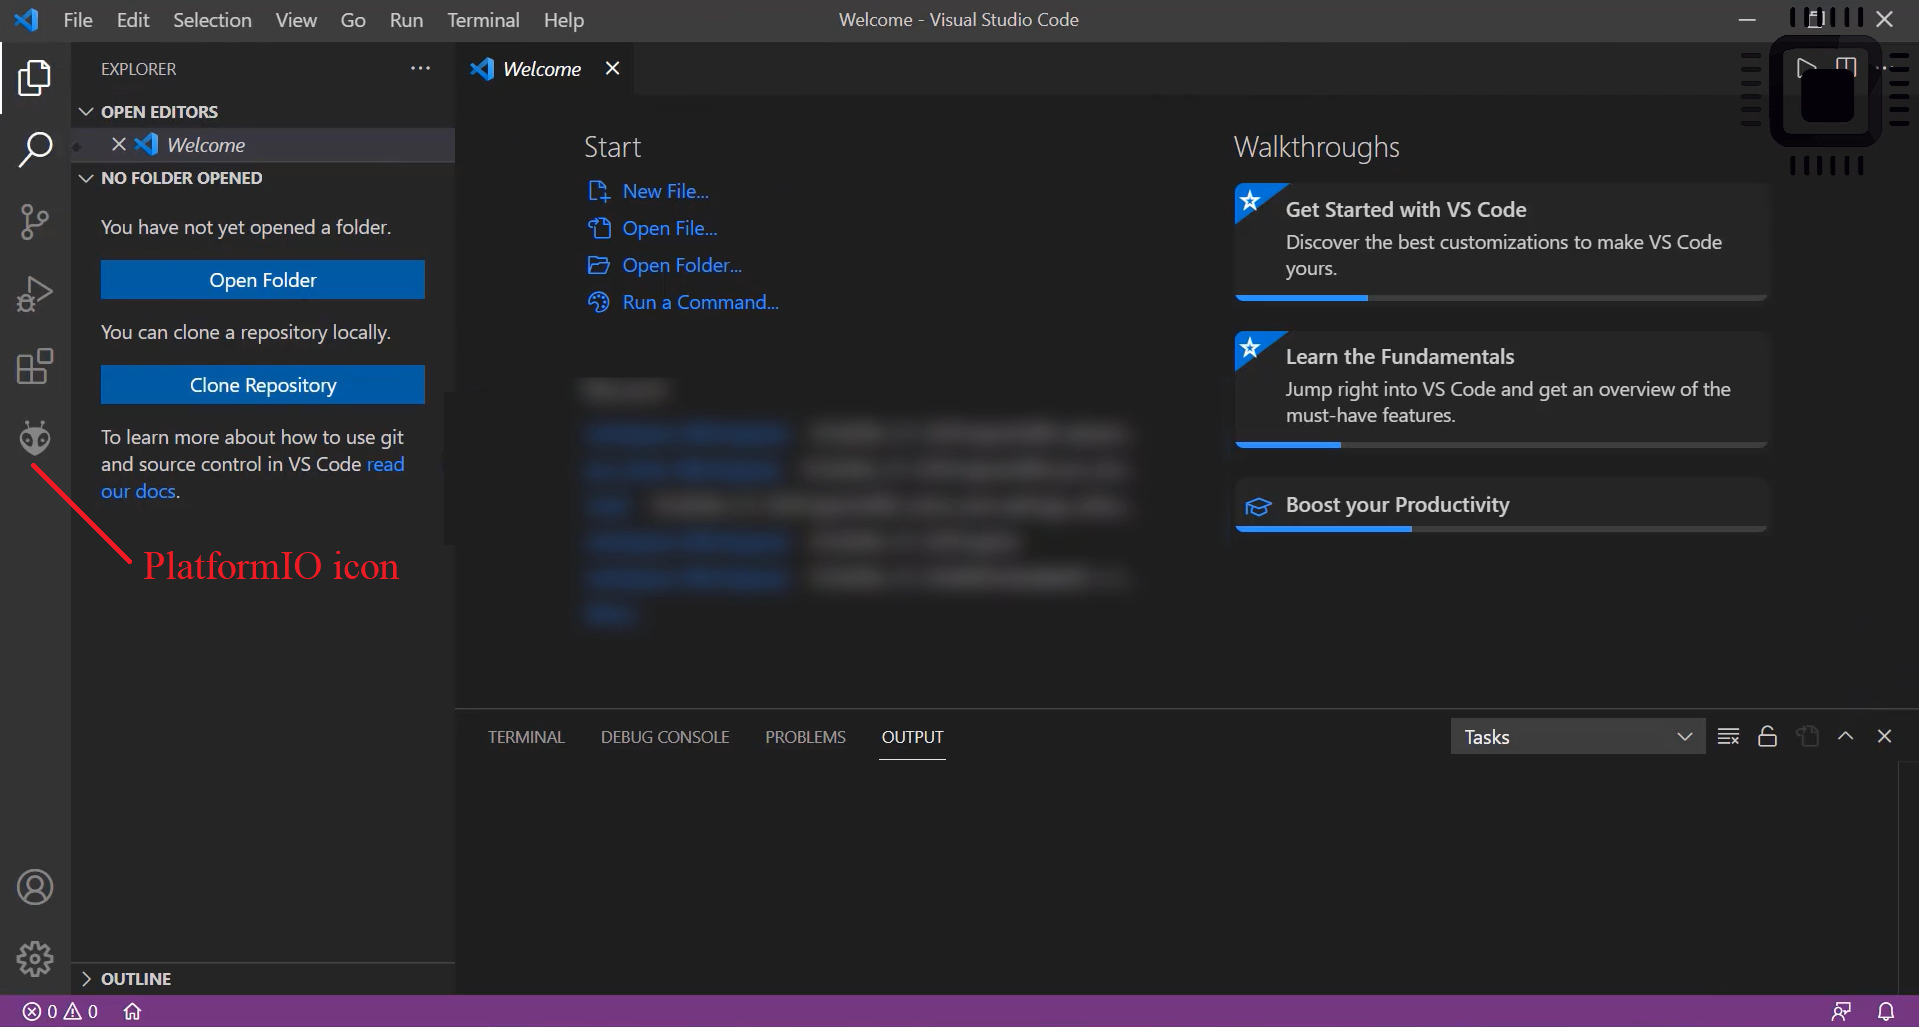
When you open this for the first time, you may see a welcome page shown in Figure 1, and it takes some time to activate the Extensions.
Once all the Extensions are activated, you see the PlatformIO icon.
Click on the PaltformIO icon, go to PIO Home and click on Open, as shown in Figure 2. It opens PIO Home.
And here, you can either create a new project, Import any existing Arduino project. Let’s click on create a New project.
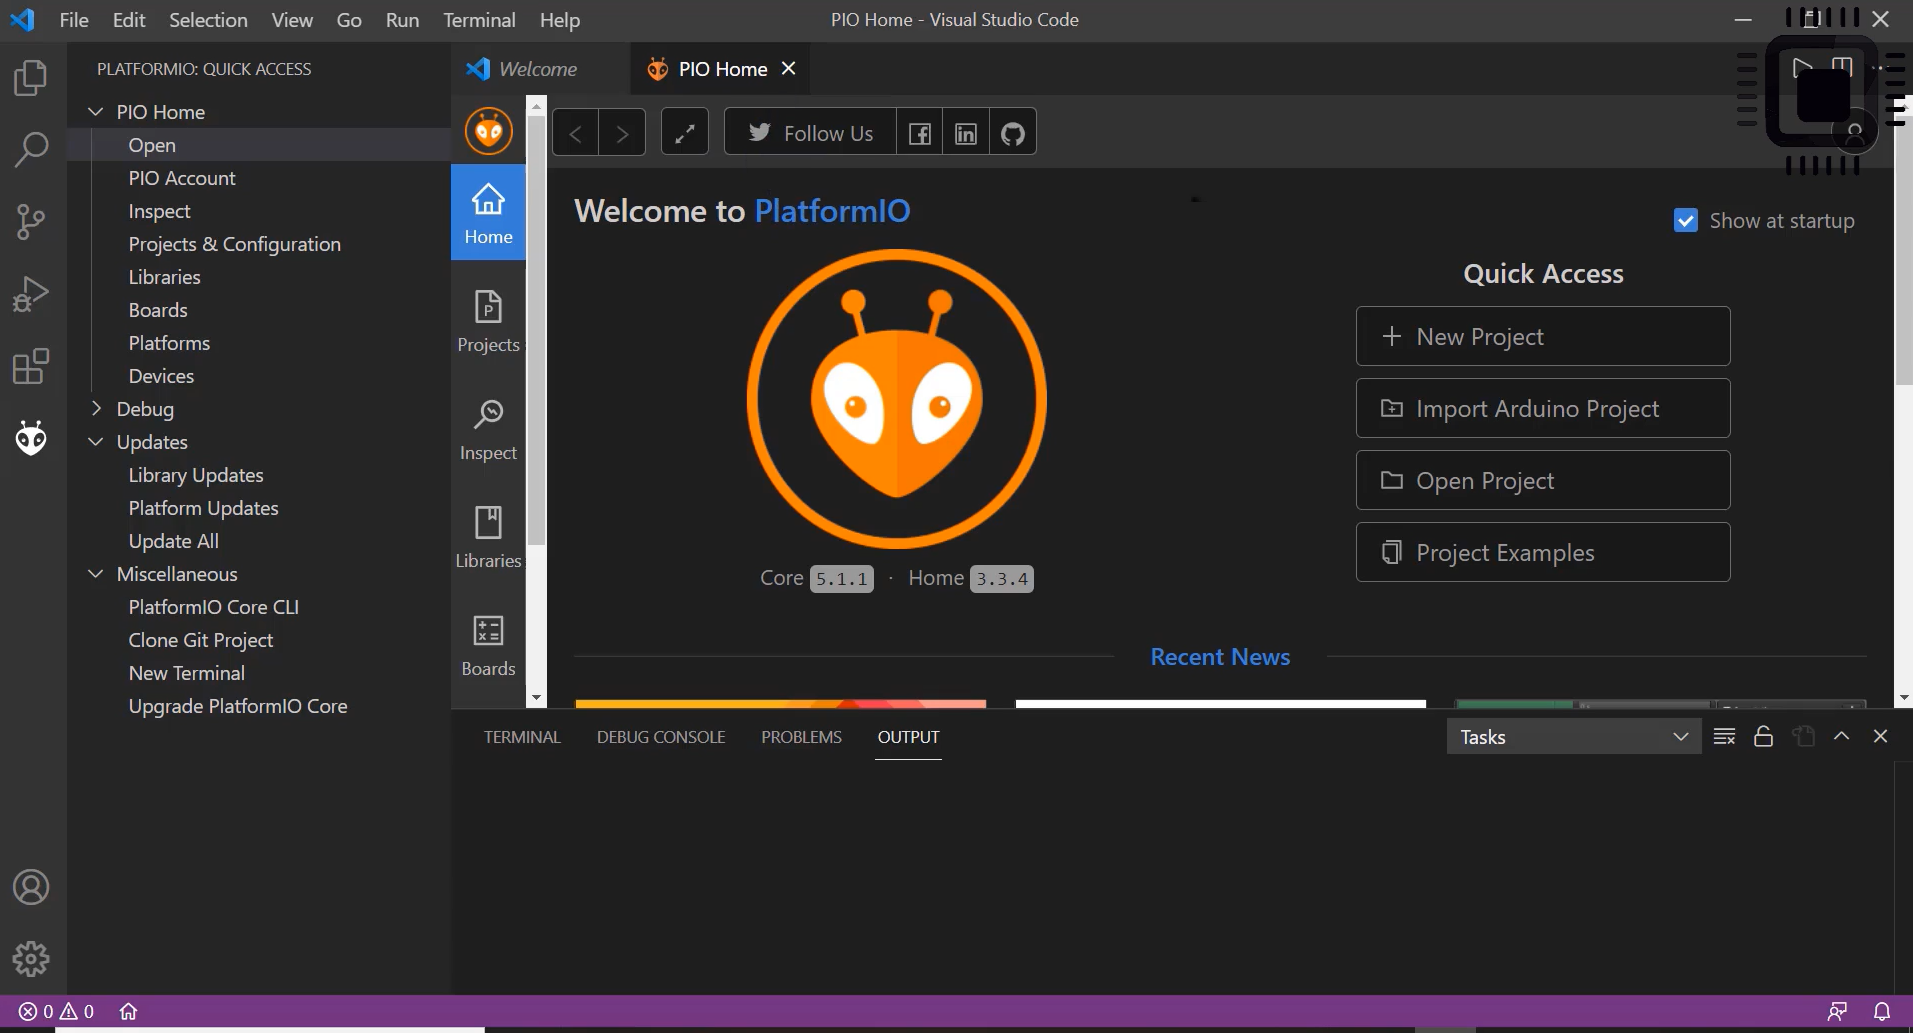
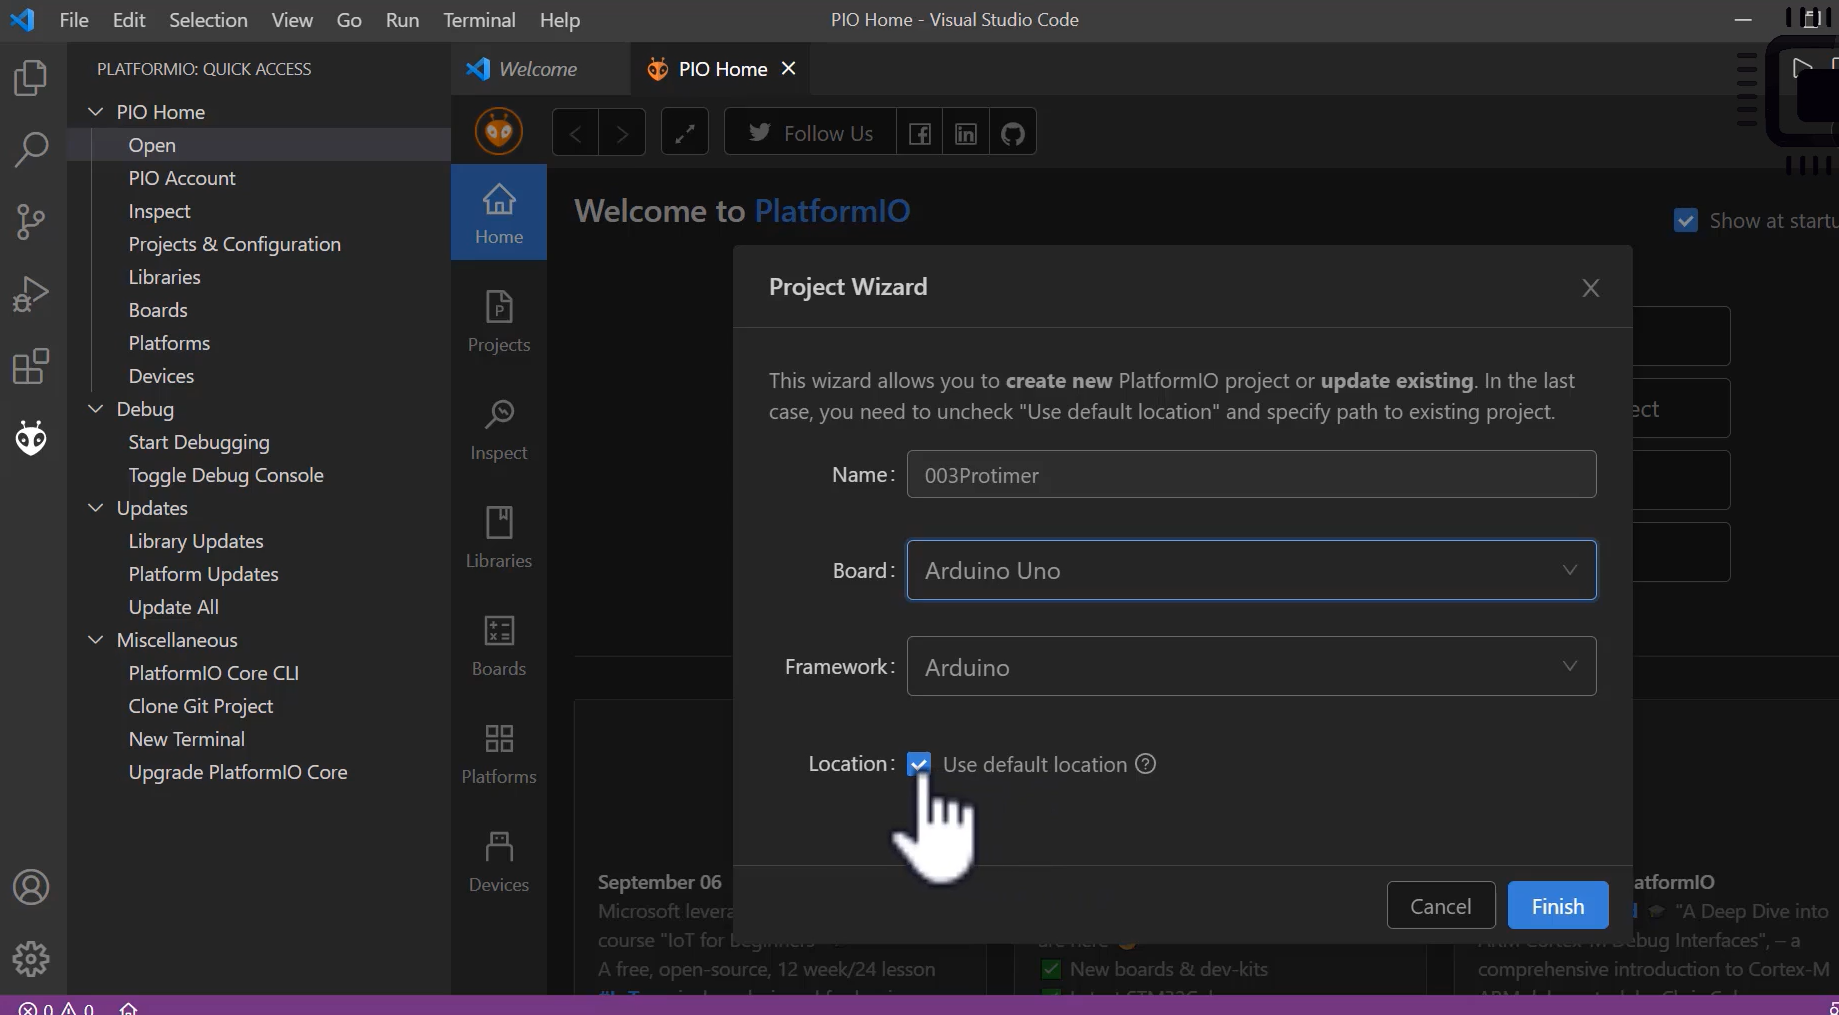
Let me give the project name 003Protimer; let’s select the board — select Arduino Uno, and the framework is Arduino as shown in Figure 3.
And use the default location, so check the default location on your PlatformIO settings, but we will not use this default location. Let’s click finish.
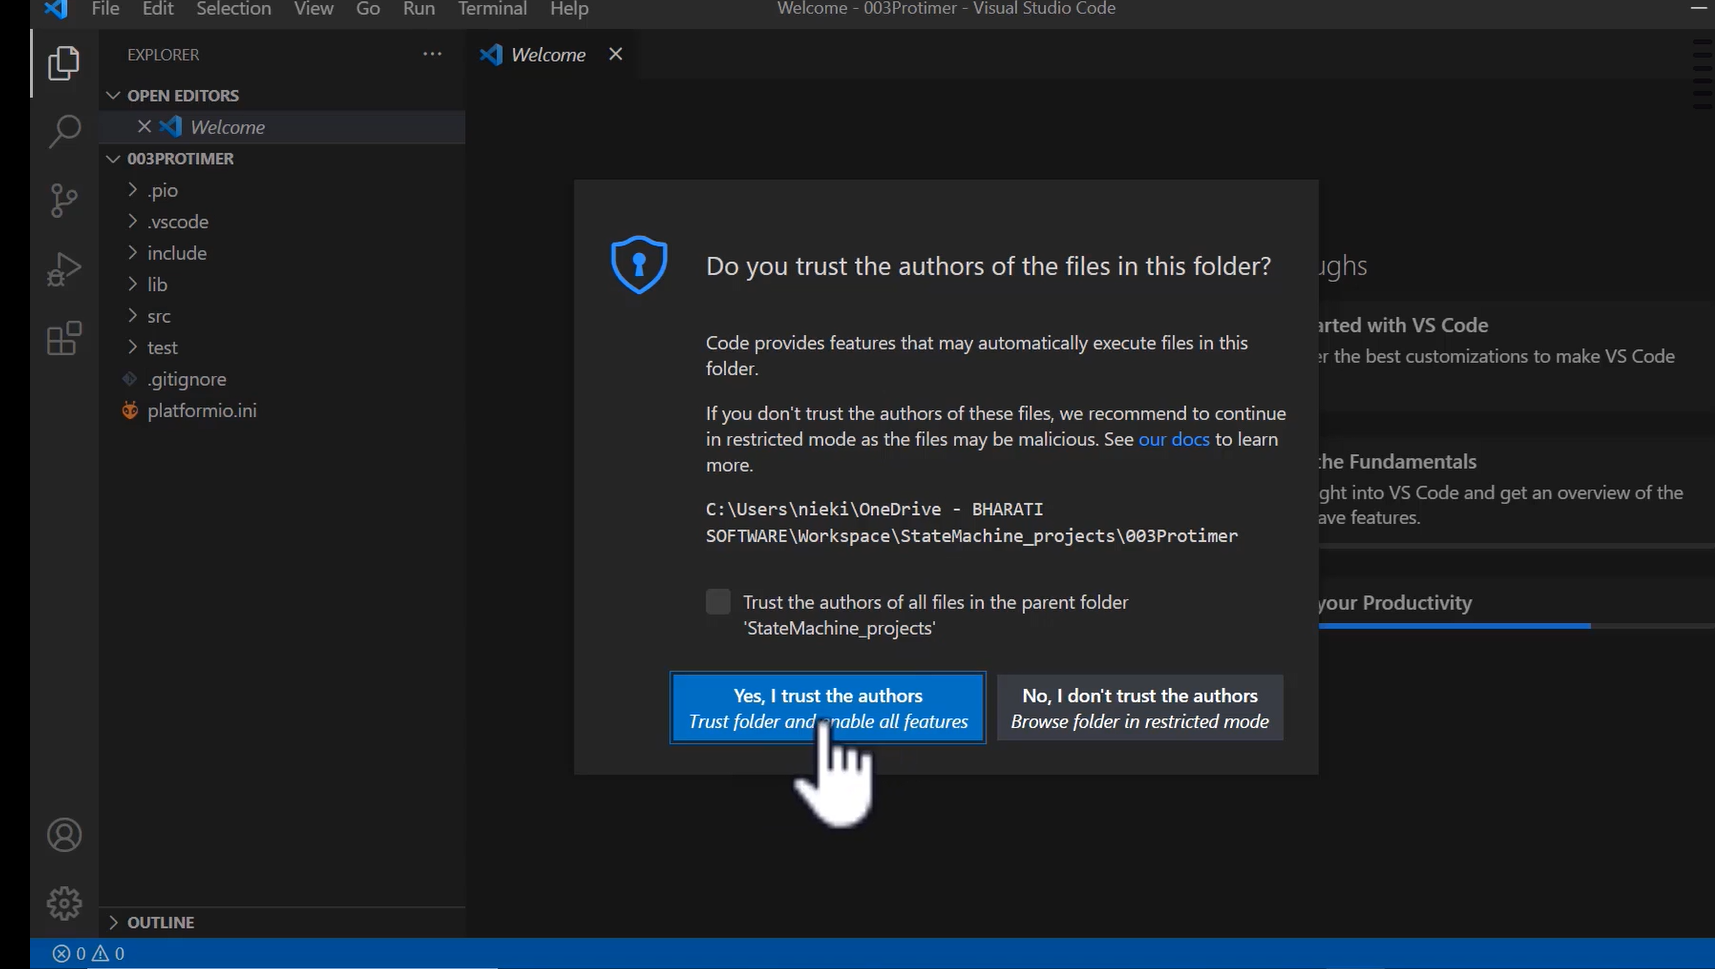
After that, click ‘Yes, I trust the authors‘.
Whenever you create a project for the first time, it may do some network activities; you have to wait until it finishes all the network activities.
Since I have already created many projects with these Extensions, it didn’t stop me from installing something. But, if you are creating a new project for the first time on PlatformIO Extension, it may do some network activities to install some toolchains, etc.
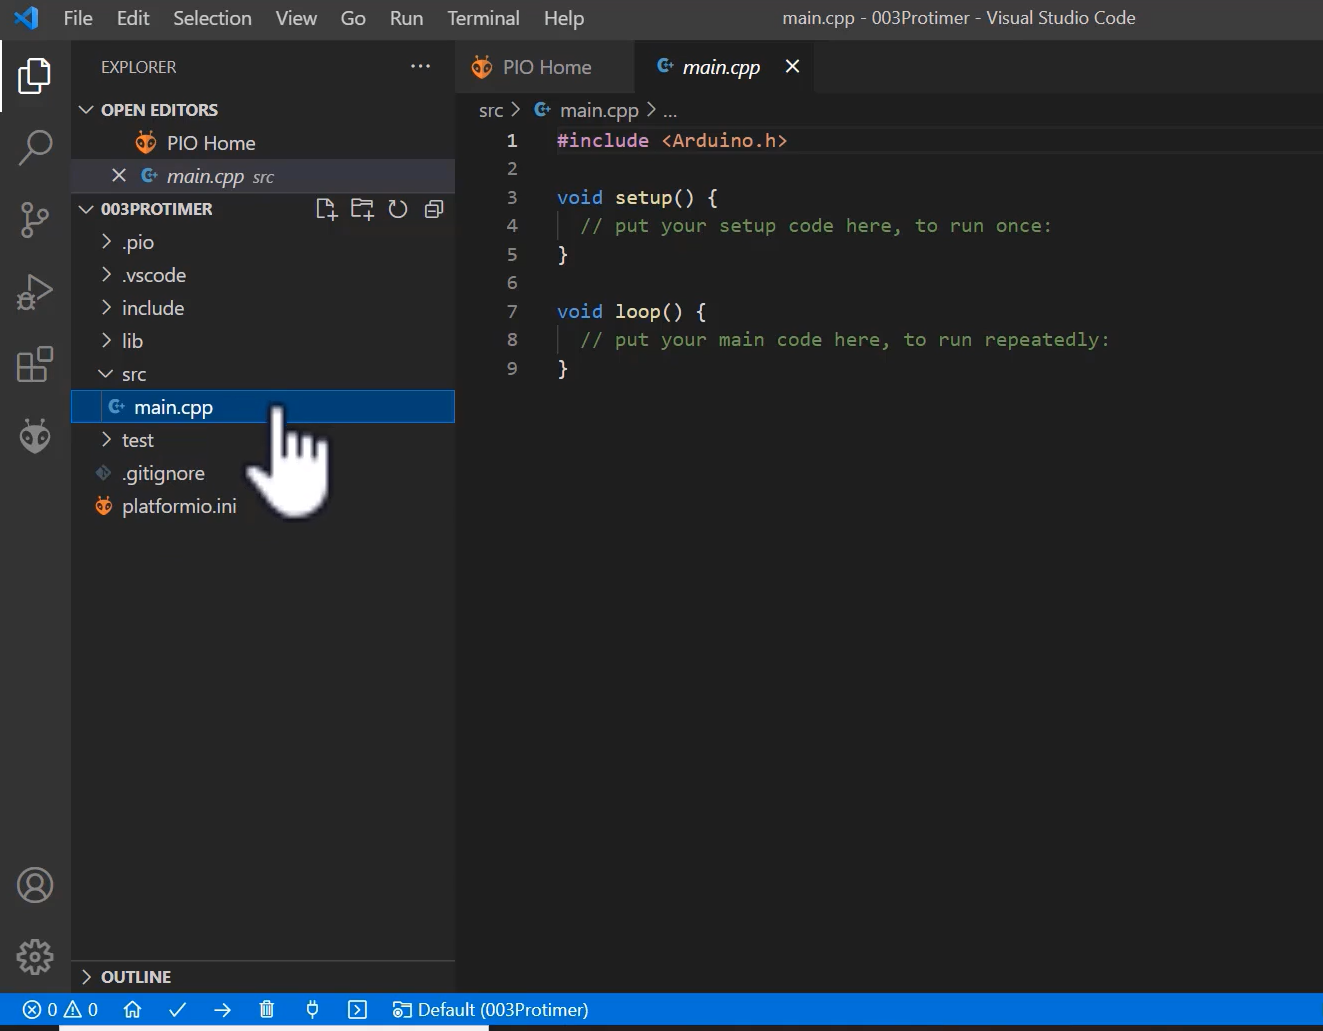
Look at Figure 5, we have successfully created the 003Protimer project, and you can see that there is a source folder and a main.cpp.
The PlatformIO Extension names it as main.cpp instead of main.ino, as you might have seen in Arduino IDE. The loop() and setup() functions are there.
After that, let’s save the visual codes workspace. Go to the file, click on Save workspace As, and save that workspace.
After that, connect your Arduino board to the computer.
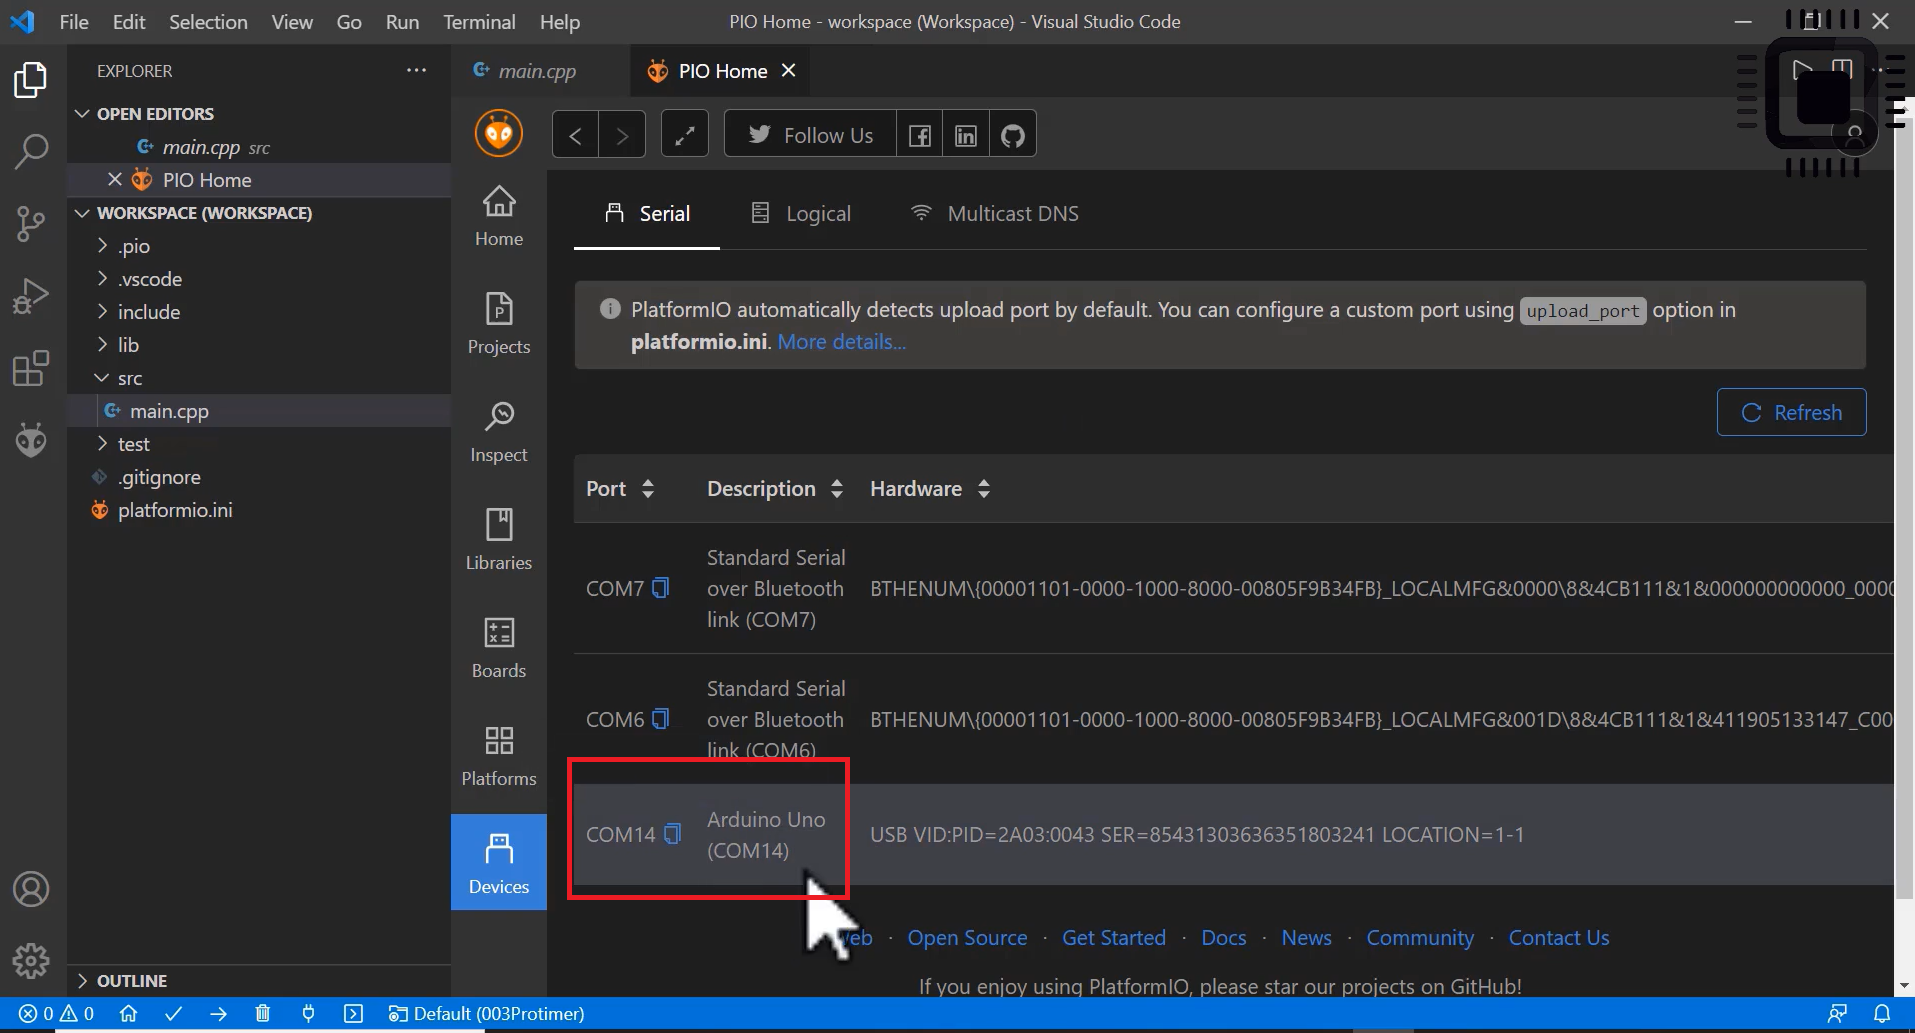
And you can see the connected board in PIO Home under the devices folder. This software has already been detected. The Arduino Uno is connected at the port number a COM14, as shown in Figure 6. When you upload a program from this IDE, it uses this COM Port.
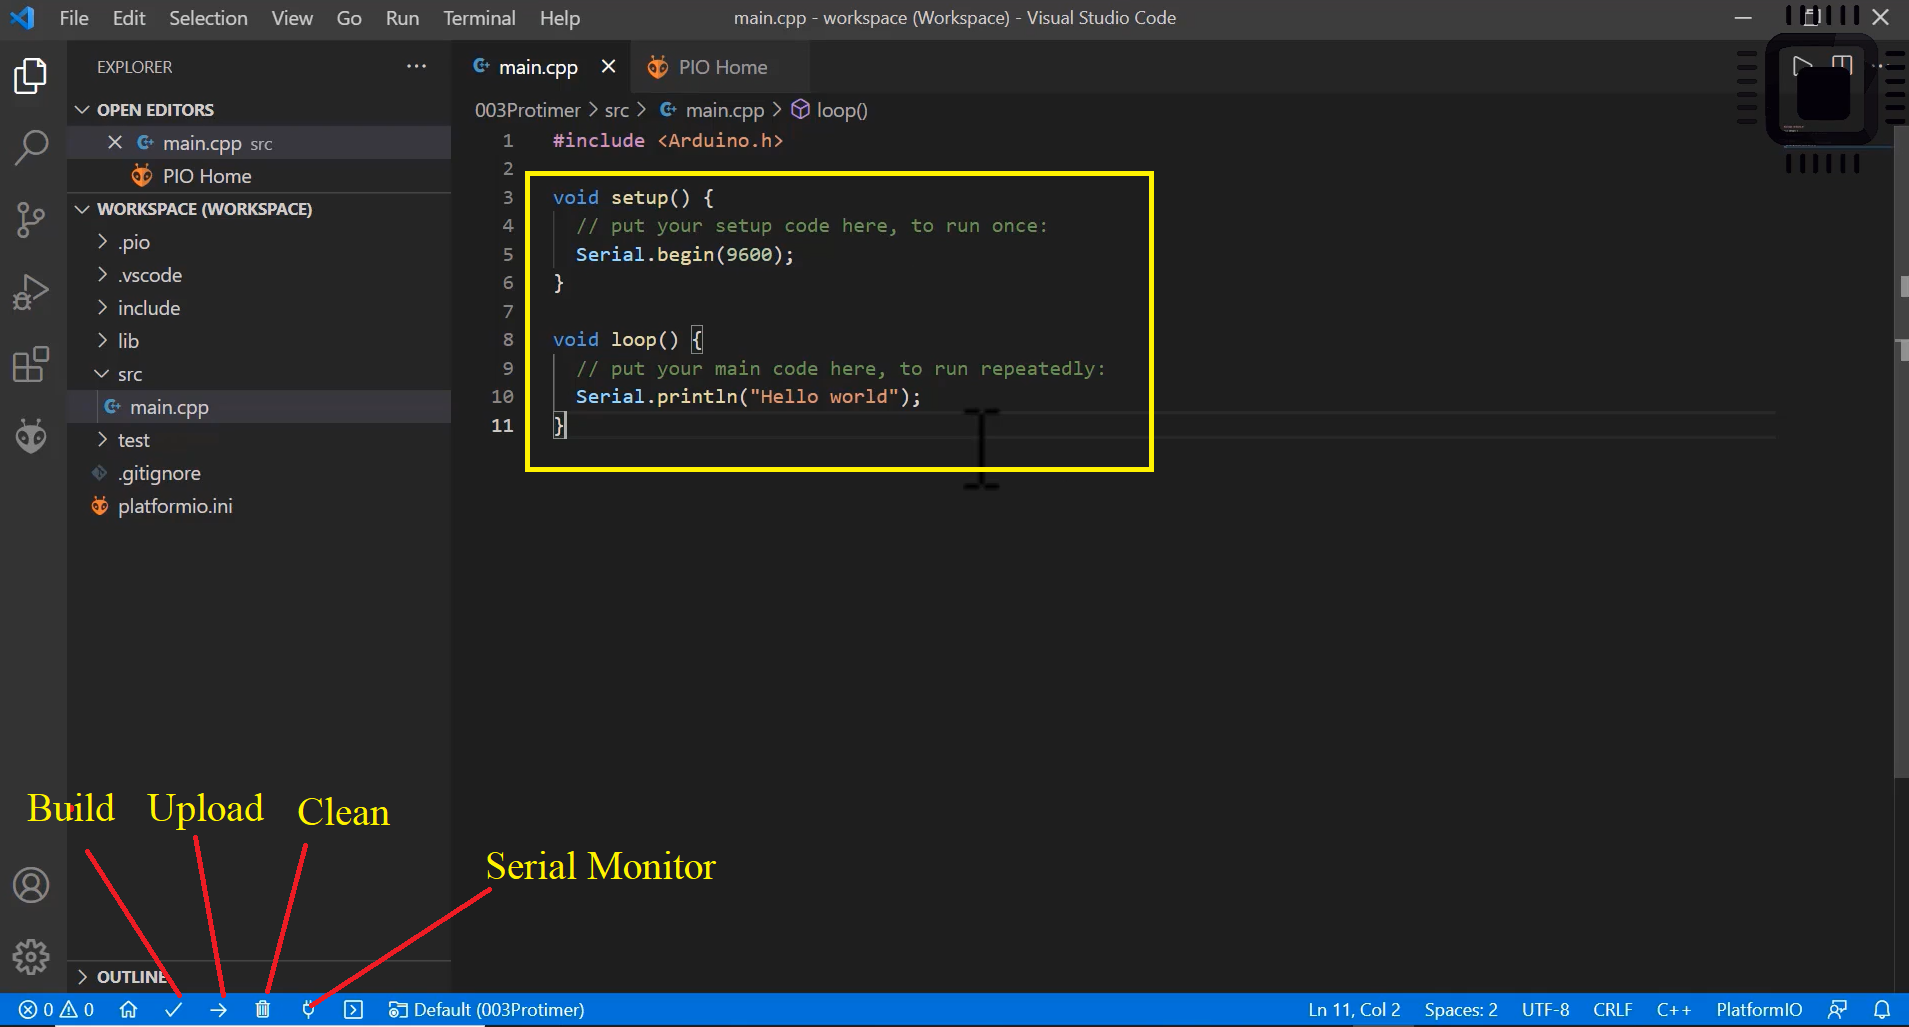
Let’s write a small program to print “Hello world” on the serial monitor. The “Hello World” program is shown in Figure 7.
There is a build, upload, clean, serial monitor, and other things in the panel. After writing the program, click on the Build option. And when the program is build successfully, let’s upload it.
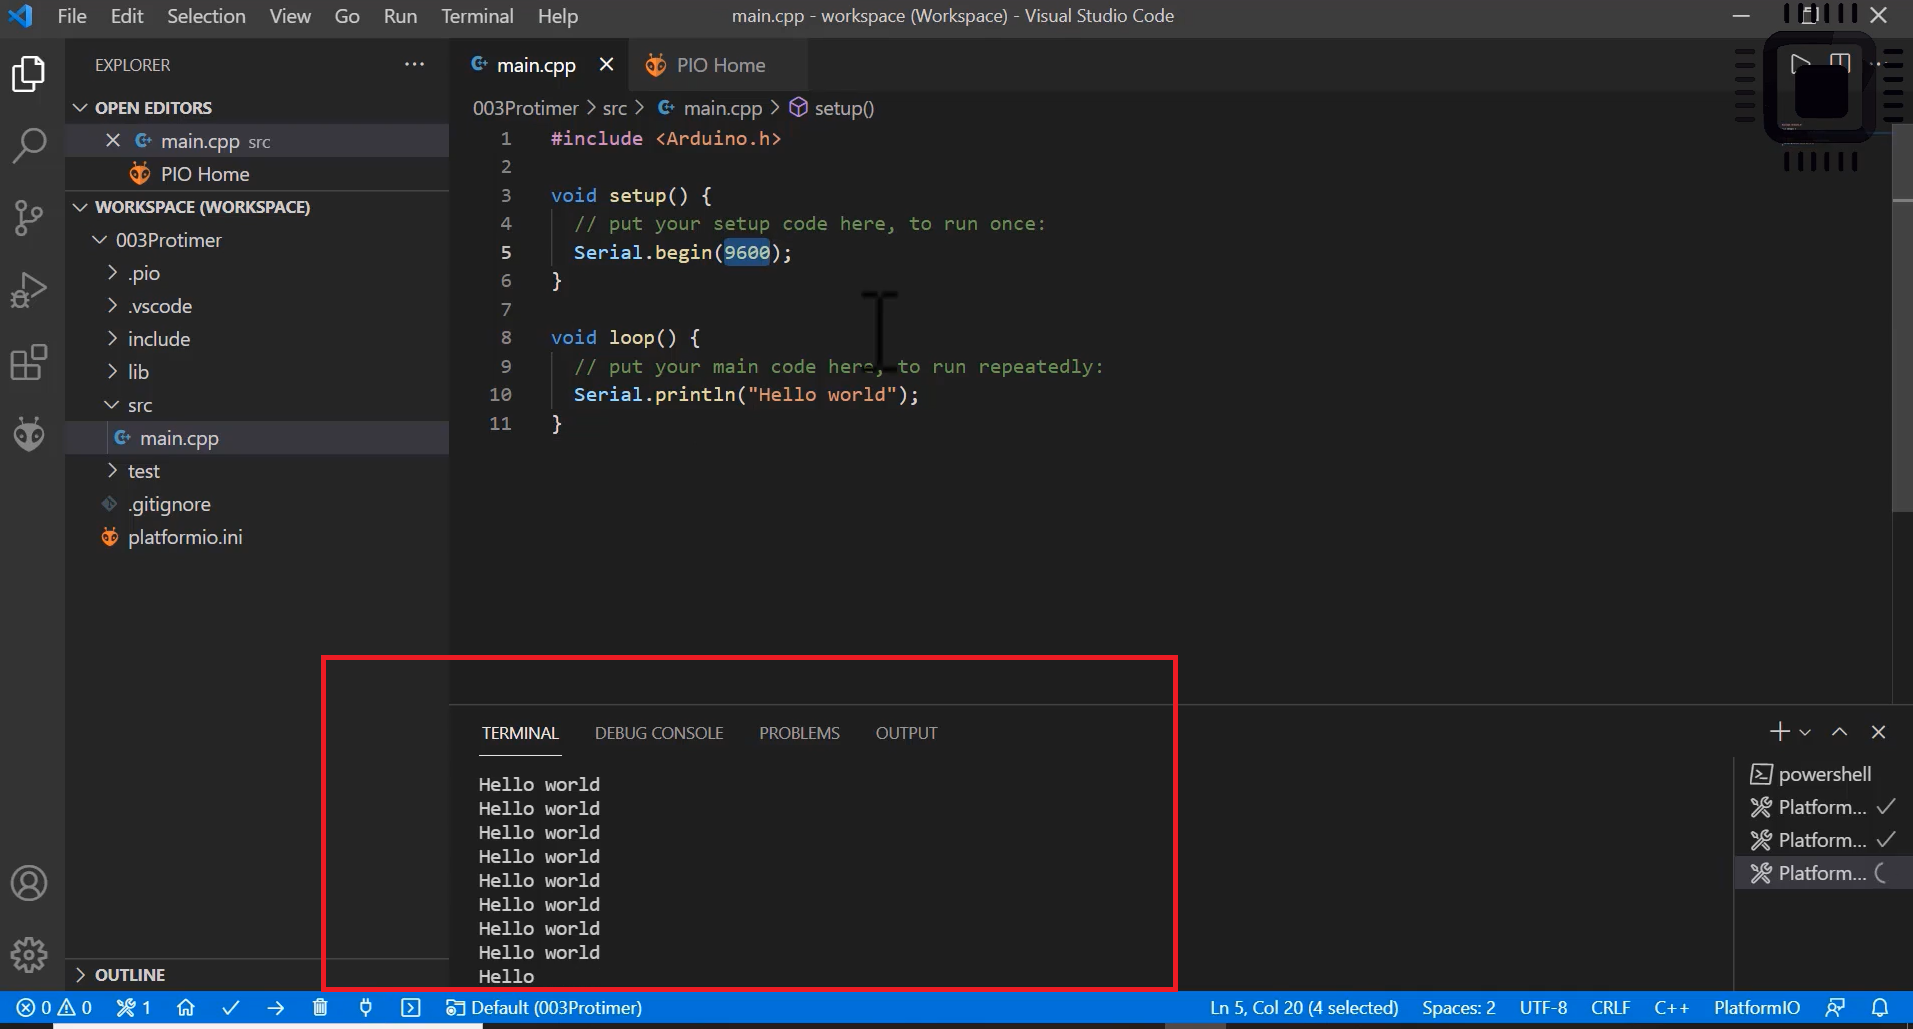
The serial monitor is printing the text “Hello world” because it is in the loop. Since it is in the loop function, it is repeatedly printed.
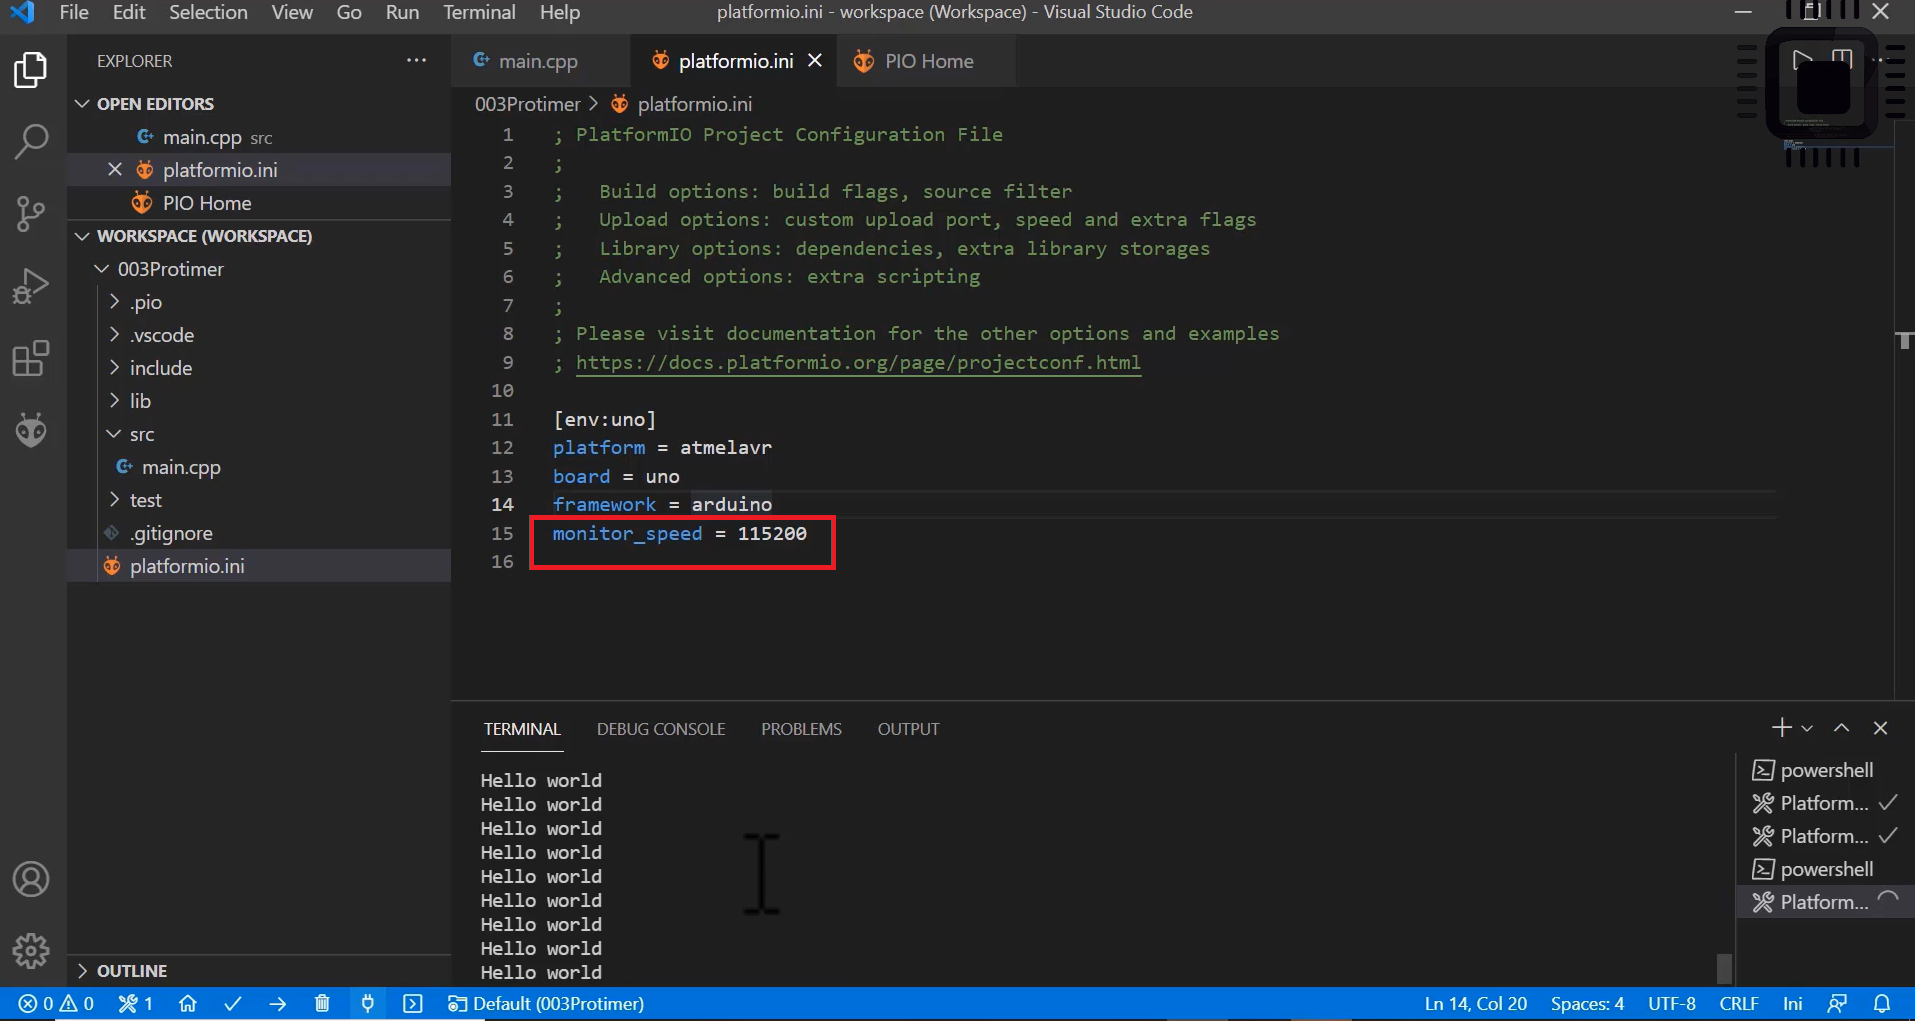
Where to configure the serial monitor baudrate?
Go to the platformio.ini file in your project and add monitor_speed = 115200; this line is to the platformio.ini file. Save. And now you need not build and upload again. Just go for a serial monitor. Now we are getting the correct output shown in Figure 9.
FastBit Embedded Brain Academy Courses
Click here:https://fastbitlab.com/course1


