Run-to-completion(RTC) and QP™ framework
The make an event code generates the event(it’s an event producer code). And the event producer sends the event to the event dispatcher function, and then the dispatcher function post that event to the state machine. And the state machine executes the behavioral action of that event. And then, the state machine returns to the event dispatcher, and then the event dispatcher returns to the super loop. That is our Arduino loop function.
We can summarize the whole step like this, as shown in Figure 1.

First, the code checks whether the event is available or not. And then if an event is available, then a post the event to the state machine. State machine executes the actions associated with that event, and then state machine returns back to the super loop. This is the run to completion pattern or RTC pattern.
Run-to-completion(RTC): Processing of the current event must finish first, before processing the next event.
If you use the run-to-completion paradigm, you should not put any blocking code (e.g., delay()) anywhere here, violating the rtc paradigm.
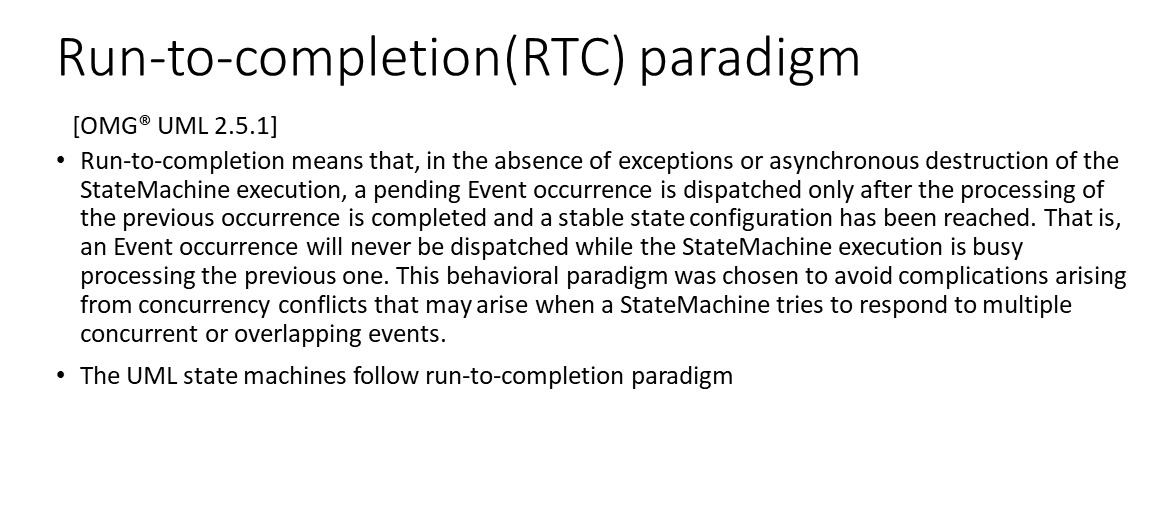
The implementation of UML state machines follows the run-to-completion paradigm. Figure 2 shows what the specification says.
Please remember that the UML StateMachines should be implemented in a run-to-completion fashion.
The event-driven + rtc paradigm provides better power efficiency. When the events are absent, you can utilize the MCU low power modes to put the microcontroller to sleep and make MCU active only during the execution of an rtc step.
Figure 1 shows the RTC step. When the rtc step is completed, the microcontroller can sleep until another event wakes it up.
We need an event processor code to solve hierarchical state machines or implement the hierarchical state machines. The event processor solves the traversal of nested hierarchical state machines. I mean, it traverses through various states, which are nested inside the hierarchical state machine, and it calls the appropriate state handler. It takes care of executing various transition sequences as per the UML specification. For all this, we need a background event processor.
We used a flat state machine in the previous exercises and didn’t use any event processor. A generic code processes the calling of various state handlers and solves various state transitions as per the specification.
When you start using the nested hierarchical state machines, it will become tedious to implement various state traversals and maintain the execution of transition sequences. Everything by yourself. That’s why you have to go for some framework or use some generic event processor code, which can help you implement the hierarchical state machines in your project.
That is why, in this article, I’ll be introducing QP real-time embedded framework and QM tool by Quantum Leaps, LLC. And this is a famous framework, and it also comes with a graphical modeling tool called QP Modeler. And this is quite famous in the field of modern embedded system programming using event-driven architecture.
You can explore more about this with these links.
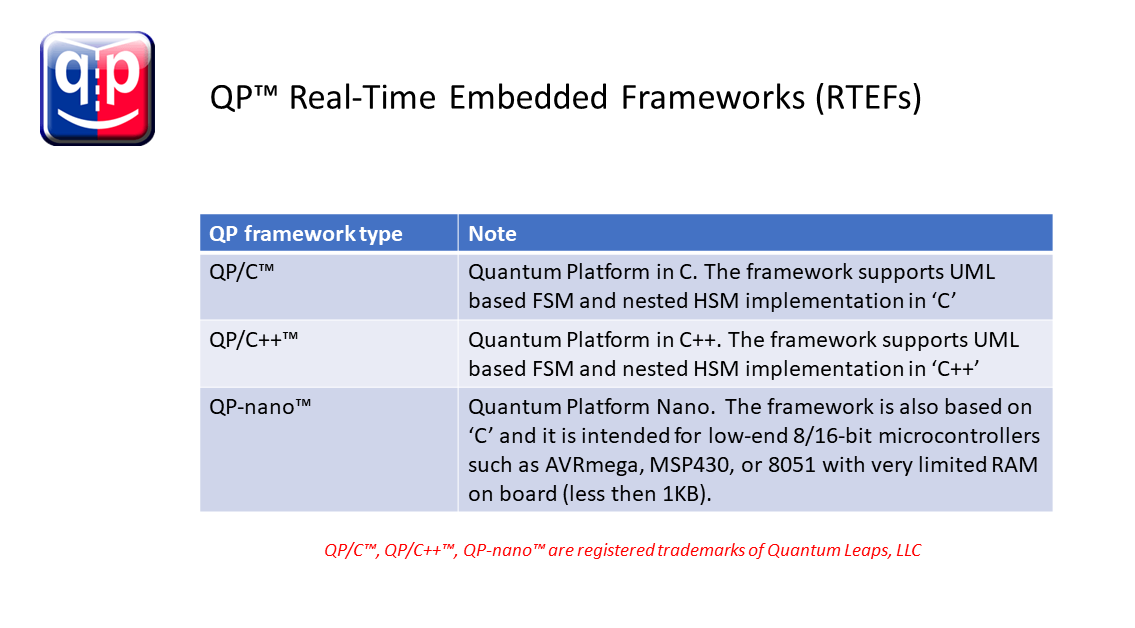
QP real-time embedded frameworks (RTEFs)
We want to thank Miro Samek, the founder and the CEO of Quantum Leaps, LLC, for giving us permission to use the QP framework and its associated components in this course. You will be using the QP framework, QP modeler tool, QHSM Event Processor, and QP Nano Arduino Library to implement that event-driven hierarchical state machine projects.
QP™ real-time embedded frameworks (RTEFs) and QM™ modeling tool by Quantum Leaps, LLC
- Run to completion and Event-driven architecture
- Support for nested HSMs(UML statecharts)
- Model-based design using QM™ tool (QP™ Modeler)
- Automatic code generation (converting UML statecharts into traceable c/c++ code)
- Support for Active objects (Actors)
- Various Kernel support
- QV (simple cooperative)
- QK (Preemptive Run-To-Completion (Non-Blocking) Kernel)
- QXK (Preemptive Dual-Mode (Run-to-Completion/Blocking) RTOS Kernel )
- QP/Spy™ Software Tracing tool
- QUTest™ Unit Testing Harness
- Dual licensing (Open and closed source licensing)
- The QP/C and QP-nano frameworks comply with most of the MISRA-C:2004 rules while the QP/C++ framework complies with most of the MISRA-C++:2008 rules
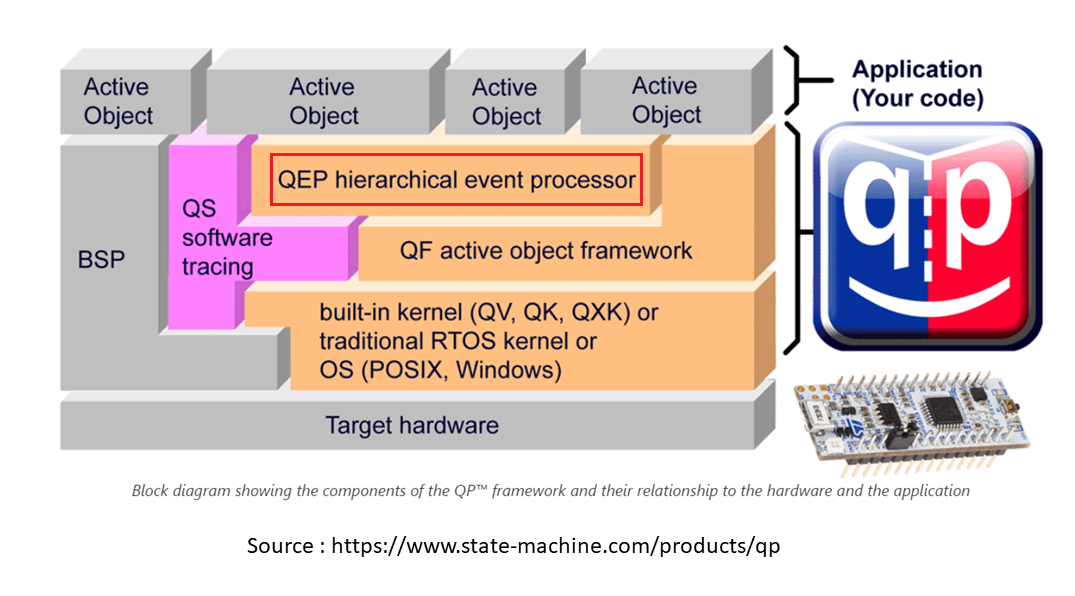
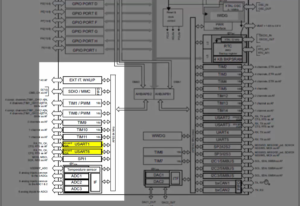
This is a block diagram of the QP™ framework. This is a picture(Figure 4) of the whole framework. In this section(see red color line), we will be using this hierarchical event processor.

The QP framework is also available in Arduino libraries. That library can be copy-pasted into an Arduino Library folder, and you can start using this framework.
The QP-nano Arduino libraries are already available for AVR based Arduinos, such as Uno and Nano. You have to download it, and you can start using that.
For ARM-based Arduino, such as Arduino Duo, which is based on ARM Cortex M architecture, the QP/C++ Arduino Library is already available. You can use that with these boards or use a QP/C framework on these boards.
But for the Arduino Uno board or Nano board, we have to use a QP-nano framework, which is a lightweight version of QP/C.
Since we are using the Arduino Uno board in this article, we’ll be using the QP-nano Arduino library. But it is not recommended for a new design because the QP-nano framework is discontinued, as mentioned on QP and Arduino web page. For newer designs, you have to upgrade your hardware to newer advanced hardware such as Arduino DUE or Arduino ZERO, which are based on ARM based Arduinos. In that case, you can either use the QP/C++ framework or the QP/C framework.
Downloads:
Download and install QM™ tool: https://www.state-machine.com/products/qm
We need the QP framework that you can download from here and the QM graphical modeling tool; everything comes with one download.
Download QP Arduino library: https://www.state-machine.com/arduino
QP-Nano API reference: https://www.state-machine.com/qpn/api.html
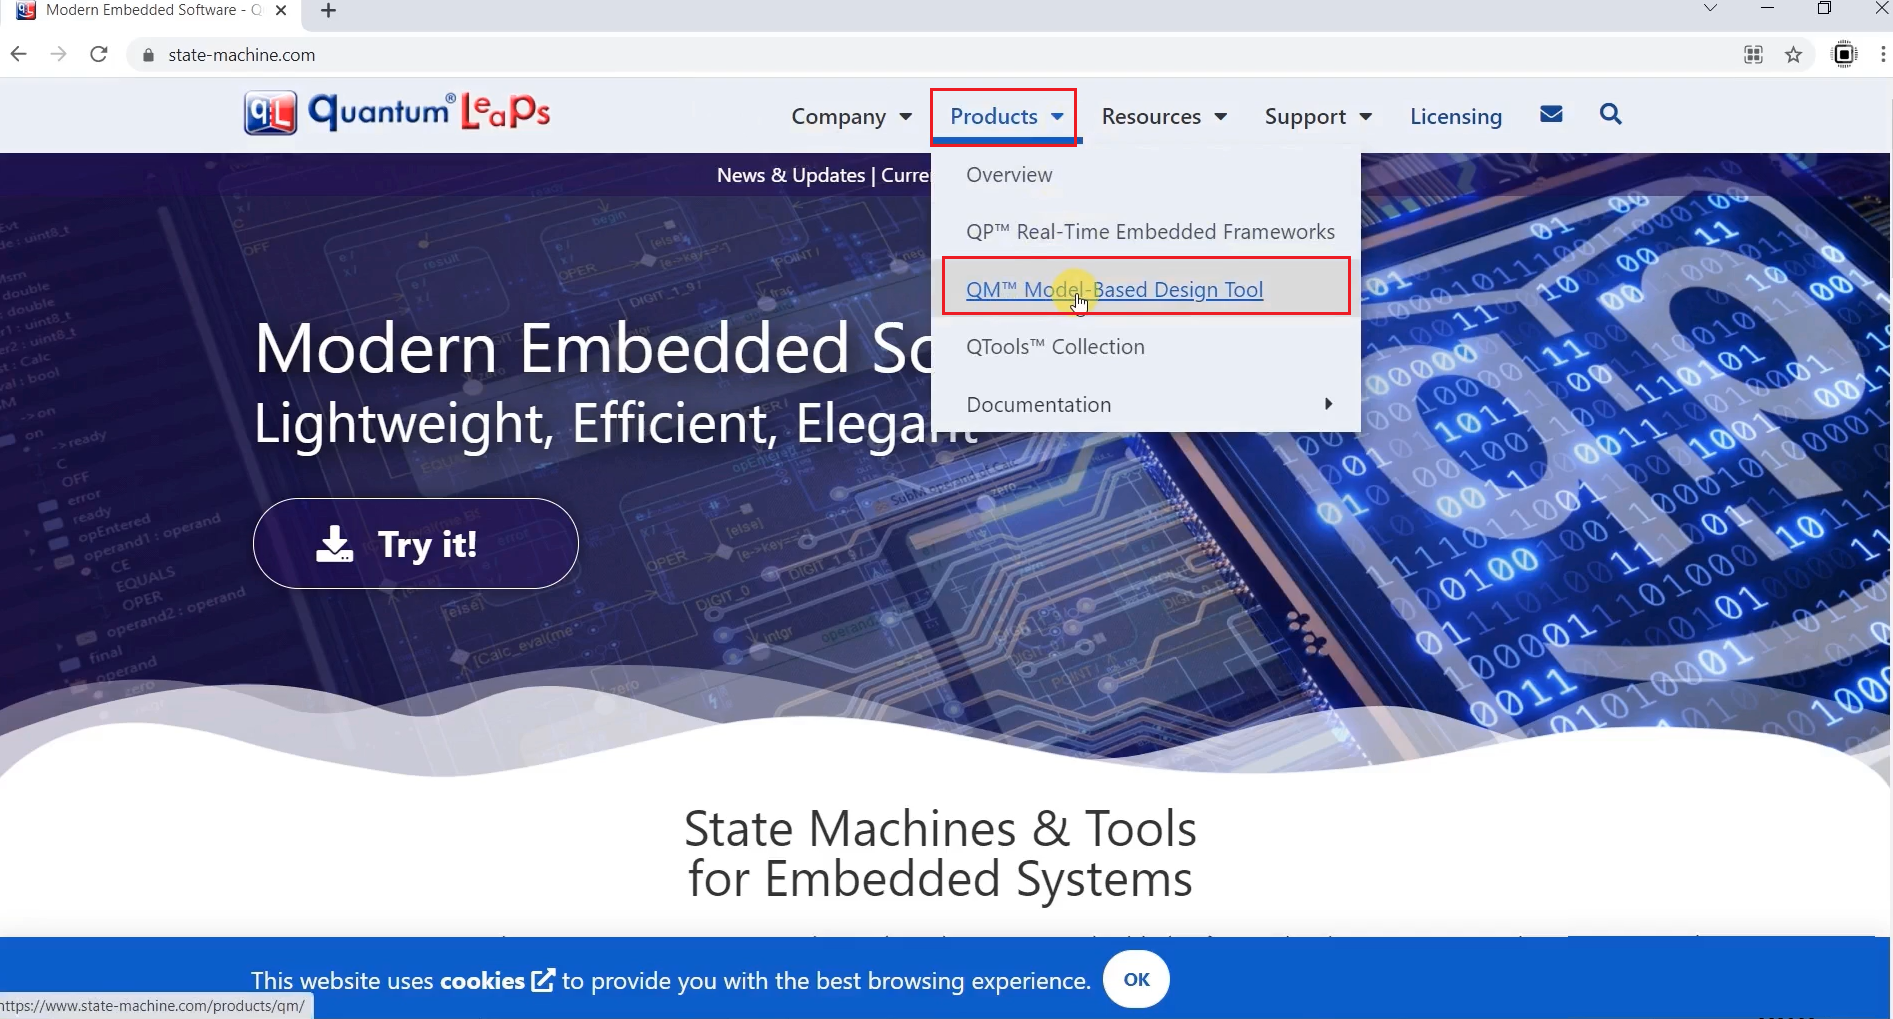
1. On the statemachine.com website, go to the products → QM Model-Based Design Tool→ click on that. (Figure 1)
2. And use the option ‘Download QM as a part of QP bundle,’ as shown in Figure 7.
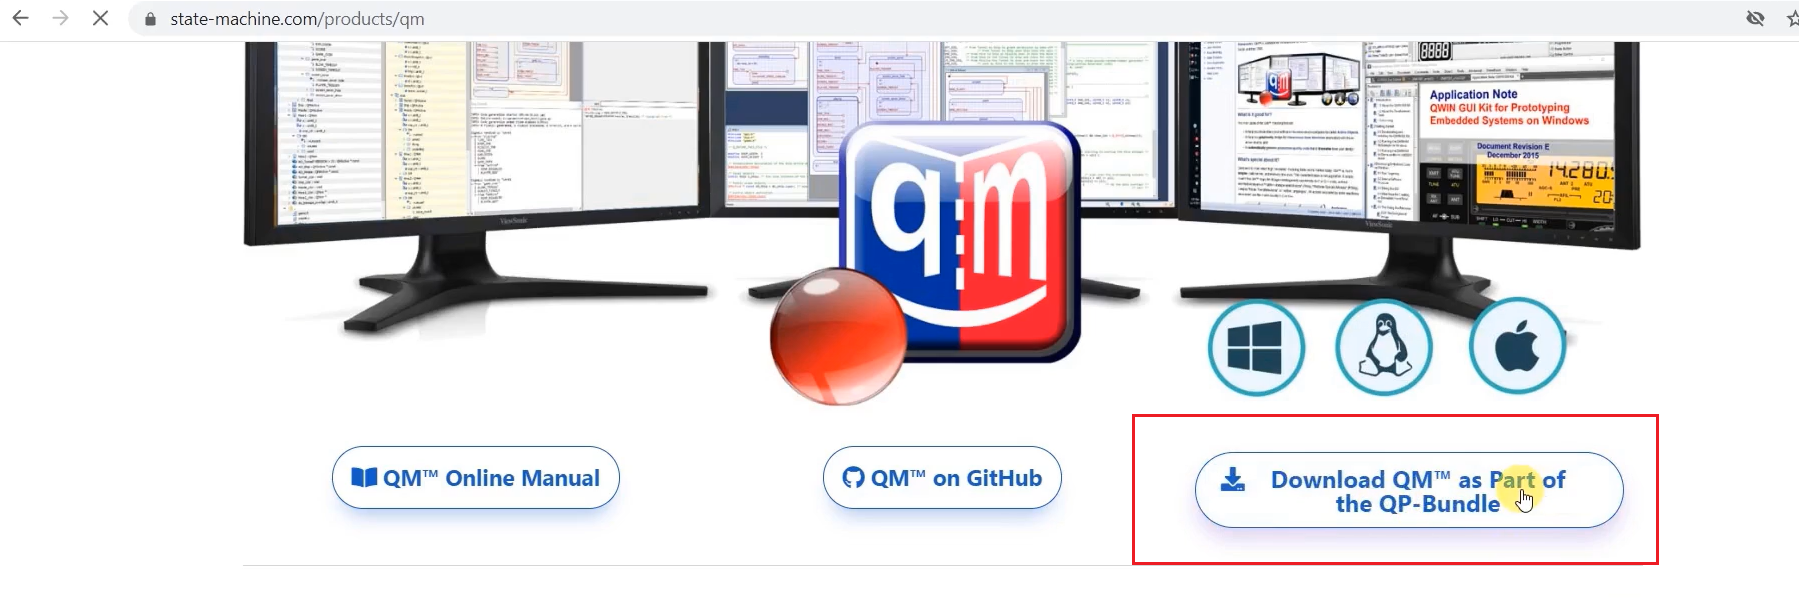
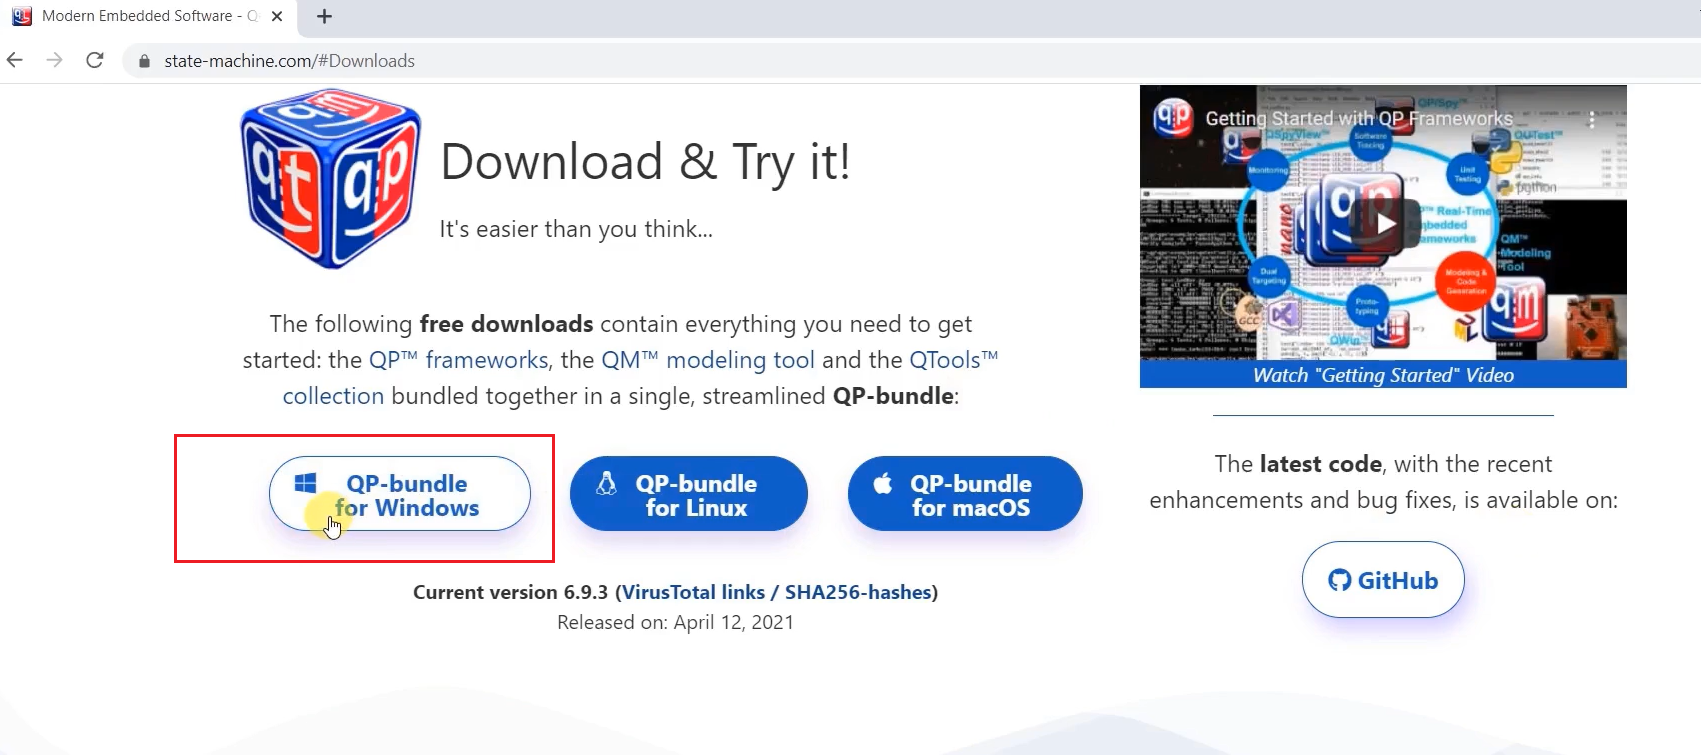
3. Download the QP-bundle as per your machine. Go for the QP-bundle for windows.
FastBit Embedded Brain Academy Courses
Click here: https://fastbitlab.com/course1