Exercise-007 Clock Alarm demo
In this article, let me give you a demo of the 007ClockAlarm exercise. When you see the Clock Alarm demo, you will understand many things. So, what and all requirements have you implemented for this application, and we will solve this application using the hierarchical state machine approach.
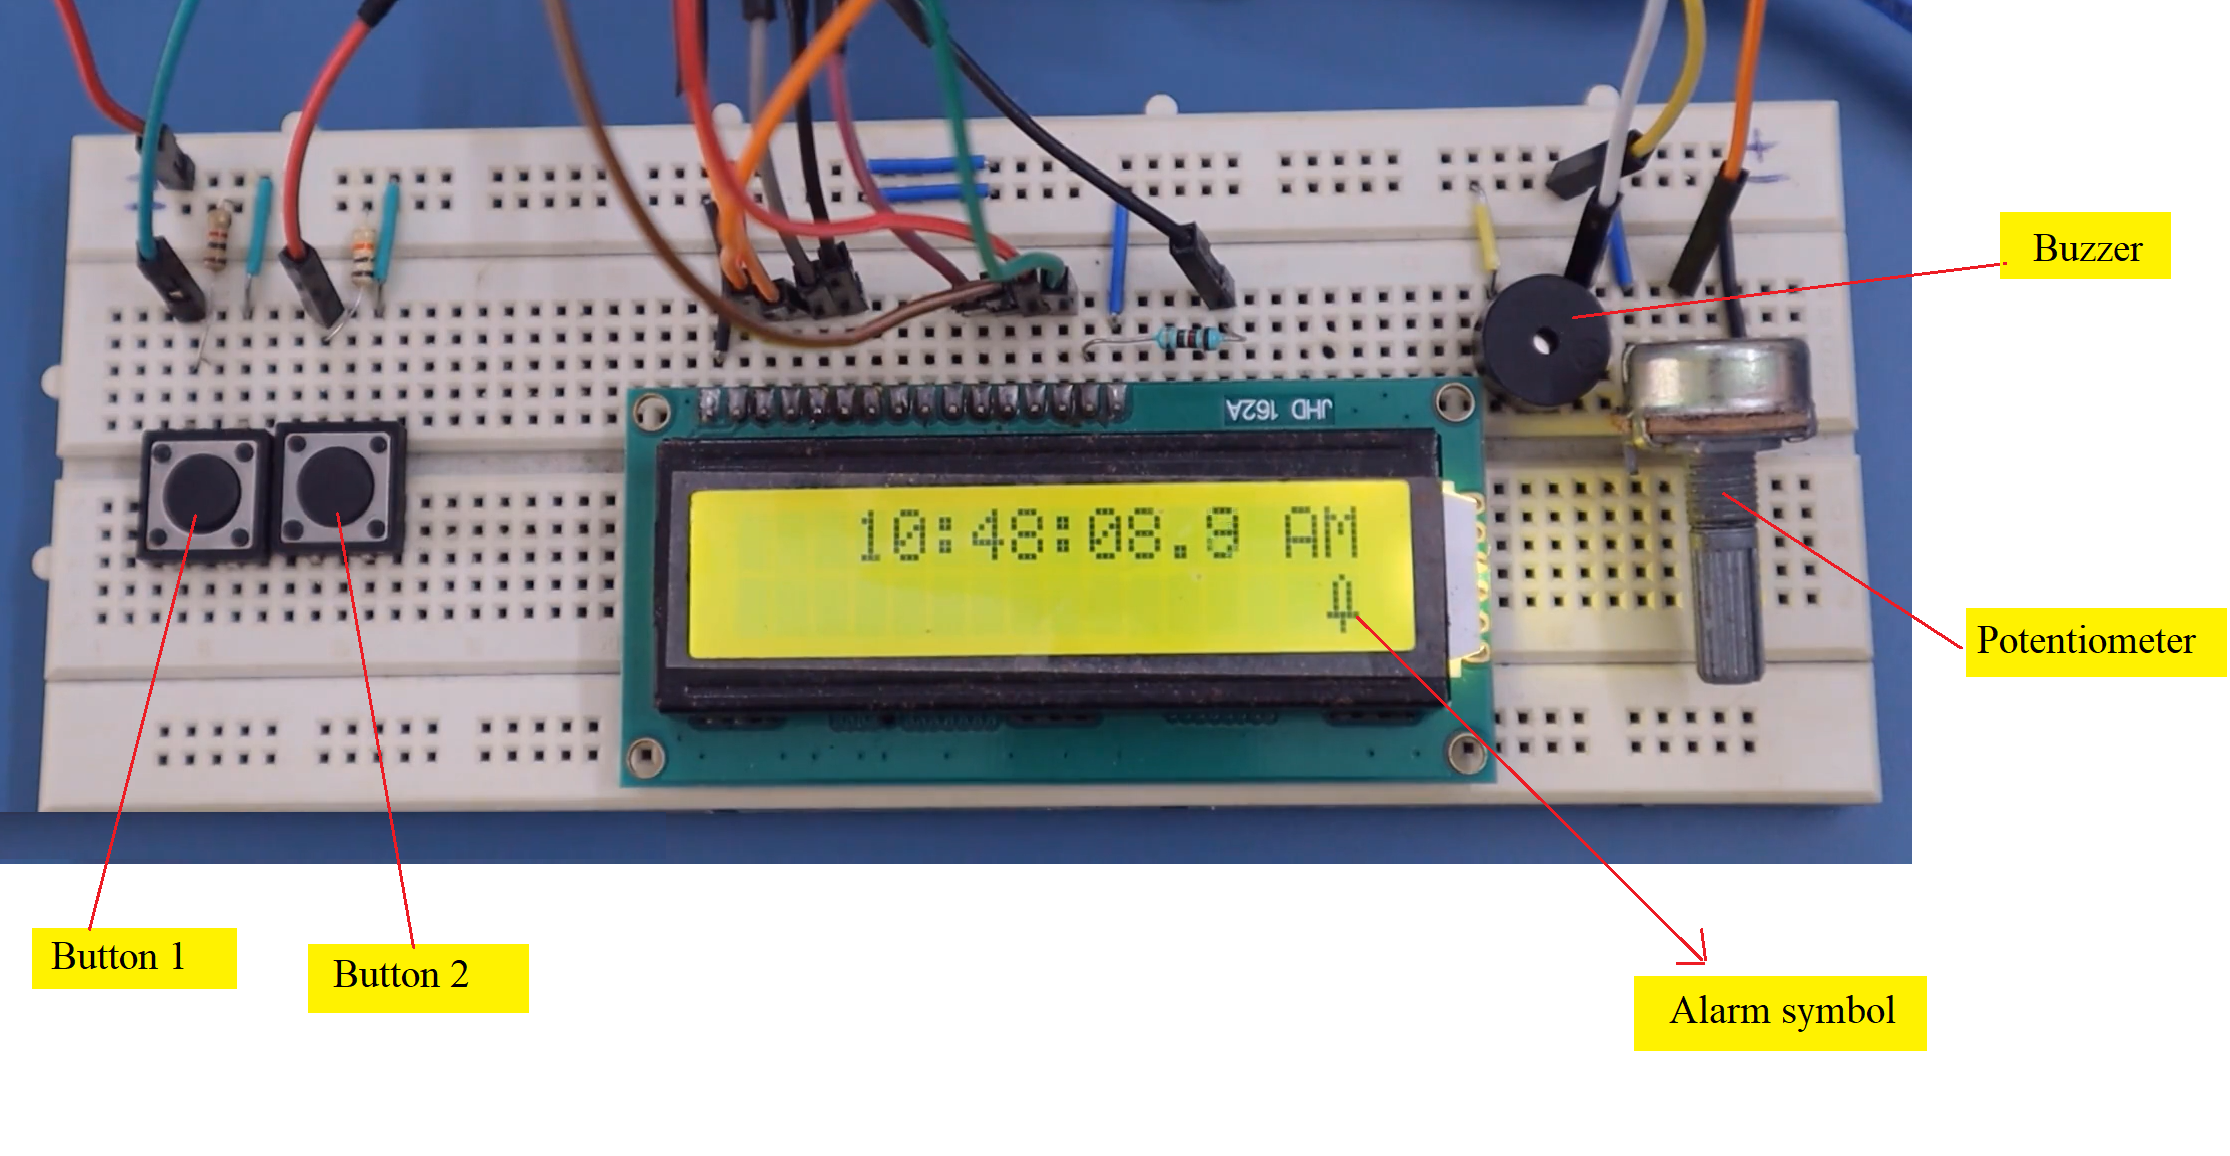
In the protimer application, we used three buttons, but you need two buttons in this application. And there is the LCD. The LCD and the Arduino board connections are the same as before. And there is an optional buzzer. A potentiometer to set the contrast for the LCD.
There are two buttons on the button pad. Now, let me explain the functionalities of these buttons for this exercise. The first button is called the ‘SET’ or ‘CLOCK_SET’ button. And the second button is the ‘OK/ALARM_SET’ button. These are multi-functional buttons. I will explain how to use these buttons in a moment.
First of all, I have downloaded the application to the Arduino board, and the application is currently running.
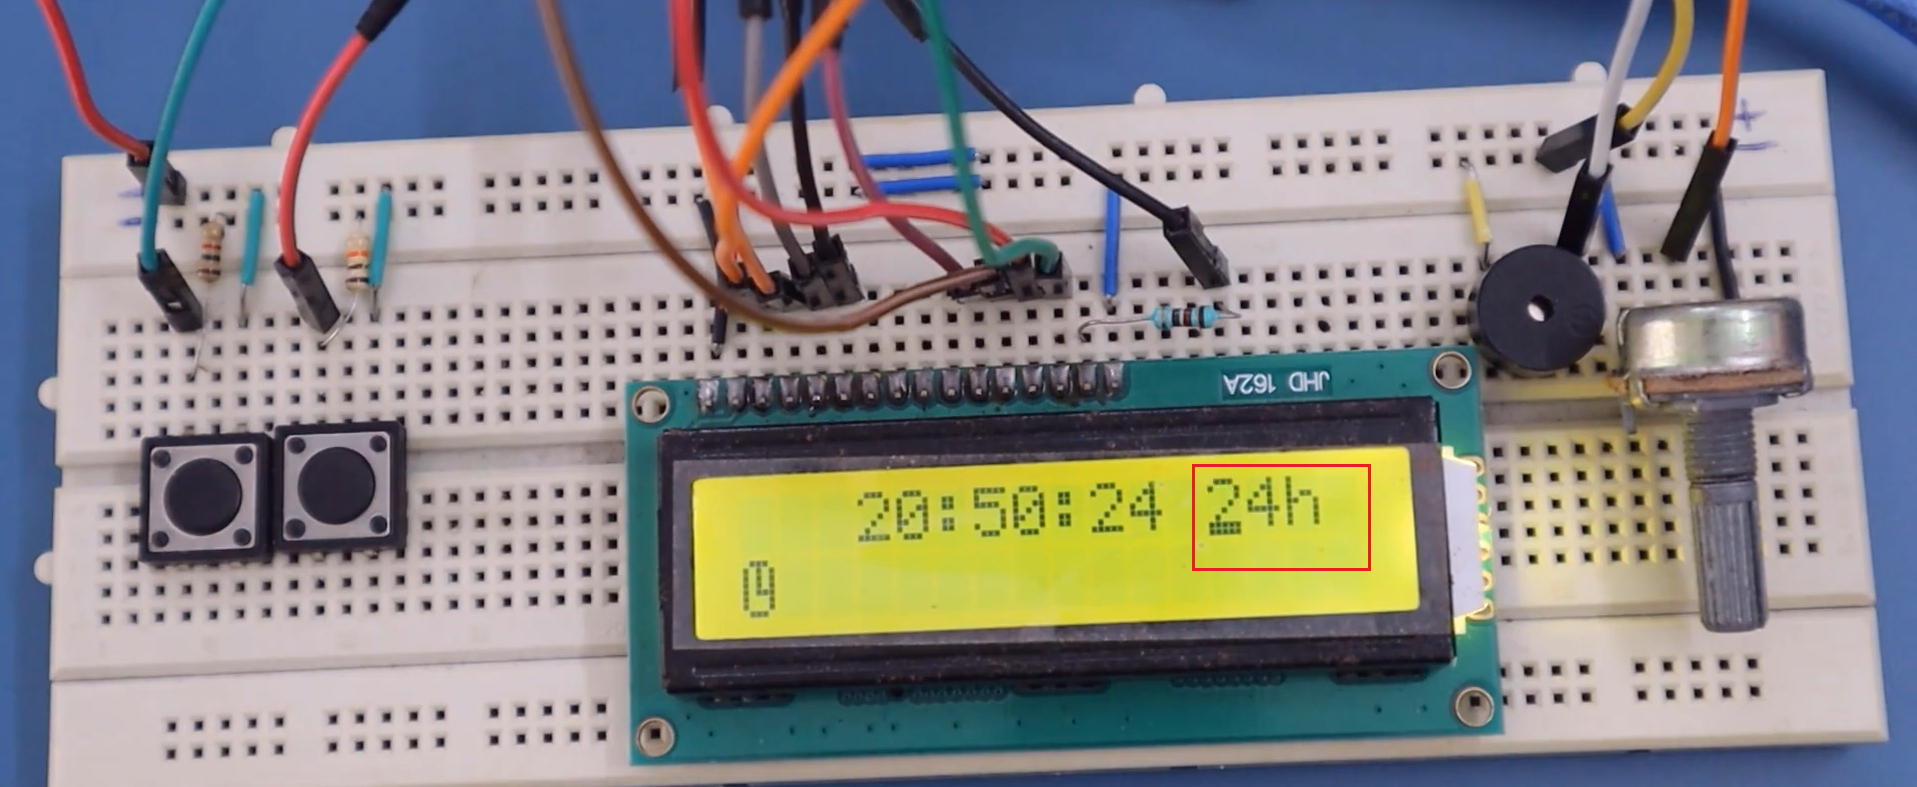
Now, just reset the Arduino board. And when you reset the board, the application is currently showing the current time of the day. The current time of the day is presented to the user. And the display format for the time is hour, minutes, seconds, and sub-seconds.
And also, you must display whether it is a 24-hour format or whether the time is in a 12-hour format. If it is in a 12-hour format, you have to show AM or PM. As you can see in Figure 1, there is an Alarm symbol, which indicates that the Alarm is currently ON.
Now you are seeing a ticking mode(Figure 1). In the ticking mode, the application ticks, and the current time is presented to the user. I call this a ticking mode.
There is also one more mode, which is Clock set mode. Suppose, if I want to modify the time or if I want to adjust the time or if I want to change the mode of the time or time format, then I can do that, so I have to go to the clock set mode.
When the application is in ticking mode and press Button 1 for ‘SET/CLOCK SET,’ the application moves to Clock set mode.
In Figure 2, you can see that the application is in Clock set mode, in which you can change some settings.
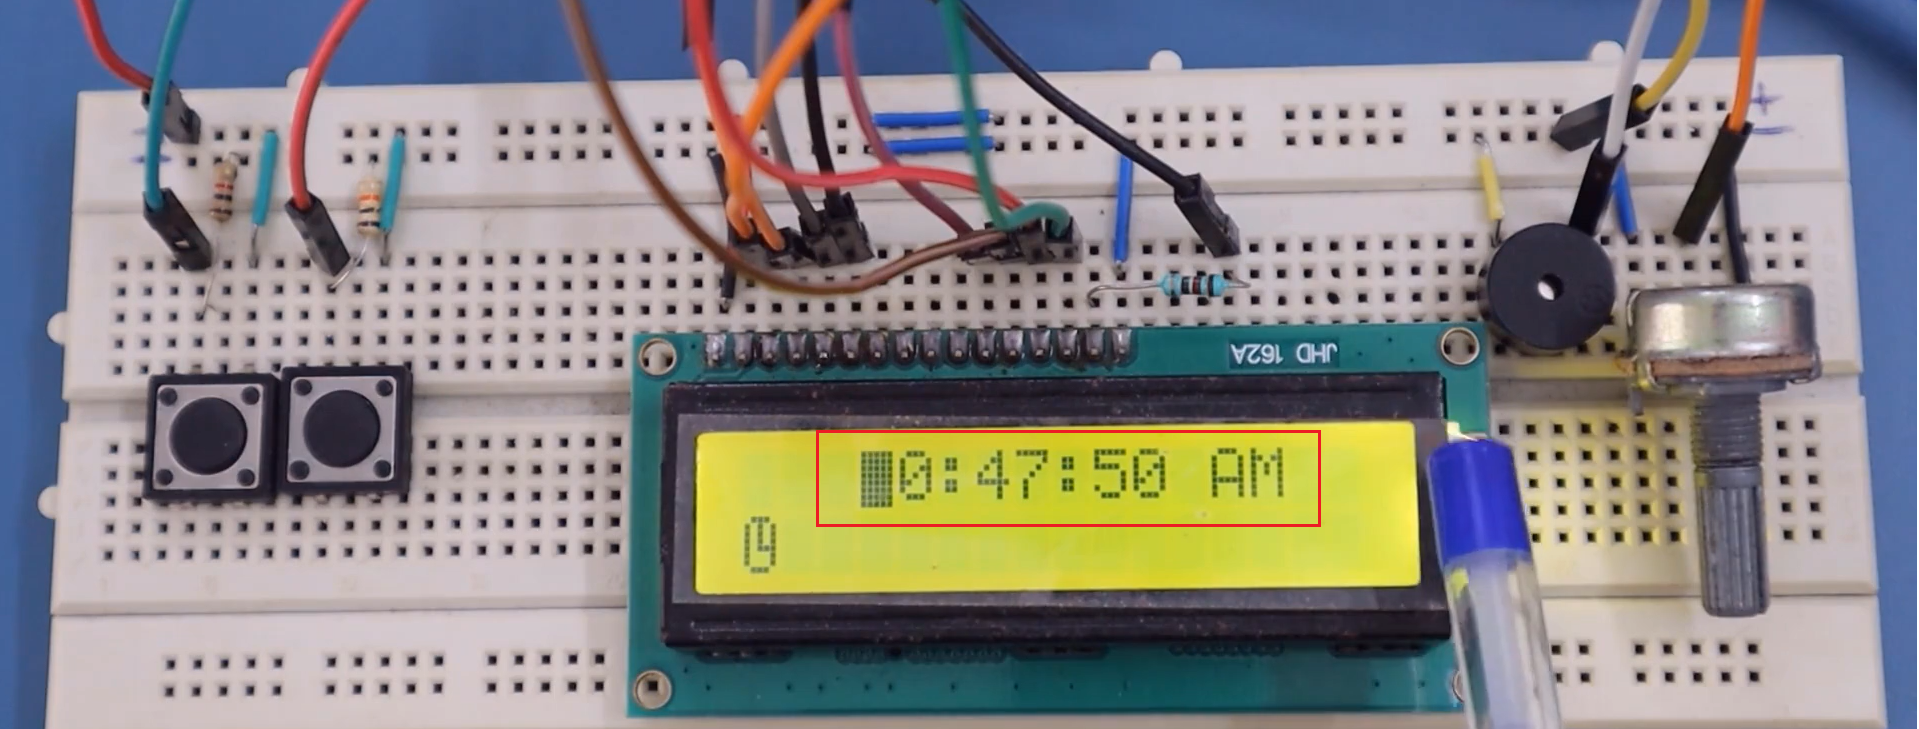
And you can also see that the LCDs cursor blinks on the first field of the hour information. In hour field 10, 1 is the first digit of the hour, and 0 is the second digit of the hour. Digit wise you can enter new values here.
The clock setting mode asks you to modify the hour information, and you have to use the ‘SET’ button. If you press the ‘SET’ button, change it to different values. Select a digit; if this is ok, you have to press the ‘OK’ button. The cursor moves to the next digit, where you can feed another value if you want. Press the OK button, and it goes to the next field. So, if you don’t want to enter anything, just press OK, it goes to the next field, like that.
Now, you want to Abort everything. So, you don’t want to set anything, then you can do that. So, to Abort this operation, you have to press these two buttons simultaneously.
Let me press the two buttons simultaneously, which Aborts that operation, returning to the ticking mode.
Now, let me again enter the clock setting mode. I press Button 1, it takes me to the clock set mode. And I enter some values here. And then, it asks you to set the mode, whether you want 24-hour format or 12-hour format. I will go for a 12- hour format, and then you can press OK.
When you press OK, it comes back to the ticking mode. Now the time is modified. It took your new setting.
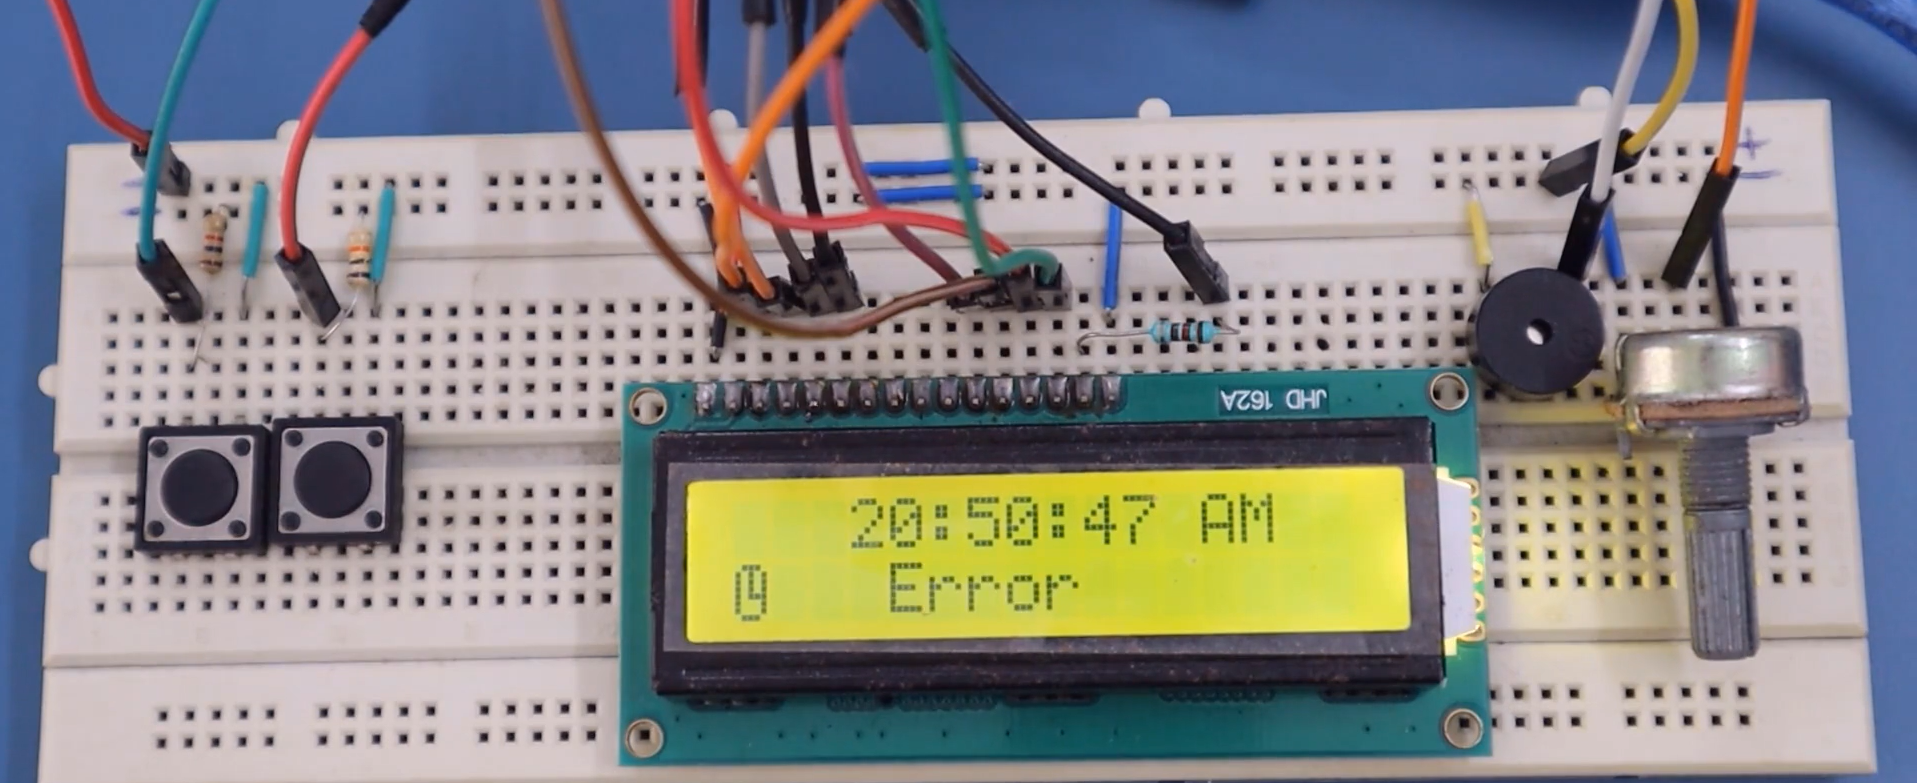
Again press the Set button. Now it is in the Clock set mode, enter some value here and press OK. And now I set it to AM and press the OK button. And now it is showing “Error.” Because the time is in 24-hour format and you are trying to set that to AM or PM information, that’s why this format is wrong. So it shows an Error.
There is no response for this OK button when it is in Error mode. What you can do is you have to go back and modify this information that you had entered here. That’s why the OK button will not work here, and you have to press the Set button. And when I press the set button, it takes me back to the setting, and now I have to modify it.
That’s about the ticking mode and the clock set mode. I think you understood what are all the requirements you have to implement for this application.
Now let me explain one more feature of this application: Alarm set mode. That is a provision to set the Alarm. When the application is in ticking mode, press the Button2 ”OK/ALARM_SET” button, which takes you to the Alarm set mode.
Let me press Button2. In Figure 5, you can see that the application is in Alarm set mode.
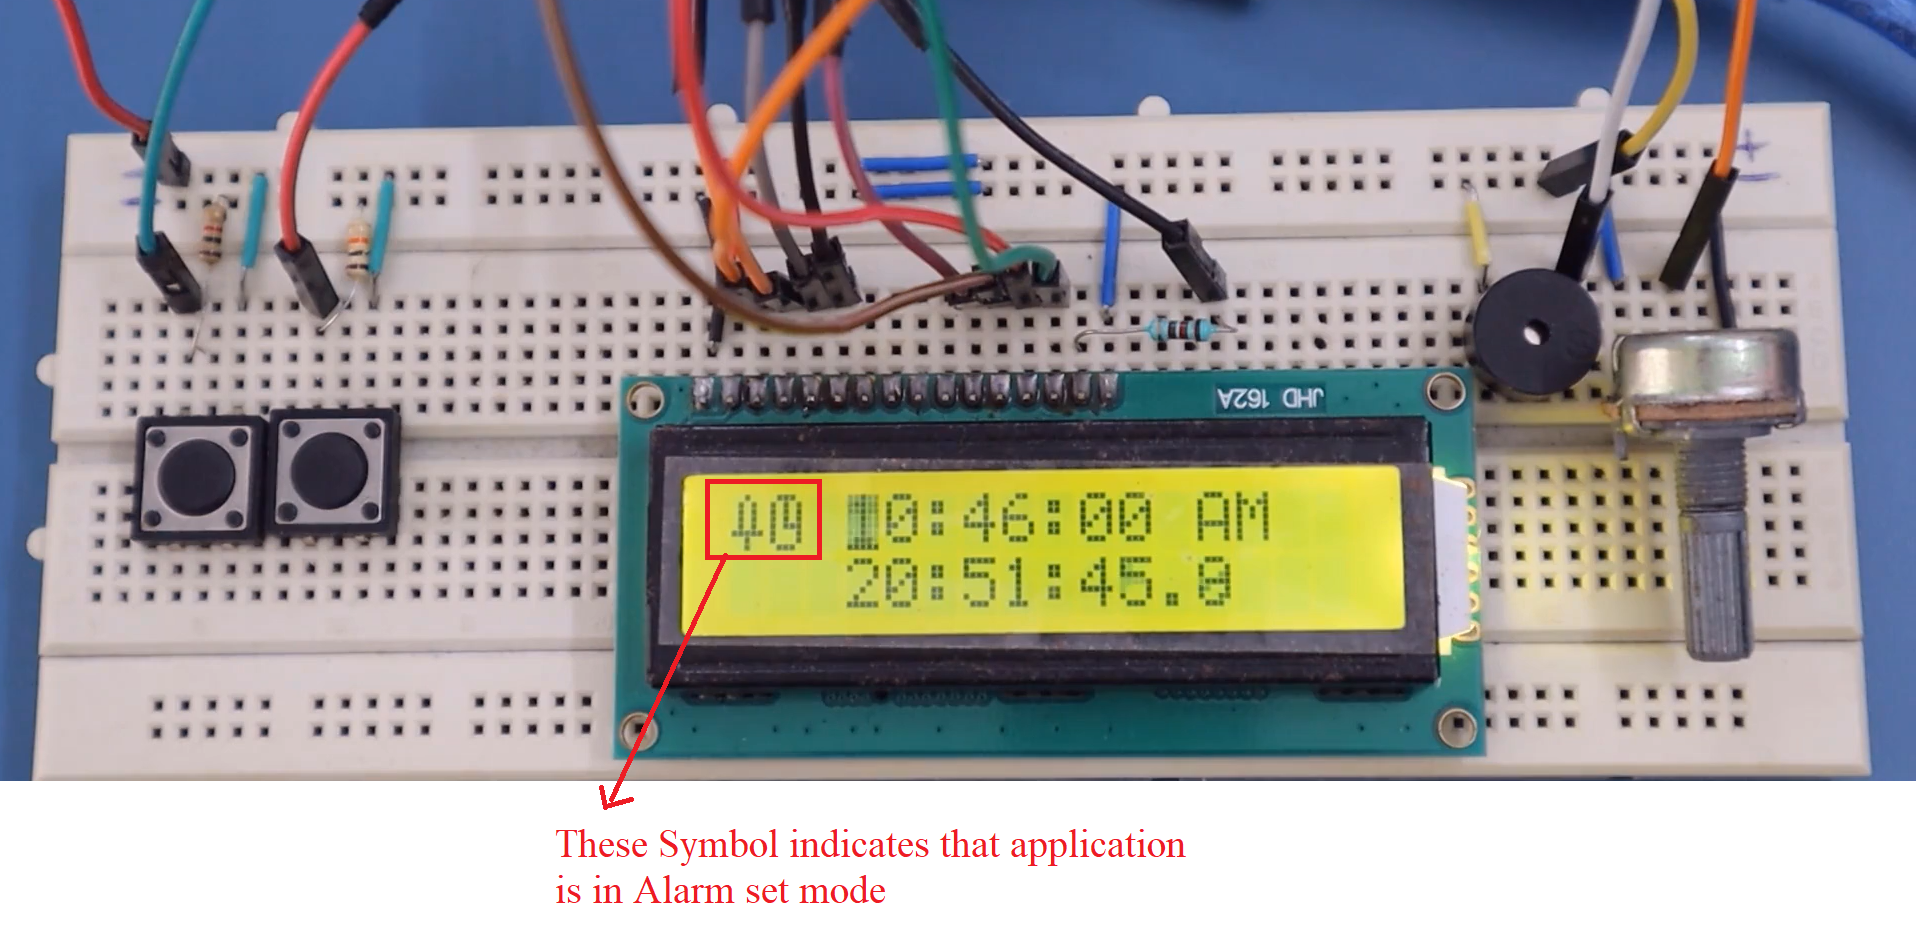
The first line shows the current Alarm set by the user. The second line must show the current time of the day. And we can also see that, at the second line, the current time is displayed; In the first line, the cursor is blinking at the hour field. And the symbols indicate that the application is in Alarm set mode.
I press the Set button again to change the field. I set it for 08:54:00. And I change this to PM and then OK. And then it is asking me whether I want to turn the Alarm OFF or ON. You can use the Set button to either turn ON the Alarm or turn OFF the Alarm. I will go for Alarm ON; press the OK button.
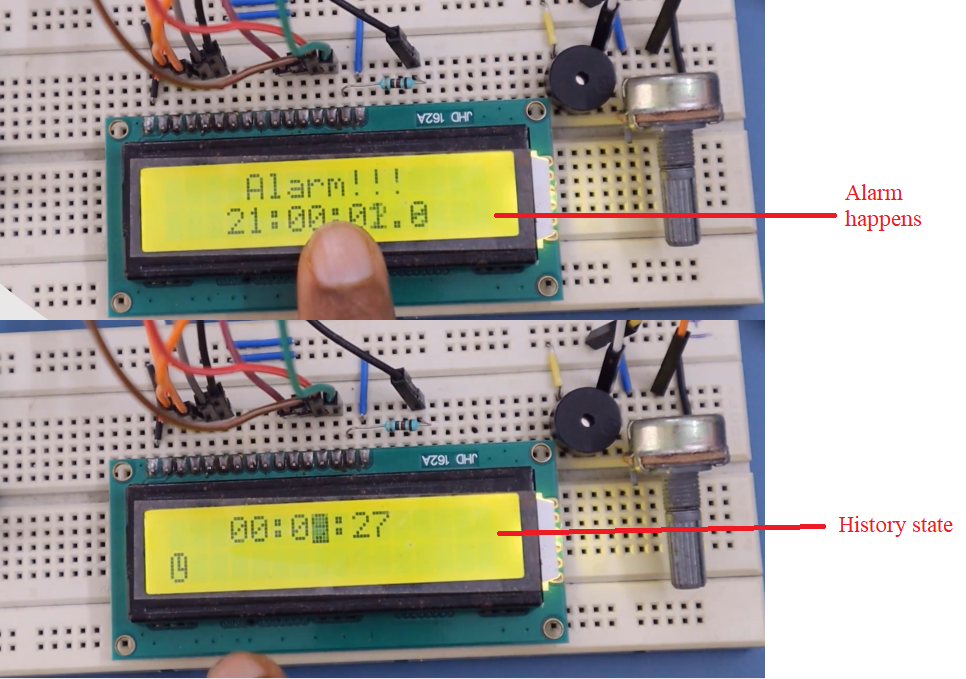
The Alarm is set for 8:54 PM. Let’s see whether Alarm happens or not.
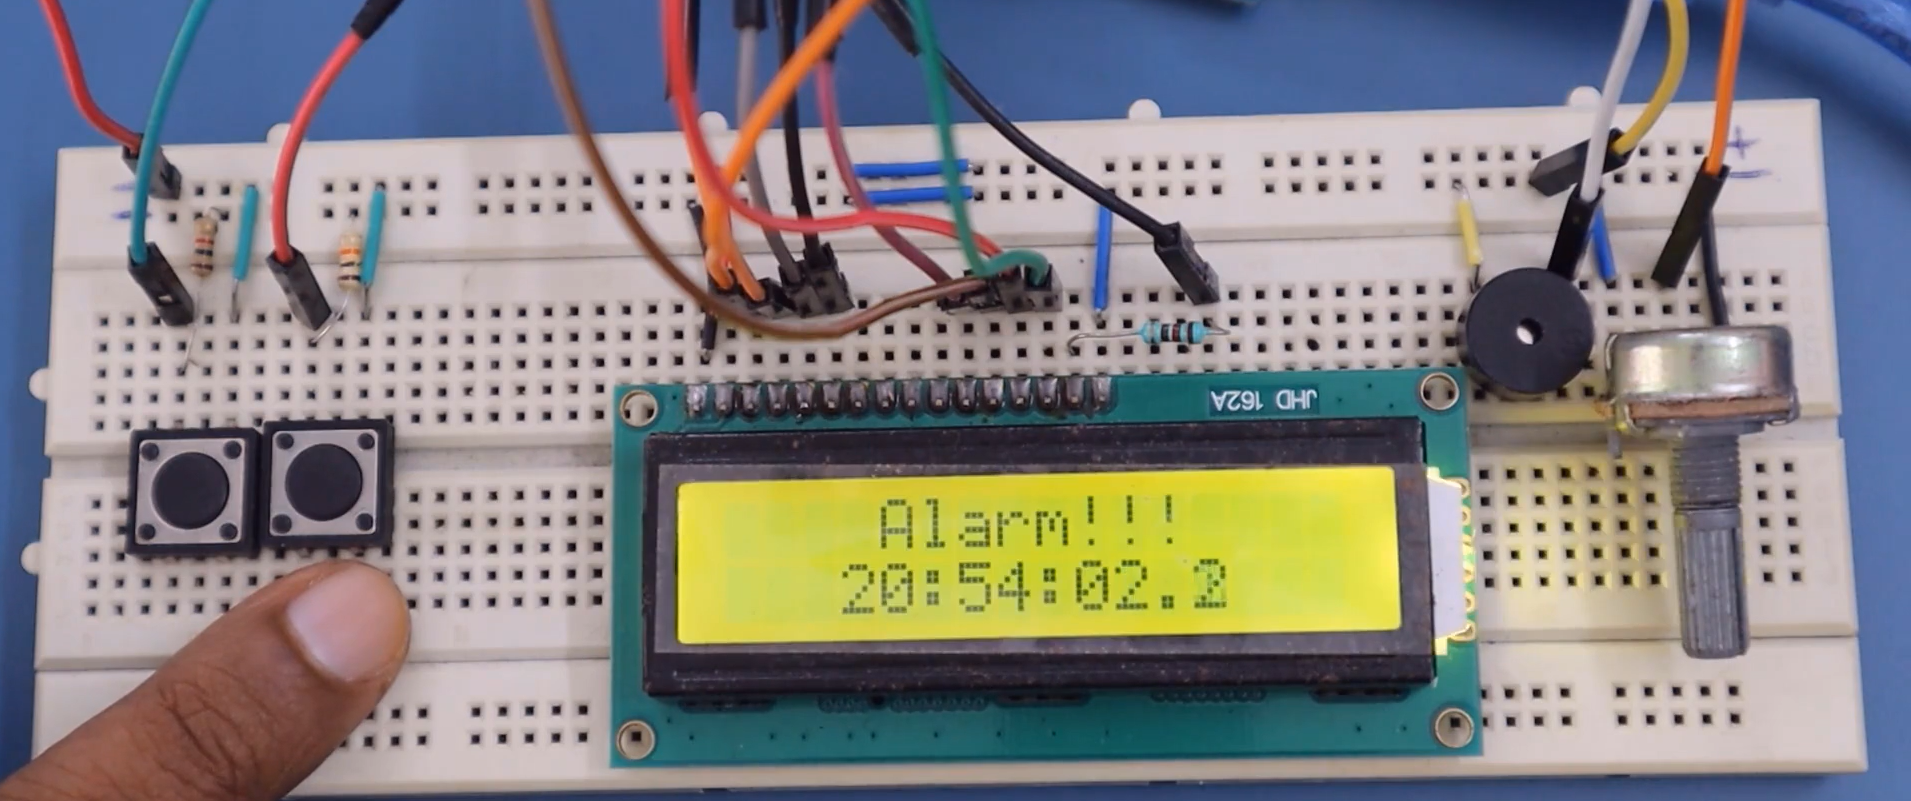
Now, the Alarm happens. And when the Alarm happens, it has to blink the Alarm message, and it can add some other effects. If I press OK, it goes back to the ticking mode.
Now let me show you once again. The application is in ticking mode, and I press the ‘OK/ALARM_SET’ button again. And here you can see that, at the first line, it shows the current Alarm set. That is 8:54 PM. And the symbol indicates there is an active Alarm. So, if you want to remove this, you have to go to the Alarm setting and make this Alarm Off, press OK.
So, now you can get rid of that symbol. Now, the Alarm is Off. There is no Alarm set.
Let me explain one more requirement that you need to implement. That is coming back to the history state.
Now let me demonstrate that. There is an active Alarm. I will set the Alarm. Let me set it for 09:00:00 PM→ Alarm ON → Press OK. Now the Alarm is set. If I press the Alarm set button, it shows that the Alarm is set for 09:00:00 PM. The Alarm is ON.
Now, I am setting some clock; I am changing some fields. And while doing this, the Alarm may trigger. When I did some settings, the Alarm could trigger. I mean, an Alarm can trigger at any time.
So, you can see that(Figure 7) the Alarm triggers. If I press OK, it should go back to that setting what you are doing. It should not go back to the ticking mode or somewhere else. It should come back to your setting. This is like coming back to the history state. So, this was the earlier state, and it moved to the Alarm display or Alarm notification state. And when I pressed OK, it came back to the earlier state.
So, this is also one of the requirements of this application; that is, while you are doing some settings if an Alarm happens and after the Alarm notification, it should come back to the previous state. So, the same is applicable while you are doing the Alarm setting.
These are the requirements. I have just explained what the features I have provided are. So, if you think you can provide some better options, then you’re welcome to do that. But, for this exercise or application implementation, we will consider these requirements and try to solve this using the hierarchical state machine approach.
FastBit Embedded Brain Academy Courses
Click here: https://fastbitlab.com/course1