Compiler settings on STM32CubeIDE
In this article, let’s see some of the compiler settings of STM32Cube IDE.
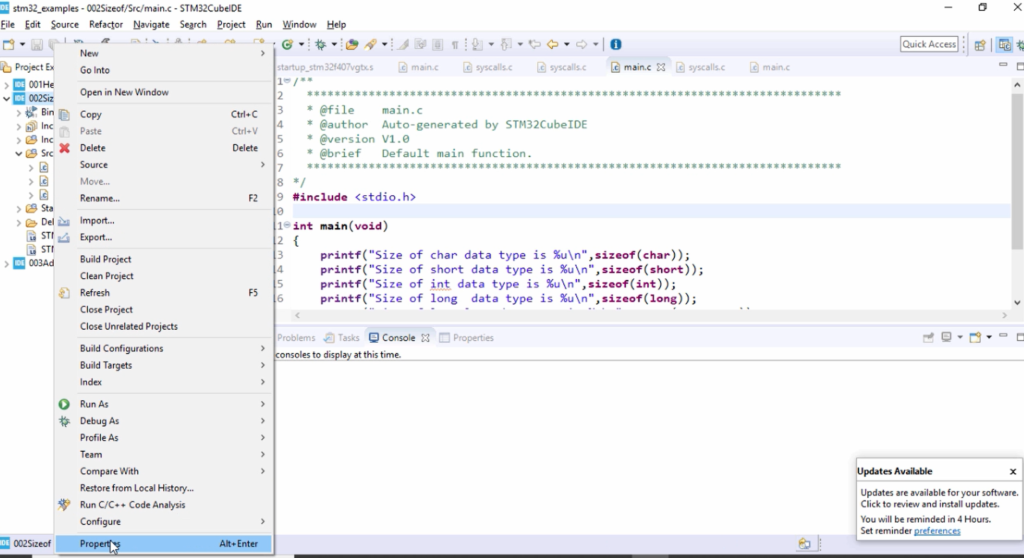
Now let’s go to the IDE, and if you want to modify or if you want to check the compiler settings, then you can do that. You have to select the project, right-click, and go to properties.
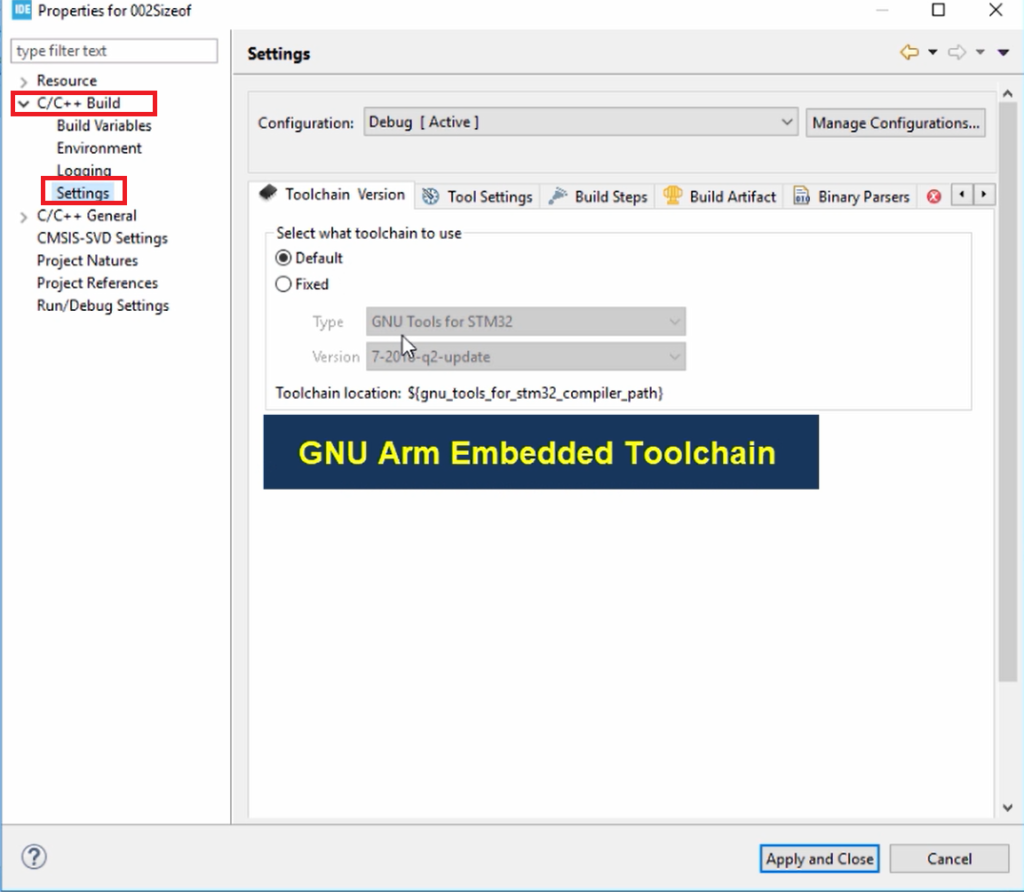
After that, expand this C/C++ Build option, and go to Settings. Here you will find various steps. The first one is the Toolchain version, and it is set to default, so you can keep the same need not to change anything here.
And you can see that here(Figure 2) it is using the cross compiler, and the version is this one. If you want to update the version or if you want to download a new Toolchain, you can do that by downloading the latest toolchain by going to the ARM website.
The Toolchain can be found on this website developer.arm.com. You have to go to that URL, and here all the GNU Arm Embedded Toolchains are hosted. So, this website will give you a Toolchain for Arm Cortex-A family of processors, also for Cortex R and M family of processors.
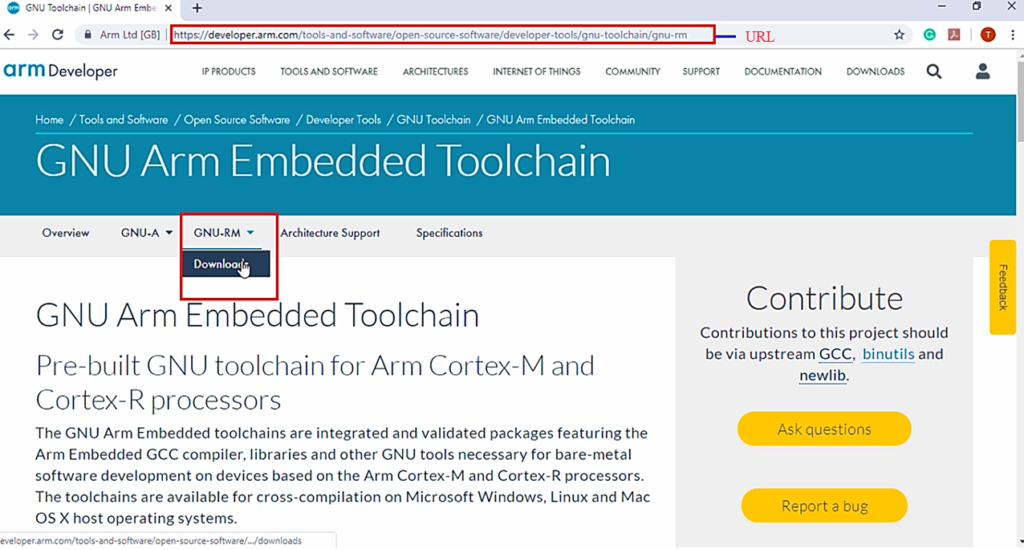
You have to go to GNU-RM and click Downloads, Figure 3.
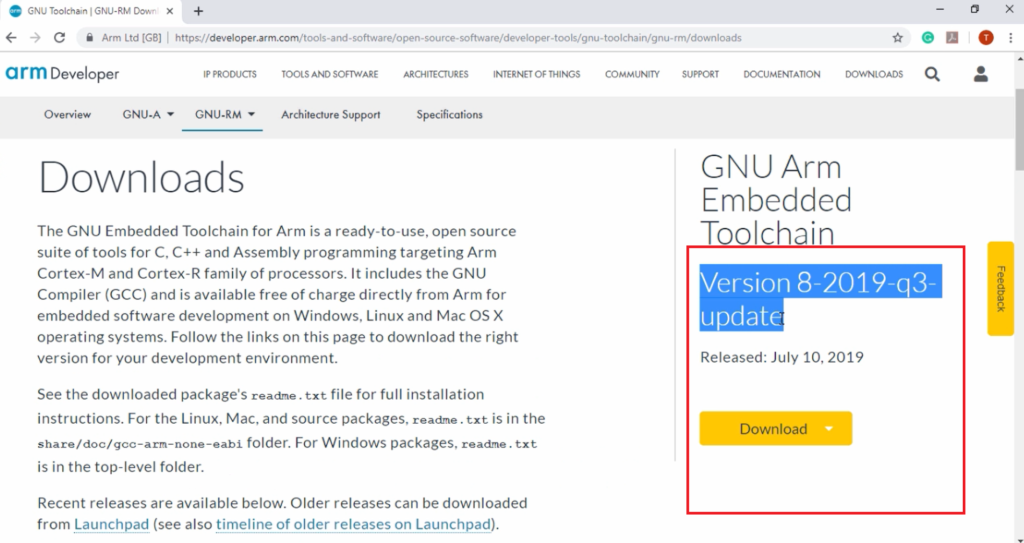
And in Figure 4, you can see the latest version available. But the STM32CubeIDE actually uses an old version, but that’s OK.
After that, go to Tool Settings and here you will see the MCU settings. Like the board you selected, the microcontroller you are using, and various other options.
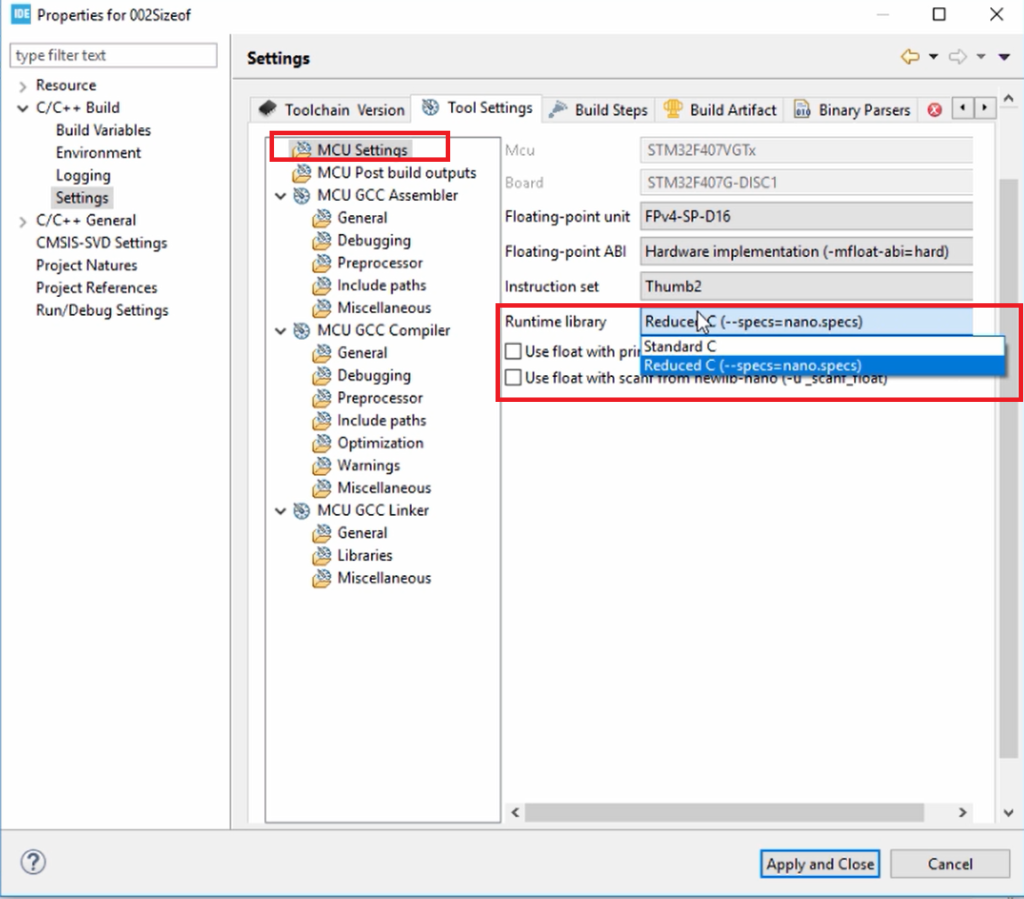
This project uses a Reduced version of the ‘C’ standard library called nano library. There are two options: either you can select Standard C or Reduced C. This IDE by default uses the Reduced C standard library, whose memory footprint is very much small compared to the standard C.
And after that, you can go and explore MCU Post build outputs. So for any reason, if you want to generate a binary file, Hex file, or any other extension, then you can do so by selecting these options.
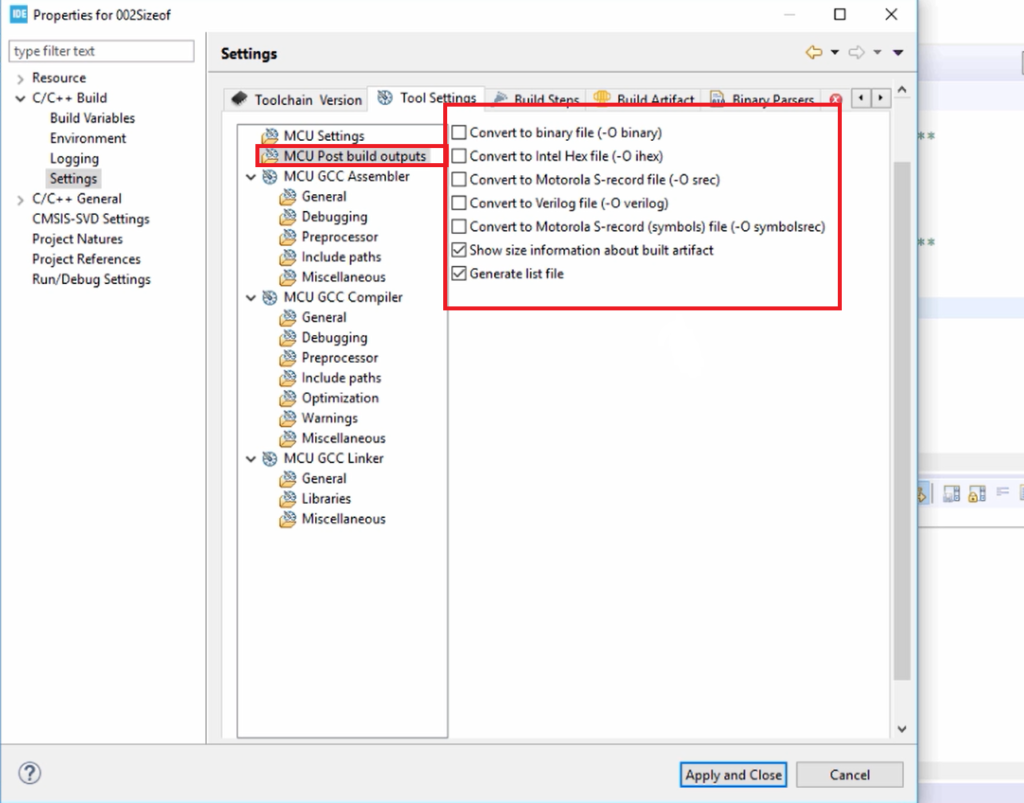
By default, this project build is not generating any binary or hex file; it is generating only elf file. So, if you want binary, then you can check this convert to binary file option.
And after that, if you go to the MCU GCC Compiler tab here. So, here it has lots of default compiler flags. So, you cannot edit that, but you can add an extra flag by using these options.
So, if you go to the General tab here, in general, you can able to change the ‘C’ standard, which is used for your project build. So, by default, you can see that it is set to GNU11. GNU11 is it is an extension of the ISO C11 standard.
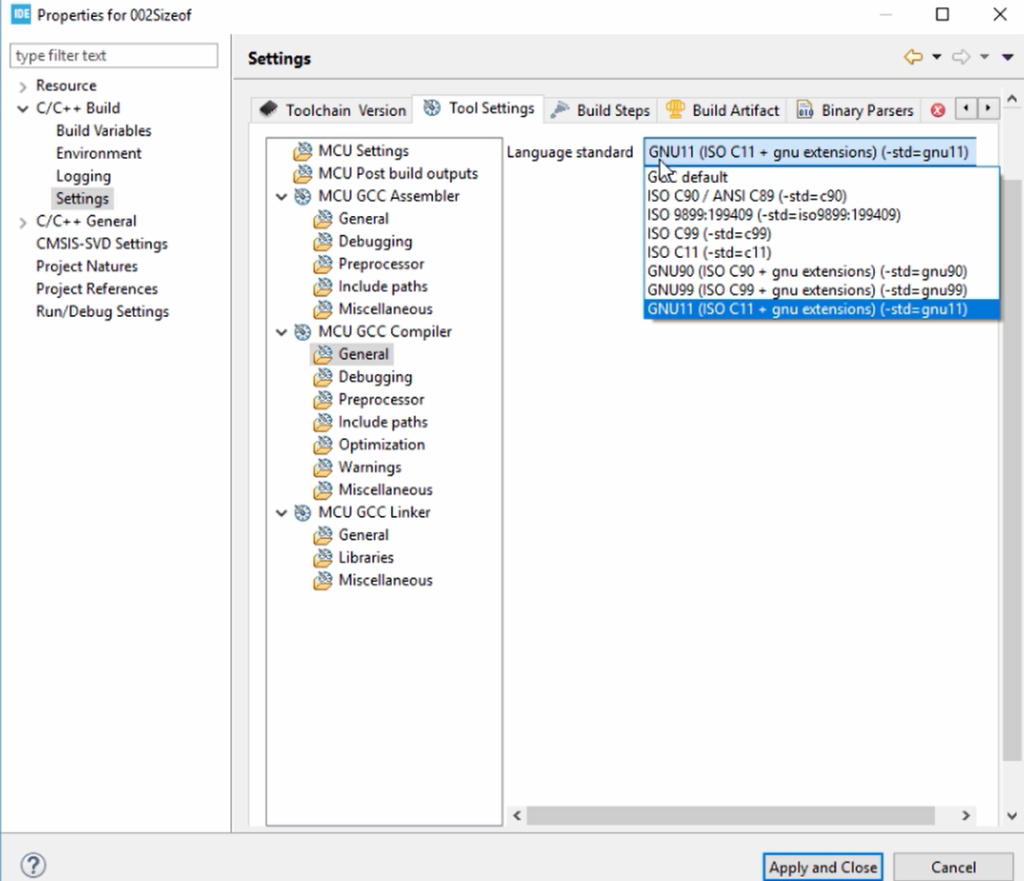
I think that would be fine, need not change that. After that, in the Debugging, Preprocessor, and Include Paths, you need not to change anything. We will see all these things later.
Optimization of the code during compilation is set to none, so I suggest you maintain the same. So, don’t change the optimization level.
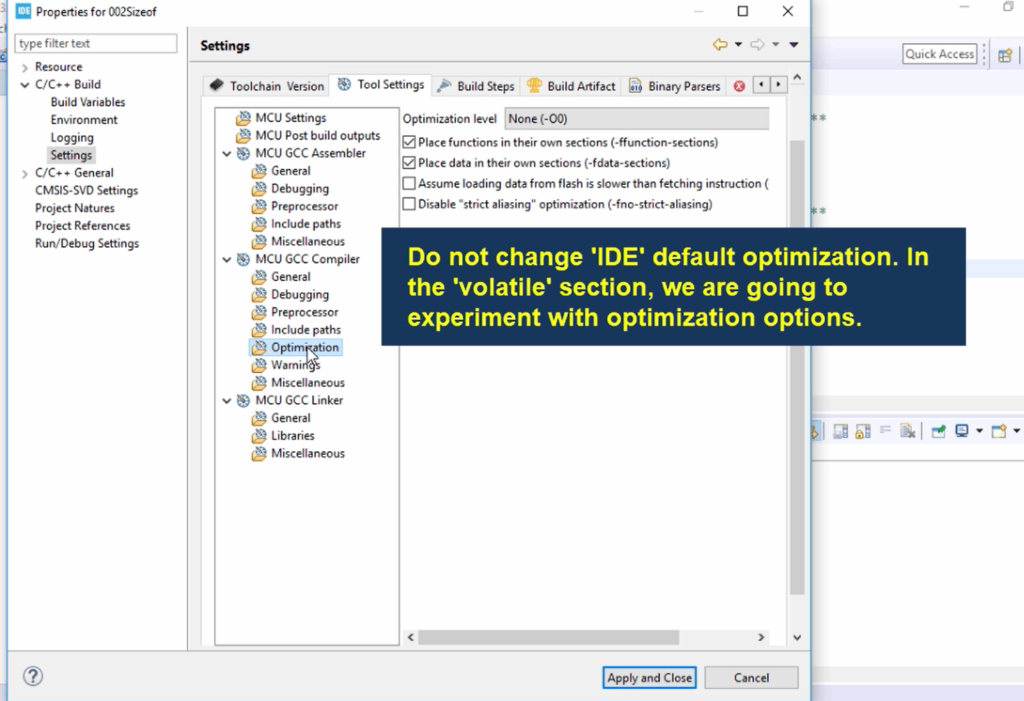
After that, Miscellaneous. So, here you need not do anything.
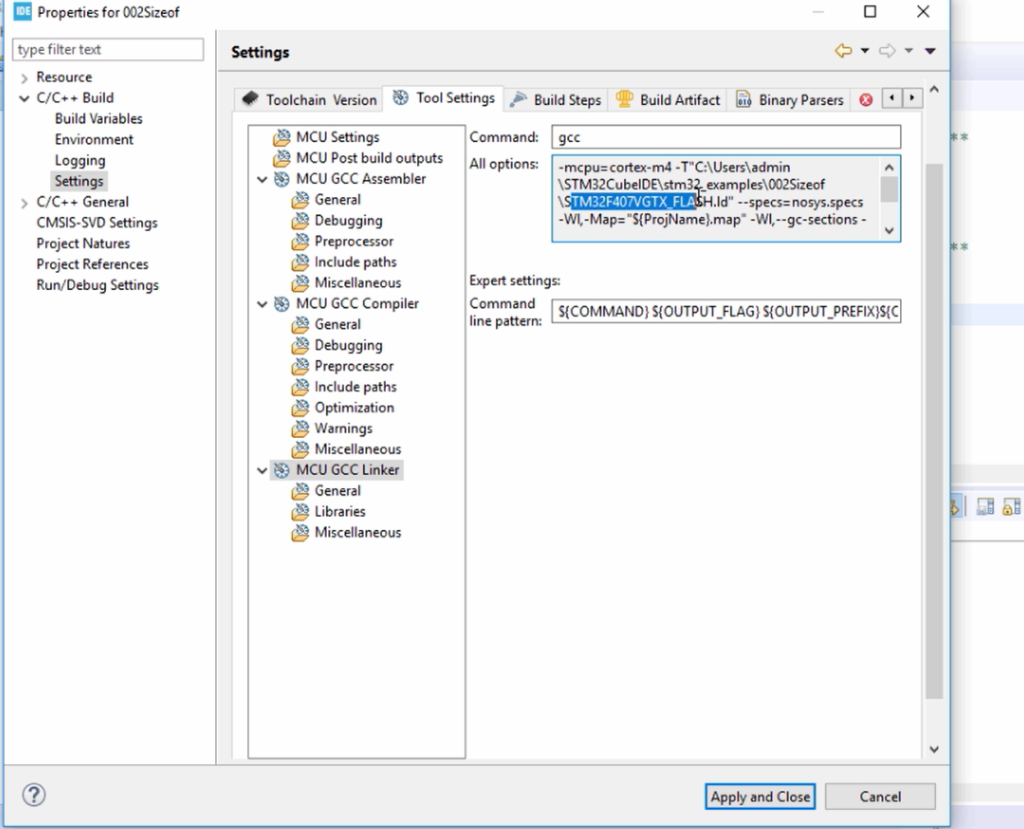
Now let’s go to the linker flags. These are the linker flags(shown in the All option) by default. So, you cannot edit this. Here you can see that it is provided with the linker script and all. So, these are some advanced concepts to understand about the linker script, etc. But for the time being, you need not to do anything in the linker section; you leave that as it is.
That’s it about the compiler settings, which is recommended to do. Even if you don’t do these settings, that’s fine, the compiler will compile with default settings.
After that, you have to click on Apply, and then Apply and Close.
In the following article, let’s learn about the compilation process.
FastBit Embedded Brain Academy Courses
Click here: https://fastbitlab.com/course1

