Windowing in the case of STM32F407X+external LCD
How to adjust the window size for an external LCD?
If you want to adjust the window size for an external LCD, specifically an ILI9341-based LCD, you can utilize the “set_display_area” command by adjusting the horizontal and vertical coordinates.
Now you draw a picture as shown in Figure 1. First, we will paint the display with a Yellow color, then set the display area to X1, X2, Y1, and Y2 coordinates and then send the data or pixel data of red and it will be written into the area which is set by you.
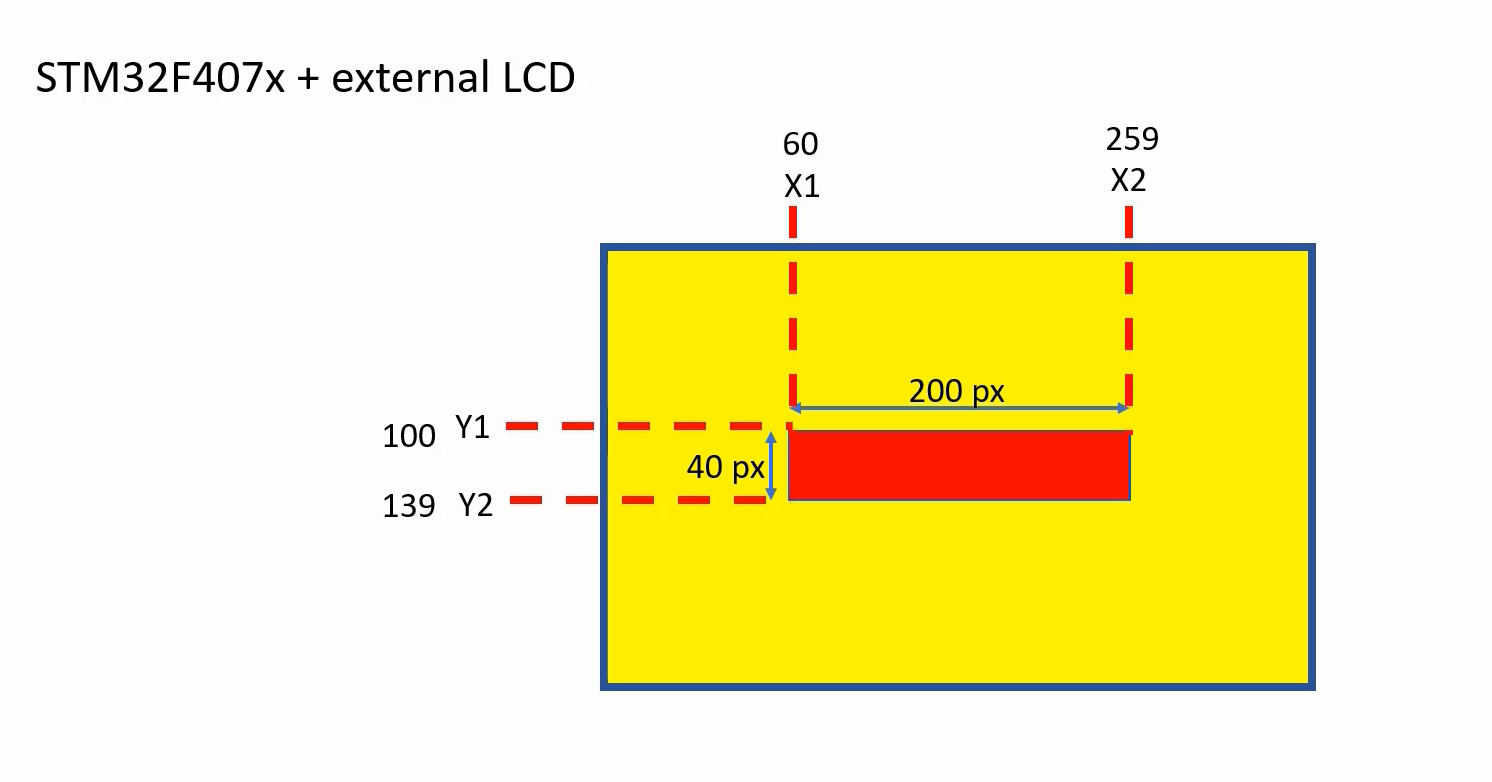
Let’s try this. Here, let’s call this first with the YELLOW and then let’s use another BSP function called bsp_lcd_set_display_area, and we have to provide x1, x2, y1, y2, these things. 60, 259, and 100, 139.
void SystemClock_Setup(void);


int main(void)
{

SystemClock_Setup();
bsp_lcd_init();
bsp_lcd_set_background_color(YELLOW);
bsp_lcd_set_display_area(60, 259, 100,139);
bsp_lcd_send_cmd_mem_write();
uint16_t data[200UL * 40UL];
for(uint32_t i = 0 ; i < (200UL * 40UL) ; i++){
    data[i] = bsp_lcd_convert_rgb888_to_rgb565(RED);
}
bsp_lcd_write((uint8_t*)data, (200UL * 40UL * 2UL));

/*loop forever*/
for(;;);
}
Look at the code. Here, the windowing is achieved by calling the bsp_lcd_set_display_area() function, which sets up the specific area on the LCD display where the subsequent data will be written using bsp_lcd_write(). The content of the data array is filled with the RGB565 representation of the color red, and it is sent to the LCD to be displayed within the defined window.
SystemClock_Setup();: This function is responsible for setting up the system clock for the microcontroller. It ensures that the microcontroller is running at the desired frequency.
bsp_lcd_init();: This function initializes the LCD display connected to the microcontroller. It performs the necessary configurations to establish communication and prepare the display for use.
bsp_lcd_set_background_color(YELLOW);: This function sets the background color of the LCD display to yellow.
bsp_lcd_set_display_area(60, 259, 100, 139);: This function sets the display area or window on the LCD. The parameters (60, 259) represent the Width of the window (X1 and X2), and (100, 139) represent the height of the window(Y1, Y2), respectively.
bsp_lcd_send_cmd_mem_write();: This function sends a command to the LCD to indicate that subsequent data writes will be directed to the display memory.
uint16_t data[200UL * 40UL];: This line declares an array named data to hold the pixel data that will be sent to the LCD. The size of the array is 200UL * 40UL, which is 200 pixels wide and 40 pixels high.
for(uint32_t i=0; i< (200UL * 40UL) ; i++): This is a loop that iterates over the data array.
data[i] = bsp_lcd_convert_rgb888_to_rgb565(RED);: Inside the loop, each element of the data array is filled with the RGB565 color representation of the color red. The bsp_lcd_convert_rgb888_to_rgb565 function converts the 24-bit RGB888 color format to the 16-bit RGB565 format expected by the LCD.
bsp_lcd_write((uint8_t*)data, (200UL * 40UL * 2UL));: This line sends the data array to the LCD display. The (uint8_t*)data is a typecast to treat the array as an array of 8-bit values (bytes). The second parameter 200UL * 40UL * 2UL represents the total number of bytes to be written, which is calculated by multiplying the width, height, and the number of bytes per pixel (2 bytes for RGB565).
for(;;);: This line creates an infinite loop, keeping the microcontroller continuously running and displaying the same content on the LCD.
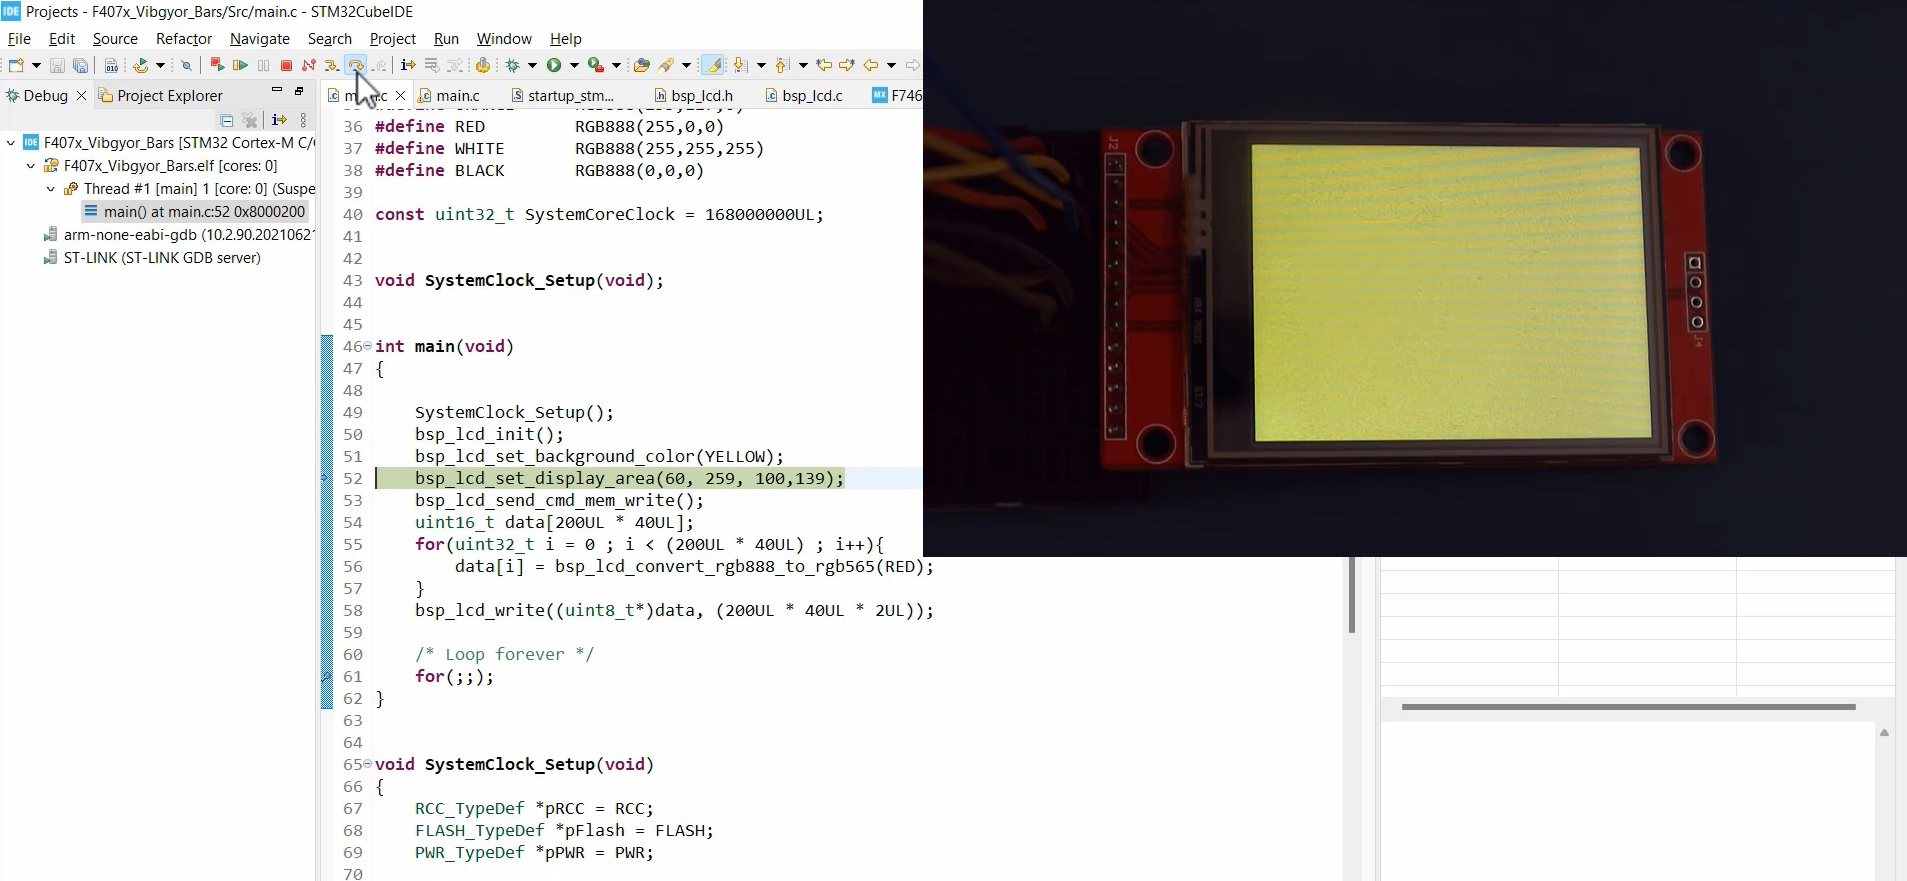
Once you have finished, test this code. Now let’s step over. You will notice that it is painted yellow, as shown in Figure 2.
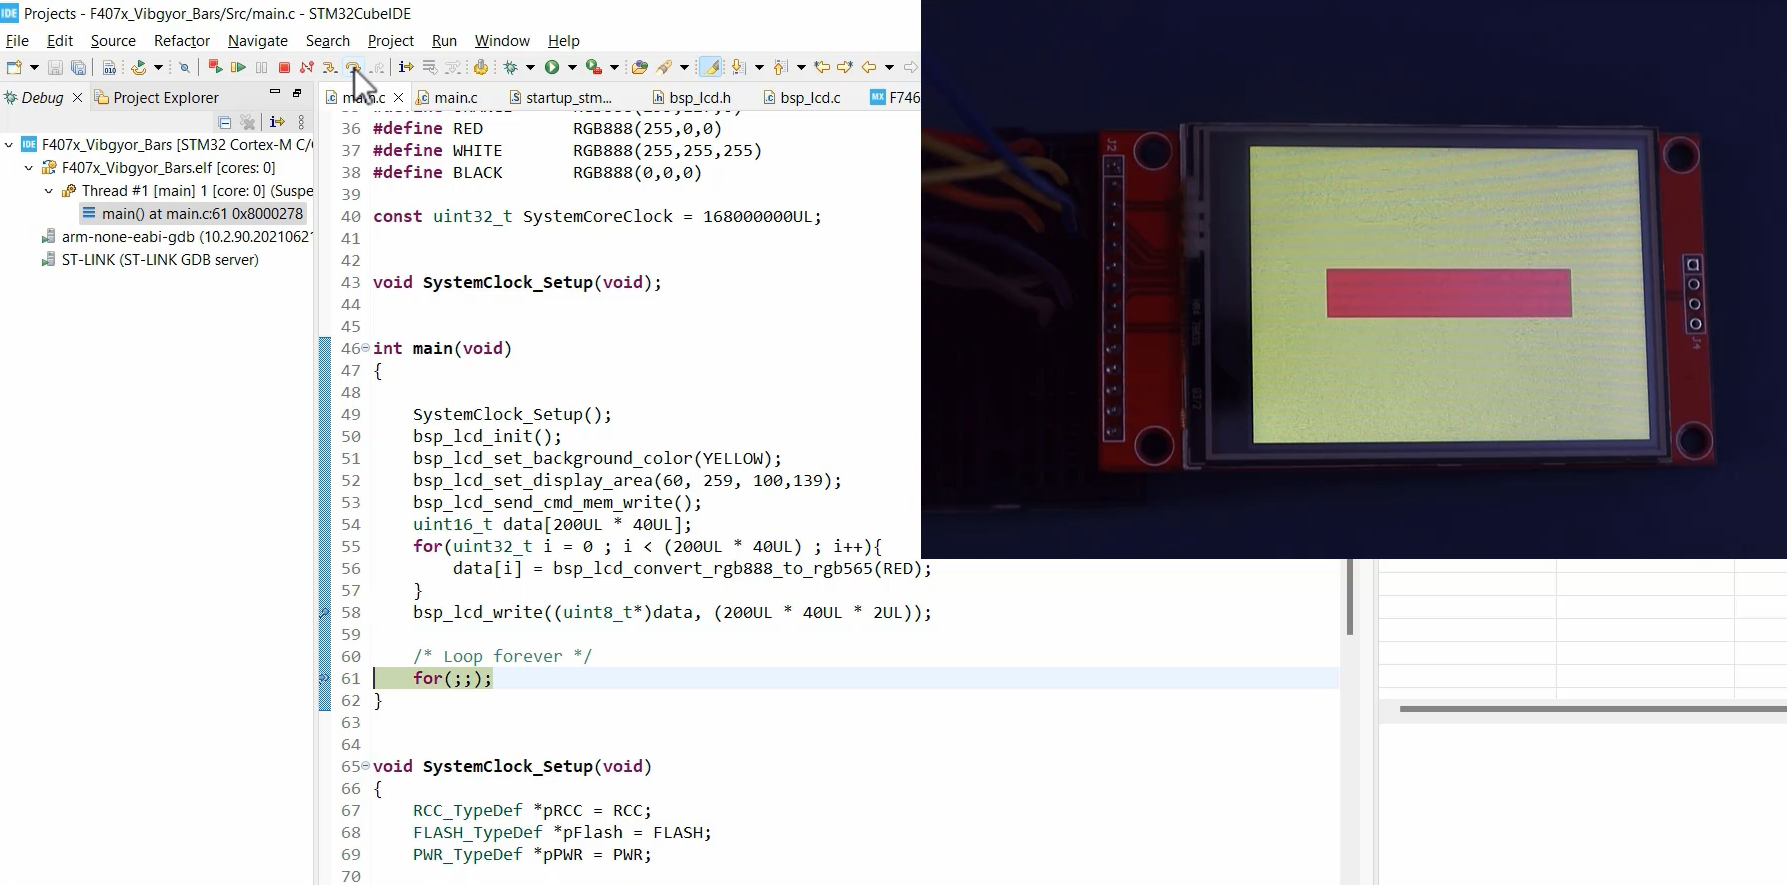
Now execute this, and here you can see that the data you sent is written onto the display area defined by the bsp_lcd_set_display_area() function.
FastBit Embedded Brain Academy Courses
https://fastbitlab.com/course1