Booting BBB via SD card
In the previous sessions, we prepared our SD card. Let’s boot the BeagleBone Hardware using the Micro SD card interface.
First of all, make sure that your Beaglebone is not powered up. If you have connected it to the PC, please remove it.
And after that, connect the serial debug cable between a Beaglebone Black and the host, as shown in Figure 1.
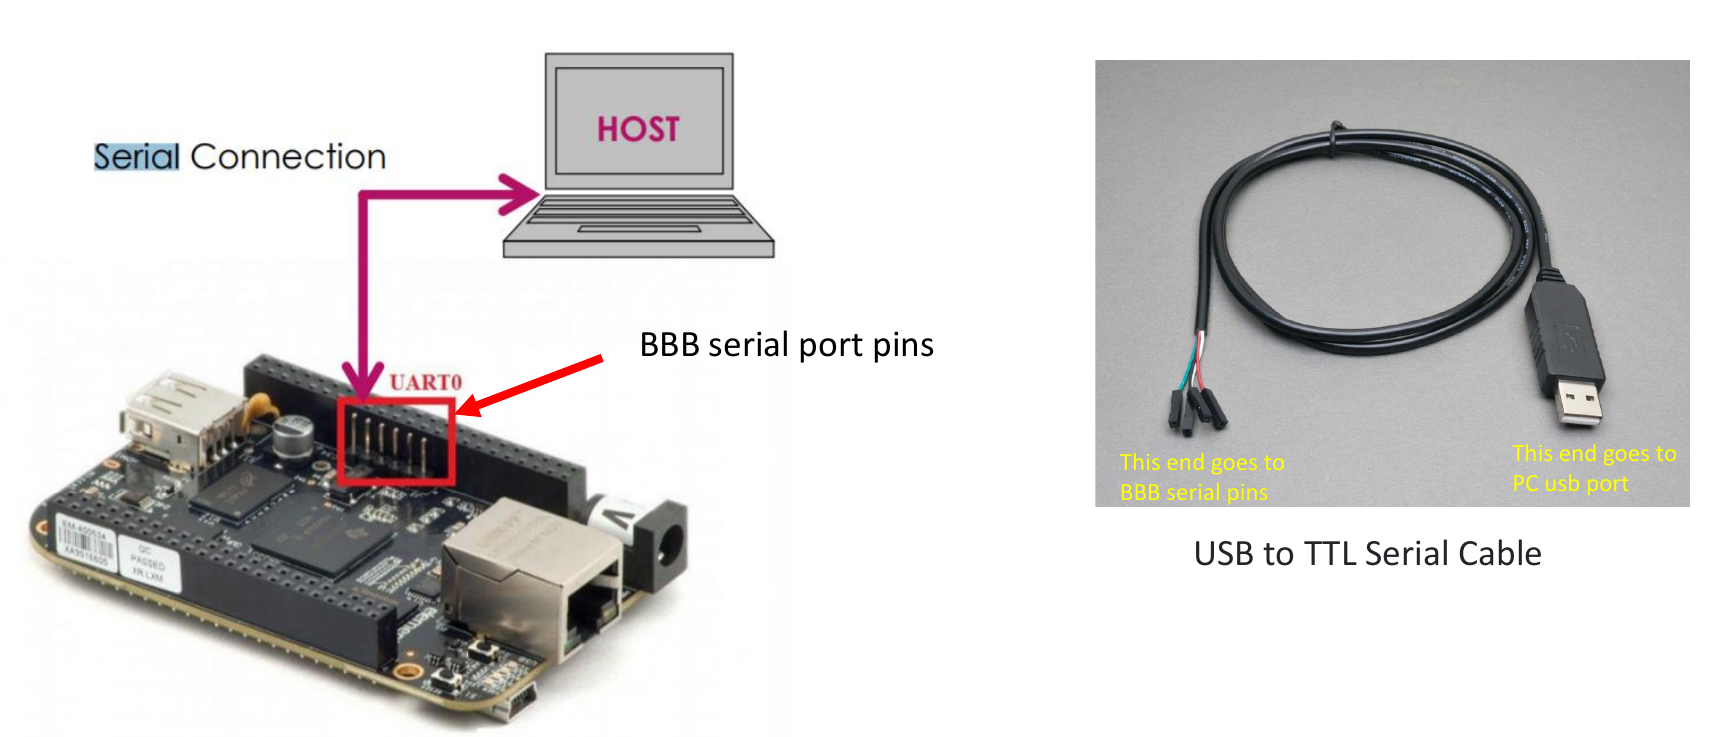
This is an optional step, but if you have a serial cable, then it’s better to connect that. Because, by using that, we can observe the early boot messages of the kernel. You have to use this cable to establish a serial connection. Just connect one end to Beaglebone serial port pins and the other end to your PC.
After that, insert the SD card into the Beaglebone SD card slot. Give the power to the board using a mini USB cable. When you give the power, what happens is the board boots by using the images, which are there in the eMMC. That’s a default boot. Let it boot.
Press and hold the boot button(S2). Then, press and hold the power button (S3) until the blue LED turns off and turns ON again.
If the blue LED doesn’t turn ON, gently press the power button. That means you are doing a power-down of the board by pressing the S3. Then, gently press the power button. When you do that, the board powers up again.
After around two to five seconds, you release the S2 button. That’s how you change the boot sequence. In this case, the board will boot from the micro SD card.
Let’s do this one by one. First of all, let me open the command prompt, i have connected my serial debug connection; just run the command dmesg.
Here you see some logs(as shown in Figure 2), which are related to our USB serial converter, that is, the cable that we connected.

For our serial debug connection, it shows that the converter is detected.
In my case, the converter is pl2303. It’s a USB to TTL converter chip from prolific technology.
If you are using a different cable, then the chip may be different. It could be from FDDI, or it could be from some other manufacturer. In that case, it would show some other vendor here. That’s not an issue. But you should see something like this (as shown in Figure 2).
The converter is attached to a device file, that is tty USB1 something like that. That means we are going to establish the serial debug connection over ttyUSB0. That means the host is going to communicate with the board over serial communication over the ttyUSB0 device file.
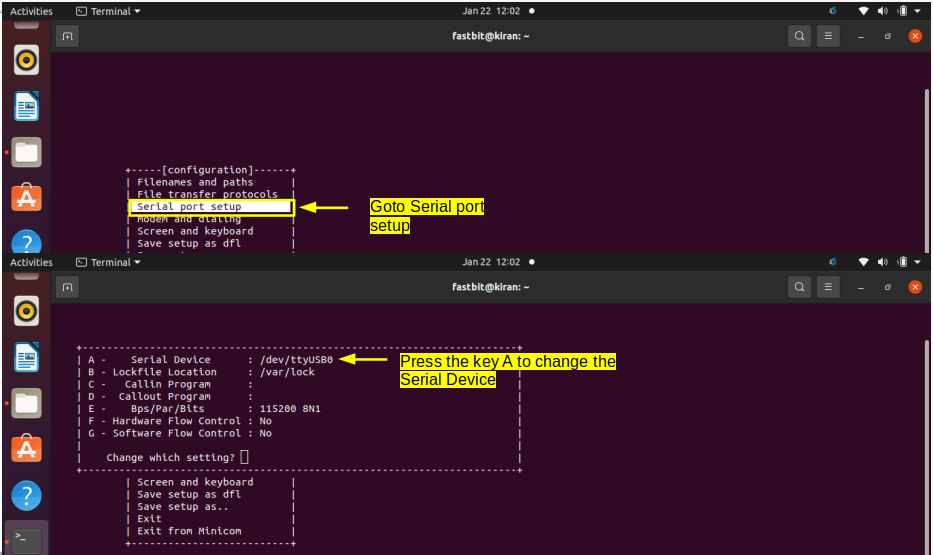
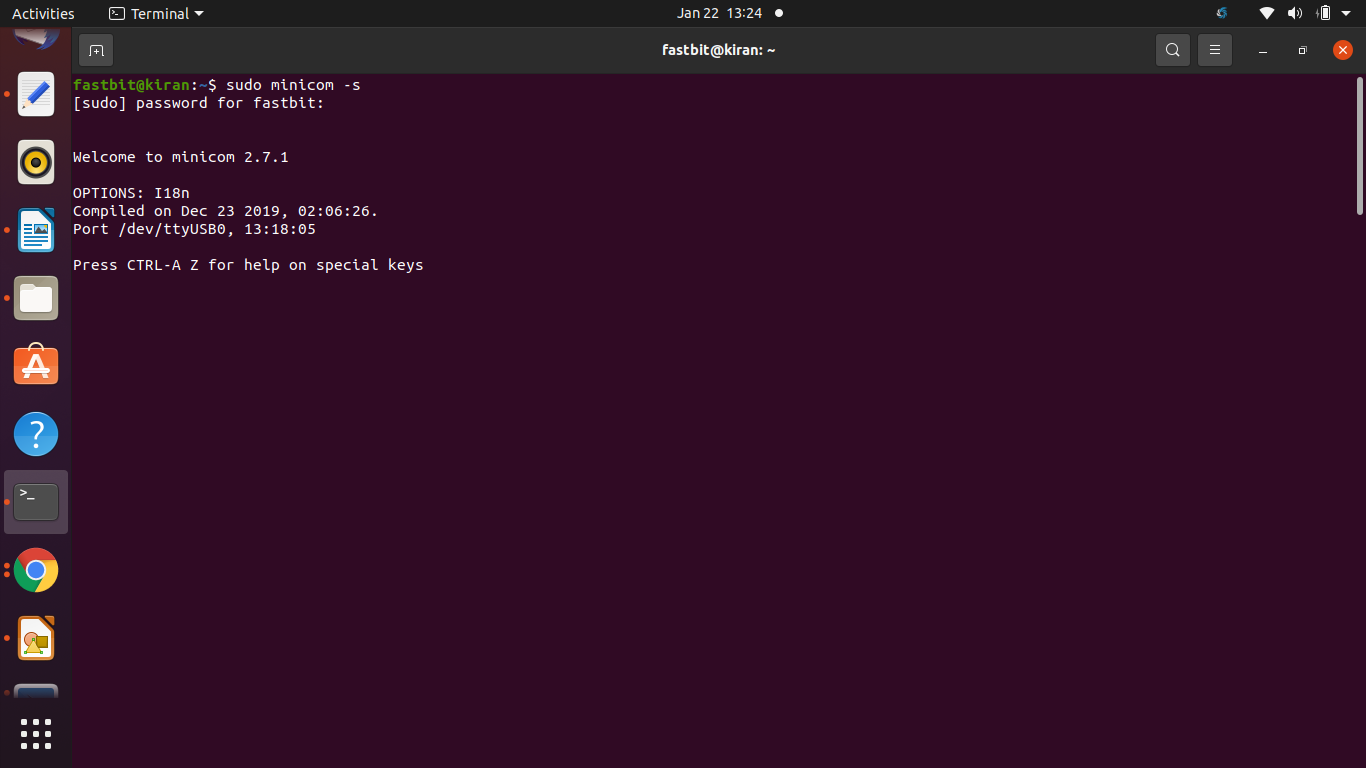
And after that, let’s use minicom to observe the serial data. For that, just run sudo minicom -s as shown in Figure 3.
Go to Serial port setup and press the key A. And there you can change the serial device. It could be ttyusb0, usb1, 2, or something like that. In my case, it is usb0. Then enter to exit from there.
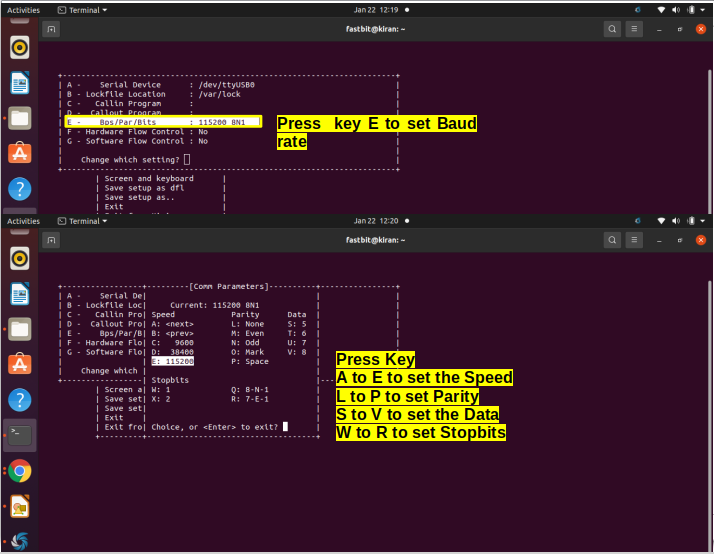
If you want to change the baud rate, that is Bps; you can press the key E.
And from here, you can select the bits per second, parity, data, or something like that.
For example, if I want to change the baud rate to 9600, I would just press the key C. You can see that the baud rate got changed. But we are going to use 115200; that’s why I would press the key E. Hit enter to exit this(Figure 4).
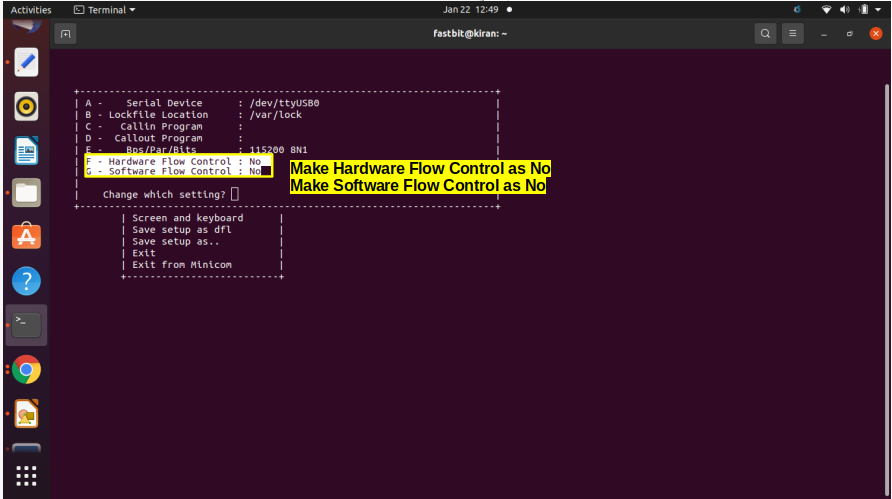
And after that, make sure that hardware flow control, no, and software flow control as no. If you want to make yes, then you should type that letter.
For example, if I want to enable the hardware flow control, I press the key ‘F.’ It becomes yes. But, in our case, it should be no, so I would press the key F again to make it no. This should be your setting and then press enter to exit this menu.
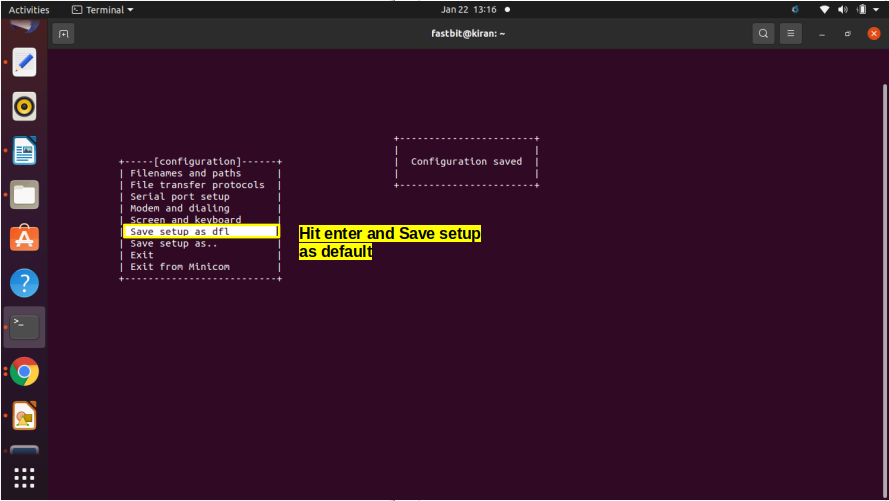
After that, go to this option, save the setup as default and press enter (as in Figure 6) then exit.
We are in the minicom(as shown in Figure 7) here.
Minicom is a serial port application in order to trace the messages which are coming over the serial interface.
If you want to exit from the minicom application, it is very simple. Just press Ctrl+A, and after that, X. You can leave the minicom as shown in Figure 8.
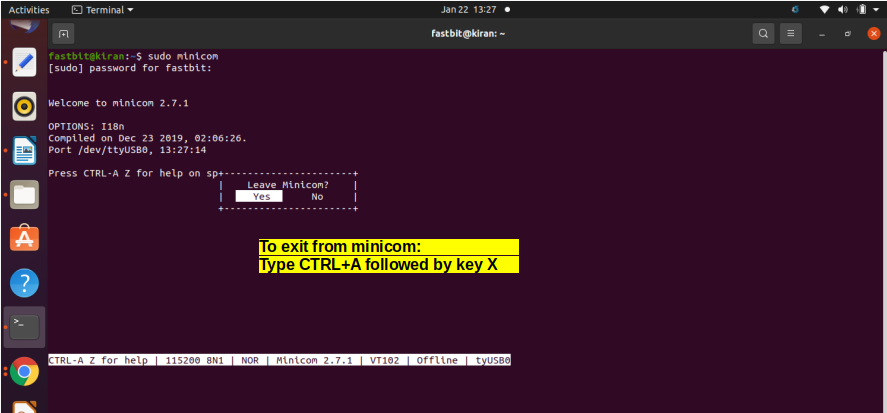
If I press Yes, what happens?
The minicom terminates. And if you want to open the minicom again, you either use sudo minicom -s or just sudo minicom. Because you have already saved the setup as default.
Let’s proceed further. Insert the SD card to the BBB and give power to the board using a mini USB cable. You may see some boot messages as shown in Figure 9, or you may see something like this, or you may not see something like this. It doesn’t matter what you see here.
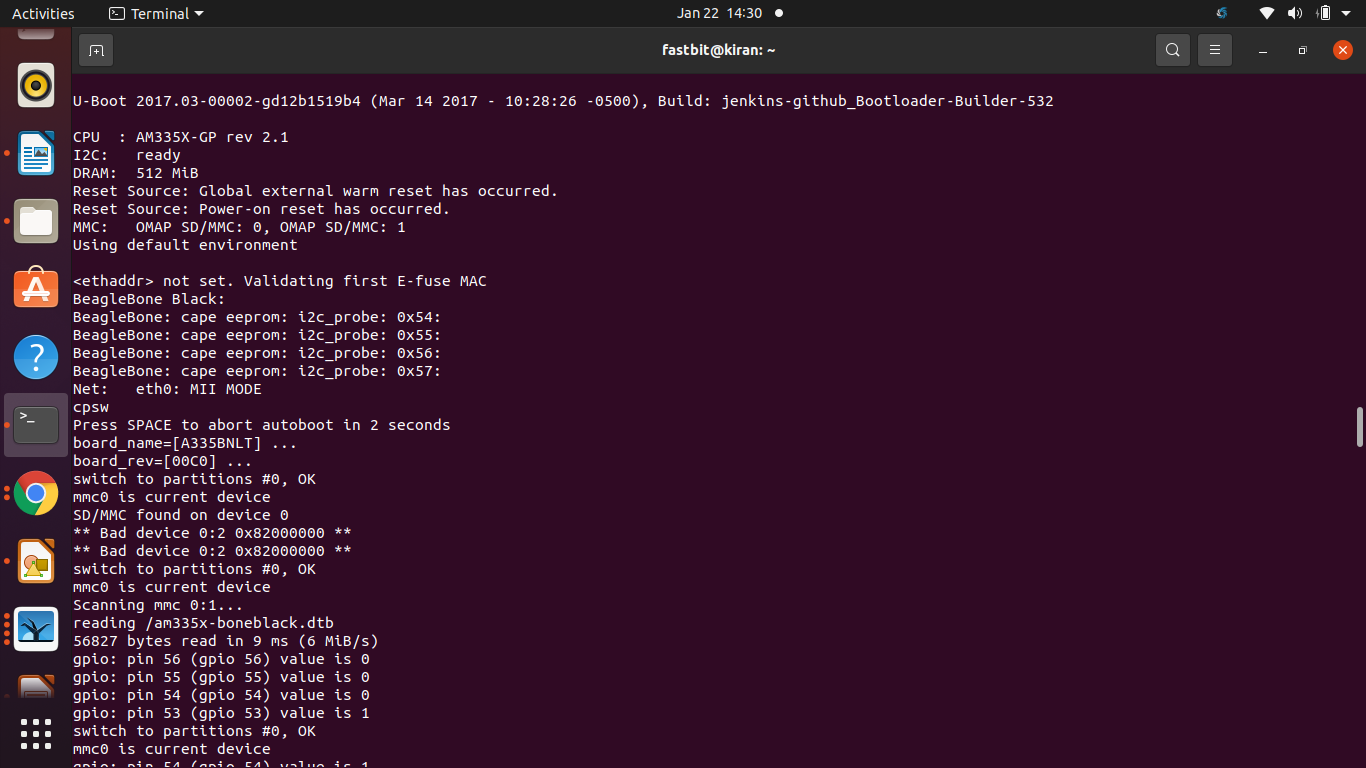
The next step is very important. You have to press and hold the boot button(S2) and then press and hold the power button(S3) until the blue LED turns off and turns on again. And once the blue LED returns on-again, release the S2 button after 2 to 5 seconds, then the board is booting from the SD card.
We got the beagle bone login(as shown in Figure 10). The board has successfully booted from the SD card interface and login name, and this is a password. Let’s type Debian and the password is temp pwd.
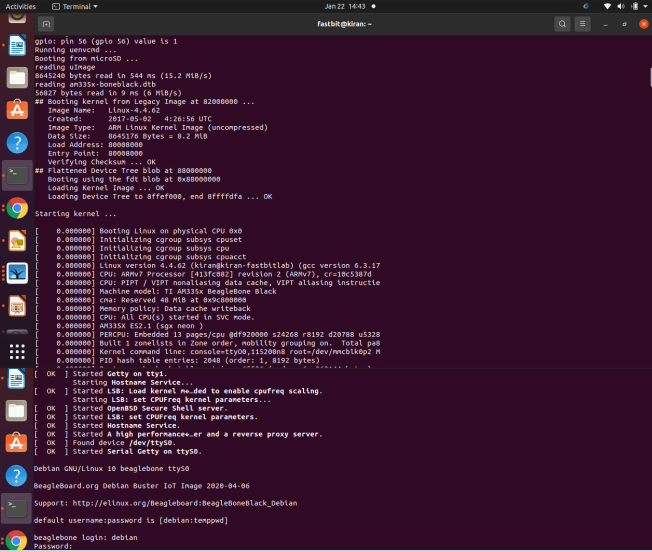
We successfully logged in into our beagle bone black hardware.
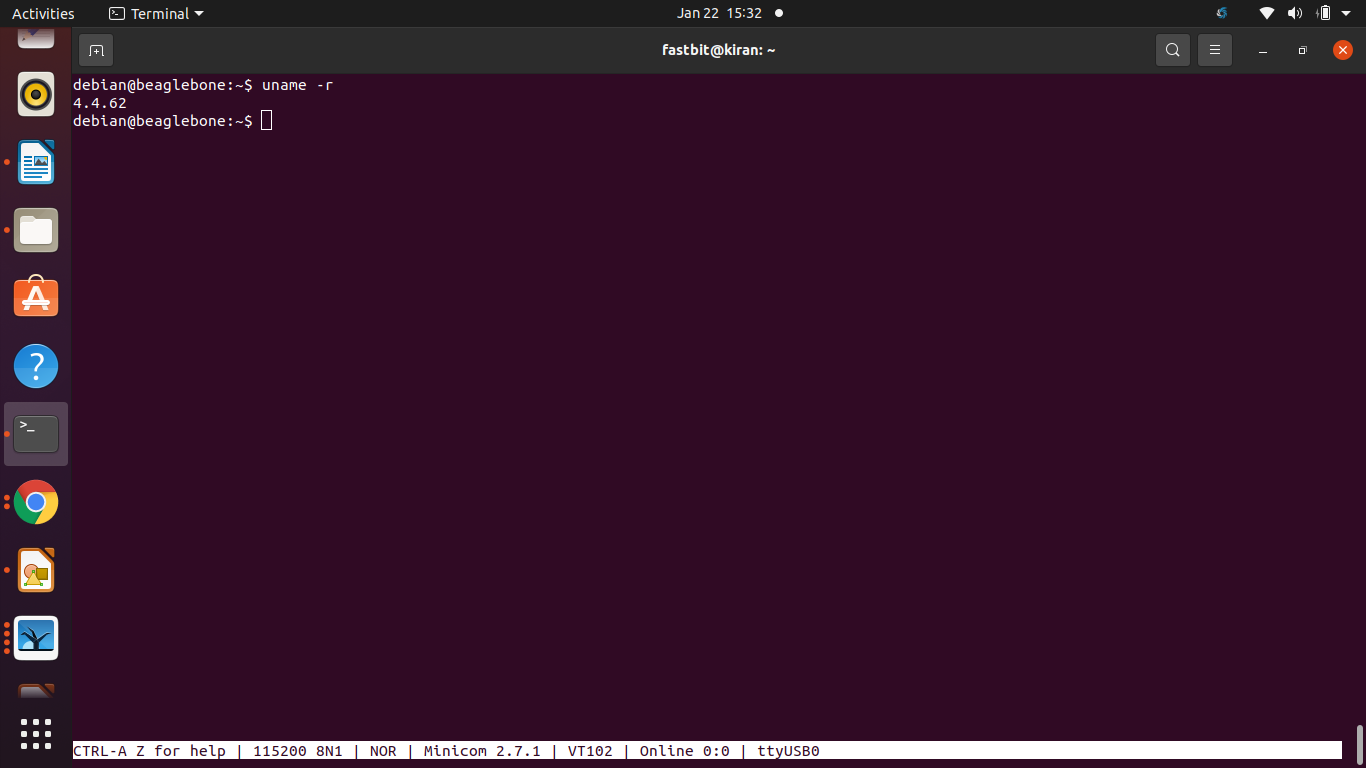
Just run uname -r, and you should see this number. This is from the pre-built image, which we have used 4.4.62. (as in Figure 11).
You also should see the same number because you also booted from the pre-built images, which I have provided.
To boot from the SD card, we played with buttons like S2 and S3, but that’s a tedious process. But if you still want the board to boot from the SD card. For that, What we can do is, in the eMMC, let’s do some changes to the boot images; let’s invalidate the boot images.
If you do that, the board first checks for the eMMC, and it fails because we have invalidated the boot images. That’s why the next source in the boot order is SD card. That’s why the board will boot from the SD card.
For that, we have to do some changes to the eMMC memory. So, you just give power to the board; it boots from the SD card.
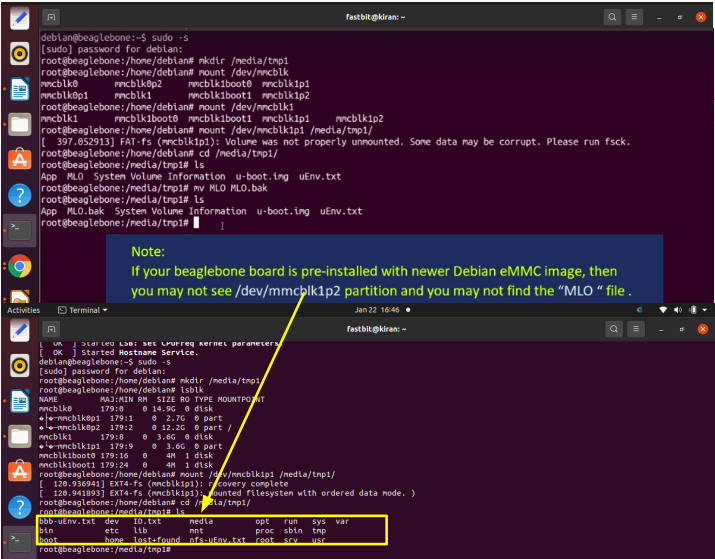
Go to the command prompt. Just do the below steps(as shown in Figure 13).
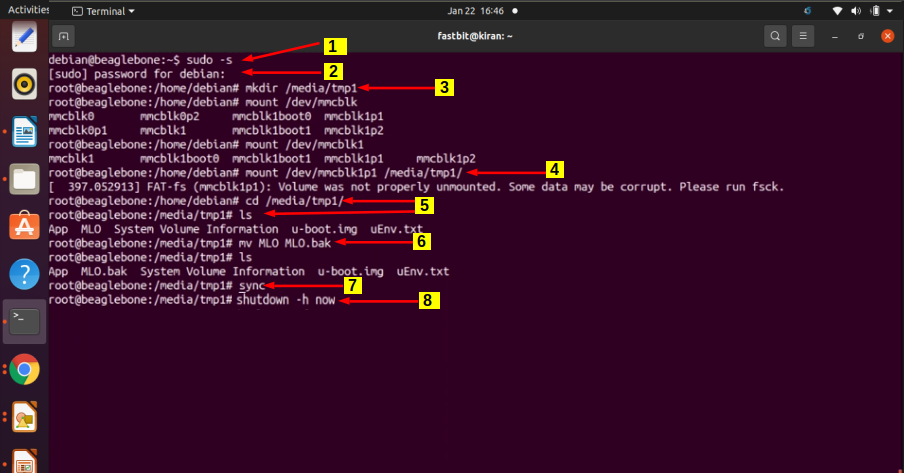
- Type sudo -s.
- Enter the password temppwd
- Create one folder in the media folder. Let’s call it tmp1. This is a mount point.
- Now, to mount the partition you have to use the command mount. Mount partition is mmcblk1p1. mmc1 interface is for eMMC, and mmc0 interface is for Micro SD card.
That’s why you have to use mmcblk1p1 and the mount point media/tmp1. It throws some error or some warning.
- Let’s get into the mount point, media/tmp1, and do ls; there are the boot images of eMMC.
- Just change the name of this MLO. Use the mv command change MLO to MLO.backup something like that. You can always go back and fix this to MLO later.
Now, what happens is, when you do a default boot, the board first checks for the eMMC; it first checks for the file called MLO. Since MLO is not present here, it goes to the next boot source in the boot order, and the next one is an SD card. We just changed this name.
- And after that, you have to execute the command sync.
- After that, you have to execute shutdown -h now.
The board will be powered down. So, you can see that your board went to power down mode just press the power button or you can remove the cable from the PC and connect it back. Now you can see that you need not press any S2 or S3; it boots from the SD card.
In the upcoming article, I will cover the Linux kernel image update.
FastBit Embedded Brain Academy Courses
click here: https://fastbitlab.com/course1