Exercise: Usage of taskYIELD() and explanation
Now let’s go to task 1 and put one if condition. Let’s create a flag called UART_ACCESS_KEY. If the UART_ACCESS_KEY is equal to available, then only execute the printf statement, i.e., printmsg (Figure 1).
Once task 1 enters the if condition, then it makes UART_ACCESS_KEY equal to non-available, as shown in Figure 2. After that, once it completes printing the entire message, it makes UART_ACCESS_KEY is equal to available again.
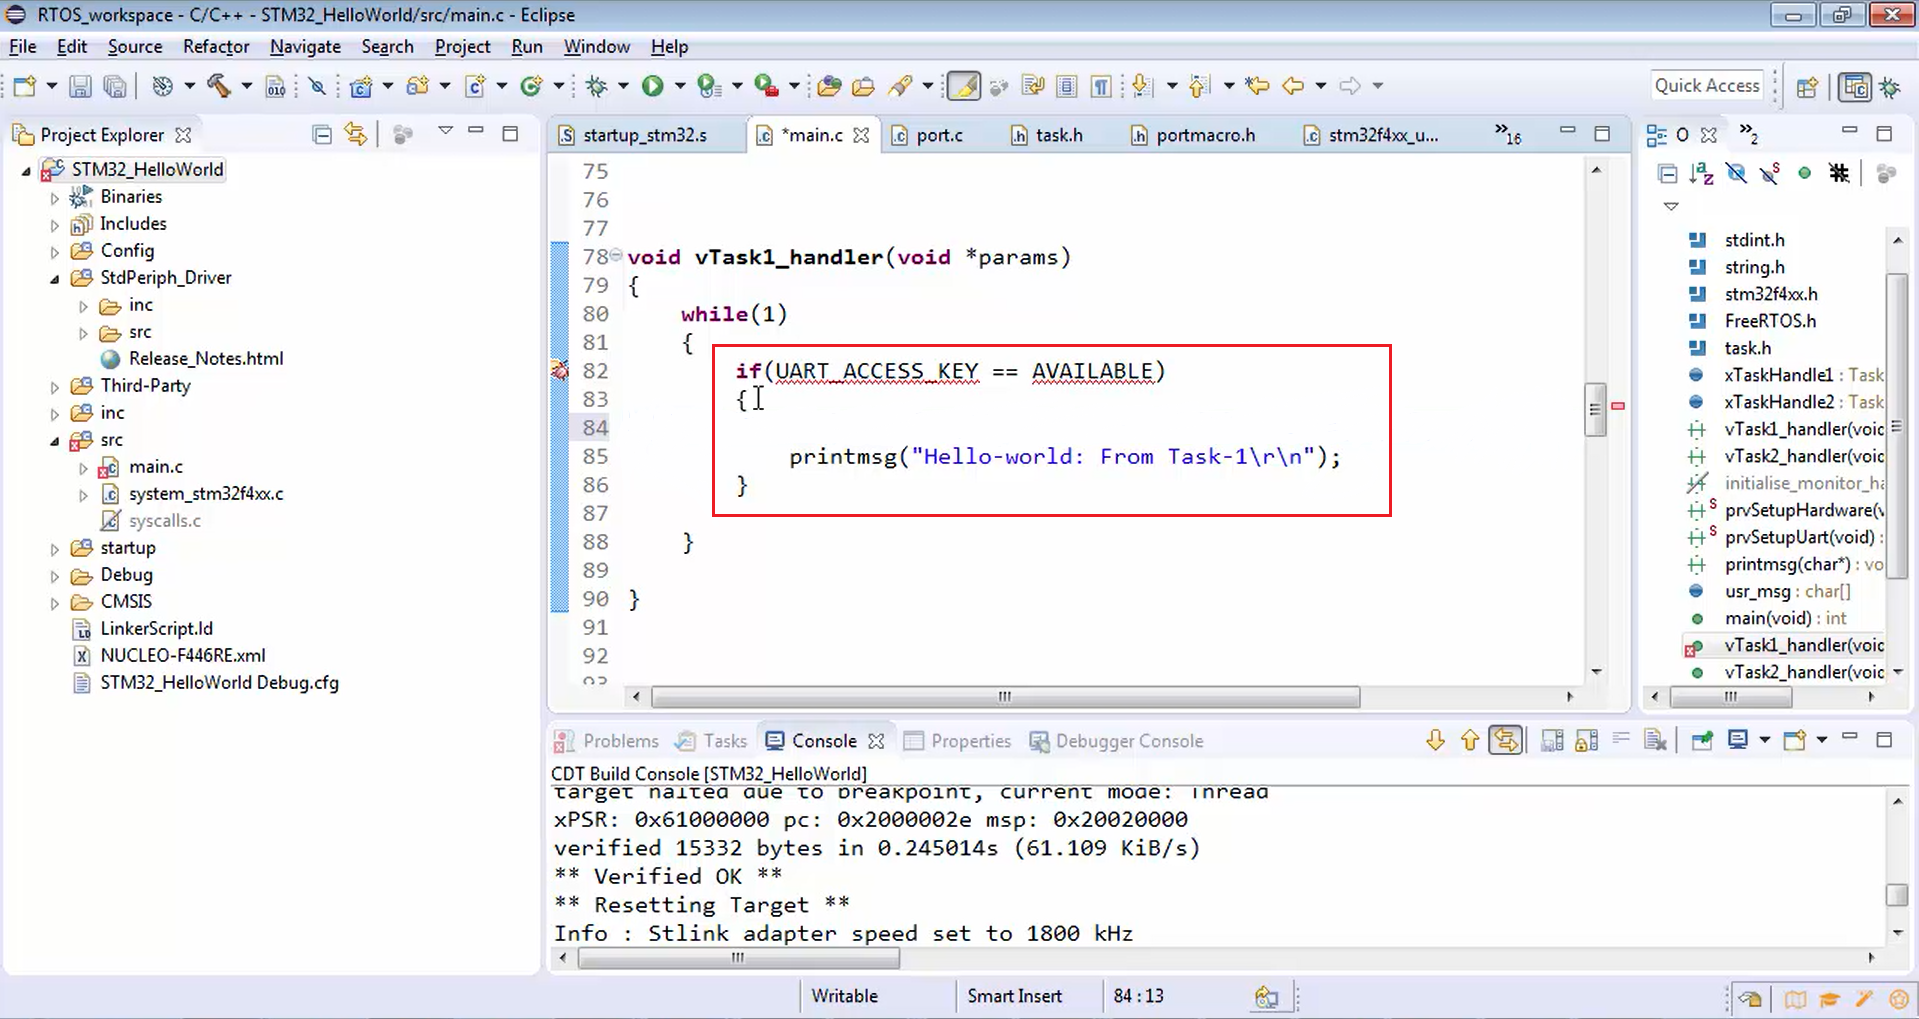
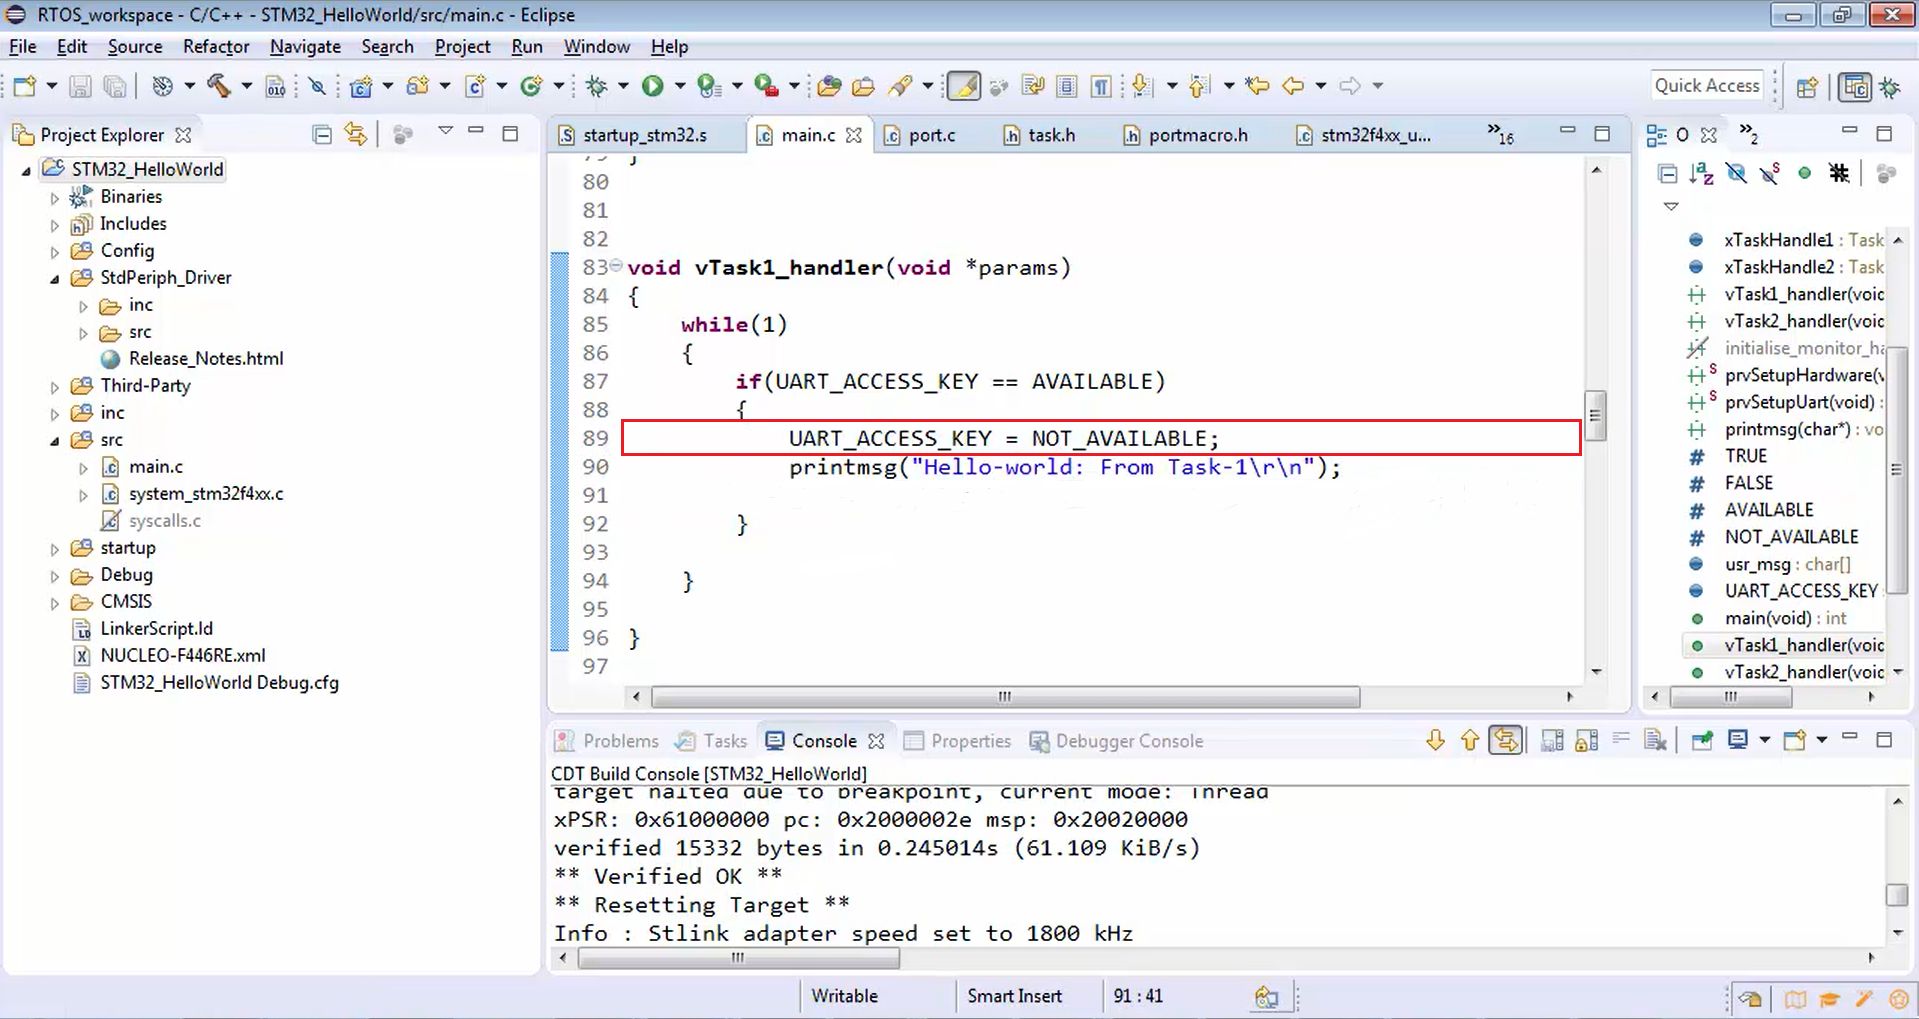
void vTask1_handler(void *params)
{

  while(1)
   {
    if(UART_ACCESS_KEY == AVAILABLE)
    {
          UART_ACCESS_KEY = NOT_AVAILABLE;
          printmsg("Hello-world: From Task-1\r\n");
          UART_ACCESS_KEY = AVAILABLE;
    }

  }

}
Making shared entities available
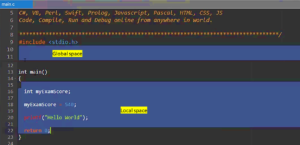
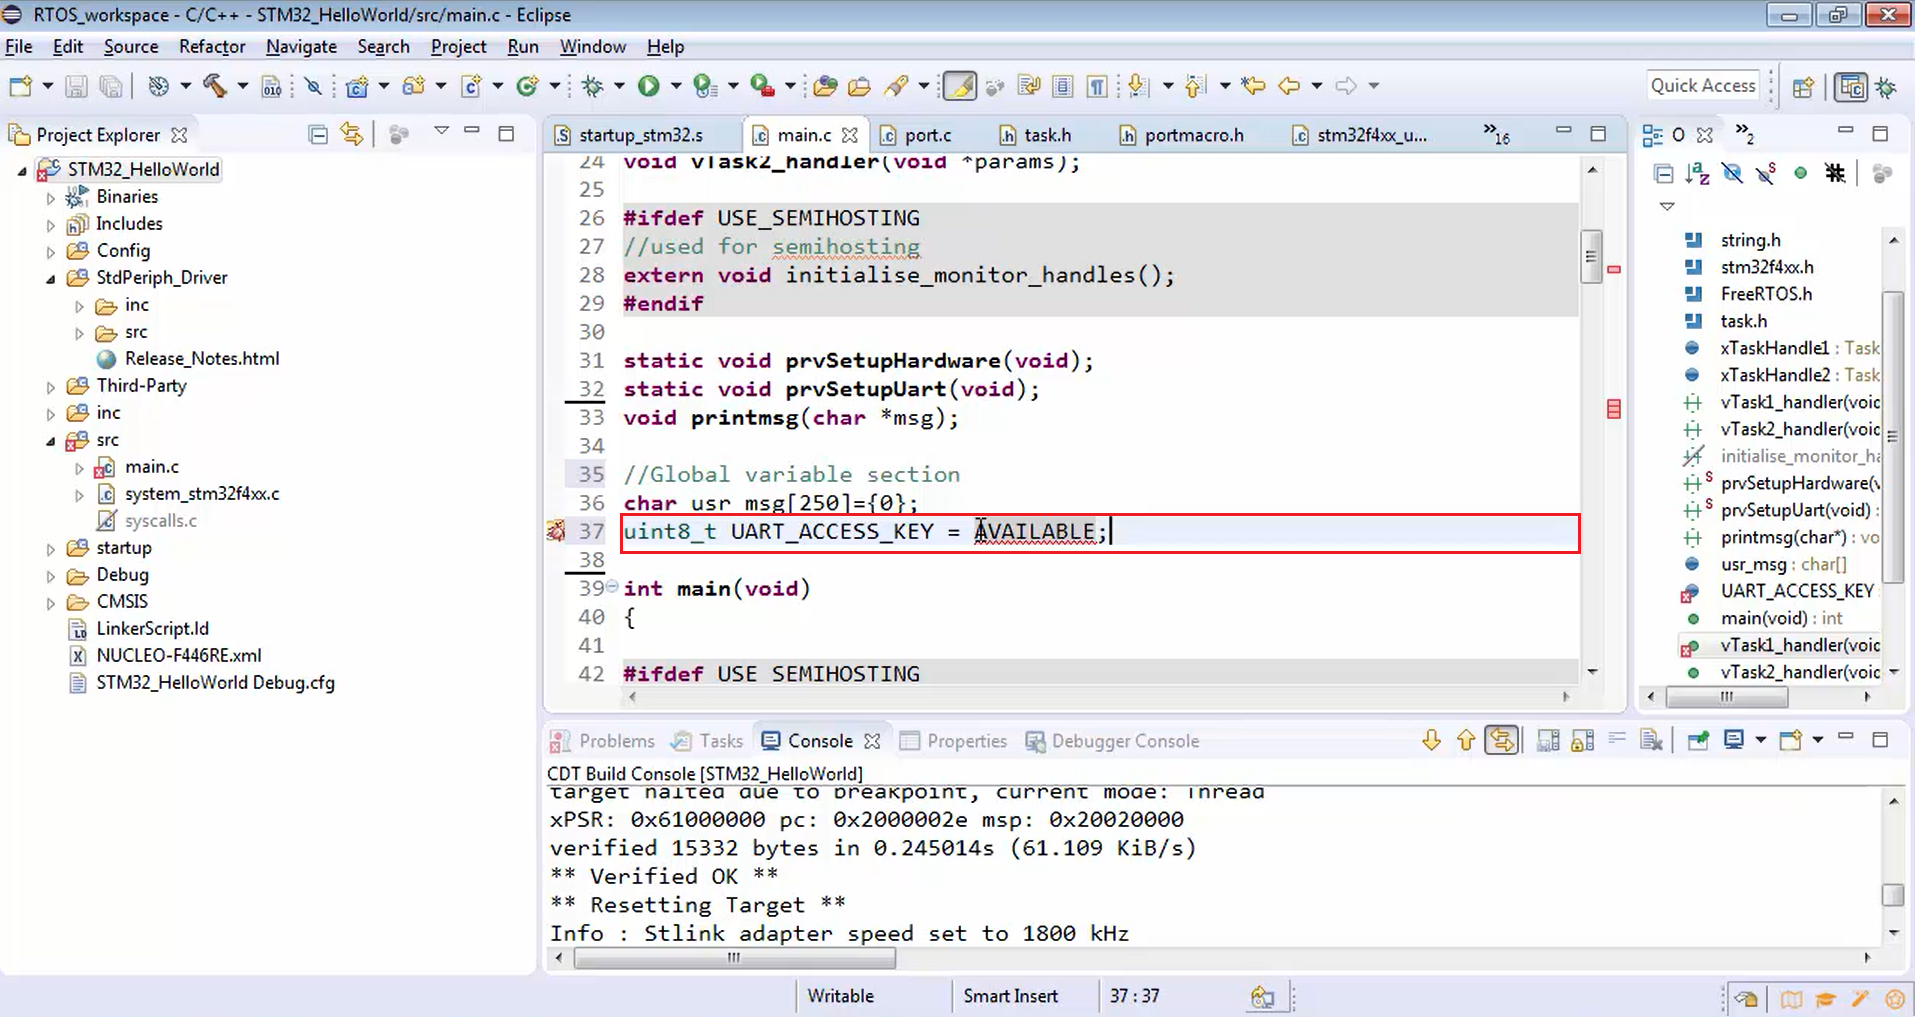
Let’s go to the global section and create a variable called UART_ACCESS_KEY and initialize it to AVAILABLE, as shown in Figure 3.
uint8_t UART_ACCESS_KEY = AVAILABLE;
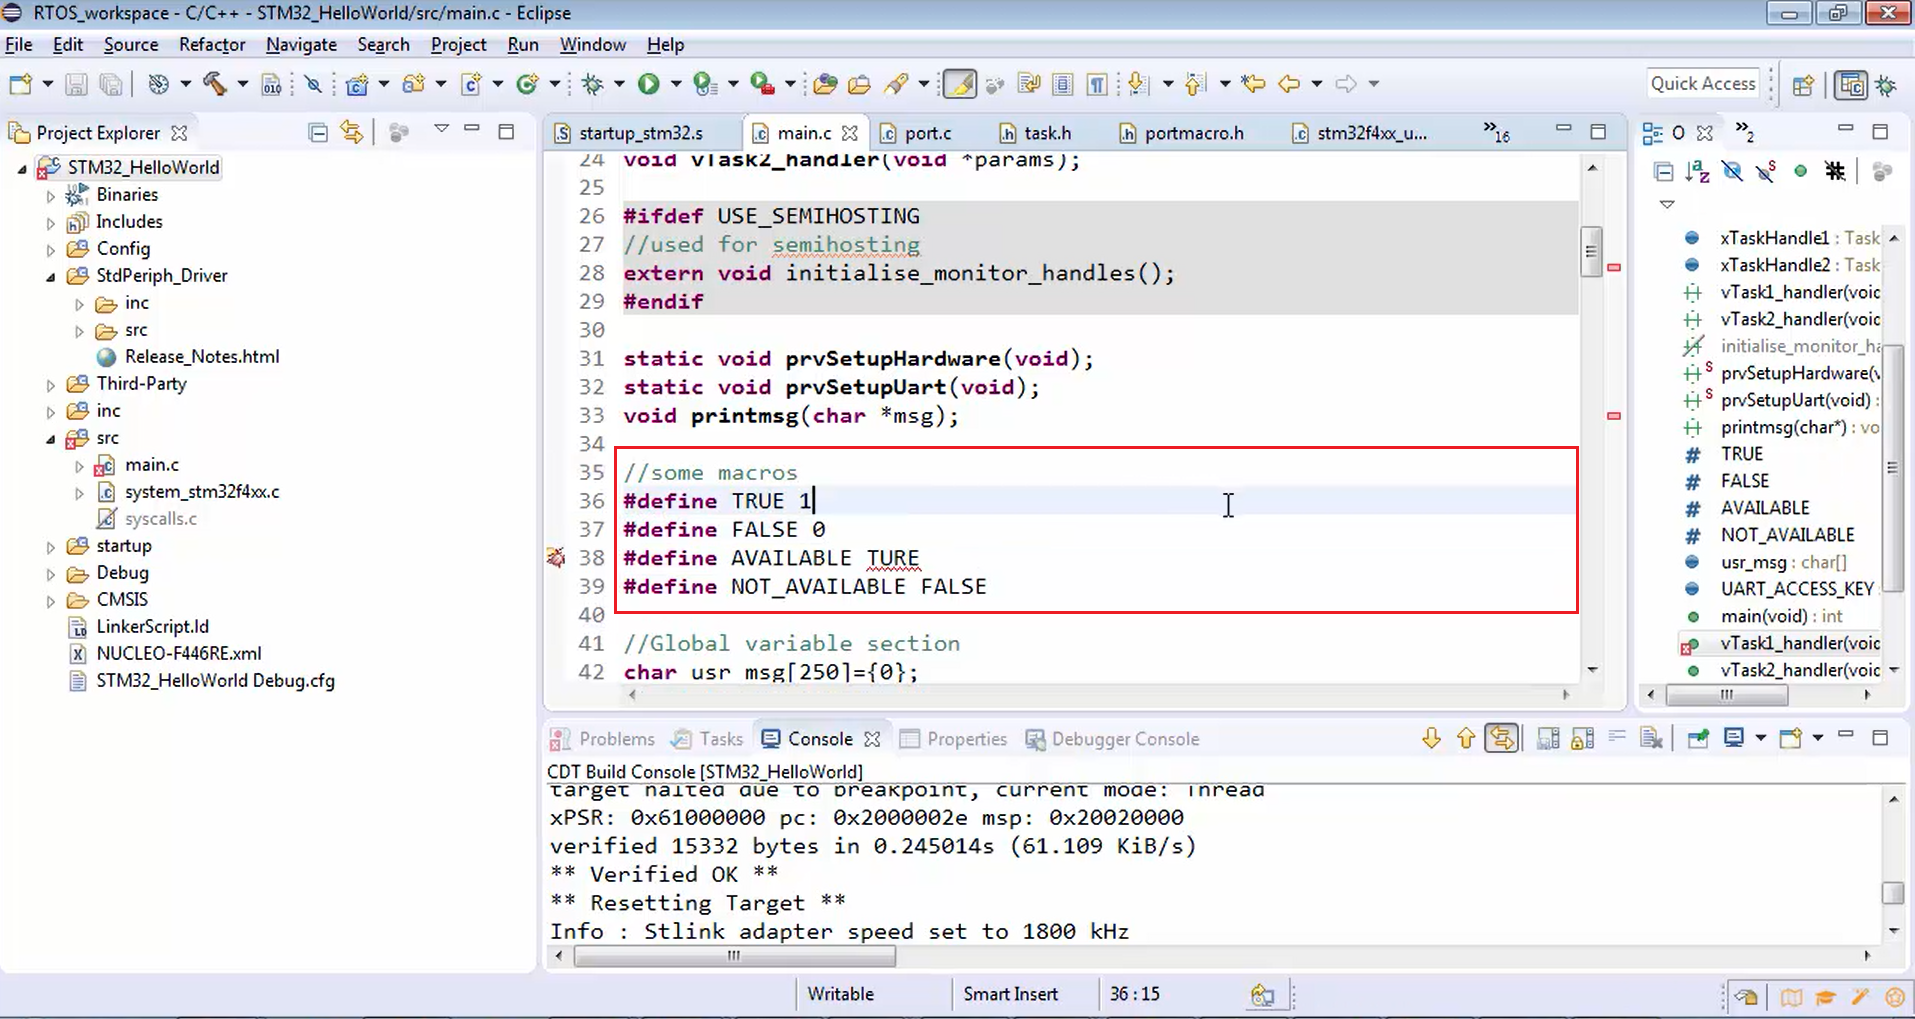
Now let’s create macros named AVAILABLE and NON_AVAILABLE, as shown in Figure 4.
Same thing you have to implement for task 2 as well. When task 2 preempts task 1, if the key is not available, then it won’t enter into task 2 handler. So, it won’t corrupt the UART by trying to send its characters. That’s how the UART is protected.
void vTask2_handler(void *params)
{
   while(1)
   {
           if(UART_ACCESS_KEY == AVAILABLE)
           {
                UART_ACCESS_KEY = NOT_AVAILABLE;
                printmsg("Hello-world: From Task-2\r\n");
                UART_ACCESS_KEY = AVAILABLE;
            }
     }
}
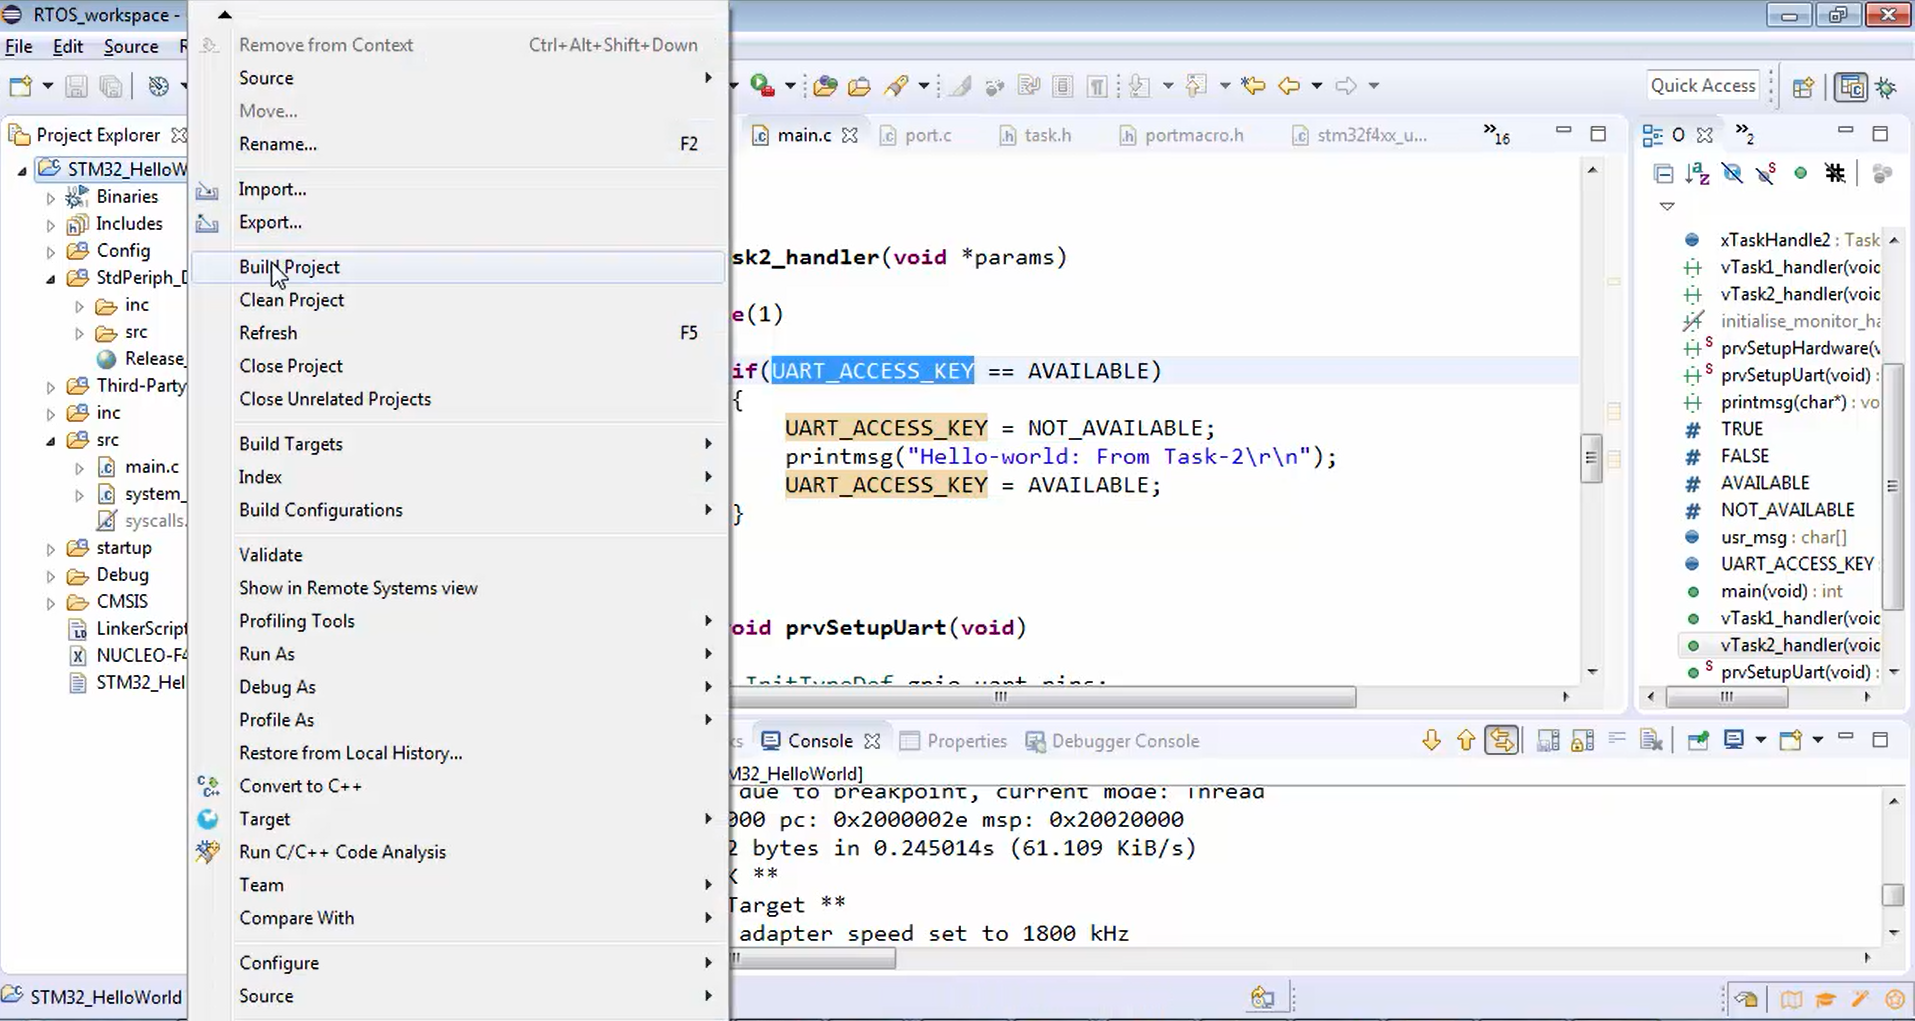
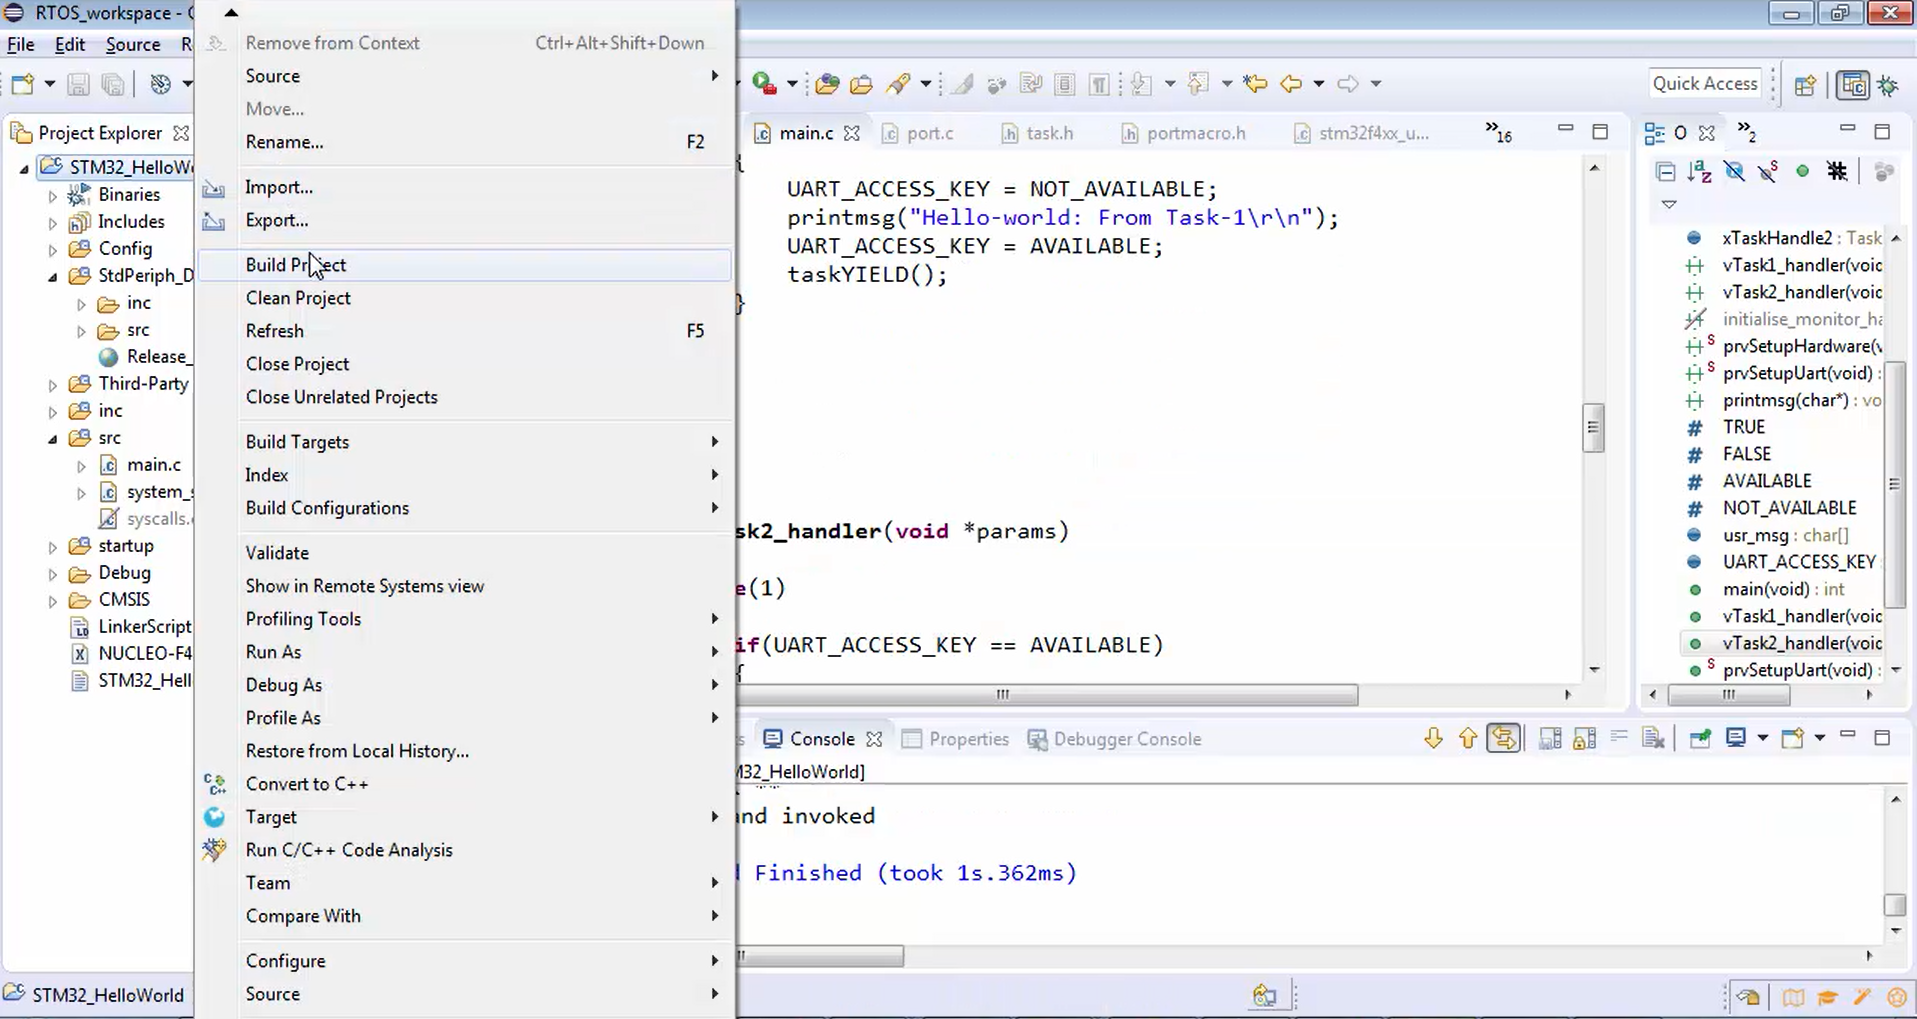
Now the UART is serialized by using UART_ACCESS_KEY. Let’s build the project (Figure 5) to see how this project goes.
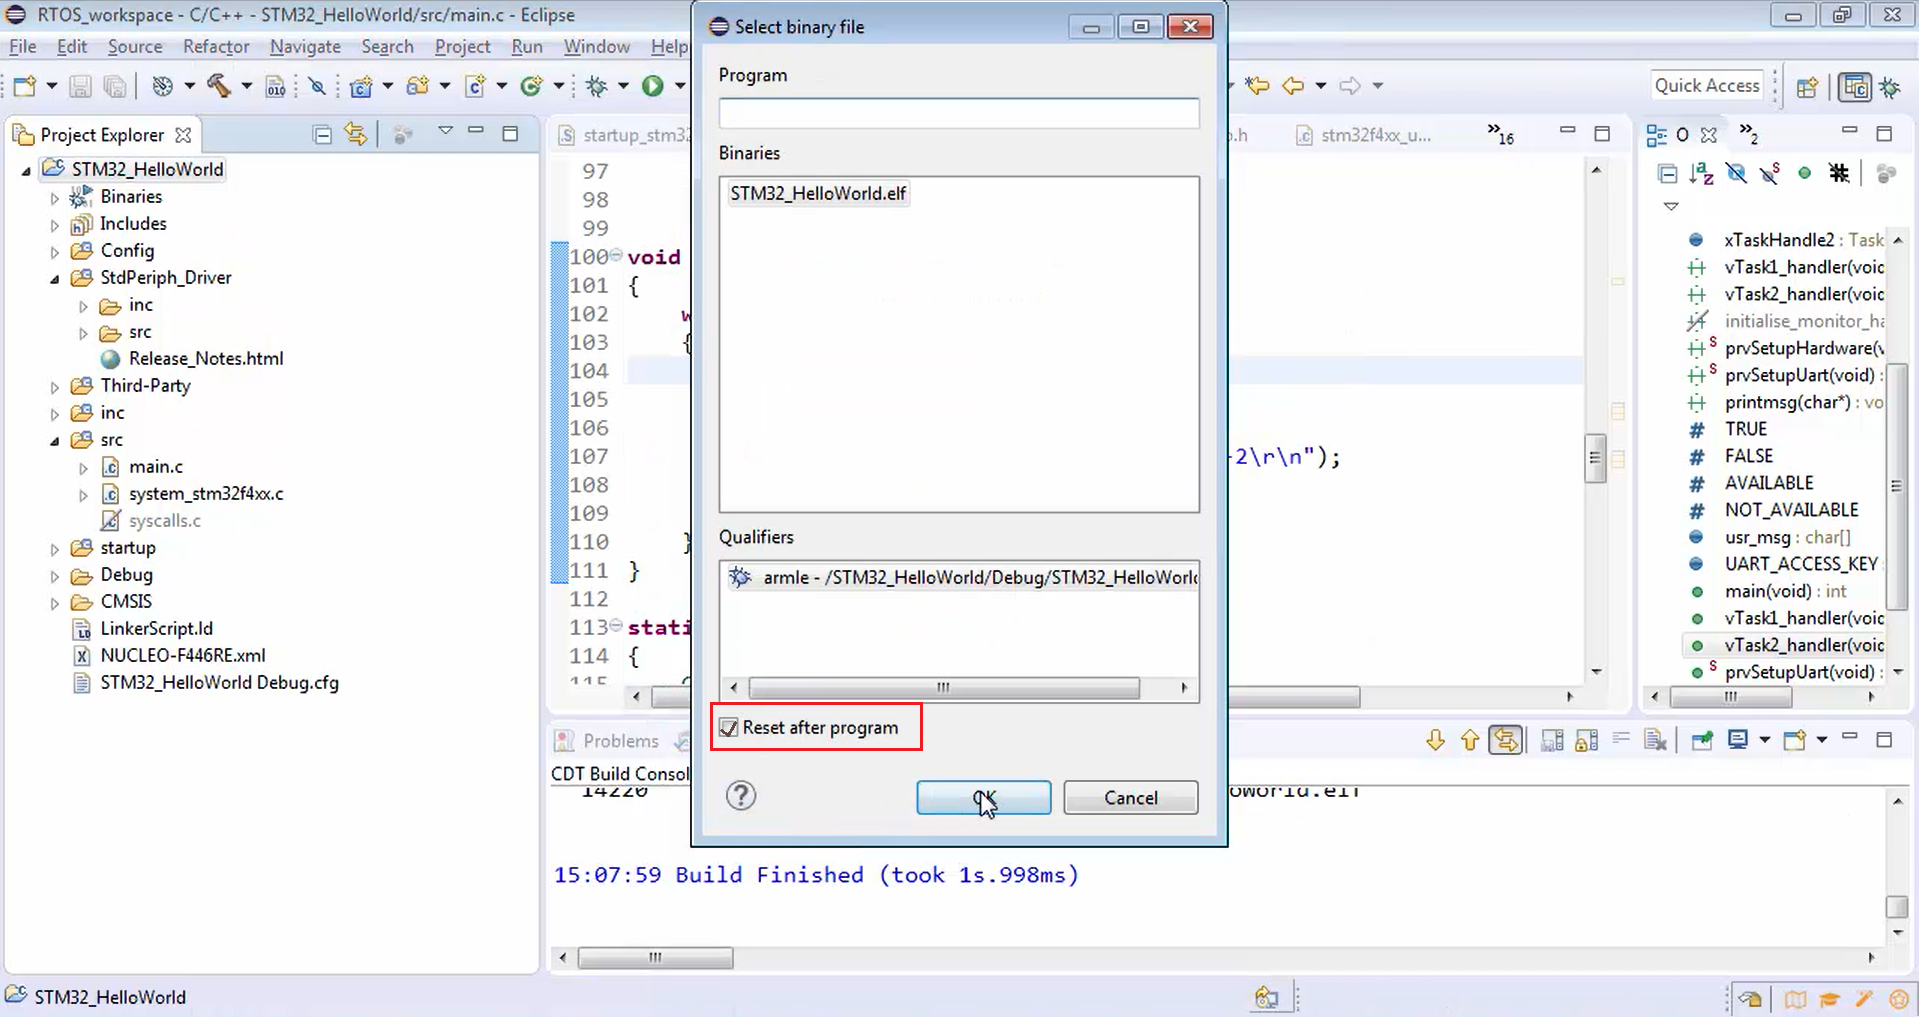
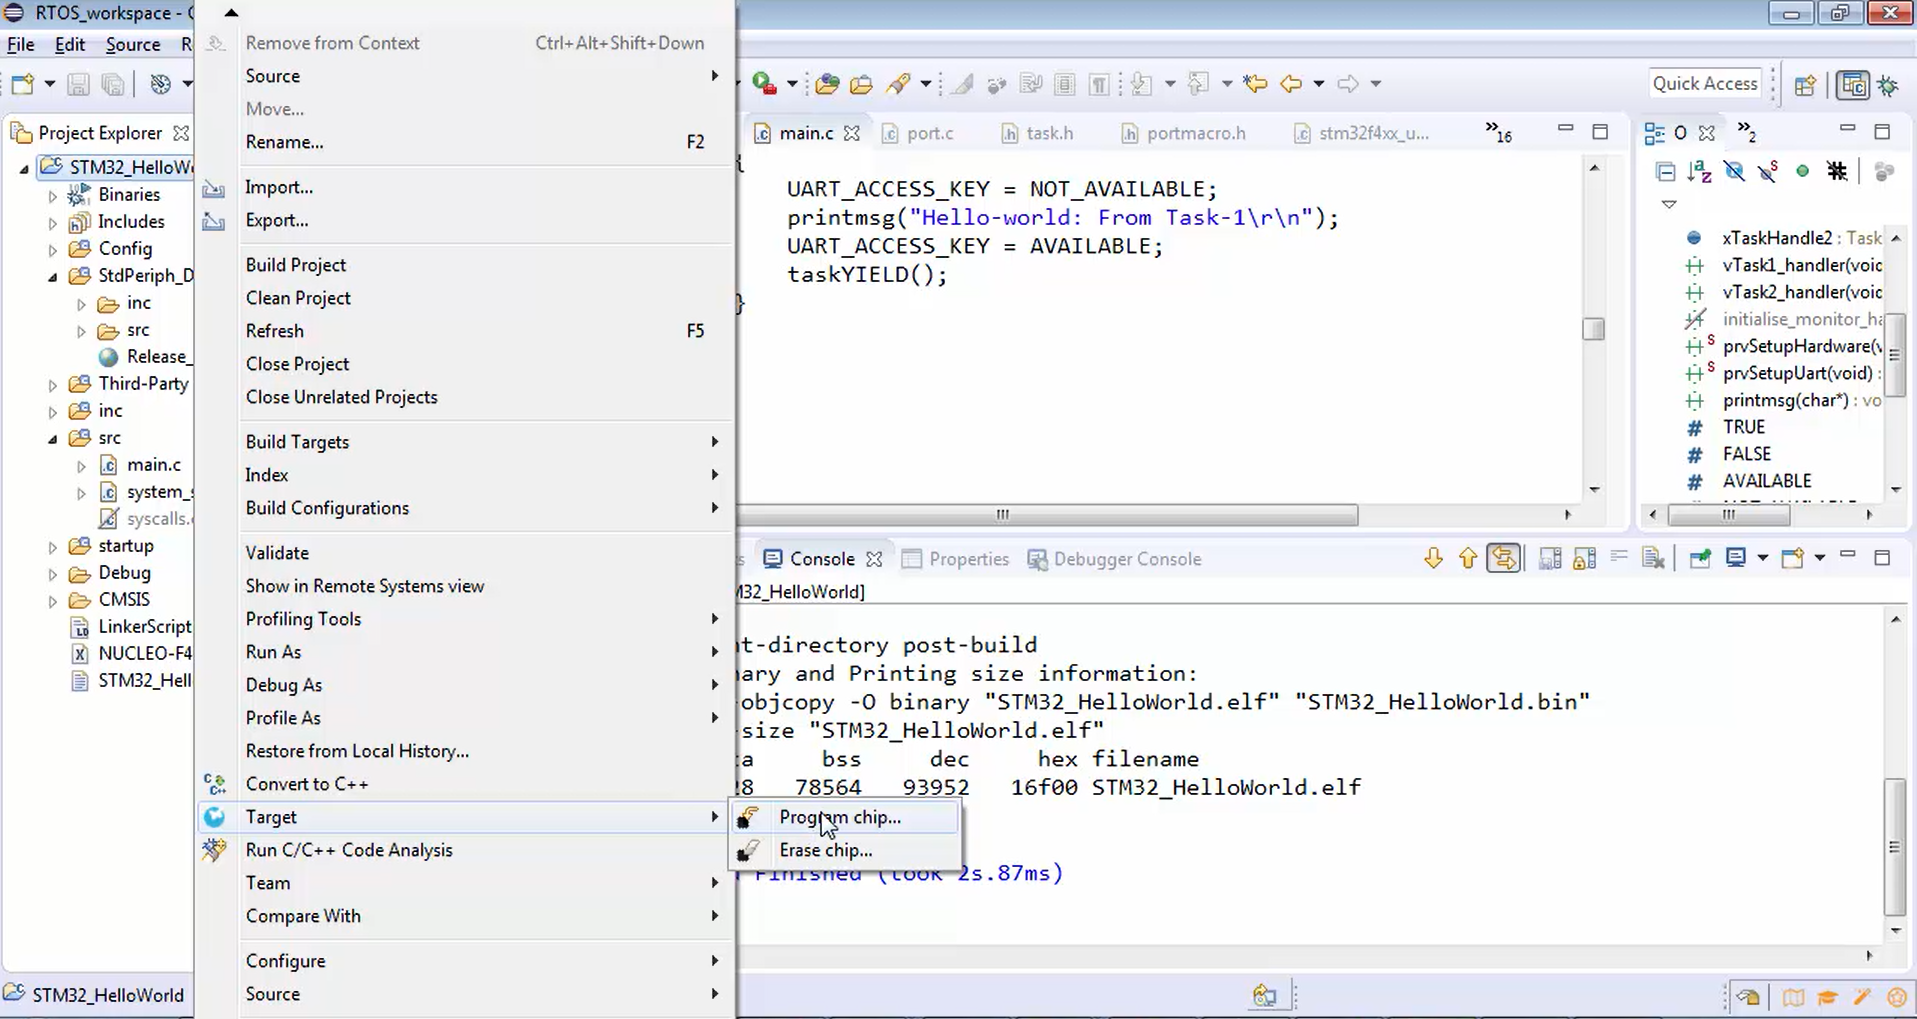
Download the code into the chip (Figure 6). Then tick the reset after the program checkbox (Figure 7) and click ok.

Now the code is downloaded. Press the reset button. Now, in Figure 8, you can see that the output looks good but here, you can see that only task 1 is executing. Task 2 is not at all executing.
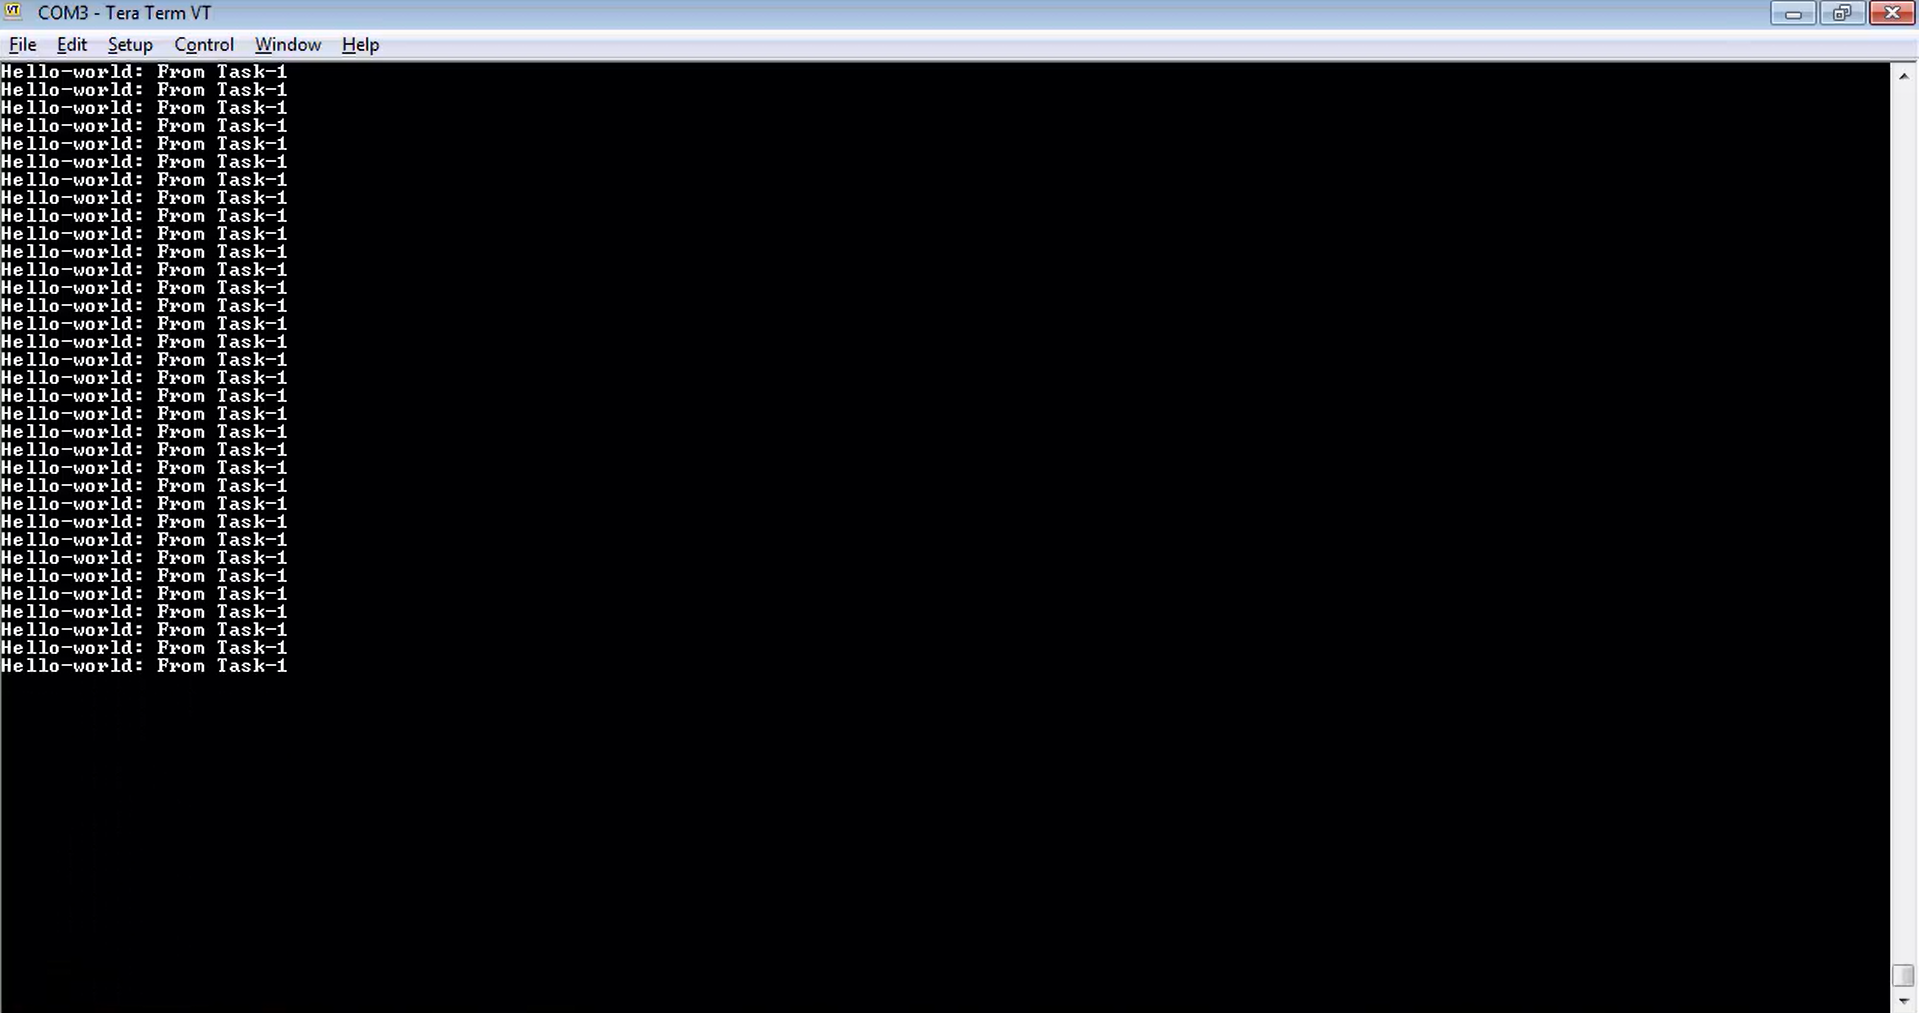
Now, task 2 is not getting a chance to enter into the if section shown in Figure 6. That may be because when task 1 was executing, it made the key unavailable and prevented task 2 from entering into sending characters to the UART. Task 1 completely executes the printmsg statement, which you see in Figure 8.
After that, it makes the key (UART_ACCESS_KEY) available. But that time, task 2 may not be preempting task 1. That’s why it again closes and makes the access key not available. That’s why task 1 is always getting the key, and the access key is always available for task 1, but for task 2, the key is not at all available. This is why task 2 may not get the chance to see UART_ACCESS_KEY as available, and the control will not enter into the if statement of task handler 2.
Now how to allow task 2 also enter into the if section to execute its print message.
One technique that you can use here is a cooperative method. When task 1 executes its printmsg, it makes the key available, and we can make task 1 leave the CPU. So, task 1 has completed printmsg, and we can force task 1 to leave the CPU so that it can give a chance to someone else waiting to execute, i.e., task 2, which also got the same priority and is waiting to execute.
Actually, task 2 is also executing, but it is not able to enter into the if section. So, you can make task 1 to give up the CPU. The way you can do that is, there is one macro in the FreeRTOS, i.e., taskYIELD(). Once task 1 makes the key as available, then it can leave the CPU.
void vTask1_handler(void *params)
{

  while(1)
  {
    if(UART_ACCESS_KEY == AVAILABLE)
    {
          UART_ACCESS_KEY = NOT_AVAILABLE;
          printmsg("Hello-world: From Task-1\r\n");
          UART_ACCESS_KEY = AVAILABLE;
          taskYIELD();
    }

  }

}
Call for taskYIELD() macro
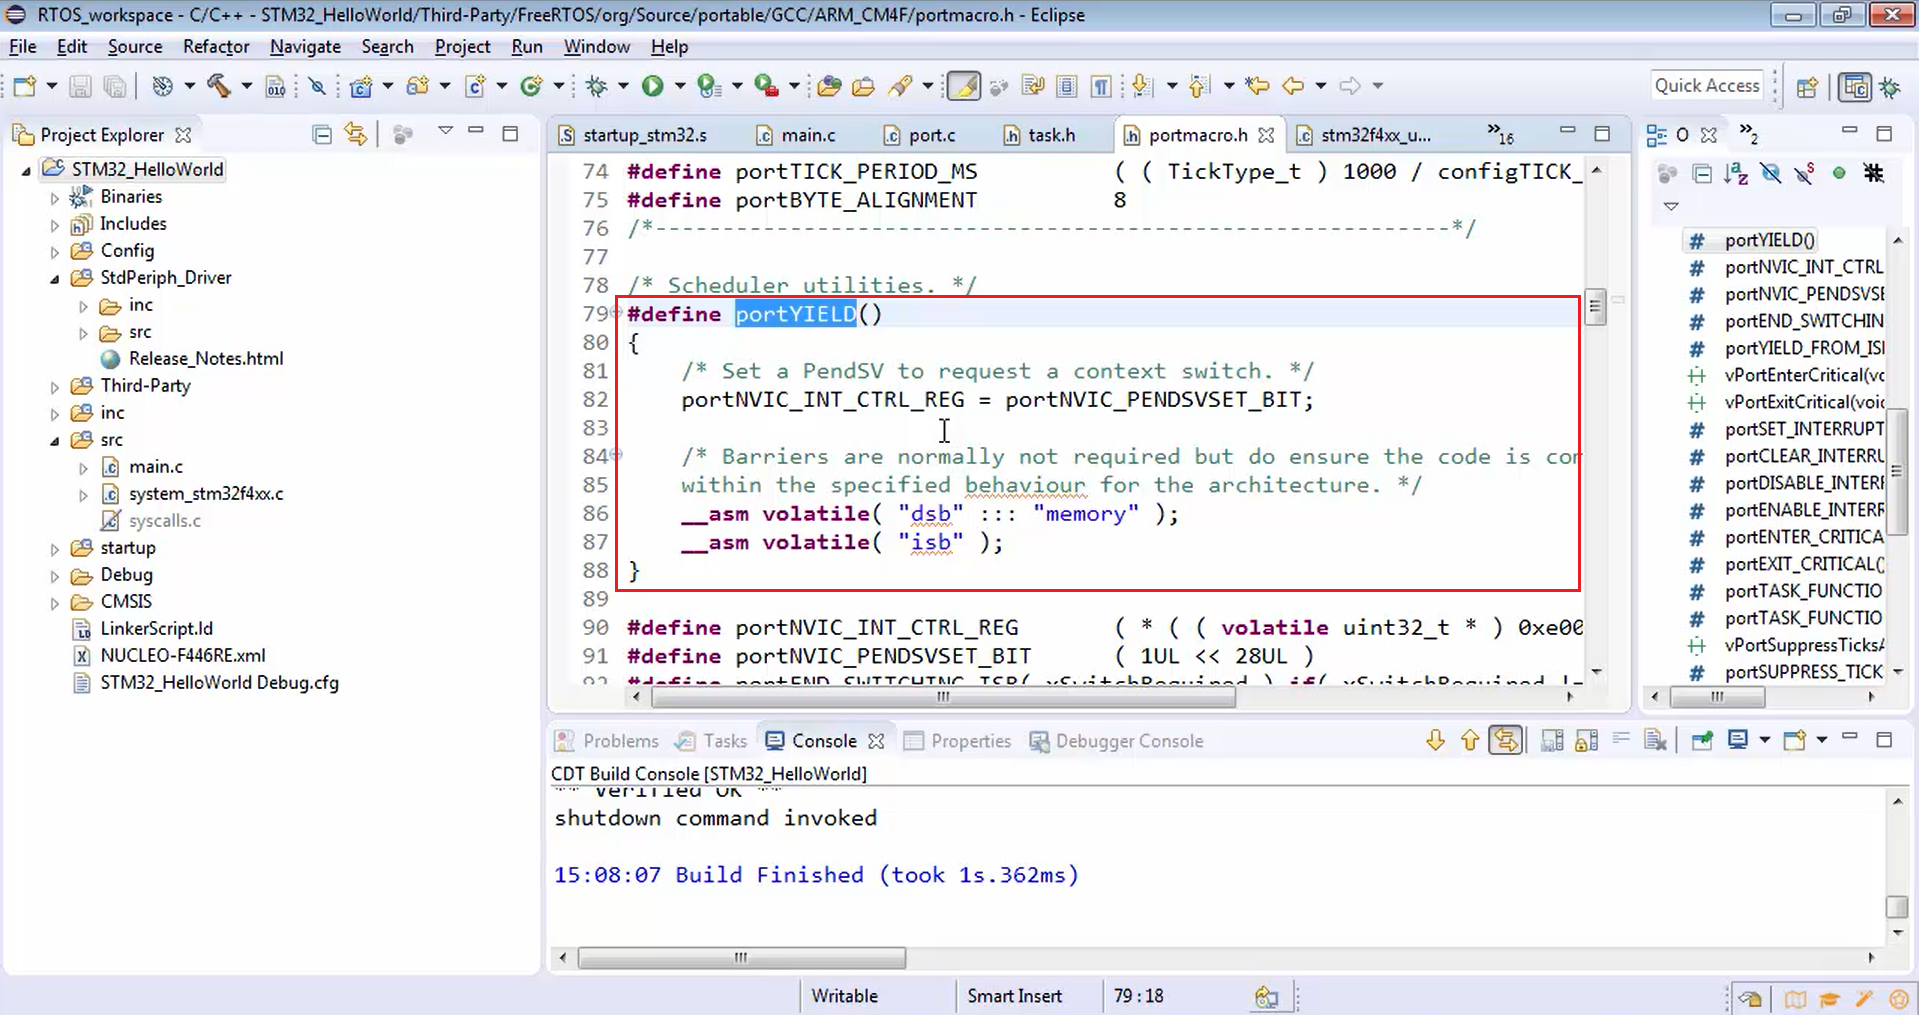
The taskYIELD() (Figure 9) is a macro that triggers the context switching manually wherever you want.
Same thing you can do for task 2 also. Now when task 2 runs, it makes the key available, and it leaves the CPU, as shown below.
void vTask2_handler(void *params)
{
   while(1)
   {
           if(UART_ACCESS_KEY == AVAILABLE)
           {
                UART_ACCESS_KEY = NOT_AVAILABLE;
                printmsg("Hello-world: From Task-2\r\n");
                UART_ACCESS_KEY = AVAILABLE;
                taskYIELD()
            }
     }
}
Both the tasks are cooperating with each other in order to enter into the print over UART section. Now let’s see how this project goes. Let’s compile the code (Figure 10).
After successfully compiling the code, download the code into the chip (Figure 11).
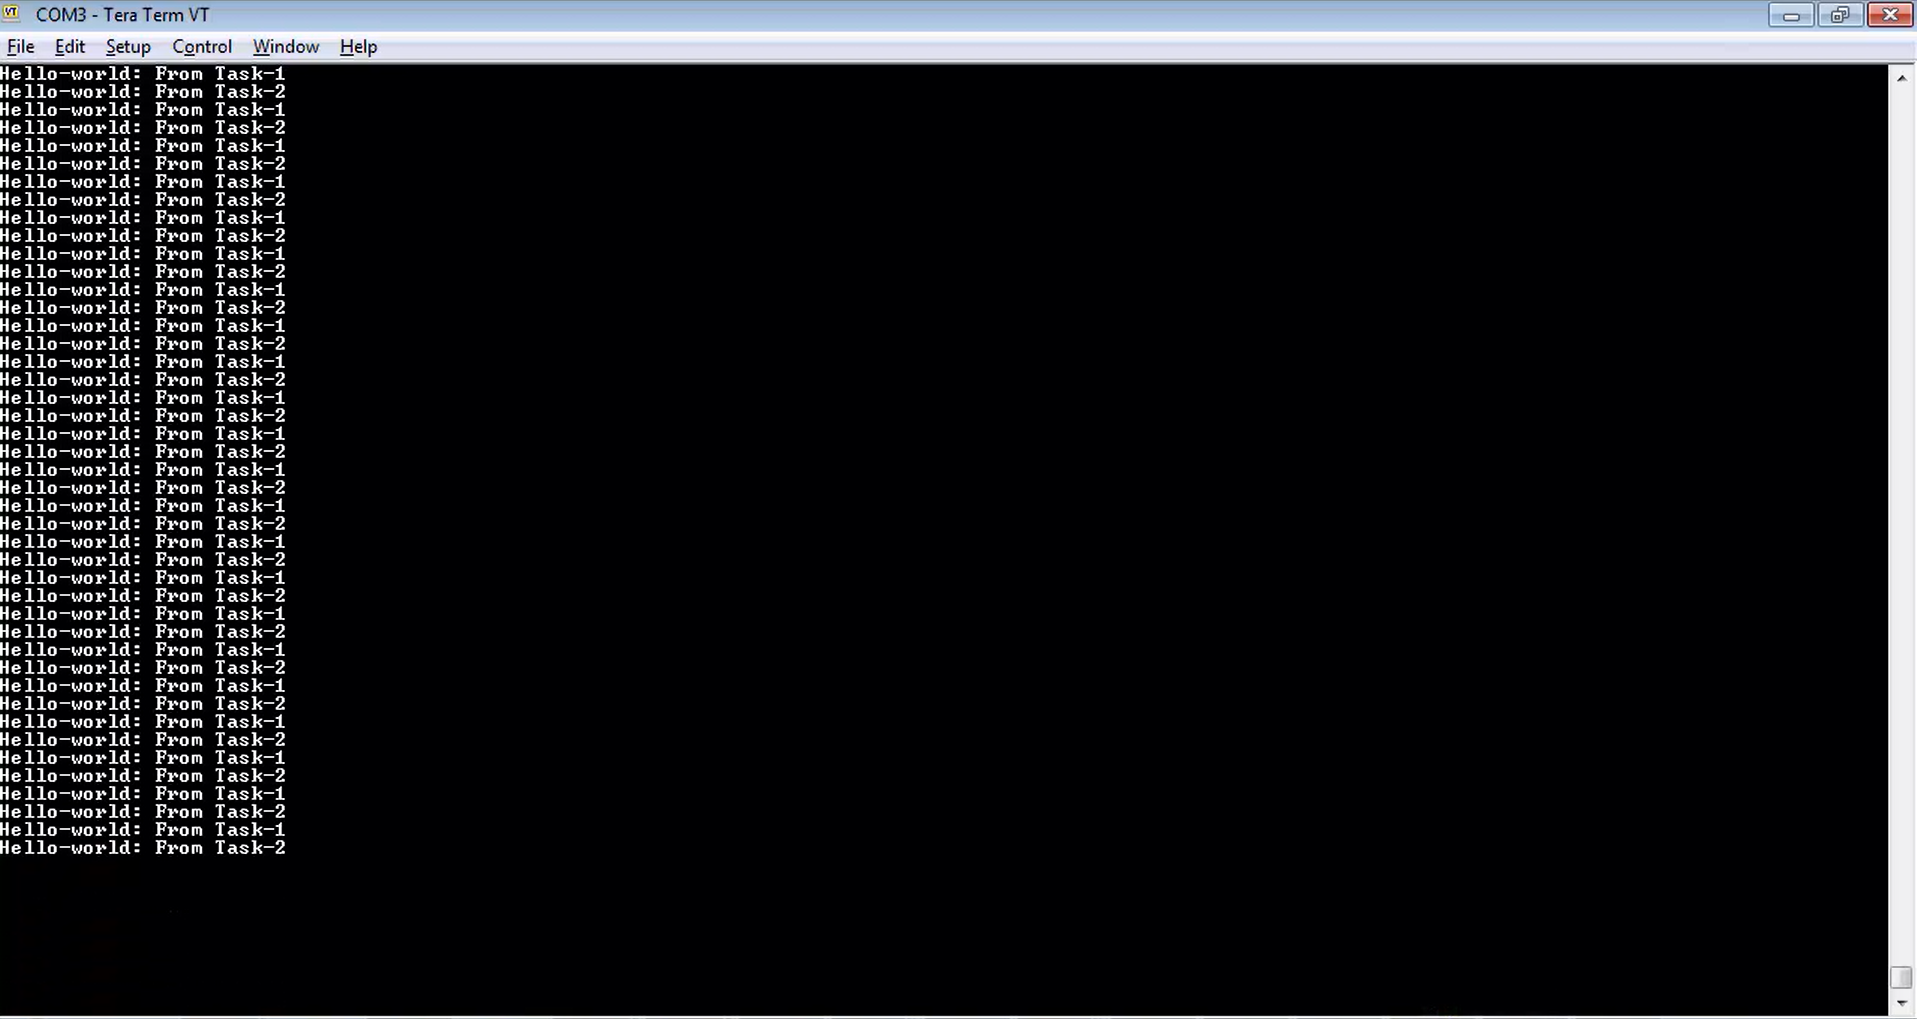
Now in Figure 12, you can see prints from both the tasks, i.e., task 1 as well as task 2.
Summary:
When task 1 was executed its printmsg, it made UART_ACCESS_KEY available, but it didn’t go for another loop here. Instead, it left the CPU. The way task 1 left the CPU is by manually triggering the context switch.
When the context switch is manually triggered, the next ready task of the same priority is selected. Since there is already one task is waiting, i.e., task 2, that is now allowed to run. Now task 2 got the chance to enter into the if section, and it printed. Then it left the CPU by using taskYIELD(). That’s how both the tasks cooperate with each other to send their message over the UART.
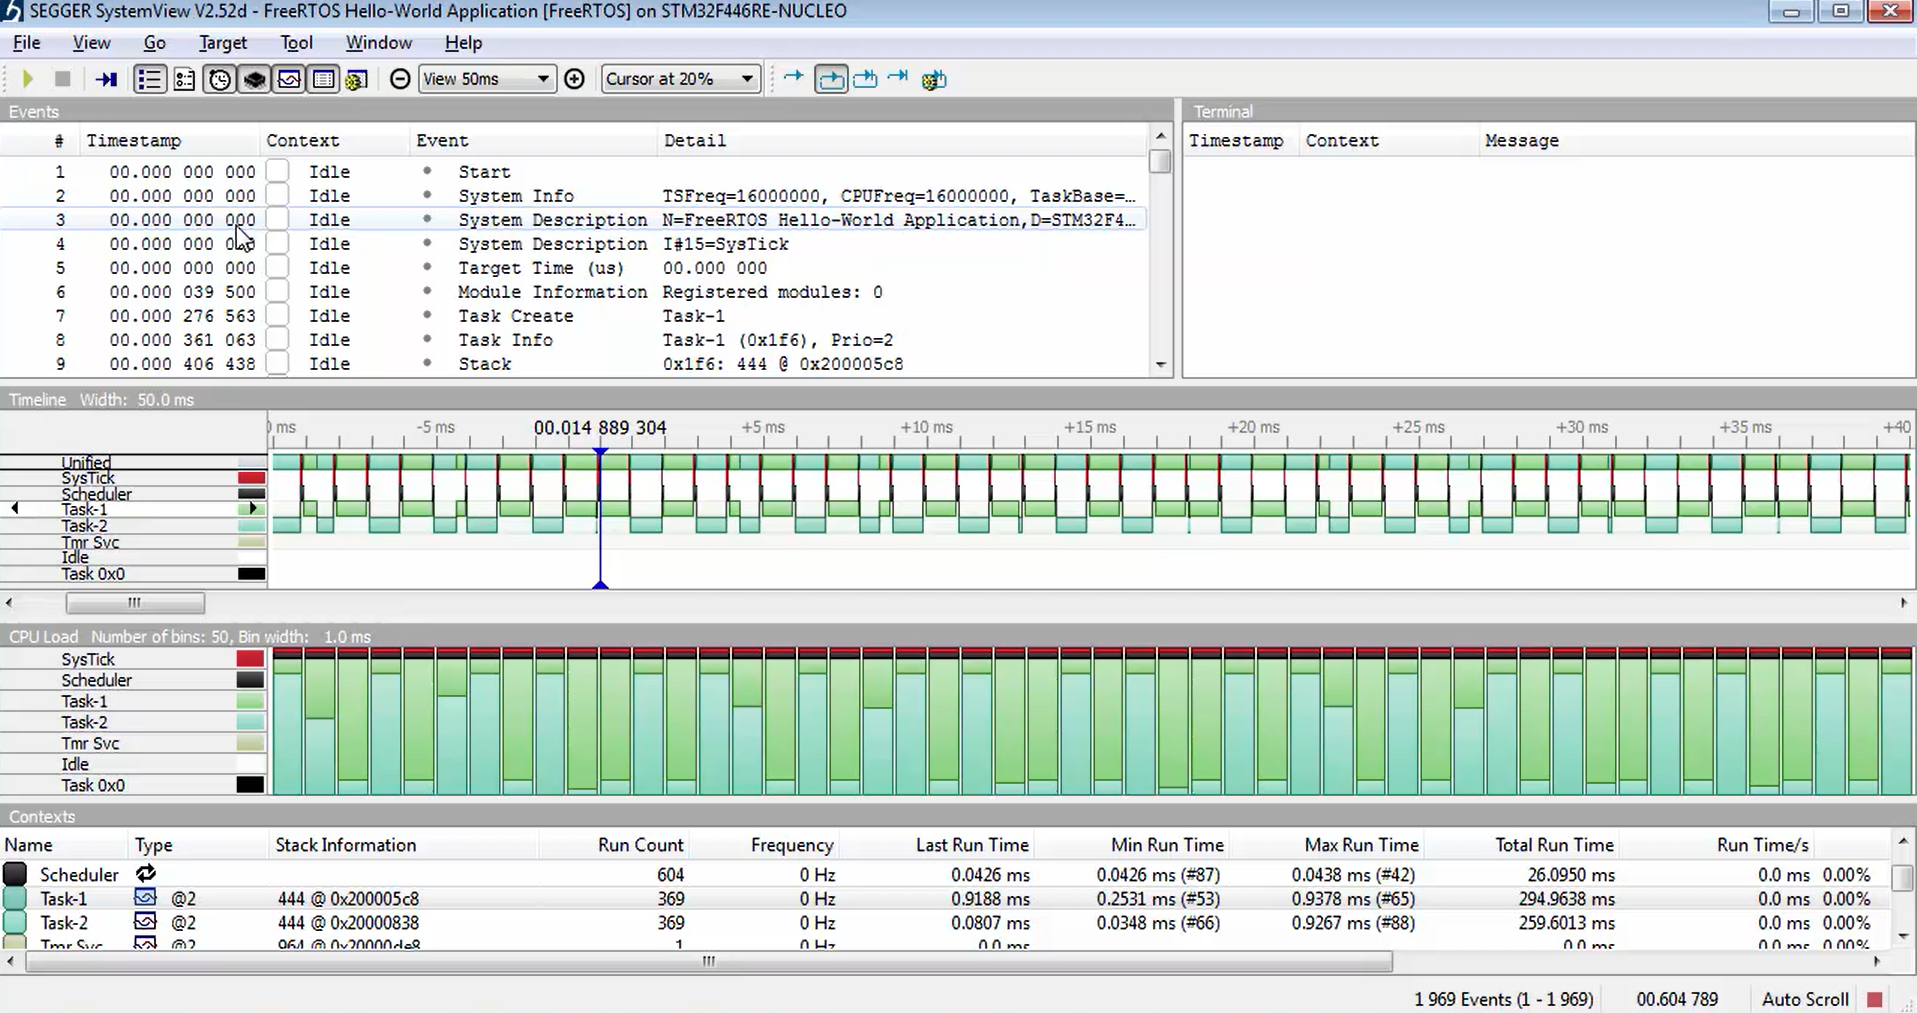
All these activities you have to analyze by using a software called segger system view software (Figure 13), and it is freely available from segger.
By using this software, you can trace the task execution, timings, visualize the interrupt timings, interrupt entry sequence. We can analyze when exactly the interrupt is triggering, how much time an ISR is consuming, how much time a task is consuming on the CPU, when the task is getting preempted. There are lots of other details we can obtain from this system view software.
FastBit Embedded Brain Academy