Exercise-008:Implementation part 7
In the previous article, we implemented the state machine for the button active object. Now let’s go to the Alarm component and add the state machine for this.
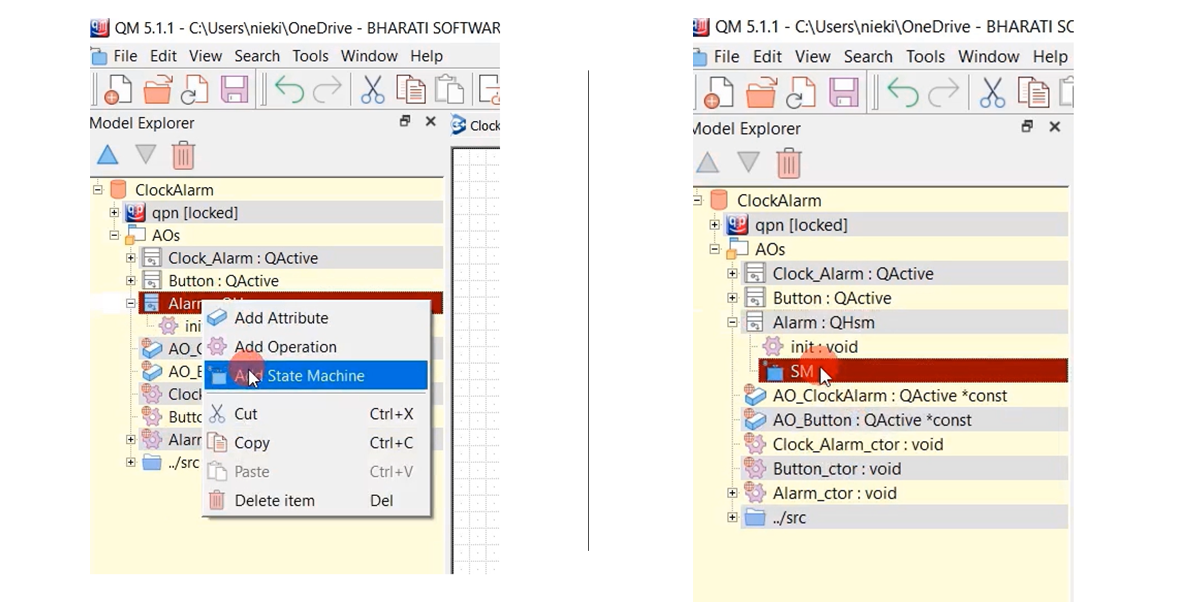
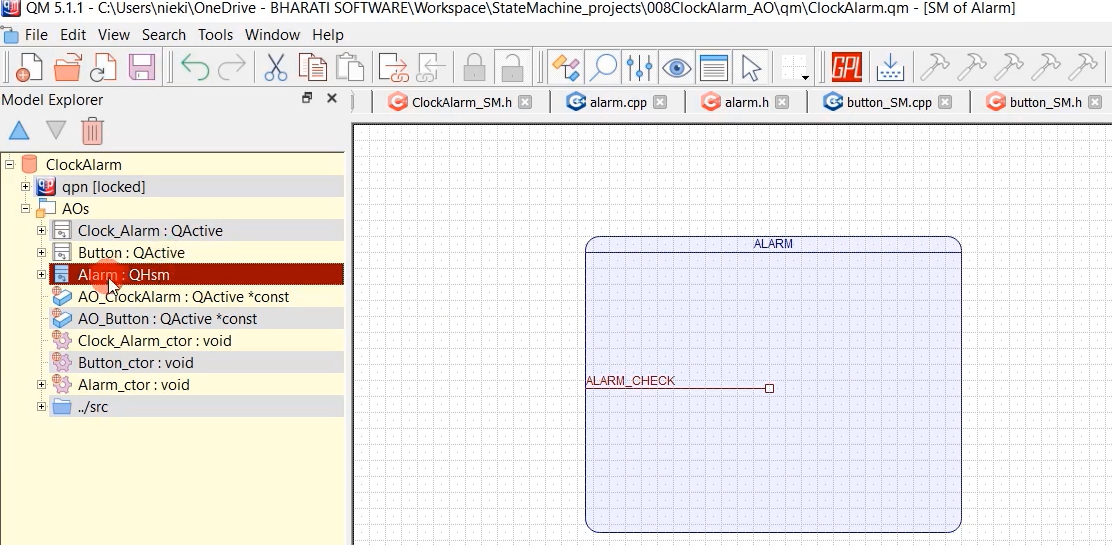
Just right-click over the Alarm and click on Add State Machine. And double-click on SM. Creating a state machine as shown in Figure 1.
Let’s take one state and give the name ALARM. And this state also has only one internal transition. The signal name is ALARM_CHECK. This ALARM_CHECK signal will be hosted by its container. That’s why this alarm class should give one dispatch function because the container has to dispatch this signal to its component. That’s why the component must provide one dispatch function to the container.
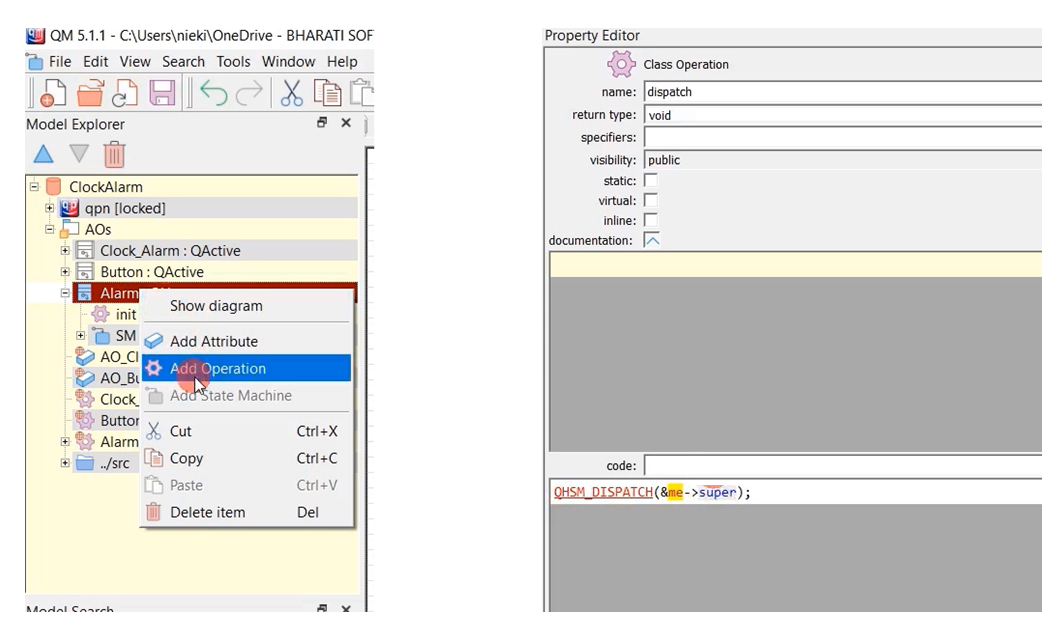
Let’s implement that dispatch function. Right-click on Alarm and Add operation. We will name this as dispatch; return type is void, visibility is public.
The code for this dispatch function is QHSM_DISPATCH(&me-> super); You have to call QHSM_DISPATCH using the pointer of the superclass of this alarm class.
And as I said, this dispatch function must be called from the container code. Let’s go to the container state machine. And for every tick, the container state machine should inform the alarm component to check whether there is any alarm signal or not. That’s why, in the Tick signal of the clock alarm state machine, we have to call the dispatch function of the component class.
The dispatch function name is Alarm_dispatch. You have to send a ‘me’ pointer. (Figure 4)
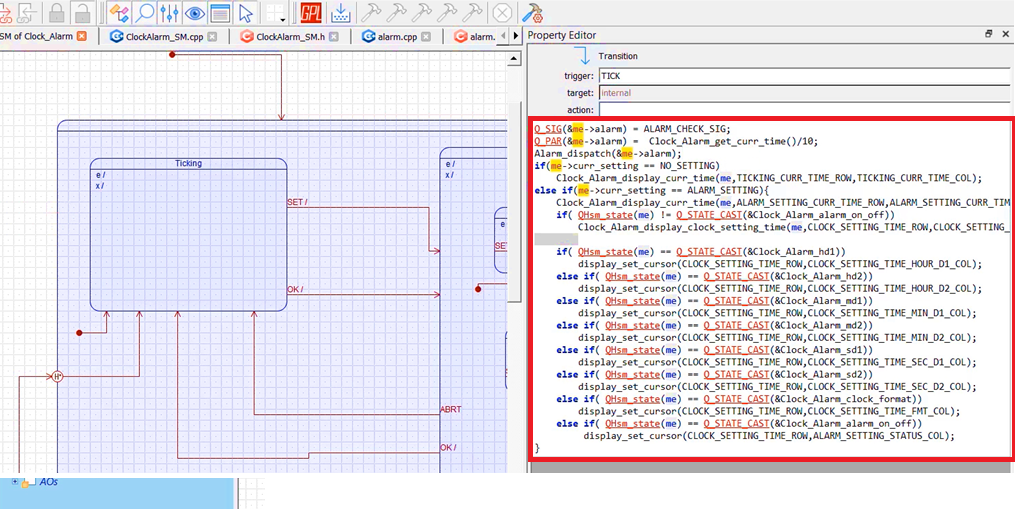
So, you have first to populate the signal name and the parameter; that is, you have to use the Q_SIG macro. Q_SIG(&me->alarm)= ALARM_CHECK_SIG;
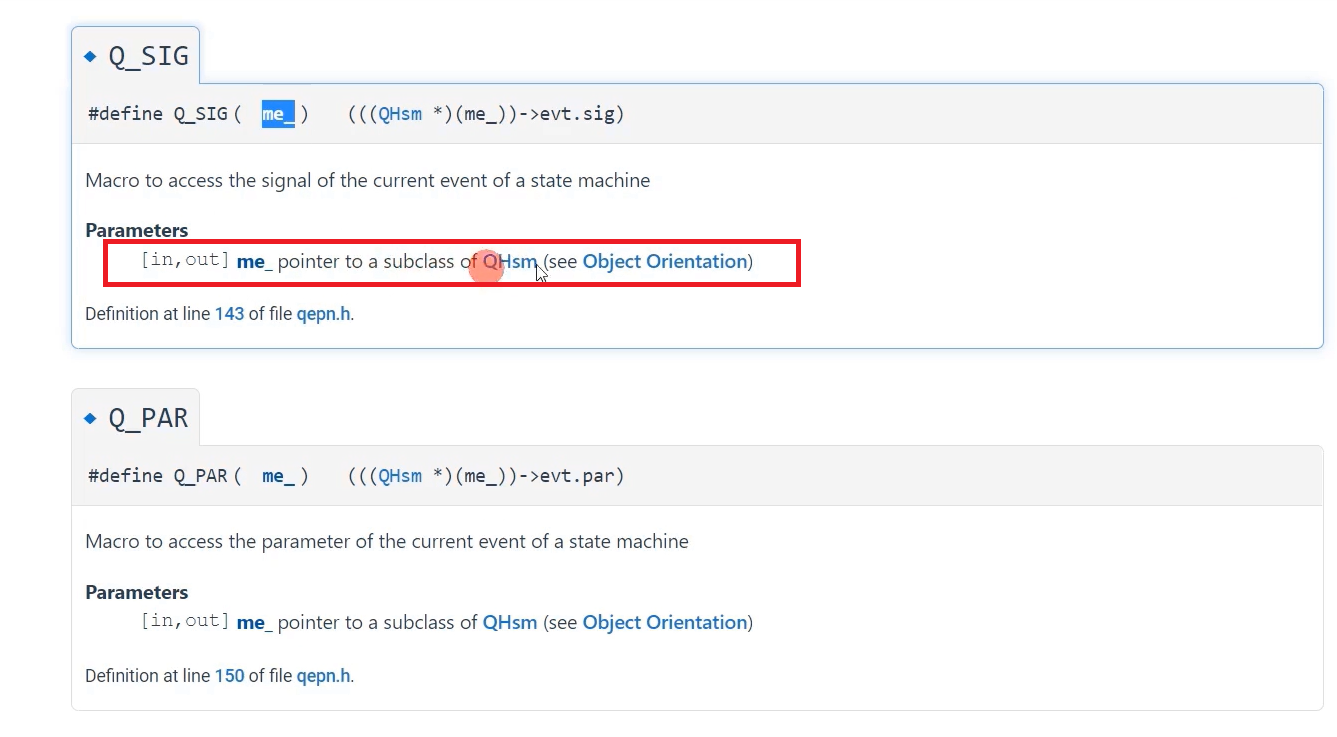
What is Q_SIG? So, let’s explore one more time—the Q_SIG macro (see Figure 5). You have to mention the pointer to the QHsm. ALARM_CHECK_SIG→ That’s a signal name. Here, the ‘me’ is nothing but a pointer to the subclass of Q_Hsm.
And then parameter. The parameter will be the value of the current time. We should inform the current time to the alarm component. So that it can compare the current time with its alarm time. You have to get the current time.
Q_PAR(&me->alarm)= Clock_Alarm_get_curr_time()/10;
How to get the current time?
There is a get current time function. So, we have to use that. Clock_Alarm_get_curr_time() and you have to divide this by 10. You need not include those milliseconds information.
And then dispatch to the alarm component.
Now let’s go back to the alarm state machine. In the alarm state machine, give the initial transition. So, now you know how this alarm state machine receives this ALARM_CHECK signal. And it also receives an associated parameter, which is nothing but the current time.
Now, the code to process the signal is very simple(Figure 6).
if(Q_PAR(me) == me->alarm_time)
QACTIVE_POST(AO_ClockAlarm, ALARM_SIG, 0U);
You have to extract the received parameter, which is the current time and compare with its alarm time. If it is equal to alarm time, then you post an event with the signal name ALARM_SIG. There is no parameter associated with this signal to the active object ClockAlarm.

That means, in the alarm class, you have to create that attribute, Alarm time. Because of the alarm time attribute which was there in Clock_Alarm before, I removed alarm time from here. Because now it’s an attribute of the alarm class.
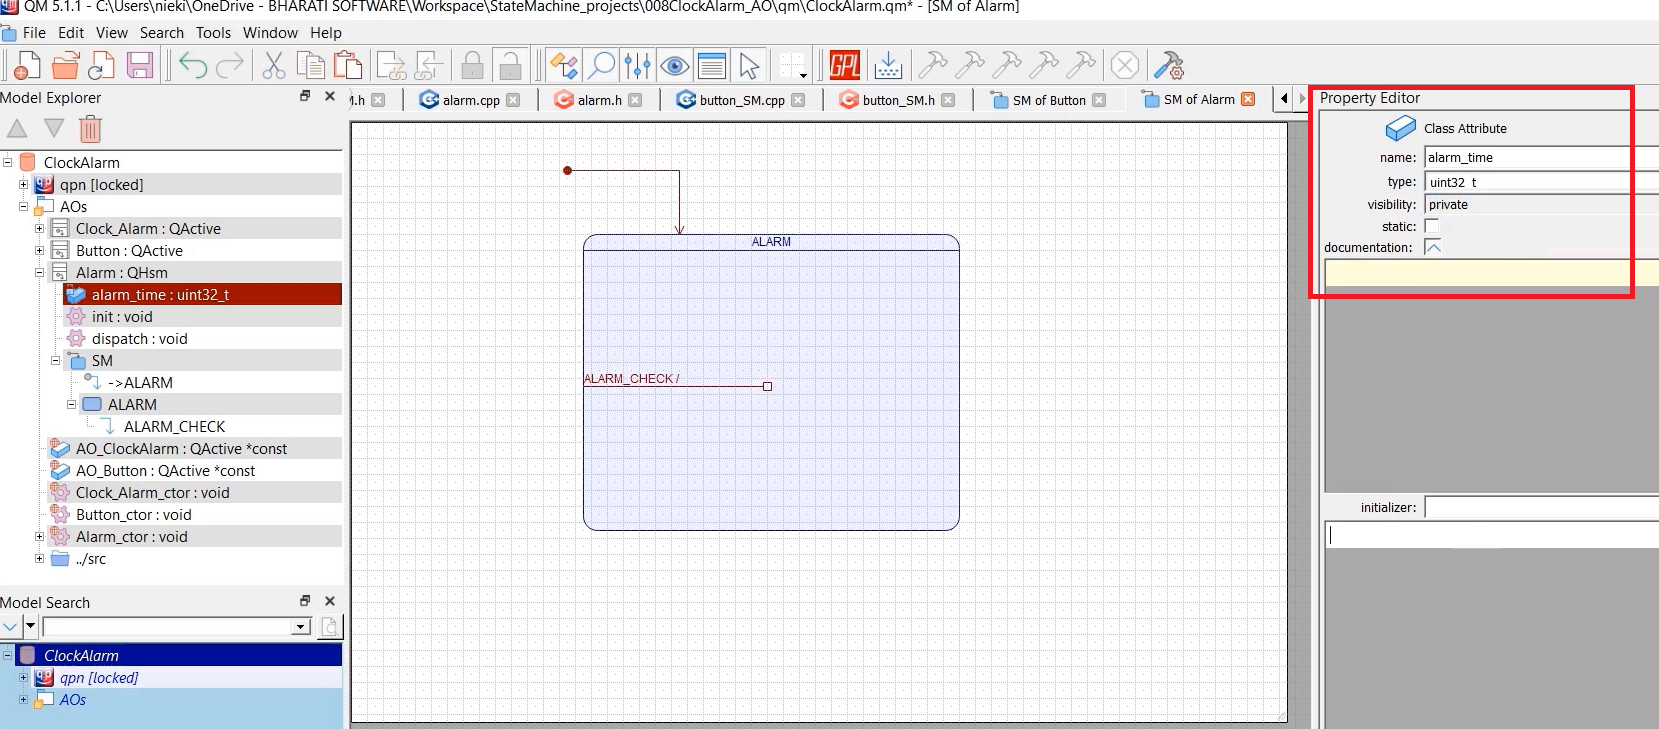
I will create one attribute. The name is alarm_time. Type is uint32_t. Visibility is private. (Figure 7)
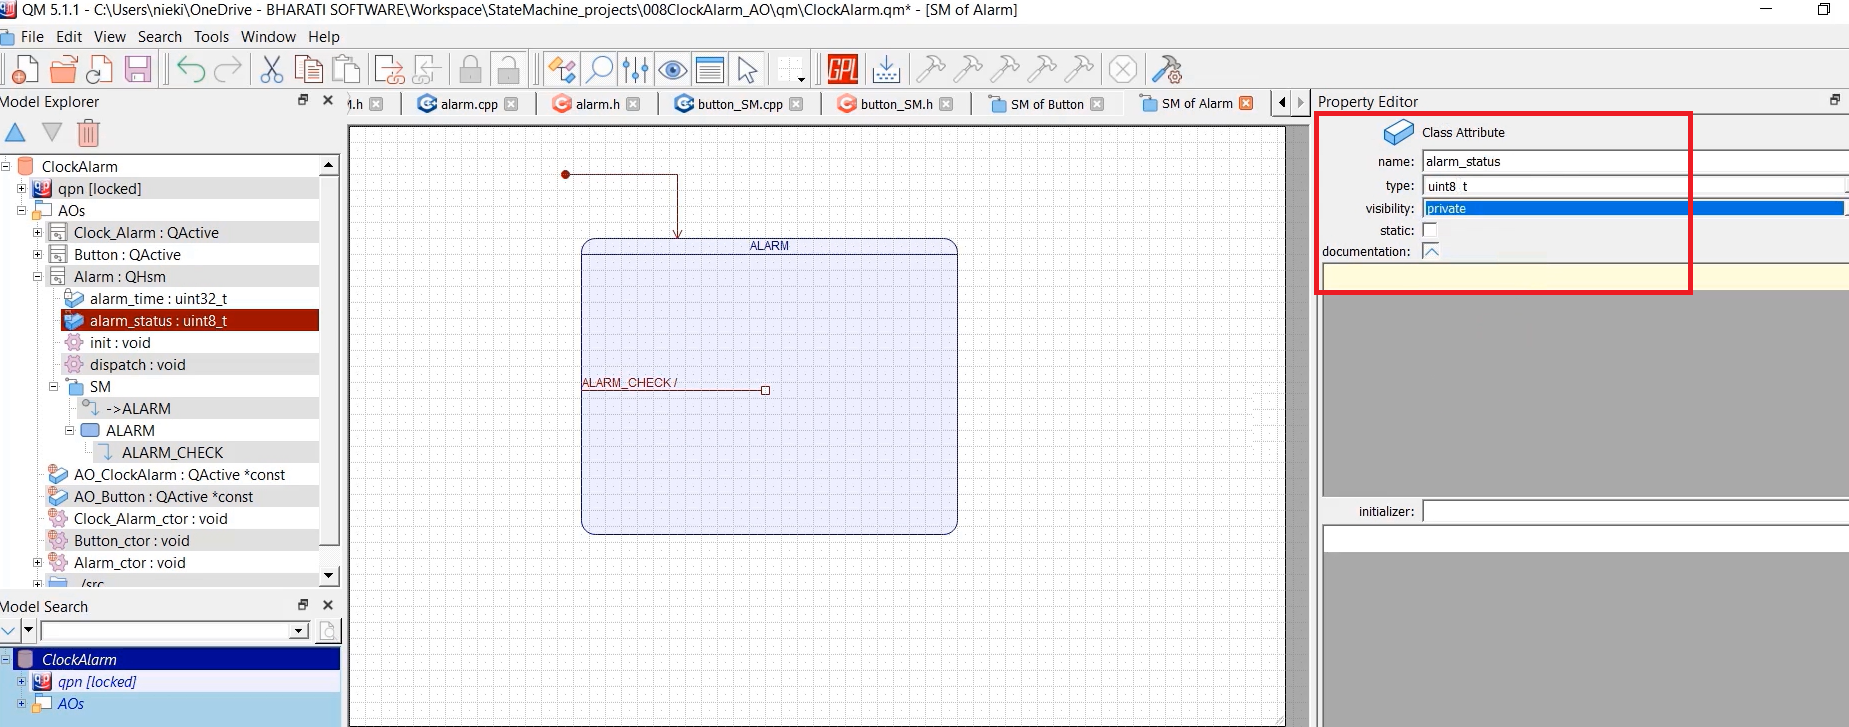
And you should also create one more attribute called alarm_status, which can be uint8_t. Let’s make it private. (Figure 8)
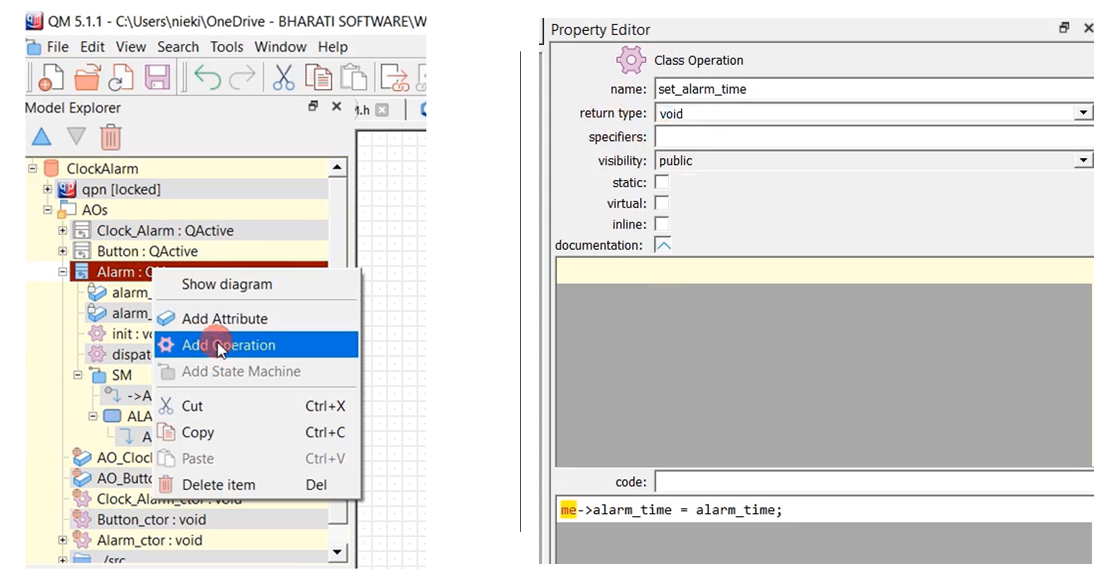
Let’s give one more method or class operation to access or to set and get alarm time and alarm status. Just give a set function, set_alarm_time; return type must be void; visibility is public. The code for this class operation is me-> alarm_time = alarm_time; as shown in Figure 9.
Whenever you do alarm setting in the clock alarm state machine, the user sets the new alarm time, which must be reported to the alarm class to save that alarm time in its private attribute.
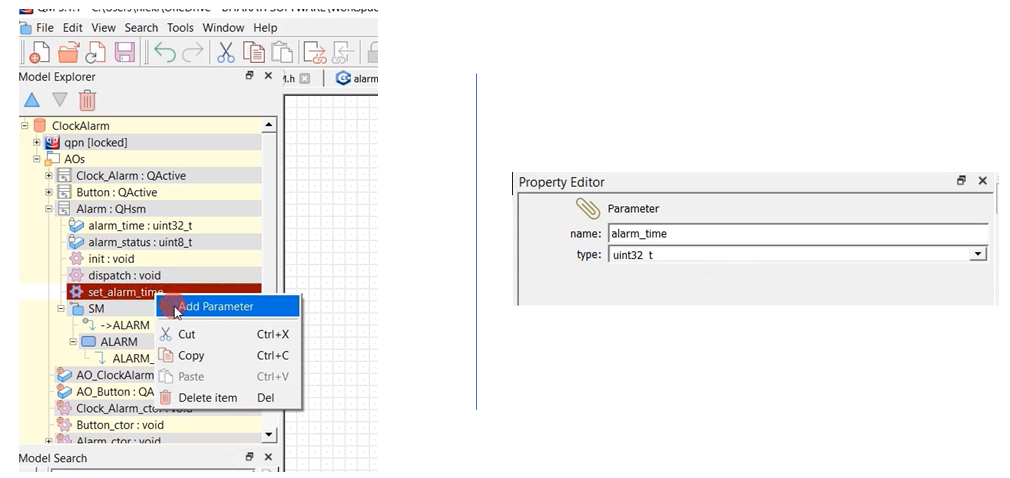
Let’s create one parameter for this set_alarm_time class operation. The name is alarm time, type is uint32_t, as shown in Figure 10.
And also, we will give one more operation called set_status. Its return type must be void. Visibility is public. Code is me->alarm_status = status;
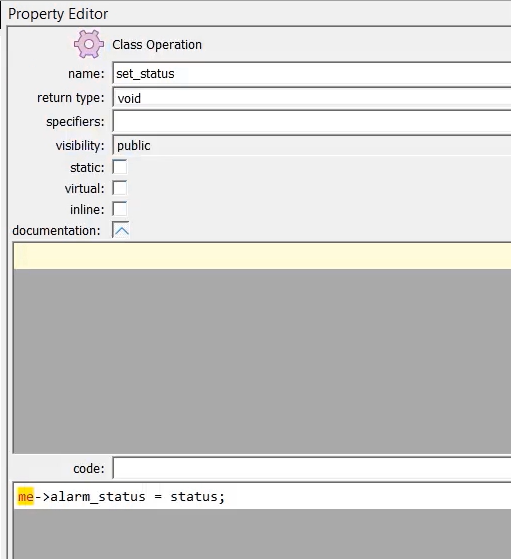
Create one parameter to set_status class operation. Name it as status; type is uint8_t.

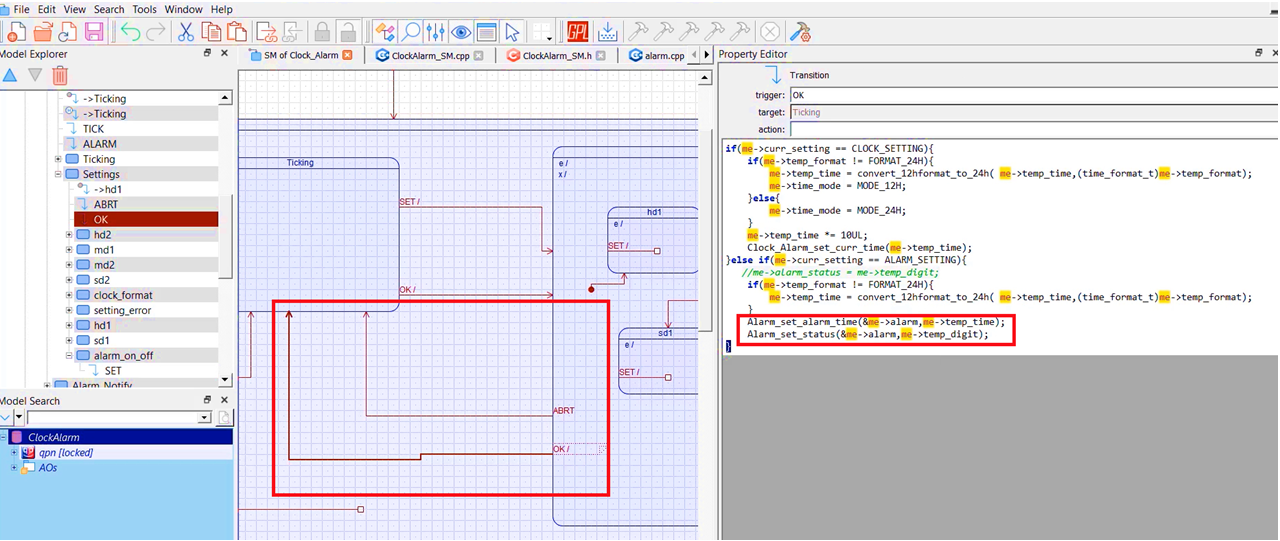
Now let’s go back to the clock alarm state machine. Whenever you press OK, this is the final OK from the Settings state(shown in Figure 13), which takes you back to that ticking state.
And here, you must call those functions what you just created. So, if the current setting is equal to the alarm setting, then you must call the Alarm_set_alarm_time function. You have to send the me pointer that is nothing but &me->alarm, and you have to send this temp_time. Alarm_set_alarm_time(&me->alarm, me->temp_time);
And, you should also call, Alarm_set_status(&me->alarm, me->temp_digit);
Also, in the initial transition, we will keep this code, as shown in Figure 14. Let’s give some initial value for the alarm time and alarm status in the initial transition.

FastBit Embedded Brain Academy Courses
Click here: https://fastbitlab.com/course1

