Linux kernel compilation
In our previous article, we guided you through the process of obtaining the Linux source code from the official BeagleBone GitHub repository. Now, let’s proceed to configure and generate the kernel image by compiling the downloaded source code.
To achieve this, follow the comprehensive kernel compilation steps outlined below:
STEP 1: Remove all the temporary folder, object files, and images
Begin by removing all temporary folders, object files, and any images generated during previous builds.
This step also deletes the .config file if created previously using command:
make ARCH=arm distclean
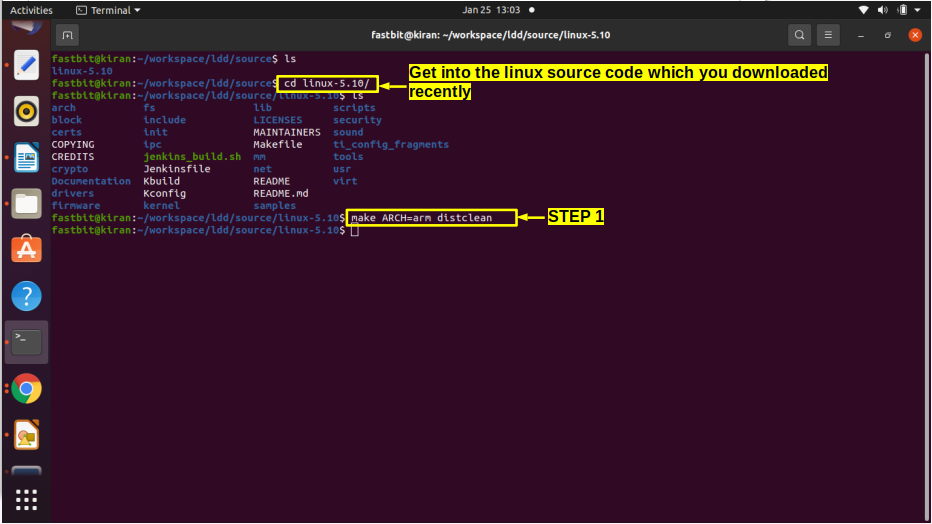
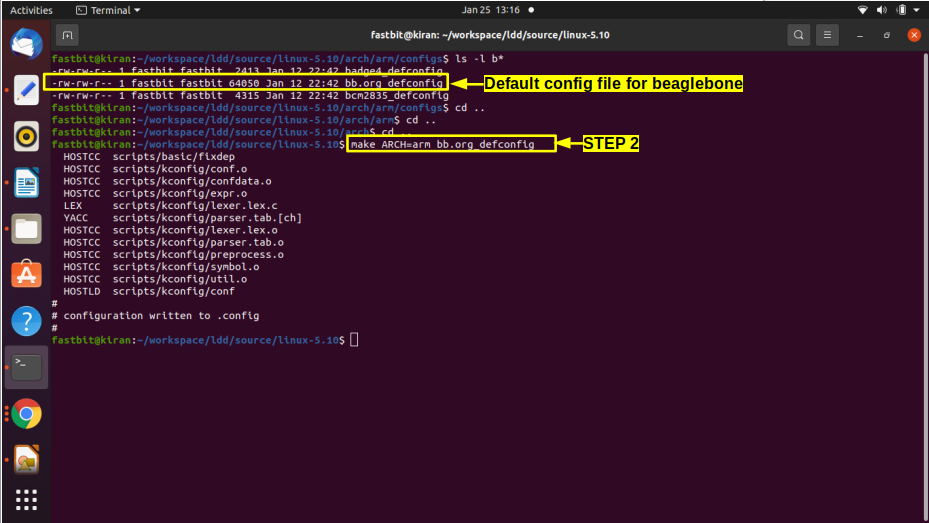
STEP 2: Create a .config file
Next, create a .config file using the default configuration file provided by the vendor. Use the following command:
make ARCH=arm bb.org_defconfig
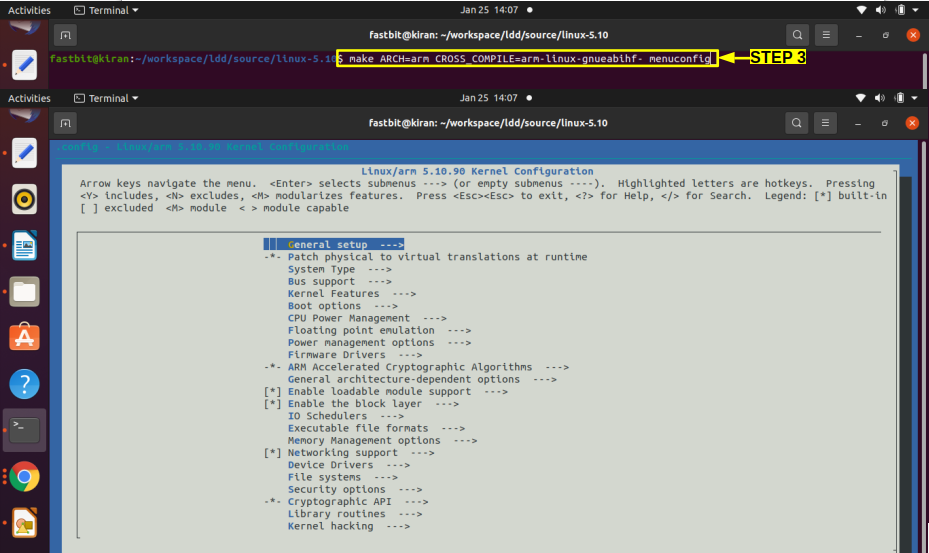
STEP 3: Change kernel settings (Optional)
If you need to customize certain kernel settings before compilation, proceed with this step. Run the following command:
make ARCH=arm CROSS_COMPILE=arm-linux-gnueabihf- menuconfig
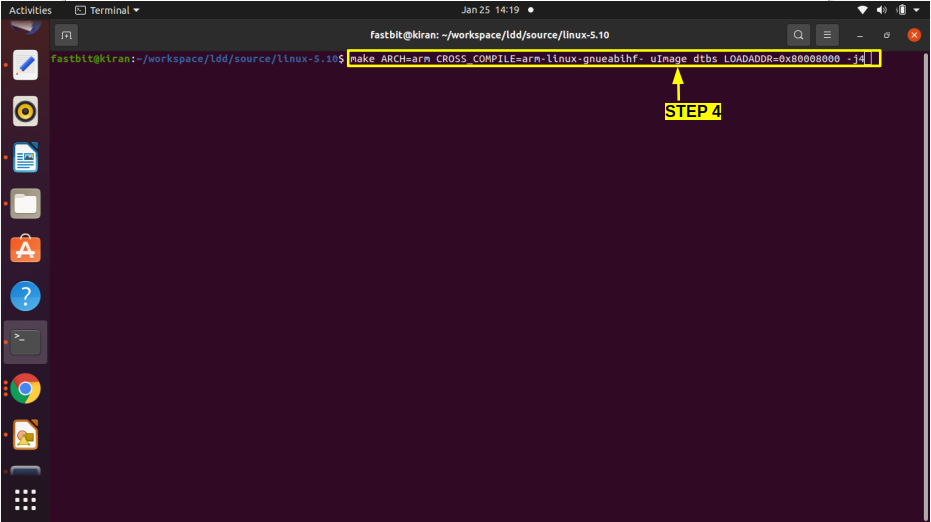
STEP 4: Create the kernel image and dtbs
This critical step involves compiling the kernel source code, resulting in the creation of the kernel image file, “uImage.” Additionally, all device tree source files will be compiled, and device tree blobs (dtbs) will be generated. Execute the following command:
make ARCH=arm CROSS_COMPILE=arm-linux-gnueabihf- uImage dtbs LOADADDR=0x80008000 -j4
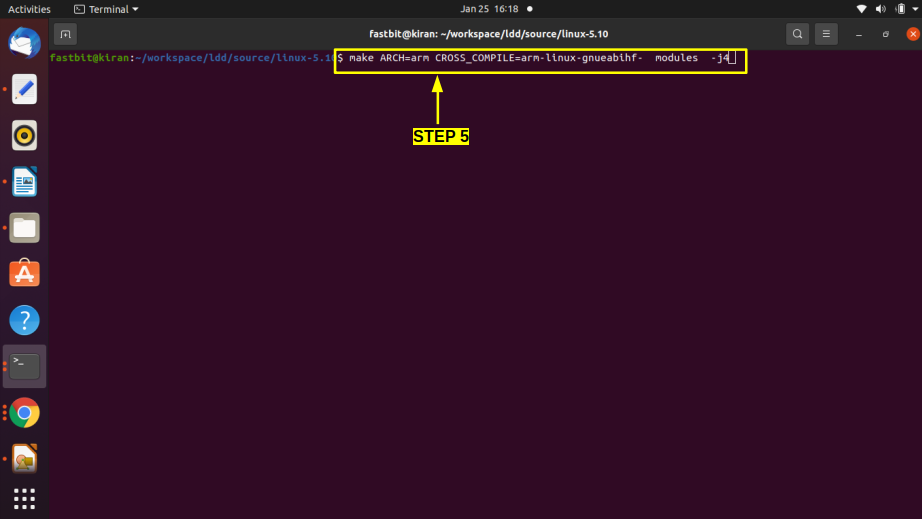
STEP 5: Build and generate in-tree loadable kernel modules
In this step, we build and generate in-tree loadable(M) kernel modules (.ko files). Use the following command:
make ARCH=arm CROSS_COMPILE=arm-linux-gnueabihf- modules -j4
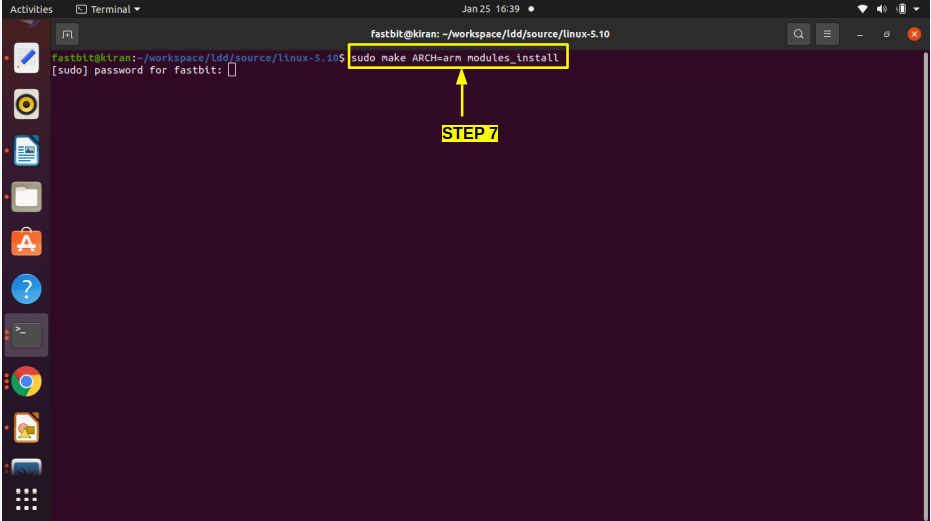
STEP 6: Install Kernel Modules
To complete the process, install all the generated .ko files in the default path on your computer, typically located at /lib/modules/<kernel_version>. Execute the following command:
sudo make ARCH=arm modules_install
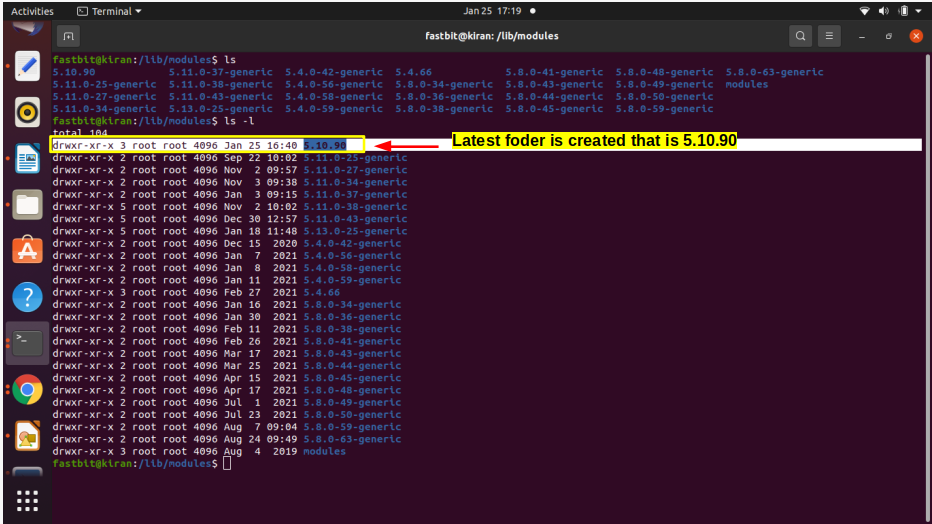
Upon successful completion of the module installation, navigate to /lib/modules/. You will find a new folder created as illustrated in Figure 7, containing all the copied .ko files.
With these steps accomplished, you have successfully compiled the Linux kernel and generated the necessary modules. Your system is now equipped with an updated kernel ready for deployment.
In the following article, let’s update the kernel image on the BBB hardware. We will cover this in an upcoming article.
FastBit Embedded Brain Academy Courses
Click here: https://fastbitlab.com/course1