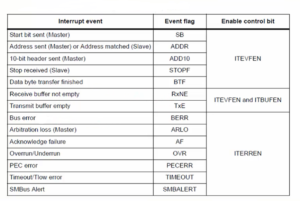
Testing of an LKM on target
In the previous article, we successfully built our kernel module for our host system.
Now, let’s explore how to build and test the same module on our target system. This process involves transferring the kernel object file, typically denoted as a .ko file, from the host to the target and then conducting tests on the target system.
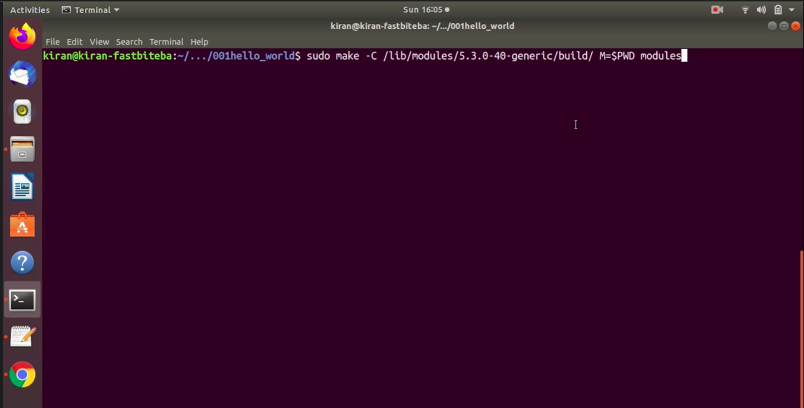
The first step is building the module against our host system. You can use the same command as shown in Figure 1.
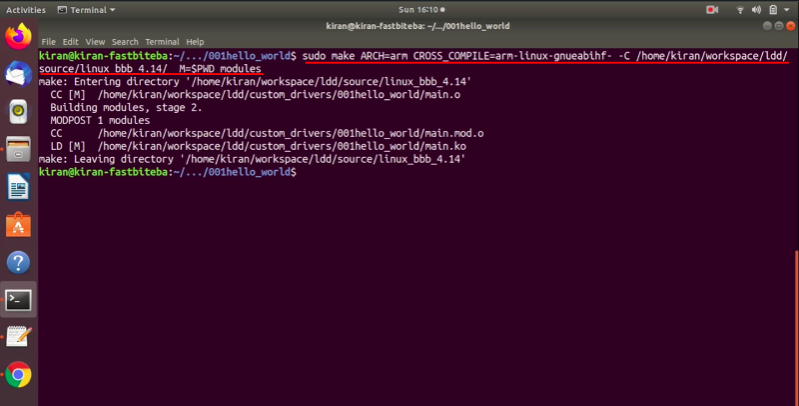
The -C flag should point to the target’s kernel source tree, which is typically located in our workspace. For example, /workspace/ldd/source/linux_bbb_4.14. Alternatively, you can specify the modules_install path or the Linux source path.
M=$PWD remains the same, indicating the current directory.
The target (modules) remains unchanged.
But you need to cross-compile because you are testing this kernel module on the target, that is, Beaglebone. That’s why we have to mention the cross compiler. Before this -C mention ARCH=arm and CROSS_COMPILE=arm-linux-gnueabihf- this looks like a long command.
Later I will explain how to include this command in a makefile itself. Let’s hit enter.
After executing this command, you’ll notice that the module is successfully built. To check the module’s architecture, run the command file main.ko as shown in Figure 3.
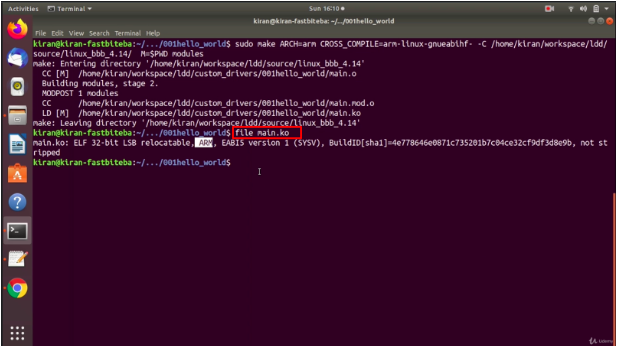
It should indicate that the module is built for ARM.
Now, you can use the modinfo command (as shown in Figure 4) on main.ko to extract module information, such as the description, author, license, and other details that you defined in the kernel module source.
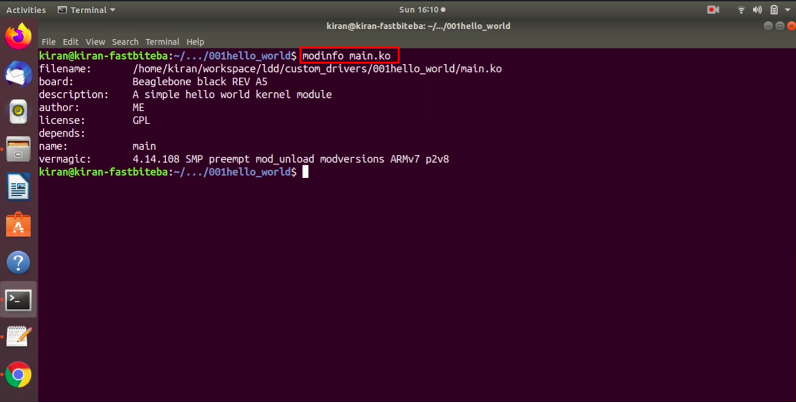
The string we added is Board = Beagle bone black, a description, a author, a license, and various other things.
Additionally, you can analyze various sections of the kernel object file using the command arm-linux-gnueabihf-objdump -h main.ko as shown in Figure 5.
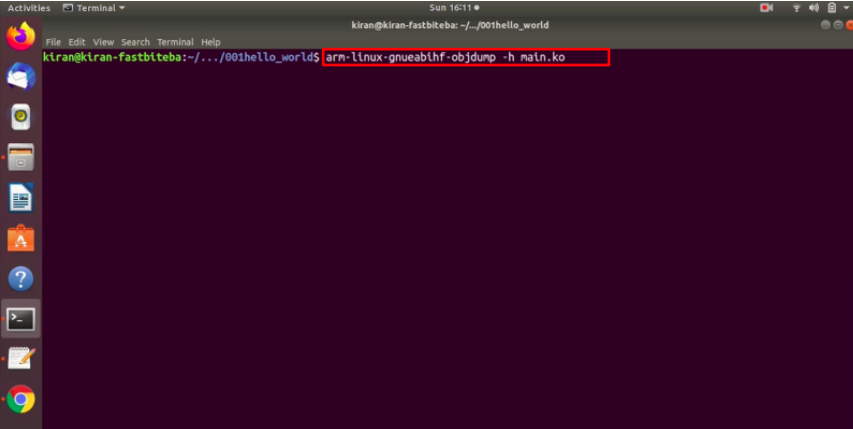
We can run this command to analyze various sections of the kernel object file. Just hit enter, and you see there is an init section, as shown in Figure 6.
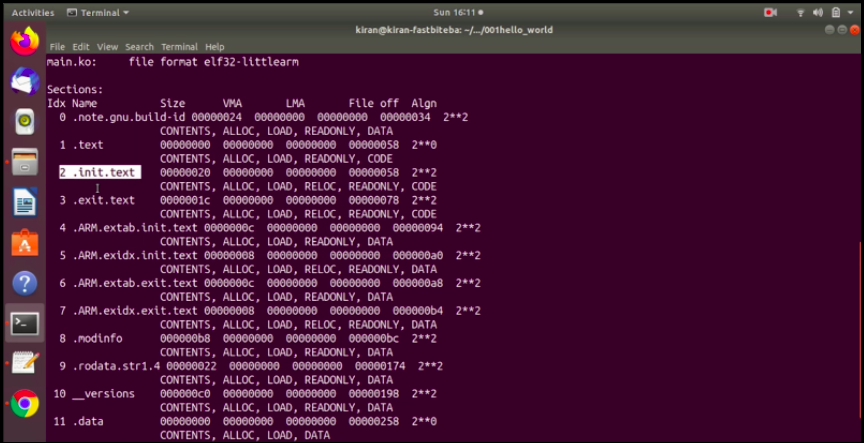
This command will reveal sections like .init.text for module initialization functions and .exit.text for cleanup functions. Other sections may include the data section, which may be empty in your kernel module. Basically, it is showing 0 because our kernel module does not contain any data.
With the module successfully built, it’s time to transfer the .ko file to the Beaglebone. Open a new terminal and connect your Beaglebone Black hardware to your PC. Power up the hardware and boot the kernel using minicom or a similar tool.
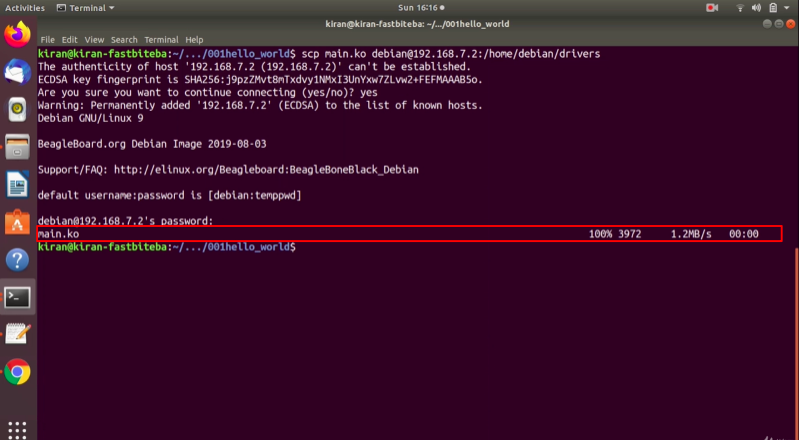
Create a directory on the target system, for example, “drivers,” and copy the kernel module into this directory. From your host system, use scp to transfer main.ko to the target. The command should look like this:
scp main.ko debian@192.168.7.2:/home/debian/drivers
Target’s username- debian, IP address 192.168.7.2. And the path is /home/debian/drivers. This is a new folder we created in the home directory of the Beagle bone. Let’s hit enter.
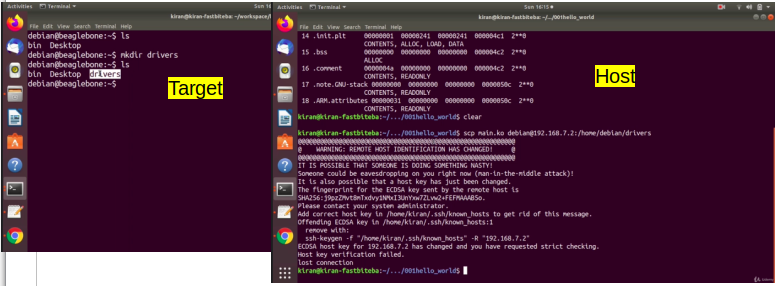
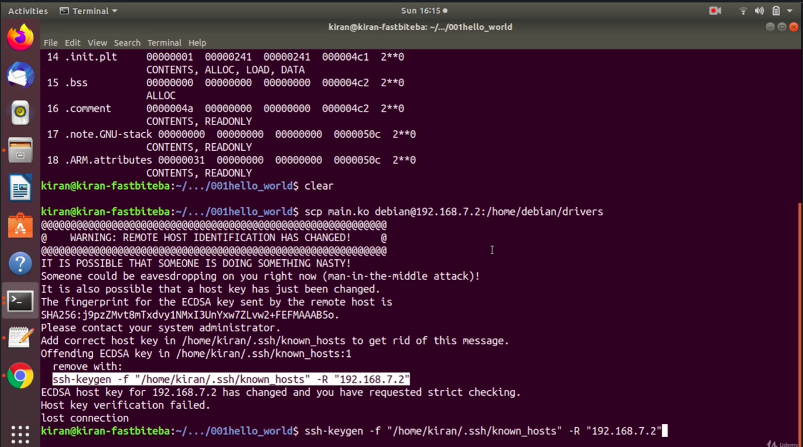
Here, there is some problem with an ssh connection.
If you encounter an SSH connection issue, follow the solution provided in Figure 8.
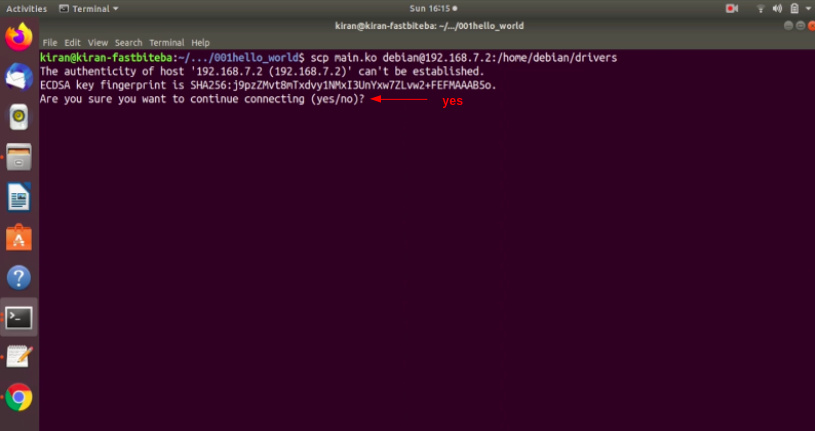
After resolving the SSH issue, try the scp command again. When prompted with “Are you sure you want to continue connecting?” (Figure 9), respond affirmatively. Yes.
It is asking you the password of the beagle bone temp pwd, and you see here we copied main.ko as shown in Figure 10.
Let’s go to the beagle bone command prompt here, and go to drivers, here it is main.ko as shown in Figure 11.
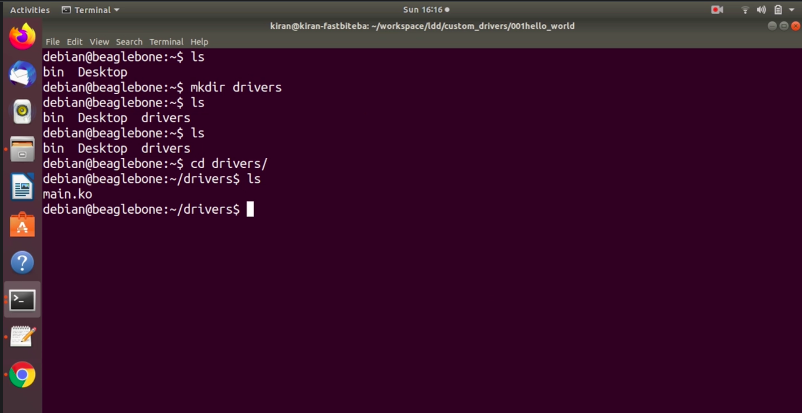
Figure 11. .ko file copied to target
Install the module using the command sudo insmod main.ko (Figure 12).
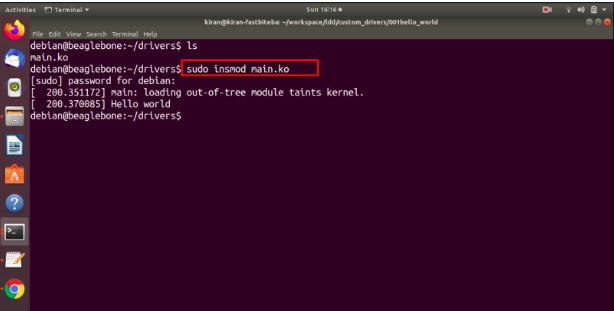
You should see “Hello world” printed directly on the terminal. Actually, it got printed a directly onto the terminals. So, I’ll explain why that happened in a later article. When we discussed about a kernel logs and kernel log priorities.
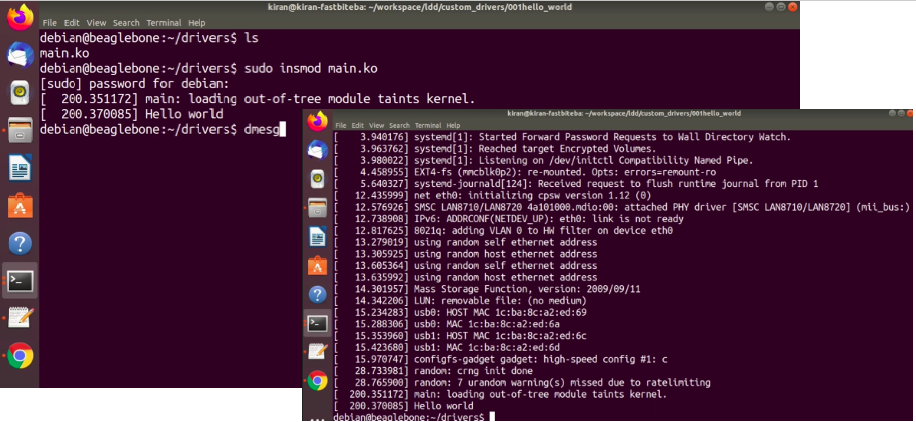
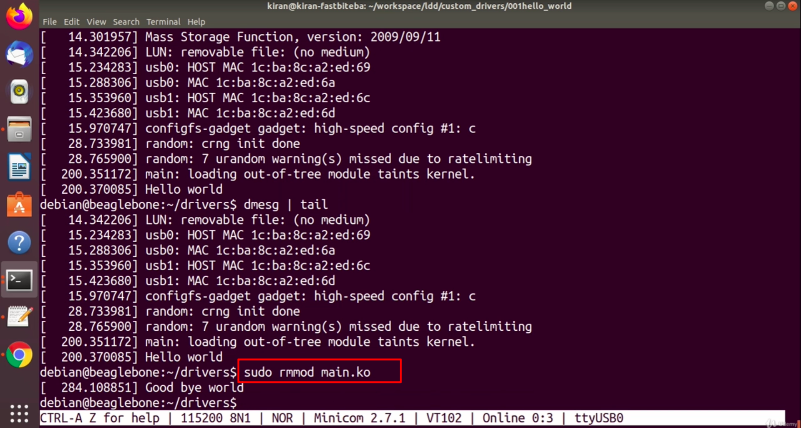
You can also run dmesg here to see that a message, or you can just type dmesg command or dmesg | tail as shown in Figure 13. You can see that message.
Lastly, remove the module using sudo rmmod main.ko, which should print “Goodbye world” (Figure 14).
Congratulations, you have successfully tested your kernel module on the target system!
In the following article, we will build the same kernel module, but not as out of tree but let’s try with In-tree building.
Get the Full Course on Linux Device Driver(LDD1) Here.
FastBit Embedded Brain Academy Courses
Click here: https://fastbitlab.com/course1